Categories
Archive

Are You Recording Your Vocals All Wrong? 4 Powerful Tips to Perfect Your Technique

If you’re not positioning your microphone correctly or using the right settings, your vocal recordings may suffer. Proper technique is crucial for capturing high-quality vocals.


Many aspiring musicians overlook the significance of proper vocal recording techniques. It’s not just about the microphone; factors like room acoustics, distance from the mic, and input levels also play a crucial role. To achieve professional-quality vocal recordings, it’s essential to understand and implement correct recording practices.


By paying attention to these details, you can enhance the clarity, depth, and overall quality of your vocal tracks. We’ll explore common mistakes to avoid when recording vocals and provide tips for optimizing your recording setup.

Are You Recording Your Vocals All Wrong? 4 Powerful Tips to Perfect Your Technique


Credit: www.schoolofrock.com


Common Vocal Recording Mistakes

Many artists unknowingly make vocal recording mistakes that can negatively impact the quality of their recordings. Here are some key errors to avoid:

Improper Mic Placement

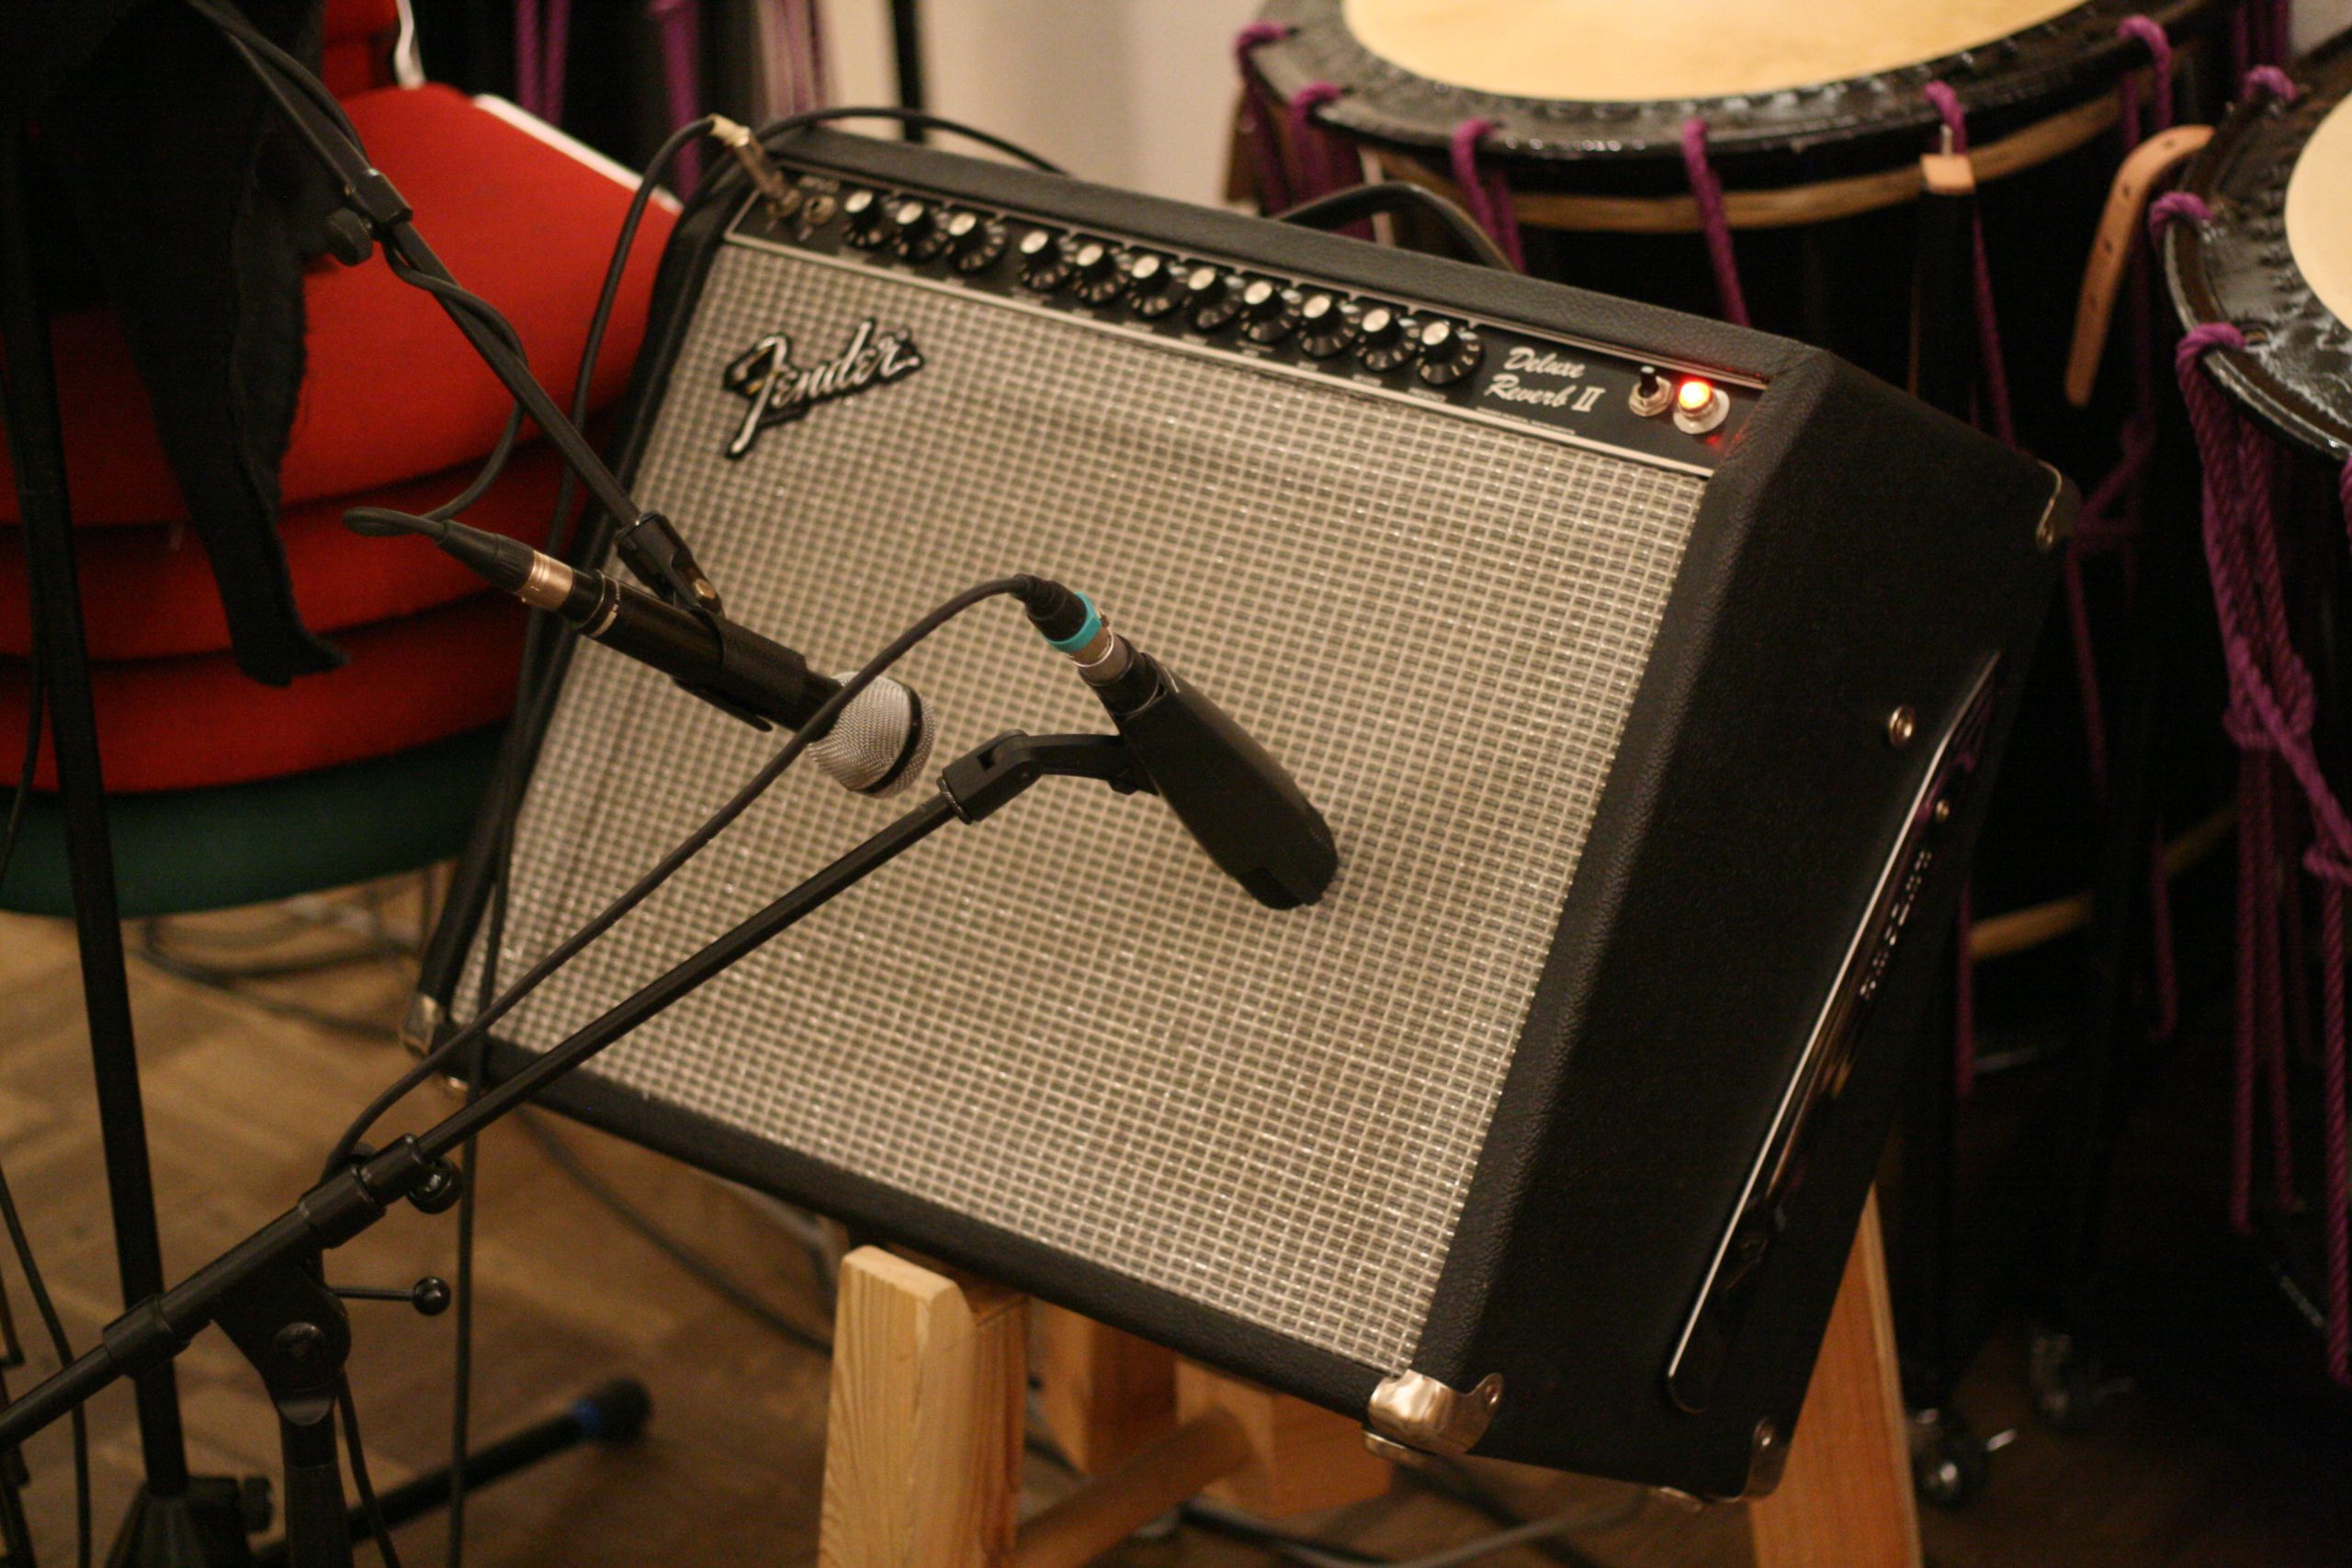
Placing the microphone incorrectly can result in a muffled sound or unwanted room noise in your vocals. It’s crucial to position the mic at the right distance and angle for optimal sound capture.

Inadequate Room Acoustics

Room acoustics play a pivotal role in vocal recordings. Poor room sound treatment can lead to echoes, reverb, and unwanted reflections that degrade the quality of your vocals. Consider using sound-absorbing materials to improve acoustics.

Understanding Vocal Techniques

Vocal techniques are crucial in producing high-quality recordings. Let’s delve into some key aspects:

Breath Control

Proper breath control enhances vocal performance. Maintain consistent airflow while singing.

  • Practice deep breathing exercises to strengthen your diaphragm.
  • Control exhalation to sustain notes and improve vocal clarity.
  • Take short breaths between phrases for seamless delivery.

Vocal Warm-ups

Vocal warm-ups prepare your voice for recording sessions, ensuring optimal performance.

  1. Engage in lip trills and sirens to relax vocal muscles.
  2. Humming scales helps in vocal agility and pitch accuracy.
  3. Perform tongue twisters to enhance articulation and diction.


Optimizing Vocal Recording Process

When it comes to optimizing the vocal recording process, paying attention to key elements such as using pop filters and setting proper levels can significantly enhance the quality of your vocal recordings. Ensuring the recording environment is optimal and employing the right techniques can make a substantial difference in the final outcome. Let’s explore how to optimize the vocal recording process to achieve the best results.

Using Pop Filters

Pop filters play a crucial role in reducing plosive sounds and sibilance during vocal recording. Placing a pop filter a few inches away from the microphone effectively minimizes the impact of strong plosive sounds, ensuring a smoother and more balanced vocal recording. By positioning the pop filter correctly and maintaining an appropriate distance from the microphone, you can avoid unwanted breath and saliva particles interfering with the recording.

Setting Proper Levels

Correctly setting levels is essential for capturing clear and undistorted vocal recordings. Ensure that the input levels are neither too low, which can lead to undesirable noise, nor too high, which may result in distortion. Utilizing a preamp or interface with adequate headroom allows for adjusting levels before they reach the recording medium, preventing clipping while retaining the desired vocal dynamics. Regularly monitoring levels during recording sessions is crucial to maintain consistency and quality throughout the vocal performance.

Are You Recording Your Vocals All Wrong? 4 Powerful Tips to Perfect Your Technique


Credit: www.techsmith.com


Leveraging Post-recording Tools

Recording vocals is a crucial step in music production, but the work doesn’t stop there. To truly enhance your vocal recordings and take them to the next level, it’s important to understand and utilize post-recording tools effectively. By leveraging tools like equalization and compression, you can improve the overall sound and bring out the best in your vocals. Let’s explore each of these tools in detail.

Equalization, or EQ, is a powerful tool that allows you to adjust the frequency balance of your vocals. It helps in shaping the tone, removing unwanted frequencies, and highlighting the important ones. When using EQ, it’s essential to approach it with a careful ear and a goal in mind. You can use EQ to reduce muddiness in the low frequencies, add clarity to the mid-range, or enhance sparkle in the high frequencies.

Compression is another valuable post-recording tool for vocals. It helps in controlling the dynamic range of the recording, making the soft parts louder and the loud parts softer. This allows you to bring out more detail and consistency in the vocals. Compression can also help in reducing any sudden peaks, ensuring a more balanced and smooth vocal performance. When applying compression, it’s important to find the right settings that suit the dynamics of the vocal performance without sacrificing its natural feel.

By leveraging post-recording tools like equalization and compression, you have the power to transform your vocal recordings and take them to new heights. With a careful application of EQ and compression, you can enhance the quality, clarity, and impact of your vocals, making them shine in the final mix. It’s important to experiment and practice with these tools, as finding the right balance will be unique to each recording. So, don’t be afraid to dive in, be creative, and let your vocals truly stand out!

Mastering Your Vocal Recording

Mastering Your Vocal Recording

When recording vocals, it’s essential to strive for excellence. Mastering your vocal recording can make a significant difference in the quality of your sound. Start by seeking professional feedback, practicing continuously, and implementing the right techniques. These three crucial steps will help you elevate your vocal recordings to new heights.

Seeking Professional Feedback

Professional feedback is invaluable when it comes to improving your vocal recording. Experienced producers or audio engineers can provide constructive criticism and tips to enhance your technique. Consider reaching out to local studios or online communities to connect with professionals who can evaluate your recordings. Their guidance will help you identify areas for improvement and refine your vocals.

Continuous Practice

Vocal recording, like any skill, requires continuous practice to perfect. Allocate regular practice sessions to refine your vocal technique, breath control, and pitch accuracy. Practice scales, vocal exercises, and singing along to your favorite songs to improve your overall vocal performance. Consistency is the key to achieving long-term progress and becoming a skilled vocalist.

Implementing The Right Techniques

Implementing the right recording techniques is vital in capturing the best possible sound. Ensure you have a quiet recording environment with minimal background noise to avoid distortion in your recordings. Experiment with microphone placement and distance to find the sweet spot that captures your voice accurately. Additionally, pay attention to proper mic technique, such as maintaining a consistent distance and employing pop filters to minimize plosives.

Using a pop filter is essential in reducing plosive sounds caused by fast-moving air during certain consonant sounds, such as “p” and “b.” These sounds can create unwanted spikes in the recording, leading to a less polished vocal track.

Furthermore, proper vocal warm-ups and hydration are crucial before recording sessions. This helps minimize strain on vocal cords and improves the overall quality of your performance. Stay hydrated by drinking room temperature water, which helps to lubricate the vocal cords and maintain optimal vocal health.

In conclusion, mastering your vocal recording involves seeking professional feedback, practicing continuously, and implementing the right techniques. By following these essential steps, you can elevate your vocal recordings and create standout tracks. So, start applying these tips today and watch your vocal recordings improve with each session.


Are You Recording Your Vocals All Wrong? 4 Powerful Tips to Perfect Your Technique


Credit: www.wikihow.com


Frequently Asked Questions Of Are You Recording Your Vocals All Wrong


Are Home Recordings Ruining The Quality Of Your Vocals?


Home recordings can impact vocal quality due to factors like poor acoustics, lack of professional equipment, and limited experience. However, with proper techniques, vocal care, and adequate equipment, you can improve the quality of your home recordings.


What Are Common Mistakes To Avoid While Recording Vocals?


Common mistakes to avoid include recording too close to the microphone, excessive use of effects, improper microphone placement, poor vocal technique, and not using a pop filter. Taking care of these factors ensures better vocal recordings.


How Can I Improve Vocal Clarity In My Recordings?


To enhance vocal clarity, consider using a high-quality microphone, practicing proper microphone technique, ensuring optimal room acoustics, using compression and equalization techniques, and employing professional vocal techniques like breath control and diction.


Is It Necessary To Have A Soundproof Room For Vocal Recordings?


While a fully soundproof room may not be necessary, it is essential to minimize external noise and echoes. Use soundproofing measures like blankets or foam panels, choose a quiet location, and consider vocal isolation shields or portable vocal booths for improved recording quality.


Conclusion


In essence, capturing quality vocals is essential for a successful recording. By applying the best techniques, equipment, and environment, you can significantly enhance the quality of your vocal recordings. Remember to experiment, practice, and seek feedback to continuously improve your vocal recording process.


Your dedication will lead to more polished and professional-sounding recordings.

Categories
Archive

What is the Difference between Sound Engineering And Music Production? A Comprehensive Guide

Sound engineering is the technical aspect of manipulating audio, while music production focuses on creating music tracks. Sound engineering involves recording, mixing, and mastering audio, ensuring quality and clarity.


Music production, on the other hand, involves composing music, arranging sounds, and collaborating with artists to create a final product. Both fields require technical skills and creativity, but sound engineering typically revolves around the technical aspects of audio production, whereas music production encompasses the broader creative process of crafting music.


Understanding the nuances between sound engineering and music production can help individuals determine their specific interests and career paths within the music industry.


Key Differences

Understanding the distinction between sound engineering and music production is essential for aspiring individuals in the music industry. Let’s explore the Key Differences:

Educational Background

  • Sound engineering primarily focuses on technical knowledge of sound equipment.
  • Music production involves creative aspects like composing, arranging, and mixing music.
  • Formal education in sound engineering involves learning about audio hardware and software.
  • Music production education often includes music theory, composition, and studio techniques.

Technical Aspects

  • Sound engineers work on capturing and manipulating sound during recording or live events.
  • Music producers oversee the entire process of creating music, from conception to the final mix.
  • Sound engineers require proficiency in operating audio equipment and managing sound levels.
  • Music producers need skills in arranging music, working with artists, and post-production editing.
What is the Difference between Sound Engineering And Music Production? A Comprehensive Guide


Credit: thecomposerclass.com


Skills And Responsibilities

When delving into the realms of Sound Engineering and Music Production, understanding the distinct Skills and Responsibilities associated with each role is crucial.

Sound Engineering

Sound Engineers handle the technical aspects of recording, mixing, and mastering audio.

Music Production

Music Producers focus on the creative direction and artistic vision of music projects.

Career Paths

Job Opportunities

Sound engineering and music production offer diverse career paths with various job opportunities. As a sound engineer, you can pursue roles such as recording engineer, live sound engineer, audio post-production engineer, or mix engineer. These positions allow you to work in recording studios, concert venues, post-production facilities, and more. On the other hand, a career in music production can lead to roles like music producer, beatmaker, recording artist, or film/TV composer. Both fields offer opportunities to work with artists, in studios, or on live productions.

Industry Trends

  • Sound engineering is witnessing a rise in demand, especially in live event production and immersive audio experiences.
  • Music production is evolving with the increasing popularity of digital audio workstations (DAWs) and online music distribution platforms.
  • Both industries are embracing advanced technologies such as virtual reality (VR) and augmented reality (AR) for creating immersive sonic experiences.
  • There is a growing emphasis on sustainability and eco-friendly practices within sound engineering and music production.

What is the Difference between Sound Engineering And Music Production? A Comprehensive Guide


Credit: www.usemogul.com


Interdisciplinary Fields

The fields of sound engineering and music production are two distinct but highly interconnected areas of expertise. They share a common foundation in audio manipulation and production, but each field offers unique perspectives and specialized skills. Understanding the difference between these interdisciplinary fields is crucial for individuals seeking to pursue a career in audio production or sound design.

Sound Design

Sound design, a fundamental aspect of sound engineering, encompasses the creation and manipulation of audio elements to enhance storytelling and evoke emotions in various media forms such as film, television, video games, and theater. It focuses on creating a sonic atmosphere that complements the visual elements and helps convey the intended message or narrative.

Sound designers employ their creativity and technical know-how to source, edit, and mix various sound effects, ambient noise, dialogue, and music to create a rich and immersive auditory experience. They collaborate closely with directors, producers, and other creative professionals to ensure that the sound design aligns seamlessly with the overall visual and narrative aesthetic.

Acoustics Consulting

Acoustics consulting, another interdisciplinary field within sound engineering, involves the application of scientific principles and engineering techniques to analyze and optimize the acoustic properties of architectural spaces and environments. Acoustics consultants work closely with architects, engineers, and other professionals to design and modify structures for optimal sound quality and noise control.

Whether it’s a concert hall, recording studio, office building, or public space, acoustics consultants play a vital role in ensuring that the sound within a given environment is clear, balanced, and free from unwanted echoes, reverberations, or other acoustic issues. They employ advanced measurement equipment and simulation software to predict and evaluate sound propagation, absorption, and reflection, enabling them to provide practical recommendations for acoustic improvements.

What is the Difference between Sound Engineering And Music Production? A Comprehensive Guide


Credit: www.amazon.com


Frequently Asked Questions On What Is The Difference Between Sound Engineering And Music Production


What Is The Difference Between Sound Engineering And Music Production?


Sound engineering involves the technical aspects of capturing, mixing, and editing audio. It focuses on recording instruments, vocals, and sound effects for various media. On the other hand, music production encompasses the creative process of composing, arranging, and producing music.


It involves working with artists, selecting instruments, and creating a unique sound for a song or album. Both fields are essential in the music industry and complement each other in different ways.


Conclusion


Both sound engineering and music production are vital in the music industry. Understanding the differences and similarities between the two can help aspiring professionals choose the right path for their career. Whether you prefer the technical aspects of sound engineering or the creative process of music production, both fields offer exciting opportunities for growth and success.


Categories
Archive

Reggae Mixing And Mastering : Unlock the Secrets to Stellar Sound

Reggae mixing and mastering involves balancing and enhancing the various elements of a reggae track for optimal sound quality. Hiring a professional audio engineer who specializes in reggae music is crucial to achieve the desired result.


By working with a skilled engineer, you can ensure that your reggae music is mixed and mastered to industry standards, resulting in a polished and professional final product. Proper mixing and mastering techniques can elevate the overall sound of your reggae tracks, making them more appealing to listeners and increasing their chances of success in the music industry.


Credit: www.reggieslive.com


Understanding Reggae Mixing

Key Elements Of Reggae Sound

  • Rich basslines
  • Distinctive drum patterns
  • Off-beat guitar rhythms
  • Intertwining vocal harmonies

Challenges In Reggae Mixing

  1. Incorporating diverse instruments
  2. Balancing vocal clarity with instrumentals
  3. Achieving the desired reverberation
  4. Preserving the authenticity of the genre

Reggae mixing requires skill in harmonizing the unique elements of the genre, such as rich basslines, distinctive drum patterns, off-beat guitar rhythms, and intertwining vocal harmonies. The challenges in this process include incorporating diverse instruments, balancing vocal clarity with instrumentals, achieving the desired reverberation, and preserving the authenticity of the genre.

Reggae Mixing And Mastering  : Unlock the Secrets to Stellar Sound


Credit: vintageking.com


Mastering In Reggae Music


Learn the art of reggae mixing and mastering to produce high-quality music. Gain expertise in techniques for balancing and enhancing the unique sound of reggae music, ensuring a professional and polished final product. Discover the secrets to achieving the perfect blend of instruments and vocals in reggae tracks.

Mastering in Reggae Music The Role of Mastering in Reggae Mastering is crucial in reggae music for polishing the final sound and ensuring optimal quality. Mastering Techniques for Reggae 1. Dynamic Range Adjustment: Balancing loudness and dynamics for a cohesive sound. 2. Equalization: Enhancing frequencies to achieve a balanced mix. 3. Stereo Widening: Creating a spacious soundstage for reggae’s signature vibe. Mastering in reggae music helps enhance the overall sound quality and ensures a cohesive and balanced mix that resonates with the unique characteristics of the genre.


Secrets To Stellar Sound

When it comes to reggae mixing and mastering, achieving stellar sound is the ultimate goal for any music producer or engineer. There are numerous techniques and tools that can be applied to elevate the quality of a reggae track, but mastering the secrets to stellar sound is essential for delivering a top-notch final product. In this post, we’ll dive into some key insights and best practices to help you enhance the sound of your reggae mixes and masters, uncovering the secrets that will take your work to the next level.

Using Effects And Plugins

One of the foundational elements in reggae mixing and mastering is the strategic use of effects and plugins. Utilizing a combination of EQ, compression, reverb, and delay can significantly impact the overall sound of the track. When applying effects and plugins, it’s crucial to understand how each element contributes to the mix and master, using them judiciously to enhance the character and depth of the sound. Experimenting with different combinations and tweaking the parameters can lead to the creation of a distinct and immersive sonic experience that captures the essence of reggae music.

Tips For Achieving Clarity And Balance

To achieve clarity and balance in reggae mixing and mastering, attention to detail is paramount. Using high-quality monitoring systems and headphones can help you discern and address any inconsistencies in the mix and master. Focusing on effective frequency balancing, panning, and level adjustments is essential for ensuring that each element of the track occupies its rightful place in the sonic landscape. Implementing advanced techniques such as parallel compression and multiband processing can further refine the clarity and balance of the mix, delivering a polished and cohesive result.

Reggae Mixing And Mastering  : Unlock the Secrets to Stellar Sound


Credit: www.amazon.com


Frequently Asked Questions For Reggae Mixing And Mastering


How Can I Achieve A Professional Sound When Mixing Reggae Music?


To achieve a professional sound when mixing reggae music, focus on balancing the instruments, using EQ to shape the tones, adding subtle effects like reverb and delay, and paying attention to the overall dynamics of the mix. Take your time to listen critically and make adjustments that enhance the clarity and impact of each element in the mix.


What Is The Role Of Compression In Reggae Mastering?


Compression in reggae mastering helps to control the dynamic range of the track, ensuring that the softer parts are audible without overpowering the louder sections. It evens out the overall level and adds a consistent feel to the song. Use compression sparingly, and apply it to instruments or vocals that need it to enhance the overall cohesion and impact of the track.


How Important Is Panning In Reggae Mixing?


Panning in reggae mixing plays an essential role in creating a spacious and immersive listening experience. By placing instruments across the stereo field, you can give each element its space and prevent them from masking each other. Experiment with panning to create a balanced and wide soundstage that complements the unique grooves and instrumentation of reggae music.


Conclusion


Mastering and mixing reggae music requires a keen ear and technical expertise. By understanding the nuances of the genre and implementing proper mixing and mastering techniques, you can achieve a professional and authentic sound. With dedication and practice, you can elevate your reggae tracks to the next level.

Categories
Archive

Musicians: Master the Art of Choosing the Right Producer

To choose the right producer, consider their experience, style, and reputation in the music industry. Collaboration is key for a successful music project.


Working with a producer who understands your vision and can enhance your sound is crucial for achieving your artistic goals. Finding the right producer can make or break the quality of your music. It’s essential to do thorough research and have open communication to ensure a productive working relationship.


By selecting a producer who aligns with your musical vision and values, you can elevate your music to the next level. The producer’s role is to bring out the best in your music and help you create a finished product that exceeds your expectations.


Finding The Right Producer

Researching Potential Producers

Check producers’ previous work and client testimonials.

Understanding Their Style

Ensure the producer’s style aligns with your musical vision.

The Producer-musician Collaboration

Choosing the right producer is crucial for musicians to create high-quality music. The collaboration between a musician and a producer is a key element in the success of a music project.

Building A Strong Relationship

Building a strong relationship with the producer is vital for a successful collaboration. Trust and respect are the foundation of this partnership.

Effective Communication

Ensuring clear and effective communication is imperative. Open discussions about goals, vision, and feedback enhance the creative process. Regular updates keep both parties aligned and on track.

The Technical And Creative Role Of A Producer

The Technical and Creative Role of a Producer

A producer plays a critical role in the creation of music, both technically and creatively. They are responsible for helping musicians achieve the desired sound quality and elevating the music to new heights through their innovative ideas and expertise.

Enhancing Sound Quality

A producer’s technical expertise allows them to optimize sound quality by skillfully manipulating various elements of the recording process. This can involve fine-tuning the mix, adjusting levels, and utilizing advanced editing techniques to ensure the music sounds professional and polished.

Bringing Fresh Ideas To The Table

Producers are not just technical wizards, but also creative visionaries. They bring fresh and innovative ideas to the table, helping musicians explore new musical directions and experiment with different sounds. Producers often provide invaluable input on arrangements, instrumentation, and sonic textures, enhancing the overall creative vision of the music.


Credit: theartofeducation.edu


Budgeting And Negotiating With Producers


When choosing a producer, musicians must prioritize budgeting and negotiation. It’s crucial to find a producer who aligns with your financial goals and has transparent communication about costs. Negotiating a fair deal can help ensure a successful collaboration that meets both artistic and financial needs.

Understanding Costs Involved

When it comes to budgeting and negotiating with producers, it is essential to have a clear understanding of the costs involved. Before diving into any collaborations, it is important for musicians to do thorough research and create a realistic budget for their project.

Agreeing On Terms

Agreeing on terms is a crucial step in working with a producer. It is important to establish clear expectations and lay out all the details before getting started. This includes discussing the scope of the project, timelines, and deliverables. During the negotiation process, both parties must communicate openly and honestly. This ensures that everyone is on the same page and there are no misunderstandings later on. List down all the terms and conditions that need to be agreed upon, so there is clarity on each aspect of the collaboration. When it comes to discussing the terms, it is important to consider the following factors:

Determining The Project Scope

Clearly define the scope of the project to avoid any miscommunications or surprises regarding the work that needs to be done. This can include the number of songs or tracks that need to be produced, the arrangement and composition, the mixing and mastering process, and any additional production elements.

Setting A Realistic Timeline

Both the musician and the producer should agree on a realistic timeline for the project. This helps in planning and managing expectations, ensuring that the project progresses smoothly. It is important to consider factors such as the complexity of the project, availability of resources, and any potential setbacks that may occur.

Establishing Payment Terms

Another important aspect of budgeting and negotiating with producers is discussing payment terms. It is essential to determine how much the producer will be paid and when the payments will be made. This can be a fixed fee, an hourly rate, or a percentage of the project’s revenue. Clarify the terms and ensure a mutual agreement is reached, so there are no misunderstandings or conflicts in the future.

Outlining Ownership And Rights

When entering a collaboration with a producer, it is important to discuss ownership and rights of the final product. This includes determining who will retain the rights to the music, how royalties will be split, and any other intellectual property considerations. Having these discussions upfront can prevent any legal disputes or conflicts down the line. In conclusion, budgeting and negotiating with producers requires careful consideration and open communication. Understanding the costs involved, agreeing on terms, and outlining the project scope, timeline, payment terms, and ownership rights are all crucial steps towards a successful collaboration. With proper planning and clear communication, musicians can find the right producer who aligns with their vision and helps bring their music to life.

Maximizing The Producer’s Impact

When it comes to making music, choosing the right producer can have a huge impact on the final product. A skilled and experienced producer can elevate your songs to new heights, bringing out the best in your music and helping you achieve your artistic vision. In this article, we will discuss how to maximize the producer’s impact, leveraging their network and utilizing their expertise.

Leveraging Their Network

One of the key advantages of working with a producer is the access they have to a wide network of industry professionals. From session musicians to mixing engineers, a producer’s connections can significantly enhance the quality of your music. By tapping into their network, you can bring in top-notch talent that can take your tracks to the next level.

A producer may have relationships with drummers, guitarists, or vocalists who are experts in their field. As a result, they can recommend the best person for the job, ensuring that every element of your music is performed to perfection. This access to skilled musicians can add depth, complexity, and uniqueness to your tracks.

Utilizing Their Expertise

Producers have a wealth of experience and knowledge in the music industry. They understand what works and what doesn’t, and can guide you through the creative process with valuable insights and recommendations. By utilizing their expertise, you can benefit from their years of experience and avoid common pitfalls that many musicians face.

Producers can help you refine your song structures, suggest alternative chord progressions, or offer ideas for adding interesting textures to your music. They can provide guidance on vocal delivery, arrangement choices, and instrumentation, making sure that every aspect of your songs is meticulously crafted.

Their technical knowledge is also invaluable when it comes to recording and mixing. They can ensure that your tracks are sonically balanced and professionally polished. With their help, you can achieve a cohesive and professional sound that captivates your listeners.

To sum up, maximizing the producer’s impact involves leveraging their network of industry professionals and utilizing their expertise in music production. By tapping into their connections and knowledge, you can create music that stands out from the crowd and resonates with your audience.

Musicians: Master the Art of Choosing the Right Producer


Credit: blog.daisie.com


Musicians: Master the Art of Choosing the Right Producer


Credit: www.thecrimson.com


Frequently Asked Questions Of Musicians How To Choose The Right Producer


What Is The Role Of A Music Producer?


A music producer oversees the entire process of creating a music recording. They work with artists to shape and refine their sound, coordinate studio sessions, and provide valuable input and guidance. Their role is to bring out the best in the artist and help create a high-quality finished product.


How Does A Producer Help Musicians Achieve Their Vision?


A producer brings their expertise and experience to the table, working closely with musicians to understand their artistic vision. They bring fresh ideas and perspectives, offer feedback and suggestions, and help refine the sound and arrangements to achieve the desired outcome.


Their objective is to collaborate with musicians to create the best possible version of their music.


What Factors Should Musicians Consider When Choosing A Producer?


Musicians should consider a producer’s portfolio, listening to their previous work to determine if their style and expertise align with their own musical goals. They should also consider their reputation and testimonials from other artists, their communication and collaboration style, and their ability to understand and support their creative vision.


How Important Is Chemistry Between A Musician And Their Producer?


Chemistry is crucial between a musician and their producer. A strong connection and good working relationship can greatly enhance the creative process. Trust, mutual understanding, and effective communication contribute to a harmonious collaboration that brings out the best in musicians and helps them achieve their artistic vision.


Conclusion


To sum up, selecting the right producer is crucial for musicians. A good fit ensures trust, communication, and a shared vision. From exploring portfolios to discussing vision, it’s essential to find someone who aligns with your music and goals. By considering expertise, chemistry, and communication, you can set the stage for a productive and successful collaboration.


Categories
Archive

Miking Acoustic Guitar : Master the Art of Amplifying Your Sound

To mic an acoustic guitar, use a small diaphragm condenser mic placed above the soundhole. Positioning matters.


Miking an acoustic guitar is essential for capturing its true essence and tonal quality. The placement and type of microphone used can greatly impact the sound produced. Whether recording in a studio setting or performing live, understanding the best methods for miking an acoustic guitar is crucial for achieving the desired audio results.


In this guide, we will explore various microphone techniques and placements to help you capture the rich and vibrant sound of your acoustic guitar accurately. Mastering the art of miking an acoustic guitar can enhance your recordings and performances, bringing out the nuances and intricacies of this versatile instrument.

Miking Acoustic Guitar  : Master the Art of Amplifying Your Sound


Credit: www.amazon.com


Choosing The Right Microphone

Choosing the right microphone is crucial when miking an acoustic guitar as it can greatly impact the sound quality of your recordings. One of the key factors to consider is the type of microphone you use. There are various options available, but one of the first decisions you’ll need to make is whether to go for a dynamic or condenser microphone.

Consider Your Budget

Before choosing a microphone, it’s important to consider your budget and how much you are willing to invest in a quality microphone. Keep in mind that higher-priced microphones often offer better sound quality and durability.

Dynamic Vs. Condenser Microphones

Dynamic microphones are rugged and versatile, making them a great choice for live performances and recording loud sound sources. On the other hand, condenser microphones are more sensitive and provide a more detailed sound, making them ideal for capturing the nuances of an acoustic guitar.

Miking Acoustic Guitar  : Master the Art of Amplifying Your Sound


Credit: upayasound.com


Placement Techniques

When it comes to miking an acoustic guitar, the placement of the microphone plays a crucial role in capturing the natural sound of the instrument. Proper placement can enhance the tone and clarity of the guitar while minimizing feedback issues. Here are some key techniques to consider:

Finding The Sweet Spot

  • Position the microphone around the 12th fret for a balanced sound.
  • Experiment with different angles to capture the desired frequencies.
  • Keep the microphone at a distance of 6-10 inches from the guitar.

Dealing With Feedback Issues

  1. Use a feedback suppressor or notch filter to eliminate unwanted noise.
  2. Opt for a cardioid microphone to reduce feedback from stage monitors.
  3. Adjust the acoustic guitar’s EQ settings to prevent feedback at high volumes.

Using External Preamps And Eq

Miking acoustic guitar involves various techniques and equipment to capture the true essence of its sound. One crucial aspect of this process is utilizing external preamps and EQ for enhancing the tonal quality and overall performance of the acoustic guitar. By understanding the benefits of external preamps and mastering the art of balancing EQ for acoustic guitar, musicians can achieve a rich and dynamic sound that resonates with the audience.

Benefits Of External Preamps

Using an external preamp with an acoustic guitar offers several advantages. Firstly, it allows for better control over the instrument’s signal before it reaches the recording or amplification stage. External preamps can also enhance the warmth and clarity of the guitar’s sound, ensuring a more professional and polished output. Additionally, they provide the flexibility to adjust the gain and impedance, catering to the specific requirements of the guitar and the recording environment.

Balancing Eq For Acoustic Guitar

When it comes to EQ for acoustic guitar, the goal is to achieve a balanced and natural sound that accentuates the instrument’s unique characteristics. Balancing EQ involves careful adjustments to the low, mid, and high frequencies, aiming to preserve the guitar’s inherent tone while addressing any sonic inconsistencies. By utilizing EQ effectively, musicians can sculpt the sound of their acoustic guitar to fit seamlessly into a mix, whether in a live performance or studio recording.

Miking Acoustic Guitar  : Master the Art of Amplifying Your Sound


Credit: www.genzleramplification.com


Understanding Pickup Systems

When it comes to miking acoustic guitars, understanding pickup systems is essential for achieving the right tone and sound quality. Pickup systems allow you to amplify the sound of your acoustic guitar, making it louder and suitable for different live performance settings. In this article, we’ll explore the different types of pickup systems and learn how to blend microphones with pickups for the best results.

Types Of Pickup Systems

Acoustic guitars can be equipped with various types of pickup systems, each offering unique advantages. It’s important to understand these options to make an informed choice based on your preferences and playing style.

Type Description
Soundboard Transducers These pickups are typically mounted on the guitar’s soundboard, capturing the vibrations and translating them into an electrical signal. They offer a natural sound with good feedback resistance.
Under-Saddle Pickups These pickups are installed under the saddle of the guitar’s bridge, detecting the vibrations as the strings resonate. They provide a balanced and clear sound, ideal for fingerstyle players.
Soundhole Pickups As the name suggests, these pickups are placed in the soundhole of the guitar. They offer a simple installation process and can provide a warm and full-bodied tone.
  • Benefits of Soundboard Transducers: Capture natural sound, good feedback resistance.
  • Benefits of Under-Saddle Pickups: Balanced and clear sound, ideal for fingerstyle playing.
  • Benefits of Soundhole Pickups: Easy installation, warm and full-bodied tone.

Blending Microphones With Pickups

While pickup systems are great for amplifying your acoustic guitar, using microphones in conjunction with pickups can further enhance your sound and add depth. Blending these two sound sources allows you to capture the nuances and characteristics of your guitar’s tone.

When blending microphones with pickups, it’s important to experiment and find the right balance. Here are some tips to make the most out of this combination:

  1. Positioning: Place the microphone near the soundhole or around the 12th fret to capture different aspects of the guitar’s sound.
  2. EQ Adjustment: Use the equalizer to fine-tune the balance between the microphone and pickup signals, emphasizing certain frequencies if needed.
  3. Phase Alignment: Check for any phase cancellation issues that may arise when combining the microphone and pickup signals. Adjust the phase of either source to achieve a more cohesive sound.

Blending microphones with pickups provides a wider range of tonal possibilities, allowing you to tailor your sound to specific performance situations. Whether you’re playing in a small venue or a large concert hall, this combination can help amplify and enrich your acoustic guitar’s sound.


Recording And Live Sound Tips

When it comes to miking acoustic guitars for recording or live sound, achieving a natural and balanced sound is crucial. Whether you’re recording at a studio or performing on stage, understanding the right techniques can make a significant difference in the quality of your sound. In this section, we’ll discuss important tips to help you capture the natural sound of your acoustic guitar and deal with stage monitoring.

Capturing The Natural Sound

To capture the beautiful, authentic sound of your acoustic guitar, it’s important to position the microphone in the right spot. Placing the microphone slightly above the soundhole can help capture the warmth and depth of the instrument. Experiment with different distances and angles to find the sweet spot that complements the unique tonal characteristics of your guitar.

Additionally, using a condenser microphone can further enhance the fidelity and detail of your recordings. These microphones are designed to capture a wide frequency range, which is ideal for reproducing the natural sound of acoustic guitars.

Another tip to consider is using multiple microphones to achieve a richer and more immersive sound. By placing one microphone near the soundhole and another near the guitar’s neck or bridge, you can capture a wider range of frequencies and create a more dynamic sound.

Dealing With Stage Monitoring

When it comes to live performances, stage monitoring plays a vital role in helping you hear your guitar and stay in tune with the rest of the band. To avoid feedback issues, it’s crucial to position the monitor speakers correctly. Ensure that they are not facing directly towards the microphone or your guitar to minimize the risk of unwanted feedback.

Additionally, using in-ear monitors can provide a more controlled and accurate monitoring experience. In-ear monitors allow you to hear your guitar and the rest of the band without relying too much on stage monitors, resulting in a cleaner and more consistent sound.

Another technique to consider is using a soundhole cover or feedback buster. These accessories can help reduce unwanted feedback caused by high sound levels on stage. Experiment with different types and sizes to find the one that works best for your specific acoustic guitar.

By following these recording and live sound tips, you can ensure that the natural sound of your acoustic guitar is accurately captured during recordings and performances. Experiment with different techniques and equipment to find the setup that suits your playing style and enhances the overall sound quality.

Frequently Asked Questions For Miking Acoustic Guitar


How Do You Mic An Acoustic Guitar For Live Performances?


To mic an acoustic guitar for live performances, position the microphone at the soundhole or around the 12th fret. Experiment with the distance and angle to get the right balance between the guitar’s resonance and any unwanted feedback.


What Type Of Microphone Works Best For Recording Acoustic Guitar?


For recording acoustic guitar, a condenser microphone is often preferred due to its ability to capture the nuances and details of the instrument. Large-diaphragm condensers and small-diaphragm condensers are commonly used for this purpose.


Can You Use A Dynamic Microphone For Miking Acoustic Guitar?


Yes, you can use a dynamic microphone for miking acoustic guitar, especially in live settings. While dynamic microphones may not capture the full range and subtleties of the acoustic guitar like condenser microphones, they can still provide good results and have the advantage of handling high sound pressure levels without distortion.


Where Should I Position The Microphone When Miking An Acoustic Guitar?


Position the microphone at the sweet spot, typically around the 12th fret or between the soundhole and the bridge. Experiment with distance and angle to achieve the desired tone, avoiding proximity effect (low-end boost) and excess handling noise.


Conclusion


Choosing the right microphone for your acoustic guitar is essential for capturing its natural sound. By understanding the different types of mics and their placement techniques, you can achieve the best results. Experimenting with various setups and taking the time to listen to the recordings will help you find the perfect sound for your acoustic guitar.


Happy miking!

Categories
Archive

Crack the Code of Audio Mastering For Beginners: Expert Tips & Tricks

Audio mastering for beginners involves enhancing the overall sound quality and preparing music for distribution. It is a crucial step in the music production process.


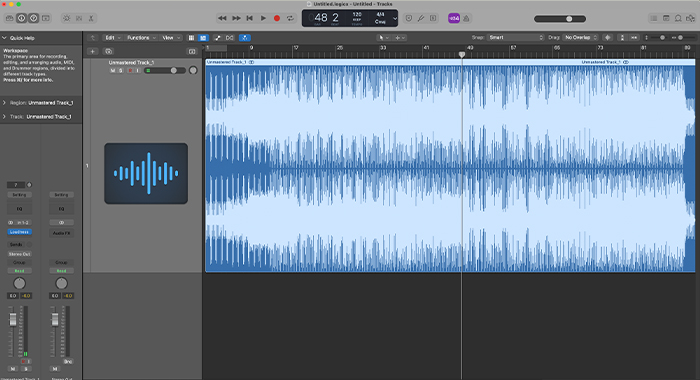
Mastering helps ensure that your music sounds polished and consistent across different playback systems. By applying various tools and techniques, a mastering engineer can adjust the volume, equalization, and dynamics of a track to achieve a professional and cohesive sound.


Understanding the basics of audio mastering can help beginners improve the quality of their music and make it stand out in a competitive industry. In this guide, we will explore key concepts and tips to help beginners navigate the world of audio mastering and elevate their music production skills.

Crack the Code of Audio Mastering For Beginners: Expert Tips & Tricks


Credit: www.linkedin.com


The Basics Of Audio Mastering


New to audio mastering? Learn the essential techniques for beginners. Discover the basics of audio mastering and how to enhance the quality of your sound recordings. Mastering is crucial in achieving professional-sounding tracks, making it a valuable skill for any aspiring music producer or engineer.

What Is Audio Mastering?

Audio mastering is the final step in the music production process where an engineer prepares and optimizes the music for distribution. It involves balancing and enhancing the sonic elements of a track.

The Importance Of Audio Mastering

Audio mastering is crucial to ensure that the final product sounds professional and consistent across different playback systems. It improves the clarity, depth, and overall quality of the music.

During mastering, the engineer employs techniques such as equalization, compression, and limiting to fine-tune the sound. This process ensures that the music is ready for radio, streaming platforms, CDs, and vinyl.

Tools And Equipment

When diving into the world of audio mastering, having the right tools and equipment is crucial. Here, we will explore the essential elements you need to get started. Let’s look at the key components under the following headings:

Digital Audio Workstation (daw)

A DAW is the central hub for your mastering process. Choose a reliable DAW like Pro Tools or Logic Pro for seamless editing and processing.

Monitoring And Playback Systems

Quality monitoring is vital in mastering to ensure accurate sound reproduction. Invest in studio monitors such as KRK Rokit or Yamaha HS Series for a clear, unbiased listening experience.

Key Techniques And Tips

Mastering audio is a crucial step in the music production process, ensuring that the final mix sounds polished and professional. For beginners, understanding the key techniques and tips in mastering is essential to achieve a high-quality sound. In this guide, we will explore important techniques such as Equalization (EQ), Compression, and Limiting to help you grasp the fundamentals of audio mastering.

Equalization (eq)

Equalization (EQ) is a vital tool in audio mastering that allows you to adjust the frequency balance of a mix. When using EQ, it’s important to:

  • Identify and cut frequencies that muddy the mix.
  • Enhance clarity by boosting the presence of key instruments or vocals.
  • Avoid excessive boosting or cutting to maintain a natural sound.

Compression And Limiting

Compression and Limiting are key techniques to control the dynamic range of audio, ensuring a consistent and balanced sound. Here are some tips for using compression and limiting effectively:

  1. Utilize compression to smooth out peaks and make the mix more uniform.
  2. Set appropriate attack and release times to preserve the natural transients of the audio.
  3. Apply limiting to prevent clipping and ensure the audio doesn’t exceed a certain level.
Crack the Code of Audio Mastering For Beginners: Expert Tips & Tricks


Credit: www.thinkific.com


The Art Of Fine-tuning

In the art of audio mastering, fine-tuning is a crucial step that can make all the difference in achieving a high-quality sound. It involves skillfully refining the audio tracks to enhance their clarity, depth, and overall impact. The process of fine-tuning involves various techniques, and in this article, we will explore two important aspects: stereo enhancement and balancing and adjusting levels.

Stereo Enhancement

The stereo image of a track plays a significant role in creating an immersive listening experience. By widening the stereo field, you can make the music sound more spacious and captivating. One effective technique for stereo enhancement is the use of panning.

By strategically placing different instruments and elements within the stereo spectrum, you can create a sense of depth and dimension. For example, you may pan a guitar riff to the left, while a keyboard melody is panned to the right. This separation allows each element to occupy its own space and contribute to a well-balanced mix.

Another technique to enhance the stereo image is the application of stereo widening effects. These effects subtly expand the soundstage and can make the mix feel more expansive. However, it’s important to use these effects judiciously to prevent the mix from becoming unnaturally wide and losing its cohesiveness.

Balancing And Adjusting Levels

Proper balance and level adjustment are vital in audio mastering to ensure that each element in the mix is heard clearly and that no single element dominates the entire sound. Balancing involves setting the relative volume levels of different tracks and instruments, while level adjustment focuses on refining the individual levels within each track.

A helpful tool for achieving balance is EQ (Equalization). By using EQ, you can emphasize or de-emphasize certain frequencies to bring out specific parts of the mix. For example, boosting the bass frequencies can add warmth and depth to the overall sound, while reducing the high frequencies can mitigate harshness and sibilance.

Additionally, compressors and limiters can be employed to control the dynamic range of the mix. These tools help ensure that no parts of the track are too loud or too soft, resulting in a more consistent and controlled sound. They can also provide a sense of cohesiveness and prevent individual elements from overpowering others. By carefully adjusting the settings of these tools, you can level out any irregularities and create a polished and professional sound.

With an understanding of stereo enhancement and balancing and adjusting levels, you are now equipped with essential techniques for fine-tuning your audio mastering. Implementing these practices can bring your tracks to life, elevating them to a higher standard of quality and captivating your listeners.

Mastering For Different Platforms

When it comes to audio mastering, one important aspect to consider is tailoring your final mix for different platforms. Each platform has its own audio specifications and requirements, and it’s crucial to optimize your audio to ensure your listeners get the best experience possible.

Streaming Services

In today’s digital age, streaming services have become the go-to platform for music consumption. Platforms like Spotify, Apple Music, and Amazon Music have their own unique audio guidelines, which you must follow to make your music sound great on these platforms. Here are a few key points to keep in mind:

  • Ensure your audio is loud enough to compete with other songs, but not overly compressed, as streaming services apply their own loudness normalization algorithms.
  • Pay attention to the streaming services’ recommended audio file formats, such as FLAC or WAV, and sample rates, typically 44.1kHz or 48kHz.
  • Make sure to check the streaming services’ loudness target levels to achieve the best playback experience across different devices and platforms.
  • Consider providing alternate versions like instrumental or acapella to increase your chances of getting featured on playlists or gaining more exposure.

Cd And Vinyl

While streaming services dominate the music industry, physical formats like CDs and vinyl records still hold a special place in the hearts of many music enthusiasts. Mastering for these formats requires a different approach to ensure optimal playback quality. Here are a few points to consider:

  • When mastering for CDs, make sure to follow the Red Book standard, which specifies audio file formats, sample rates (typically 44.1kHz), and bit depths (usually 16-bit).
  • Take into account the limitations of vinyl records, such as the dynamic range and frequency response. Vinyl mastering involves optimizing the audio for the physical medium and adjusting the overall tonal balance to compensate for the inherent limitations of vinyl playback.
  • Consider creating separate master versions specifically tailored for CD and vinyl, as the mastering process for each format may differ to achieve the best results.

By understanding the specific requirements and considerations for different platforms, you can ensure that your mastered audio sounds its best, no matter how it is consumed.

Crack the Code of Audio Mastering For Beginners: Expert Tips & Tricks


Credit: medium.com


Frequently Asked Questions On Audio Mastering For Beginners


What Is Audio Mastering And Why Is It Important?


Audio mastering is the final step in the music production process that ensures the songs sound polished and professional. It balances the audio levels, enhances clarity, and optimizes the track for different playback systems. Mastering is crucial as it adds richness, depth, and ensures consistency across the entire album.


How Long Does Audio Mastering Take?


The time required for audio mastering depends on multiple factors, including the number of tracks, complexity of the music, and the specific requirements. On average, mastering a single song can take anywhere from 30 minutes to a few hours. For an entire album, it usually takes a day or two to complete the process.


What Is The Difference Between Mixing And Mastering?


Mixing and mastering are two different steps in the music production process. While mixing involves adjusting individual track levels, EQ, and effects to achieve a well-balanced sound, mastering focuses on enhancing the overall audio quality. Mastering ensures the songs sound cohesive and consistent, ready for distribution on different platforms.


Conclusion


Audio mastering is an essential step in the music production process. By implementing the right techniques and tools, beginners can effectively enhance the quality and impact of their music. Understanding the fundamentals of mastering and its impact on the overall sound can greatly improve the final product.


Keep practicing and refining your skills to achieve professional-level results.


Categories
Archive

De Essing Vocals: Unlock the Power of Crisp and Clear Audio

De-essing vocals is the process of reducing harsh “s” sounds in vocal recordings using a de-esser plugin. It helps create a smoother, more balanced sound for vocals.


De-essing is an essential technique in audio production to enhance the clarity and overall quality of vocal tracks. By effectively managing sibilance, de-essing ensures that vocals sound polished and professional. We will explore the importance of de-essing vocals and provide tips on how to achieve optimal results in your music production projects.


Let’s delve deeper into the world of de-essing vocals and learn how this technique can elevate the quality of your audio recordings.


The Basics Of De Essing

De Essing is a crucial process in audio production where sibilant sounds, usually caused by the letters S, T, and Z, are reduced or removed. This technique helps in achieving a smoother and more pleasant vocal tone. Let’s delve into the fundamentals of de essing to understand its significance in producing high-quality vocals.

What Are Sibilant Sounds?

Sibilant sounds are the sharp, high-frequency noises produced by certain consonants such as S, F, X, and SH. These sounds can be harsh to the ears and can distract listeners from the overall vocal performance. De essing targets these specific frequencies to control and minimize their impact on the audio quality.

Importance Of De Essing

De Essing plays a vital role in enhancing the clarity and intelligibility of vocals. By reducing excessive sibilance, the vocal track becomes more balanced and pleasing to the listener’s ears. It helps to maintain a consistent level of brightness in the vocals without causing any harshness or fatigue. Effective de essing ensures a professional and polished sound in audio productions.

De Essing Vocals: Unlock the Power of Crisp and Clear Audio


Credit: www.amazon.com


De Essing Techniques

Frequency Band Compression

Frequency Band Compression targets specific frequency ranges of sibilance for efficient reduction.

Dynamic Equalization

Dynamic Equalization adjusts frequencies depending on input signal levels for precise de-essing.

Choosing The Right Tools

When it comes to de-essing vocals, choosing the right tools is crucial for achieving a clean and balanced sound. Whether you opt for software or hardware options, selecting the appropriate tools can significantly impact the quality of your vocal recordings. To help you make an informed decision, let’s explore the software and hardware options available for de-essing vocals.

Software Options

Software de-essers are popular among music producers and audio engineers for their flexibility and ease of use. They offer a wide range of customizable settings to effectively control sibilance in vocal recordings. Some well-known software options for de-essing vocals include:

  • Waves Renaissance DeEsser
  • FabFilter Pro-DS
  • iZotope RX 8 De-ess

Hardware Options

While software de-essers have gained popularity, hardware options continue to be favored by many professionals for their tactile control and analog warmth. Hardware de-essers are often integrated into channel strips, preamps, or outboard rack units. Some notable hardware options for de-essing vocals are:

  • dbx 520 De-Esser
  • Empirical Labs EL8 Distressor
  • SPL Transient Designer

De Essing Vocals: Unlock the Power of Crisp and Clear Audio


Credit: www.imore.com


Advanced De Essing Tips

When it comes to achieving professional-sounding vocals, de essing plays a crucial role in reducing or eliminating harsh sibilance sounds, allowing the vocals to shine through. In this section, we will explore some advanced de essing tips to take your vocal production to the next level.

Multiband Processing

Multiband processing is a powerful technique that allows you to target specific frequency bands when de essing. By splitting the vocal signal into multiple frequency ranges, you gain more control over the de essing process.

Here’s how you can use multiband processing for de essing:

  1. Identify the problem frequency range: Listen closely to your vocal track and determine the frequency range where the sibilance is most pronounced.
  2. Apply a multiband compressor: Use a multiband compressor or dynamic EQ to isolate the problematic frequency range and compress only those frequencies when they exceed a certain threshold. This helps to reduce sibilance without affecting the overall vocal tone.
  3. Tweak the settings: Experiment with the threshold, ratio, attack, and release settings of the multiband processor to find the right balance between reducing sibilance and preserving the natural vocal sound.

Sidechain Filtering

Sidechain filtering is another valuable technique to address sibilance issues in vocals. This method involves using a sidechain signal to control the amount of frequency reduction applied to the vocal track.

Follow these steps to apply sidechain filtering for de essing:

  1. Set up a sidechain signal: Create a separate track or utilize an existing instrument or sound with a similar frequency range that will act as the sidechain signal.
  2. Insert a dynamic EQ or de esser on the vocal track: Route the sidechain signal to the dynamic EQ or de esser’s sidechain input.
  3. Configure the processor: Set the dynamic EQ or de esser to reduce the problematic frequencies whenever the sidechain signal exceeds a certain threshold. This way, the vocal’s sibilant frequencies will be dynamically reduced based on the presence of the sidechain signal.

By using sidechain filtering, you can precisely control the reduction of sibilance in vocals while maintaining the natural timbre and transparency of the overall mix.

Mastering De Essing

De-essing is an essential technique in audio production that focuses on reducing or eliminating harsh sibilant sounds, particularly on vocal tracks. These sibilant sounds, commonly caused by the letters S, T, and Z, can be distracting and take away from an otherwise pristine vocal performance. Mastering the art of de-essing is crucial for achieving a balanced and professional sounding mix.

Balancing Effectiveness And Transparency

When de-essing vocals, it is crucial to strike a balance between effectiveness and transparency. The goal is to reduce the sibilance without compromising the natural timbre and clarity of the singer’s voice. Too much de-essing can make the vocals sound unnatural, thin, or even distorted, while too little de-essing can leave those harsh frequencies untouched and still noticeable.

Here are some tips for finding the right balance:

  1. Start by using a de-esser plugin with adjustable threshold and ratio settings.
  2. Listen carefully to the vocal track and identify the specific moments when the sibilance becomes distracting.
  3. Gradually lower the threshold until the de-esser starts attenuating those harsh frequencies.
  4. Keep an eye on the gain reduction meter to ensure it doesn’t exceed a moderate level.
  5. Regularly switch the de-esser on and off to compare the difference and make sure the effect is transparent.

Automating De Essing

To save time and maintain consistency, de-essing can be automated in certain sections of a vocal track. This technique allows you to apply the de-esser only when needed, minimizing the risk of over-de-essing. Here’s how you can automate the de-esser:

  1. Identify the sections of the vocal track that contain excessive sibilant sounds.
  2. Use automation tools within your digital audio workstation (DAW) to create control points.
  3. Gradually adjust the de-esser settings for each specific section to reduce the sibilance effectively.
  4. Smooth out any noticeable transitions between automated and non-automated sections.
  5. Regularly listen and make necessary adjustments to ensure consistency throughout the track.

By mastering the art of de-essing and striking the right balance between effectiveness and transparency, your vocal tracks will sound professional, polished, and free from distracting sibilance. Whether you manually adjust the settings or automate the process, the goal is to preserve the natural beauty of the vocals while eliminating any harshness that may detract from the overall listening experience.

De Essing Vocals: Unlock the Power of Crisp and Clear Audio


Credit: www.amazon.com


Frequently Asked Questions On De Essing Vocals


How Can I Reduce Sibilance In Vocal Recordings?


To reduce sibilance in vocal recordings, you can use a de-esser plugin or EQ to specifically target and tame the harsh “s” sounds. Adjust the frequency range of the de-esser and set the intensity to reduce the sibilance without affecting the overall vocal quality.


Why Do Vocals Sound Harsh?


Vocals can sound harsh due to excessive sibilance, which is the exaggerated “s” sound. This can be caused by microphone placement, recording techniques, or the natural characteristics of the singer’s voice. Controlling sibilance during the mixing process helps in achieving a smooth, balanced vocal sound.


What Is A De-esser And How Does It Work?


A de-esser is a specialized audio processor used to reduce excessive sibilance in vocal tracks. It works by detecting the frequencies where sibilance occurs and then attenuating those frequencies. De-essers use various techniques like frequency-dependent compression or dynamic equalization to tame harsh “s” and “shh” sounds in vocals.


Conclusion


De-essing vocals is a crucial tool for enhancing the overall quality of audio productions. By minimizing sibilance, the clarity and intelligibility of vocals are greatly improved. Incorporating de-essing techniques into your workflow can elevate the professionalism and appeal of your music or voice recordings.


Embracing these methods will undoubtedly contribute to a more polished and captivating result.


Categories
Archive

Discover the Untapped Revenue Potential: Musicians, Are You Leaving Money on the Table?

Are musicians missing out on potential earnings? Learn how to maximize your income opportunities.


In today’s music industry landscape, earning a living as a musician is not just about creating great music but also knowing how to monetize your talent effectively. Many musicians are unaware of the various income streams available to them, leaving them with untapped potential for financial success.


By understanding the different ways to make money as a musician, you can ensure that you are not leaving any valuable opportunities on the table. We will explore the common income sources for musicians and provide tips on how to capitalize on them to maximize your earnings.


The Changing Music Industry Landscape


The music industry is evolving rapidly, leaving many musicians unaware of potential revenue streams. With the shift towards digital platforms, understanding rights and royalties is crucial for artists to maximize their earnings. It’s important for musicians to stay informed and explore new avenues to ensure they’re not missing out on potential income.

Streaming Services Revolution

The rise of streaming services has drastically changed the way musicians distribute their music.

Artists now have the opportunity to reach a global audience with just a few clicks.

Impact Of Digital Transformation

Digital transformation has shifted the focus from physical album sales to online streaming platforms.

Musicians must adapt to this new landscape to maximize their revenue streams.

Discover the Untapped Revenue Potential: Musicians, Are You Leaving Money on the Table?


Credit: www.modern-musician.com


Diversifying Revenue Streams

Musicians have various opportunities to diversify revenue streams beyond music sales. By exploring different avenues to earn money, artists can maximize their income potential and reach new audiences.

Live Performances And Merchandise

Live performances are a lucrative revenue stream for musicians. Concerts, music festivals, and gigs allow artists to connect with fans and earn income through ticket sales and merchandise. Selling branded merchandise like t-shirts, hats, and posters can also generate additional revenue.

Licensing And Sync Opportunities

Licensing music for commercials, TV shows, movies, and video games can provide musicians with passive income. Sync opportunities, where music is paired with visual media, are valuable for exposure and financial gain for the artist.

Maximizing Online Presence

Maximizing online presence is crucial for musicians to ensure they are not leaving money on the table. In today’s digital age, having a strong online presence can significantly impact a musician’s career and revenue stream. Through effective social media strategies and the use of e-commerce platforms, musicians can maximize their online presence to reach a wider audience and capitalize on new revenue streams.

Social Media Strategies

Utilizing social media platforms effectively can be a game-changer for musicians seeking to expand their reach and engage with fans. Engaging posts that include visually appealing content, such as photos, videos, and behind-the-scenes glimpses, can capture the attention of followers. Consistent updates keep fans informed and excited about upcoming releases and events. Interaction with followers through comments and direct messages can build a loyal and dedicated fan base.

Effective E-commerce Platforms

Setting up an effective e-commerce platform allows musicians to capitalize on their online presence by offering merchandise, music, and exclusive experiences for their fans. User-friendly interfaces and secure payment gateways are essential for a seamless shopping experience. Personalized offerings such as limited edition merchandise or exclusive access to live streams can entice fans to make purchases and support their favorite artists.

Navigating The World Of Royalties

Are you a musician looking to maximize your earnings? When it comes to making money in the music industry, it’s essential to navigate the world of royalties effectively. Understanding the various types of royalties and optimizing their collection can help you ensure that you are not leaving any money on the table. Let’s delve into the details and explore how you can make the most out of your royalty earnings.

Understanding Different Types Of Royalties

One crucial type of royalty is the performance royalty. Performance royalties are generated whenever your music is played on the radio, at live performances, on streaming platforms, or even in TV shows and movies. These royalties are collected by performance rights organizations (PROs) like ASCAP, BMI, and SESAC. Remember, the more your music is played, the higher your performance royalties will be.

Another important type of royalty is the mechanical royalty. Mechanical royalties are generated from the sale or reproduction of your music. These royalties are typically collected by agencies such as the Harry Fox Agency in the United States. It’s crucial to understand that mechanical royalties are separate from your earnings from live performances or digital streaming.

Optimizing Royalty Collection

The first step towards optimizing your royalty collection is ensuring that all your works are properly registered. Whether it’s with a PRO, a mechanical rights agency, or a digital distribution platform, registering your music helps you establish your ownership rights and enables these organizations to track and collect your royalties accurately.

If you find navigating the world of royalties overwhelming, consider collaborating with experts. Music publishing companies or royalty management services can assist you in maximizing your earnings. These professionals have the necessary experience and expertise to handle complex licensing agreements, monitor royalty distributions, and ensure that you receive your fair share of earnings.

Monitoring your royalty streams is essential to optimize your earnings. Keeping track of where your music is being played, streamed, or sold enables you to identify any discrepancies or missed royalties. Utilize analytics and reporting tools provided by platforms like Spotify for Artists and YouTube Analytics to gain insights into your audience and track your revenue streams accurately.

Regular auditing of your royalty earnings and statements is critical to ensure that you are receiving your entitled amount. By reviewing your statements, cross-referencing with your own records, and seeking clarification when necessary, you can identify any errors or discrepancies that may have occurred during the royalty collection process.

Collaborating with other musicians is not only a creative opportunity but can also open doors to additional royalty income. By co-writing songs or featuring on other artists’ tracks, you can tap into their fan bases and generate more revenue through shared royalty earnings. Remember, collaboration is a powerful tool for expanding your reach and maximizing your earning potential.

To maximize your earnings as a musician, understanding the different types of royalties and optimizing their collection is crucial. By registering your works, collaborating with experts, monitoring your royalty streams, and regularly auditing your earnings, you can ensure that you are leaving no money on the table. So, take control of your royalties and make the most out of your musical talent!

Building Sustainable Financial Planning


Discover the crucial strategy of sustainable financial planning for musicians to maximize earnings and avoid missed opportunities. Unlock hidden revenue streams and secure financial stability through strategic money management practices.

Budgeting And Financial Management

When it comes to building sustainable financial planning as a musician, budgeting and financial management play a crucial role in maximizing your earnings and ensuring long-term stability. By carefully planning and managing your finances, you can avoid leaving money on the table and make the most out of your income.

One of the key aspects in budgeting is creating a detailed plan of your expenses and income. This involves breaking down all your sources of revenue, such as album sales, streaming royalties, merchandising, and live performances, and comparing them against your expenses, including production costs, marketing expenses, and everyday living costs.

By closely monitoring your income and expenses, you can identify areas where you might be overspending or failing to allocate enough resources. This awareness allows you to make informed decisions and find ways to optimize your finances. For example, you might discover that investing more in digital marketing campaigns yields a higher return on investment, resulting in increased album sales or higher ticket sales for your shows.

Keeping track of your finances through budgeting also enables you to respond to unexpected financial challenges. It provides you with a safety net for emergencies or periods of low income. By setting aside a portion of your earnings for savings and creating an emergency fund, you ensure that you have the financial resilience to weather any storm that might come your way.

Investment In Long-term Assets

Another important aspect of building sustainable financial planning as a musician is considering the investment in long-term assets. While it may be tempting to spend your earnings on luxurious purchases or short-term pleasures, taking a long-term view and investing in assets can greatly enhance your financial position.

Investing in long-term assets can take various forms, such as purchasing real estate, acquiring shares in companies related to the music industry, or even starting your own business. These investments can provide you with additional sources of revenue and assets that grow in value over time.

For example, owning a property that you can rent out or use as a studio can generate rental income and potentially appreciate in value, creating long-term wealth. Similarly, investing in shares of music streaming platforms or record labels can allow you to benefit from their growth and success, serving as passive income streams.

Of course, it is important to conduct thorough research and seek professional advice before making any investments. Consider the potential risks, returns, and your own financial goals to make informed decisions that align with your long-term vision.

Discover the Untapped Revenue Potential: Musicians, Are You Leaving Money on the Table?


Credit: www.powerreviews.com


Discover the Untapped Revenue Potential: Musicians, Are You Leaving Money on the Table?


Credit: lsvp.com


Frequently Asked Questions Of Musicians Are You Leaving Money On The Table


How Can Musicians Maximize Their Earnings From Their Music?


Musicians can maximize their earnings by diversifying their revenue streams. They can focus on licensing their music for commercials, movies, and TV shows, as well as performing at live events and selling merchandise. Additionally, they should leverage digital platforms to distribute and monetize their music globally.


What Are Some Overlooked Ways Musicians Can Make Money?


Musicians often overlook the potential earnings from sync licensing, where their music is used in advertisements, films, or video games. Another overlooked way is through brand partnerships, where musicians can endorse products and earn royalties. Additionally, creating and selling online courses and providing music production services can generate extra income.


How Can Musicians Increase Their Fan Base And Monetize It?


Musicians can increase their fan base by engaging with their audience through social media, live streaming performances, and collaborating with other artists. They can also offer exclusive content or merchandise to their loyal fans. To monetize their fan base, musicians can offer premium memberships, crowdfunding campaigns, and encourage direct support through platforms like Patreon.


Conclusion


Musicians can enhance their earnings by leveraging multiple revenue streams. Diversifying income sources through merchandising, live performances, and digital platforms is vital. Furthermore, collaborating with brands and creating exclusive content can yield lucrative opportunities. Therefore, adapting to the evolving landscape of the music industry is crucial for financial success.


Categories
Archive

How to Make a Song Louder in Logic Pro X: Boost Your Track’s Volume

To make a song louder in Logic Pro X, use the Gain or Output Level controls on the desired track. Need to enhance the overall volume of your music in Logic Pro X?


Making your song louder can give it that extra punch and impact needed to stand out. By adjusting the Gain or Output Level controls on the track you want to boost, you can achieve a louder sound without compromising the quality of your mix.


In this guide, we’ll explore the steps to effectively increase the volume of your song in Logic Pro X while maintaining a balanced and professional sound. Whether you’re a beginner or a seasoned producer, these techniques will help you elevate the loudness of your music and make it shine.


Credit: whylogicprorules.com


Selecting The Right Tracks

In the process of making a song louder in Logic Pro X, selecting the right tracks is crucial to achieving the desired sound quality and balance. By choosing the main elements and identifying the key components, you can ensure that each track contributes effectively to the overall volume and impact of the song.

Choosing The Main Elements

  • Start by determining the primary elements of your song such as vocals, drums, bass, and melody.
  • Consider the role of each track in the composition and prioritize the essential elements that should stand out.
  • Ensure that the main elements are well balanced and distinct to create a powerful and coherent sound.

Identifying The Key Components

  1. Inspect each track to identify the key components that contribute to the overall dynamics and intensity of the song.
  2. Focus on elements like transients, harmonics, and frequencies that play a significant role in defining the sound quality.
  3. Adjust the levels and effects of each component to enhance the clarity and impact of the song while maintaining a cohesive mix.
How to Make a Song Louder in Logic Pro X: Boost Your Track's Volume


Credit: crumplepop.com


Utilizing Compression

Understanding The Basics Of Compression

Compression reduces the dynamic range of audio signals.

Applying Compression Effectively

Adjust threshold and ratio settings to control compression intensity.

  1. Threshold: Sets the level at which compression begins.
  2. Ratio: Determines how much the audio is compressed.

Utilize attack and release controls for precise timing of compression.

  • Attack: Adjusts how quickly compression engages.
  • Release: Controls how long compression continues after peak reduction.

Experiment with knee settings for smooth transitions into compression.


Maximizing Eq Techniques

Maximizing EQ techniques in Logic Pro X can greatly enhance the overall volume and impact of your song. By effectively balancing frequencies and using EQ for volume enhancement, you can achieve a louder and more powerful sound without sacrificing clarity or balance.

Balancing Frequencies

When working with EQ in Logic Pro X, it’s crucial to balance the frequencies within your mix. Identify frequency ranges where certain elements of the mix may be competing with each other. By adjusting the levels of these frequencies, you can create a more balanced and spacious mix, ultimately leading to a louder and clearer sound.

Utilizing Eq For Volume Enhancement

EQ can be a powerful tool for increasing the perceived volume of a specific element within a mix. By applying strategic EQ boosts to the fundamental frequencies of instruments and vocals, you can achieve a more pronounced and impactful sound without simply raising the volume fader. This allows for a more controlled and focused approach to increasing the overall loudness of your mix.

How to Make a Song Louder in Logic Pro X: Boost Your Track's Volume


Credit: m.youtube.com


Exploring Limiting And Clipping

When it comes to producing music using Logic Pro X, one of the essential skills is understanding how to make your songs louder. Two techniques that can help you achieve this are limiting and clipping. These methods allow you to control the overall volume and make your tracks stand out in the mix. In this article, we will explore the utilization of limiters for peak control and the use of clipping in Logic Pro X.

Utilizing Limiters For Peak Control

If you want to ensure that your song’s volume remains consistent without any sudden peaks, employing a limiter is the way to go. This powerful tool helps you maintain control over the highest points in the audio signal—the peaks—by setting a threshold beyond which the volume cannot exceed.

By utilizing a limiter, you can prevent distortion and clipping from occurring when the signal surpasses the threshold. A well-configured limiter will gently reduce the volume of the peaks, allowing you to achieve a louder and more polished sound. To use a limiter effectively in Logic Pro X:

  1. Open your mixer window and locate the channel strip of the track you want to make louder.
  2. Insert a limiter plugin onto the track.
  3. Adjust the threshold setting just below the highest point of the audio signal.
  4. Gradually increase the output gain to boost the overall loudness.

Understanding The Use Of Clipping

While limiting focuses on controlling peaks, clipping gives you the ability to intentionally introduce distortion into your audio signal. This technique can add excitement and character to your tracks, particularly in genres like rock, EDM, and hip-hop.

Clipping occurs when the peak levels of the audio signal exceed the maximum available headroom. This results in a “clipped” waveform that can sound edgy and energetic. However, it’s important to use clipping sparingly and with the utmost care.

To utilize clipping in Logic Pro X:

  1. Insert a distortion plugin or use the built-in Clip Distortion effect.
  2. Adjust the input gain or drive control to push the signal into clipping territory.
  3. Tweak the output gain to achieve the desired loudness.
  4. Experiment with different clipping settings and levels to find the right balance between distortion and clarity.

By mastering the utilization of limiters for peak control and exploring the use of clipping, you can take your songs to the next level of loudness in Logic Pro X. Remember to always trust your ears and make adjustments based on the unique characteristics of each track.

Applying Volume Automation

The process of applying volume automation in Logic Pro X is crucial for making your song louder and creating dynamic volume changes. By utilizing automation, you can ensure consistent levels throughout your track, resulting in a polished and professional sound.

Creating Dynamic Volume Changes

To make your song louder, it’s essential to create dynamic volume changes that add depth and intensity to certain parts of your track. With Logic Pro X, you can easily achieve this by using volume automation. Here’s how:

  1. Select the track you want to apply volume automation to by clicking on it.
  2. In the track header, click on the “Automation” button to reveal the automation lane.
  3. Click on the drop-down menu within the automation lane and choose “Volume”.
  4. Use the pencil tool to add points to the automation line where you want volume changes to occur.
  5. Drag the points up or down to increase or decrease the volume level.
  6. For a gradual volume change, create a slope by dragging points in a diagonal line.
  7. Repeat this process for different sections of your song to create dynamic volume changes.

Utilizing Automation For Consistent Levels

In addition to creating dynamic volume changes, automation can also be used to ensure consistent levels in your track. This prevents certain elements from being too loud or too quiet and helps maintain balance throughout the song. Here’s how to utilize automation for consistent levels:

  • Go to the section of the track where you want to set the consistent level.
  • Add a point to the automation line at this location.
  • Drag the point up or down to set the desired volume level.
  • Repeat this process for other sections of the song as needed.

By applying volume automation in Logic Pro X, you can make your song louder and achieve a professional sound. Creating dynamic volume changes adds depth and intensity, while utilizing automation for consistent levels ensures a balanced mix. Experiment with these techniques to enhance your music production and make your tracks stand out.

Frequently Asked Questions On How To Make A Song Louder In Logic Pro X


Q: How Can I Make A Song Louder In Logic Pro X?


A: To make a song louder in Logic Pro X, use the Gain plugin to increase the overall volume. You can also use compression to control the dynamic range and maximize the loudness. Additionally, try using EQ to enhance specific frequencies and make the song sound more balanced and impactful.


Q: What Is The Role Of Mastering In Making A Song Louder?


A: Mastering plays a crucial role in making a song louder. It involves applying various techniques like compression, limiting, and equalization to enhance the overall sound and increase the perceived loudness. Mastering gives your song the final polish and ensures that it sounds great across different playback systems.


Q: Can I Make A Song Louder Without Sacrificing Its Quality?


A: Yes, it is possible to make a song louder without sacrificing its quality. By using proper gain staging, dynamic range control, and careful equalization, you can increase the loudness while maintaining the integrity of the original mix. It’s important to strike a balance between loudness and the overall sound quality.


Q: What Are Some Common Mistakes To Avoid When Making A Song Louder In Logic Pro X?


A: When making a song louder in Logic Pro X, avoid overcompressing or clipping the audio, as this can introduce distortion and reduce the dynamic range. Also, be cautious of excessive equalization, as it can create an unnatural and harsh sound.


Always listen critically and make adjustments in moderation to ensure a balanced and professional result.


Conclusion


Incorporating these tips will help you significantly increase the loudness of your songs in Logic Pro X. Remember to use compression, EQ, and limiting to enhance the overall sound without sacrificing quality. Experiment with the different techniques and find the right balance for your tracks.


Keep practicing and refining your skills, and you’ll soon master the art of making your songs louder in Logic Pro X.

Categories
Archive

Master the Art of Networking: Weaving a Web of Relationships for Musicians

Build a strong network by engaging with other musicians and industry professionals. Networking is crucial in advancing your music career and opening up opportunities for collaboration and growth.


Engaging with your peers, attending events, and utilizing social media platforms can help you weave a web of valuable relationships that can benefit your career in the long run. By fostering meaningful connections with like-minded individuals, you can expand your reach, gain valuable insights, and create a supportive community that can propel your music career forward.


In the competitive music industry, establishing a strong network can be the key to unlocking new opportunities and achieving success.

Master the Art of Networking: Weaving a Web of Relationships for Musicians


Credit: www.ableton.com


Building Connections In The Music Industry

Creating a strong network is vital for musicians seeking success in the competitive music industry. Connecting with industry professionals can open doors to new opportunities and collaborations.

Navigating Networking Events

  • Attend industry conferences to meet like-minded individuals.
  • Prepare an elevator pitch to introduce yourself concisely.
  • Exchange contact information for future follow-ups.

Leveraging Social Media

  1. Utilize platforms like Instagram and Twitter to showcase your work.
  2. Engage with industry influencers through comments and shares.
  3. Share your upcoming projects and connect with fans.
Master the Art of Networking: Weaving a Web of Relationships for Musicians


Credit: blog.hubspot.com


Crafting A Memorable Elevator Pitch

An elevator pitch is a concise and compelling introduction that showcases who you are as a musician in a limited timeframe. Whether you’re at a music event, industry conference, or even just meeting someone new, a well-crafted elevator pitch can leave a lasting impression. Here are some essential tips on how to create a memorable elevator pitch that will help you effectively network and build valuable connections.

Identifying Your Unique Selling Points

  • Highlight your unique music style and genre.
  • Showcase your notable achievements or performances.
  • Emphasize your passion for music and what sets you apart.

Tailoring Your Pitch For Different Audiences

  1. Understand the interests and preferences of the person you are pitching to.
  2. Adapt your pitch to reflect their needs or potential collaborations.
  3. Keep it concise and engaging to maintain their interest.

Nurturing And Maintaining Relationships

Building and nurturing relationships is a crucial aspect of success as a musician. The music industry thrives on connections and trust, so it’s essential to focus on nurturing and maintaining these relationships once you’ve made them. Let’s explore some effective strategies to ensure that your connections stay strong and continue to benefit both you and your fellow musicians.

Following Up After Initial Meetings

After the initial contact with a fellow musician or industry professional, following up is key. Send a personalized email expressing your gratitude for the meeting and reiterating any points of discussion you found particularly compelling. Keep the conversation going by suggesting a follow-up meeting or collaboration opportunity. Show genuine interest in their work and express your willingness to contribute to the relationship.

Contributing To The Music Community

Contributing to the music community not only enhances your visibility but also strengthens your relationships. Attend industry events and networking functions to stay in touch with peers and establish new connections. Offering your support and expertise to fellow musicians can lead to reciprocal interactions that benefit all parties. Engage in collaborations within your community, whether it’s through joint performances, workshops, or social media shoutouts.

Utilizing Networking For Career Advancement

As a musician, building a strong network of industry connections is essential for career advancement. By actively engaging in networking opportunities, you can create a web of relationships that can open doors to mentorship, collaborations, and various business opportunities. In this post, we’ll delve deeper into how you can maximize the potential of networking to take your music career to new heights.

Seeking Mentorship And Collaborations

One of the key benefits of networking in the music industry is the opportunity to seek mentorship and collaborations. Connecting with experienced professionals and fellow musicians can provide you with invaluable guidance, knowledge, and support. To make the most of these relationships, follow these tips:

  • Attend music conferences and events where you can meet industry veterans and potential mentors.
  • Reach out to musicians whose work you admire and express your interest in collaborating. Remember to provide examples of your own work.
  • Consider joining online communities and forums dedicated to musicians, where you can connect with like-minded individuals and share ideas.
  • Stay active on social media platforms, engaging with other musicians and industry influencers by commenting on their posts and sharing relevant content.

Exploring Business Opportunities

Networking can also open doors to various business opportunities that can accelerate your music career. Here’s how you can leverage your network to explore these opportunities:

  1. Get to know music industry professionals such as talent managers, booking agents, and music producers, who can help you advance in your career.
  2. Consider joining organizations or associations focused on music business, as they often provide networking events and resources.
  3. Attend trade shows and music industry exhibitions, where you can showcase your talents and connect with potential collaborators or investors.
  4. Collaborate with local businesses, such as venues and music retailers, to increase your exposure and create mutually beneficial partnerships.

Remember, networking is not just about making contacts – it’s about nurturing relationships. Take the time to build genuine connections, support others in their endeavors, and offer value whenever possible. By weaving your web of relationships strategically, you can create a strong foundation for your music career to thrive.

Overcoming Networking Challenges


For musicians, building a strong network can be challenging. By prioritizing authentic connections and engaging with fellow artists, talents, and industry professionals, one can effectively expand their web of relationships. Remember to focus on quality over quantity and to remain consistent in your networking efforts.

Dealing With Rejection

Rejection is an inevitable part of the networking journey for musicians, but it doesn’t have to dampen your spirits or hold you back. Instead, embrace rejection as an opportunity for growth and learning. Remember, even the most successful musicians have faced rejection at some point in their careers before achieving their breakthroughs.

Here are some ways to deal with rejection:

  1. Reframe your mindset: Instead of viewing rejection as a personal failure, see it as a chance to refine your skills and approach. Keep pushing forward and learn from each experience.
  2. Seek constructive feedback: Request feedback from those who rejected you. Their insights can provide valuable guidance for improvement and help you understand their expectations better.
  3. Stay persistent: Use rejection as a motivational tool to fuel your determination. Keep refining your craft, networking, and seeking opportunities. Don’t let rejection discourage you from pursuing your passion.

Building Confidence And Authentic Connections

Building confidence is crucial for networking success in the music industry. When you radiate confidence, others are naturally drawn to you and your music. Here’s how to build confidence and foster authentic connections:

  1. Showcase your strengths: Focus on what makes you unique as a musician and highlight those qualities when networking. Embrace your individuality and use it as a powerful tool to connect with like-minded individuals.
  2. Step out of your comfort zone: Expand your network by attending events, joining music communities, and collaborating with other musicians. Engaging in new experiences builds your confidence and exposes you to potential connections and opportunities.
  3. Be genuine: Authenticity is key in building lasting connections. Be yourself and let your true personality shine through when interacting with fellow musicians, industry professionals, and fans. People are more likely to gravitate towards genuine individuals.
  4. Be an active listener: When networking, listen attentively to others and show genuine interest in their stories and music. This fosters stronger connections and encourages reciprocity, which can lead to valuable collaborations or referrals.

Master the Art of Networking: Weaving a Web of Relationships for Musicians


Credit: hbr.org


Frequently Asked Questions On Networking Tips For Musicians Weaving Your Web Of Relationships


What Are The Benefits Of Networking For Musicians?


Networking can open doors to new collaboration opportunities, increase your visibility in the industry, and help you gain valuable insights and knowledge from other musicians. It can also lead to gigs, referrals, and potential partnerships that can boost your career.


How Can Musicians Effectively Network In The Digital Age?


In the digital age, musicians can utilize social media platforms, online communities, and music networking websites to connect with other artists, industry professionals, and fans. It’s important to actively engage with others, share your work, and participate in online discussions to build meaningful connections.


What Are Some Networking Mistakes Musicians Should Avoid?


Musicians should avoid being overly pushy or self-centered when networking. It’s important to approach networking with a genuine interest in others and their work. Additionally, avoid spamming or bombarding people with unsolicited requests or demos. Building relationships takes time and effort, so patience is key.


How Can Musicians Make The Most Out Of Networking Events?


When attending networking events, musicians should come prepared with business cards, a reliable elevator pitch, and an open mindset. Be approachable, listen actively, and show genuine interest in others. Following up with new connections after the event is crucial to reinforce the relationship and possibly collaborate further.


Conclusion


In closing, building a strong network of connections is essential for musicians to succeed in the industry. By implementing the networking tips discussed, musicians can effectively weave a web of relationships that will open doors to new opportunities. From attending events to leveraging social media, the power of networking cannot be overstated in the music world.


Keep building those connections and let your music reach new heights!