Categories
Archive

Diy Acoustic Panels: Boost Your Sound Quality with These Easy-to-Make Panels

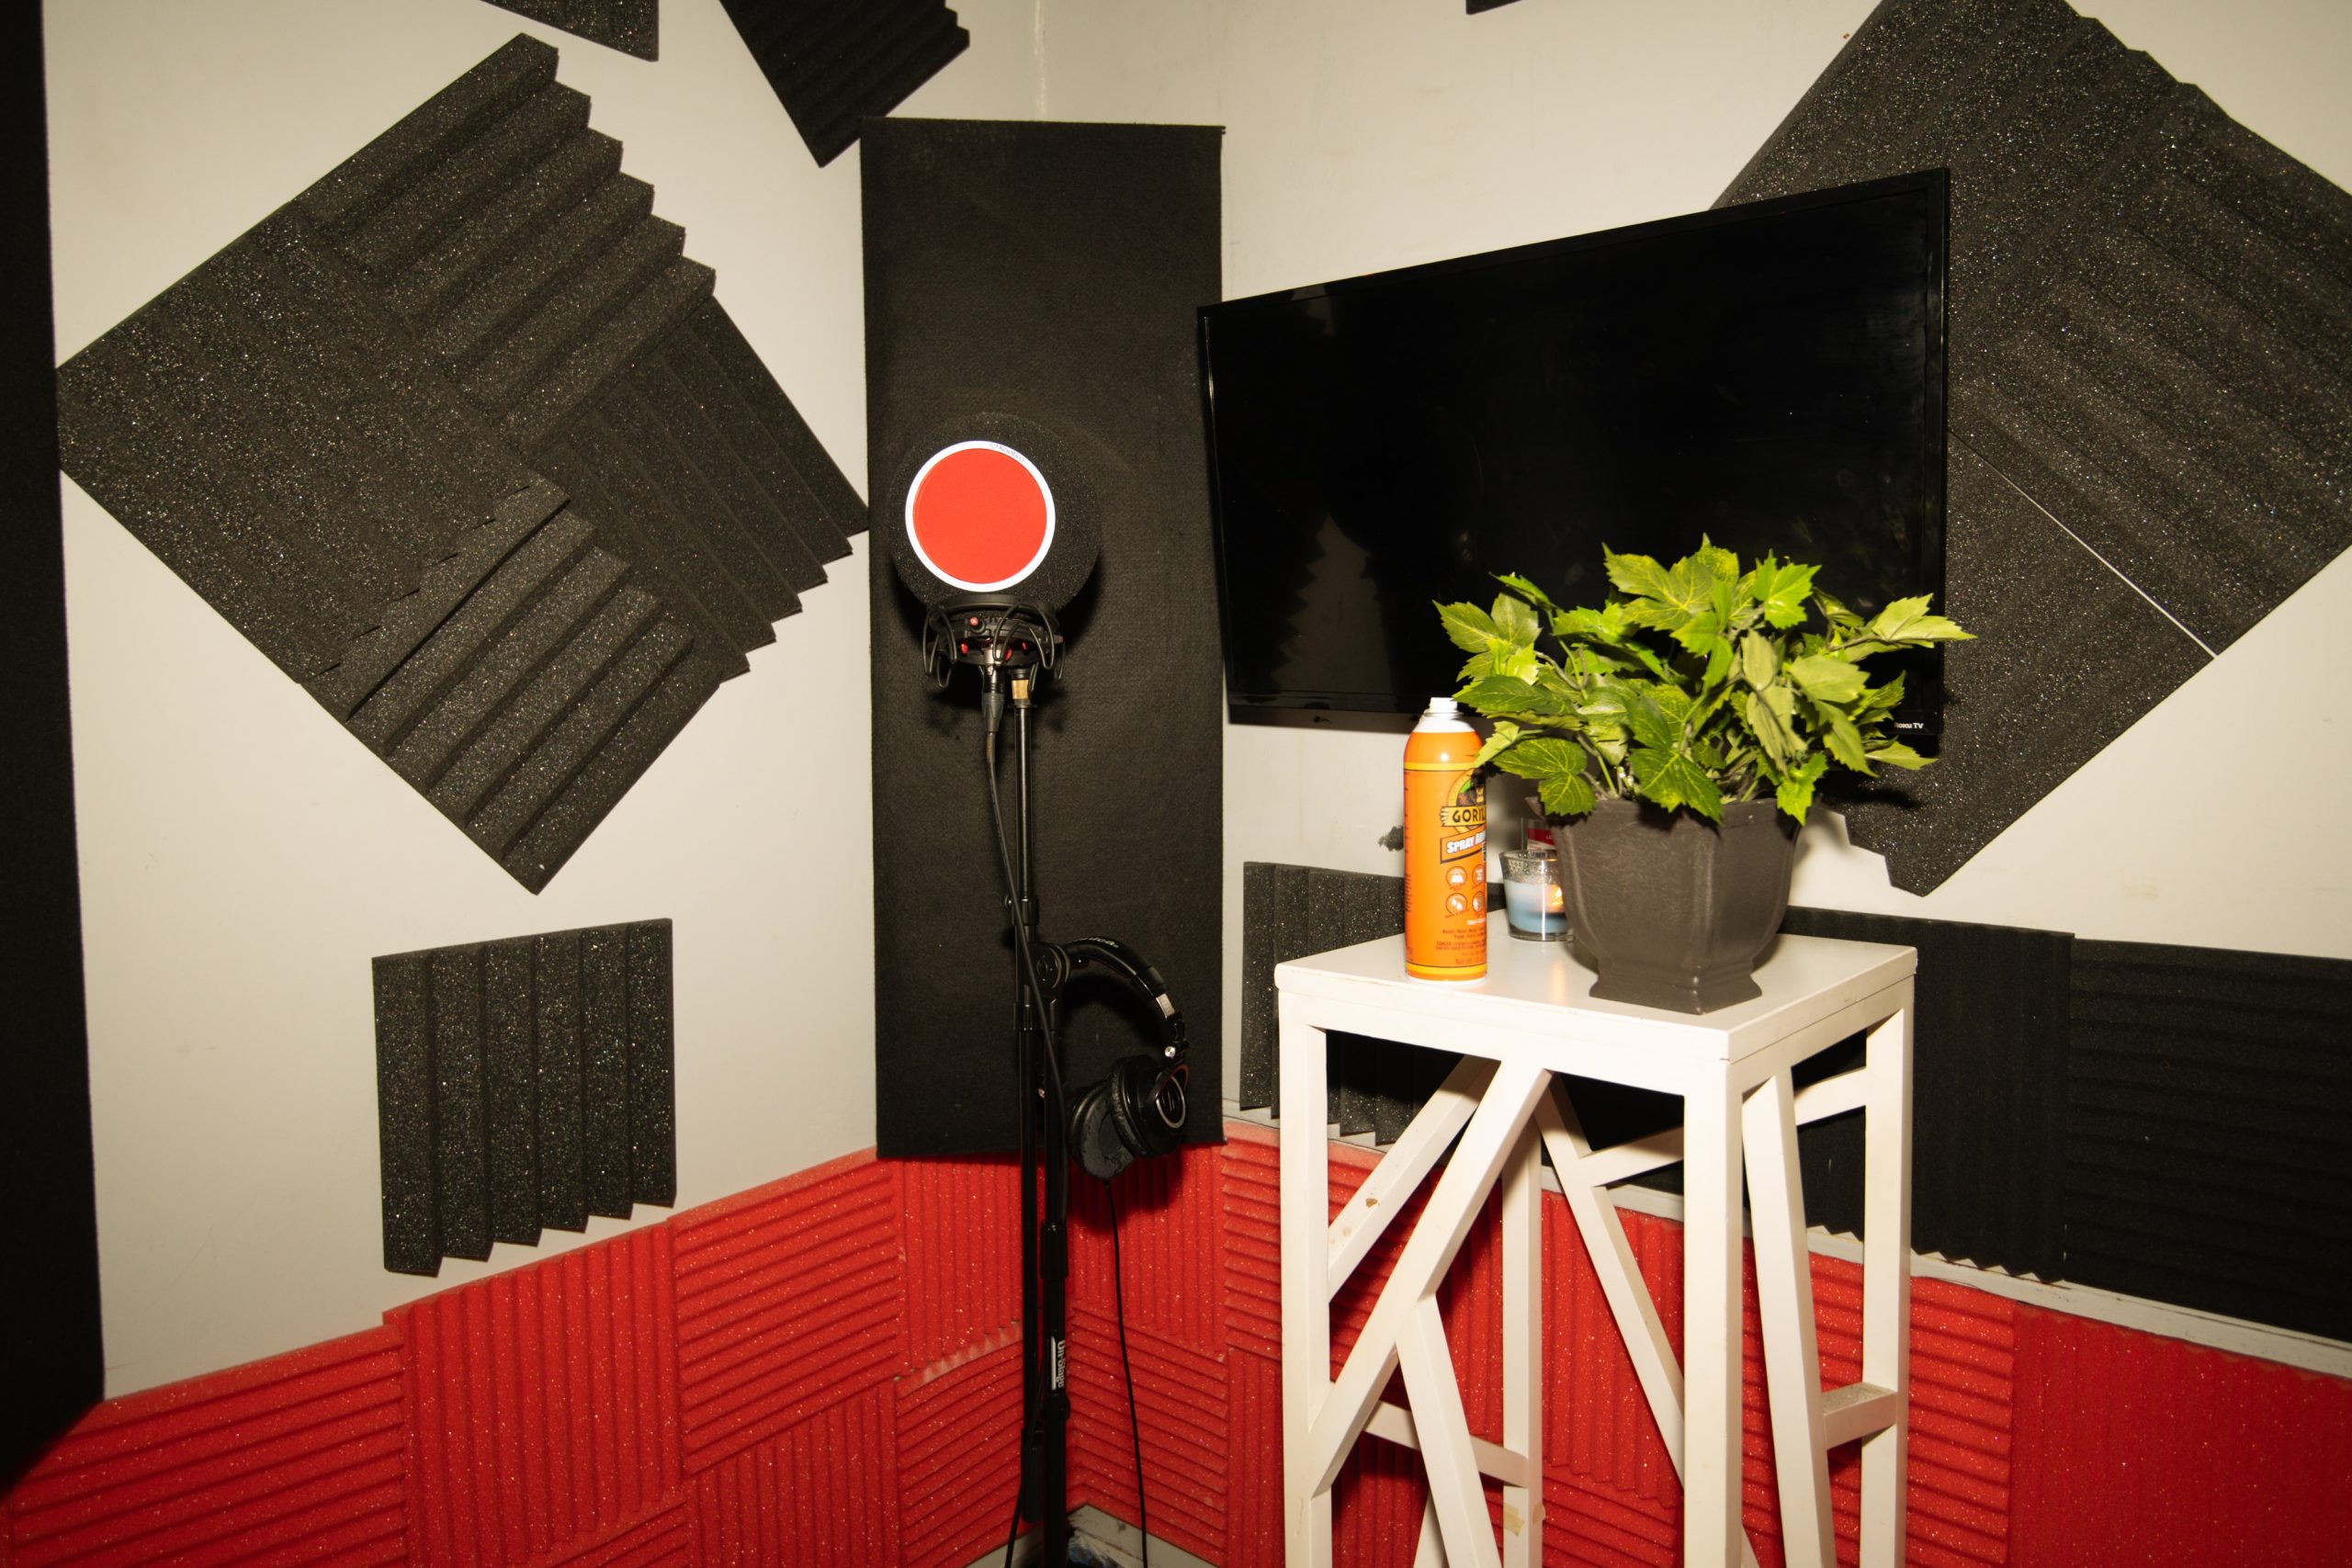
For DIY acoustic panels, measure, cut, and assemble frame; insert sound-absorbing material; cover with fabric. Creating your own DIY acoustic panels can be a cost-effective way to improve sound quality in your space.


With just a few simple materials and some basic crafting skills, you can reduce echoes and unwanted noise, making your room more acoustically pleasing. Whether you’re a musician, podcaster, or simply looking to enhance the sound quality of your home theater, DIY acoustic panels are a great solution.


In this guide, we’ll walk you through the step-by-step process of building your own acoustic panels, helping you achieve professional sound treatment without breaking the bank. Let’s get started!


Choosing The Right Materials

When assembling DIY acoustic panels, selecting the right materials is crucial for optimal sound absorption. Below, we’ll delve into the key components to consider in creating effective acoustic panels.

Acoustic Panel Frame

A sturdy frame is essential for the structural integrity of your acoustic panel.

  • Consider using lightweight yet durable materials like wood or aluminum.
  • Ensure the frame is securely assembled to support the weight of the sound-absorbing material.
  • The frame should be sized to fit the desired dimensions of your panel.

Sound-absorbing Material

The material you choose for the core of your acoustic panel determines its sound absorption capabilities.

  1. Opt for high-density materials such as rockwool or acoustic foam.
  2. Ensure the material is thick enough to effectively absorb sound frequencies.
  3. Consider covering the sound-absorbing material with a breathable fabric to maintain airflow.
Diy Acoustic Panels: Boost Your Sound Quality with These Easy-to-Make Panels


Credit: www.amazon.com


Design And Construction

Panel Size And Shape

When designing DIY acoustic panels, consider the ideal size and shape. Common panel dimensions are 2 feet by 4 feet for standard wall applications.

Assembly Techniques

Various assembly techniques can be used for acoustic panels, such as professional stapling or DIY methods with adhesive. Choose what works best for you.

Placement And Installation

When it comes to DIY acoustic panels, proper placement and installation are crucial for achieving the best sound absorption and minimizing unwanted reflections. Strategic placement and suitable mounting options play a significant role in maximizing the effectiveness of your acoustic treatment. In this section, we’ll delve into the key considerations for placement and installation of DIY acoustic panels.

Strategic Placement

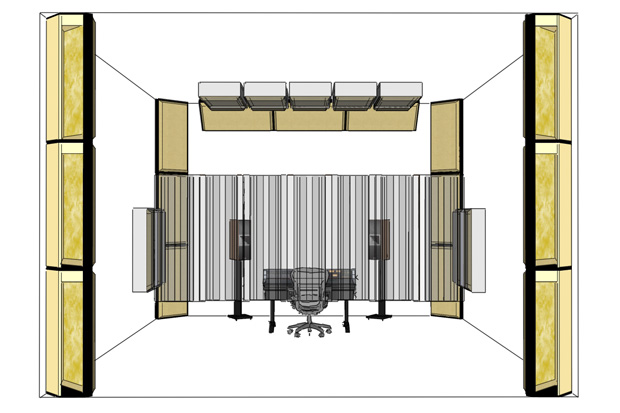
Proper placement of DIY acoustic panels is essential to ensure optimal sound absorption and improved acoustics within a room. Consider placing the panels in areas where sound reflections and reverberations are prominent, such as the corners of the room, ceiling/wall junctions, and behind the primary listening area. By strategically positioning the panels, you can effectively minimize unwanted sound reflections and enhance the overall sound quality in the room.

Mounting Options

When it comes to mounting DIY acoustic panels, there are several options to consider based on your specific requirements and the nature of the surface where the panels will be installed. Some common mounting options include using impaling clips, adhesive Velcro strips, or mounting the panels on wooden frames for a more secure installation. It’s important to choose the mounting method that best suits your space and provides a secure attachment for the panels.

Benefits Of Diy Acoustic Panels

DIY acoustic panels are a cost-effective and easy way to improve sound clarity in your home or studio. With their simple construction and customizable design, these panels offer a range of benefits that make them a popular choice among music enthusiasts, podcasters, and home theater owners. In this article, we will explore the top three advantages of DIY acoustic panels: improved sound clarity, cost-effectiveness, and ease of installation.

Improved Sound Clarity

One of the primary benefits of DIY acoustic panels is their ability to improve sound clarity. These panels are designed to absorb unwanted echoes and reverberations, reducing the impact of room acoustics on the overall sound quality. By installing these panels strategically on walls, ceilings, and corners, you can create a more balanced and precisely tuned audio environment.

The porous materials used in DIY acoustic panels, such as foam or rock wool, effectively trap sound waves, preventing them from bouncing back and interfering with the original sound source. As a result, you will experience a cleaner and more defined audio output, whether you are recording music, conducting a podcast, or enjoying your favorite movie in a home theater setting.

Cost-effectiveness

Another notable advantage of DIY acoustic panels is their cost-effectiveness. Compared to professionally manufactured panels, which can be quite expensive, DIY panels offer a budget-friendly option without compromising on quality. By sourcing the materials yourself and following step-by-step instructions, you can save significant money while achieving the same level of effectiveness.

Moreover, DIY acoustic panels allow for customization based on your specific needs and preferences. You can choose from various sizes, shapes, and colors to match your room decor while still achieving excellent sound absorption. This flexibility not only saves you money but also ensures that your acoustic treatment aligns perfectly with your aesthetic vision.

Ease Of Installation

Installing DIY acoustic panels is a straightforward process that requires minimal technical expertise. With clear instructions and basic tools, anyone can successfully mount these panels on their walls or ceilings. Unlike complex soundproofing materials or construction projects, DIY acoustic panels offer a user-friendly solution that can be completed within a short span of time.

Additionally, DIY acoustic panels are typically lightweight and easy to handle, making them convenient for temporary or portable setups. Whether you are a musician constantly traveling or a renter who cannot make permanent modifications to your space, these panels provide a versatile and non-intrusive option for improving sound quality.


Maintenance And Upkeep

Proper maintenance and regular upkeep are key to ensuring the longevity and effectiveness of your DIY acoustic panels. By taking a few simple steps, you can not only keep them looking their best but also maintain their performance over time. In this section, we will explore two important aspects of maintenance: cleaning and dusting, as well as replacement considerations.

Cleaning And Dusting

Keeping your DIY acoustic panels clean and free from dust is essential for optimal performance. Regular dusting helps to preserve the sound-absorbing properties and prevent any build-up that could affect the panel’s effectiveness. Follow these simple steps to effectively clean and dust your acoustic panels:

  1. Gently remove surface dust using a soft bristle brush or a microfiber cloth. This will help to prevent any scratches or damage to the panel’s surface.
  2. If necessary, use a mild detergent diluted in water to clean any stains or stubborn dirt. Avoid using harsh chemicals or abrasive cleaners as they can damage the panel’s finish.
  3. After cleaning, make sure to thoroughly rinse the panel with clean water and then pat it dry with a clean cloth or allow it to air dry naturally.

It is recommended to clean your acoustic panels at least once every few months or whenever they appear visibly dirty.

Replacement Considerations

While DIY acoustic panels are designed to be durable, there may come a time when they need to be replaced. Here are some factors to consider when determining whether it’s time to replace your acoustic panels:

  • Visible signs of wear and tear, such as cracks, sagging, or discoloration, may indicate that the panels have reached the end of their lifespan.
  • If you notice a significant decrease in the panel’s sound-absorbing capabilities, it may be a sign of deterioration and a replacement should be considered.
  • Changes in environment or usage may warrant the need for new panels. For example, if you’ve moved to a larger space or altered the layout of your room, you may need different-sized or additional panels.

Regularly inspect your DIY acoustic panels to assess their condition and effectiveness. By replacing them as needed, you can ensure that you continue to enjoy the benefits of improved sound quality and reduced echo in your space.
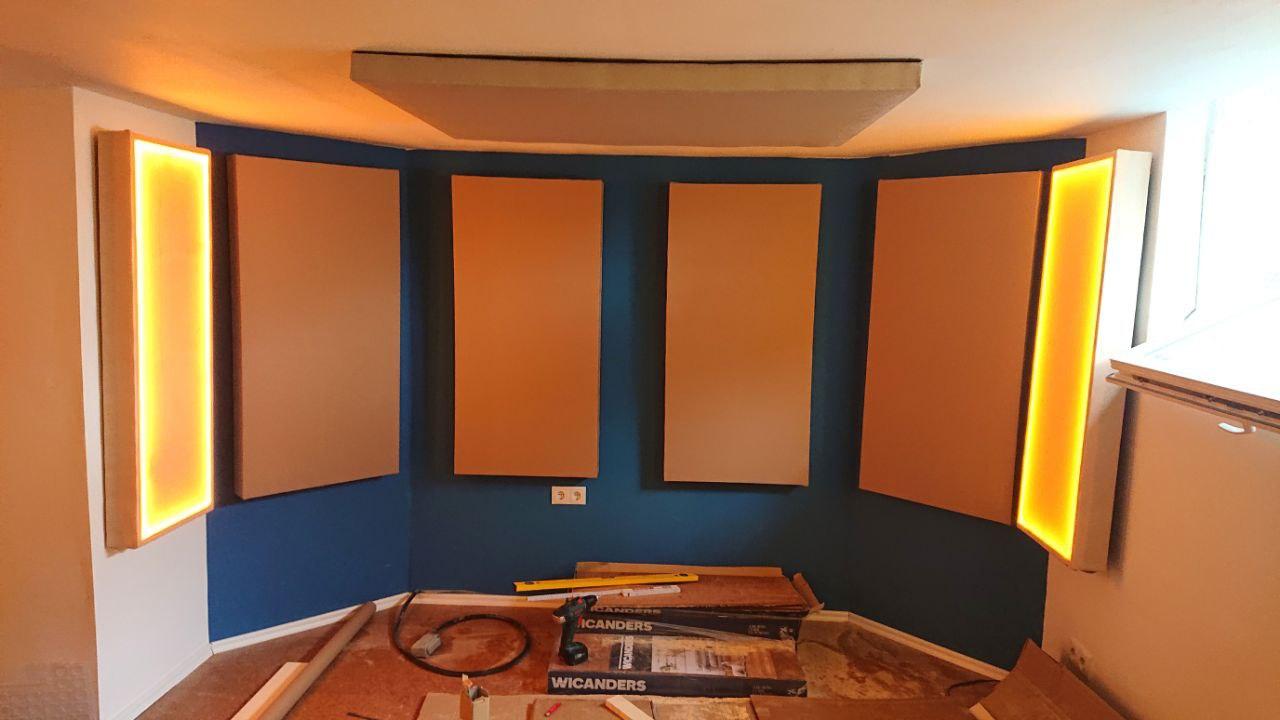
Diy Acoustic Panels: Boost Your Sound Quality with These Easy-to-Make Panels


Credit: upayasound.com


Diy Acoustic Panels: Boost Your Sound Quality with These Easy-to-Make Panels


Credit: www.blackghostaudio.com


Frequently Asked Questions Of Diy Acoustic Panels


What Material For Diy Acoustic Panels?


The best material for DIY acoustic panels is rigid fiberglass or mineral wool. These materials effectively absorb sound and are easy to work with for home projects. Additionally, they offer good acoustic performance and are readily available at hardware stores.


How Much Does It Cost To Make Your Own Acoustic Panels?


To make your own acoustic panels, costs vary but typically range from $50 to $150 per panel.


How Do You Make Sound-absorbing Panels?


To make sound-absorbing panels, choose acoustic fabric, frame, and soundproofing material. Attach fabric to the frame, then insert the soundproofing material. Finish by hanging or mounting the panel on a wall.


How Thick Should Diy Acoustic Panels Be?


DIY acoustic panels should be at least 2 inches thick to effectively absorb sound. Thicker panels, around 4-6 inches, offer better low-frequency absorption. Consider the specific needs of your space when deciding on panel thickness.


Conclusion


To sum up, DIY acoustic panels offer an affordable and effective solution for sound control in any space. By following the step-by-step instructions in this guide, you can create customized acoustic panels that enhance the sound quality of your room.


Embrace the satisfaction of a successful DIY project while enjoying the improved acoustics.

Categories
Archive

Speaker Placement 101: Master the Art of Perfect Sound

Proper speaker placement ensures optimal sound quality and balance in a room. Placing speakers correctly enhances your audio experience.


When setting up your speakers, consider factors like room size, layout, and acoustics to achieve the best sound output. Proper speaker placement involves finding the right balance between the speakers and creating an immersive listening environment. By following some basic principles, you can position your speakers effectively to enjoy high-quality sound reproduction.


Experimenting with different speaker placements can help you find the sweet spot for optimal audio performance.

Speaker Placement 101: Master the Art of Perfect Sound


Credit: www.sweetwater.com


The Importance Of Speaker Placement


For optimal audio quality, proper speaker placement is crucial. Placing speakers at ear level and away from walls can provide a more balanced sound. Positioning speakers strategically can greatly enhance the listening experience, creating a clear, immersive soundstage.

Room Acoustics

Optimal Listening Experience

The Importance of Speaker Placement Speaker placement is crucial for optimizing sound quality and overall listening experience. Correct placement can greatly enhance the audio output, while improper placement may lead to distorted sound and reduced enjoyment.

Room Acoustics

Room acoustics play a pivotal role in how sound waves interact with the space. Factors like room size, shape, and material can impact sound quality. To optimize speaker placement, consider the acoustics of the room to reduce echoes and unwanted sound reflections.

Optimal Listening Experience

Placing speakers at the right height and distance ensures a balanced sound projection. Proper speaker placement can create an immersive audio experience, enhancing the overall quality of music, movies, and any other content being played.

  • Consider the listener’s position for the best audio experience.
  • Avoid placing speakers too close to walls or corners to prevent sound distortion.

Remember, the goal of speaker placement is to achieve optimal sound balance and clarity for an enjoyable listening experience.

Speaker Placement 101: Master the Art of Perfect Sound


Credit: elevenlabs.io


Key Considerations

Key Considerations:

Room Size And Shape

Consider the dimensions and layout of your space to determine the most suitable placement for your speakers.

Speaker Type And Features

Select speakers that match your audio preferences and room acoustics for optimal sound performance.


Optimizing Speaker Placement

When it comes to creating the best sound experience, optimizing speaker placement is crucial. The way you position your speakers can greatly impact the quality of sound and overall enjoyment of the listening experience. Here’s a look at two key factors to consider when optimizing speaker placement:

Distance From Walls

Placing your speakers the right distance from walls is essential to achieve optimal sound quality. Here are some guidelines to consider:

  • Keep the speakers at least 2 feet away from the back wall to prevent sound reflections.
  • For optimal bass response, consider placing the speakers at least 2 feet away from side walls.
  • Experiment with speaker positioning to find the sweet spot that minimizes reflections and enhances sound clarity.

Height And Angle

The height and angle at which your speakers are positioned can significantly impact the sound dispersion and overall listening experience. Consider the following tips:

  1. Position the tweeters at ear level to ensure the best sound projection.
  2. Angle the speakers slightly inward toward the listening area to create a more immersive soundstage.
  3. Experiment with different angles and heights to find the optimal positioning for your specific listening space.

Common Mistakes To Avoid


Discover how to optimize speaker placement to enhance your listening experience and avoid common mistakes that can negatively impact sound quality. Proper positioning can make a significant difference in the way you enjoy music, movies, and more.

Common Mistakes To Avoid:

Proper speaker placement is crucial for achieving optimal sound quality and creating an immersive audio experience. However, many people make common mistakes that can hinder their audio setup. By understanding these mistakes and learning how to avoid them, you can enhance your listening experience and make the most out of your speakers.

Placing Speakers In Corners:

One of the most prevalent mistakes in speaker placement is positioning them in corners. While it may seem like a convenient option, placing speakers in corners can negatively impact the sound quality. This setup can result in excessive bass due to the reinforcement caused by the reflections off the walls. The bass will overpower other frequencies, creating an unbalanced and boomy sound. To avoid this, position your speakers away from the corners and ensure they have sufficient space around them.

Ignoring Reflection Points:

Another common mistake is ignoring reflection points. Reflections occur when sound waves bounce off surfaces such as walls, ceilings, and floors, interfering with the direct sound from the speakers. Failure to consider reflection points can lead to sound distortion and a loss of clarity. To mitigate this issue, identify the reflection points in your room and place acoustic panels or furniture in those areas to absorb or diffuse the sound waves. By addressing reflection points, you can improve the overall sound quality and enhance your listening experience.

In conclusion, avoiding these common mistakes will ensure you achieve the best possible sound quality and audio experience from your speakers. Take the time to position your speakers correctly, away from corners, and address reflection points in your room. By doing so, you’ll create an audio setup that truly brings your music and movies to life.

Fine-tuning For Audio Excellence

When it comes to achieving audio excellence, fine-tuning the placement of your speakers plays a crucial role. The right positioning can greatly enhance your listening experience, delivering crisp and immersive sound throughout your room. In this section, we will explore two key aspects of fine-tuning: experimenting with positions and utilizing room treatments.

Experimenting With Positions

1. Start by placing your speakers at ear level, ensuring that they are positioned symmetrically in relation to your listening area. This allows for an optimal stereo image and balanced sound.

2. Consider the distance between your speakers and the listening area. A general rule of thumb is to form an equilateral triangle, with the listener sitting at the center and the speakers at an equal distance. This helps create a cohesive soundstage and prevents any imbalances.

3. Try adjusting the toe-in angle of your speakers. Slightly angling them inward towards the listening area can improve imaging and clarity. Experiment with different angles until you find the sweet spot that suits your preferences.

4. Take into account the placement of your speakers in relation to the room boundaries. Avoid placing them too close to walls or corners, as this can result in muddiness and boomy bass. Allow some space between the speakers and the walls to achieve a more balanced and accurate sound.

Utilizing Room Treatments

1. Consider incorporating acoustic panels or diffusers into your listening space. These room treatments help control echoes and unwanted reflections, allowing the sound to be more focused and precise. Place them strategically on the walls and ceiling to achieve the best results.

2. Bass traps are particularly useful for reducing low-frequency resonances and standing waves in your room. These can be placed in corners or near walls where bass buildup tends to occur. By optimizing your room’s acoustics, you can achieve a cleaner and more natural sound reproduction.

3. Experiment with adding rugs or curtains to your room, as fabrics have the ability to absorb and diffuse sound reflections. This can help reduce excessive reverberation, making your audio experience more detailed and enjoyable.

4. Consider the overall layout and furnishings of your room. Large, reflective surfaces such as glass tables or hardwood floors can introduce unwanted reflections and affect the sound quality. By making small adjustments to your room’s design, you can create a more conducive environment for optimal audio performance.

Speaker Placement 101: Master the Art of Perfect Sound


Credit: www.reddit.com


Frequently Asked Questions On Speaker Placement 101


What Is The 38% Rule For Speaker Placement?


The 38% rule suggests placing speakers at 38% of the room’s length for optimal sound distribution.


What Is The 1 3 Rule For Speaker Placement?


The 1-3 rule for speaker placement is a guideline that recommends placing the speakers one-third of the room’s length from the front wall, and one-third of the room’s width from the side walls for optimum sound distribution.


What Is The 1 5 Rule For Speaker Placement?


The 1 5 rule for speaker placement is a guideline for positioning speakers in a room. It suggests that speakers should be placed one speaker width apart from each other and five speaker widths away from the listener. This helps create an optimal listening experience by ensuring balanced sound distribution and preventing sound distortion.


What Is The Speaker 1 5 Rule?


The speaker 1 5 rule refers to a set of guidelines to follow when writing content. It includes keeping sentences short (maximum 20 words), using SEO friendly language that is original and easy to understand, avoiding certain words and phrases, writing in active voice, and ensuring the content passes AI writing detection.


Conclusion


Proper speaker placement is essential for optimizing sound quality in any space. By following these guidelines, you can achieve balanced audio coverage and enhance the overall listening experience. We’ve learned the importance of positioning speakers for optimal performance, considering factors like room acoustics and placement angles.


With these tips in mind, you can create a more immersive and enjoyable audio environment.

Categories
Archive

Make Electronic Music: Unleash Your Creative Potential with Pro Tips

To make electronic music, use computer software and audio hardware to create digital sounds and rhythms. Experiment with different sounds and techniques to develop your unique style and sound.


Electronic music production allows for endless creativity and innovation. You can blend various genres and explore new sonic landscapes. With practice and dedication, you can craft music that resonates with listeners worldwide. By mastering the tools at your disposal, you can produce high-quality tracks and establish yourself as a successful electronic music artist.


Let your creativity flow and bring your musical vision to life through electronic music production. Explore and push the boundaries of sound to create captivating and original pieces that reflect your artistic expression.


Gear Essentials For Electronic Music Production

Creating electronic music requires the right gear essentials to bring your musical vision to life. From software to hardware, each component plays a crucial role in the production process. Let’s delve into the key elements you need to kickstart your electronic music journey.

Choosing The Right Software

Software is the heart of electronic music production. Select a digital audio workstation (DAW) that suits your workflow and creativity. Look for features like intuitive interfaces, versatile plugins, and robust MIDI capabilities. Popular DAWs include Ableton Live, FL Studio, and Logic Pro.

Selecting The Best Hardware

Hardware complements your software to enhance your production capabilities. Invest in a powerful computer with ample RAM and CPU performance. Quality monitors and headphones are essential for accurate sound reproduction. Controller keyboards and MIDI interfaces provide tactile control and connectivity.

Make Electronic Music: Unleash Your Creative Potential with Pro Tips


Credit: www.udemy.com


Understanding Sound Design Techniques

Understanding Sound Design Techniques involves mastering the art of shaping and manipulating sounds to create unique musical compositions.

Exploring Synthesis Methods

Synthesis methods are fundamental for crafting original sounds in electronic music production.

  • Experiment with subtractive synthesis, manipulating waveforms to adjust sound characteristics.
  • Dive into FM synthesis, altering frequency modulations for complex and dynamic tones.
  • Explore wavetable synthesis to blend various waveforms and create evolving sounds.

Manipulating Audio Effects

Audio effects play a crucial role in enhancing and transforming raw sound elements.

  1. Utilize reverb to add depth and space to your tracks.
  2. Experiment with delay to introduce rhythmic patterns and echoes.
  3. Harness compression to control dynamics and ensure a balanced mix.

Mastering Composition And Arrangement

Mastering composition and arrangement is a crucial skill for creating captivating electronic music. Crafting catchy melodies and structuring tracks effectively are essential components of this art. In this blog post, we will dive into the details of honing your composition and arrangement skills, helping you elevate your electronic music to new heights.

Crafting Catchy Melodies

Creating captivating melodies is the cornerstone of a memorable electronic music composition. Start by experimenting with different musical scales and chord progressions to find the right combination that resonates with your audience. Utilize synthesizers and sound design techniques to sculpt the tone and character of your melodies, making them stand out in the mix.

Structuring Tracks Effectively

Effective track structuring is key to holding the listener’s attention and guiding them through the sonic journey. Begin by outlining the arrangement of your track, considering the build-up, climax, and resolution. Utilize variation in rhythm, instrumentation, and dynamics to keep the track engaging. Pay attention to transitions between sections, ensuring a seamless flow throughout the composition.

Mixing And Post-production Secrets

When it comes to electronic music production, the importance of mixing and post-production cannot be overstated. These crucial stages give your tracks that professional polish and bring them to life. In this section, we will explore some of the most effective secrets for achieving a well-balanced mix and adding creative effects to enhance your electronic music creations. Let’s delve into the world of mixing and post-production and unlock the secrets that allow your tracks to shine.

Balancing Levels And Equalization

To create a professional-sounding mix, it is essential to focus on balancing levels and equalization. Balancing levels involves adjusting the volume of each individual track in relation to the others to ensure that all elements of the song can be heard clearly. Equalization, on the other hand, involves adjusting the frequency content of each track to create a balanced and cohesive sound.

Here are some tips to help you achieve a well-balanced mix:

  1. Start by setting the overall volume level of your mix. This will allow you to bring all the elements together without any clipping or distortion.
  2. Use panning to place different elements of the track in the stereo field. This will create a sense of depth and separation, making the mix more engaging.
  3. Apply equalization to each track to ensure that conflicting frequencies are properly balanced. This will prevent certain elements from overpowering others and create a more pleasant listening experience.
  4. Utilize compression to control the dynamic range of individual tracks. This helps to even out volume levels and make each element of the mix more cohesive.
  5. Regularly refer to reference tracks that have a similar sound and style to yours. This can provide valuable insights into the overall balance and EQ choices you should make in your mix.

Applying Creative Effects

Once you have achieved a balanced mix, it’s time to unleash your creativity by applying various effects to enhance the overall sound of your electronic music. Creative effects can add depth, texture, and excitement to your tracks, making them stand out and captivate listeners.

Consider the following creative effects for your mix:

  • Reverb: Add a sense of space and depth by applying reverb to certain elements of your mix. Experiment with different types and settings to achieve the desired effect.
  • Delay: Create interesting rhythmic patterns and echoes by using delay effects on specific elements of your track. This can add a unique character and energy to your music.
  • Modulation: Modulation effects such as chorus, flanger, and phaser can bring movement and vibrancy to your mix. Apply them sparingly and tastefully for the best results.
  • Filters: Manipulate the frequency content of your tracks by using filters. High-pass filters can remove unwanted low-end rumble, while low-pass filters can create a more mellow and intimate sound.
  • Automation: Take full control of your mix by automating various parameters such as volume, panning, and effects settings. This enables you to add dynamic changes and create a more engaging listening experience.

Remember, the key to applying creative effects is to use them purposefully and in moderation. Each effect should serve a specific purpose and enhance the overall aesthetic of your music without overpowering the mix.


Promoting And Sharing Your Music

Once you have successfully created your electronic music tracks, the next crucial step is to promote and share your music with the world. With the advent of the internet and social media, musicians today have numerous opportunities to connect with their audience and build a strong online presence. In this section, we will explore effective strategies to promote and share your music, focusing on building your online presence and connecting with your audience.

Building Your Online Presence

Building a strong online presence is essential for any musician aspiring to make an impact in the electronic music industry. To create a compelling online presence:

  • Create a dedicated website or blog that showcases your music, provides a platform for your fans to connect with you, and offers valuable content such as music tutorials or behind-the-scenes videos.
  • Optimize your website for search engines by using relevant keywords in your content, meta tags, and headings. This will help your website rank higher in search engine results and attract more visitors.
  • Utilize social media platforms such as Facebook, Twitter, and Instagram to engage with your fans, promote your music, and share updates about your latest releases or upcoming gigs.
  • Collaborate with other musicians or influencers in the electronic music community to expand your reach and tap into their existing fan base.
  • Consider creating a newsletter or email list where you can regularly update your fans about new music releases, upcoming shows, and other exciting news.

Connecting With Your Audience

Connecting with your audience is crucial to building a loyal fan base and developing a strong presence in the electronic music scene. Some effective ways to connect with your audience include:

  • Interact with your fans on social media platforms by responding to comments, messages, and mentions. Show appreciation for their support and engage in meaningful conversations.
  • Organize live streams or online Q&A sessions where you can interact with your fans in real-time, answer their questions, and showcase your music.
  • Consider organizing meetups or fan events where your fans can meet you in person, listen to your music, and share their experiences.
  • Regularly update your fans on your creative process, such as sharing snippets of new tracks or giving them a glimpse into your studio setup. This helps them feel involved in your journey and builds excitement for your upcoming releases.
  • Encourage your fans to share your music with their friends and networks. Word-of-mouth promotion is a powerful tool in the music industry and can greatly expand your reach.

Make Electronic Music: Unleash Your Creative Potential with Pro Tips


Credit: www.amazon.com


Make Electronic Music: Unleash Your Creative Potential with Pro Tips


Credit: www.positivegrid.com


Frequently Asked Questions Of Make Electronic Music


How Can I Make My Own Electronic Music?


To make electronic music, you need a computer, digital audio workstation software, and MIDI controller. Create melodies using virtual instruments and drum patterns. Experiment with sound effects and mix tracks. Share your music on platforms like SoundCloud and Spotify to reach a wider audience.


How Do I Make My Own Digital Music?


To make your own digital music, get a DAW software, choose your instruments, create melodies, add effects, mix, and export your track.


Is It Hard To Make Electronic Music?


Creating electronic music can be challenging due to the learning curve of software and production techniques. Practice and dedication are key.


What Is The Best Software To Make Electronic Music?


The best software for electronic music production is subjective, but popular choices include Ableton Live, FL Studio, and Logic Pro. Each has unique features and capabilities suited to different preferences and styles. Ultimately, the best software will depend on individual needs and workflow.


Conclusion


Electronic music offers endless creative possibilities for aspiring musicians. With the right tools and knowledge, anyone can explore this exciting genre. By understanding the key aspects of electronic music production and staying open to experimentation, you can unlock your potential and find your unique sound.


Start your journey into electronic music today and let your creativity soar.

Categories
Archive

Bright Wide Powerful Mixes: Unleashing the Power of Vibrant Sound

Bright Wide Powerful Mixes provide a dynamic and impactful sound for any audio project. With a versatile range of elements, these mixes offer a vibrant and energetic feel that can enhance the overall listening experience.


In today’s competitive media landscape, having high-quality mixes is essential for grabbing and maintaining audience attention. Bright Wide Powerful Mixes deliver a polished and professional sound that can help your content stand out from the crowd. Whether you’re creating music, podcasts, or video content, these mixes can elevate the production value and engage your audience effectively.


Incorporating these mixes into your projects can greatly enhance the overall quality and impact of your audio content.


The Power Of Bright Mixes

Bright mixes add vibrancy and energy to audio tracks, enhancing the overall listening experience.

Characteristics Of Bright Mixes

  • Bold, crisp, and clear tones
  • Emphasis on high frequencies
  • Enhanced clarity and sparkle

Impact On Sound Quality

  • Bright mixes elevate the overall sound quality
  • Creates a sense of dimension and space
  • Enhances detail and depth in the music


Credit: www.facebook.com


Exploring Wide Soundscapes

Creating Depth And Immersion

Bright Wide Powerful Mixes offer immersiveness through intricate layering and rich sound textures.

  • Utilize panning techniques for spatial effects in the mix.
  • Incorporate reverbs and delays to create a sense of space.

Expanding The Sonic Environment

Wide soundscapes stretch the audio spectrum, enveloping listeners in engaging auditory experiences.

  1. Enhance dynamics through varied volume levels and instrumentation.
  2. Utilize stereo widening plugins to broaden the sonic field.


Unleashing The Potential Of Powerful Sound

Bright wide powerful mixes have the ability to unlock transformative experiences through their superior sound quality. Harnessing energy and impact and enhancing emotional resonance are crucial in leveraging the full potential of these dynamic audio mixes.

Harnessing Energy And Impact

By capturing and intensifying the energy within each note and beat, bright wide powerful mixes invigorate the listener’s sensory experience. This heightened energy creates a lasting impact that resonates deeply, enriching the overall auditory journey.

Enhancing Emotional Resonance

The emotive power of bright wide powerful mixes elevates the emotional resonance of the music, allowing the audience to connect on a profound level. The intricate combination of tones and arrangements elicits raw emotions, intensifying the impact of the sonic narrative.

Understanding Vibrant Sound Blends

When it comes to creating captivating music, understanding vibrant sound blends is crucial. These blends encompass the harmonious combination of various elements, including frequencies and dynamics. In this article, we delve deep into the art of creating powerful and engaging sound mixes that leave a lasting impact on listeners.

Balancing Frequencies And Dynamics

One of the key aspects of creating bright, wide, and powerful mixes is finding the perfect balance between frequencies and dynamics. Frequencies refer to the range of tones present in a sound, while dynamics refer to the variations in volume and intensity.

To achieve a vibrant sound blend, it’s essential to ensure that each frequency is well-represented and given its rightful space in the mix. This involves carefully orchestrating the highs, mids, and lows to create a well-rounded and balanced sonic landscape. By avoiding frequency clashes and optimizing the arrangement of different elements, you can create a mix that is rich in detail and clarity.

Furthermore, dynamics play a crucial role in creating a captivating listening experience. By skillfully manipulating the volume and intensity of different elements, you can add depth and emotion to your sound. Whether it’s a subtle crescendo, a powerful drop, or a nuanced fade-out, mastering the dynamics of your mix will allow you to create moments that truly captivate and engage the listener.

Embracing Diversity In Sound

Another essential aspect of understanding vibrant sound blends is embracing the diversity of sound. Every genre, instrument, and vocalist brings a unique character and texture to the mix. By embracing this diversity and recognizing the strengths of each element, you can create mixes that stand out and resonate with your audience.

Experimenting with different sound sources and instruments allows you to add layers of complexity and interest to your mix. Whether it’s blending acoustic and electronic elements, incorporating unconventional instruments, or exploring various sonic textures, embracing diverse sound opens up a world of possibilities for creating vibrant and captivating mixes.

Moreover, understanding the distinctive qualities of each sound source enables you to make informed decisions on how to position and balance them within the mix. This way, you can highlight the strengths of each element and create a cohesive sonic tapestry that appeals to the listeners on multiple levels.

To sum it up, understanding vibrant sound blends encompasses finding the delicate balance between frequencies and dynamics, as well as embracing the diversity of sound. By honing these skills, you can create powerful mixes that captivate and leave a lasting impression on the listener. So, dive into the world of vibrant sound blends, and let your creativity soar to new heights!

Crafting A Diverse Audio Palette

Creating a diverse audio palette that captivates and engages listeners is one of the key elements in producing music that stands out. Bright Wide Powerful Mixes offer a unique approach to crafting a diverse audio palette, allowing you to experiment with various genres, styles, and ethnic influences. In this blog post, we will explore how you can mix different genres and styles, as well as incorporate ethnic and cultural influences to create a truly remarkable audio experience.

Mixing Different Genres And Styles

The beauty of music lies in its ability to transcend boundaries and appeal to a wide range of listeners. By mixing different genres and styles, you can create compositions that are fresh, innovative, and tailored to your unique artistic vision. Whether you blend pop with classical, jazz with rock, or electronic with folk, the possibilities are endless.

Here are some tips to help you effectively mix different genres and styles:

  • Identify the key elements of each genre or style you want to incorporate into your mix.
  • Experiment with different combinations, layering and integrating various elements to create a harmonious and cohesive sound.
  • Pay attention to dynamics, tempo, and instrumentation to ensure a seamless transition between different genres or styles.
  • Use EQ, compression, and effects strategically to enhance the unique characteristics of each genre or style.

When done correctly, mixing different genres and styles can result in music that not only grabs attention but also leaves a lasting impression on your audience.

Incorporating Ethnic And Cultural Influences

Adding ethnic and cultural influences to your music can add depth, intrigue, and a sense of authenticity to your compositions. It allows you to explore new sonic landscapes and create a truly multicultural audio experience.

Consider the following when incorporating ethnic and cultural influences:

  • Research and familiarize yourself with the musical traditions, instruments, and rhythms of the culture you wish to incorporate.
  • Experiment with incorporating traditional instrumentation, melodies, or vocal styles into your compositions.
  • Pay attention to the cultural significance and context of the elements you are using, respecting and honoring the traditions and customs.
  • Blend the ethnic influences seamlessly with the rest of your composition, maintaining a coherent and balanced sound.

By incorporating ethnic and cultural influences into your music, you create a rich tapestry of sound that not only celebrates diversity but also allows your compositions to resonate with a broader audience.


Credit: m.facebook.com


Credit: www.amazon.com


Frequently Asked Questions On Bright Wide Powerful Mixes


How The Pros Get Bright Wide And Powerful Mixes?


Pros achieve bright, wide, and powerful mixes through careful EQing, using complementary frequencies, and balancing levels. They also utilize panning to create space and depth, and apply proper compression and reverb to enhance the overall sound. Understanding the individual tracks and how they fit together is crucial for achieving professional-quality mixes.


How Do You Make A Mix Brighter?


To make a mix brighter, boost high frequencies using an EQ, add reverb or delay, and use compression for clarity.


How Do I Make My Sound Brighter?


To make your sound brighter, adjust EQ settings by increasing high frequencies, use a brighter microphone, position mic closer to source, reduce background noise, consider acoustic treatment in the room.


Why Don’t My Mixes Sound Wide?


To achieve width in your mixes, use panning, stereo imaging plugins, and reverb. Avoid cluttering the mid-range frequencies and use EQ to create space. Vary the timing and the type of reverb to create depth. Experiment with different elements to enhance the width of your mixes.


Conclusion


To sum up, bright, wide, and powerful music mixes are a key ingredient in creating a remarkable listening experience. With the right blend of instruments and sound elements, these mixes can captivate and engage listeners, elevating the overall impact of the music.


By embracing the potential of powerful mixes, musicians and producers can truly take their compositions to the next level while providing an immersive sonic journey for their audience.

Categories
Archive

Mixing Guitars Tips: Master the Art of Harmonious Sound

When mixing guitars, pay attention to levels, panning, and EQ to achieve a balanced sound. Properly mixing guitars can enhance the overall quality of your music production.


This article will provide valuable tips and techniques for mixing guitars effectively. Guitars play a crucial role in music arrangements and can significantly impact the final mix. By understanding how to properly mix guitars, you can create a dynamic and cohesive sound that elevates your music to the next level.


In this guide, we will explore essential tips for mixing guitars, including adjusting levels, panning, and EQ settings. Whether you are a seasoned producer or a beginner looking to improve your mixing skills, these tips will help you achieve professional-sounding guitar tracks in your music productions.


Selecting The Right Guitars

When it comes to mixing guitars, selecting the right instruments is crucial for achieving a great sound. Let’s dive into some essential tips for choosing the perfect guitars for your mix.

Consider The Style:

Each guitar type has a unique sound and tone. Consider the style of music you are mixing and choose guitars that complement it. Acoustic guitars work well for folk or unplugged performances, while electric guitars are ideal for rock or blues.

Evaluate The Sound Quality:

Check for clarity, warmth, and resonance when selecting guitars. A high-quality instrument will have a rich sound that enhances your mix. Listen closely to ensure the guitars produce clean, crisp tones with minimal interference.


Credit: www.amazon.com


Understanding Individual Guitar Roles

Understanding Individual Guitar Roles:

Lead Guitar Vs. Rhythm Guitar

Lead Guitars: Create melodies and stand out in the forefront.

Rhythm Guitars: Maintain the beat and add depth to the music.

Identifying the Main Melody:

Identifying The Main Melody

  • Listen for the most prominent tune in the arrangement.
  • Can be played by the lead guitar or another instrument.
  • Essential to highlight the main melody for clarity in the mix.

Utilizing Different Amps And Effects

When it comes to creating a unique and dynamic guitar sound, utilizing different amps and effects can open up a world of possibilities. Experimenting with various combinations of amps and effects pedals allows guitarists to craft a signature sound that sets them apart from the crowd.

Experimenting With Amp Settings

Adjusting the settings on your amplifier can drastically alter the tone and character of your guitar sound. By experimenting with the amp’s EQ, gain, and other settings, you can achieve a wide range of tones, from clean and mellow to gritty and aggressive. Remember to start with the basics, adjusting the bass, mid, and treble controls, before exploring more advanced features like presence and resonance.

Exploring Various Effects Pedals

Effects pedals are essential tools for adding depth and texture to your guitar sound. Whether you’re interested in distortion, delay, modulation, or reverb, there’s a wide variety of pedals to choose from. Explore different types of effects pedals to find the ones that best complement your playing style and musical genre. Don’t be afraid to mix and match pedals to create unique sonic combinations.


Credit: www.ebay.ca


Mixing Techniques For Optimal Blend

When it comes to mixing guitars, it’s essential to employ the right techniques to achieve a harmonious and balanced sound. By utilizing these tried-and-tested methods, you can ensure that each individual guitar track complements the others, resulting in a cohesive and professional mix. In this article, we will explore two key techniques that will take your guitar mix to the next level: EQ and Panning, and Layering and Stereo Imaging.

Eq And Panning

EQ and panning are vital tools in creating space and separation for each guitar track in your mix.

EQ

Equalization, or EQ, allows you to shape the tonal characteristics of each guitar track. By using EQ effectively, you can carve out specific frequencies, reducing muddiness and enhancing clarity in your mix.

  1. Start by analyzing each guitar track individually. Identify any problematic frequencies or areas that could benefit from improvement, such as excessive low-end rumble or harsh high-end frequencies.
  2. Using a parametric equalizer, gently cut or boost the selected frequencies to achieve a more balanced and pleasing sound. Remember to make subtle adjustments to avoid drastic changes to the original tone.
  3. Experiment with EQ settings on each guitar track, ensuring that no frequency ranges clash with one another. This will help create a spacious and defined mix.

Panning

Panning refers to the placement of each guitar track within the stereo field, allowing for a wider and more immersive listening experience.

  • Consider the role of each guitar track in the mix. For example, rhythm guitars can be panned slightly to the left and right or centered to anchor the mix, while lead guitars can be panned slightly off-center for added width.
  • By using a combination of panning and EQ, you can create a balanced and well-defined soundscape, with each guitar occupying its own space.

Layering And Stereo Imaging

Layering and stereo imaging techniques can elevate your guitar mix, adding depth and dimension to each track.

Layering

Layering involves recording multiple guitar tracks, each serving a specific purpose and complementing one another.

  • Experiment with different guitar tones, such as clean, distorted, or effects-laden, to add variety and thickness to your mix.
  • By layering multiple guitars playing the same or similar parts, you can create a more robust and powerful sound.
  • Ensure that each layer has its own distinct frequency range and occupies a specific sonic space within the mix to avoid sonic clutter.

Stereo Imaging

Stereo imaging allows you to position each guitar track within the stereo field, enhancing the overall width and depth of your mix.

  1. Consider using stereo effects, such as chorus or stereo reverb, to create a wider and more immersive sound.
  2. Experiment with different stereo panning techniques to position guitars in various locations within the stereo field, enhancing the spatial dimension of your mix.

By employing EQ and panning techniques, as well as layering and stereo imaging, you can achieve an optimal blend of guitars in your mix. Remember to approach each technique with a critical ear, making subtle adjustments to create a balanced and cohesive sound.


Achieving Cohesive Arrangements

When it comes to mixing guitars, achieving cohesive arrangements is crucial. Balancing guitars with other instruments and creating depth and dynamics are key aspects to consider. By carefully blending each element, you can create a well-rounded and harmonious sound that captivates your listeners.

Balancing Guitars With Other Instruments

To achieve a cohesive arrangement, it is essential to strike the right balance between guitars and other instruments in your mix. Here are some tips to help you achieve it:

  • Start by identifying the main focus of your arrangement. Determine whether the guitars should take center stage or blend in with the other instruments.
  • Use panning to separate the guitars from other instruments and create space in the stereo image. Experiment with different pan positions to find the sweet spot for each element.
  • Consider the frequency range of each instrument. Ensure that guitars and other instruments occupy different parts of the spectrum, preventing any overlapping and muddiness.
  • Use EQ to carve out space for each instrument. Tweak the frequencies of the guitars and other instruments to avoid clashing and create a clean, balanced mix.

Creating Depth And Dynamics

Depth and dynamics play a crucial role in enhancing the overall quality of your guitar mix. Here are some techniques to help you achieve depth and dynamics:

  • Experiment with different microphone placements to capture the desired sound. Close-miking can result in a more intimate tone, while room miking can add depth and ambiance.
  • Utilize effects such as reverb and delay to add depth and dimension to your guitar sound. Apply these effects subtly to maintain clarity and avoid overwhelming the mix.
  • Employ automation to control the volume of the guitars throughout the arrangement. Gradual volume changes during different sections can create captivating dynamics and keep the listener engaged.
  • Consider layering multiple guitar tracks to add texture and richness to the mix. Experiment with different guitar tones and techniques to create an interesting and dynamic sonic palette.

By implementing these tips and techniques, you can achieve cohesive arrangements that highlight the guitars while maintaining balance and depth with other instruments. Remember, the key is to experiment, trust your ears, and find a mix that brings out the best in your guitar tracks!

Mixing Guitars Tips: Master the Art of Harmonious Sound


Credit: www.waves.com


Frequently Asked Questions Of Mixing Guitars Tips


How Do You Mix Guitar Properly?


To mix guitar properly, adjust levels for balance, use panning for space, apply EQ to carve out frequencies, add compression for consistency, and consider reverb and delay for depth and atmosphere.


How Can I Make My Guitar Sound Better In Mix?


Enhance your guitar’s sound in the mix by adjusting EQ settings, adding reverb or delay effects, and choosing the right amp simulation. Experiment with different placement techniques and try layering multiple guitar tracks for depth.


How Do You Mix Two Guitars Together?


To mix two guitars together, adjust their volumes and pan positions in the mix to create a balanced sound. Experiment with EQ and effects to blend them harmoniously.


Where Should Guitar Sit In A Mix?


The guitar should sit in a mix slightly to the left or right to create balance and stereo imaging. Adjust the EQ to carve out space for other instruments. Avoid excessive reverb or delay to prevent muddiness. Experiment to find the best placement for your specific mix.


Conclusion


To sum up, mastering the art of mixing guitars is crucial for achieving a professional sound in your music production. By utilizing these tips and techniques, you can enhance the clarity, presence, and impact of your guitar tracks. Experiment with different settings and trust your ears to find the perfect balance within your mix.


Keep honing your skills and trust the process to create outstanding guitar mixes.

Categories
Archive

How Musicians Can Benefit From Social Media: Unlocking Success Through Digital Platforms

Musicians benefit from social media by reaching wider audience and engaging with fans. In today’s digital age, leveraging social media platforms can significantly boost a musician’s career.


It offers a direct channel for artists to connect with fans, share their music, upcoming shows, and behind-the-scenes content. Through social media, musicians can increase their visibility, collaborate with other artists, promote new releases, and gather valuable feedback from their audience.


Additionally, by utilizing social media analytics, musicians can track their performance and optimize their strategies to enhance their online presence. Overall, social media provides a powerful tool for musicians to showcase their talent, expand their reach, and build a loyal fan base.

How Musicians Can Benefit From Social Media: Unlocking Success Through Digital Platforms


Credit: medium.com


Building A Strong Online Presence


Musicians can greatly benefit from utilizing social media platforms to build a strong online presence. Engaging with fans, promoting new releases, and sharing behind-the-scenes content can all contribute to increasing visibility and expanding their fanbase. By effectively leveraging social media, musicians can enhance their brand and grow their careers in the digital age.

Creating Engaging Content

Engaging content is crucial for capturing the attention of your audience.

Consistent Branding

Consistent branding helps in establishing a recognizable identity for your music brand.

Having a strong online presence is essential for musicians to connect with fans and increase visibility.

Social media platforms provide musicians with a powerful tool to showcase their artistry to a global audience.

By utilizing social media effectively, musicians can engage with their followers in real-time, share their music, and create a loyal fan base.

Creating captivating content is the key to maintaining audience interest and driving interaction with your music.

When it comes to social media, remember to keep your content fresh and diverse, including behind-the-scenes glimpses, live performances, and personal insights.

Consistency in your branding across all social media platforms helps in building trust with your audience and reinforces your music brand identity.

  • Post regular updates about your music journey
  • Interact with your fans through comments and messages
  • Share sneak peeks of your upcoming projects

Remember to maintain a balance between promotional content and personal interactions to keep your audience engaged and interested.

Through a strong online presence and engaging content creation, musicians can leverage the power of social media to expand their reach and connect with fans on a deeper level.

Connecting With Fans And Audience

Connecting with fans and audience is crucial for musicians to build a loyal following and grow their reach.

Direct Engagement

Musicians can directly communicate with fans on platforms like Instagram through comments and direct messages.

Engaging with fans regularly helps create a personal connection and builds a loyal fanbase.

Utilizing Live Features

Using live streaming features on platforms such as Facebook Live and Twitch allows musicians to perform for a live audience and engage in real-time.

Live interactions create a sense of intimacy and enable musicians to showcase their talent.

Collaborating And Networking Opportunities

Social media offers incredible collaborating and networking opportunities for musicians. It has transformed the way musicians connect with one another and industry professionals, providing a platform for collaborations and networking that was previously limited to in-person interactions.

Connecting With Other Musicians

One of the key benefits of social media for musicians is the ability to connect with other musicians across the globe. Platforms like Instagram, Facebook, and Twitter allow musicians to find and interact with like-minded individuals, share experiences, and collaborate on projects.

Engaging With Industry Professionals

Social media also provides a unique opportunity for musicians to engage with industry professionals. By following and interacting with industry professionals such as producers, promoters, and A&R representatives, musicians can gain exposure, build relationships, and even secure opportunities for growth in their careers.

How Musicians Can Benefit From Social Media: Unlocking Success Through Digital Platforms


Credit: www.modern-musician.com


Promotion And Marketing Strategies

One of the most important aspects of a successful music career is effective promotion and marketing. With the rise of social media, musicians now have more opportunities than ever to reach a wider audience and connect with their fans. In this section, we will explore two powerful strategies that can help musicians leverage social media: announcing releases and gigs and utilizing ads and sponsored content.

Announcing Releases And Gigs

When it comes to building anticipation and generating buzz around new music releases and upcoming gigs, social media platforms are invaluable. With millions of users worldwide, these platforms offer musicians the chance to connect directly with their fans in real-time. Here are a few effective ways to announce releases and gigs through social media:

  1. Create engaging posts: Craft eye-catching posts with captivating visuals and compelling descriptions that excite your fans about the upcoming release or gig. Use bold and vivid images to stand out among the clutter of social media feeds.
  2. Tease your audience: Build anticipation by giving your fans sneak peeks or teasers of what to expect. Short video clips, snippets of new songs, or behind-the-scenes photos can all be effective in generating excitement and curiosity.
  3. Host live streams: Take advantage of the “live” feature on platforms like Facebook, Instagram, or YouTube to share exclusive announcements and interact with your audience in real-time. This fosters a sense of intimacy and connection.
  4. Collaborate with influencers: Partnering with popular influencers relevant to your genre or target audience can help amplify your announcements. Their endorsement and reach can bring your music to a wider audience and generate more engagement.

Utilizing Ads And Sponsored Content

Beyond organic reach, musicians can also benefit from social media advertising and sponsored content to expand their fan base and promote their music effectively. Here are some strategies to consider:

  • Targeted ads: Utilize the targeting options provided by social media platforms to reach specific demographics, interests, or locations. This ensures your ads are seen by the people most likely to be interested in your music.
  • Boosted posts: Boosting your posts ensures they appear in the feeds of a wider audience, increasing the visibility of your music releases and gig announcements. This can be especially effective when you have important news to share.
  • Sponsored content: Partner with relevant social media influencers or music blogs to promote your music through sponsored content. This allows you to tap into their audience and gain exposure to potential new fans.
  • Retargeting campaigns: Implement retargeting campaigns to reach people who have already shown interest in your music or engaged with your content. This helps to reinforce your brand and increase the likelihood of conversions.

Data Analytics And Insights


Discover how musicians leverage data analytics and insights from social media to enhance their engagement and reach. By analyzing metrics, artists can tailor their content and connect with fans more effectively, ultimately boosting their online presence and career success.

Understanding Audience Demographics

Understanding your audience is essential for any musician looking to succeed in today’s digital age. With the help of data analytics and insights, musicians can gain valuable information about their fan base and better cater their content to them.

By utilizing social media platforms, musicians can gather data on their audience’s age range, gender, location, and interests. This knowledge can help them tailor their music, marketing strategies, and even live performances to match their fans’ preferences.

For example, if a musician discovers that their audience primarily consists of young adults in a specific city, they can prioritize promoting shows in that area or collaborate with local influencers popular among this age group.

Measuring Engagement And Reach

Measuring engagement and reach is another invaluable aspect of data analytics and insights for musicians. Social media platforms offer various metrics that allow musicians to track how their content is performing.

These metrics include likes, comments, shares, and the number of followers or subscribers. By analyzing this information, musicians can gauge the success of their content and make informed decisions about their future campaigns, releases, or collaborations.

For instance, if a musician notices that a particular type of content, such as behind-the-scenes videos, receives higher engagement, they can focus more on creating similar content to keep their audience engaged and interested.

Furthermore, by constantly monitoring their reach, musicians can identify trends or patterns that lead to increased exposure. This can help them tweak their marketing strategies, target specific demographics, or even collaborate with other artists or influencers to expand their reach.

How Musicians Can Benefit From Social Media: Unlocking Success Through Digital Platforms


Credit: neilpatel.com


Frequently Asked Questions Of How Musicians Can Benefit From Social Media


How Social Media Has Benefited Musicians?


Social media benefits musicians by increasing visibility, connecting with fans, promoting music, and building a strong fan base.


How Should Musicians Use Social Media?


Musicians should use social media to connect with their fans, share their music, and promote upcoming events. Engaging with the audience through regular updates and interactive posts can build a loyal following. Utilizing various platforms like Instagram, Facebook, and TikTok can help reach a wider audience and boost their online presence.


Why Is Social Media So Important For Artists?


Social media is vital for artists because it helps them reach a wider audience and promote their work. It allows artists to showcase their talents, connect with fans, collaborate with other artists, and sell their artwork. With the power of social media, artists can establish their brand and gain recognition in the industry.


How Does The Internet Help Musicians?


The internet helps musicians by offering a global platform to share and promote their music. It provides opportunities for collaboration, access to a wider audience, and the ability to sell songs online. Musicians can also discover new trends, connect with fans through social media, and gain exposure through streaming platforms.


Conclusion


To sum up, social media presents endless opportunities for musicians to grow their fan base, engage with their audience, and promote their music in an efficient and cost-effective manner. By leveraging various platforms and implementing a strategic approach, musicians can significantly benefit from social media’s reach and impact on their careers.


https://www.youtube.com/watch?v=bixR-KIJKYM


Categories
Archive

Diy Bass Traps : Transform Your Sound Space with Affordable and Effective Power Bass Traps

You can easily make DIY bass traps using wood frames and acoustic foam to improve sound quality. Crafting your bass traps allows customization to suit your needs precisely.


Bass traps are essential for controlling low-frequency sound waves and reducing room resonance, making them a valuable addition to any soundproofing setup. When designing bass traps, consider factors like room size, ceiling height, and the types of instruments used to ensure optimal performance.


By following simple DIY instructions, you can create cost-effective bass traps that enhance the acoustics of your space without breaking the bank. With a bit of creativity and effort, DIY bass traps can elevate your sound experience and provide a professional touch to your home studio or listening room.

Diy Bass Traps  : Transform Your Sound Space with Affordable and Effective Power Bass Traps


Credit: arqen.com


Choosing The Right Materials

Choosing the Right Materials for DIY Bass Traps

Selecting The Right Acoustic Panels

Absorption quality is essential for effective bass traps.

  • Choose dense acoustic panels to absorb low-frequency sound waves.
  • Opt for panels with NRC ratings above 0.7 for better performance.

Finding Inexpensive Insulation Materials

Cost-effective options can still offer great sound absorption.

  1. Consider using mineral wool or fiberglass insulation for bass traps.
  2. Shop for surplus or discounted insulation materials to save money.

Building The Bass Trap Frame

Measuring And Cutting The Frame Pieces

Bass traps are essential for improving sound quality in your DIY studio. Proper measurement of the frame pieces ensures a snug fit.

Assembling The Frame

Assemble the frame by joining the pieces together securely. Follow these steps:

  1. Measure the length and width of the frame pieces accurately.
  2. Use a saw to cut the pieces according to the measurements taken.
  3. Double-check the dimensions to avoid any discrepancies.

After cutting the pieces, align and connect them using screws or wood glue for a sturdy frame.


Installing The Absorption Material

When it comes to installing the absorption material for your DIY bass traps, precision and proper technique are essential. Follow these steps to ensure that you properly cut, place, and secure the absorption material for effective sound control in your space.

Cutting And Placing The Insulation

1. Select the right insulation: Choose a dense and effective acoustic material such as rock wool or fiberglass. Measure the dimensions needed for your bass traps and use a sharp knife or insulation cutter for precise cuts.

2. Wear protective gear: Before cutting the insulation, wear gloves, a dust mask, and eye protection to safeguard yourself from any potential irritation or health hazards.

3. Cut with care: Use a straight edge to guide your cuts and ensure that the insulation fits snugly into the bass trap frames without any gaps or uneven edges.

Securing The Acoustic Panels

1. Determine the placement: Decide where the acoustic panels will be positioned for optimal sound absorption. Corners and primary reflection points are ideal locations.

2. Fixing the panels: Attach the panels securely using appropriate hardware such as screws, brackets, or adhesive. Make sure the panels are flush against the walls or corners to prevent any sound leakage.

3. Test for stability: Gently tap on the panels to ensure they are firmly in place without any wobbling or movement.

Diy Bass Traps  : Transform Your Sound Space with Affordable and Effective Power Bass Traps


Credit: www.youtube.com


Customizing The Bass Traps


Create unique DIY bass traps by customizing the design to fit your space and improve sound quality. Enhance sound absorption and reduce bass resonance with personalized bass traps for a more professional home studio or entertainment room ambiance.

When it comes to creating the perfect acoustic environment in your home studio or listening room, bass traps are an essential element. These simple yet effective devices help to tame low-frequency sound waves, ensuring a balanced and accurate listening experience. While pre-made bass traps are widely available, customizing them allows you to tailor their appearance and functionality to suit your specific needs. In this article, we will explore two ways to customize your bass traps: by adding a decorative fabric covering and by incorporating corner mounting brackets.

Decorative Fabric Covering

Adding a decorative fabric covering to your bass traps not only enhances their appearance but also allows you to match them to your room’s color scheme and aesthetic. Here are a few simple steps to guide you:

  1. Measure the width and height of your bass traps.
  2. Select a fabric that is both acoustically transparent and visually appealing.
  3. Cut the fabric to the required dimensions, leaving a few inches of excess on each side.
  4. Starting from one edge, fold the excess fabric over the bass trap and staple it in place.
  5. Continue folding and stapling the fabric along each side, ensuring a tight and smooth finish.

By following these steps, you can easily transform your plain bass traps into attractive and personalized acoustic decorations that blend seamlessly with your room’s design.

Adding Corner Mounting Brackets

To maximize the effectiveness of your bass traps, it is essential to position them correctly in your room. Adding corner mounting brackets is a practical solution that allows you to securely attach the traps to the corners of your space. Here’s how to proceed:

  1. Determine the optimal location for your bass traps in the corners of your room.
  2. Measure the distance from the ceiling to the floor in each corner.
  3. Purchase corner mounting brackets that are suitable for your bass trap size and weight.
  4. Attach the brackets to the walls using screws and anchors.
  5. Slide the bass traps into the brackets and adjust them to the desired height.

By adding these corner mounting brackets, you ensure that your bass traps stay securely in place, effectively absorbing low-frequency sound waves and improving the overall acoustics of your space.

Optimizing Placement And Usage

When it comes to enhancing your listening space, strategic placement and proper usage of DIY bass traps play a crucial role. By optimizing their placement and usage, you can significantly improve the acoustics of your room and achieve a well-balanced sound experience.

Strategic Placement In Listening Space

Placing your DIY bass traps strategically within your listening space is essential. By understanding the characteristics of low-frequency sound waves, you can effectively identify the ideal locations for placement.

Consider the following placements for your bass traps:

  1. Room corners: The corners of your room are hotspots for low-frequency buildup. Installing bass traps in these areas helps in reducing excessive bass resonance.
  2. Wall reflections: Mounting bass traps on the walls opposite your speakers can help eliminate unwanted reflections and echoes, resulting in clearer and more defined sound.
  3. Behind listening position: Placing bass traps behind your listening position helps control bass energy and prevents excessive low-frequency reverberation.

Monitoring And Adjusting For Best Results

To achieve optimal results, it’s important to monitor and adjust the placement of your DIY bass traps as needed. Regularly assessing the sound quality in your listening space allows you to make necessary adjustments for the best acoustic performance.

Here are a few tips for monitoring and adjusting your bass traps:

  • Perform listening tests: Regularly listening to familiar music or audio tracks helps you identify any noticeable improvements or areas that may require further adjustment.
  • Record measurements: Use measurement tools such as a sound level meter or room analyzer to record measurements before and after making adjustments. This helps you objectively evaluate the impact of your changes.
  • Tweak placement: If you notice areas of improvement or certain frequencies still dominating, experiment with repositioning your bass traps slightly to target those specific problem areas.
  • Consider room size and layout: The size and layout of your room can influence the effectiveness of bass traps. Experiment with different placements based on your room’s characteristics to achieve the best results.

Remember, optimizing the placement and usage of your DIY bass traps is a continuous process. By observing and adjusting as necessary, you can create an acoustically balanced listening environment that enhances your audio experience.

Diy Bass Traps  : Transform Your Sound Space with Affordable and Effective Power Bass Traps


Credit: acousticgeometry.com


Frequently Asked Questions For Diy Bass Traps


How Do You Make Homemade Bass Traps?


To make homemade bass traps, use rigid fiberglass or rockwool insulation, fabric, and a wooden frame. Cut insulation to size, wrap in fabric, and assemble in corners or walls for sound absorption.


What Makes A Good Bass Trap?


A good bass trap effectively absorbs low-frequency sound waves, reducing room resonance and improving acoustic clarity. Quality materials and strategic placement are key factors for optimal performance.


Should Bass Traps Be Floor Or Ceiling?


Bass traps can be placed on the floor or ceiling to effectively absorb low-frequency sound waves. Consider the room’s acoustics to determine the best placement for optimal sound treatment.


What Is The Best Material To Absorb Bass?


The best material to absorb bass is acoustic foam.


Conclusion


To sum up, DIY bass traps offer an effective and cost-efficient solution for improving the acoustics of your recording space. By following the steps detailed in this guide, you can create custom bass traps that fit your specific requirements. With better sound control, you can elevate your music production or listening experience.

Categories
Archive

Recording Bass Guitar : Master the Art of Groove

To record bass guitar effectively, use a DI box for clean signal and mic placement for tone capture. When recording bass guitar, it’s essential to achieve a balanced and full-bodied sound that complements the overall mix of the song.


By utilizing the right gear and techniques, you can capture the low end and dynamics of the bass guitar while avoiding muddiness or distortion in the recording. In this comprehensive guide, we will explore the steps and tips for recording bass guitar in a professional and efficient manner.


From choosing the right equipment to setting up your recording space, you will learn how to achieve the best results for your bass tracks. Let’s dive in and enhance your bass recording skills for outstanding music production.


The Importance Of Bass Guitar


Recording bass guitar is crucial in creating a solid foundation for any musical composition. The deep, rhythmic undertones of the bass guitar add complexity and depth to the overall sound, enhancing the quality of the music. Properly recorded bass guitar can greatly impact the dynamics and groove of a song, resulting in a more cohesive and professional sound.

The Backbone Of The Band

Setting The Groove

The bass guitar plays a crucial role in any music ensemble. It is often referred to as the backbone of the band. Without the bass guitar, the music lacks depth and cohesion. The low-end frequencies provided by the bass guitar create a solid foundation for the rest of the instruments to build upon. A skilled bass guitarist can set the groove for an entire song. The rhythmic patterns and melodic lines played on the bass guitar establish the feel and tempo of the music. This helps to keep the other musicians in sync and maintains the overall flow of the composition. In essence, the bass guitar is essential for a well-rounded sound in any musical piece. Its presence ensures a balanced mix and adds a sense of unity to the overall arrangement. So, next time you listen to music, pay attention to the bass guitar, and you’ll gain a newfound appreciation for its significance.

Choosing The Right Equipment

When recording Bass Guitar, it’s crucial to Choose the Right Equipment to achieve optimal sound quality. Here, we delve into Selecting the Ideal Bass and Exploring Amplification Options to enhance your recording experience.

Selecting The Ideal Bass

1. Start by considering factors like body style, Scale Length, and Number of Strings when selecting a bass guitar.

2. Ensure the bass fits well in your hands and offers a comfortable playing experience for extended recording sessions.

Exploring Amplification Options

1. Experiment with different Amp Types such as tube amps or solid-state amps to find the right tone for your bass recordings.

2. Focus on selecting an amplifier that complements the Timbre and Frequency Range of your bass guitar for a well-rounded sound.

Techniques For Mastering Groove

Bass guitar is the backbone of any band, setting the rhythm and providing a solid foundation for the entire musical composition. Mastering groove is essential for bass players to create a cohesive and captivating sound that moves and grooves with the rest of the band. Understanding root notes, playing with dynamics, and developing a strong sense of rhythm are key elements in achieving a tight and infectious groove. Let’s delve into these techniques and see how they can elevate your bass guitar recordings.

Understanding Root Notes

Root notes form the foundation of any bassline, providing the fundamental tonal center for the entire song. By emphasizing the root notes of each chord progression, bass players can create a strong sense of resolution and stability, anchoring the groove and guiding the listener through the musical journey. Being able to identify and highlight the root notes will add depth and direction to your bass recordings, enhancing the overall groove of the track.

Playing With Dynamics

Manipulating dynamics is a powerful tool for shaping the groove of a bassline. Varying the intensity and volume of your playing can inject energy and emotion into the music, creating a more engaging and impactful listening experience. By utilizing techniques such as ghost notes, accents, and subtle variations in attack, bass players can add depth and dimension to their recordings, driving the groove forward and captivating the audience.

Incorporating these techniques into your bass guitar recordings will not only enhance the groove but also elevate the overall musicality of your playing. Mastering groove is a continual journey that requires practice, experimentation, and a deep connection to the rhythm of the music. By honing these skills, bass players can become the driving force behind an irresistible and infectious groove that captivates listeners and propels the music to new heights.


Credit: www.facebook.com


Recording Tips And Tricks

Recording bass guitar can be a challenging yet rewarding task. The bass guitar is a crucial element in many genres of music, providing the foundation for the entire track. In order to capture the richness and depth of the bass, it’s essential to follow some recording tips and tricks. This article will delve into two important aspects of recording bass guitar: setting up for a great recording and utilizing effects and processing.

Setting Up For A Great Recording

When it comes to recording bass guitar, the first step is to ensure a proper setup. This includes using quality equipment and optimizing the recording environment. Here are some crucial factors to consider:

  • Choose the right bass: Find a bass guitar that suits the desired tone and style of the track. Experiment with different bass guitars to find the perfect fit.
  • Select the right strings: Different types of strings can greatly affect the sound of the bass. Choose strings that complement the genre and desired tone.
  • Use a good bass amp: A quality bass amp is essential for capturing the true essence of the bass guitar. Invest in a reliable amplifier that provides a clean and balanced sound.
  • Optimize the recording space: Ensure that the recording environment is acoustically treated and free from any background noise or interference. This will help to capture a clean and professional recording.
  • Position the microphone correctly: Experiment with microphone placement to find the optimal position for capturing the desired sound. Placing the microphone near the bass amp’s speaker cone can produce a punchy and focused tone.

Utilizing Effects And Processing

Once the recording setup is optimized, the next step is to explore the use of effects and processing techniques to enhance the bass guitar’s sound. Here are some tips for utilizing effects and processing:

  • EQ for clarity: Use equalization to shape the bass guitar’s tone and enhance its clarity. Boosting the low end can add depth, while cutting frequencies that clash with other instruments can improve the overall mix.
  • Compression for control: Apply compression to even out the dynamics of the bass guitar. This can help to control any sudden spikes or dips in volume and create a more consistent sound.
  • Experiment with distortion: Adding a touch of distortion can give the bass guitar a gritty and edgy sound. However, be cautious not to overdo it and maintain the clarity and definition of the bass.
  • Explore modulation effects: Modulation effects like chorus or flanger can add depth and movement to the bass sound. Experiment with different settings to find a balance between subtlety and character.
  • Consider reverb and delay: Using reverb and delay effects sparingly can add a sense of space and dimension to the bass guitar. Be mindful of the overall mix and avoid overpowering other instruments.

By following these recording tips and tricks, you can capture the true essence of the bass guitar and create a professional and impactful recording. Remember to experiment and trust your ears to find the perfect balance for your desired sound.


Collaborating With Other Musicians


Experience the magic of collaborating with other musicians by adding the rich depth of a recorded bass guitar to your music. Elevate your sound and create dynamic tracks that resonate with listeners, enhancing the overall quality of your musical projects.


Let the bass guitar be the foundation that ties all elements together, bringing your compositions to life.

Collaboration is the key to creating extraordinary music. When recording bass guitar, it is crucial to work closely with other musicians to achieve a cohesive sound that brings the entire song to life. By collaborating effectively, bassists can lock in with the drummer, complement the rhythm and melody, and contribute to the overall musical experience.

Locking In With The Drummer

Bass guitar and drums have a special relationship in music. They form the rhythmic foundation that drives the entire composition. As a bassist, it is essential to have a deep understanding of the drummer’s timing, dynamics, and style. By locking in with the drummer, you create a solid groove that supports the other instruments and enhances the song’s overall energy. Here are a few tips to achieve this synergy:

  1. Pay close attention to the drummer’s kick drum and snare patterns, and align your bass lines to match their accents.
  2. Sync your rhythm with the drummer’s hi-hat or ride cymbal to maintain a tight, synchronized feel.
  3. Communicate and practice together to develop a strong musical connection that allows for seamless transitions and improvisations.

Complementing The Rhythm And Melody

In addition to supporting the drummer, the bass guitar also interacts with other instruments by complementing their rhythm and melody. As a bassist, your role is to enhance the harmonic structure and add depth to the overall sound. Here are some ways to achieve this:

  • Coordinate your bass lines with the chord changes, using appropriate scales and arpeggios to create interesting melodic variations.
  • Experiment with different playing techniques, such as fingerpicking or slapping, to bring out the desired tonal qualities and dynamics.
  • Listen attentively to the other musicians, adjusting your playing style and volume to ensure the bass blends smoothly with the rest of the ensemble.

By collaborating effectively with other musicians, bass guitarists can take their recordings to a whole new level. Remember, it’s all about communication, understanding, and working together to create something truly remarkable. So, grab your bass guitar, find your fellow musicians, and embark on an exciting collaborative journey, where the magic of music comes alive.

Recording Bass Guitar  : Master the Art of Groove


Credit: www.dustygroove.com


Recording Bass Guitar  : Master the Art of Groove


Credit: www.amazon.com


Frequently Asked Questions Of Recording Bass Guitar


How Do You Record A Bass Guitar?


Position the microphone close to the bass guitar’s sound hole for a fuller tone. Experiment with distances and angles for desired sound. Use a quality recording interface to capture the bass guitar’s rich tones accurately. Experiment with different recording techniques to find the best sound for your mix.


Can You Record Bass Directly To Computer?


Yes, you can record bass directly to your computer using an audio interface and a digital audio workstation (DAW).


Do You Need A Preamp For Recording Bass?


Yes, a preamp is necessary for recording bass. They boost the signal from the instrument, ensuring it is compatible with recording equipment and providing a cleaner sound. A preamp also allows for tone shaping and control over the bass’s dynamics.


Do You Need A Bass Amp For Recording?


Yes, you need a bass amp for recording. It helps capture the unique sound and character of the bass guitar. The amp enhances the low-end frequencies and provides the necessary amplification for a polished recording. Using a bass amp ensures a professional and authentic sound in your recordings.


Conclusion


Capturing the full sound of a bass guitar is crucial for a satisfying recording. By experimenting with mic placement and using high-quality equipment, you can achieve the perfect bass track. Remember to consider the room acoustics and take the time to find the best sound before hitting record.


Your efforts will certainly pay off in the end.

Categories
Archive

Minor Chord Progressions : Unlocking the Emotional Power of Minor Keys

Minor chord progressions create a melancholic atmosphere in music, evoking emotions of depth and introspection. By combining minor chords in specific sequences, musicians can convey a sense of tension, sadness, or mystery in their compositions.


These progressions often include chords like Am, Dm, and Em, among others, to establish a minor tonality. Understanding the various ways in which minor chords can be arranged and resolved in a progression is essential for crafting evocative and compelling music.


Whether used in pop, rock, jazz, or classical genres, minor chord progressions add a nuanced layer of complexity to musical compositions, resonating with listeners on an emotional level. Mastering the art of minor chord progressions can elevate a musician’s work to new heights of creativity and expression.

Minor Chord Progressions  : Unlocking the Emotional Power of Minor Keys


Credit: blog.flat.io


The Emotional Power Of Minor Chord Progressions

Understanding Minor Keys

Minor keys create a sense of melancholy, mystery, and depth.

Conveying Emotion Through Minor Chords

Minor chords evoke feelings of sadness, introspection, and longing in listeners.

Minor Chord Progressions  : Unlocking the Emotional Power of Minor Keys


Credit: blog.native-instruments.com


Popular Minor Chord Progressions

Minor chord progressions are essential in creating emotional depth and complexity in music. By exploring popular minor chord progressions, musicians can evoke a range of feelings from melancholy to suspense. Let’s delve into two main categories of popular minor chord progressions: Natural Minor Progressions and Harmonic Minor Progressions.

Natural Minor Progressions

The Natural Minor Progressions are built on the classic minor scale, creating a somber and introspective tone. Common progressions like i-iv-V or i-iv-VI include the tonic, subdominant, and dominant chords. These progressions are widely used in genres like jazz, pop, and rock music.

Harmonic Minor Progressions

Harmonic Minor Progressions introduce a unique twist by raising the seventh note of the natural minor scale. This alteration creates a sense of tension and drama, commonly found in classical and flamenco music. Progressions like i-VII-VI-V add a touch of exoticism to compositions.

Creating Atmosphere With Minor Chord Progressions

Minor chord progressions can play a crucial role in establishing the mood and atmosphere of a musical piece. The use of minor chords in composition adds depth and emotion, allowing the music to evoke a range of feelings from melancholy and introspection to tension and unease. Understanding how to utilize minor chord progressions effectively can significantly enhance the emotional impact of a musical composition.

Using Minor Chords In Composition

For composers and musicians, incorporating minor chords into their compositions opens up a world of expressive possibilities. Minor chords bring a sense of complexity and depth to the music, allowing for the conveyance of subtle nuances of emotion. By strategically integrating minor chord progressions, composers can create rich, evocative musical landscapes that resonate with the listener on a profound level.

Building Tension And Release

One of the most powerful aspects of utilizing minor chord progressions is the ability to build tension and release within a musical piece. The inherent dissonance and emotive qualities of minor chords can be harnessed to create a sense of anticipation and unease, followed by moments of resolution and catharsis. This dynamic interplay of tension and release keeps the listener engaged and captivated, forming a compelling emotional journey throughout the composition.

Minor Chord Progressions In Different Genres

Minor chord progressions are a crucial element in a wide range of music genres. From the soulful melodies of Blues and Jazz to the catchy hooks in Pop and Rock, understanding how minor chords work within each genre can greatly enhance your musical compositions. In this blog post, we’ll explore the unique characteristics of minor chord progressions in various genres, providing you with valuable insights and inspiration for your own musical journey.

Blues And Jazz

In the world of Blues and Jazz, minor chord progressions play a central role in creating a melancholic and soulful atmosphere. These genres heavily rely on the emotional impact of minor chords to convey a range of feelings, from sadness to longing and even anticipation. Blues and Jazz often feature the classic 12-bar blues progression, where a combination of major and minor chords create a distinct pattern that is instantly recognizable. The minor chords used in Blues and Jazz add a touch of complexity and depth, allowing musicians to express their emotions through the music.

Pop And Rock

Pop and Rock songs are known for their energetic and catchy melodies, and minor chord progressions have a significant role in shaping these tunes. While major chords dominate the pop music scene, minor chords are strategically used to create contrast and add emotional depth to the songs. Many Pop and Rock hits feature verses with minor chord progressions that build tension, leading to the uplifting and triumphant chorus sections filled with major chords. This dynamic shift between minor and major chords creates a powerful impact on the listeners, making the songs more memorable and emotionally charged.


Mastering Minor Chord Progressions


Unlock the secrets of Minor Chord Progressions and take your music to the next level with expert guidance. Learn the intricacies of crafting evocative and emotive progressions that will add depth and complexity to your compositions. Mastering Minor Chord Progressions will elevate your musical prowess and captivate your audience.

When it comes to creating beautiful and emotive music, mastering minor chord progressions is an essential skill for any musician. Minor chords have a rich and melancholic sound that can evoke a wide range of emotions. In this section, we will explore some tips and techniques to help you effectively create and use minor chord progressions in your music.

Tips For Effective Minor Progressions

Creating a compelling minor chord progression requires careful consideration of chord choices and their arrangement. Here are some tips to help you craft engaging and interesting minor progressions:

  1. Vary chord types: Mix different types of minor chords, such as natural minor, harmonic minor, and melodic minor, to add depth and complexity to your progressions.
  2. Experiment with inversions: Try inverting minor chords to create unique voicings and a more fluid movement between chords.
  3. Utilize tension and release: Incorporate tension chords, such as diminished or half-diminished chords, in your progressions to build anticipation and release it with resolved chords.
  4. Consider chord extensions: Add chord extensions like sevenths, ninths, or elevenths to minor chords to create a richer and more vibrant sound.
  5. Explore chromaticism: Experiment with chromatic notes as passing tones between minor chords to add unexpected flavor and make your progressions stand out.

Experimenting With Minor Chords

Minor chords offer a vast playground for musical exploration and experimentation. Here are some ways you can explore and push the boundaries with minor chords:

  • Mix major and minor: Combine major and minor chords in your progressions to create tension and contrast. This technique can create a bittersweet and introspective atmosphere.
  • Modal interchange: Borrow chords from parallel major or minor scales to introduce unexpected chord progressions and tonalities.
  • Explore different genres: Minor chord progressions are not limited to specific music genres. Experiment with different styles such as blues, rock, jazz, or classical to discover new ways to use minor chords.
  • Use pedal tones: Incorporate pedal tones, where a single note is sustained while the chords change, to create a hypnotic and captivating effect.
  • Try unconventional chord progressions: Break away from traditional progressions and create your own unique combinations of minor chords to express your musical ideas.

By employing these techniques and continuously experimenting with minor chords, you can unlock a world of creativity and emotion in your music. Remember, mastering minor chord progressions is a journey, so don’t be afraid to explore, take risks, and let your musical intuition guide you.

Minor Chord Progressions  : Unlocking the Emotional Power of Minor Keys


Credit: blog.flat.io


Frequently Asked Questions On Minor Chord Progressions


What Are Some Good Minor Chord Progressions?


Popular minor chord progressions include i-iv-V, i-VI-III-VII, and i-III-VII-vi. These progressions create a melancholic and emotional feel in music.


What Is The Rule For Minor Chords?


The rule for minor chords is to lower the third note in a major chord by a half step.


What Is The Chord Progression Scale For A Minor?


The chord progression scale for A minor is: Am, Bdim, C, Dm, Em, F, G. These are the primary chords to use in the key of A minor.


What Is The Minor 4 Progression?


The minor 4 progression refers to a chord progression commonly used in music. It involves playing a minor chord followed by a major fourth chord. This progression gives a melancholic and emotional sound to the music.


Conclusion


In the world of music, minor chord progressions offer a depth of emotion and richness. By understanding the role of minor chords and how they can be combined, you can create captivating and evocative musical compositions. Experimenting with minor chord progressions can unlock a world of creative possibilities, adding intrigue and complexity to your musical arrangements.


Dive into the emotive power of minor chord progressions and elevate your music to new heights.

Categories
Archive

In Ear Monitors : Amplify Your Music Experience

In Ear Monitors are devices worn in the ear for personal sound monitoring on stage. They provide clear audio for musicians.


These monitors help artists hear themselves and the band better while performing, enhancing their musical performance and reducing stage noise distractions. In Ear Monitors have become essential tools for musicians and performers, offering a more precise and personal audio experience compared to traditional stage monitors.


By providing a customized sound mix directly into the artist’s ears, these devices allow for better control over individual audio levels, ensuring a high-quality performance every time. In addition, they contribute to protecting the artist’s hearing by reducing the need for high stage volume levels. This results in a more comfortable and immersive on-stage experience for the performer.

In Ear Monitors  : Amplify Your Music Experience


Credit: www.amazon.com


The Evolution Of In Ear Monitors

The Evolution of In Ear Monitors has marked a significant shift in the way audio is delivered and experienced. Over the years, In Ear Monitors (IEMs) have evolved from being just stage monitors to becoming versatile personal listening devices that cater to the individual needs of musicians and audiophiles alike.

From Stage Monitors To Personal Listening Devices

Originally designed for musicians to monitor their own performances on stage without the need for bulky speakers, IEMs have now become indispensable tools for performers, sound engineers, and music enthusiasts.

Advancements in Technology have enabled IEMs to deliver studio-quality sound directly into the ears, providing a more immersive and personal audio experience.

Advancements In Technology

The journey of IEMs has been shaped by continuous technological innovations such as custom-fit earpieces, multi-driver configurations, noise isolation capabilities, and wireless connectivity options.

In Ear Monitors  : Amplify Your Music Experience


Credit: www.wired.com


Benefits Of In Ear Monitors

In ear monitors are a favorite among musicians and audio enthusiasts for several reasons. Let’s delve into the benefits they offer!

Improved Sound Quality

In ear monitors provide superior sound quality compared to traditional earphones, delivering clear highs and deep lows.

Customized Fit For Comfort And Noise Isolation

In ear monitors offer a personalized fit, ensuring comfort during long listening sessions and effective noise isolation.

Choosing The Right In Ear Monitors

In ear monitors (IEMs) have become essential for musicians and audiophiles, providing a personalized listening experience and isolation from external noise. When choosing the right in ear monitors, it’s crucial to consider various factors that affect the overall performance and user experience. From sound signature and frequency response to the wired vs wireless options, each aspect plays a significant role in meeting your specific audio needs.

Sound Signature And Frequency Response

Sound signature indicates the unique character of the audio reproduction, defining how different elements of the sound are emphasized or attenuated. Whether you prefer a neutral, balanced sound or a more bass-heavy or treble-focused experience, understanding the sound signature can help you select the IEMs that best suit your preferences.

Frequency response refers to how accurately an IEM reproduces audio across the audible frequency range. A wider frequency response ensures that you can hear both low and high frequencies clearly, resulting in a more detailed and lifelike sound. When comparing IEMs, pay attention to their frequency response graphs to identify the ideal balance for your listening needs.

Wired Vs Wireless Options

Wired IEMs offer a consistent connection and high-quality audio, making them a reliable choice for professional use and critical listening. With a wired connection, you can enjoy minimal latency and uncompressed audio, ensuring an uncompromised listening experience.

Wireless IEMs provide the freedom of movement, making them ideal for performers and those who require mobility during their audio sessions. Advancements in wireless technology have significantly improved the audio quality and stability, offering a convenient solution without sacrificing sound performance.

In Ear Monitors  : Amplify Your Music Experience


Credit: www.meeaudio.com


Tips For Using And Caring For In Ear Monitors

Using in ear monitors (IEMs) can greatly enhance the audio experience for musicians and performers. These compact and lightweight devices provide clear and accurate sound while reducing stage noise. To ensure you get the most out of your IEMs and prolong their lifespan, it’s important to follow a few essential tips for proper insertion and removal, as well as cleaning and maintenance.

Proper Insertion And Removal

Inserting and removing IEMs correctly is crucial for both comfort and optimal sound quality. Follow these steps for proper insertion and removal:

  1. Choose the right size: Start by selecting the appropriate eartips that fit your ears. Different sizes are usually included to accommodate various ear shapes.
  2. Clean your ears: Before inserting IEMs, make sure your ears are clean to prevent wax buildup and ensure a proper fit.
  3. Hold the cable: When inserting the IEMs, hold the cable near the connector to avoid stressing the cable or damaging the internal components.
  4. Insert at a slight angle: Gently insert the IEMs into your ears at a slight angle, following the natural curve of your ear canal. Do not force them in.
  5. Check the seal: Once inserted, twist the IEMs slightly to create a snug fit and ensure a proper seal. This will improve sound isolation and bass response.
  6. Remove carefully: To remove the IEMs, grasp the cable near the connector again and gently pull them out of your ears. Avoid jerking or yanking to prevent damage.

Cleaning And Maintenance

Maintaining cleanliness and performing regular maintenance on your IEMs will help preserve their longevity and audio quality. Follow these tips for cleaning and maintenance:

  1. Remove regularly: Take the habit of removing the eartips and cleaning them regularly to prevent wax buildup and keep them hygienic.
  2. Use a soft cloth: Wipe down the exterior of the IEMs and the cables with a soft cloth to remove dirt and sweat. Avoid using harsh chemicals or abrasive materials.
  3. Store properly: When not in use, store your IEMs in a clean and dry case to protect them from dust, moisture, and physical damage.
  4. Inspect for damage: Periodically check the cables and connectors for any signs of wear or damage. If you notice any issues, contact the manufacturer or a professional technician for repair.
  5. Replace eartips: Over time, eartips may wear out and lose their effectiveness. Replace them when needed to ensure a proper seal and optimal sound quality.


In Ear Monitors For Different Settings

In ear monitors are an essential piece of equipment for musicians and music lovers alike. They provide a personalized listening experience, allowing users to enjoy their favorite tunes without any distractions. In order to cater to the diverse needs and preferences of different individuals, in ear monitors are designed for various settings. Whether you are a professional musician performing on stage or simply an avid music listener, there is an in ear monitor that suits your requirements. Let’s take a closer look at the different settings where in ear monitors excel.

Live Performances

For musicians, one of the most crucial aspects of a live performance is being able to hear oneself and the rest of the band clearly. In ear monitors provide an exceptional level of audio quality and isolation, making them ideal for stage use. They block out external noise, allowing performers to focus solely on their music. In addition, in ear monitors are wireless, providing freedom of movement on stage. With customizable sound options, musicians can adjust the mix according to their preferences, ensuring an optimal performance. Whether you are a solo artist or part of a band, in ear monitors enhance the overall live experience.

Casual Listening And Everyday Use

In ear monitors aren’t just for professional musicians; they are also perfect for casual listening and everyday use. With their compact design and lightweight construction, in ear monitors are portable and convenient. They can easily fit into your pocket or bag, making them ideal for listening on the go. In addition, their noise isolation capabilities allow you to immerse yourself in your favorite music, without being disturbed by external noises. Whether you are commuting to work, working out at the gym, or simply relaxing at home, in ear monitors provide a comfortable and enjoyable listening experience.

Comparison of In Ear Monitors for Different Settings
Setting Live Performances Casual Listening and Everyday Use
Audio Quality Exceptionally clear and detailed sound reproduction Immersive and high-fidelity audio experience
Noise Isolation Blocks out ambient noise for improved concentration Minimizes external distractions for an immersive listening experience
Portability Wireless design for freedom of movement on stage Compact and lightweight for easy carrying
Customization Adjustable sound options for personalized mix N/A

Benefits Of In Ear Monitors For Different Settings:

  • Exceptional audio quality
  • Isolation from external noise
  • Customizable sound options
  • Wireless design for stage performance
  • Compact and portable for everyday use

Frequently Asked Questions For In Ear Monitors


What Is An In-ear Monitor Used For?


An in-ear monitor is used for delivering clear sound directly into the ears during live performances. It provides musicians and performers with personalized audio monitoring, reducing stage noise and enhancing their ability to hear themselves and the band.


Why Do Singers Wear Earpieces When They Perform?


Singers wear earpieces to hear themselves and the backing track while performing. This helps them stay on key and in sync with the music.


What Is The Difference Between In-ear Monitors And Earbuds?


In-ear monitors deliver high-quality sound for professionals, while earbuds are for casual listening. Monitors offer better noise isolation and audio accuracy compared to earbuds.


Are In-ear Monitors Better For Your Ears?


Yes, in-ear monitors are better for your ears as they provide a better seal, reducing the need for high volumes and external noise.


Conclusion


In-ear monitors are essential for professional musicians and audiophiles. They provide superior sound quality and isolation, enhancing the listening experience. With technological advancements, in-ear monitors continue to evolve, offering more features and customization options. Investing in a quality pair of in-ear monitors can significantly improve your musical performances or leisure listening.