Categories
Archive

Mixing Wide Using Stereo Field: Elevate Your Sound with Powerful Stereo Techniques

To mix wide using stereo field, pan instruments left and right for spaciousness. Adjust levels for balance.


When it comes to creating a dynamic and engaging mix, utilizing the stereo field can greatly enhance the overall sound quality of a production. By strategically placing instruments across the stereo spectrum, you can achieve a wider and more immersive sound stage.


Mixing wide using the stereo field allows for separation of elements, clarity, and depth in the mix. Understanding how to manipulate the stereo field effectively can take your mixes to the next level, providing a professional and polished finish to your audio projects. Let’s explore the key techniques and strategies for utilizing the stereo field in mixing to optimize your sonic creations.
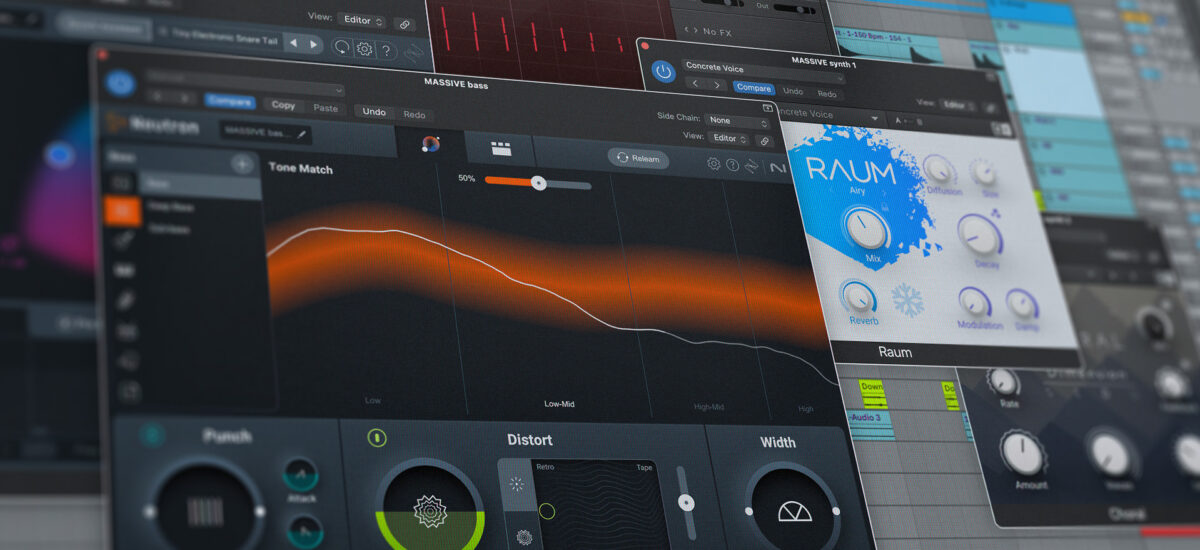
Mixing Wide Using Stereo Field: Elevate Your Sound with Powerful Stereo Techniques


Credit: blog.native-instruments.com


The Importance Of Stereo Field In Mixing

Understanding the importance of stereo field in mixing is crucial for achieving a professional sound. Manipulating the stereo field can elevate your mix by creating depth and width, enhancing spatial imaging, and ultimately captivating your audience.

Creating Depth And Width

By panning instruments strategically across the stereo spectrum, you can create a sense of depth in your mix. Wider placement in the stereo field can enhance the perceived width of the soundstage, making your mix more engaging and immersive.

Enhancing Spatial Imaging

Spatial imaging is vital in creating a three-dimensional sound experience for the listener. Utilize reverbs and delays to place sounds in specific positions within the stereo field for a more dynamic mix.

Techniques For Widening The Stereo Field

For a captivating soundstage, mastering the art of widening the stereo field is paramount. Let’s delve into effective techniques for achieving this sonic brilliance.

Panning Strategies

Pan instruments opposite to balance the mix.

  1. Use hard left/right panning for impact.
  2. Experiment with mid-range positioning.

Use Of Stereo Widening Tools

Enhance depth and width through innovative stereo widening tools.

  • Employ plugins like wideners, chorus, or delay.
  • Adjust parameters for subtle or dramatic effects.
https://www.youtube.com/watch?v=y8NFpMlhJOo


Avoiding Phase Issues In Wide Stereo Mixing

When it comes to mixing wide using a stereo field, it’s crucial to avoid phase issues for a clean and balanced sound. Understanding phase cancellation and ensuring phase coherence are essential aspects of achieving a wide stereo mix without encountering unwanted artifacts.

Understanding Phase Cancellation

Phase cancellation occurs when identical audio signals, with one being inverted, combine and negate each other. This can lead to a loss of clarity and definition in the mix, particularly when working with stereo widening techniques. Careful consideration of phase relationships is necessary to prevent this phenomenon.

Phase Coherence Checking

Checking phase coherence involves verifying that the stereo content remains coherent and consistent across different playback systems. It ensures that the widened stereo image maintains its integrity without causing phasing issues or inconsistencies in translation. Utilizing specialized tools can aid in detecting and rectifying any potential phase coherence problems.

Mixing Wide Using Stereo Field: Elevate Your Sound with Powerful Stereo Techniques


Credit: www.avid.com


Utilizing Stereo Field To Enhance Different Instruments

Utilizing the stereo field is a powerful technique that can greatly enhance the overall sound of a mix. By strategically placing elements in the stereo field, we can create a sense of space and dimension, making the mix more immersive and engaging. This technique becomes particularly important when working with different instruments, as each instrument has its own unique characteristics and benefits from specific stereo processing techniques. In this article, we will explore how to use the stereo field to enhance various instruments, focusing on drums, guitar, and keyboards.

Stereo Processing For Drums

Drums are the foundation of any song, and by applying stereo processing techniques, we can make them sound bigger and more impactful. One common approach is panning individual drum elements to create separation and a sense of width. For example, panning the hi-hat slightly to the left and the ride cymbal slightly to the right can help distinguish between the two and provide a wider stereo image. Additionally, utilizing stereo reverb or delay on the drum bus can add depth and a sense of space to the overall drum sound.

Guitar And Keyboard Stereo Techniques

Guitars and keyboards are often featured prominently in a mix, and using the stereo field effectively can help them stand out and contribute to the overall sonic landscape. One popular technique is the double-tracking method, where the guitarist or keyboardist records the same part twice and pans each recording to opposite sides of the stereo field. This creates a wide and immersive sound that fills the space. Another approach is using stereo modulation effects, such as chorus or phaser, to add movement and depth to the instrument. These effects can be applied subtly to widen the stereo image without overwhelming the mix.

Mastering For Optimal Stereo Impact


Gain control over your sound’s width by mastering the art of mixing wide using the stereo field, allowing for optimal stereo impact. Experiment with panning and spatial effects to create a rich, immersive listening experience that captivates your audience. Mastering stereo impact can elevate your music to the next level.

Stereo Imaging In Mastering

When it comes to mastering your audio tracks, one crucial aspect that often gets overlooked is stereo imaging. This process involves manipulating the stereo field to create a sense of width and depth in your music. By applying the right techniques, you can achieve a polished and professional-sounding track that captivates and engages your listeners.

However, stereo imaging is not just about widening the mix; it also involves maintaining mono compatibility to ensure your music translates well across different playback systems. Let’s explore some essential tips for mastering your tracks with optimal stereo impact.

Maintaining Mono Compatibility

Mono compatibility refers to the ability of a stereo mix to sound balanced and cohesive when played back in mono. It is crucial because many platforms and devices, such as radios and clubs, still rely on mono sound reproduction. If your track loses its impact or sounds imbalanced in mono, it may result in an inferior listening experience for a significant portion of your audience.

To maintain mono compatibility, consider the following techniques:

  • Center the important elements: Keep fundamental elements like kick drums, basslines, and vocals centered in the stereo field. This ensures they remain prominent and well-balanced in both stereo and mono playback environments.
  • Avoid excessive panning: While panning can add depth and interest to a mix, be cautious with extreme panning, especially with essential elements. Some panning beyond the center can contribute to the stereo width, but be mindful not to overdo it and risk creating phase and phase cancellation issues when collapsed to mono.
  • Regularly check mono compatibility: Throughout the mastering process, periodically listen to your mix in mono to ensure all elements stay intact and well-balanced. Making adjustments as you go can help you catch any potential issues before they become problematic.

By implementing these strategies, you can ensure that your music maintains its impact and cohesiveness regardless of the playback system.

Now that we’ve covered the importance of maintaining mono compatibility let’s focus on the techniques for achieving an optimal stereo impact when mastering your tracks.

Mixing Wide Using Stereo Field: Elevate Your Sound with Powerful Stereo Techniques


Credit: fastercapital.com


Frequently Asked Questions For Mixing Wide Using Stereo Field


How Do I Make My Stereo Mix Wider?


To make your stereo mix wider, use panning techniques to place different instruments at varying positions. Experiment with stereo widening plugins to enhance the spatial dimension of your mix.


What Does Stereo Widening Do?


Stereo widening enhances the perceived width of audio, making it sound more spacious and immersive. It separates the left and right channels, creating a fuller sound.


What Is The Stereo Spread Effect?


The stereo spread effect widens the audio image by adding depth to the sound. It makes the music or sound appear wider and more spacious, enhancing the listening experience.


Can A Mix Be Too Wide?


Yes, a mix can be too wide. When a mix is too wide, it means that the stereo image is spread too far apart, causing elements to become disconnected and lose focus. It can result in a lack of clarity and cohesion in the overall sound.


It’s important to find a balance and ensure that the mix is wide enough to create a sense of space, but not so wide that it compromises the unity of the elements.


Conclusion


Incorporating stereo mixing techniques into your music production can add depth and dimension to your sound. By experimenting with wideness in the stereo field, you can create a captivating listening experience for your audience. Harness the power of panning and spatial effects to push your music to new horizons.


Embrace the possibilities of stereo mixing and elevate your music to the next level.

Categories
Archive

Shure SM7B Review: Unveil Its Studio Magic!

As an Amazon Associate I earn from qualifying purchases.

The Shure SM7B is a professional-grade dynamic microphone known for its smooth, flat, wide-range frequency response. Its popularity spans radio to recording studios, podcasting to streaming.


Boasting legendary quality, the Shure SM7B has become a staple in the audio industry, cherished by broadcasters and musicians alike for its reliability and versatility. The microphone’s cardioid pattern ensures excellent isolation from background noise, while the built-in pop filter and internal shock mount keep unwanted sounds to a minimum.


With its rugged construction and ability to capture clear, natural sound, the SM7B excels in both spoken word and music applications, making it a top choice for production environments demanding top-notch audio performance.


Shure Sm7b: The Legacy And Evolution

Deep within the halls of audio legend, the Shure SM7B stands tall. Born to capture sound with precision, this microphone has evolved. From its advent to revolutionizing modern studios, it tells a story of durability and quality. Its journey from broadcasting staple to recording star is nothing short of remarkable. Let’s delve into the path it treaded and the enhancements that keep it at the forefront.

From Broadcasting Roots To Studio Stardom

The Shure SM7B began its life in the world of radio. Its clear sound made it the perfect choice for the airwaves. Newsrooms and broadcast studios alike sought after this rugged microphone. Yet, talent behind the mixing desks noticed its potential beyond broadcasting.

The microphone’s ability to isolate vocals placed it in the spotlight. Recording artists adopted the SM7B, capturing the intricacies of their voice. From Michael Jackson to podcasters, the SM7B transitioned to a studio icon. This leap is central to its enduring legacy.

Key Upgrades Over The Years

Upgrade Impact
Improved Shielding Less interference, purer sound.
Advanced Cartridge Enhanced audio capture, greater detail.
Aesthetic Design Sleek look, durable build.
Mounting Options Increased versatility for users.
Pop Filter Addition Cleaner vocals, fewer plosives.

Each upgrade expanded the Shure SM7B’s capabilities. These enhancements made it a staple in diverse audio environments. With every tweak and improvement, the microphone not only preserved its legendary status—it built upon it, making giant leaps in the audio industry.


Credit: www.peerspace.com


Design That Speaks Volumes

Let’s delve into what sets the Shure SM7B apart, starting with its design. Shure combined function and form to create a true masterpiece. It’s no surprise that this microphone has become a staple in studios worldwide.

The Iconic Look And Solid Build

The SM7B’s classic silhouette is instantly recognizable. Its dark, charcoal finish gives it a professional vibe. But it’s not just about looks. The build quality is equally striking. Its rugged construction handles daily use easily. Here’s why the SM7B’s design is both iconic and durable:

  • All-metal design ensures durability.
  • Advanced electromagnetic shielding blocks hum.
  • Cartridge protection from physical damage.

Ergonomics And Setup Ease

Effortless to handle, the SM7B is designed for ease of use. You’ll spend less time setting it up and more on recording. Whether you’re a pro or just starting, its usability won’t disappoint. Check out the ergonomic features:

  • Captive stand nut for easy mounting.
  • Detachable windscreen for quick adjustments.
  • Yoke mounting for precise positioning.

Get ready to turn your creative visions into reality with the Shure SM7B. Its design speaks louder than words in both aesthetics and functionality.

https://www.youtube.com/watch?v=J9bniJsyb1E


Performance Under The Microscope

The Shure SM7B stands as a legend among microphones. Its reputation in studios and podcasts is hard to match. Let’s take a closer look at how it holds up when we scrutinize both its sound and silencing prowess. We’ll dissect the quality and depth of audio it reproduces and explore the clever engineering behind its noise filtering capabilities.

Sound Quality Evaluation

Pristine audio is the hallmark of the Shure SM7B. To understand its excellence:

  • Dynamic range: Captures soft whispers and booming voices alike.
  • Cardioid pattern: Focuses on sounds in front, reducing unwanted sides and back noise.
  • Flat, wide-range frequency response: For natural audio reproduction.
Frequency Response Benefit
50 Hz – 20 kHz Ensures clarity across all pitches

A comparison to others reveals the superior sound of SM7B. Every tone is as intended, a true replication of the source.

Addressing The Noise: Filter Features

Background noise can ruin recordings. SM7B has solutions:

  1. Internal ‘air suspension’: Drastically reduces mechanical noise.
  2. Pop filter: Eliminates breathing and wind sounds.
  3. Detachable A7WS windscreen: Provides extra warmth for close-talk vocals.

These features work together to ensure a clean, professional sound. Whether in a loud environment or a quiet studio, the SM7B’s ability to preserve vocal purity is unmatched.


Credit: www.gearnews.com


The Professionals’ Verdict

Studio legends often share their secrets behind the sound that defines genres. The Shure SM7B emerges as a recurring mention. The real test of any studio equipment is its reception by professionals. Let’s explore why the SM7B holds a special place among industry experts.

Endorsements And Famous Use Cases

Musicians and podcasters alike rave about the Shure SM7B. Its dynamic range and durability earn it stellar endorsements. Here are some highlights:

  • Recognized in the Music World: Artists like Michael Jackson used the SM7B to record his hit album ‘Thriller’.
  • Podcasters’ Choice: Top podcasts, including ‘The Joe Rogan Experience’, rely on the SM7B for clear sound.

Comparisons With Other Industry Standards

The SM7B often gets compared to other mics, such as the Neumann U87:

Shure SM7B Neumann U87
Broadcast-quality sound Studio recording staple
Lower price point Higher-end price
Robust build for longevity Delicate, requires care

Professionals often prefer the SM7B for its quality and affordability. Its reputation stands tall against industry giants.

Unboxing The Value

Excitement builds as a new Shure SM7B enters your space. This microphone has made waves in recording studios around the world. Now, we dive into the moment of truth: Unboxing the Value. What treasures lie within? Does the cost reflect its worth? Let’s find out.

What’s In The Box?

The Shure SM7B package presents:

  • Shure SM7B Microphone: The star of the show.
  • Windscreen: Two styles to tame plosives.
  • Mounting Bracket: For secure attachment.
  • Velcro Straps: To keep cables tidy.
  • User Guide: Tips for optimal use.

Price Point And Value For Money

The Shure SM7B claims a premium price tag. But its rich legacy commands respect. Look within the box and you find quality that speaks volumes:

Feature Benefits
Flat, Wide-Range Frequency Captures your voice naturally.
Internal ‘Air Suspension’ Diminishes mechanical noise.
Pop Filter Built-in Eliminates the need for external pop filters.
Classic Cardioid Pattern Isolates from unwanted background noise.

The SM7B is an investment. It brings studio-grade recording to your home or professional space. Your voice deserves this level of excellence. The value? Undeniable. The outcome? Professional audio that’s worth every cent.

Final Thoughts: Is The Sm7b Right For You?

As we wrap up our deep dive into the Shure SM7B, a legendary microphone, it’s time to decide if it’s the right fit for your sonic arsenal. This final section will guide you through the decision-making process, tailored to your needs and preferences.

Making The Decision: Suitability Across Genres

The SM7B’s versatility shines across various audio landscapes. Let’s explore its fit for different genres:

  • Podcasting: Delivers clear, professional vocals.
  • Music Recording: Excels in rock, pop, and rap.
  • Broadcasting: A favorite for its rich, broadcast-quality sound.
  • Gaming and Streaming: Captures voice with detail, perfect for engaging an audience.

Weighing Pros And Cons

Evaluating the SM7B’s strengths and weaknesses is crucial. Below is a concise breakdown:

Pros Cons
  • Exceptional sound quality
  • Versatile for many genres
  • Durable and well-built
  • Effective pop filter
  • Requires good preamp
  • Higher price point
  • May pick up background noise
  • Heavier mount needs a sturdy stand

In sum, the Shure SM7B stands out for its impeccable sound and build quality. Assess your specific needs, consider the genre you’re targeting, and weigh the pros against the cons. Is clarity your priority? Does your studio setup support a high-end mic? Your answers will lead you to the right decision.

Shure SM7B Review: Unveil Its Studio Magic!


Credit: www.soundonsound.com


Frequently Asked Questions For Shure Sm7b


Is Shure Sm7b Overkill?


Whether the Shure SM7B is overkill depends on your needs. For professional studios and advanced setups, it’s a solid choice. Casual users might find it more than necessary.


Why Is The Shure Sm7b So Popular?


The Shure SM7B is popular for its superior sound quality, durable construction, and ability to reduce background noise. It’s favored by podcasters, musicians, and broadcasters for its flat, wide-range frequency response and versatility.


Does Joe Rogan Use Shure Sm7b?


Yes, Joe Rogan uses the Shure SM7B microphone for his podcast, “The Joe Rogan Experience. ” This high-quality dynamic mic is well-known for its vocal clarity.


What Is The Shure Sm7b Best For?


The Shure SM7B excels at capturing smooth, warm vocals for podcasting, broadcasting, and music recording, making it a popular choice among professionals. It effectively reduces background noise, ensuring clear audio quality.


Conclusion


The Shure SM7B stands tall in the realm of microphones, a testament to quality and performance. Its versatility and durability make it a wise choice for audio professionals and enthusiasts alike. Whether for podcasting, recording, or broadcasting, this microphone delivers with clarity and precision.


Embrace the SM7B and elevate your sound to new heights.

Categories
Archive

Aston Spirit Review: Unveiling the Studio’s Secret

The Aston Spirit is a high-performance, multi-pattern condenser microphone. It excels in capturing studio-grade vocals and instruments.


The microphone boasts a sleek design with a signature wave-form mesh head and a built-in pop filter. Its versatility is evident with selectable polar patterns—omnidirectional, cardioid, or figure-eight—that allow for accommodating various recording scenarios. Whether for professional recording studios, home setups, or podcasting stations, the Aston Spirit offers a blend of clarity, richness, and flexibility, ideal for producers and artists who demand pristine audio quality.


With a robust stainless-steel chassis, it is not only sonically outstanding but also durably constructed. The Aston Spirit bridges the gap between affordability and professional-grade recording, making it a sought-after microphone in its class.

Aston Spirit Review: Unveiling the Studio's Secret


Credit: www.soundonsound.com


Aston Spirit Microphone Unmasked

Aston Spirit Microphone Unmasked: Step into the world of professional recording with the Aston Spirit Microphone. Talented artists and producers recognize this microphone for its excellence and versatility. Let’s uncover what makes the Spirit a studio darling.

The Birth Of A Studio Icon

The Aston Spirit sprang to life with one purpose: to capture sound flawlessly. Its origin story is not just about technology, but passion. British engineers crafted the Spirit with care for each detail. They used top materials and innovative design to ensure every recording shines.

Key Specifications At A Glance

  • Type: Condenser
  • Polar Patterns: Cardioid, Figure-Of-Eight, Omnidirectional
  • Frequency Response: 20Hz – 20kHz (+/-3dB)
  • Sensitivity: 23.7mV/Pa
  • Max SPL for THD 0.5%: 138dB
  • Power: 48V Phantom power required

Every nuance of sound is the Spirit’s domain. From gentle acoustic strums to the power of a rock band, it captures it all.

Specification Detail
Diaphragm Gold-sputtered
Pad Switches -20dB/-10dB/0dB
Filter 80Hz

The Spirit’s key specs make it a true asset in any studio setup. Its versatility ensures it can handle a wide range of recording applications with ease.

Design And Durability

The Aston Spirit is not only a marvel in sound capture. Its design and durability are core features that stand out. Crafted with precision, the Aston Spirit combines elegance and resilience. This makes it a favorite for both studio and rugged environments.

Crafting The Aston Look

The Aston Spirit’s aesthetic is no accident. Designers took great care to ensure it stands out. Its unique wave-form mesh head isn’t just for looks. It provides a hardened shield for the capsule inside. The signature chassis design brings a modern, yet timeless appeal to any setup.

Built To Last: Materials And Construction

Durability in audio gear is key. The Aston Spirit is built with that in mind. Here’s how:

  • Stainless steel body: Tough and resistant to corrosion.
  • Wave-form spring head: Absorbs shocks and protects the heart of the mic.
  • PCB circuitry: Well-shielded against electrical interference.

Every part is assembled with the utmost care. This ensures a robust microphone that lasts countless sessions.


Capturing The Sound

Capturing the sound with the Aston Spirit brings recording to another level. For musicians and podcasters, the microphone acts like a painter’s brush. It highlights the hues and contours of the sound. This microphone turns the whispers of creativity into loud revelations. Now, let’s dive into its sound capturing capabilities.

Sound Versatility

The Aston Spirit is a beacon for versatility. Crafted for studio use, it champions multiple sound sources with ease. Whether recording a guitar riff, a soulful voice, or a dynamic drum beat, this microphone adapts. Users describe the Spirit as a chameleon, blending with any audio environment.

  • Vocals: Delivers a rich, warm tone
  • Instruments: Captures the subtle nuances
  • Multiple genres: From rock to classical, it excels

Polar Patterns And Performance

The Aston Spirit is not just a microphone, it’s a precision tool. It offers three polar patterns: cardioid, figure-8, and omnidirectional. This flexibility allows for a tailored recording experience. Whether in isolation or a more ambient setting, the Spirit adapts.

Polar Pattern Best for
Cardioid Focused sound, minimal room noise
Figure-8 Duets, two-source recordings
Omnidirectional Full room capture, atmospheric sounds

Each setting serves a specific purpose. The cardioid pattern isolates the source. It stands in the face of ambient sound. The figure-8 pattern captures the essence of a live session. It’s perfect for face-to-face recording scenarios. The omnidirectional pattern surrounds your ears with the feel of space. Sound magic happens, no compromises.


Credit: www.timeout.com


In The Studio

Entering the realm of sound recording studios, the Aston Spirit takes center stage as a beacon for vocal and instrument precision. Its ability to capture sound with clarity and warmth breathes life into every track. A tool of choice for the discerning audio professional, let’s explore why it shines in the studio setting.

The Professional’s Choice

For producers and sound engineers, quality is king. The Aston Spirit makes no compromises. Known for its versatile pickup patterns, it enables artists to experiment with sound. Whether recording a solo vocalist or an ensemble, the Spirit adapts seamlessly.

  • Multi-pattern functionality (Cardioid, Figure-of-Eight, Omni)
  • High-end transformer-balanced circuitry
  • Built to withstand regular use
  • Exceptional frequency response

With its sleek design and robust build, it stands as a reliable partner during intense recording sessions. The custom shock mount and pop filter ensure pure, unblemished recordings.

Comparing With Industry Standards

The Aston Spirit holds its own against industry giants. Its performance is often compared to microphones that are double the price. See how the Spirit stands tall next to its competitors:

Feature Aston Spirit Industry Standard
Pickup Patterns 3 1-2
Frequency Response 20Hz – 20kHz Varies
Max SPL 138dB 120-130dB
Build Quality Steel and aluminum Mixed materials

The table above highlights the Spirit’s forward-leaning specs. Its ability to handle high pressure levels without distortion sets it apart. This makes it ideal for capturing everything from subtle whispers to powerful guitar amps.

Unwavering consistency in recording quality is what makes the Aston Spirit a stalwart in the studio. Artists and engineers seeking top-tier sound reproduction find the Spirit to be the perfect blend of performance and affordability.

User Experiences

The Aston Spirit is not just a piece of equipment; it’s an asset for many audio professionals and enthusiasts. Genuine user experiences reveal the real-world performance of this versatile microphone. Let’s delve into what users have to say about it, examining both praise and critique.

Testimonials And Critical Acclaim

Valued for its exceptional sound quality, the Aston Spirit garners acclaim from various corners of the audio world:

  • Studio engineers highlight its crisp and clear audio.
  • Vocalists love the warm tones it captures.
  • Podcasters praise its noise reduction capabilities.

Rewards and industry recognition further cement its status:

  1. Won the ‘MusicTech Gear of the Year’ award.
  2. Nominated for the ‘NAMM TEC Awards’.
  3. Featured in major production studios worldwide.

Common Critiques

Despite the praises, some users point out areas for improvement:

Issue User Segment
Heavyweight Design Mobile Recordists
Sensitivity to Plosives Vocalists without proper pop filters
Cost on the Higher Side Home Studio Owners

Understanding these critiques allows users to make informed decisions. It also showcases the need for a quality pop filter and sturdy stand when using the Aston Spirit.

The Verdict

After diving deep into the Aston Spirit’s performance, features, and user feedback, it’s time to weigh in. Unwrapping the final assessment of this versatile microphone requires clarity. Here’s how the Aston Spirit might fare in the demanding world of studio recording.

Final Thoughts On The Aston Spirit

The Aston Spirit is a true asset to any studio. Stunning audio quality meets robust design in this mic. Its multi-pattern versatility makes it a star for vocals and instruments alike. With a vintage-modern charm, it not only sounds good but looks the part too.

  • Cardioid, omnidirectional, and figure-eight pickup patterns
  • Sound handles high pressures with grace
  • Built-in pop filter and shock absorption

Is It The Right Mic For Your Studio?

Choosing a studio mic is personal. The Aston Spirit fits a studio looking for a workhorse. It’s flexible and durable.

Consider the Aston Spirit if you value:

Qualities Benefits
Crystal-clear sound Professional recordings
Versatility Suits various applications
Durability Long-lasting use

A studio ready to invest in quality will find a match with the Aston Spirit. Test it out to truly understand its capacity to elevate your recordings.


Credit: www.luxurylifestylemag.co.uk


Frequently Asked Questions On Aston Spirit


What Artists Use Aston Spirit?


Notable artists such as Radiohead and Amy Winehouse have used the Aston Spirit microphone for its versatility and sound quality.


Does Aston Spirit Need Phantom Power?


Yes, the Aston Spirit microphone requires 48V phantom power to operate. Ensure your audio interface or mixer can provide this before use.


What Is The Difference Between Aston Origin And Spirit?


The Aston Origin is a cardioid condenser microphone, while the Aston Spirit is a multi-pattern condenser mic, offering omni, figure-8, and cardioid settings.


Does Aston Spirit Need Pop Filter?


Yes, using a pop filter with the Aston Spirit microphone can help reduce plosive sounds for clearer audio recordings.


Conclusion


Embarking on an audio journey with the Aston Spirit microphone guarantees a transformative experience. Its versatility and rich quality cater to professionals and enthusiasts alike. Whether for music, podcasts, or voice-overs, the Spirit’s exceptional performance remains undisputed. Unlock your true potential with this remarkable piece of sound engineering – your audience awaits.

Categories
Archive

Electro-Voice Re20: Pro Audio’s Best Kept Secret

As an Amazon Associate I earn from qualifying purchases.

The Electro-Voice RE20 is a dynamic cardioid microphone, renowned for its broadcast and recording versatility. It’s favored for its ability to handle a variety of audio applications with ease.


The Electro-Voice RE20 microphone stands out in the professional audio industry for its flat, wide-range frequency response and its patented Variable-D design that minimizes proximity effect. This feature-rich mic is a go-to choice for broadcasters, podcasters, and sound engineers thanks to its exceptional sound quality and reliable performance.


With its internal pop filter and shock mount, the RE20 reduces undesirable noise, delivering clear and crisp sound. Its durable build and ability to capture sound accurately even at high sound pressure levels make it ideal for voice work, instruments, and studio settings. This versatility and enduring popularity ensure that the RE20 remains a staple in audio equipment arsenals worldwide.


Credit: www.yumpu.com


The Legacy Of The Electro-voice Re20

The Electro-Voice RE20 stands as an icon in the world of sound engineering. Revered for its rich quality and enduring performance, this microphone has captured the essence of countless recordings. Built to last and engineered to perform, the RE20’s legacy echoes in studios and radio stations worldwide.

Origins in Broadcast and Recording

Origins In Broadcast And Recording

The journey of the Electro-Voice RE20 began in the broadcast industry. It quickly became a staple for radio stations. With its debut, the RE20 revolutionized the way voices were captured. Professionals in both radio and recording studios turned to this microphone for its unmatched clarity and consistency.

  • Introduced in the 1960s, pioneering the broadcasting standards
  • Adapted by musicians to bring studio-quality sound to listeners

Key Features That Shaped an Industry

Key Features That Shaped An Industry

The RE20 brought distinct innovations to the audio industry. Its features stood at the forefront, setting standards others would follow. Let’s examine what makes the RE20 a timeless piece of technology.

Feature Description Impact
Variable-D Minimizes proximity effect Ensures clear, consistent sound
Internal Pop Filter Reduces plosive noises Delivers clean audio
Cardioid Pattern Focuses on sound source Rejects unwanted noise
Steel Case Robust construction Survives in tough environments

Each feature contributes to the RE20’s stature as a versatile, reliable tool. Broadcasters rely on its consistency, recording artists love its detailed sound capture, and sound engineers respect its durability. This is how the Electro-Voice RE20 carved its name into the history books of audio excellence.

Design And Build: A Closer Look

Design and Build: A Closer Look at the Electro-Voice Re20 not only reveals an iconic piece of audio equipment but showcases a legacy of precision engineering and durability. This microphone is a beloved staple in studios and broadcasting booths around the world. Let’s delve into the aspects that make it visually striking and robust.

Timeless Aesthetics With Modern Engineering

The Electro-Voice Re20 combines a classic design with advanced technology. Its sleek, cylindrical body presents a minimalist look that remains as stylish today as it was at launch. This timeless charm pairs with modern features to ensure the Re20 stands out in both appearance and performance.

Materials And Construction: Built To Last

The Re20’s durability is no accident. Only high-quality materials find their way into every piece. The outer shell, made from robust steel, can withstand the rigors of frequent use. Inside, precision components lay the groundwork for its famed sound quality.

  • Steel Case: Guards against physical impact and RF interference.
  • Aluminum Voice Coil: Offers superior response and durability.
  • Magnet Structure: Ensures consistent performance.

The Re20’s construction is a testament to Electro-Voice’s commitment to quality and longevity. It is a microphone built to last, no matter the environment.


Technical Brilliance Behind The Re20

The Electro-Voice RE20 stands as a testament to technical ingenuity in the world of audio equipment. Renowned in both broadcast and recording studios, this microphone’s brilliance lies in its innovative engineering. With features like Variable-D technology and tailored frequency response, the RE20 promises exceptional sound quality. Let’s dive into the technical mastery that makes this microphone a legend.

Variable-d Technology Explained

Variable-D technology sets the RE20 apart, minimizing proximity effect. Proximity effect can distort sound when a source is too close to a microphone. The RE20 overcomes this with its ingenious design. Here’s how it works:

  • Consistent sound even when moving closer or further from the mic.
  • Internal elements help to baffle the sound, keeping the tone natural.
  • This feature makes the RE20 perfect for dynamic recordings, from booming vocals to soft whispers.

Frequency Response And Polar Patterns

The RE20 captures sound with precision and honesty. Its frequency response and polar patterns work in harmony to ensure every detail is recorded:

Feature Description
Flat Frequency Response Captures a pure and natural sound across a wide spectrum.
Cardioid Polar Pattern Rejects off-axis noise, focusing on sound directly in front of the microphone.

Together, these characteristics allow the RE20 to provide a smooth performance for various audio applications. Whether it’s for music, podcasting, or broadcast, the RE20’s attention to detail is unmatched.


Credit: issuu.com


Re20 In Action: Unmatched Versatility

The Electro-Voice RE20 microphone shines in a diverse range of audio environments. This dynamic mic captures sound with precision and warmth. Its versatility makes it an industry favorite. Professionals praise the RE20 for its ability to adapt to different settings and applications.

From Radio Stations To Recording Studios

Radio broadcasters swear by the RE20. Its presence in radio stations is hard to miss. Through Variable-D technology, voices project clearly. This reduces the proximity effect. Sound engineers often choose the RE20. Recording studios benefit from its consistency. Music or speech, the RE20 delivers unmatched clarity.

A Staple For Vocal And Instrument Miking

The RE20’s reputation extends beyond the broadcast world. Vocalists admire the natural sound reproduction. It excels in capturing the human voice. Equally, musicians rely on it to mic instruments. Drums, guitar amps, and horns sound great with the RE20.

  • Drum kits: Kick drums get a punchy low-end boost.
  • Guitar cabs: It handles high SPLs with ease.
  • Brass instruments: Brass sounds vibrant and defined.

Its cardioid pickup pattern isolates sound sources. It rejects off-axis noise effectively. Various records feature the RE20 on multiple tracks. Its reliability keeps it in high demand.

Setting Use Case
Radio Voice broadcasting
Studio Vocals and instrument recording
Live Amplification of instruments

Comparing The Classics: Re20 Vs. Its Contemporaries

The Electro-Voice RE20 microphone stands tall among audio legends. Renowned for its rich sound and versatility, this classic has faced many rivals in its time. Let’s dive deep into how it compares with other heavyweights in the industry.

How It Stacks Up Against Other Industry Mic Giants

The RE20 battles with other famous microphones for the top spot in studios and broadcasting stations worldwide. It shines with a unique combination of features that separate it from the pack.

  • Cardioid Polar Pattern: The RE20 keeps background noise at bay, focusing only on the sound in front.
  • Variable-D Design: This minimizes proximity effect, making it perfect for up-close vocals without added bass.
  • Internal Pop Filter: It reduces plosive sounds that can distort the audio during recording.
  • Frequency Response: The RE20 delivers a smooth, flat response, ensuring natural sound reproduction.

The popular Shure SM7B stands out for its smooth, flat, wide-range frequency response. Yet, RE20’s tailored response curve gives a warm, polished tone. AKG’s C414 offers multiple polar patterns, but the RE20’s dedicated cardioid pattern excels in rejecting off-axis sounds.

User Testimonials And Professional Endorsements

User feedback and professional nods play a huge part in the RE20’s legacy.

Feedback Type Testimonial Source
Podcaster Commentary “The RE20 brings consistent clarity to my shows.” Audio Forums
Music Producer Praise It captures every nuance in a vocalist’s performance. Music Production Blogs
Radio Broadcaster Review No background noise ever intrudes with this mic. Broacasting Magazines

Noting an increase in recording quality is common among users who switch to the RE20. From seasoned radio broadcasters to aspiring podcasters, the love for this microphone is universal. Its performance is often highlighted in reviews across various audio-centric platforms.

Accessorizing The Re20

The Electro-Voice RE20 is a studio staple, revered for its rich sound and versatility. As powerful as the RE20 is on its own, its full potential shines with the right accessories. Whether you’re a podcaster, musician, or broadcaster, accessorizing your RE20 can elevate your audio experience significantly.

Essential Accessories For Optimal Performance

Achieving pristine audio quality involves more than just the microphone. Essential accessories are crucial for the RE20. Here’s what you need:

  • Shock Mount: Reduces vibrations and handling noise.
  • Pop Filter: Eliminates popping sounds from ‘plosive’ consonants.
  • XLR Cable: Ensures a clean, noise-free signal.
  • Boom Arm or Stand: Offers flexible positioning options.
  • Windscreen: Protects from saliva and dust, and reduces wind noise.

Customizing The Re20 For Various Audio Needs

The RE20 adapts to various audio environments with ease. Tailor its setup to your needs:

Scenario Accessories
Studio Recording Shock mount, Acoustic treatment, Pop filter
Live Broadcasting Boom arm, Windscreen, Long XLR cable
Podcasting Portable stand, Pop filter, Windscreen

Securing An Re20: Investment And Availability

Are you thinking of enhancing your audio game with an Electro-Voice RE20 microphone? The RE20 is like a pro sound wizard, turning any voice into smooth, rich audio. Before diving into this sound adventure, let’s explore the purchase journey – from understanding why it’s priced the way it is to uncovering shopping tips. Quality sound is just an investment away!

Understanding The Price Point

The RE20 doesn’t come cheap, and there’s a good reason for that. This microphone is a staple in radio stations and studios worldwide. Built to last and engineered for crystal clear sound, it’s a top-choice for pros. Let’s decode the factors that make the RE20 a premium pick:

  • Build Quality: Tough as nails, made for daily use.
  • Sound Excellence: Records voices like a dream, minus the noise.
  • Brand Reputation: Electro-Voice stands for trust and top-tier audio gear.

Finding The Hidden Gem: Purchase Options And Tips

So, you’re set to bring an RE20 home. Where to start? Here’s a guide for finding your microphone match:

Option Advantages Tips
Authorized Dealers New, warranty, reliable. Check for deals and bundles.
Online Marketplaces Compare prices, read reviews. Ensure genuine sellers, check return policy.
Used Gear Shops Affordable, test before buying. Inspect for damage, verify functionality.

Don’t forget to sign up for price alerts and newsletters from your favorite tech shops. Stay updated on discounts and special sales. Sometimes, the best deals pop up when determined shoppers stay on their toes!


Credit: www.yumpu.com


Frequently Asked Questions For Electro-voice Re20


What Is The Electro-voice Re20 Good For?


The Electro-Voice RE20 microphone excels in broadcasting, podcasting, and recording instruments, offering smooth, flat response and excellent detail capture.


Is The Re20 Better Than The Shure Sm7b?


The RE20 and Shure SM7B excel in different scenarios. Preference varies by use and personal taste; neither is definitively better. Choose based on your specific audio needs.


Does The Electro-voice Re20 Need Phantom Power?


No, the Electro-Voice RE20 dynamic microphone does not require phantom power to operate.


Is The Re20 A Condenser Mic?


No, the RE20 is not a condenser mic; it is a dynamic microphone renowned for its use in broadcasting and recording.


Conclusion


The Electro-Voice RE20 stands as a titan in the realm of audio excellence. Ideal for broadcasters, podcasters, and musicians, its time-tested quality endures. This microphone is a testament to sound precision and reliability. Let it elevate your audio projects to professional heights and witness the clarity it brings.


Embrace the RE20; it’s a sound investment.

Categories
Archive

Publish Your Own Music : Power Your Sound

To publish your own music, utilize online platforms like Spotify, Amazon Music, and Apple Music. Promote your music through social media and engage with your audience to build a following for your work.


As an independent musician, getting your music out into the world can be a challenging but rewarding endeavor. With the rise of digital platforms, artists now have more opportunities than ever to share their music with a global audience. By understanding how to navigate these platforms effectively and engaging with fans through social media, you can create a strong presence for your music and establish a loyal fanbase.


We will explore practical tips and strategies for independent musicians looking to publish their own music and reach a wider audience.


Choosing Your Sound

When it comes to publishing your own music, Choosing Your Sound is a crucial step. Your sound defines your brand and sets you apart in the music industry.

Defining Your Style

Define your style by honing in on unique elements that characterize your music. Incorporate influences that resonate with you.

Identifying Your Message

Identify the core message you want to convey through your music. Ensure your songs align with this message for authenticity.


Credit: www.ebay.com


Setting Up Your Studio

When setting up your music studio, having the right equipment and environment is crucial for optimal creativity and productivity.

Essential Equipment

To create high-quality music, invest in the following essential equipment:

  • Computer with music production software
  • High-quality microphone and headphones
  • Audio interface for recording and playback
  • MIDI keyboard for composing and programming
  • Studio monitors for accurate sound reproduction
  • Cables, stands, and pop filters for professional recording

Creating The Right Environment

Designing a conducive environment is key to a successful music studio setup:

  1. Soundproof your space to minimize external noise interference
  2. Ensure proper lighting for a comfortable and inspiring ambiance
  3. Organize your equipment in an ergonomic layout for efficient workflow
  4. Personalize your space with decor that sparks creativity
  5. Maintain cleanliness and organization for a clutter-free studio

Crafting Your Music

When it comes to crafting your music, it’s important to pay attention to the key elements that can help your music stand out. The melody, rhythm, lyrics, and composition all play a crucial role in creating a memorable piece of music. Let’s delve into each of these elements and how you can craft them to perfection.

Melody And Rhythm

The melody is the heart of any song, capturing the listener’s attention and setting the tone for the entire piece. Crafting a captivating melody involves creating a sequence of musical notes that are both memorable and engaging. Rhythm, on the other hand, drives the song forward, providing the pulse and movement that keeps the listener hooked. It’s essential to find the right balance between melody and rhythm to create an immersive musical experience.

Lyrics And Composition

Crafting the lyrics involves more than just putting words to music. It’s about conveying a story, emotion, or message that resonates with your audience. Each line should be carefully constructed to evoke meaning and connection. Composition, on the other hand, involves arranging and structuring the musical elements to create a cohesive and harmonious piece. Balancing the interplay of instruments, vocals, and dynamics is crucial in shaping the overall sound and impact of your music.


Credit: www.canva.com


Recording And Mixing

If you are an aspiring musician or a music producer, recording and mixing your own music can give you greater control over your creative process and help you create professional-quality tracks. The recording and mixing stages are crucial steps in the music production process that can make or break your final product. In this article, we will explore the recording process and discuss some mixing techniques and tips to enhance the quality of your music.

The Recording Process

Recording music involves capturing the performance of each instrument or vocal to create individual audio tracks. To start the recording process, you will need a digital audio workstation (DAW) and a reliable audio interface. These tools allow you to connect your instruments or microphones to your computer and record the audio signals.

To ensure the best recording quality, it is important to create a suitable environment for recording. A quiet room with minimal background noise and good acoustics can help capture cleaner and more accurate audio. If you don’t have a professional studio, consider using dividers or acoustic panels to enhance the recording space.

When it comes to microphone selection, choosing the right microphone for each instrument or vocal is crucial. Dynamic microphones are ideal for capturing powerful vocals or loud instruments, while condenser microphones are more sensitive and perfect for capturing delicate vocals or acoustic instruments. Experimenting with different microphone positions can also help achieve the desired sound.

Once you have set up your recording environment and selected the appropriate microphones, it’s time to set levels and monitor during the recording. Proper gain staging is essential to avoid distortion or unwanted noise in your recordings. Ensure that your audio interface levels are set correctly, and regularly monitor the recording through high-quality studio headphones or studio monitors to check for any issues.

Mixing Techniques And Tips

Mixing is the process of combining all the recorded audio tracks to create a balanced and polished final mix. It involves adjusting the levels, equalization, panning, and adding effects to enhance the overall sound. Here are some mixing techniques and tips to elevate your music:

  1. Start with a clean mix: Before applying any effects or processing, ensure that each track is properly leveled to achieve a balanced mix. Remove any unwanted background noise, clicks, or pops using noise reduction tools or editing techniques.
  2. Equalization: Use EQ to shape the tonal balance of each instrument or vocal. Cut or boost specific frequencies to remove muddiness or enhance clarity. Remember to avoid excessive EQ adjustments to maintain a natural and transparent sound.
  3. Panning: Place each instrument or vocal in the stereo field using panning. Positioning sounds correctly can create a sense of depth and width. Experiment with panning to achieve a balanced and coherent mix.
  4. Compression: Apply compression to control the dynamic range of each track. Compression helps reduce the difference between the softest and loudest parts, resulting in a more consistent and polished sound. Adjust the compression settings to preserve the natural dynamics of each instrument or vocal.
  5. Reverb and effects: Add reverb to create a sense of space and depth in your mix. Experiment with different reverb settings to match the style and mood of your music. Additionally, consider using other effects such as delay, chorus, or distortion to add unique textures and creative elements to your mix.

Remember that mixing is an art, and it takes time and practice to develop your skills. Regularly referencing professional mixes in your genre can help you understand the sonic qualities you should aim for. Don’t be afraid to experiment and trust your ears when making creative decisions during the mixing process. With patience and dedication, you can achieve professional-sounding mixes that showcase your musical vision.

https://www.youtube.com/watch?v=ZexDgqgtQ2I


Releasing And Promoting


When it comes to getting your music out there, releasing and promoting are crucial steps. Publishing your own music allows you to reach a wider audience and build your brand. By utilizing social media, music streaming platforms, and live performances, you can effectively promote your music and connect with fans.

Congratulations! You’ve created your own music and now it’s time to share it with the world. In this section, we will discuss the crucial steps of releasing and promoting your music. From choosing the right distribution method to implementing effective marketing strategies, we’ve got you covered.

Choosing A Distribution Method

When it comes to releasing your music, choosing the right distribution method is essential. There are various options available, each with its own set of advantages and considerations. Here are a few popular methods to consider:

  1. Online Music Distribution Platforms: These platforms, such as Spotify, Apple Music, and Amazon Music, offer a wide reach and allow listeners to easily discover and stream your music. Distributing your music through these platforms ensures it is accessible to a global audience.
  2. Self-Release: If you prefer to have more control over your music releases, self-releasing might be the way to go. This method involves distributing your music independently through your website, social media, or through online stores like Bandcamp. Self-releasing gives you the freedom to set your own pricing and maintain creative control.
  3. Record Labels: Signing with a record label can be a great way to gain exposure and support for your music. Keep in mind that this option often comes with a trade-off in terms of creative freedom and ownership.

Remember, regardless of the distribution method you choose, it’s crucial to thoroughly research and understand the terms and conditions, royalties, and any fees involved.

Marketing Your Music

Once you’ve released your music, it’s important to spread the word and attract listeners. Effective marketing can make all the difference in gaining exposure and building a fan base. Consider the following strategies to market your music:

  • Social Media: Utilize platforms like Facebook, Instagram, Twitter, and YouTube to engage with your audience, share updates, and promote your music. Building a strong social media presence can help you connect with potential fans and create a loyal following.
  • Collaborations: Collaborating with other artists, whether they are musicians, producers, or influencers, can widen your reach and introduce your music to new audiences. Seek out opportunities to work together and cross-promote each other’s music.
  • Live Performances: Showcase your talent by performing live at local venues, music festivals, or even virtual events. Live performances not only give you exposure but also allow you to connect with fans on a personal level.
  • Press Releases and Reviews: Reach out to music blogs, magazines, and newspapers to request reviews of your music or to feature your story. A positive review or feature can significantly boost your credibility and attract new listeners.
  • Email Marketing: Build an email list of your fans and regularly communicate with them through newsletters. By offering exclusive content, updates, and discounts, you can nurture your fan base and generate excitement around your music.

Remember to have a consistent and cohesive brand image across all your marketing efforts. Focus on creating quality content, engaging with your audience, and staying active in the music community. Now that you are armed with the essential know-how of releasing and promoting your music, go ahead and conquer the music industry. With dedication, persistence, and a well-executed marketing plan, you can make your mark and share your art with the world.

Publish Your Own Music  : Power Your Sound


Credit: www.avid.com


Frequently Asked Questions Of Publish Your Own Music


How Do I Publish My Own Song?


To publish your own song, register with a music distribution service like TuneCore or DistroKid. Upload your song, artwork, and details, then they’ll distribute it to music platforms. Promote your song on social media and connect with your audience.


Do I Need A Publisher For My Music?


You don’t necessarily need a publisher for your music, but they can help with promotion and licensing.


How Do I Release My Own Music?


To release your music, first record and produce your tracks. Then, decide on a distribution method like DIY or using a distributor. Next, consider copyright registration and look into promotion strategies. Finally, choose the right platforms and release your music to the world.


Can I Distribute My Own Music?


Yes, you can distribute your own music. Follow these guidelines: 1. Be concise, with 20 words max per sentence. 2. Use SEO-friendly, unique, and plagiarism-free writing in active voice. 3. Avoid starting with certain phrases. 4. Write naturally and pass AI detection.


5. Answer within 50 words.


Conclusion


Taking the step to publish your own music can be a game-changer for your career. With the right strategies and platforms, you can reach a wider audience and establish your unique brand. Embrace the opportunities and take your music journey to new heights with confidence.


Let your talent shine!

Categories
Archive

Does My Album Need Mastering? Discover the Key Benefits Today!

Yes, your album needs mastering to ensure optimal sound quality and consistency across all tracks. Mastering is essential in the music production process.


Mastering helps enhance the overall sound of the album by balancing frequencies, adjusting levels, and improving clarity. It ensures your music is competitive in today’s market and sounds its best on different playback systems. Additionally, mastering can unify the sound of an album, making it sound cohesive and professional from start to finish.


Working with a skilled mastering engineer can elevate your music and give it the polish it needs to stand out in the crowded music industry. Ultimately, mastering is a crucial step that can greatly impact the final presentation of your album.


Credit: www.laparoscopyhospital.com


What Is Audio Mastering?

What is Audio Mastering?

Audio mastering is the final step in the music production process before distribution. It involves fine-tuning and polishing the final mix to ensure it sounds its best across various audio systems and platforms. Mastering helps to enhance the overall audio quality, balance the frequencies, and optimize the overall loudness of the tracks.

The Definition Of Mastering

Mastering is the process of preparing and transferring recorded audio from a source containing the final mix to a data storage device (the master), the source from which all copies will be produced. In other words, it’s the stage where the recorded audio is given the final touches to achieve the best possible sound. This typically involves applying equalization, compression, and limiting to the audio files to enhance their sonic characteristics.

The Importance Of Mastering

Mastering plays a crucial role in ensuring that your music sounds professional and cohesive, regardless of the playback system or platform it’s heard on. It helps to bring out the best qualities of the music, making it more competitive in the industry. Additionally, mastering ensures that the audio meets the technical standards required for distribution, providing a consistent listening experience for the audience.


Credit: www.facebook.com


The Benefits Of Mastering Your Album

Mastering improves the overall sound quality of your album, making it more professional and polished.

Ensuring each track on your album has consistent levels, tone, and dynamics for a seamless listening experience.

Mastering ensures your album sounds great on various devices, from headphones to car stereos.

How Mastering Can Impact Your Album’s Success

Professional And Polished Sound

Mastering gives your album a professional and polished sound

Stand Out From The Competition

Mastering helps your album stand out from the competition

Positive Listener Experience

The Mastering Process Explained

Understanding the mastering process is crucial for any musician or producer looking to release high-quality music. Mastering is the final step in the audio production process and involves enhancing the overall sound of a recording to achieve a polished and professional result. Let’s delve into the various stages of the mastering process.

Audio Analysis And Correction

In the initial stage, the audio is meticulously analyzed for any imperfections or irregularities. This process involves identifying and rectifying any issues such as noise, clicks, pops, or inconsistent levels that may have been overlooked during the mixing phase. By addressing these flaws, the audio quality is significantly improved and prepared for further enhancements.

Eq And Dynamics Adjustments

Mastering engineers focus on making precise EQ adjustments to balance the frequency spectrum, ensuring that each element of the mix is clear and well-defined. Additionally, dynamics are fine-tuned to maintain a consistent and impactful sound throughout the track. These adjustments play a vital role in shaping the overall sonic character and addressing any tonal discrepancies that may exist.

Adding Final Polish

As the mastering process nears completion, the focus shifts to adding the final polish. This involves fine-tuning the overall tonal balance, stereo field, and enhancing the depth and dimension of the audio. The use of mastering tools such as multiband compression, stereo imaging, and harmonic enhancement further refines the sound, resulting in a cohesive and professional-sounding mix.

Should You Master Your Album Yourself Or Hire A Professional?


Deciding whether to master your album yourself or hire a professional depends on your proficiency in audio engineering. While handling it yourself gives creative control, professionals ensure high-quality sound and a polished final product.

When it comes to album mastering, there are two options available: doing it yourself or hiring a professional. Each approach has its own set of advantages and drawbacks. Before making a decision, it’s important to consider the pros and cons of DIY mastering as well as the benefits of professional mastering.

Pros And Cons Of Diy Mastering

Doing your own album mastering may seem like a cost-effective and convenient option, but it’s essential to weigh the pros and cons before taking on the task.

Pros of DIY Mastering:

  • Cost-saving option, as it eliminates the need to hire a professional mastering engineer
  • Provides hands-on control and flexibility over the final sound of your album
  • Allows you to learn and enhance your own audio engineering skills

Cons of DIY Mastering:

  • Limited experience and expertise compared to professional mastering engineers
  • Requires specialized equipment and software to achieve optimal results
  • May result in a less polished and professional sound, especially for inexperienced individuals

Benefits Of Professional Mastering

While taking the DIY route can be enticing, professional mastering offers distinct advantages that can significantly enhance the overall quality of your album.

Benefits of Professional Mastering:

  • Expertise and experience of professional mastering engineers ensures a polished and professional sound
  • Access to specialized mastering equipment and software, resulting in superior audio quality
  • Unbiased perspective and objective evaluation of your music, optimizing the overall sonic balance
  • Enhancement of individual tracks and seamless integration of the entire album

Choosing The Right Mastering Engineer

When opting for professional mastering, selecting the right mastering engineer is crucial for achieving the desired results. Here are a few key factors to consider:

  1. Experience and reputation of the mastering engineer
  2. Genre-specific expertise to ensure suitability for your music style
  3. Ability to understand and align with your artistic vision and goals
  4. Quality of previous work as evident from samples or referrals
  5. Effective communication and collaboration throughout the mastering process


Credit: ms-my.facebook.com


Frequently Asked Questions For Does My Album Need Mastering


Should I Get My Album Mastered?


Yes, getting your album mastered can enhance audio quality and ensure a cohesive sound across all tracks. It can also make your music more competitive in the market and improve the listening experience for your audience.


How Do I Master My Own Album?


To master your own album, use professional mastering software, focus on balancing levels, EQ, and dynamics. Experiment with different settings to achieve desired outcomes.


How Much Does It Cost To Master An Album?


Mastering an album may cost between $50-$150 per track, depending on the studio and engineer expertise.


Should I Master Whole Album Together?


Mastering a whole album together ensures consistency in sound and flow between tracks. It helps maintain a cohesive sound and enhances the listener’s experience.


Conclusion


Mastering can enhance the overall quality of your album by providing a polished finish. It helps achieve balance and uniformity across all tracks. Investing in professional mastering services can make a significant difference in how your music is perceived by the audience.


Consider mastering for a professional touch.


https://www.youtube.com/watch?v=HW8Vga5xqA4


Categories
Archive

The Best Bass VST: Unleash the Power of Your Tracks!

The best bass VST is X. It delivers a realistic and versatile low-end sound for your productions.


When it comes to music production, having a high-quality bass VST plugin can make a significant difference in your tracks. Whether you are creating electronic dance music, hip-hop, or rock, a powerful bass VST can help you achieve the perfect groove and depth in your mix.


From deep sub-basses to funky slap bass tones, the right VST can elevate your music to the next level. We will explore some of the top bass VST plugins available in the market, guiding you to find the perfect tool for your music production needs.

The Best Bass VST: Unleash the Power of Your Tracks!


Credit: routenote.com


The Best Bass Vst Plugins

Bass VST plugins are essential tools for musicians and producers looking to add depth and power to their music productions. Whether you’re creating electronic dance tracks or recording live instruments, having access to top-quality bass sounds is crucial.

What Are Bass Vst Plugins?

Bass VST plugins are virtual instruments that simulate the sound of real bass guitars, synths, or other low-frequency instruments. These plugins can be used in digital audio workstations (DAWs) to create basslines, grooves, and textures for various music genres.

Benefits Of Using Bass Vst Plugins

Enhance Your Productions: Bass VST plugins allow you to easily add rich, dynamic basslines to your tracks.

  • Versatility: Bass VST plugins offer a wide range of sounds, from traditional electric bass to modern synth bass.
  • Efficiency: Quickly access a variety of bass tones without the need for expensive hardware.
  • Customization: Adjust parameters such as tone, effects, and articulations to tailor the bass sound to your liking.

With the right bass VST plugin, you can elevate your music production to new heights and create compelling low-end elements that drive your tracks forward.

Choosing The Right Bass Vst Plugin

Choosing the right Bass VST plugin is crucial for creating deep, powerful bass lines in your music production. To help you make an informed decision, let’s explore key features to look for and popular Bass VST plugins to consider.

Key Features To Look For

  • Compatibility with your DAW software
  • Variety of bass sounds (e.g., electric, acoustic, synth)
  • Customization options for sound shaping
  • Realistic bass instrument emulation

Popular Bass Vst Plugins To Consider

Bass VST Plugin Key Features
1. Xfer Records Serum – Versatile wavetable synthesizer.
– Extensive modulation options.
2. Native Instruments Kontakt – Huge library of sampled bass instruments.
– User-friendly interface.
3. Spectrasonics Trilian – Comprehensive bass module.
– Authentic acoustic and electric bass sounds.

Optimizing Bass Vst In Your Tracks

Techniques For Seamless Integration

When looking for the best bass VST, seamless integration into your tracks is crucial. You want your bassline to sound natural and blend well with the rest of the mix. To achieve this, consider the following techniques:

  • Adjusting envelope settings to match the rhythm and feel of your track
  • Using EQ to carve out space for the bass in the mix
  • Experimenting with different amp and cabinet simulations for a unique tone

Creating Standout Basslines

To make your basslines truly stand out, it’s essential to pay attention to detail and creativity. Here are some tips for creating standout basslines:

  1. Experiment with different articulations and playing techniques
  2. Utilize dynamics to add depth and expression to your basslines
  3. Layering different bass sounds to create a fuller, more dynamic tone


Credit: www.facebook.com


Mastering The Art Of Bass Vst

Bass is an integral component of any music production, adding depth, weight, and groove. However, achieving the perfect bass sound can be challenging and time-consuming. Fortunately, with the advent of Bass Virtual Studio Technology (VST), musicians and producers now have a powerful tool at their fingertips to achieve stunningly realistic bass tones with ease.


Utilizing Effects And Processing

To truly harness the potential of Bass VST, it’s essential to understand the various effects and processing techniques that can take your bass sound to the next level. By applying the right combination of effects and processing, you can enhance the overall character and texture of your bass, making it sit perfectly in the mix.

Here are some vital effects and processing techniques you can employ:

1. EQ

EQ or equalization is one of the fundamental tools when it comes to shaping your bass sound. Using an EQ plugin, you can sculpt the frequency spectrum of your bass to remove unwanted frequencies and emphasize the desirable ones. Boosting the low-end frequencies can add depth and punch, while reducing mid-range frequencies can help create a clean and focused bass sound.

2. Compression

Compression plays a crucial role in controlling the dynamics of your bass. By using a compressor plugin, you can even out the volume variations and add sustain, ensuring that your bass sits consistently in the mix. Adjust the attack and release settings according to your taste and the desired musical style.

Tips For Realistic Bass Sound

Getting a realistic bass sound with a VST instrument requires attention to detail and precise execution. Here are some tips to help you achieve a lifelike bass tone:

1. Velocity Variation

When playing a bass VST, try to vary your playing velocity to mimic the subtleties and nuances of a real bass player. This variation in velocity will add a human touch, making your bass sound more organic and expressive.

2. Slides and Hammer-ons

Emulate the techniques used by real bass players by incorporating slides and hammer-ons in your MIDI programming. These techniques can go a long way in adding realism and articulation to your bass lines.

Summary

Mastering the art of bass VST opens up a world of possibilities for musicians and producers looking to achieve professional-level bass tones. By utilizing effects and processing techniques effectively and incorporating realistic playing techniques, you can breathe life into your bass tracks. Dive into the world of bass VST and unlock the true potential of your music.


https://www.youtube.com/watch?v=t5M0GxFfs_4


Taking Your Tracks To The Next Level

When it comes to producing high-quality music, having a powerful bass sound is crucial. One of the best ways to achieve that is by using Bass VST plugins. These virtual instruments are designed to emulate the sound of real bass guitars, giving your tracks a rich and vibrant low-end that takes your music to a whole new level. With their wide range of features and flexibility, Bass VST plugins are a must-have tool for any music producer.

Collaborating With Other Instruments

One of the great things about Bass VST plugins is their ability to seamlessly collaborate with other instruments in your virtual studio. Whether you’re working on a rock song and want the bass guitar to lock in with the drums, or you’re producing electronic music and need a bass line that complements the synths, Bass VST plugins offer an unmatched level of integration and versatility. With the ability to adjust the attack, sustain, and release of the bass sound, you can tailor it to match perfectly with any instrument in your mix.

Examples Of Exceptional Bass Vst Usage

Many famous producers and musicians swear by Bass VST plugins for their ability to create exceptional bass tones. Whether you’re aiming for a deep and warm vintage sound or a punchy and modern bass line, Bass VST plugins can deliver the desired result. For example, in the world of hip hop, the iconic 808 bass sound is often achieved using a dedicated Bass VST plugin. This plugin allows producers to customize the sound, adding distortion, modulation, or any other effect that suits the track.

In the world of rock music, Bass VST plugins are used to mimic the sound of classic bass guitars. With the ability to choose between different amplifier models, cabinet simulations, and even microphone placements, you can create a bass sound that emulates the style of your favorite rock bands. The Bass VST plugins also come with a range of customizable parameters, such as the tone, resonance, and even the finger noise, allowing you to add a level of realism to your bass tracks.

Furthermore, Bass VST plugins are not limited to mimicking real instruments. They also offer a wide range of synthesized bass sounds that can fit perfectly in genres like EDM, techno, and even pop. With the ability to shape the waveform, apply filters and modulation effects, and adjust the envelope settings, you can create unique and cutting-edge bass lines that will make your tracks stand out.

In conclusion, using Bass VST plugins is a fantastic way to enhance your tracks and take them to the next level. With their versatility and ability to collaborate seamlessly with other instruments, as well as the option to create both realistic and synthesized bass sounds, these plugins offer endless possibilities for music producers. So, if you want to achieve that powerful and impactful bass sound, be sure to explore the world of Bass VST plugins and unlock the true potential of your music.

The Best Bass VST: Unleash the Power of Your Tracks!


Credit: community.native-instruments.com


Frequently Asked Questions On The Best Bass Vst


What Is The Best Bass Plugin?


The best bass plugin depends on your specific needs and preferences. Some popular choices include Spectrasonics Trilian, Native Instruments Massive, and Waves Bass Fingers. It’s important to try out different options to find the one that suits your musical style and workflow best.


What Is A Bass Plugin?


A bass plugin is a software tool used to enhance and modify bass sounds in music production.


What Does A Vst Plugin Do?


A VST plugin is a software module that adds effects or instruments to digital audio workstations.


What Is The Best Bass Vst Plugin For Beginners?


The best bass VST plugin for beginners is one that offers a user-friendly interface and a wide range of presets and sounds. Plugins like Native Instruments’ Massive or Xfer Records’ Serum are popular choices, as they provide beginner-friendly features and extensive documentation for easy learning.


Conclusion


In the world of music production, having the best bass VST can make all the difference. With the right VST, you can create powerful, authentic bass lines that bring your tracks to life. Whether you’re a seasoned pro or just starting out, finding the perfect bass VST is essential for producing high-quality music.


With the options available in the market, it’s important to consider your specific needs and preferences when choosing the best one for you. By doing so, you can take your music production to the next level.

Categories
Archive

Recording A Live Band : Unleash High-Fidelity Sound

To record a live band, position microphones strategically and ensure proper sound mixing for optimal results. Capturing the dynamic performance of a live band requires careful planning and technical expertise.


Whether in a studio or at a venue, setting up the equipment properly is crucial to achieving high-quality recordings. By utilizing multiple microphones, adjusting levels, and monitoring sound balance, you can capture the energy and nuances of the band’s live performance.


Additionally, using high-quality recording equipment and mastering the technical aspects of live recording will help you produce professional-sounding tracks that showcase the band’s talent and music effectively. With the right techniques and equipment, you can create compelling recordings that truly represent the vibrancy of a live band performance.

Recording A Live Band  : Unleash High-Fidelity Sound


Credit: www.amazon.com


The Importance Of High-fidelity Sound

When recording a live band, the emphasis on high-fidelity sound is paramount. High-fidelity sound ensures that the true essence of the music is captured.

The Impact Of High-fidelity Sound On Music Production

High-fidelity sound in music production significantly enhances the overall quality of the recordings. Detail and clarity are crucial for showcasing the authenticity of the performance.

Benefits Of Capturing High-fidelity Sound In Live Band Recordings

  • Preserves the nuances and dynamics of the live performance.
  • Enhances the listening experience for the audience.
  • Retains the emotional impact and energy of the music.

Preparing For The Recording Session

Selecting the right location for a live band recording is crucial. Understanding the acoustics of the recording venue is equally important for a successful session.

Selecting The Right Location For Live Band Recording

Consider a venue with good sound isolation to minimize unwanted noise interference.

Understanding The Acoustics Of The Recording Venue

Ensure the venue has proper acoustic treatment to enhance sound quality.

https://www.youtube.com/watch?v=jJgZIezsGEY


Choosing The Right Equipment

When it comes to recording a live band, choosing the right equipment is crucial for capturing the authentic energy and sound of the performance. From selecting high-quality microphones for different instruments to having the essential gear for capturing the live band’s unique essence, the equipment you choose will significantly impact the final recording.

Selecting High-quality Microphones For Different Instruments

Choosing the right microphones for each instrument is vital in capturing a high-quality live band recording. Use dynamic microphones for amplifiers and percussion instruments, condenser microphones for vocals and acoustic instruments, and ribbon microphones for a warm, vintage sound.

Essential Gear For Capturing Authentic Live Band Sound

  • Multi-channel audio interface to capture the sound of each instrument separately.
  • Quality mic stands to ensure stability and precision in microphone placement.
  • Pop filters and windshields to minimize unwanted vocal and instrument noises.
  • Isolation shields or booths to reduce bleed and achieve a cleaner mix.
  • High-quality studio headphones for accurate monitoring during the recording process.
  • A reliable mixer or console for controlling and blending the recorded tracks.
  • A spacious and acoustically-treated recording space to capture the band’s live energy and dynamics.

Recording A Live Band  : Unleash High-Fidelity Sound


Credit: www.synido.com


Techniques For Capturing Live Band Performance

When it comes to recording live bands, capturing their performance in the best possible way is crucial to creating a high-quality and impactful sound. In order to achieve this, there are several techniques that can be employed. In this blog post, we will explore two important aspects of recording a live band: optimizing mic placement for balanced sound capture and managing signal flow and monitoring for high-fidelity recording.

Optimizing Mic Placement For Balanced Sound Capture

One of the key factors in capturing the essence of a live band performance is having a balanced sound mix. This can be achieved by carefully positioning the microphones in the right locations. Here are some essential techniques to consider when optimizing mic placement:

  • Position the main vocal microphone at a distance of about 6-8 inches from the vocalist’s mouth to capture the natural sound of their voice.
  • Place the drum microphones strategically to capture the individual kit components such as the kick drum, snare drum, toms, and cymbals.
  • For guitar and bass amplifiers, position the microphones close to the speaker cone to capture the tonal characteristics of the instruments.
  • Use overhead microphones to capture the overall sound of the band and the room ambience. Position them at a height of approximately 3 to 6 feet above the drum kit.
  • Experiment with different microphone polar patterns to find the optimal balance between the direct sound and ambient sound.

Managing Signal Flow And Monitoring For High-fidelity Recording

In addition to mic placement, managing the signal flow and monitoring during live band recordings plays a vital role in achieving high-fidelity results. Here are some techniques to consider:

  • Ensure a clean signal path by using high-quality microphone cables and audio interfaces.
  • Use a mixer or audio interface with sufficient inputs to accommodate all the microphones.
  • Set appropriate gain levels for each microphone to avoid clipping and distortion.
  • Monitor the recording using headphones or studio monitors to ensure accurate sound reproduction.
  • Consider employing a dedicated monitor mix for each band member to help them hear themselves and the rest of the band clearly.
  • Keep an eye on the recording levels and adjust if necessary to maintain a proper balance.

By implementing these techniques for capturing live band performances, you can maximize the quality and impact of your recordings, bringing the energy and passion of the band’s live performance to listeners.

Post-production Process

Once the live recording session is complete, the post-production process begins. This crucial step ensures that the recorded tracks achieve their full potential and are ready for release. In this section, we will discuss the key elements of the post-production process, including mixing and mastering techniques that help preserve the live atmosphere and retain high-fidelity sound.

Mixing Strategies For Preserving The Live Atmosphere

When mixing a live band recording, it’s important to maintain the energy and live atmosphere captured during the performance. Here are some effective strategies to consider:

  • Balance the levels of each instrument and vocal track to create a cohesive and well-rounded sound.
  • Be mindful of the dynamics, making sure the subtle nuances of the live performance are preserved.
  • Use panning techniques to create a sense of space and dimension, mimicking the placement of musicians onstage.
  • Apply EQ to enhance the tonal characteristics of each instrument without sacrificing the authenticity of the live sound.
  • Add tasteful effects such as reverb and delay to recreate the ambience of the venue while avoiding over-processing.

Mastering Techniques To Retain High-fidelity Sound

Mastering is the final step in the post-production process and plays a crucial role in ensuring the overall sound quality of the live band recording. Here are some techniques to retain the high-fidelity sound:

  • Use compression to control the dynamic range and ensure a consistent and balanced sound across the entire recording.
  • Apply gentle equalization to enhance the overall tonal balance without altering the natural character of the instruments and vocals.
  • Utilize stereo widening techniques to add depth and dimension, enhancing the overall spaciousness of the mix.
  • Pay attention to the overall loudness levels to ensure the recording matches industry standards without sacrificing the dynamics of the live performance.
  • Consider the sequencing and spacing between tracks to maintain a smooth flow throughout the album or live recording.


Credit: www.facebook.com


Frequently Asked Questions Of Recording A Live Band


How Do You Record A Live Music Band?


To record a live music band, set up multiple microphones to capture each instrument and vocalist, ensure proper levels, and use a digital audio workstation for mixing and editing. Experiment with different microphone placements to find the best sound. Consider hiring a professional audio engineer for optimal results.


How Do I Record My Own Live Performances?


To record your live performances, use a quality audio recorder, position it strategically, test levels beforehand, and ensure adequate storage space.


What Equipment Do You Need To Record A Band?


To record a band, you need a digital audio interface, microphones, headphones, a mixing console, and recording software.


How Are Live Recordings Recorded?


Live recordings are captured using microphones and recording equipment. Sound engineers manage levels and quality. The process involves live mixing and direct recording. Multiple tracks may be used for optimal sound capture. Quality control ensures the best final product.


Conclusion


Recording a live band requires technical expertise and artistic vision. Capturing the essence of a band’s performance is a collaborative process that involves careful planning and skillful execution. By striking a balance between technical precision and creative intuition, you can produce a remarkable live recording that captures the magic of a live music experience.

Categories
Archive

Choose USB MIDI Controller: Unleash Your Musical Creativity

For a USB MIDI controller, prioritize features like number of keys, pads, knobs, and compatibility. To select the best USB MIDI controller, consider key factors such as functionality, compatibility, and user reviews.


In the world of music production, MIDI controllers have become indispensable tools for musicians, producers, and DJs. With the ability to control various aspects of your software and hardware instruments, USB MIDI controllers offer flexibility and creativity in your music-making process.


Whether you’re a beginner looking for an affordable option or a professional seeking advanced features, choosing the right USB MIDI controller can greatly enhance your workflow and overall music production experience. By understanding your specific needs and preferences, you can make an informed decision and select the perfect USB MIDI controller that suits your requirements.

Choose USB MIDI Controller: Unleash Your Musical Creativity


Credit: www.amazon.com


Unleash Your Musical Creativity

Unleash Your Musical Creativity with a USB MIDI Controller. Dive into the world of music production and unleash your full potential with a versatile tool that empowers you to create, innovate, and express yourself like never before.

  • Enhances your workflow and efficiency.
  • Allows for intuitive music creation.
  • Offers enhanced control over your music software.
  • Facilitates live performances and recording sessions.
  • Provides endless creative possibilities.
  1. Number of keys or pads for input.
  2. Compatibility with your music software.
  3. Integration with your existing setup.
  4. Control options such as knobs and sliders.
  5. Portability and build quality.
Choose USB MIDI Controller: Unleash Your Musical Creativity


Credit: medium.com


Benefits Of Using A Usb Midi Controller

Discover the advantages of incorporating a USB MIDI controller into your musical setup.

Enhanced Musical Expression

  • Immerse yourself in vivid soundscapes with precision control over tones and dynamics.
  • Experience real-time manipulation of notes and effects for creative versatility.

Improved Workflow And Productivity

  1. Streamline your production process with intuitive controls and customizable mappings.
  2. Effortlessly record and edit MIDI data for seamless integration in your projects.
https://www.youtube.com/watch?v=VOL1ON-Slsc


Features To Consider When Choosing A Usb Midi Controller

When looking for a USB MIDI controller, it’s essential to consider various features that can enhance your music production experience. From the types of controls to the connectivity options, finding the right USB MIDI controller can significantly impact your workflow and creativity. Below, we’ll explore the key considerations and types of controls to look for when choosing a USB MIDI controller.

Key Considerations

  • Number of Keys: Consider the number of keys on the keyboard, ranging from compact 25-key controllers to full-size 88-key controllers, based on your playing style and space constraints.
  • Pad Controls: Look for controllers with responsive drum pads for programming beats and triggering samples, ideal for electronic music producers.
  • Faders and Knobs: Check for the presence of faders and knobs for precise control over parameters such as volume, panning, and effects.
  • Transport Controls: Consider controllers with dedicated transport controls for seamless recording, playback, and navigation within your digital audio workstation (DAW).

Types Of Controls To Look For

  • Velocity-Sensitive Keys: Choose a controller with velocity-sensitive keys for expressive playing dynamics, mimicking the response of a traditional piano.
  • Assignable Controls: Look for controllers with assignable controls, allowing you to customize the functions of knobs and buttons to suit your specific workflow and software.
  • Pitch Bend and Modulation Wheels: Ensure the presence of pitch bend and modulation wheels for adding articulation and expression to your performances.
  • Aftertouch: Consider controllers with aftertouch capabilities, enabling you to apply additional effects or modulations by varying pressure on the keys.

Choose USB MIDI Controller: Unleash Your Musical Creativity


Credit: www.amazon.com


Frequently Asked Questions Of Choose Usb Midi Controller


How Do I Choose A Midi Controller?


To choose a MIDI controller, consider your music production needs, budget, and preferred features. Research different models, read reviews, and compare prices. Look for a controller with a sufficient number of keys, pads, and knobs to suit your workflow. Ensure compatibility with your computer and software.


What Usb Do Midi Controllers Use?


MIDI controllers use USB for connectivity. It allows them to transfer data and power through a single cable.


How To Setup Midi To Usb?


To set up MIDI to USB, connect the MIDI out port of your MIDI device to the MIDI in port of the USB adapter. Then, connect the USB end to your computer. Install any required drivers, and the MIDI device will now be recognized as a USB device.


How Do I Assign A Midi Controller?


To assign a MIDI controller, connect it to the computer, open the software, go to the settings, select the MIDI controller, and assign functions.


Conclusion


Get ready to elevate your music production with the perfect USB MIDI controller. The wide range of features and intuitive design offer a seamless user experience and unparalleled creative control. With our top-notch selection, you can take your music to new heights.


Find your ideal USB MIDI controller and unlock your full creative potential today.

Categories
Archive

How To Start A Band : Unleash Your Musical Journey

Starting a band involves finding passionate musicians, selecting a genre, practicing together, and performing live gigs to build a fanbase. Collaborate with like-minded individuals, choose roles within the band, rehearse regularly, and market your music effectively.


Establishing a solid foundation is crucial for success in the competitive music industry. By following these steps, you can kickstart your band and achieve your musical aspirations.


Finding Your Sound

Choosing Your Musical Genre

Before making music, choose a musical genre that resonates with your band members.

Consider your influences, skills, and audience preferences when selecting a genre.

  • Explore various genres through research and experimentation.
  • Ensure all band members are committed to the chosen genre.

Defining Your Band’s Unique Style

Define a unique style that sets your band apart from others in the same genre.

Experiment with different sounds and arrangements to discover your signature style.

  1. Collaborate with band members to develop a cohesive sound.
  2. Use your style to create memorable music that resonates with listeners.


Credit: m.facebook.com


Assembling Your Band

Finding the right group of musicians to form a band is crucial for a successful music journey.

Finding Like-minded Musicians

Search for local music events and network with other musicians in your community.

  • Attend open mics and jam sessions to meet potential bandmates.

Defining Roles And Responsibilities

Clarify each member’s responsibilities within the band to ensure smooth collaboration.

  1. Assign roles such as lead vocalist, guitarist, drummer, etc.

Crafting Your Sound

In the process of starting a band, one crucial aspect is to craft a unique sound that will set your band apart. This involves both writing original music and arranging cover songs to fit your band’s style. Your sound is what will define your band and resonate with your audience, so it’s important to put effort into developing it.

Writing Original Music

Writing original music is a key component of crafting your band’s sound. It allows you to express your creativity and establish a unique identity. When writing original music, consider the emotions and themes you want to convey through your songs. Experiment with different melodies and lyrical styles to find the sound that truly represents your band.

Arranging Cover Songs

Arranging cover songs is another valuable tool for crafting your sound. While cover songs are already familiar to the audience, arranging them in a way that showcases your band’s style and individuality is essential. Consider tweaking the instrumentation, rhythms, and vocals to put your own spin on the song, making it recognizable as your band’s rendition.


Credit: www.facebook.com


Promoting Your Band

Promoting your band is crucial for gaining visibility in the music industry and attracting an audience. With the right strategies, you can effectively showcase your talent and grow your fan base. In this section, we will explore two essential aspects of band promotion: Creating a Strong Online Presence and Networking and Booking Gigs.

Creating A Strong Online Presence

To succeed in today’s digital age, having a strong online presence is vital for promoting your band. Here are some key steps to consider:

  1. Build a Professional Website: Create a visually appealing and user-friendly website that reflects your band’s personality and showcases your music. Include a biography, discography, high-quality photos, and links to your social media accounts.
  2. Utilize Social Media: Engage with your fans on platforms like Facebook, Instagram, Twitter, and YouTube. Regularly update your social media profiles with behind-the-scenes content, live performances, and announcements about upcoming releases.
  3. Create Engaging Content: Produce high-quality content such as videos, blog posts, and podcasts related to your band. This will help to establish your authority in the industry and attract new followers.
  4. Optimize for Search Engines: Use relevant keywords in your website and social media content to improve your search engine ranking. This will increase your band’s visibility and attract organic traffic to your online platforms.

Networking And Booking Gigs

Networking with industry professionals and booking gigs are crucial steps towards gaining exposure for your band. Here’s how you can effectively navigate this process:

  • Attend Music Industry Events: Participate in music conferences, local gigs, and open mic nights to connect with other musicians, producers, and promoters. Building relationships with industry insiders can open doors to potential gig opportunities.
  • Collaborate with Other Artists: Collaborations can expose your music to a wider audience. Seek out opportunities to collaborate with other local bands or artists and cross-promote each other’s work.
  • Reach Out to Local Venues: Research local venues that align with your music style and target audience. Craft a compelling pitch and reach out to these venues, showcasing your talent and offering to perform at their establishment.
  • Utilize Online Booking Platforms: There are numerous online platforms that connect musicians with promoters and event organizers. Make sure you have a strong online presence and upload your work on these platforms to increase your chances of getting booked.

By following these strategies and consistently promoting your band, you can increase your visibility, attract new fans, and ultimately, create exciting opportunities for your musical journey.

https://www.youtube.com/watch?v=JUO7L1Vy96g


Building A Fanbase

One of the most important aspects of starting a band is building a strong and loyal fanbase. Without fans to support and engage with your music, it can be difficult to gain momentum and succeed in the music industry. In this article, we will discuss some effective strategies to help you build a fanbase for your band.

Engaging With Your Audience

Engaging with your audience is crucial for building a fanbase. By connecting with your fans on a personal level, you can create strong relationships that will keep them coming back for more. Here are some ways to effectively engage with your audience:

  1. Interact on social media platforms: Regularly post updates, behind-the-scenes content, and interact with your fans through comments and direct messages. Show genuine interest in their thoughts and feedback.
  2. Respond to messages and comments: Take the time to respond to messages and comments from your fans. Thank them for their support and answer any questions they may have. This shows that you value their engagement and strengthens the connection.
  3. Host live Q&A sessions: Conduct live Q&A sessions on social media platforms or through live streaming. This allows your fans to connect with you in real-time and ask questions directly.

Merchandising And Branding

Merchandising and branding are powerful tools for building a fanbase and creating a sense of belonging among your fans. When done right, it can help you establish a recognizable and attractive brand. Here are some strategies to consider:

  • Create unique and eye-catching merchandise: Design merchandise that showcases your band’s logo, artwork, or catchphrases. This can include t-shirts, hoodies, posters, stickers, and more. Make sure the quality is good to maintain customer satisfaction.
  • Sell merchandise at your shows and online: Set up a merch booth at your shows and promote your merchandise on your website or social media platforms. Offer exclusive limited-edition items to create a sense of urgency among fans.
  • Use your branding consistently: Incorporate your band’s logo, color scheme, and fonts across all your online platforms. This consistent branding helps create a strong and recognizable identity for your band.

Building a fanbase takes time and effort, but with the right strategies, you can create a dedicated following that will support your band’s journey. By engaging with your audience and effectively merchandising and branding your band, you can cultivate a fanbase that will help your band grow and succeed.


Credit: medium.com


Frequently Asked Questions For How To Start A Band


How Do You Start A Band For Beginners?


To start a band for beginners, find like-minded musicians, choose instruments, practice together, create a unique sound, and promote yourselves. Collaborate, be open to feedback, and have fun! Good communication and dedication are key. Regular rehearsals and learning from each other’s strengths will help grow your band.


How Much Does It Cost To Start A Band?


Starting a band can cost anywhere from $500 to $5000, depending on instruments, equipment, and practice space.


What Is A Good Age To Start A Band?


The ideal age to start a band is typically in the teenage years when musicians are passionate and dedicated.


How Do You Start A Band If You Don’t Know Anyone?


To start a band without knowing anyone, attend local music events to meet potential band members. Utilize social media and online platforms to connect with like-minded musicians. Join meetup groups and music forums to network and collaborate with others. Consider posting ads or flyers seeking band members in music stores and venues.


Conclusion


Starting a band requires dedication, collaboration, and a clear vision. By following these steps, you can establish a solid foundation for your musical journey. Remember to stay true to your passion and be open to growth and learning. With hard work and perseverance, you can turn your dream of starting a band into a reality.