What is the Purpose of a True Peak Meter in Audio Production?
In the world of audio production, accuracy is key. Engineers and producers strive to create high-quality audio that sounds great on various playback systems. To achieve this, they rely on a range of tools and techniques, one of which is the true peak meter.
Understanding True Peak Meter
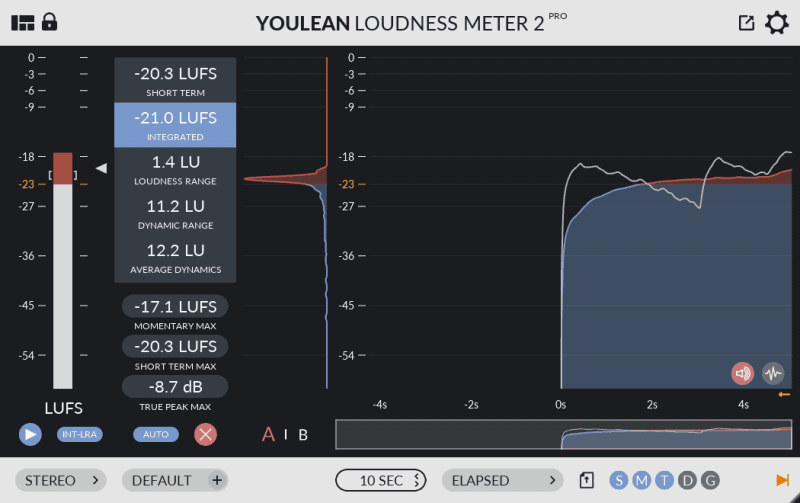
A true peak meter is an essential tool used to measure the peak levels of an audio signal. Unlike a regular peak meter, which measures the maximum sample value of a signal, a true peak meter takes into account the inter-sample peaks that can occur when an analog signal is converted to digital format. This ensures that the audio remains within the required limits, preventing the occurrence of digital clipping and distortion.
The Purpose of True Peak Meter
The main purpose of a true peak meter is to ensure that audio signals do not exceed the maximum level allowed by the respective medium, such as streaming platforms, broadcast standards, or music distribution platforms. This is crucial because exceeding these limits can lead to audio distortion and loss of quality, especially when the signal is decoded and played back on different systems.
True peak meters provide accurate readings of the actual peak levels that would occur during the analog-to-digital conversion process. By capturing these inter-sample peaks, audio engineers can make adjustments to avoid any potential issues before the audio is finalized for distribution or playback.
Credit: www.izotope.com
Benefits of Using True Peak Meter
The use of true peak meters offers several benefits:
Preventing distortion: By monitoring and controlling the peak levels, audio professionals can avoid distortion and ensure that the audio maintains its integrity across various playback systems.
Compliance with standards: Different platforms and mediums have specific loudness standards that audio must adhere to. True peak meters help engineers ensure compliance with these standards, preventing potential rejection or poor listening experiences.
Preserving dynamic range: True peak meters allow engineers to find the optimal balance between the desired loudness and the preservation of the audio’s dynamic range. This ensures that the music or audio maintains its intended impact on the listener.
Enhanced audio quality: By avoiding digital clipping and distortion, true peak meters contribute to overall improved audio quality, creating a more enjoyable experience for the listeners.
Using True Peak Meters Effectively
To make the most of true peak meters, it is important to:
Monitor levels consistently: Regularly check the true peak meter throughout the audio production process to ensure that the levels are within acceptable limits.
Adjust levels when necessary: Use the information provided by the true peak meter to make necessary adjustments to the audio levels, applying techniques such as compression or limiting to control peaks and prevent distortion.
Test across different systems: Playback the audio on various devices and systems to ensure that it maintains its quality and does not exceed the allowed peaks.
Stay up to date with standards: Standards for audio levels and loudness can change over time. Stay informed about the specific requirements for different platforms and mediums to ensure compliance and optimal audio quality.
Credit: mastering.com
Frequently Asked Questions Of What Is The Purpose Of A True Peak Meter In Audio Production?
What Is A True Peak Meter In Audio Production?
A true peak meter measures the peak levels of an audio signal without any digital clipping.
Why Is It Important To Use A True Peak Meter?
Using a true peak meter is essential for preventing distortion and ensuring audio doesn’t clip.
How Does A True Peak Meter Differ From A Standard Peak Meter?
Unlike a standard peak meter, a true peak meter accounts for inter-sample peaks accurately.
Can A True Peak Meter Help In Mastering Audio Tracks?
Yes, a true peak meter helps in mastering by ensuring the audio doesn’t exceed the peak limit.
Conclusion
A true peak meter is a valuable tool in audio production, helping engineers and producers maintain accurate levels and prevent audio distortion. By monitoring and controlling the actual peak levels that occur during the analog-to-digital conversion, true peak meters ensure compliance with standards and preserve the overall audio quality. Proper use of true peak meters is essential for creating high-quality audio that sounds great on any playback system.
How is a High Pass Filter Used in Audio Production?
A high pass filter is a critical tool in audio production that allows for precise control over the low-frequency content of a sound signal. It is commonly used to remove unwanted low-frequency noise or to sculpt the tonal balance of a recording. In this article, we will explore the functions and applications of high pass filters in audio production.
What is a High Pass Filter?
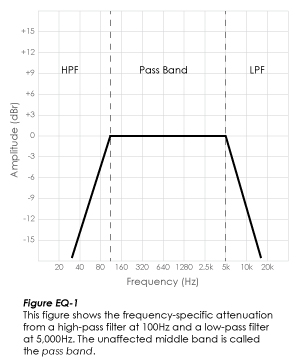
A high pass filter is an audio processing tool that attenuates or cuts off frequencies below a certain cut-off point while allowing higher frequencies to pass through unaffected. This cut-off point is determined by the filter’s settings and is measured in Hertz (Hz).
The Function of a High Pass Filter
High pass filters are used to eliminate low-frequency rumble, stage noise, and other unwanted sounds that may compromise the clarity and quality of a recording. By removing these low-frequency components, a high pass filter helps to clean up the audio signal and makes it more focused and defined.
Credit: theproaudiofiles.com
Applications of High Pass Filters
High pass filters have a variety of applications in audio production. Some common uses include:
Removing rumble and hum: High pass filters can eliminate low-frequency background noise such as air conditioning hum or ground loop interference.
Improving clarity: By removing unnecessary low-end frequencies, high pass filters can make vocals and instruments sound clearer and more defined.
Creating space: High pass filters can help create separation between instruments in a mix by reducing low-frequency masking.
Credit: www.youtube.com
How to Use a High Pass Filter
Using a high pass filter in audio production is relatively straightforward. Most digital audio workstations (DAWs) and audio processors have built-in high pass filters that can be applied to individual tracks or the overall mix. To use a high pass filter:
Select the audio track you want to apply the high pass filter to.
Locate the high pass filter control in your software or hardware device.
Adjust the cut-off frequency to the desired point where you want to start filtering out low frequencies.
Listen to the track and make any additional adjustments as needed to achieve the desired sound.
Frequently Asked Questions Of How Is A High Pass Filter Used In Audio Production?
How Does A High Pass Filter Work In Audio Production?
A High Pass Filter allows higher frequencies to pass through while attenuating lower frequencies, resulting in a cleaner and clearer audio signal.
Why Is A High Pass Filter Important In Audio Production?
A High Pass Filter is crucial in Audio Production as it helps eliminate unwanted low-frequency noise, such as rumble and background hum, improving the overall sound quality.
What Are The Benefits Of Using A High Pass Filter In Audio Production?
Using a High Pass Filter in Audio Production helps remove low-frequency rumble, resulting in a cleaner mix, increased clarity, and better definition of high-frequency elements like vocals and instruments.
When Should I Use A High Pass Filter In Audio Production?
You should use a High Pass Filter in Audio Production when you want to remove low-frequency noise, enhance the intelligibility of vocals, emphasize the clarity of instruments, or reduce muddiness in the mix.
Conclusion
In conclusion, high pass filters play a crucial role in audio production by helping to clean up and enhance the quality of sound recordings. By selectively removing unwanted low-frequency content, high pass filters allow audio engineers and producers to achieve a more polished and professional sound. Understanding how to effectively use high pass filters can greatly improve the overall clarity and impact of your music productions.
When it comes to music production, creating a spacious and immersive mix is essential. One powerful tool that can help achieve this is stereo imaging. In this article, we’ll explore how you can harness the power of stereo imaging in FL Studio to enhance the width and depth of your mixes.
Understanding Stereo Imaging
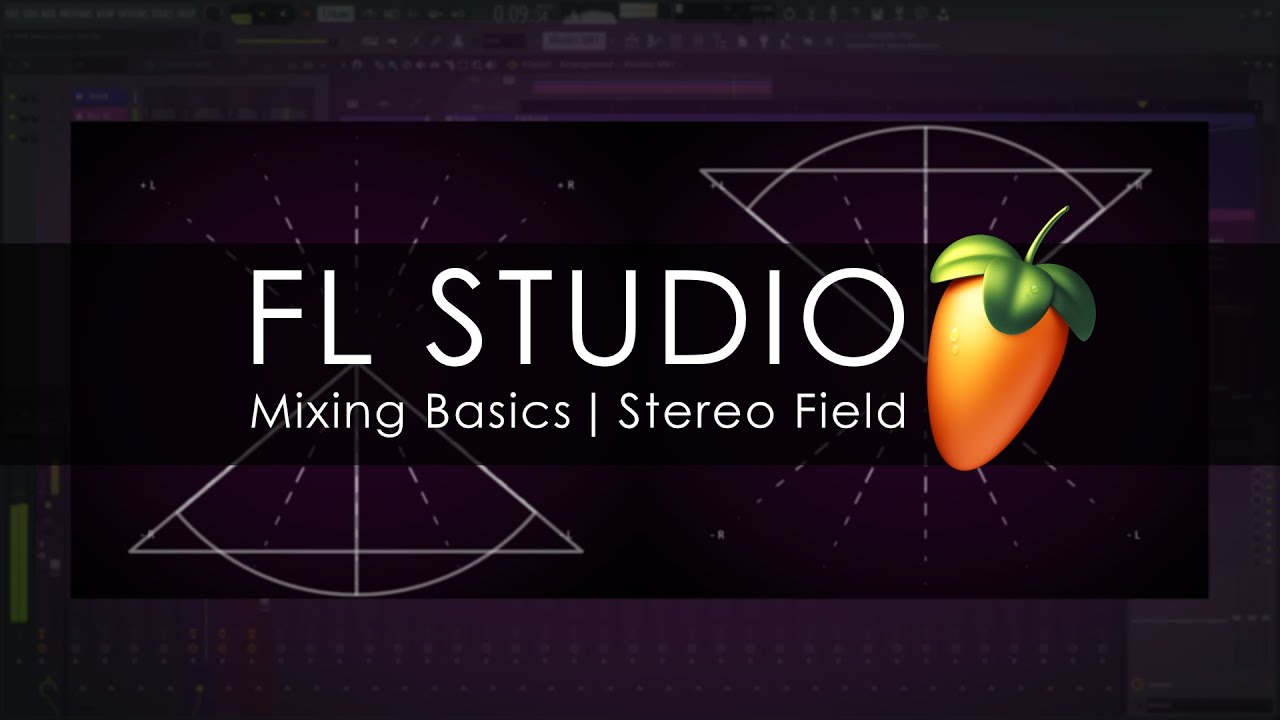
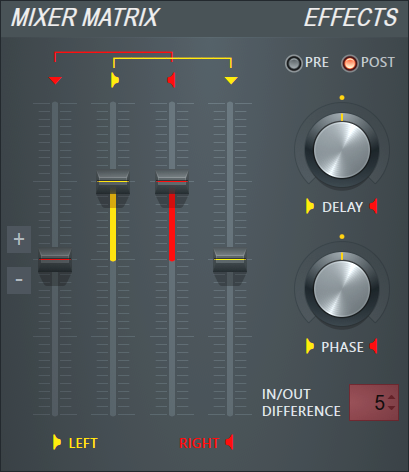
Stereo imaging refers to the spatial placement of audio within the stereo field. It allows you to position different elements of your mix across the left and right channels, creating a sense of width and depth. In FL Studio, you can manipulate the stereo image of your tracks using a variety of techniques and tools.
Using Panning
One of the fundamental techniques for creating a wide stereo image is panning. FL Studio provides a simple and intuitive way to adjust the panning of individual audio channels. By placing different sounds at varying positions across the stereo spectrum, you can achieve a balanced and spacious mix.
Utilizing Stereo Widening Plugins
FL Studio offers a range of stereo widening plugins that can instantly enhance the width of your mix. Plugins like Fruity Stereo Enhancer and Fruity Stereo Shaper allow you to manipulate the stereo field, expand the stereo image, and add depth to your tracks. These tools are particularly useful for giving synths, pads, and other elements a wider, more expansive sound.
Layering and Duplicating Tracks
An effective way to create a rich stereo image is by layering and duplicating tracks. By stacking multiple versions of the same sound and subtly altering their panning and processing, you can achieve a sense of fullness and width. FL Studio’s versatile audio editing capabilities make this process seamless and intuitive.
Credit: www.image-line.com
Credit: www.image-line.com
Applying Effects and Automation
Effects such as chorus, flanger, and reverb can further enhance the stereo image of your mix. FL Studio’s extensive collection of effects plugins empowers you to add spatial depth, movement, and character to your tracks. Additionally, automation can be used to dynamically modulate parameters and create evolving stereo landscapes within your mix.
Checking Mono Compatibility
While stereo imaging is essential for creating an immersive listening experience, it’s important to ensure that your mix translates well to mono playback systems. FL Studio allows you to easily switch between stereo and mono monitoring to assess the mono compatibility of your mix. This ensures that your music will sound great across diverse playback environments.
Best Practices for Stereo Imaging in FL Studio
Here are some best practices to keep in mind when utilizing stereo imaging in FL Studio:
Use stereo imaging to create a sense of space and dimension in your mix.
Experiment with different panning positions to achieve a balanced stereo image.
Be mindful of phase cancellation when layering and processing stereo tracks.
Regularly check your mix in mono to ensure mono compatibility.
Consider the playback environment when optimizing your stereo image.
By incorporating these best practices into your workflow, you can harness the power of stereo imaging to elevate the impact and appeal of your music productions in FL Studio.
Frequently Asked Questions For Using Stereo Imaging In Fl Studio: Enhance Your Mix
Can Stereo Imaging Enhance The Sound In Fl Studio?
Yes, stereo imaging can significantly enhance the sound in Fl Studio by creating a wider and more spacious audio experience.
How Does Stereo Imaging Work In Fl Studio?
Stereo imaging in Fl Studio works by manipulating the stereo field of a sound, allowing you to position elements in the stereo image and adjust their width and depth.
What Are The Benefits Of Using Stereo Imaging In Fl Studio?
Using stereo imaging in Fl Studio can give your mixes more depth, separation, and clarity, making them sound more professional and immersive.
How Can I Use Stereo Imaging To Create A Wider Soundstage In Fl Studio?
To create a wider soundstage in Fl Studio, you can use techniques like panning, stereo widening, and spatial effects to position elements in the stereo field.
Conclusion
Stereo imaging is a potent tool for enhancing the spatial characteristics of your music. In FL Studio, you have access to a wealth of features and plugins that enable you to sculpt a captivating stereo image for your mixes. By strategically applying panning, utilizing stereo widening plugins, experimenting with layering and effects, and adhering to best practices, you can create mixes that captivate and immerse your listeners.
Mastering the art of stereo imaging in FL Studio empowers you to unleash the full potential of your creativity and bring your music to life in thrilling dimensions.
When it comes to electronic music production, one of the most important elements is the creation of captivating lead sounds. A lead sound serves as the main melodic component of a track, drawing the listener in and setting the mood for the entire composition. In this article, we will explore the process of creating lead sounds in FL Studio, one of the most popular digital audio workstations (DAWs) used by music producers worldwide.
The Basics of Sound Design
Before we dive into the specifics of creating lead sounds, it is crucial to understand the basics of sound design. Sound design is the process of manipulating audio to create unique and interesting sounds. In FL Studio, sound design can be achieved through various techniques, such as synthesis, sampling, and processing.
Synthesis: The Foundation of Lead Sound Creation
Synthesis is the process of creating sounds from scratch using various oscillators, filters, and modulation techniques. FL Studio provides a wide range of synthesizers, including the popular “Sytrus” and “Harmor.” These synthesizers offer a plethora of options to shape and mold your lead sound.
1. Oscillator Selection
The first step in creating a lead sound is to select an oscillator. Oscillators generate the fundamental waveform of the sound. FL Studio offers various waveform options such as sine, sawtooth, square, and more. Experiment with different waveforms to find one that suits the vibe you are aiming for.
2. Modulation And Filters
Once you have chosen your oscillator, it’s time to add modulation and filtering to shape your sound further. Modulation introduces movement and variations to the sound, making it more dynamic. FL Studio provides tools like envelopes, LFOs, and modulation matrix, allowing you to modulate parameters such as pitch, amplitude, and filter cutoff.
3. Effects And Processing
To give your lead sound a polished and professional touch, it’s essential to add effects and processing. FL Studio offers a vast array of effects plugins such as reverb, delay, distortion, and compression. Experiment with different effects to find the perfect combination for your lead sound.
Credit: www.levelsmusicproduction.com
Sampling: Exploring Endless Possibilities
In addition to synthesis, FL Studio allows you to create lead sounds through sampling. Sampling involves taking snippets of audio from various sources and manipulating them to create unique and interesting sounds. Here are a few steps to follow when using samples to create leads:
Find or record a suitable audio sample that contains the desired tonality or texture you are looking for in your lead sound.
Import the sample into FL Studio and assign it to a sampler channel.
Experiment with pitching, time-stretching, and layering to transform the sample into a lead sound that fits your arrangement.
Apply effects and processing to enhance the sampled lead sound and make it stand out in the mix.
Tips for Creating Unique and Attention-Grabbing Lead Sounds
Now that you understand the fundamentals of lead sound creation in FL Studio, here are some tips to help you create unique and attention-grabbing sounds:
Experiment with different combinations of oscillators, filters, and effects to find your signature sound.
Layer multiple lead sounds to create depth and richness in your compositions.
Don’t be afraid to push the boundaries and try unconventional sound design techniques.
Use automation to add movement to your lead sounds and make them more expressive.
Take inspiration from existing tracks and lead sounds but strive to put your own creative spin on them.
Credit: mixedinkey.com
Frequently Asked Questions For Creating Lead Sounds In Fl Studio : Ultimate Guide For Music Producers
How To Create Lead Sounds In Fl Studio?
To create lead sounds in FL Studio, start by selecting a synthesizer, tweaking oscillator settings, adding filters, and experimenting with effects like delay and reverb.
What Are Some Popular Lead Sound Presets In Fl Studio?
Popular lead sound presets in FL Studio include saw leads, square leads, and pluck leads, which can be further customized to create unique sounds.
What Is The Role Of Modulation In Creating Lead Sounds?
Modulation adds movement and expression to lead sounds by controlling parameters such as pitch, volume, and filter cutoff, enhancing the overall sonic character.
How Can Layering Enhance Lead Sound Creation In Fl Studio?
Layering allows combining multiple sounds to create a rich and unique lead sound, providing depth and complexity to the final result.
Conclusion
In conclusion, creating lead sounds in FL Studio is an exciting and creative process that allows you to craft unique and attention-grabbing elements for your music productions. Whether you choose to delve into synthesis or explore the endless possibilities of sampling, FL Studio provides the tools and features necessary to bring your creative ideas to life. So go ahead, experiment, and let your imagination soar as you craft captivating lead sounds for your next electronic music masterpiece.
Understanding the Different Types of Synthesizers in Fl Studio
In the world of music production and composition, synthesizers play a crucial role in creating unique sounds and melodies. FL Studio, a popular digital audio workstation, offers a wide range of synthesizers that cater to various musical genres and styles.
With so many options to choose from, it can be overwhelming for beginners to understand the different types of synthesizers available in FL Studio. In this article, we will explore the various synthesizers and their functionalities to help you make informed decisions when crafting your musical compositions.
1. Subtractive Synthesizers
Subtractive synthesis is one of the most commonly used techniques in electronic music production. It involves starting with a complex waveform and then using filters to remove specific frequencies, resulting in a desired sound. FL Studio offers several subtractive synthesizers, such as:
Sytrus
Harmless
3xOSC
2. Additive Synthesizers
Additive synthesis is the opposite of subtractive synthesis. Instead of removing frequencies, additive synthesizers generate sound by combining multiple sine waves together. FL Studio features additive synthesizers like:
Harmor
Sytrus (capable of both additive and subtractive synthesis)
3. FM Synthesizers
Frequency Modulation (FM) synthesis involves using one sound source, called a modulator, to modulate the frequency of another sound source, known as a carrier. This technique produces complex and evolving tones. FL Studio offers FM synthesizers such as:
Sytrus
Flex
4. Granular Synthesizers
Granular synthesis is a method that manipulates small portions of an audio sample to create new sounds. FL Studio’s granular synthesizer, Granulizer, lets you adjust the grain size, envelope, and other parameters to transform audio into unique textures and atmospheres.
5. Wavetable Synthesizers
Wavetable synthesis utilizes pre-recorded waveforms, or wavetables, to generate sounds. FL Studio offers multiple powerful wavetable synthesizers, including:
Serum
Massive
Surge
Credit: www.image-line.com
6. Sample-Based Synthesizers
Sample-based synthesizers use recorded audio samples as their sound sources. FL Studio’s Sampler and DirectWave are popular sample-based synthesizers that allow you to manipulate and shape the samples to fit your musical needs.
Credit: www.groove3.com
7. Physical Modeling Synthesizers
Physical modeling synthesis emulates the sound produced by physical instruments, such as pianos, guitars, and drums. FL Studio’s Sakura offers realistic physical modeling capabilities, allowing you to create authentic instrument sounds.
Frequently Asked Questions Of Understanding The Different Types Of Synthesizers In Fl Studio : Master Your Music
What Are The Different Types Of Synthesizers Available In Fl Studio?
There are various types such as subtractive, additive, FM, and wavetable synthesizers widely used in FL Studio.
How Do Subtractive Synthesizers Work In Fl Studio?
Subtractive synthesizers work by filtering harmonically rich waveforms to produce diverse sound effects in FL Studio.
Why Are Additive Synthesizers Popular In Fl Studio Music Production?
Additive synthesizers are favored in FL Studio for their ability to control individual harmonics and create unique sounds.
Can Fm Synthesizers Create Complex And Dynamic Sounds In Fl Studio?
Yes, FM synthesizers excel at producing complex and dynamic sounds by modulating one waveform with another in FL Studio.
Conclusion
FL Studio provides a wide array of synthesizers that cover various synthesis techniques, allowing you to explore and enhance your creativity. Whether you prefer subtractive, additive, FM, granular, wavetable, sample-based, or physical modeling synthesis, FL Studio has the perfect synthesizer for your musical endeavors.
Take some time to experiment with different synthesizers within FL Studio and discover the limitless possibilities they offer in shaping your own unique sound signature. Happy synthesizing!
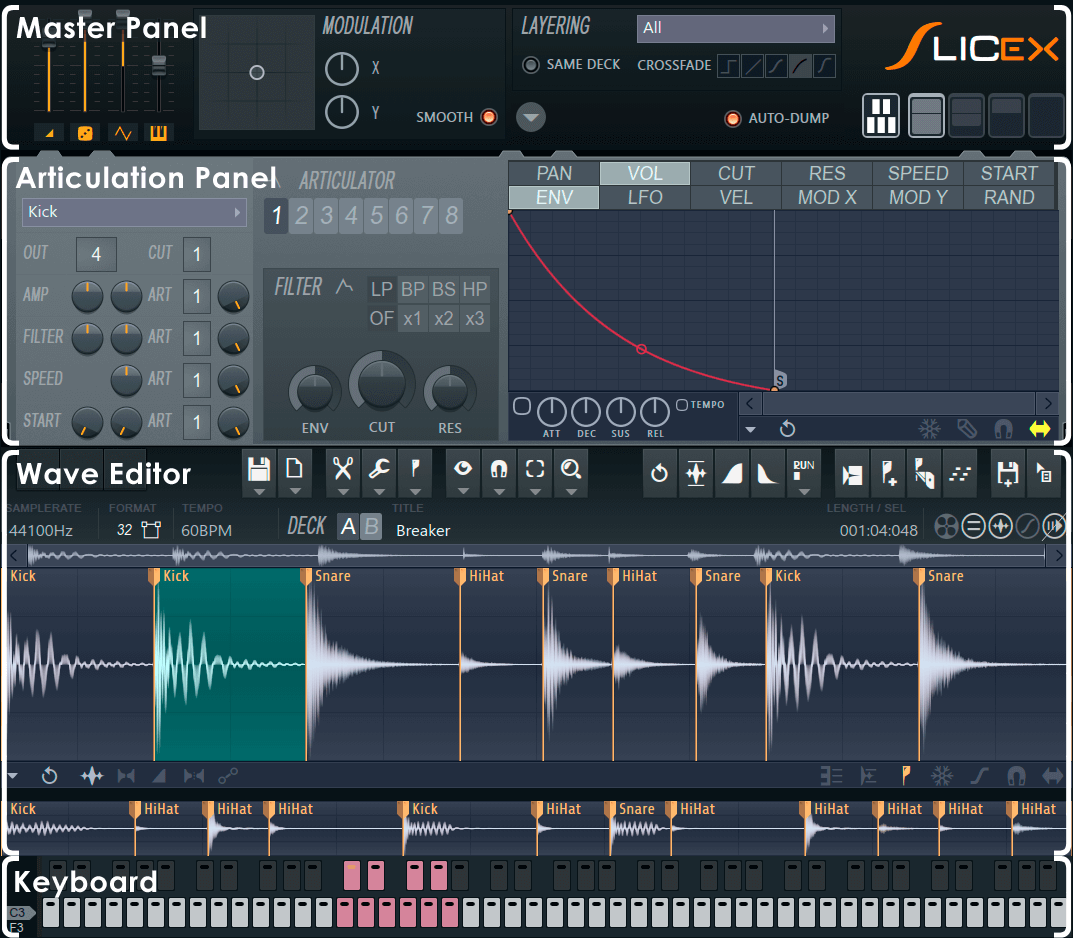
If you are a music producer or a beatmaker using FL Studio, then the Slicex sampler is a powerful tool that can greatly enhance your workflow and creativity. Slicex is a beat slicing and resequencing sampler that allows you to chop up and rearrange audio samples with ease. In this article, we will explore the features and functionality of Slicex and provide you with some tips and tricks to get the most out of this versatile tool.
Getting Started
Before we dive into the details, let’s first talk about how to access Slicex in FL Studio. To open Slicex, simply navigate to the Channel Rack and select an empty slot. Then, click on the “+” icon and choose Slicex from the list of available plugins. Once Slicex is added, you can start using its various features to manipulate your samples.
Chopping and Slicing
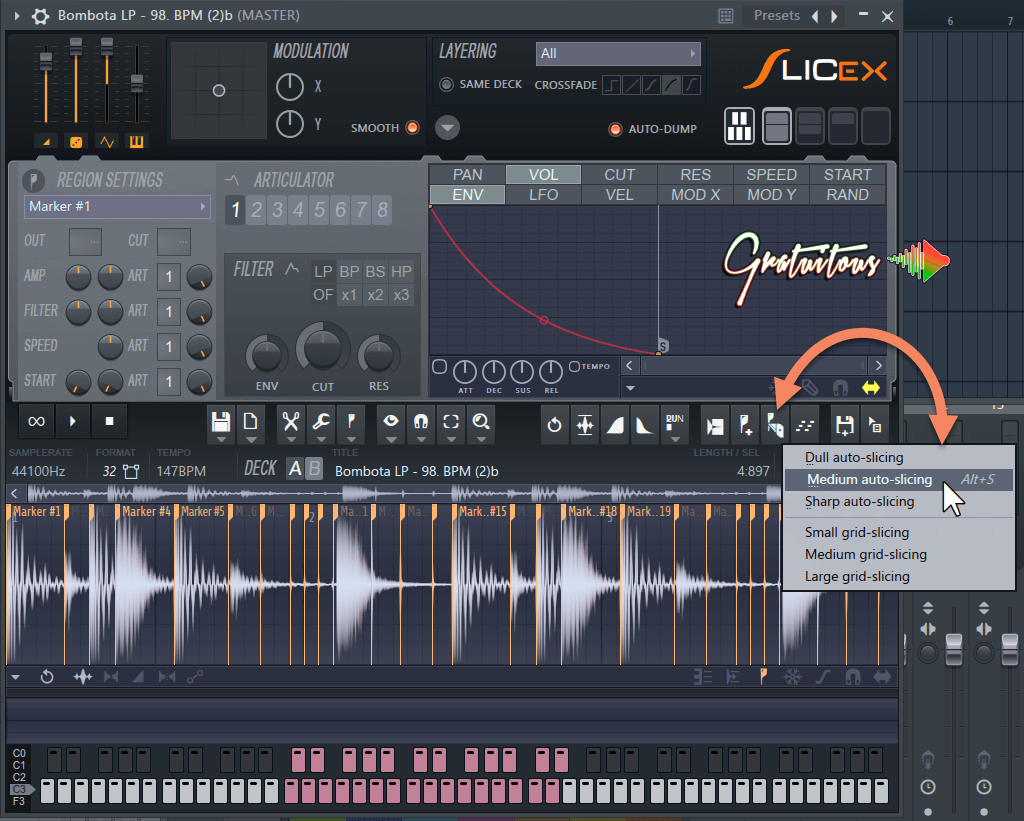
The main function of Slicex is to chop and slice audio samples, allowing you to extract specific sections or individual sounds. To do this, simply load an audio file into Slicex by clicking on the sample slot and selecting your desired file. Once loaded, Slicex will automatically detect the transients in your sample and create slices accordingly. You can adjust the sensitivity of the transient detection using the Sensitivity knob.
Once your sample is sliced, you can start rearranging the slices and creating new patterns. Slicex provides a visual representation of the slices in the waveform display, making it easy to identify and rearrange specific sections. You can move slices around by clicking and dragging them, or you can use the built-in step sequencer to create complex rhythmic patterns.
Credit: itsgratuitous.com
Time Stretching and Pitch-shifting
In addition to slicing, Slicex also offers powerful time stretching and pitch-shifting capabilities. With the Time tab, you can adjust the length of your slices without affecting their pitch. This is great for creating interesting variations and tempo changes in your beats. The Pitch tab, on the other hand, allows you to transpose your slices to different notes, giving you endless possibilities for melody and harmony.
Effects and Automation
One of the advantages of using Slicex is the ability to apply effects and automation to individual slices. By right-clicking on a slice, you can access a range of processing options such as filter, EQ, distortion, and more. This allows you to add unique textures and dynamics to specific elements of your sample. You can also automate the parameters of these effects to create evolving and dynamic sounds.
Exporting and Integration
Once you have created your sliced and manipulated sample, you can export it as a new audio file to use in your projects. Simply click on the Export button in the top right corner of the Slicex interface and choose your desired settings. You can export individual slices or the entire sample as a single file. Alternatively, you can drag and drop the slices directly into the Playlist or arrange them in the Channel Rack for further experimentation.
Tips and Tricks
Here are some additional tips and tricks to help you master the Slicex sampler:
Experiment with different slicing methods to find the best results for your samples.
Use the Crossfade feature to smooth out transitions between slices and minimize artifacts.
Try reversing slices or adding effects to create unique and unexpected variations.
Use the Slice Marker tab to manually adjust and fine-tune the position of individual slices.
Explore the Slicex library for ready-to-use sample packs and presets.
Combine Slicex with other FL Studio plugins and effects to unleash your creativity.
Credit: www.image-line.com
Frequently Asked Questions For Using The Slicex Sampler In Fl Studio: Master Sampling Techniques
What Is The Slicex Sampler Used For?
The Slicex Sampler in Fl Studio is used for slicing and rearranging audio samples for music production.
How To Import Audio Samples Into Slicex?
To import audio samples into Slicex, simply drag and drop the audio file onto the Slicex interface.
Can Slicex Be Used For Time-stretching Audio?
Yes, Slicex can be used to time-stretch audio samples without affecting the pitch, providing flexibility in music production.
What Are The Primary Features Of Slicex?
The primary features of Slicex include automatic slicing, loop points, cue points, and the ability to export sliced audio to piano rolls.
Conclusion
The Slicex sampler is a powerful tool that can revolutionize your beatmaking process. Its intuitive interface, advanced slicing capabilities, and flexible manipulation options make it a must-have for any FL Studio user. Whether you’re a beginner or an experienced producer, mastering Slicex will open up a world of possibilities for creating unique and professional-sounding beats. So, go ahead and start exploring the endless possibilities of the Slicex sampler in FL Studio!
Musicians need a vision and mission to define their goals and guide their careers. A clear direction helps in creating a cohesive brand and attracting a dedicated audience.
Crafting a compelling vision and mission is essential for musicians, as it solidifies their artistic identity and serves as a beacon for their professional journey. In the competitive world of music, articulating a unique purpose can distinguish an artist from the crowd, fostering a strong connection with fans and industry stakeholders.
An engaging introduction to such concepts invites musicians to consider their long-term objectives and values, shaping the trajectory of their endeavors. A well-defined vision acts as a roadmap for decision-making, ensuring that every step taken aligns with the artist’s ultimate intentions. With a mission that reflects their passion, musicians can inspire, resonate with listeners, and achieve enduring success in their craft.
The Significance Of Vision For Musicians
In the world of music, a clear vision is a beacon guiding artists through the industry’s complexity. It serves as an artist’s roadmap, spotlighting unique paths and destinations. Vision not only motivates musicians but also aligns their actions with their core values and artistic aspirations.
Defining Artistic Identity Through Vision
A musician’s vision is the cornerstone of their artistic identity. This vision sets the stage for creating a distinctive voice in a crowded market. Crafting a personal vision involves deep self-reflection on one’s inspirations, goals, and the messages they wish to convey. It’s about answering why they make music and who they make it for. A well-defined vision can distinguish an artist from their peers, forging a strong connection with listeners.
Long-term Career Trajectory Shaped By Vision
Vision charts a long-term route for a musician’s career. It’s not just about the next gig or single but where they see themselves in the years to come. A forward-looking vision helps set achievable milestones, each stepping stone being a part of a larger journey. Musicians with a clear vision can make informed decisions that contribute to their growth and adapt to industry changes without losing sight of their original intent. This kind of strategic planning can lead to a sustainable and fulfilling career.
Mission: Translating Vision Into Action
Every musician dreams big. Dreams turn into goals with a clear mission. A mission puts your vision into steps to follow. It’s your music career’s action plan. Without it, you may get lost. Let’s break down how a mission guides musicians to stardom.
Mission Statements As Roadmaps
A mission statement is a roadmap for your music journey. It points to your destination. Think of it as your music’s GPS. It answers “What am I doing?” and “Why am I doing it?” A strong mission keeps you focused, especially when the industry gets tough.
Defines your path: It tells what steps to take next.
Aligns your team: Everyone works towards a common goal.
Sets clear expectations: Fans and collaborators know your core values.
Real-world Examples: Successful Artists With Clear Missions
Looking at artists who’ve made it big shows the power of a mission. They’ve turned their vision into chart-topping success.
Artist
Mission
Beyoncé
To push the limits of music and inspire empowerment.
Ed Sheeran
To share stories and emotions through songwriting.
The Beatles
To innovate and leave a timeless mark on music.
These artists connect with millions. Their missions guide their creative choices. Fans love them for their clarity and dedication. These missions are the engines behind their hits.
Aligning Personal Values With Musical Endeavors
Aligning Personal Values with Musical Endeavors is essential for any artist striving for authenticity and meaningful impact. A musician’s vision and mission guide their path. They serve as the foundation for their work and public image. Infusing personal values into music creates a unique identity and helps build genuine connections with the audience. Let’s delve into how integrity and values play a critical role in a musician’s journey.
Integrity In Art: Staying True To Oneself
Musicians face a complex landscape filled with trends and expectations. Yet, integrity stands as the pillar of authentic artistry. Holding onto one’s roots and beliefs is paramount. Artists must honor their essence in every note and lyric. Integrity in music ensures an unwavering identity amidst a changing industry.
Fostering originality
Resisting pressure to conform
Creating with honesty and passion
The Role Of Values In Audience Connection
Values resonate. They transcend melodic lines and rhythms to touch hearts. Aligning values with music creates a bridge to the listener. It solidifies a powerful audience connection. Music with a message reflects the artist’s soul. It provokes thought and stirs emotion, leading to lasting fan loyalty.
Sharing personal stories and lessons
Empowering others through musical messages
Uniting people under common principles
Crafting A Unique Brand In The Music Industry
Brand crafting stands vital for musicians in today’s crowded landscape. A strong brand helps you stand out. Your vision and mission guide your unique narrative. They shape how fans connect with your music. Now, let’s dive into how a clear vision and mission influence your brand identity.
Differentiation Through Vision And Mission
A well-defined vision and mission set the foundation for your brand. Your vision represents your musical goals. Your mission outlines the path to achieve them.
Ignite Passion: A captivating vision stirs excitement among fans.
Clear Purpose: A clear mission helps fans understand your journey.
Lasting Impact: Both cement your legacy in the music scene.
These elements make your brand unmistakable. They differentiate your music from the masses.
Consistent Messaging Across Platforms
Consistency in your message ensures a coherent brand experience. Every platform should echo your vision and mission. Here’s how consistency amplifies your brand:
Platform
Role in Branding
Website
Your musical hub, reflecting your brand ethos.
Social Media
Daily interactions underlining your brand’s message.
Merchandise
Tangible items that fans can own, evoking your vision.
This unified approach builds a loyal fanbase. Your brand speaks directly to the hearts of your audience.
Goal-setting And Achieving Artistic Milestones
Every musician’s journey is a climb up a unique mountain. Goals act as markers on this climb. To reach the peak, artists must envision their path and set clear, attainable objectives. This roadmap guides music creators through uncertain creative landscapes. Let’s explore how setting intentional goals can lead to significant artistic achievements.
Setting S.m.a.r.t Goals Aligned With Vision
True artistic vision requires a plan. S.M.A.R.T goals turn dreams into realities. This stands for:
Specific: Clear and detailed targets.
Measurable: Track progress with tangible evidence.
Achievable: Realistic and attainable.
Relevant: Goals that matter and align with your mission.
Time-bound: Set deadlines to stay on track.
By setting S.M.A.R.T goals, musicians can bridge the gap between their present state and their vision. It paves a clear path for growth and success.
Measuring Success In A Subjective Field
Music is an art, and success can seem blurry. Yet, progress demands measurement. Artists should identify success markers that reflect personal values and artistic goals. This could include:
Subjective Measure
Objective Marker
Emotional Impact
Fan feedback, testimonials
Creative Satisfaction
Completed projects, personal milestones
Professional Growth
Collaborations, skill development
Tracking these indicators helps artists feel a sense of accomplishment. It fuels their journey forward and keeps their passion alive.
Building A Loyal Fan Base With Authenticity
Building a Loyal Fan Base with Authenticity stands as a crucial milestone for musicians. An honest vision and mission resonate with audiences, fostering a deep, enduring connection. This bond turns casual listeners into ardent supporters, crucial for a sustainable career in music.
Transparency And Relatability As Key Factors
In an era where fans crave genuine connections, an artist’s transparency can be a magnet. Sharing personal stories and struggles makes musicians relatable. This connection encourages fans to invest emotionally, transforming them into a loyal base.
Fans value artists who aren’t afraid to be vulnerable. When musicians reflect their true journey in their music and interactions, they build trust. This authenticity is a cornerstone of a solid fan-artist relationship.
Cultivating Fan Relationships Over Time
Consistency is key in nurturing fan relationships. Regular updates, interactive sessions, and personal acknowledgments strengthen ties. By taking these steps, musicians cultivate a community around their music.
Sharing progress and milestones invites fans to be part of the journey.
Responding to comments and messages personalizes the fan experience.
Creating fan-exclusive content shows appreciation for their support.
Over time, these efforts create a robust, active fan base. Fans become brand ambassadors, spreading the word and multiplying the musician’s reach. This organic growth is essential for long-term success.
The Impact Of Vision And Mission On Creativity
The Impact of Vision and Mission on Creativity is profound for musicians. These guiding principles ignite passion and innovative thinking. Musicians navigate the tumultuous waters of the music industry with purpose when they grasp their vision and mission. This clarity fuels the creative process, aligning each note and lyric with a deeper sense of meaning. Let’s explore how having a solid vision and mission can transform creativity.
Maintaining Artistic Direction During Creative Blocks
Creative blocks are like unwelcome clouds on a musician’s creative horizon. Yet, a clear vision and mission act as a beacon, guiding artists through these challenging times. These foundational statements remind musicians of their core intentions, providing direction when the path ahead seems obscured. The result is a sustained artistic journey, even when inspiration seems out of reach.
Inspiration Flow From Clear Artistic Intentions
A musician’s vision and mission are not just words; they are the wellspring of inspiration. When artists define and commit to their artistic intentions, they unlock a steady stream of creative ideas. This clarity allows musicians to hone their craft, pushing boundaries, and exploring new concepts aligned with their artistic aims. Creativity blossoms when guided by an unwavering sense of purpose.
Credit: blog.hubspot.com
Leveraging Vision And Mission In Marketing And Pr
Musicians must resonate with audiences beyond their music. Their vision and mission can play pivotal roles in crafting marketing initiatives and public relations strategies, enhancing their brand’s cohesion and appeal. We’ll explore how artists can leverage these foundational statements to captivate and engage their fan base.
Storytelling Through Vision-driven Campaigns
In the realm of marketing, a musician’s vision can fuel powerful storytelling. With vision-driven campaigns, artists create a narrative arc that fans can follow and connect with. By embedding their ultimate artistic goals and dreams into their communications, musicians can forge a deeper bond with their audience.
Consistency Across Channels: Vision articulates a clear direction, ensuring consistency in messaging.
Emotional Connection: Fans are more likely to invest emotionally when they understand the artist’s journey.
Brand Loyalty: A compelling vision can transform casual listeners into loyal fans.
Effective Public Relations: Mission-centric Approaches
A mission-centric approach in public relations shapes the way an artist interacts with the public and the media. A clear mission statement informs all PR activities, ensuring that the artist’s core values are always front and center. It fosters authenticity and can often lead to more profound connections and a consistent brand identity.
Media Narratives: A mission helps in creating impactful narratives for media coverage.
Community Engagement: It encourages involvement in causes that reflect the artist’s values.
Strategic Alliances: Mission-oriented partnerships can broaden an artist’s reach and influence.
Surviving Industry Shifts With An Anchored Purpose
The music industry is a sea of constant change. Waves of new trends and technologies can sweep away those unprepared. Musicians who last stand firm with a purpose. This guide dives into why a solid vision and mission set the stage for enduring success.
Adaptability Rooted In A Strong Vision
Having a clear vision gives direction in chaos. Think of it as a lighthouse guiding ships through murky waters. A musician’s vision is their musical identity. It’s a promise of what they aim to deliver, regardless of shifting trends. This vision allows artists to adapt without losing their essence. Changes become less of a threat and more of an opportunity to grow their art.
Staying true to their sound while exploring new genres
Innovating within their style to keep it fresh
Embracing new tech to enhance their art, not change it
The Role Of Mission In Reinvention And Longevity
A mission breathes life into a musician’s journey. It’s the ‘why’ behind their music. A strong mission helps artists to stay focused when reinventing themselves. This keeps their core message intact while their music evolves. Musicians with a mission have a story that resonates across ages and changes.
Clarity in intention helps to forge deeper connections with audiences.
Consistent storytelling turns listeners into loyal fans.
Authenticity in their mission wins trust and respect.
Case Studies: Artists Who Succeeded With A Defined Vision
In the landscape of music, a clear vision and mission can distinguish a budding artist from a seasoned icon. This section dives into the stories of artists whose defined visions propelled them to stardom. Let’s explore how having a roadmap to success has shaped their careers and the lessons budding musicians can learn from them.
Every musical icon starts with a dream, a vision that guides their journey. Their steadfast commitment to this vision often becomes the catalyst for monumental career highs. Let’s take a closer look at a few such artists.
The Beatles: Known for their distinct sound, The Beatles had a vision of evolving music to reflect societal changes. This led to groundbreaking albums like ‘Sgt. Pepper’s Lonely Hearts Club Band’.
Beyoncé: Queen B’s vision of emboldening women through music is evident in anthems like ‘Run the World (Girls)’. It’s this vision that has consistently influenced her career trajectory.
Bob Dylan: His vision of producing music with a message propelled songs like ‘Blowin’ in the Wind’ to become anthems for change.
Upcoming musicians can glean wisdom from the trials and triumphs of artists who have walked before them. Here’s what their journeys teach:
Authenticity is Key: Staying true to your vision can set you apart in an industry saturated with talent.
Adaptability Matters: As the music scene evolves, so should your strategies—always aligned with your core vision.
Consistency Drives Success: Regularly producing content that aligns with your vision will build a strong, loyal audience.
Frequently Asked Questions On Why Musicians Must Have A Vision And Mission
Why Is A Musician’s Vision Important?
A musician’s vision establishes their long-term artistic goals and aspirations. It serves as a guiding star, providing direction and purpose to their career. It helps them stay focused on what they ultimately want to achieve, distinguishing them in a competitive industry.
How Does A Mission Statement Benefit Musicians?
A mission statement outlines a musician’s current intentions and the impact they wish to make through their music. It communicates their values and serves to connect with their audience on a deeper level. This clarity can attract like-minded collaborators and loyal fans.
What’s The Difference Between Vision And Mission?
A musician’s vision is their long-term goal or dream, the ultimate achievement they aim for. Conversely, their mission is how they plan to reach that vision, outlining the approach and values they’ll adhere to while navigating their musical journey.
Can Vision And Mission Affect A Musician’s Brand?
Yes, a musician’s vision and mission significantly shape their brand. They inform the artist’s image, the messages they convey, and the audience they attract. This coherence helps in building a strong, recognizable personal brand that resonates with fans and the industry.
Conclusion
Crafting a clear vision and mission empowers musicians to navigate their careers with purpose. It defines their artistic identity and guides their growth. Remember, a strong mission resonates with fans and industry leaders alike. Embrace this strategic approach to transform passion into a sustainable musical journey and leave a lasting legacy.
The Scarlett Solo 1st Gen, 2nd Gen, and 3rd Gen represent successive enhancements in audio quality, usability, and design. With each generation, Focusrite has introduced upgrades that benefit home recording enthusiasts and professionals alike.
As an Amazon Associate I earn from qualifying purchases.
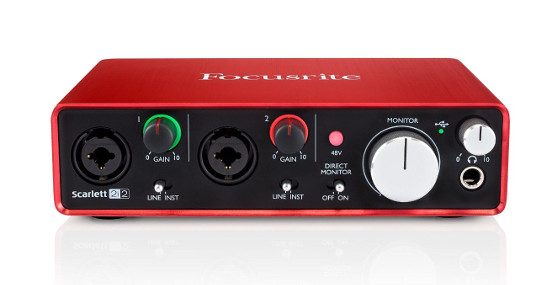
Embarking on a home recording journey demands the right audio interface, and the Focusrite Scarlett Solo series stands out for its quality and user-friendliness. Dive into the world of Scarlett Solo and discover key evolutions from the 1st Gen to the 3rd Gen.
These compact interfaces have etched a legacy in the audio recording space, offering musicians and podcasters a blend of portability, sound fidelity, and ease of use. Each successive generation builds on its predecessor’s strengths, featuring improved preamps, enhanced audio resolutions, and a more intuitive user experience. The Scarlett Solo series continues to be a popular choice for those seeking reliable and high-quality audio capture without overwhelming complexity. Whether you’re setting up a home studio or recording on the go, understanding the differences between these three generations of the Scarlett Solo will inform your decision for the best audio interface to suit your needs.
Introduction To Scarlett Solo Generations
Imagine creating studio-quality sound in your bedroom. That’s the power of the Focusrite Scarlett Solo series. From the first to the third generation, these audio interfaces have transformed home recording. The Scarlett Solo brings professional features into a compact form. It’s perfect for singer-songwriters and solo podcasters.
The Evolution Of A Compact Audio Interface
The Scarlett Solo series has evolved to meet the demands of modern creators. With each new generation, Focusrite pushes the boundaries of what’s possible. From the 1st Gen to the 3rd Gen, the differences are clear. Let’s explore how they shaped the world of home recording.
Key Features Across The Generations
Generation
Preamps
Resolution
Latency
Connectivity
1st Gen
One
24-bit/96kHz
Higher Latency
USB 2.0
2nd Gen
One, Improved
24-bit/192kHz
Lower Latency
USB 2.0
3rd Gen
New ‘Air’ Feature
24-bit/192kHz
Lowest Latency
USB-C
The 1st Gen made its mark with quality preamps and high-resolution audio.
The 2nd Gen improved upon these features and the design.
The 3rd Gen introduced the ‘Air’ effect and USB-C connectivity.
Credit: ritzcamera.com
Scarlett Solo 1st Gen Breakdown
Welcome to our detailed breakdown of the Scarlett Solo 1st Gen audio interface. Musicians and podcasters rely heavily on their audio equipment. The Scarlett Solo series by Focusrite offers amazing tools. The pioneering 1st Generation Scarlett Solo marks the beginning. It comes with features that still hold up today.
Design And Build
The 1st Gen Scarlett Solo strikes a balance between compact design and robust build. It has a matte aluminum chassis, giving it both a sleek look and durable feel. The distinct red finish makes it easily recognizable. Intuitive controls and ports sit on the front and back.
Performance Metrics
Focusrite didn’t skimp on quality for its 1st Gen Scarlett Solo. With 24-bit resolution and 96kHz sampling rate, it ensures high-fidelity recordings. Its preamp is renowned for its clarity. The interface delivers a dynamic range essential for capturing every nuance.
Dynamic Range: High-quality audio capture
Supported Sample Rates: Up to 96kHz
Bit Depth: 24-bit
Connectivity Options
The Scarlett Solo 1st Gen offers key connectivity options. It includes a single XLR input with phantom power for microphones and a line/instrument input. USB 2.0 connection ensures compatibility with most systems. Direct monitoring allows for latency-free recording.
Input/Output
Type
Mic Preamp
XLR with 48V phantom power
Line/Instrument Input
1/4″ TRS
USB
2.0 Type B
Headphone Output
1/4″ TRS
Upgrading To Scarlett Solo 2nd Gen
Music creators know the importance of a good audio interface. The Scarlett Solo series has been a game-changer for many. With each generation, the series has grown bolder and better. Are you eyeing the Scarlett Solo 2nd Gen upgrade?
Let’s dive into what the 2nd Gen brings to the table.
Enhancements In Audio Quality
Scarlett Solo 2nd Gen takes sound to a new level. It boasts crisp, clear preamps and increased headroom. Musicians record with less noise and more clarity.
Improved Dynamic Range: Capture the nuances of your performance.
24-bit/192kHz Conversion: Higher sample rates mean precision audio.
Improved Usability
The 2nd Gen makes setting up and recording simple. Its redesigned inputs handle instruments and mics with ease. LED indicators prevent signal clipping, ensuring perfect takes every time.
Direct Monitor Switch: Real-time monitoring without latency.
USB Power: Record anywhere with your laptop.
New Additions To The Feature Set
Apart from stellar audio quality, the 2nd Gen adds exciting features. Bundled software and integration with most recording software make this interface a top pick for producers and musicians.
Included Software: Start recording right away with tools at hand.
Sturdy Build Quality: Reliability becomes better with a stronger exterior.
Credit: masters-of-music.com
Scarlett Solo 3rd Gen: A Leap Forward
The Scarlett Solo series by Focusrite has consistently pushed the boundaries of what a compact audio interface can do. With the arrival of the Scarlett Solo 3rd Gen, Focusrite solidifies its commitment to excellence and innovation. This iteration is not just an incremental update; it exhibits significant leaps in technology, performance, and user experience. Let’s delve into the enhancements that make the 3rd Gen a standout choice for audio enthusiasts and professionals alike.
Cutting-edge Technology Integration
The Scarlett Solo 3rd Gen boasts improved technical capabilities that elevate the recording experience. Key features include the latest preamps and the coveted Air mode, which adds richness to your recordings. The device ensures crystal-clear audio fidelity with enhanced digital converters capable of up to 24-bit/192kHz quality. These advancements assure that every nuance of your performance is captured with the utmost clarity.
Advanced Inputs And Outputs
The new interface comes equipped with amplified versatility in its I/O configuration. The Solo features one XLR input with improved gain for microphones and one line/instrument input that can handle hot guitar pickups. For outputs, the upgraded device houses balanced TRS outputs, minimizing noise and enhancing audio quality for studio monitors. This advancement presents users with a seamless and robust recording setup.
Software And Compatibility Updates
Focusrite ensures that users of the Scarlett Solo 3rd Gen can access the newest software with ease. The interface is fully compatible with all major DAWs on both Mac and PC. It also comes bundled with an array of professional recording software, plugins, and tools to jumpstart any musical project. The included tools, like Ableton Live Lite and Pro Tools First Focusrite Creative Pack, offer a versatile suite of options for any level of audio production.
Comparative Analysis: Pros And Cons
Exploring the Scarlett Solo series reveals a captivating journey of technological progress. Each generation carries its unique features. This post highlights the pros and cons across three generations.
Sound And Recording Quality
The heart of any audio interface is the sound quality. Let’s delve into how each generation of the Scarlett Solo series has evolved in this regard.
1st Gen: It offered reliable sound with Focusrite’s preamps. Great for starters.
2nd Gen: Improved with purer preamp clarity and a higher sample rate. A noticeable upgrade for enthusiasts.
3rd Gen: Boasted the best sound with the ‘Air’ feature, adding richness. Ideal for professionals.
Latency And Monitoring
Latency can be a deal-breaker when recording. The Scarlett Solo series understands this.
Generation
Pros
Cons
1st Gen
Good for its time
Higher latency than successors
2nd Gen
Faster processing
Some users reported minimal lag
3rd Gen
Near-zero latency
–
Durability And Portability
Durability and portability matter for artists on the move. Here’s how each Scarlet Solo stacks up.
1st Gen: Rugged and reliable, but slightly bulkier than newer models.
2nd Gen: Maintained durability with a slimmer profile. Easier to transport.
3rd Gen: Best of both worlds, with robust build and compact size.
User Experiences With Each Generation
Exploring the Scarlett Solo range from Focusrite unveils how each generation has influenced user experiences. From budding musicians to seasoned producers, each version has garnered attention. Let’s delve into first-hand accounts, community feedback, and expert reviews for a comprehensive look.
First-hand Accounts
1st Gen: Users mention the ease of setting it up. The solid build quality often comes up in discussions.
2nd Gen: Improvements in latency impressed many users. They appreciate the sharper, crisper audio capture.
3rd Gen: Users love the enhanced preamps. They also note the added ‘Air’ feature brings vocal and acoustic recordings to life.
Community Feedback
Generation
Feedback Highlights
1st Gen
Reliable for starters, sturdy design, but with limitations in preamp quality.
2nd Gen
Marked improvement in sound quality, with better driver stability being a common praise.
3rd Gen
Better overall user experience with the ‘Air’ effect and the ‘Quick Start’ tool, enhancing its plug-and-play nature.
Expert Reviews
Experts point out the 1st Gen as a game-changer in home recording during its time.
The 2nd Gen received nods for its improved latency and higher recording quality.
For the 3rd Gen, reviews often highlight its superior preamp design and added features that cater well to modern recording needs.
Who Should Upgrade And When?
Deciding whether to upgrade your Scarlett Solo audio interface is a big step. If you’re contemplating between the 1st, 2nd, or 3rd Gen, understanding who should upgrade and when is crucial for making the right choice.
Considering Your Audio Needs
Identify your current requirements before deciding on an upgrade. Here’s who should consider switching:
Podcasters aiming for clearer vocals
Music producers needing higher sample rates
Home studio enthusiasts looking for better connectivity
Cost-benefit Analysis
Performing a cost-benefit analysis helps you decide financially:
Feature
1st Gen
2nd Gen
3rd Gen
Sound Quality
Good
Better
Best
USB Connectivity
USB 2.0
USB 2.0
USB-C
Sample Rate
96kHz
192kHz
192kHz
Price
Low
Medium
High
Compare your budget with the improvements each generation offers.
The Right Time To Switch
Upgrade timing varies for everyone. Consider making the switch when:
You outgrow your current interface’s features
Updated software no longer supports your device
New recording challenges arise, necessitating better hardware
Remember: An upgrade should enhance your workflow, not complicate it.
Making Your Decision
Choosing between the Scarlett Solo 1st, 2nd, and 3rd Gen can seem daunting. These audio interfaces hold the keys to pristine sound quality for artists and producers. The goal is to select the ideal model for your needs. Consider compatibility, investment value, and our final recommendations to ease your decision process.
Assessing Compatibility And Requirements
Start by evaluating your setup. Your computer and recording software must match with the Scarlett Solo’s generation. Take note of all interface specifications.
1st Gen: Basic, compatible with USB 2.0.
2nd Gen: Superior latency, requires more system resources.
3rd Gen: High performance, works with USB-C.
Choose a model that your current equipment supports.
Think future-proof, select a device that grows with you.
Final Verdict And Recommendations
Budget: For tight budgets, 1st Gen is suitable.
Quality seekers: 2nd Gen balances cost and features.
Professionals: The 3rd Gen leads in innovation. Ideal for full-time creators needing the latest tech.
Evaluate your goals and budget.
Match your gear to the interface version.
Invest in a generation that benefits you long-term.
Future Of Scarlett Solo And Audio Interfaces
The evolution of Scarlett Solo audio interfaces captures the essence of technology’s march forward. From the 1st Gen to the 3rd Gen, each iteration brings us a step closer to perfecting home recording. Users across the globe eagerly anticipate what’s next in this innovative product line.
Potential Developments
The audio interface sector is constantly evolving, with innovation at its core. The Scarlett Solo series is at the forefront of this march. Future models could offer even more advanced features:
Improved Preamps for even clearer audio capture
Enhanced Portability with lighter designs
Integration with Emerging Software to stay ahead
Higher Resolution Recording capabilities
Extended Connectivity for diverse setups
Staying Current With Technology Trends
Adaptation is crucial in the tech world. Scarlett Solo is no different. Ensure your setups evolve with these trends:
Trend
Impact on Audio Interfaces
Artificial Intelligence
Smarter interfaces with user-friendly controls
Cloud Connectivity
Access and store settings remotely
High-Fidelity Wireless Data
Seamless audio transfer without cables
Energy Efficiency
Longer sessions with reduced power consumption
Credit: m.youtube.com
Frequently Asked Questions For Scarlett Solo 1st Gen Vs 2nd Gen Vs 3rd Gen
What Are The Main Differences Between Scarlett Solo Generations?
The main differences lie in design, latency, and preamp improvements. The 1st Gen has a simpler design and basic features. The 2nd Gen offers lower latency and better preamps. The 3rd Gen builds on this with improved audio interfaces, additional software, and a more modern aesthetic.
Are 2nd Gen Scarlett Solos Compatible With All Daws?
Yes, the 2nd Gen Scarlett Solo is compatible with most DAWs. It comes with USB connectivity and requires no additional drivers for macOS, while Windows users can download drivers from Focusrite’s website. It supports various recording software, offering versatility for different audio projects.
Can I Use 3rd Gen Scarlett Solo For Professional Recording?
Absolutely, the Scarlett Solo 3rd Gen is designed for professional recording. It features high-performance converters, a ‘Air’ mode for vocals, and instrument inputs that handle high-level pickups. This makes it suitable for studio-quality recordings at home or in a professional setting.
How Does ‘air’ Mode Enhance Recording On Scarlett Solos?
‘Air’ mode on the Scarlett Solo 3rd Gen adds clarity and detail to your recordings. It simulates the classic ISA preamp by modifying the frequency response. This feature provides a brighter, more open sound, especially beneficial for vocal and acoustic instrument recordings.
Conclusion
Navigating the evolution of the Scarlett Solo interface reveals clear advancements. Each generation serves unique user needs, balancing quality with innovation. Whether you’re a beginner or a seasoned pro, there’s a Scarlett Solo perfect for your setup. Choose wisely and enhance your audio experience—your creativity deserves it.
Promote your music on Facebook by creating compelling content and utilizing paid advertising options. Engage with your audience by sharing behind-the-scenes clips and live sessions.
Delving into the world of Facebook as a musician offers a multitude of promotional avenues. Crafting a robust online presence on this social media behemoth can transform a whisper of sound into a symphony of engagement. With over two billion active users, Facebook’s potential for exposure is vast.
Establishing an official artist page is just the beginning. From here, musicians can harness the platform’s targeted advertising capabilities, optimizing reach to specific demographics. Regularly updating your page with fresh, interactive content keeps your fanbase plugged in and eager for more. Tailoring post content to spur conversation and shares can lead to organic growth, while insight tools track the resonance and reach of your musical journey. Every note you play can ripple across the digital landscape, amplifying your artistry to new heights through strategic Facebook promotion.
Credit: blog.groover.co
Setting The Stage For Facebook Fame
Setting the Stage for Facebook Fame begins with a solid foundation. Your music deserves the spotlight, and Facebook is a powerful stage to showcase your talent. Success on this bustling platform hinges on presentation and strategy. Let’s break down the essential steps to ensure your music hits the right notes in the Facebook arena.
Your Facebook Artist Page Essentials
A stand-out Facebook Artist Page acts as your music’s virtual home. It’s where fans can gather, engage, and connect with your sound. To hit the right chord, ensure your page includes:
High-Quality Profile Picture: Make a lasting first impression with an image that captures your music’s essence.
Cover Photo: Use this space to promote your latest release or upcoming event.
Call-to-Action Button: Direct fans to stream your music, visit your website, or book tickets to your shows.
Up-to-Date Contact Info: Provide a way for fans and industry professionals to reach you easily.
Remember, visuals matter. Choose images that tell your music’s story.
Crafting A Compelling Bio
Your bio is your musical introduction. It should be more than a timeline of your career. A compelling bio includes:
Unique Story: Share what sets you apart from the rest, be it your inspiration or musical journey.
Social Proof: Highlight any awards, collaborations, or notable performances.
Personality: Let your individuality shine through with a personal anecdote or your creative philosophy.
Keep your bio concise, current, and engaging. Fans should leave feeling closer to your music and your brand.
Creating Content That Resonates
Devise a plan to capture your audience’s heart on Facebook.
Charm them with posts that tell your music’s story. Create moments, memories, and connections through your content.
Posts should offer value, entertain, and engage your fans consistently.
Concoct a brilliant strategy to make your sound unforgettable.
Types Of Engaging Posts For Musicians
Diversify your posts to maintain a vibrant Facebook presence.
Fans adore a mix of updates. Engage them with different types of content.
Live performance snippets: Share the energy of your shows.
Behind-the-scenes peeks: Offer a glimpse into your creative process.
Fan shoutouts: Acknowledge and appreciate your followers.
Cover song teasers: Excite fans with upcoming releases.
Poll questions: Spark conversations with interactive polls.
Music trivia: Connect through fun facts about your genre.
Throwback posts: Nostalgia wins hearts. Share old favorites.
Visual Storytelling With Photos And Videos
Visuals grab attention.
Use stunning images and infectious videos to tell your music’s story. Photos and videos should reflect your brand.
They’re powerful tools for sharing your musical journey.
Visual Content Type
Idea for Musicians
Music Video Clips
Teasers of your latest music video.
Live Show Photos
Highlight electrifying live performances.
Rehearsal Sessions
Insights into your rehearsal space and routine.
Lyric Graphics
Share powerful lyrics as eye-catching graphics.
Album Artwork
Spotlight on your creative album covers.
Meet-and-Greet Pictures
Capture moments with fans at events.
Mastering Facebook Ads For Musicians
Breaking into the music scene is no small feat. Facebook Ads offer a powerful platform for musicians to shine. With billions of users, your next fan could be scrolling right now. Let’s harness the power of targeted advertising to amplify your music’s reach on Facebook!
Targeting The Right Audience
Knowing your audience is crucial for the success of your Facebook Ads. Think about who enjoys your music. Your ads should reach these listeners.
Use Facebook Insights to understand your current fan base.
Lookalike audiences let you reach similar people to your fans.
Select demographics such as age, location, and interests.
Custom audiences allow you to target listeners based on past interactions.
Direct your ads to those who matter most to your music journey. Better targeting equals less spend, more impact.
Designing Ads That Stand Out
Your ad design should grab attention and make users want to listen. Your visuals and message are key. Here’s how to create ads that pop:
Component
Tips
Visuals
Use high-quality images or videos of your performances or artwork.
Copy
Keep your message short, sweet, and to the point.
Call-To-Action (CTA)
Make it clear. Use phrases like “Listen Now” to drive action.
Value Proposition
Showcase what’s unique about your music. Why should they listen?
Incorporate these elements to create ads that not only look good but also resonate with your targeted audience.
Leveraging Facebook Events
Musicians can tap into Facebook’s vast audience to amplify their reach. The platform offers a powerful tool: Facebook Events. This feature allows artists to create a virtual hub for any upcoming show or album release. Leveraging Facebook Events helps to generate excitement and keep fans in the loop with all the vital details they crave.
Creating Buzz With Event Pages
Create a dedicated event page for your music gig. This is the first step to gather your audience in one place. Make sure it stands out with these tips:
Add eye-catching visuals, like posters or the album cover.
Include all essential details: time, date, location, and ticket info.
Use a clear call-to-action, such as “Get Tickets Now!” or “RSVP.”
Keep the conversation going by posting regular updates. Share behind-the-scenes content or teaser videos. This will spark conversations and anticipation among your fan base.
Using Facebook Live To Engage Fans
Facebook Live connects you with fans in real time. This creates an immersive experience like no other. Use it to:
Host a live Q&A session before the event. Answer questions and hype up the audience.
Stream live performances from rehearsals or soundchecks. Give your audience a sneak peek.
Share backstage access on the event day. Offer a glimpse of the excitement behind the scenes.
Integrate live streaming in your event strategy. It can lead to more engagement and excitement. This also encourages fans to share your content. Their friends become potential new fans. Remember to interact with your viewers. Acknowledge their comments and shout-outs during the live stream.
Collaborating With Other Artists
When it comes to promoting your music on Facebook, collaborating with other artists can open new doors. You can reach new fans. Plus, you create unique content that stands out. Collaborations can lead to magic that fans love to share.
Cross-promotion Strategies
Working together means you share the spotlight. It doubles your audience. Here are some effective ways:
Feature on tracks: Work on a song and share it on both Facebook pages.
Facebook Live jams: Team up for a live session and tag each artist involved.
Shared posts: Boost each other’s content with likes, shares, and tags.
Music video cameos: Appear in each other’s videos to spark interest.
Get creative with these strategies and watch your network grow.
Networking In Facebook Groups
Facebook Groups are a goldmine for networking. Join groups that are music-focused. Look for ones with other artists. It’s a perfect spot to meet collaborators. Follow these tips:
Engage regularly: Comment, post, and react to build genuine connections.
Offer value: Share tips and be helpful to stand out.
Post collaborations: Show off your joint projects to get feedback.
Seek new partnerships: Always be open to teaming up with new talent.
Find artists aligned with your style to hit the right notes with fans.
Regular Interaction To Build Community
Regular Interaction to Build Community sits at the heart of music promotion on Facebook. Engaging with fans isn’t just about sharing your music; it’s about creating a bond. Every like, comment, and share increases visibility, fostering a thriving community around your sound.
Engagement Through Comments And Messages
A simple reply can turn a casual listener into a loyal fan. Watch for feedback and stories from your audience. By acknowledging your fans’ presence, you can build a network of supporters eager to spread the word about your music.
Putting this into practice includes:
Reply promptly to comments on your posts.
Personalize your responses to show you value each fan.
Encourage conversation by asking for their opinions.
Hosting Q&a Sessions And Contests
Live Q&A sessions and contests are power moves for engaging your community. They can create buzz and give fans a unique opportunity to interact with you directly, deepening their connection to your music.
Activity Type
Benefits
Q&A Sessions
Builds rapport, answers fan questions, showcases personality
When promoting music on Facebook, tracking your progress is critical. Effectively interpreting your impact helps refine your approach. You must know what strategies work. Let’s dive into ways to measure and optimize your Facebook promotions.
Understanding Facebook Insights
Facebook Insights offers valuable data. It’s a tool for tracking user interaction on your music page. Insights help you see patterns in your audience’s behavior.
Key metrics include:
Page Views: Counts how many saw your page.
Post Reach: Measures the number of people who saw a post.
Engagement: Tracks likes, comments, and shares.
Follower Growth: Shows new fans over time.
Use these metrics to understand what records fans love. Learn the best time to post new music. Notice when fans are online most often.
Adapting Strategy Based On Metrics
Metrics guide your promotional tactics. They tell you what content shines. Data show which posts fans prefer.
Revise your strategy with clear goals:
Boost posts that perform well.
Make similar content.
Post when fans are online.
Always experiment. Try new post types. Check the results. Did a live video draw attention? Did a sneak-peek of new music get shared a lot? Change your plan based on these findings.
Regularly check metrics. Make small tweaks often. Small changes can lead to big gains in how many people love your music.
Looking Beyond Facebook
As artists harness the power of Facebook to share music, exploring new territories broadens the audience reach. Facebook is a springboard, but an all-encompassing approach, transcending a single platform, significantly amplifies promotional efforts. Let’s navigate the digital expanse where harmonic synergy between multiple online stages awaits.
Integrating With Other Social Platforms
Connecting various social networks creates a cohesive brand. An artist’s presence on Instagram, Twitter, and TikTok, paired with Facebook, strengthens fan interactions. Start by identifying platforms where potential fans congregate. Use these tactics:
Sync content across platforms for consistency.
Share exclusive snippets or behind-the-scenes content.
Engage with followers to foster a sense of community.
Utilize platform-specific features, like Instagram Stories or TikTok challenges.
Building An Omni-channel Presence
An omni-channel strategy ensures fans experience a unified brand message. Seamlessly blend online and offline touchpoints to enhance fan loyalty. Implement these steps:
Ensure brand imagery and messaging is coherent and recognizable across all channels.
Track performance to understand where engagement levels peak.
Use insights to tailor experiences that resonate with your audience.
Cross-promote events and new releases for higher impact.
Frequently Asked Questions For How To Promote Your Music On Facebook
Can Facebook Ads Boost Music Popularity?
Using Facebook ads is an effective way to promote music. They allow precise targeting of potential fans based on interests. A well-designed ad can significantly increase song plays and fan engagement.
What Content Works Best For Facebook Music Promotion?
Engaging content like music videos, behind-the-scenes clips, and live sessions works best. Interactive posts, such as polls and Q&As, also boost engagement. Consistency in posting keeps fans interested and involved.
How Often Should Musicians Post On Facebook?
Musicians should post regularly, aiming for 3-5 times per week. This keeps their audience engaged without overwhelming them. The key is to maintain a balance between promotional content and personal updates.
What’s The Role Of Facebook Events For Music Promotion?
Facebook events are powerful for promoting gigs and releases. They remind fans of upcoming events and facilitate easy sharing to increase reach. Creating an event can also provide valuable insights into the audience’s interest levels.
Conclusion
Promoting music on Facebook can catapult your career to new heights. Start by engaging with your fans, leveraging Facebook ads, and collaborating with influencers. Remember, consistency is key. Stay active, share your journey, and watch your fanbase grow. Your music deserves an audience – Facebook can help you find it.
You might not hear your MIDI keyboard in Ableton due to incorrect settings or software issues. Ensure your MIDI controller is properly connected and recognized by Ableton.
Navigating the world of digital audio workstations (DAW) like Ableton can initially seem daunting. One common issue users face is not hearing their MIDI keyboard when connected. This problem typically stems from a few key areas: incorrect setup within Ableton’s preferences, connectivity issues, an inactive track, or the need for driver updates.
Ensuring that your MIDI keyboard is correctly configured within Ableton is essential for smooth music production. With settings ranging from input recognition to monitoring, each parameter must align for successful audio playback. Regularly updating your software and drivers can preempt many of these problems, keeping your creative process uninterrupted. Troubleshooting such issues is a necessary skill for any digital musician or producer hoping to seamlessly integrate MIDI instruments into their workflow.
Credit: www.amazon.com
Introduction To Midi Keyboards And Ableton
Dive into the world of music creation with a MIDI keyboard and Ableton Live. A MIDI keyboard does not make sound on its own. Instead, it sends signals. These signals turn into amazing sounds in Ableton, a powerful music software.
The Connectivity Of Midi Devices
Connecting a MIDI keyboard to your computer opens a door to musical expression. Here’s a quick guide on setting up:
Plug in the MIDI keyboard using USB or MIDI cables.
Turn on the keyboard and your computer.
Open Ableton Live and go to Preferences > MIDI.
Select your keyboard from the list of MIDI devices.
If sounds are still missing, ensure the track’s ‘In’ button illuminates.
Ableton Live: A Hub For Electronic Musicians
Ableton Live shines in electronic music. Its layout, tools, and features focus on live performances and production. Live treats your MIDI keyboard as an orchestra at your fingertips. Twists, turns, and presses become your composition.
Ableton Live’s Feature
Benefit for MIDI
Intuitive Interface
Quickly map MIDI controls
Instrument Rack
Layer sounds for rich textures
Clip Launching
Trigger loops and samples on the fly
A correctly connected and configured MIDI keyboard unlocks Ableton Live’s full potential.
Common Midi Configuration Issues
Working with MIDI in Ableton can sometimes lead to a silent keyboard. Let’s dig into some common MIDI configuration issues that may be affecting your sound.
Incorrect Midi Channel Selection
Choosing the right MIDI channel is essential. If you select the wrong one, your MIDI keyboard will stay quiet. Each device connects on its unique channel. Here’s how to check:
Open Ableton. Go to the ‘Preferences’ menu.
Click ‘MIDI Sync’ to view MIDI ports.
Ensure your keyboard’s output matches Ableton’s MIDI track.
If your channels don’t align, change the MIDI channel on your keyboard or in Ableton.
Conflicts With Multiple Midi Devices
Multiple MIDI devices can confuse Ableton. If more than one device sends signals, it’s like a traffic jam. To fix this:
Isolate the problem. Disconnect all MIDI devices.
Reconnect them one by one, testing each time you add a new one.
This process helps identify which device may be causing conflict. Once found, configure it separately or disable it when not in use.
Software Settings To Check In Ableton
Many Ableton users face a common challenge: not being able to hear their MIDI keyboard. Knowing where to look within Ableton’s software settings is vital for troubleshooting. The right adjustments can restore the harmony between your MIDI device and production software. Ensure these software settings are correct to start creating music without delay.
Midi Preferences Setup
Firstly, make sure Ableton recognizes your MIDI keyboard. In Ableton, go to the Options menu and select Preferences. Click on the Link/MIDI tab and examine the MIDI Ports section. Your device should be listed under Input. To enable the instrument, turn on the Track, Sync, and Remote switches for the keyboard. This ensures Ableton accepts MIDI signals from the device.
Select Options > Preferences
Click Link/MIDI
Activate Track, Sync, Remote for the keyboard
Track Arm And Monitoring Status
Secondly, it is crucial to arm the track receiving MIDI input. Activate the Arm Session Recording button. It’s usually a red circle on the track. This tells Ableton to record MIDI data from the chosen track. Additionally, set the Monitoring to ‘In’ or ‘Auto’. This lets you monitor the track’s real-time signals. With both settings correct, your MIDI’s sounds should come to life.
Setting
Action
Arm Session Recording
Activate the red circle
Monitoring
Set to ‘In’ or ‘Auto’
Verifying Midi Keyboard Connectivity
Are you struggling to hear your MIDI keyboard in Ableton? You are not alone. One vital step is verifying MIDI keyboard connectivity. It’s the bridge between your musical ideas and your software. Let’s dive into ensuring your keyboard is talking to Ableton properly.
Physical Connection Troubleshooting
Your MIDI keyboard needs a good physical connection. Start with these checks:
Check cables: Ensure that USB or MIDI cables are secure on both ends.
Power: Confirm that your MIDI device has power. Look for LED indicators.
Direct connection: Connect to your computer directly rather than through a hub.
Different USB port: Sometimes, switching ports solves the issue.
Restart: Turn off your device and computer, then turn them back on.
Verifying Midi Signal Reception
To hear sounds, Ableton must receive MIDI signals. Follow these steps:
Open Ableton’s Preferences.
Navigate to the Link/MIDI tab.
Look under ‘MIDI Ports’.
Ensure ‘Track’ and ‘Remote’ are on for your device.
Press keys on your keyboard.
Watch for the indicator light in Ableton’s top right.
If the light flashes, Ableton is receiving data. If not, double-check your setup. Proper signal reception ensures your creativity flows uninterrupted.
Understanding Driver And Firmware Roles
In the realm of digital music production, drivers and firmware are the unsung heroes behind seamless device functionality. Think of them as interpreters, turning your creative impulses from your MIDI keyboard into audible music in Ableton. Without proper communication, your keyboard will remain silent. Let’s troubleshoot your silent MIDI keyboard by diving into the world of drivers and firmware updates.
Update Midi Keyboard Drivers
Imagine your MIDI keyboard is a new friend moving into Ableton’s neighborhood. The driver is the friendly neighbor who helps your keyboard communicate with Ableton. If they aren’t well acquainted, misunderstandings happen, and your keyboard stays quiet. Here’s how to update your drivers:
Identify your MIDI keyboard’s make and model.
Visit the manufacturer’s website and navigate to their support or downloads section.
Look for the latest driver compatible with your operating system.
Download and install the driver following the on-screen instructions.
Restart your computer and open Ableton to check if your keyboard is heard.
Firmware Updates For Seamless Functionality
Firmware is the brain of your MIDI keyboard. It’s the built-in software that controls how your device behaves. Keeping it updated is like giving your keyboard a new set of smarts. It can solve many communication problems between your keyboard and Ableton. Here’s a straightforward approach to updating your firmware:
Ensure your keyboard is connected to your computer.
Find the firmware update on the manufacturer’s website under the support or downloads section.
Follow the manufacturer’s instructions for the update process carefully to avoid errors.
After updating, power cycle your MIDI keyboard and reconnect it to Ableton.
Remember, keeping your drivers and firmware up to date can prevent a lot of headaches. Take these steps, and you should hear your MIDI keyboard ringing through Ableton’s virtual studio in no time.
Using Ableton’s Built-in Midi Troubleshooting Tools
Encountering silence when you hit the keys on your MIDI keyboard can be frustrating, especially when creativity is flowing. Ableton Live provides tools for troubleshooting this issue. A deep dive into these functions can quickly restore harmony between you and your digital setup.
Midi Track Input Indicators
Ableton’s interface features MIDI Track Input Indicators, a visual cue confirming whether MIDI data reaches the program. If you’re expecting a sound but remain met with silence, check these indicators. They reveal if your MIDI keyboard’s information is transmitted.
Look for blinking squares next to the track names when you press a key.
If the squares remain unlit, Ableton isn’t receiving MIDI data.
Ensuring active Arm Session Record on the relevant track is crucial.
The Midi Ports Section Of Preferences
In Ableton Live’s Preferences, the MIDI Ports section is the central hub for managing MIDI connections. It’s here where you can enable or disable devices for use within your project.
Access Preferences via Live > Preferences or use the shortcut CTRL/CMD + ,.
Navigate to the MIDI tab.
Locate your MIDI device under MIDI Ports.
Toggle ‘Track’ and ‘Remote’ for your device to On.
A proper configuration here ensures Ableton sends and receives MIDI signals to and from your keyboard, allowing for a harmonized playing experience.
Optimizing Computer Settings For Midi
When working with MIDI keyboards in Ableton, optimal computer settings are crucial. They help ensure smooth performance and clear audio. To troubleshoot issues where you can’t hear your MIDI keyboard, start by adjusting computer and DAW settings.
Adjusting The Daw’s Audio Buffer Size
A crucial step is to set the audio buffer size correctly in your DAW. Here’s why:
Small buffer sizes may cause glitches if your computer can’t process data fast enough.
Large buffer sizes can create noticeable lag, affecting playability.
Adjust the setting:
Go to Ableton’s Preferences.
Select the Audio tab.
Find and adjust the Buffer Size slider.
Begin with a medium setting and test your keyboard. Adjust as needed for the best balance.
Ensuring High-speed Usb Ports
USB ports affect how well your MIDI keyboard communicates with your computer. Make sure to:
Use USB 3.0 ports for faster data transfer.
Avoid using USB hubs that can slow down the connection.
Check your computer’s USB drivers and update if necessary.
Directly connecting your keyboard to a high-speed USB port can solve many audio issues.
Seeking External Help
Struggling to hear your MIDI keyboard in Ableton can be frustrating. You’ve checked your settings and cables but still, silence reigns. Don’t fret, help is readily available. Look beyond your home studio for solutions. The web harbors a wealth of knowledge with forums and manufacturer support just a click away. Let’s dive in and amplify your troubleshooting prowess.
Utilizing Online Forums And Communities
Online forums teem with users facing similar challenges. Start by searching for your issue.
Ableton’s own forum: Scan for threads addressing MIDI audio concerns.
Reddit and Quora: Pose your question or join relevant discussions.
Facebook groups: These communities can offer real-time support.
Remember to detail your setup and the steps you’ve taken when seeking input. It helps others provide precise advice. Share your progress too. It could guide someone in a similar boat.
Customer Support From Midi Keyboard Manufacturers
Contacting the maker of your MIDI keyboard is wise. Their customer support teams are trained to handle such situations.
Locate the support section on the manufacturer’s website.
Use the provided contact details to reach out.
Prepare your keyboard’s model number and a description of the issue.
Be as clear as possible about what’s happening. The support team may offer firmware updates, troubleshooting guides or direct assistance to resolve your sound woes.
Preventive Measures For The Future
If you’ve struggled with your MIDI keyboard’s silence in Ableton, it’s crucial to take steps to ensure it doesn’t happen again. Preventive measures can save you from frustration and lost time in the future. Ahead, you’ll find essential tips to keep your MIDI setup harmonious and responsive. Embrace these practices and make creating music a seamless experience.
Regular Maintenance And Updates
Keeping your MIDI keyboard in top shape is vital. Like any instrument, it deserves regular attention. Follow these guidelines to maintain your keyboard’s performance:
Check for Updates: Keep your Ableton software and keyboard’s firmware up-to-date. Manufacturers release updates that can fix bugs and enhance functionality.
Clean Your Equipment: Dust and debris can affect your keyboard’s sensors. Use a soft, dry cloth to gently clean the keys and controls.
Inspect Cables: Examine your USB and MIDI cables for damage. Replace them if you find any signs of wear or tear.
Back Up Your Settings: Save your Ableton preferences and templates. This makes it easier to restore your setup if anything goes wrong.
Creating A Stable Midi Environment
A reliable MIDI setup minimizes potential issues. Follow these steps for a stable connection:
Select the Right Driver: Choose a driver type in Ableton that best suits your system. For Windows, ASIO drivers are usually the best option.
Minimize USB Hub Use: Connect your MIDI keyboard directly to your computer. Too many devices on one hub can lead to power and connection problems.
Close Conflicting Software: Ensure no other applications are using your MIDI keyboard. Background apps can intercept or disrupt the MIDI signal.
Reset MIDI Preferences: In Ableton, go to ‘Preferences’, then ‘Link/MIDI’. Turn off ‘Track’ and ‘Remote’ for all inputs, then reactivate for your keyboard.
Frequently Asked Questions On Why Can’t I Hear My Midi Keyboard In Ableton
Why Is My Midi Keyboard Silent In Ableton?
The primary reason for a silent MIDI keyboard in Ableton is often an issue with the software’s audio setup. Ensure that your DAW is configured to use the correct audio driver and output device. Also, check that the track armed for recording is receiving MIDI signal from your keyboard.
How To Configure Midi Keyboard In Ableton?
To configure your MIDI keyboard in Ableton, go to the ‘Options’ menu and select ‘Preferences’. Click on the ‘Link/MIDI’ tab, and under ‘MIDI Ports’, find your keyboard in the list and enable ‘Track’ and ‘Remote’ for input.
What Causes No Sound From Midi In Ableton?
No sound from a MIDI device in Ableton can be due to several issues: the instrument track not being armed, the MIDI channel being incorrect, or an instrument not being loaded on the MIDI track. Check these areas first to troubleshoot the problem.
How Do I Test Midi Connection In Ableton?
Test your MIDI connection in Ableton by opening the software’s ‘Preferences’ and navigating to the ‘Link/MIDI’ tab. Play keys on your keyboard and look for the indicator light in the top right corner of the software to flash, signifying MIDI data is being received.
Conclusion
Navigating MIDI issues in Ableton can be tricky, but solutions are at hand. Remember to check device connections, software settings, and driver updates. Tackling these areas will usually restore harmony between your MIDI keyboard and Ableton. Keep producing and let your creativity flow interruption-free.