Categories
Archive

Which Keyboard is Best for Music? Top Picks for Melody Makers!

The best keyboard for music largely depends on the user’s needs and skill level. The Yamaha Montage 8 and the Nord Stage 3 are renowned favorites among professionals.


Choosing the perfect keyboard for creating music is a vital step for any musician, from beginners to seasoned professionals. It blends the intricacies of touch sensitivity, range of sounds, and usability, ensuring artists can express their creativity without limitations. High-quality keyboards enhance performance with diverse instrument voices and recording capabilities.


Beginners might favor user-friendly models with learning tools, whereas experts could opt for keyboards offering extensive customization and fine control. Durability, connectivity, and software integration are also crucial factors to consider. A keyboard that excels in these areas, such as those from Yamaha or Nord, can significantly elevate the music production experience, making the creative process smoother and more enjoyable.


The Quest For The Perfect Music Keyboard

Finding the ideal music keyboard feels like a personal adventure. Countless options fill the market, each promising to be the ideal fit for your creative endeavors. From portability and price to digital integration and sound diversity, the quest brims with considerations. Yet, it’s a fulfilling journey when you finally strike the right chord with that perfect instrument. This guide helps decipher the puzzle and leads you to your musical companion.

Criteria For Choosing A Music Keyboard

Not all keyboards serve every purpose. Picking the best match depends on specific features. Let’s explore them:

  • Action and Touch Sensitivity: The feel of the keys is vital. Consider weighted keys for a piano-like experience.
  • Sound Library: A vast array of built-in voices allows for versatile performances.
  • Polyphony: More polyphony means richer, more complex sound without note dropout.
  • Connectivity: MIDI/USB ports enable connection with computers and other devices.
  • Portability: For musicians on the move, a lightweight design is crucial.
  • Extra Features: Metronomes, lesson functions, and recording capabilities are valuable additions.

Diverse Needs Of Melody Makers

The perfect keyboard adapts to the artist’s unique requirements. Check these categories to find where you fit:

Type of User Key Considerations
Beginners Simple interfaces, educational features, and budget-friendly options.
Performing Artists Stage-ready durability, high-quality sounds, and easy setup.
Studio Musicians Advanced connectivity, extensive control surfaces, and high polyphony.
Hobbyists Fun voices, portability, and lower cost.

Whether you compose in a home studio or rock out on stage, there’s a keyboard designed to meet your musical demands. Use these pointers to start your journey, and you’ll soon discover the music keyboard that not only meets your expectations but also inspires your creative flow.

Which Keyboard is Best for Music? Top Picks for Melody Makers!


Credit: www.amazon.com

Classic Acoustic Pianos Vs. Digital Keyboards

Choosing the right instrument is crucial for any musician. Piano players often debate between classic acoustic pianos and digital keyboards. Each offers a unique set of features. Your decision can shape your music journey.

The Timeless Appeal Of Acoustic Pianos

Acoustic pianos stand as a symbol of musical tradition. Their rich, resonant sound is unmatched. Each piano carries its own character. The feel of weighted keys adds to a physically engaging playing experience. They are not just instruments, but also pieces of art and heritage.

  • Unique Sound: No two pianos sound the same.
  • Weighted Action: Keys provide real mechanical feedback.
  • Resonance: Strings and wooden body create natural echoes.

Acoustic pianos require tuning and can be expensive. Yet, many argue that their authentic touch and tone are worth it. They do take up space and need a stable environment.

The Versatility Of Digital Keyboards

Digital keyboards shine in versatility. They offer a range of sounds and features in a compact form. You can choose various instrument voices or record your own music. These keyboards are portable, making them perfect for musicians on the go.

Feature Benefit
Variety of Sounds Explore different musical styles easily.
Portability Take your music anywhere.
Headphone Jack Practice without disturbing others.

Technology has enhanced digital keyboards with weighted key action and improved sound quality. Some mimic the touch of an acoustic piano. They also offer connectivity options for computers and speakers.

Top Digital Keyboards For Aspiring Musicians

Embarking on a musical journey requires the right instrument. For many, the keyboard is the go-to choice. Different skill levels and budgets influence the kind of keyboard one might choose. This guide highlights top keyboards that set the stage for musical growth, from budget-friendly options to mid-range models. Whether a beginner or a passionate musician, finding the perfect keyboard enhances practice and performance alike.

Budget-friendly Beginnings

Finding a top-quality keyboard doesn’t mean breaking the bank. Many reputable brands offer keyboards with features that support the progression of a beginner. Look for full-sized keys, basic lesson functions, and USB MIDI connectivity. These features ensure ease of use and compatibility with educational apps. Affordable models often include a range of sounds and rhythms that encourage exploration without overwhelming the user. Beginner keyboards are lightweight, so young musicians can carry them easily.

Model Keys Features Price
Yamaha PSR-E263 61 130 Accompaniment Styles $100 – $120
Casio CTK-2550 61 Dance Music Mode $90 – $110
Alesis Melody 61 MKII 61 Includes Stand, Bench, and Headphones $120 – $140

Mid-range Models For The Dedicated Hobbyist

As skills develop, a mid-range keyboard offers more sophisticated features. These include touch-sensitive keys, wider sound palettes, and often higher polyphony. This allows for a more dynamic playing experience. Recording capabilities, stronger speakers, and MIDI functionality cater to those taking their musicianship seriously. Durability and improved sound quality define this category, providing long-term satisfaction and motivation to keep playing.

  • Yamaha P-45: Weighted keys; feels like an acoustic piano.
  • ROLAND FP-10: Bluetooth MIDI/USB; play along with apps.
  • Casio Privia PX-160: Eloquent design; creates rich tones.


Professional Workstations And Synthesizers

Music professionals need tools that can keep pace with their creativity. Professional workstations and synthesizers provide just that. These instruments pack powerful features for composing, recording, and live performances. They combine advanced technology and versatile functionality, becoming a central piece in the music production process.

Cutting-edge Tech For Producers

Today’s music producers demand excellence. They seek workstations that offer:

  • High-quality sound engines for clear audio production
  • Extensive sound libraries that cover numerous musical styles and genres
  • Intuitive interfaces for seamless workflow
  • Sequencing capabilities for building complex arrangements
  • Real-time controls for dynamic performance modulation

Workstations like the Yamaha Montage and the Roland Fantom series rise to the occasion. These beasts fuse state-of-the-art sound generation with touch screens and assignable knobs. They cater to evolving production needs.

Synthesizers For Sound Experiments

An endless palette of sounds inspires creators. Synthesizers like the Moog Subsequent 37 and the Nord Lead A1 offer this. They are capable of:

  • Sculpting unique textures for standout tracks
  • Analog warmth for full-bodied soundscapes
  • Modular architectures for personalized sound design
  • Multi-effects units to twist and turn sounds

They are perfect tools for creating never-heard-before sounds. Music makers harness these synthesizers to push boundaries and define new genres.

Weighted Keys Vs. Synth-action

Choosing the right keyboard for music is a big step for any musician. The feels of keys play a key role. Weighted keys and synth-action keys both offer unique playing experiences. They cater to different styles and preferences. Let’s explore these differences.

The Importance of Key Feel

The Importance Of Key Feel

When you press a keyboard key, it should feel right. Weighted keys aim to mimic acoustic piano keys. They feel heavier under the fingers. As a result, they offer a dynamic expression that pianists love. On the other hand, synth-action keys are lightweight. They respond quickly to touches, which is perfect for fast synth runs and glissandos.

Balancing Act: Performance vs. Portability

Balancing Act: Performance Vs. Portability

Keyboard players often face a tough choice. They must balance key feel with the convenience of portability. Here’s a breakdown:

  • Weighted Keyboards: Often heavier and best for stationary setups
  • Synth-Action Keyboards: Lightweight and great for gigging musicians

This choice affects transport, setup time, and playability at gigs. Musicians need to consider their needs carefully.

Connectivity For Modern Music Making

Connectivity for Modern Music Making is a spotlight feature for today’s musicians. Quick and reliable connection between instruments and tech gear is key. Let us dive into the essentials of integrating your keyboard for making music that resonates with today’s standards.

Usb/midi Interfaces For The Digital Age

Every musician knows that a smooth workflow is vital. USB/MIDI interfaces are the bridge between your keyboard and the digital world. These interfaces cater to transmitting MIDI data to and from your computer.

Let’s look at attributes that define top USB/MIDI interfaces:

  • Plug-and-play: Simple connection without confusing installations
  • Compatibility: Works effortlessly with various operating systems
  • Low latency: Ensures real-time audio without noticeable delay

Better interfaces also offer enhancements such as:

  • Multiple ports: Connect several devices simultaneously
  • LED indicators: Visual cues for data transmission

Integrating Keyboards With Software

Integrating your keyboard with music software opens a new realm of possibilities. There are some pointers to remember:

  • Select compatible software: Confirm that your keyboard and software can communicate
  • Map controls: Assign keyboard controls to software functions for easier access
  • Update drivers: Keep software and drivers up-to-date for the smoothest experience

Here’s a table highlighting key aspects:

Feature Description
VST Instrument Support Use virtual instruments for a vast range of sounds
DAW Integration Control your Digital Audio Workstation directly from your keyboard
Auto-Mapping Keys and knobs match software controls automatically

Accessories That Enhance Keyboard Play

The right accessories can transform keyboard play, from a basic setup to a professional rig. Whether you’re a beginner or a pro, certain enhancements are essential for comfort, stability, and sound control. Let’s dive into the must-have items that bring out the best in your keyboard.

The Support System: Stands And Benches

A solid foundation is key for any keyboard player. Stands and benches provide this stability and comfort. Here’s what to look for:

  • Adjustable stands suit various heights and playing styles.
  • Padded benches offer comfort for long sessions.
  • Ensure both are sturdy and durable to avoid wobbles.
Type Feature Benefit
X-style stands Portable and lightweight Great for gigging musicians
Z-style stands Extra stability Ideal for heavy keyboards
Benches with storage Space for sheet music Keep your music organized

Sustain Pedals And Other Enhancements

A sustain pedal is essential for expressive playing. It allows notes to ring out longer. Look for pedals with:

  1. Non-slip bottoms for stability.
  2. Polarity switches for compatibility with all keyboards.

Besides pedals, consider other enhancements:

Headphones:
– Practice without disturbing others.
Metronomes:
– Keep time with precision.
Keyboard covers:
– Protect from dust and spills.

Learning And Improvement Tools

Choosing the right keyboard for music is not just about the sounds it can produce but also the learning and improvement tools it offers. For beginners and seasoned musicians alike, these tools can greatly enhance the learning experience. Features like built-in lessons and recording capabilities streamline practice sessions and track progress effectively.

Built-in Lessons And Tutorials

The best keyboards come with integrated lessons that help you master playing techniques. These lessons often cater to various skill levels, from beginner to advanced. Look for keyboards that provide:

  • Step-by-step guidance for learning songs and chords.
  • Interactive exercises to sharpen your skills.
  • Access to a wide range of music genres for diverse learning.

Recording Features For Progress Tracking

Recording what you play is crucial for tracking your improvement over time. Opt for keyboards with built-in recording functions that enable you to:

  • Record and playback your practice sessions.
  • Analyze your performance to identify areas for improvement.
  • Save recordings to monitor progress and set learning goals.

Making The Right Choice

Picking the best keyboard for music sparks creativity and brings endless joy. But it’s not just about the number of keys or the flashy lights. It’s the feel, the sound, and how it fits into your musical journey that matter. With options ranging from synthesizers to MIDI controllers, finding the “perfect” keyboard means considering what you need, what you can afford, and where your music will take you. Let’s dive into what makes a keyboard stand out.

Final Thoughts Before You Buy

As you hover over the ‘buy now’ button for your potential new keyboard, pause and run through this checklist.

  • Keys: Weighted or unweighted? Think about what feels right.
  • Size: How many keys fit your space and playing style?
  • Features: Do you need built-in rhythms, effects, or recording capabilities?
  • Connectivity: Consider USB, MIDI, or audio outputs for your setup.
  • Portability: Will you travel with it or mostly play at home?
  • Price: Set a budget that makes sense for you.

Play before you pay when possible. Nothing beats hands-on experience!

Exploring Soundscapes With Your New Keyboard

Your new keyboard is a portal to vast musical worlds. Each press, each melody unlocks new soundscapes to explore.

You might discover lush strings, punchy bass lines, or crystalline piano sounds. Or perhaps venture into creating your own sounds with the onboard synthesizer tools. Your keyboard is not just an instrument; it’s a tool of expression, a sidekick on your musical quest.

So, experiment with different genres. Join online communities to exchange ideas. Remember, the best keyboard for music is one that meets your creative demands and inspires your personal symphony.

Which Keyboard is Best for Music? Top Picks for Melody Makers!


Credit: www.rollingstone.com

Frequently Asked Questions On Which Keyboard Is Best For Music

What Features Define The Best Music Keyboards?

A high-quality music keyboard typically features responsive keys, a wide range of sounds, and a built-in sequencer. Connectivity options for MIDI and USB are essential. User-friendly design aids performance and recording.

How Do Weighted Keys Affect Keyboard Playability?

Weighted keys mimic the feel of an acoustic piano, providing a more realistic playing experience. They offer better touch sensitivity and dynamic control, which is crucial for expressive music production.

Are Digital Pianos Good For Music Production?

Yes, digital pianos are excellent for music production due to their authentic sound quality, diverse instrument voices, and recording capabilities. They are compact and offer a practical alternative to acoustic pianos.

What’s The Best Keyboard For Beginners?

The best keyboard for beginners offers a simpler interface, a decent range of sounds, and learning tools like built-in lessons. It’s often portable and budget-friendly, making it accessible for new players.

Conclusion

Selecting the ideal keyboard for music creation is pivotal. Consider your style, space, and budget when choosing. MIDI controllers offer versatility, while digital pianos provide authenticity. Whatever your choice, prioritize quality and your musical journey will flourish. Keep experimenting to find your perfect match.

Categories
Archive

How Much Does a Music Producer Cost: Unveiling the Truth

Music producers typically charge between $50 to $500 per hour, or offer flat rates ranging from a few hundred to several thousand dollars per project. Navigating the intricacies of music production costs can be challenging for artists and bands ready to record their music.


Also, knowing how much to budget for a music producer is paramount as they play a pivotal role in shaping the sound and quality of a recording. Also, the cost may vary widely depending on the producer’s experience, reputation, and the project’s complexity.

Related reading: What Do Music Producers Do and Music Producer Cheat Sheets. For background, see the Wikipedia article on Record producer.

Emerging artists often seek affordable options without compromising on quality, while established musicians may invest heavily to work with renowned producers. In addition, it’s crucial to balance financial considerations with the creative and technical expertise a producer brings to the studio. Moreover, selecting the right producer involves weighing their cost against the potential value they add to your music.


In addition, the Role Of A Music Producer

Imagine a film director, but for music. For example, that’s what a music producer does. Furthermore, they shape the sound of an album.
These sound wizards help artists turn songs into sonic gold. A producer’s role is complex. It varies from managing studio time to crafting hit songs. The sound of your favorite tracks often reflects their magic touch.

Crafting The Sound for Music Producer Cost

Music producers are soundscape artists. As a result, they create the musical atmosphere . Additionally, the producer decides how a song should feel. Should it make you dance? Should it make you dream? They work closely with musicians. They choose the right tones and effects. This creates the perfect vibe for each track. Here’s how they do it:

  • Also, picking the right instruments for the song’s style.
  • Moreover, tuning into the artist’s vision and expanding on it.
  • In addition, experimenting with sounds to find unique audio textures.
  • Furthermore, adjusting tempo and pitch for the right mood.

Coordinating The Production for Music Producer Cost

Additionally, coordinating a music production is like leading a team to victory. However, Producers manage the recording process. They make sure everyone hits the right notes at the right time. They keep the project on track. Here are key responsibilities in this role:

Task Details
Schedule sessions Book studio time and plan the recording agenda.
Guide artists Help performers give their best in each take.
Oversee edits Work with engineers on mixing and mastering tracks.
Manage budget Keep spending in check without compromising quality.


Cost Factors For Music Producers

Also, understanding how much a music producer costs requires examining several key factors. Then, each element plays a significant role in the final pricing. From the producer’s experience to the complexity of your project, let’s break down the costs.

Experience Level for Music Producer Cost

Experience often dictates price. In short, Music producers with a track record of successful hits typically charge more. Moreover, newcomers might offer competitive rates to build their portfolios.

  • In addition, beginner: $200 – $500 per track
  • Furthermore, intermediate: $500 – $1,500 per track
  • Expert: $2,000+

Studio Quality for Music Producer Cost

The studio’s quality is crucial. Similarly, higher-end studios imply top-notch equipment, acoustics, and possibly higher costs.

Studio Type Cost Range
Home Studio $50 – $300 per day
Professional Studio $200 – $2,000+ per day

Project Complexity for Music Producer Cost

Additionally, complex projects require more time and skill. Also, an album with multiple tracks or intricate production might incur additional costs.

  1. Single track: Lower Cost
  2. EP (3-5 tracks): Moderate Cost
  3. Also, full Album (10+ tracks): Higher Cost

The Price Spectrum Of Music Production

Moreover, understanding the Price Spectrum of Music Production is key for artists planning to hire a producer. Producers’ rates vary wildly. In addition, their experience, reputation, and your project’s needs greatly influence the cost. From bedroom studios to Grammy-winning studios, let’s explore the range of what you might invest.

Entry-level Rates for Music Producer Cost

In addition, breaking into the music scene doesn’t have to break the bank. For example, newer producers or those building a portfolio often charge less. They offer talent at budget-friendly rates. This table shows typical costs for entry-level music production:

Service Cost Range
Beat Making $50 – $200
Mixing $100 – $300 per song
Full Production $300 – $500 per song

Furthermore, these rates serve as a starting ground and can be perfect for demos or simple projects.

Mid Tier Pricing for Music Producer Cost

Additionally, as we move up the ladder, producers with solid experience come into play. As a result, their services reflect a balance of affordability and professional quality. Here’s an outline of mid-tier production costs:

  • Beat Making: $200 – $700
  • Also, mixing: $300 – $800 per song
  • Moreover, full Production: $500 – $2,000 per song

In addition, with these producers, you can expect a higher caliber of work and more polished final products.

High-end Costs

Furthermore, at the top, you find producers who’ve notched chart-topping hits. However, their rates reflect their status and demand. High-end budgeting is more complex but offers unparalleled expertise:

  • Beat Making: $700 – $3,000+
  • Additionally, mixing: $800 – $5,000+ per song
  • Also, full Production: $2,000 – $50,000+ per song
  • Moreover, these premium services suit serious artists aiming at the charts. Then, you’re paying for a producer’s golden touch.

Hidden Costs In Music Production

Embarking on a music production project involves costs that may not be obvious at first. While teaming up with a music producer can elevate your sound, it’s essential to understand all potential expenses. This ensures a smooth creative process while managing your budget effectively.

Additional Musicians

Beyond the main producer fee, you might need extra talent. In short, hiring additional musicians to enrich your tracks often leads to unexpected expenses. Think drummers, guitarists, or background vocalists.

  • Session musicians often charge by the hour or per track.
  • Prices vary based on experience and reputation.
  • Always discuss and agree on costs before recording.

Post-production Expenses

After recording, your music needs post-production polish. Similarly, this might include mixing, mastering, and sometimes additional editing. These post-production steps are vital for a professional sounding track.

Costs for mastering can be per song or at an hourly rate. Also, editing might incur costs if it goes beyond the producer’s base fee. Prepare for these to maintain quality without harming your wallet.

Marketing And Distribution Fees for Music Producer Cost

Once your music is ready, getting it to listeners is the next step. In addition, marketing and distribution are crucial and often come with their own set of fees.

Typical Marketing and Distribution Costs
Service Cost Type Expected Fee Range
Digital distribution Flat fee / Percentage of sales $20 – $100 / 10% – 30%
Physical copies production Per unit cost $1 – $5 per CD/vinyl
Social media advertising Per campaign / daily budget $100 – $1000+
Music video production One-time fee $500 – $20000+

Research distribution platforms carefully. For example, choose based on your budget and audience. Comprehensive marketing might involve video production, which requires a significant budget. Plan strategically to optimize spend.

Negotiation Tips With Producers

An effective negotiation with your music producer can save a lot and help you gain more control over your project. As a result, knowing the right strategies ensures both sides are happy and clear on the terms. Let’s dive in to help you get the best deal.

Understanding Rights And Royalties for Music Producer Cost

The key to a fair deal lies in grasping rights and royalties.

Different producers have different approaches to rights and royalties. However, some want a share of the profits. Others might take a flat fee, leaving all rights to you. It’s important to know what you aim to keep and what you’re okay with sharing.

  • Ask about all possible rights: reproduction, distribution, performance, and sync.
  • Determine if royalties will be a percentage or a flat rate.
  • Negotiate terms that work for both, considering future revenue.

Setting Clear Budgets for Music Producer Cost

Transparent budget discussions prevent last-minute surprises.

Before you sit down to talk money, know your budget range. Then, this gives you a clear picture of what you can offer. You should communicate clearly about this total amount early on.

Cost Component Description Cost Estimate
Studio Time Hours spent recording $$/hour
Producer Fee Fixed or hourly rate $$/project or $$/hour
Mixing/Mastering Post-production work $$/song

Ensure that your budget includes all elements of production. In short, be upfront about your limit and be willing to discuss alternate options if their fee is higher.

Highlight the scope of work needed so the producer knows exactly what you expect. Similarly, this clarity prevents extra costs from popping up.


Alternatives To Traditional Producers

Exploring alternatives to traditional producers opens doors for artists with varied budgets and visions. Also, with the digital era in full swing, the cost of producing music has diversified. Creative minds now have access to a plethora of options beyond the conventional music producer.

Online Production Services

Global collaboration without breaking the bank becomes a reality with online production services. In addition, these platforms connect artists with music producers across the world. Here’s a peek at this groundbreaking approach:

  • Choose from a wide range of production styles and genres.
  • Work with experienced producers remotely.
  • Flexible pricing based on song complexity and producer expertise.

Fixed rates or bids for projects keep things transparent. For example, this means you find a production fit at a price that matches your budget.

Emerging Music Production Software

For the DIY artist, innovative production software ushers in unmatched autonomy and cost-efficiency. Consider these points:

  1. Make music without the steep costs of studio time or personnel.
  2. Access advanced tools that were exclusive to top studios.
  3. Experiment and produce at your own pace.

Subscription or one-time purchase models of software mean upfront pricing without surprises. Coupled with online tutorials, mastering these tools is simpler than ever.

A world where creativity is not tethered by budget constraints is within reach.

Investing Wisely In Music Production

Investing wisely in music production is key for musicians and artists. It’s more than just a cost; it’s a critical investment into your career’s future. As a result, the services of a music producer can vary greatly in price. Understanding where your budget fits can make a big difference. Let’s explore strategic budgeting and long-term value to make the best investment in your music’s future.

Strategic Budgeting

Setting a budget for music production is a must-do for all artists. However, a clear financial plan keeps your spending on track. But what factors determine the budget? Think about these:

  • Your project’s scope – More complex projects often need a bigger budget.
  • Your music genre – Some genres require more production work than others.
  • Producer’s reputation – Highly regarded producers may charge more for their expertise.
  • Additional expenses – Don’t forget costs like studio time and session musicians.

Remember to factor in all these elements when crafting your budget. Doing so ensures no surprises later.

Long-term Value Considerations

When you pay for a music producer, you aren’t just paying for the immediate product; you’re investing in the longevity of your music. A quality producer does more than record songs. Then, they help create a sound that resonates for years. Consider how a reputable producer can:

  • Elevate your sound – Making your music stand out among competitors.
  • Boost your brand – Crafting a sonic identity that attracts a loyal fan base.
  • Open industry doors – Their network can lead to more opportunities.

Think of a producer as a partner in building lasting value. In short, your investment today pays dividends in your future success.

Success Stories And Cautionary Tales

The journey of hiring a music producer is full of highs and lows. Success stories inspire many to take the leap into music production, while cautionary tales serve as essential guides. Similarly, this article explores both sides to prepare aspiring artists for what lies ahead.

Breakthrough Artists

Every artist dreams of hitting the big time, and a talented music producer can make that happen. Also, consider Billie Eilish, who partnered with her brother Finneas. The sibling duo produced unique sounds from their home studio. This collaboration led to multi-platinum records and a shelf bulging with Grammys.

Notable breakthroughs include:

  • Lizzo, who worked with producers like Ricky Reed to craft her signature style.
  • Chance the Rapper, an independent artist whose production collaboration earned him critical acclaim.

Financial Pitfalls To Avoid

With dreams of stardom, some artists overlook budget planning. In addition, hiring a top-tier producer often requires deep pockets. New artists can face significant debts if they don’t plan carefully. Hence, it’s vital to assess all costs before signing any contracts.

To avoid financial woes, artists should:

  1. Establish a clear budget for production.
  2. Research and compare producer rates.
  3. Understand the terms of the contract fully.
  4. Consider alternative financing, like crowdfunding.

Remember, an expensive producer does not guarantee a hit. For example, smart budgeting often equals sustained success.

Frequently Asked Questions Of How Much Does A Music Producer Cost

What Factors Affect Music Producer Fees?

Music producer costs can vary based on their experience, reputation, project complexity, and the duration of the production. As a result, additional factors include geographical location and whether they require royalties from the final product.

How Do Music Producer Rates Compare Between Genres?

Rates for music producers can differ between genres due to varying production complexities and genre-specific expertise. However, typically, electronic and pop genres might command higher rates due to the demand for producers in these popular markets.

Can I Negotiate Pricing With A Music Producer?

Yes, negotiating with a music producer is common. Prices can often be tailored to a project’s budget, especially if the producer is flexible or keen on the project’s potential success.

What’s The Average Cost For A Beginner Music Producer?

A beginner music producer may charge between $200 to $500 per track. Then, these rates are lower due to their relative inexperience and objective to build a portfolio.

Conclusion

Navigating the costs of a music producer can be complex, with variables like expertise, project length, and additional services influencing the price. While budgeting for your musical journey, remember that investing in a quality producer can significantly elevate your sound.


The right producer isn’t just an expense; it’s a pivotal step towards your artistic success. In short, choose wisely, and your music could reach new heights.

Categories
Archive

What Is Audio Dithering?: Unveil the Sonic Secret!

Audio dithering is a technique used to minimize quantization error in digital audio. It involves adding low-level noise to a signal before quantization.


Understanding audio dithering is essential for sound engineers and audiophiles seeking top-quality digital audio. This process, integral in converting high-resolution recordings to lower bit depths, ensures that the final output maintains the nuances of the original sound. By applying a deliberate and finely tuned noise, dithering masks the distortions that can occur when reducing the digital word length of an audio signal.


This subtle noise allows for greater perceived audio depth and can prevent unpleasant artifacts like quantization distortion. Consequently, listeners enjoy a more accurate and pleasing auditory experience. Embracing audio dithering is a mark of professionalism and attention to detail in audio production, reflecting an expert understanding of digital sound processing.


The Basics Of Audio Dithering

In the world of digital audio, purity of sound is a top goal. Yet, digital systems have limits. These limits can cause unwanted noise, known as quantization error. Audio dithering is the secret tool that tackles this issue. It might seem complex, but it’s crucial for crisp audio.

!– What Is Dithering? —

What’s dithering all about? Imagine you’re painting with pixels and you have to use fewer colors. Dithering is like blending these to give the illusion of more colors. In audio, it helps make digital sound less harsh and more like real life. By adding a sprinkle of noise, dithering makes audio fuller and cleaner. This is vital when converting high-resolution recordings to more common qualities.

!– The Science Behind The Process —

The science of dithering is a deep dive into how we handle digital audio. When audio levels are too low, information gets lost. A sound wave trapped between two digital steps is rounded off. This rounding can make unwanted noise. The science kicks in by adding a low-level noise before the rounding process. This spreads out the error, which makes the resulting sound more natural. It’s like a magic trick for the ears.

History Of Dither In Audio Engineering

The journey of dither in audio engineering is a fascinating slice of sound science history. From its inception to modern applications, understanding how dithering became a crucial tool in digital audio requires a dive into its origins and growth. Let’s explore how this technique evolved over time, shaping the clarity of the sounds we enjoy today.

Early Uses Of Dithering

Dither’s history begins in the analog realm, long before digital audio existed. Engineers used dither to compose clearer radio transmissions during World War II. These early applications set the stage for dithering as we know it in the digital age.

Evolution Of The Technique

With the rise of digital audio in the 1980s, dithering became essential. Pioneering minds refined the process, enabling smoother transitions in digital recordings. Dither helps convert analog signals to digital form, without losing the small audio details.

Table 1 lists key milestones in the evolution of audio dithering.

Year Milestone Impact
1940s Initial Use in Radio Improved signal clarity
1980s Digital Audio Emergence Foundation for digital recording
1990s Algorithm Development Enhanced audio resolution

These steps led to today’s sophisticated audio processes. Dithering applies a low-level noise that masks quantization errors. Without this step, digital sounds could become harsh or distorted. The continuous refinement of dithering has allowed music and audio to reach impressive levels of fidelity.

Why Dithering Is Critical In Digital Audio

Understanding dithering in digital audio is key to producing high-quality sound. This process adds a little noise to audio signals. Strange as it sounds, this noise improves the sound we hear. Without dithering, your music could lose fine detail, especially during quiet parts. Read on to see why skilled audio creators never skip this step.

Quantization Errors

When an analog sound turns digital, it gets measured in steps. These are quantization steps. Not all sounds fit perfectly into these steps. This mismatch creates quantization errors. Picture a flight of stairs with irregular steps; that’s how sound gets distorted. Dithering helps smooth out these steps. It’s like filling gaps for an even surface.

Dithering adds controlled noise to nearly silent parts. This masks the errors. Listeners enjoy clearer sound. They don’t hear the unwanted distortions.

Improving Audio Fidelity

Fidelity means truthfulness. In audio, it’s about staying true to the original sound. To improve fidelity, dithering is a must. It’s vital during the final stage of sound production: mastering.

With dithering:

  • Audio has deeper depth.
  • Quiet sounds remain detailed.
  • Musical dynamics shine through.

The noise from dithering spreads evenly across all frequencies. This makes it less noticeable. It’s a subtle trick for smooth, natural sound. Dithering is the hidden ace up a sound engineer’s sleeve.

Think of it like fine art. Without dithering, you get blocky pixelated images. Dithering turns it into a masterpiece full of nuance. It fills the audio canvas with the right shades and textures.

What Is Audio Dithering?: Unveil the Sonic Secret!


Credit: www.bozdigitallabs.com


Types Of Dither

Enter the world of audio dithering. Dither adds a sprinkle of noise to digital audio. This prevents distorting during conversion. When choosing the right type, we must know our options. Let’s dive into the different types of dither.

Tpdf Dithering

TPDF stands for Triangular Probability Density Function. This type of dither adds a low-level noise. The noise is evenly spread across all frequencies. TPDF dithering works well for most situations. It’s like a safe choice in complex audio tasks.

Noise-shaping Dither

Noise-shaping dither goes one step ahead. It’s not just about adding noise. It shapes it too. This dither moves noise to frequencies we hear less. This makes the audio seem clearer. It’s great for detailed work. Think of it like a sculptor shaping clay to create a smooth statue.

The Art Of Applying Dither

Imagine a painter adding fine, invisible dots to blend colors seamlessly. Audio dithering works similarly in the digital audio realm. This technique adds low-level noise, purposefully, to mask the quantization errors that happen when converting higher bit-rate recordings down to lower bit-rates. Properly applied, dither can improve the quality of digital audio, especially during the final mastering stage.

When To Use Dithering

Dithering is essential when bit depth reduction is in process. This scenario typically occurs:

  • During mastering: Before distributing audio files, especially when converting from 24-bit to 16-bit.
  • After audio editing: If tracks undergo significant processing, dither helps maintain audio integrity.
  • In multi-format releases: Different formats may require different bit depths, making dithering vital.

How To Apply Dither Properly

The art of dithering requires following specific steps to ensure audio clarity. Here’s how to do it right:

  1. Select the dithering algorithm suited for the content. Options include triangular, rectangular, and noise-shaped dither.
  2. Apply dither only once. Multiple applications can degrade the audio quality.
  3. Insert dither at the very last stage of mastering. Doing so earlier jeopardizes the process.


Hearing The Difference

When sound transforms from analog to digital, we need audio dithering. It’s like sprinkling magic dust to make sounds clearer. Let’s explore how we can actually hear this difference.

A/b Testing With Dither

To truly appreciate dithering, listening is key. Imagine having two audio tracks. One uses dithering; the other doesn’t. During A/B testing, you play both tracks back-to-back. Your focus is on the quiet parts. That’s where dithering shines. It reduces distortion, making the sound cleaner.

  • Prepare two similar audio tracks
  • Apply dither to one track
  • Listen closely to quiet sections

What to listen for:

  1. The naturalness of silent spaces
  2. Clarity in fade-outs
  3. Absence of buzzing during quiet moments

Understanding Perceptual Coding

Perceptual coding tricks our ears. It keeps audio size small but sounds good. This is crucial for formats like MP3. Dithering is a friend to perceptual coding. It helps prevent noise when the sound is low. This makes even compressed audio pleasant to our ears.

  • Dither aids in masking potential quantization noise
  • Allows for smoother gradients in audio levels
  • Enhances overall perceptual sound quality

Dithering isn’t about loudness; it’s about audio quality, especially in quiet moments. With the right testing and understanding of coding, you can hear the difference.

Dithering In Modern Audio Production

Imagine painting with only primary colors. Now imagine the countless hues you can get by mixing them. Audio dithering works similarly. It adds a touch of sonic ‘paint’ to recordings. This makes them sound better. It’s a fine brush stroke in the world of digital audio.

Dithering In Mastering

Mastering is a critical step in music production. It’s when audio gets its final polish. Here, dithering plays a key role. It helps to prevent harsh sounds when converting tracks. This happens when high-definition audio turns into standard formats, like CD quality. Dithering maintains clarity and depth. It does so by adding a subtle noise. This noise actually improves the sound. Think of it as a sprinkle of audio magic.

Software And Hardware Tools

Music makers use many tools for dithering. Let’s talk about two types. First, the software tools. These are plugins for audio editing programs. They make dithering easy. Just click and apply. Second, the hardware tools. These are physical devices. They sit on racks in studios. They need setting up by pros. Both types serve one purpose. They enhance sound in the digital realm.

Expert tips for using dithering:

  • Apply it once, during the last step of mastering.
  • Choose the right type for your sound. There are many options.
  • Listen carefully. Make sure it sounds just right.

Common Misconceptions And Debates

Behind the polished audio we enjoy, a lesser-known hero named audio dithering works quietly. Misunderstandings about this process are widespread. Let’s dispel myths and tune into ongoing debates.

Myths About Dither

Some believe dithering degrades audio quality. This is untrue. Dithering actually preserves the nuance during the digital conversion process. Below, we confront common inaccuracies:

  • Dither noise is always audible: Dither noise usually resides beneath the musical content, often inaudible to listeners.
  • Dither is optional: Without dither, audio can suffer from quantization distortion when rendered at lower bit depths.
  • All dither types are the same: Various dither algorithms exist, each designed for specific scenarios and results.

Ongoing Discussions Among Audio Engineers

Audio engineers often engage in debates about the necessity and application of dithering:

  • When to apply dither: Some insist on dithering at every stage, while others reserve it for the final master.
  • Amount of dither: The proper dither level is a subject of exploration to avoid overpowering the audio content.
  • Dither and contemporary music: Electric genres create a unique landscape for dithering’s role and audibility.

The quest for the perfect sound continues with dithering as a valuable tool.


Future Of Dithering

The evolution of digital audio processing continues to transform the sounds we hear. Dithering plays a key role in maintaining audio fidelity during this progression. Let’s explore what the future of dithering holds, focusing on algorithmic advancements and the impact of high-resolution formats.

Advancements In Algorithms

Algorithm enhancement is crucial in dithering’s future. Developers constantly refine techniques to reduce noise and distortion.

  • Improved noise shaping: Algorithms will more precisely manipulate the noise spectrum.
  • Adaptive dithering: Systems will adjust dither based on the audio signal.
  • Artificial intelligence: AI could revolutionize dithering by learning the most effective patterns.

Impact Of High-resolution Formats

As audio resolutions increase, so does the need for sophisticated dithering. High-resolution formats provide more detail and dynamic range.

Format Bits Benefit
CD 16-bit Baseline quality
High-Res 24-bit Greater headroom
Future Formats 32-bit? Potential for even finer gradations

Dithering ensures that these high-resolution formats sound as intended, regardless of playback device volume or power.


Frequently Asked Questions On What Is Audio Dithering


What Is Audio Dithering In Music Production?


Audio dithering in music production is the process of adding low-level noise to a digital audio signal. This technique minimizes quantization errors and enhances the perceived sound quality, especially when converting higher bit-depth recordings to lower bit depths.


Why Should You Use Dithering In Audio?


Dithering is used in audio to mask quantization errors that occur when reducing bit depth. It helps to preserve audio clarity and detail, resulting in a more natural-sounding recording after the bit-depth conversion process.


When Is The Best Time To Apply Dithering?


The best time to apply dithering is during the final stage of mastering, right before exporting the final mixdown. This ensures that dither noise only affects the audio once, preventing cumulative noise from multiple dithering processes.


How Does Dithering Affect Audio Quality?


Dithering positively affects audio quality by adding a minute amount of noise, which prevents the harsh distortion that would typically result from quantization errors. The result is smoother and more natural sounding transitions between audio levels.


Conclusion


Understanding audio dithering enhances your final audio productions. It masks quantization noise, ensuring clarity and warmth. Perfecting its use takes practice, but the payoff in sound quality is undeniable. As you navigate digital audio work, keep dithering in your toolkit—it’s the polish your tracks deserve.

Categories
Archive

Best Way to Add Reverb to Vocals: Enhance Your Mix!

The best way to add reverb to vocals is by using a digital audio workstation (DAW) plugin. Adjust the reverb settings to match the desired sound and blend it with the original track.


Achieving the perfect reverb for your vocal track can elevate your music production to professional levels. Reverb helps in creating depth and space, making vocals feel more alive and resonant within a mix. Often, music producers and sound engineers use a variety of software reverb effects available in DAWs like Ableton Live, Pro Tools, or Logic Pro.


Crafting the ideal reverb involves choosing the right type of reverb, such as room, hall, or plate, and tweaking parameters like decay time, pre-delay, and wet/dry mix. These adjustments allow the vocals to sit nicely in the mix without overwhelming the listener or creating muddiness. By following these guidelines, you can impart a natural ambience or an ethereal vibe to your vocals, crucial for a polished final product.


Introduction To Reverb In Vocals

An Introduction to Reverb in Vocals opens up the magical world where voices fill spaces with warmth and depth. Reverb, short for reverberation, wraps around vocals, creating an atmosphere where each note lingers, giving life to music. Understanding reverb’s role in vocal mixing helps artists find the sweet spot between clarity and ambience. It’s a sonic brush that paints vocals across the sonic spectrum, from intimate whispers to grand, echoing choruses. Applying reverb to vocals isn’t just a technical step; it’s an art form that, when mastered, can transform good tracks into timeless masterpieces.

The Role Of Reverb In Vocal Mixing

Reverb acts as the invisible choir, supporting and enhancing the lead vocal. It adds dimension and connects lyrics to emotions. A masterful mix utilizes reverb to:

  • Create depth: placing the vocal in a three-dimensional space
  • Enhance mood: matching reverb types to the song’s emotional tone
  • Spatial texture: giving a unique character to the vocals within a mix

Balancing Clarity And Space

Striking the right balance with reverb is crucial for vocal tracks. Too much reverb can muddle a mix; too little can leave it dry and flat. Important steps include:

  1. Choosing the right reverb type: Plates for rich decay, halls for expansive tails.
  2. Setting the right decay time: Ensuring tails don’t overpower the lead vocal.
  3. Adjusting pre-delay: Allowing initial note articulation before reverb starts.

Techniques like automation and EQ-filtering of the reverb can also maintain vocal clarity while providing a lush, engaging space.

Choosing The Right Reverb Type

Choosing the Right Reverb Type can transform vocals from flat to ethereal. Reverb adds depth. It makes vocals resonate with emotion. The trick is to find the perfect match. Each song demands a unique reverb effect. The right reverb can make a vocal track come alive.

Types Of Reverb Effects

Vocal tracks can shine with the correct reverb. Let’s explore the types available:

  • Room Reverb – Mimics small spaces, adds intimacy.
  • Hall Reverb – Creates a sense of grandeur, like concert halls.
  • Plate Reverb – Offers a metallic resonance, classic for vintage tones.
  • Spring Reverb – Delivers a twangy effect, great for retro vibes.
  • Chamber Reverb – Uses actual chambers for natural echoes.
  • Digital Reverb – Allows precise control, gives modern sound.

Matching Reverb Type To The Song’s Genre

Selecting reverb aligns with the genre. Each genre has signature sounds:

Genre Reverb Type
Pop Room, Plate
Rock Hall, Spring
RB Plate, Digital
Classical Chamber, Hall
Jazz Room, Chamber
Electronic Digital, Spring

Setting Up Your Reverb Parameters

Reverb breathes life into vocals, making them resonate with the music.
Correct settings transform a flat performance into an ethereal experience.
Let’s dive into optimizing reverb parameters for that perfect vocal sound.

Adjusting Decay Time and Pre-Delay

Adjusting Decay Time And Pre-delay

Decay time and pre-delay shape the reverb’s character.
Here’s how to set them right.

  • Decay Time: The length your reverb lingers in the mix.
  • Pre-Delay: The slight delay before reverb kicks in, separating vocals from the ambience.

A fast decay suits upbeat songs. Ballads may need a longer tail.
Pre-delay keeps vocals crisp in the mix.
Start with short times and increase until it sits well.

Genre Decay Time (seconds) Pre-Delay (milliseconds)
Pop 1.2-1.8 20-30
Ballad 1.8-2.5 30-50

Fine-Tuning Reverb Density and Diffusion

Fine-tuning Reverb Density And Diffusion

Density and diffusion affect the texture of reverb.
They complete your vocal soundscape.

  1. Density: Controls the concentration of echoes.
    High density fills the space.
    Lower for more discrete echoes.
  2. Diffusion: Spreads out the reverb’s echoes.
    More diffusion for a smoother sound.
    Less keeps it focused.

Experiment with these settings.
Each song needs a unique balance.
Trust your ears and refine for harmony with your track.

Best Way to Add Reverb to Vocals: Enhance Your Mix!


Credit: reverb.com

Wet/dry Mix And Its Importance

Understanding the Wet/Dry Mix is crucial for polishing vocals. It balances raw and reverberated sounds. This skill enhances vocal tracks, making them stand out or blend smoothly.

Finding The Sweet Spot For The Mix

Discovering the ideal mix level is a game-changer. It can transform a track from flat to professional. It’s like finding the perfect seasoning for a dish. The right balance brings out the best in vocals.

  • Start with the dry signal at 100%.
  • Gradually add wet signal until you notice a change.
  • Adjust until vocals sound natural and spacious.

The Impact Of The Wet/dry Ratio On Vocal Presence

The ratio between wet and dry signals influences how vocals sit in a mix. Too much wet signal can drown them. Too little might make them sound detached.

Wet/Dry Ratio Effect on Vocals
High Wet Vocals recede, becoming less distinct
Low Wet Vocals remain upfront, possibly too raw
Balanced Mix Vocals achieve harmonious presence

Use your ears and trust your instinct for the best result. A balanced wet/dry mix supports vocal clarity while providing depth.

Eq Tips For Reverb-processed Vocals

EQ Tips for Reverb-Processed Vocals play a crucial role in shaping the sound of your mix. They ensure that the essence of the vocals cuts through clearly while providing space and dimension. The right EQ adjustments help vocals sit perfectly in the mix, complementing the overall sound.

Cutting Low-end Frequencies

Cutting low-end frequencies clears up mud and reduces muddiness. It lets the vocal reverb breathe and makes room for other instruments. Below are key pointers:

  • Start with a high-pass filter.
  • Cut below 100Hz to remove rumble.
  • Adjust to taste, ensuring clarity is preserved.

Enhancing Reverb Tails With High-end Boosts

Enhancing the high-end of reverb tails adds air and presence. It allows greater definition and a subtle shimmer. To achieve this:

  • Boost above 5kHz cautiously.
  • Use a shelf filter for a smooth lift.
  • Target the reverb send, not the vocal track.
  • Listen for brightness without harshness.

Side-chain Compression For Clarity

Best Way to Add Reverb to Vocals

Side-Chain Compression for Clarity helps vocals stand out in a mix. This nifty trick ensures reverb doesn’t muddle your sound. Let’s dive into how to master this technique.

Creating Space Using Side-chain Techniques

Side-chain compression connects the vocal track to the reverb. It ducks the reverb when the vocal hits and then lets it bloom afterwards. This creates a clear and spacious effect. Here’s a simple step-by-step:

  1. Add a reverb effect to a bus track.
  2. Send your vocal to this track.
  3. Insert a compressor after the reverb.
  4. Choose your vocal track as the side-chain input.
  5. Adjust threshold and ratio to taste.

Maintaining Vocal Dynamics With Compression

Compression is key to keeping vocals upfront. With side-chain setup, your voice stays dynamic. The reverb will not overpower your voice. Apply these tips:

  • Set a mild ratio on the compressor.
  • Use a fast attack to control the reverb.
  • Release time should let the reverb tail flow naturally.

Layering And Automation For Dynamic Reverb

When it comes to adding reverb to vocals, it’s not just about slapping on an effect. For truly dynamic and compelling vocals, reverb needs finesse. Enter the twin techniques of layering and automation. Both help blend reverb into vocals, turning the ordinary into the extraordinary.

Automating Reverb Parameters For Impact

Automation breathes life into vocal tracks. It tailors the reverb to match the song’s emotional ebb and flow. Here’s how to use automation:

  • Pre-Delay: Change pre-delay times for different sections.
  • Decay: Shorten decay in verses, lengthen in choruses.
  • Dry/Wet Mix: Adjust the balance for subtle or pronounced effects.

Alter these settings to make vocals soar during a powerful chorus or recoil during an intimate verse. Automation ensures each word sits perfectly in the mix.

Layering Reverbs For Complexity

Different reverbs can combine to create rich, textured vocals. Consider these steps:

  1. Choose varying types: Combine hall, room, and plate reverbs.
  2. EQ each layer: Cut lows on one, boost highs on another.
  3. Set different tails: Have one reverb end quickly, another linger.

Layering offers depth and variance. It prevents a one-dimensional sound. The right blend of reverbs can transform vocals from flat to three-dimensional.

Both techniques require time and experimentation. The result is a vocal track that stands out for all the right reasons. Use these techniques to make your vocals not just heard, but felt.

Common Reverb Mistakes To Avoid

Understanding the art of reverb on vocals is crucial in music production. Many enthusiastic producers make mistakes. Let’s dive into the common reverb pitfalls and learn to avoid them for professional vocal tracks.

Over-saturating Vocals With Reverb

Reverb can make or break a stellar vocal take. Using too much can drown the vocals, obscuring clarity and detail. Aim for balance. Check these tips to maintain vocal integrity:

  • Start with less: Add reverb gradually until it sits right in the mix.
  • Use pre-delay: This separates the vocal from the wash, maintaining presence.
  • Tailor the decay: Keep the reverb tail short to avoid a muddy vocal.

Always assess the reverb effect in context with other mix elements. The vocals should complement, not compete.

Ignoring Room And Microphone Interactions

The physical space and mic used during recording significantly influence reverb. Reflect on these points:

  • Room acoustics matter: Corrections in post-production cannot fix a bad room sound.
  • Mic choice is key: Different mics interact with reverb differently.
  • Consider mic placement: Moving the mic in the room can change the reverb characteristics.

Select the right microphone and record in an acoustically treated space to ensure the best vocal reverb.

To ensure vocal clarity, avoid over-saturating with reverb and acknowledge room impact. Keep these tips in mind for crisp and resonant vocal tracks.

Experimenting With Creative Reverb Techniques

Experimenting with Creative Reverb Techniques

Vocals shine with the right reverb. A touch can transform a flat recording into a vibrant soundscape. Let’s dive into creative reverb experiments that breathe life into vocals.

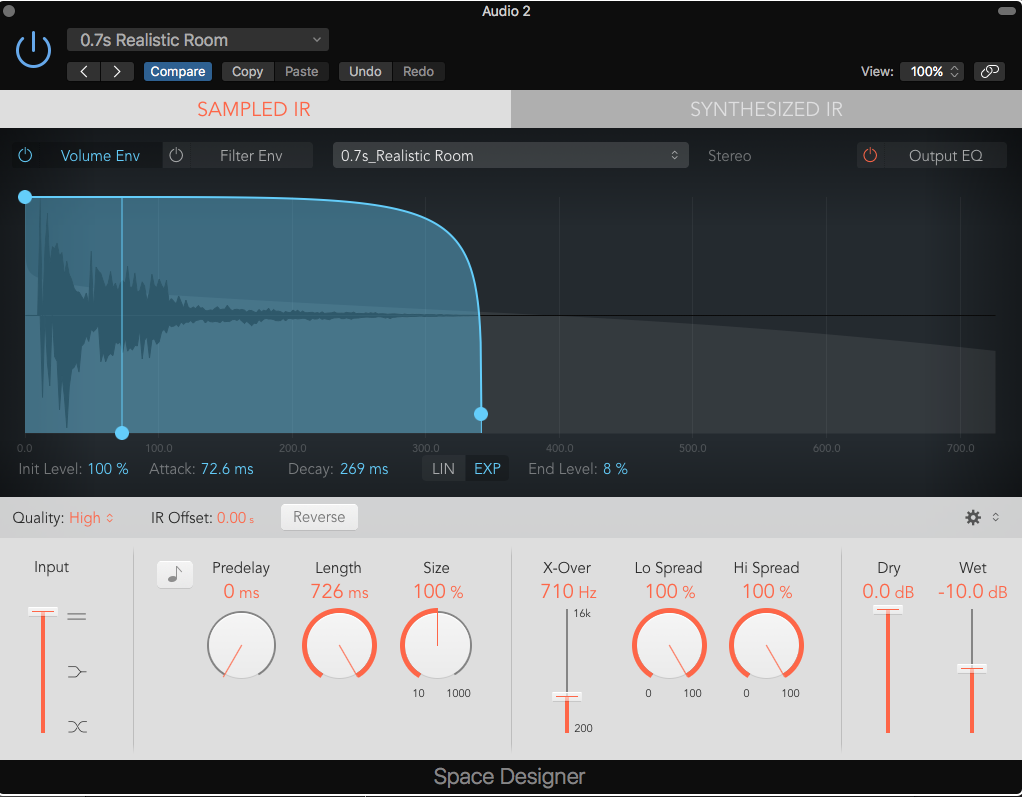
Using Convolution Reverb Creatively

Convolution reverb doesn’t have to be realistic. Twist it to shape new worlds. Here’s how:

  • Space Out: Try otherworldly IRs (Impulse Responses).
  • Morph Settings: Play with decay and size parameters.
  • Automate: Sweep parameters mid-track for dynamic effects.

Innovative Reverb Effects For Unique Vocal Textures

Normal is boring; mix it up with these tips:

  • Reverse Reverb: Apply reverb to a reversed vocal.
  • Layering: Stack different reverb types for depth.
  • Granular Glaze: Granular effects add a shimmering layer.

Reverb tells a story. Use these techniques, and let vocals recount epic tales. Dare to reshape vocal reverbs in ways that capture emotion and spellbind listeners.


Conclusion: Finding Your Signature Vocal Reverb Sound

Finding your signature vocal reverb sound marks the end of an exciting exploration in music production. A tailor-made reverb gives vocals a distinctive edge, helping them match the emotion and energy of a song.

The Journey To A Personalized Vocal Reverb

Crafting the perfect reverb for vocals is like painting with sound. It begins with understanding the basics, such as pre-delay and decay. Then, stepping into the realms of creativity, one tweaks and fine-tunes to enhance the vocals.

Start with templates or presets. Modify them to suit the track’s character. Listen critically. Trust your ears to lead the way.

Continuous Learning And Experimentation

The secret ingredient in music production is always constant learning. Each project is a new lesson, a fresh opportunity to refine your vocal reverb approach. Use different environments to test how the reverb behaves and reacts.

  • Try out various reverb types: plate, hall, or room.
  • Adjust the wet/dry mix to find the sweet spot.
  • Don’t shy away from unconventional choices. They can lead to unique results.

Keep records of settings that work. This can help you recreate or evolve your specific sound in the future.

Best Way to Add Reverb to Vocals: Enhance Your Mix!


Credit: www.levelsmusicproduction.com

Frequently Asked Questions On Best Way To Add Reverb To Vocals

What Is Reverb Effect In Vocal Recording?

Reverb, or reverberation, adds depth and space to vocals, simulating the sound of the voice bouncing off walls and surfaces in an environment. It’s a technique used in recording to create ambiance and enhance the vocal track’s presence in a mix.

How Can You Apply Reverb To Vocals Effectively?

To apply reverb effectively, start with a subtle amount and adjust to taste. Use pre-delay to separate the vocal from the reverb tail, and EQ the reverb to avoid muddiness. It’s crucial to ensure that the reverb complements the vocal without overwhelming it.

What Are The Best Reverb Settings For Vocals?

The best reverb settings for vocals often include a short to medium decay time, low pre-delay, and a touch of high-pass filtering. Tailor these settings to the tempo and mood of the song, and ensure it blends well with your mix.

Can Excessive Reverb Harm Vocal Sound Quality?

Excessive reverb can muddy the mix and make lyrics unintelligible, detracting from the vocal quality. It’s important to strike a balance where reverb enhances without overpowering the vocals.

Conclusion

Fine-tuning vocals with reverb can truly elevate a track. It’s crucial to strike a balance for that perfect sound. Experiment with different techniques and trust your ears. Remember, subtlety often leads to the most professional results. Now, go blend some silky reverb into your next vocal masterpiece!

Categories
Archive

Should You Add Reverb in Mastering?: Sonic Secrets Unveiled

Reverb should be used sparingly in mastering, if at all. It’s best suited for mixing individual tracks rather than the master.


Mastering is the final step in music production, intended to unify the sound of a record and prepare it for distribution. Subtle enhancements and refinements characterize this delicate process. Adding reverb during mastering can potentially muddy the mix or introduce unintended tonal changes, compromising the clarity and cohesiveness.


Reverb can affect the dynamic range and stereo image, which are critical aspects preserved in mastering. Therefore, it is integral for sound engineers to approach reverb with caution during this stage. Expert mastering requires a balance, enhancing the overall sound while maintaining the integrity of the mix.


The Role Of Reverb In Mastering

Reverb is a tool that can make music feel alive. It adds a sense of space. In mastering, reverb serves a delicate purpose. It can enhance a track or muddy the sound. Knowing when and how much reverb to use is key.

Balancing Space And Clarity

Mastering is about balance. A touch of reverb can create a spacious sound. Too much reverb causes a lack of clarity. The goal is to achieve a crisp, clear finish while still providing depth.

  • Space: Add reverb for depth
  • Clarity: Avoid too much to keep sounds distinct

Maintaining Genre Integrity

Each music genre has its own signature sound. Reverb should honor that. For example, classical music benefits from a hall-like reverb. Rock music often needs something punchier.

Genre Reverb Type
Classical Hall
Rock Plate
Pop Room
Hip-Hop Minimal

Choose reverb that fits the music style. Keeping it genre-appropriate ensures that the essence remains intact while mastering.

Common Myths About Reverb In Mastering

Welcome to the world of audio mastering, where myths often overshadow the truth. Let’s debunk some common misconceptions about the role of reverb in the mastering process.

Reverb Is Always Required

Many believe that reverb is a staple. This is not the case. Mastering needs no fixed formula. It’s all about what the track requires. Sometimes, reverb adds depth, but in mastering, subtlety is key.

More Reverb Equals Richer Sound

A richer sound does not always need more reverb. Overuse can lead to a muddy mix. Clarity often trumps richness, so use reverb judiciously for the best outcome. Remember, less can be more.

Pros Of Using Reverb In Mastering

Reverb in mastering can lift a track from good to great. It adds space and spreads the sound in a mix. This process can turn flat-sounding tracks into deep, immersive experiences. Expert mastering uses reverb to bring magic to music. Let’s look at why reverb is a pro move in mastering.

Enhanced Depth

Imagine a painting without shadows; it looks flat. Music is similar. Reverb is like the shadow in music. It creates a sense of space around the notes. Add reverb in mastering and you give your track three-dimensional life. This effect can make your song feel larger than life.

Cohesion Across Tracks

A major album challenge is making different songs sound like one story. Reverb can be the glue that binds these tracks together. Applying a touch of the same reverb across all songs can turn a collection of tracks into a coherent album. It’s the secret sauce for an album that flows.


Cons Of Overusing Reverb In Mastering

The use of reverb in mastering can be a double-edged sword. Adding space and depth, reverb can enhance tracks but overuse can lead to issues. Recognizing the importance of balance is key to a polished final product.

Muddied Frequencies

Too much reverb in a master can result in a mix where individual instruments lose their clarity. Layers that were distinct in the mix can blend together in an undefined wash of sound. Frequencies can pile up, leading to a ‘muddied’ audio spectrum that leeches vitality from the music.

Loss Of Detail And Punch

Attention to detail matters in audio production. Excessive reverb can dull the sharpness of transient sounds. This means the percussive elements that drive rhythm can lose their impact. Instruments meant to be crisp and articulate can become lifeless, diminishing the track’s dynamism and energy.

Understanding these pitfalls helps avoid a master that undermines a mix’s true potential. Discipline in reverb application ensures a clear, impactful listening experience.

Choosing The Right Reverb: Tips And Tricks

Mastering a song is like adding the final touches to a painting. You may wonder, “Should I add reverb during mastering?” This choice can define the spaciousness and depth of your track. The key is selecting the appropriate reverb. Here are insightful tips and tricks to help you make the best choice.

Types Of Reverb Effects

Different reverb types can drastically alter your sound. Here’s a quick rundown:

  • Room Reverb – Mimics the echo of a small space.
  • Hall Reverb – Emulates the expansive echo of a concert hall.
  • Plate Reverb – Creates a smooth decay that’s studio-favorite.
  • Spring Reverb – Offers a bright, characterful vibration.
  • Digital Reverb – Provides versatile and adjustable settings.

Tailoring Reverb To Your Mix

Selecting reverb can make or break your master. Follow these guidelines:

Tip Action
Match the Reverb to the Track Choose a reverb type that complements your song’s genre and mood.
Listen to The Mix Opt for minimal reverb if the mix is already full and complex.
Avoid Muddiness Use reverb sparingly to prevent washing out other elements.
Test Different Settings Experiment with decay times and wet/dry mixes for the perfect sound.
Preserve Dynamics Bypass heavy reverb that can squash your track’s dynamic range.

Remember, mastering with reverb requires a gentle touch. Your aim is enhancing, not overshadowing, your mix’s natural appeal. Ready to bring your track to life?


Techniques For Subtle Reverb Application

Mastering with reverb demands a delicate touch. It can glue a track together. Yet, too much can muddy your sound. Below, explore techniques to apply reverb subtly. These ensure your final mix shines without becoming overbearing.

Wet/dry Mix Adjustments

Striking the right balance is key. Start with a low wetness level. Increase it slowly. Listen carefully as you blend. Aim for a light tail of reverb. It should enhance, not overwhelm.

  • Start with dry: Keep your mix dry initially.
  • Slow increments: Move up in small steps.
  • Aim for unity: The reverb should unite the track elements subtly.

Frequency-dependent Reverb

Not all frequencies are equal in reverb. Higher frequencies can cause harshness. Lower ones might lead to muddiness. Use EQ on your reverb send. Cut highs to soften. Cut lows to clarify.

Frequency Range Action
High Frequencies Cut for smoothness
Low Frequencies Cut to prevent muddiness

Remember, in mastering, reverb is seasoning. It’s never the main dish. Use these techniques wisely. Your tracks will stand out with that professional polish.

Analyzing Professional Masters

Analyzing Professional Masters reveals insights into the art of audio enhancement. Mastering engineers often debate the use of reverb in the final mastering stage. Successful masters show that with careful application, reverb can enhance the listening experience without compromising the mix’s clarity. Let’s dive into some real-world examples and exercises to understand better when and how reverb should be applied in mastering.

Case Studies Of Successful Reverb Use

Dissecting acclaimed albums and tracks provides valuable lessons on reverb use. Using reverb in mastering has led to some iconic music moments. The table below shows a brief overview of noteworthy projects:

Artist Album/Track Reverb Details
Dire Straits Brothers in Arms Subtle hall reverb for depth
Norah Jones Come Away with Me Light room reverb for warmth
Hans Zimmer Inception (OST) Epic spatial reverb

Critical Listening Exercises

Critical listening sharpens our ability to discern subtle effects like reverb. Here’s a simple exercise:

  1. Choose a mastered track you admire.
  2. Listen to the track on high-quality headphones.
  3. Focus on the tail of the mix — the lingering sound after instruments stop.
  4. Note the spatial presence and depth; this often indicates reverb.

Repeat this exercise with various genres to understand how reverb plays different roles in different musical contexts. Keep notes on your observations. Look for patterns in how reverb contributes to the overall polish and cohesiveness of professional masters.

When To Say No To Reverb

‘When to Say No to Reverb’ is crucial for music production. Reverb can add depth, but too much may harm the final sound. This section discusses when it’s better to skip reverb in mastering.

Identifying Signs Of Overprocessing

Overprocessing with reverb can lead to a muddy or washed-out mix. Key indicators that you might be dealing with too much reverb include:

  • Lack of Clarity: Instruments sound blurred together.
  • Reverb Tail Overpowering: The decay of reverb drowns other elements.
  • Incoherent Depth: Spatial placement of instruments feels off.

Mixes should sound clean and distinct. Reducing or removing reverb can restore definition.

Preserving Dynamic Range

Dynamic range represents the contrast between loudest and softest parts. Excessive reverb can squash this range. Signs that your dynamic range is compromised:

  • Limited Peaks: Loud sections lose impact.
  • Volume Compression: Soft sections are no longer subtle.
  • Audible Swelling: Background noise becomes prominent.

It’s important for mastering to maintain natural dynamics. For optimal audio quality, avoid heavy reverb during mastering.

Achieving Mastering Excellence Without Reverb

Mastering music is an art that polishes a track’s final sound.

Reverb can blur the clarity in mastering.

Is it possible to reach mastering brilliance without it? Absolutely!

Let’s explore how to refine sounds while leaving reverb behind.

Alternative Mastering Tools And Techniques

Mastering is more than just adding effects like reverb.

Several tools shape the final sound of a track.

  • Equalizers adjust the balance of frequencies.
  • Limiters safeguard against distortion.
  • Stereo enhancers widen the soundstage.

Each tool plays a key role in mastering. Music breathes life even without reverb.

Focusing On Eq And Compression

Equalizers (EQ) and compressors are powerful allies in mastering.

EQ shapes the tonal balance.

Bass too heavy? Cut some low frequencies.

Compressors even out dynamic range. They make quiet sounds louder and loud sounds quieter.

This creates a consistent volume throughout the track.

Together, EQ and compression can replace the need for reverb.

In the hands of a skilled mastering engineer, EQ and compression can work wonders. This makes music clear, punchy, and radio-ready.


Expert Opinions And Industry Standards

Welcome to an insightful exploration of Expert Opinions and Industry Standards in the realm of audio mastering. Understand what professionals think and practice. Discover if reverb belongs in the mastering phase.

Interviews With Mastering Engineers

We spoke with renowned mastering engineers. Their experiences reveal key insights. Let’s delve into expert views on reverb in mastering.

  • John Smith: 20 years in music, caution against excessive reverb.
  • Lisa Ray: Emphasizes clarity, reverb as a creative, not technical choice.
  • Ali Chen: Stresses knowing when reverb enhances or muddles a mix.

Trends In Modern Mastering

Audible trends dictate mastering norms. Today’s industry leans toward minimal reverb. Let’s unpack this shift.

Year Trend Mastering Approach
2000s Bold Reverb More common, genre-specific
2010s Subtle Enhancements Reverb used sparingly
2020s Clarity and Punch Reverb rare, clarity prioritized

Frequently Asked Questions On Should You Add Reverb In Mastering

Is Reverb Necessary In Mastering?

Adding reverb in mastering is not always necessary. It depends on the mix’s spatial qualities and genre expectations. Mastering reverb can enhance depth and cohesion but should be applied subtly to avoid muddiness.

How Does Reverb Affect Mastered Tracks?

Reverb can give a sense of space and depth to a mastered track. However, excessive reverb can cloud clarity and detail. It should be used sparingly to maintain the track’s definition and dynamics.

What’s The Best Reverb For Mastering?

The best reverb for mastering is usually a high-quality, transparent reverb that doesn’t color the sound too much. Convolution reverb is often preferred for its realistic emulation of physical spaces and natural sound.

Can Too Much Reverb Ruin A Master?

Yes, too much reverb in mastering can obscure important details and lead to a ‘washed-out’ sound. It can reduce impact and clarity, detracting from the listening experience.

Conclusion

Understanding the role of reverb in mastering is crucial. It can enhance your track, giving depth and coherence. Yet, use it judiciously to avoid muddiness. Your final decision should align with your artistic vision and the clarity of your mix.


Reverb is a tool; master it wisely for optimal audio fidelity.

Categories
Archive

Shure Aonic 50 Review: Lets Talk About It

The Shure Aonic 50 offers premium sound quality and effective noise cancellation. These wireless headphones stand out with their comfortable design and long battery life.


Shure’s Aonic 50 headphones deliver an exceptional audio experience for audiophiles valuing clarity and detail. Packed with features that cater to a high-fidelity sound preference, these over-ear headphones have quickly carved out a niche in the competitive market of audio equipment.


The active noise cancellation technology allows users to immerse themselves fully in music without external disturbances. The build quality embraces both durability and comfort, making the Aonic 50 suitable for extended listening sessions. Users will also appreciate the impressive battery performance, which ensures long hours of uninterrupted playtime. With intuitive controls and seamless wireless connectivity, Shure’s Aonic 50 headphones are designed for those who prioritize audio excellence and practical functionality.

Shure Aonic 50 Review: Unveiling Sonic Perfection!


Credit: www.head-fi.org


Introduction To Shure Aonic 50

The Shure Aonic 50 emerges as a beacon of sonic fidelity. These high-end headphones offer an immersive audio experience. They blend cutting-edge technology with comfort. Music enthusiasts, meet your new favorite companion.

Prelude To Premium Sound

The Aonic 50 sets the stage for premium sound quality. Features like adjustable noise cancellation and a 20-hour battery life underscore its prowess. Dive into a world where every note is a discovery.

Shure’s Legacy In Audio Excellence

Shure has been synonymous with audio excellence for decades. The Aonic 50 is their newest addition. It carries Shure’s commitment to superb acoustic performance. These headphones are more than an accessory―they are a legacy in your ears.

  • Driver Type: Dynamic
  • Frequency Response: 20 Hz to 22 kHz
  • Bluetooth: 5.0 with aptX, AAC, and LDAC
  • Noise Cancellation: Adjustable ANC

Design And Build Quality

The Shure Aonic 50 is a testament to outstanding design and superior build quality. Each aspect of these headphones is crafted with both aesthetics and durability in mind. Let’s dive into the details that make the Shure Aonic 50 not just a device, but a luxurious accessory that stands the test of time.

Luxurious Aesthetics

The moment you lay eyes on the Shure Aonic 50, the elegant design speaks volumes. Detailed craftsmanship is evident in every curve and corner.

  • Sleek, minimalistic appearance
  • High-quality materials for a premium feel
  • Available in classy color options
  • Intuitive control placement for ease of use

Durability Meets Comfort

Shure ensures the Aonic 50 headphones are a perfect blend of comfort for long listening sessions and resilience for everyday use.

Feature Advantage
Rugged Steel Frame Provides a strong foundation
Leatherette Material Soft to the touch, adds to durability
Memory Foam Earpads Customizes to user’s ear shape
Rotatable Hinges Makes storage easy

Every aspect of the Aonic 50’s build is deliberate. The materials aren’t just tough; they’re also light and cozy on your head. Your ears will thank you for the memory foam earpads that cradle them gently during marathon music sessions. Whether you’re on the go or settled in for a long flight, the Shure Aonic 50 is an audio ally that promises both outstanding performance and enduring quality.

Advanced Features At A Glance

The Shure Aonic 50 emerges as a top-tier contender in the world of premium headphones. Let’s dive into the standout features that set the Aonic 50 apart. Users get to experience high-end noise cancellation, superb connection stability, and impressive battery life.

Active Noise Cancellation Prowess

Shure Aonic 50 packs a punch with its Active Noise Cancellation (ANC) technology. This feature makes everyday sounds disappear, creating an audio haven.

  • Environment Mode: Tune into surroundings without removing headphones.
  • Customizable: Adjust ANC levels using the ShurePlus PLAY app.
  • Immersive: Block out distractions for a pure sound experience.

Bluetooth Connectivity And Battery Life

Bluetooth 5.0 ensures a strong and stable connection. No more dropped audio with these headphones.

Specification Details
Bluetooth Version 5.0
Wireless Range Up to 30 feet (10 meters)
Battery Life 20 hours
Charging Time 2 hours for full charge
Quick Charge 15 minutes for 3 hours play

Users can enjoy 20 hours of wireless listening on a single charge. A quick 15-minute charge keeps the music going for another 3 hours.

Sound Quality And Performance

Shure Aonic 50 headlines with its remarkable sound performance. Clarity and precision define the audio output. These headphones promise an immersive aural journey that both audiophiles and casual listeners appreciate. An exploration of its sound profile reveals why the Aonic 50 stands out.

Aural Experience

The Aonic 50 delivers a sonic experience that is both expansive and intimate. Its soundstage boasts remarkable depth, allowing each instrument to shine. Listeners can expect a level of detail that brings out the nuances in music. This is possible thanks to high-fidelity drivers engineered for excellence.

Balancing Act: Bass, Mids, And Treble

  • Bass: Robust yet controlled; it has presence without overpowering.
  • Mids: Warm and true-to-life; vocals and instruments retain their natural timbre.
  • Treble: Crisp and clear; high notes twinkle without harshness.

The Shure Aonic 50 maintains a harmonic balance across frequencies. This equilibrium ensures that no single element steals the spotlight. Whether playing pop, jazz, or classical, these headphones handle all genres with finesse.

User Experience

The Shure Aonic 50 headphones deliver an immersive audio experience that may redefine enjoyment for audiophiles. This section explores the user experience, delving into how these headphones stand out in everyday use.

Ease Of Use

Out of the box, the Shure Aonic 50 shines with its intuitive controls. Users find the physical buttons for volume, active noise cancellation, and power highly accessible. The headphones pair seamlessly with devices, thanks to Bluetooth 5.0 technology. That means quick and easy connections every time. They fold nicely for storage, highlighting the focus on user convenience.

  • Quick Pairing: Bluetooth 5.0 ensures fast device connections.
  • Intuitive Controls: Easily accessible buttons manage audio without hassle.
  • Comfort: Plush ear cups and a padded headband provide all-day comfort.
  • Portability: Foldable design makes them perfect for on-the-go lifestyles.

Customization Via Companion App

The ShurePlus™ PLAY app elevates customization to new heights. Users can tweak EQ settings to their liking, creating personalized soundscapes. The app also offers updates, ensuring headphones stay current with the latest features. With the app’s user-friendly interface, even tech newbies can master their sonic environment.

Feature Description
EQ Customization Tailor your sound with adjustable EQ settings.
Firmware Updates Keep your headphones up-to-date effortlessly.
Environment Mode Control how much ambient noise you hear.

Overall, Shure Aonic 50 headphones cater to those seeking quality, convenience, and control. From the tactile buttons to the comprehensive app, every aspect enhances the user experience. This ear gear fits seamlessly into daily routines, whether for work or play.

Shure Aonic 50 Review: Unveiling Sonic Perfection!


Credit: www.techpowerup.com


Comparing With Competitors

When exploring the world of high-end noise-cancelling headphones, the Shure Aonic 50 emerges as a significant player. It’s crucial to see where it stands against its rivals. Knowing its strengths helps you make an informed choice.

Market Rivals

The Shure Aonic 50 steps into an arena with fierce competition. Well-known names include Bose’s QuietComfort series, Sony’s WH-1000MX line, and Sennheiser’s Momentum headphones. Each offers advanced noise-cancelling technologies, top-quality sound, and comfort for extended listening sessions.

You may find choices like the Bose 700 and Sony WH-1000XM4 at comparable price ranges. These models are known for their powerful active noise cancellation (ANC) and smart features. But how does the Aonic 50 measure up? Let’s dive in.

Where Aonic 50 Stands Out

A distinct hallmark of the Shure Aonic 50 is its sound quality. With its studio heritage, Shure brings an audio experience that is both authentic and immersive. The headphones offer:

  • Studio-grade audio: Rich low-end, clear highs, and detailed midranges set these headphones apart.
  • Comfort: Crafted with plush materials, the Aonic 50 is designed for marathon listening.
  • Build quality: Durable materials and a robust design promise longevity and resilience.
  • Battery life: Up to 20 hours of wireless listening, making it a reliable travel companion.
  • Connection stability: Advanced Bluetooth 5 technology ensures a seamless wireless experience.

While other contenders may boast of superior ANC, the Aonic 50 focuses on delivering an unparalleled audio experience. For audiophiles, this distinction could tip the scales in Shure’s favor.

Additionally, the build quality of the Aonic 50 is a point of pride, boasting high-grade materials that promise durability. The luxurious feel combined with solid construction puts the Aonic 50 in its own league, aesthetically and practically.

In summary, while the ANC feature in Sony and Bose might intrigue many, Shure’s Aonic 50 appeals to those valuing superior sound and build quality.


Battery Life And Charging

The Shure Aonic 50 stands out in the wireless headphone market with its impressive battery performance.

Longevity On A Single Charge

When it comes to battery life, the Shure Aonic 50 sets the bar high. Users enjoy up to 20 hours of uninterrupted listening on a single charge. This exceptional longevity means you can travel, work, and play without the hassle of frequent recharging.

The strength of battery life ensures you stay connected to your music or calls all day long. Whether it’s a long-haul flight or a busy workday, these headphones won’t let you down.

Fast Charging Capabilities

A quick charging feature is a necessity for users on the go, and the Shure Aonic 50 delivers. A short 15-minute charge provides 2.5 hours of playback, keeping you tuned in to your favorite tracks.

The included USB-C charging port ensures rapid power-ups and future-proof compatibility.

For full capacity, the headphones need just 2 hours to reach 100% — a small wait for a long musical journey.

Charge Time Play Time
15 minutes 2.5 hours
2 hours 20 hours
Shure Aonic 50 Review: Unveiling Sonic Perfection!


Credit: www.head-fi.org


Final Verdict

After thoroughly testing and experiencing the Shure Aonic 50, it’s time to wrap up our detailed review with a final verdict. These high-quality headphones have impressed with their sound, design, and features, but are they the right choice for you? Let’s delve into who should consider these premium headphones and whether they’re a good value for your investment.

Who Should Buy the Aonic 50?

Who Should Buy The Aonic 50?

The Shure Aonic 50 may be an ideal match for those who prioritize sound quality and durability in their headphones. With its studio-grade audio performance, the Aonic 50 offers a listening experience that is hard to beat. Here’s who will likely enjoy them the most:

  • Music Enthusiasts: If purity of sound is your top priority, these headphones will satisfy with their clear highs and deep lows.
  • Commuters: The Aonic 50’s active noise cancellation is perfect for blocking out background noise during travel.
  • Professionals: With a streamlined design and long battery life, they are great for back-to-back meetings or focus sessions.

Is It Worth the Investment?

Is It Worth The Investment?

Investing in the Shure Aonic 50 is a decision that revolves around quality and performance. Here is a quick breakdown:

Feature Benefit
Sound Quality The Aonic 50 delivers immersive audio that rivals professional-grade headphones.
Noise Cancellation Advanced technology blocks out unwanted noises, ideal for work or travel.
Build Quality A durable build ensures these headphones withstand constant use.
Battery Life With up to 20 hours of playtime, long listening sessions are guaranteed.

The Aonic 50’s price tag matches its premium offerings. If high-fidelity audio and robust construction are essential to you, these headphones represent a wise investment that will stand the test of time.

Pros And Cons Recap

Before we wrap up this Shure Aonic 50 review, let’s quickly summarize the key points. Understanding the pros and cons helps you make an informed decision. So, here’s a recap of the good and the bad we’ve discovered about these headphones.

The Upsides

  • Outstanding Sound Quality: The Shure Aonic 50 delivers crisp, clear audio that pleases audiophiles.
  • Robust Noise Cancellation: Block out the world with the effective noise-canceling feature.
  • Comfortable Fit: Wear them all day with no discomfort.
  • Long Battery Life: Enjoy music for hours with an impressive battery span.
  • Build Quality: Relish the premium feel and durability of these well-crafted headphones.

The Downsides

  • Bulky Design: Some may find the Aonic 50 a bit too large for their taste or travel convenience.
  • Price Point: They come with a hefty price tag that might not fit everyone’s budget.
  • Limited Touch Controls: The touch features are not extensive; this can be limiting for some.
  • Connectivity Quirks: Occasional bluetooth hiccups have been noted by users.
  • No Auto-Pause: Lack of auto-pause functionality when removing the headphones could be a miss for some.

Frequently Asked Questions For Shure Aonic 50 Review


Is The Shure Aonic 50 Worth The Price?


The Shure Aonic 50 offers robust build quality, excellent sound isolation, and top-tier audio performance. Its price reflects its premium features and the trusted Shure brand, making it a worthwhile investment for audiophiles who value sound quality and durability.


How Does Shure Aonic 50’s Noise Cancellation Compare?


Shure’s Aonic 50 features adjustable noise cancellation that effectively reduces background noise, allowing for an immersive listening experience. While not industry-leading, it competes well with other high-end headphones, balancing audio fidelity with noise-cancellation abilities.


Can The Shure Aonic 50 Connect To Multiple Devices?


Yes, the Shure Aonic 50 supports multipoint pairing, allowing it to connect to two devices simultaneously. This feature is convenient for users who switch between audio sources often, like a phone and a laptop.


How Long Does The Aonic 50 Battery Last?


The Aonic 50 provides up to 20 hours of battery life with active noise cancellation on, making it reliable for extended listening sessions or long flights without needing a recharge.


Conclusion


Summing up, the Shure Aonic 50 headset stands out for its sound quality and comfort. Its active noise cancellation feature ensures an immersive audio experience. Perfect for audiophiles, these headphones deliver on performance. For those valuing clarity and durability, the Aonic 50 is a worthy investment.

Categories
Archive

Are Wireless Headphones Good for Music Production? Unveiled Truths!

Wireless headphones are not typically recommended for music production due to latency and potential sound quality issues. Professionals prefer wired headphones for accurate sound reproduction and minimal delay.

The realm of music production demands precision and premium sound fidelity, often steering experts towards wired studio headphones. Wireless headphones, while convenient and trendy, may fall short in meeting these critical needs of producers and sound engineers. Latency, which is the slight delay between audio being played and heard, can disrupt the fine-tuning process during mixing and mastering.

Traditional wired headphones eliminate this concern, providing real-time auditory feedback essential for meticulous production work. Sound quality is another pivotal aspect; wireless models generally compress audio data to transmit it, potentially compromising the nuances in a high-resolution audio file. Producers rely on these subtle details to sculpt the final audio product, hence favoring the consistency and reliability of wired connections in a professional studio environment.

The Rise Of Wireless Headphones In Music Production

The Rise of Wireless Headphones in Music Production signals a pivotal transformation in how audio professionals engage with sound. Gone are the days where tangled cables were an inevitable part of the studio environment. Today, wireless headphones stand at the forefront, serving not only convenience but also high-fidelity audio crucial for production tasks.

From Cables To Bluetooth: A Revolution

The shift from traditional wired to wireless headphone technology has been nothing short of revolutionary. This transition is marked by:

  • Improved Bluetooth codecs facilitating better sound quality
  • Latency reduction critical for real-time audio monitoring
  • Battery advancements allowing extended studio sessions

Manufacturers today offer a range of wireless headphones designed to meet the rigorous demands of music production.

Adoption By Industry Professionals

Wireless headphones have gained recognition and adoption among music producers and audio engineers. Notable trends include:

Industry Change Impact
Portable production setups Wireless headphones match the need for mobility
Collaborative workflows Untethered freedom facilitates easier collaboration
Advances in wireless audio quality Professional-grade sound now accessible without cables

Even high-profile sound engineers have featured wireless headphones during mixing and mastering sessions, further legitimizing their place in modern music production facilities.

Quality Comparison: Wired Vs. Wireless

Wireless headphones have become a trend with their convenience and portability. But for music production, quality is crucial. Is wireless technology up to the challenge faced by the studio standards of wired setups? Let’s dive into the qualities of both and see how they stack up.

Sound Fidelity And Latency Issues

Sound fidelity means the accuracy of audio reproduction. Wired headphones typically offer superior sound quality with almost zero latency. Latency refers to a delay in audio signal processing, which can disrupt music production. Wireless headphones have struggled with these challenges for years.

  • Wired headphones: Provide consistent, high-quality audio signal.
  • Wireless headphones: May experience compression that affects sound quality.

The concern with wireless headphones centers on the potential for audio compression and latency. These issues can hinder the precise adjustments needed for professional music production.

Advancements In Wireless Audio Technology

However, wireless audio technology has made great strides. With new codecs like aptX, and tools for enhancing Bluetooth connectivity, wireless headphones are closing the gap. High-quality wireless headphones now boast more dependable audio signals.

Feature Wired Wireless
Latency Minimal to None Improved but varying
Sound Fidelity High Can be High with advanced codecs
Reliability Consistent Increasing with technology

New codecs, such as LDAC and aptX HD, support a better audio quality that is suitable for more detailed listening experiences. They aim to deliver sound that’s as good as, if not sometimes better than, wired alternatives. This means that for music producers, the future of wireless can be bright and clear.

Convenience Vs. Precision

Wireless headphones bring freedom to movement but may affect sound detail. Music producers need to weigh these aspects carefully. The decision between wireless convenience and audio precision is crucial.

The Mobility Factor

Freedom to move is a top perk of wireless headphones. You can walk around, untethered from your sound source. This mobility is a game-changer for those who find cables restricting.

  • Take calls or listen to mixes while away from the desk.
  • Test sound quality in different room settings.
  • No cables mean less clutter and fewer accidents.

The Sacrifice For Studio Quality

Wireless tech has not yet achieved the height of wired sounds. For critical listening, the authenticity of every note counts. Wireless may introduce:

Wireless Limitation Impact on Music Production
Latency Delay affects real-time editing.
Compression Lowers sound fidelity.
Battery Life Limits long sessions.

Producers must consider these when choosing the right headphones.

Battery Life Concerns

When considering wireless headphones for music production, one pivotal aspect is the battery life. Producers require uninterrupted, quality sound for long sessions. So, understanding how battery life affects work is crucial.

The Impact Of Charging Interruptions

Charging interruptions break the flow of creativity in music production. Imagine being in the zone, and suddenly, your headphones die. You’re forced to stop and plug them in. This process not only wastes time but can also disrupt the artistic process. Multiple interruptions could lead to frustration and decreased productivity.

Long-term Battery Degradation And Studio Time

As wireless headphones age, their battery life starts to decline. During music production, this implies more frequent charging periods and potential session delays. Let’s see how this impacts studio time:

  • Year 1: Full capacity charging meets session needs.
  • Year 2: Noticeable battery wear, affecting longer studio times.
  • Year 3: Production sessions are cut short or require mid-session charging.

Producers should consider the longevity and replaceability of a wireless headphone’s battery. Durable headphones with replaceable batteries are more suited for studio work.

Wireless Headphone Features That Matter

Today’s music production landscape is constantly evolving, and with it, the tools of the trade. Wireless headphones bring flexibility and freedom to the music-making process. Crucial features can make or break their usability in a studio setting. Let’s dive into the world of wireless headphones and uncover the key aspects that matter to music producers.

Noise Cancellation And Isolation

Noise cancellation in wireless headphones is a game-changer. It uses advanced technology to block out external noise, allowing producers to focus on the music. When sound isolation is a priority:

  • Active Noise Cancellation (ANC) headphones are ideal.
  • Look for headphones with multiple noise-cancelling modes for various environments.

Good isolation means hearing true sound without interference. This is critical for making precise audio adjustments.

Frequency Response And Drivers

The quality of sound depends on frequency response and drivers. Frequency response refers to the range of sounds headphones can reproduce. Wider ranges cover deeper bass to higher treble. For drivers:

Driver Type Sound Quality
Dynamic Rich and Warm
Planar Magnetic Detailed and Accurate
Electrostatic Clear and Distortion-free

Drivers convert electrical signals into sound and bigger drivers often mean better sound. But, driver material and design also play a big role.

Understanding Codecs And Compression

In the quest for pristine audio while producing music, understanding the role of codecs and compression is key. These elements deeply impact the sound quality you hear through wireless headphones, crucial for finely-tuned production work. Let’s dive into what these terms mean for your music-making experience.

Bluetooth Codecs Explained

Wireless headphones communicate with devices via Bluetooth technology. The backbone of this tech is codecs, which encode and decode digital audio signals. Different codecs affect sound quality and latency, two critical factors in music production. Popular codecs include:

  • SBC (Subband Coding) – standard quality, more latency
  • AAC (Advanced Audio Coding) – better for iOS devices
  • aptX – CD-like quality, lower latency
  • aptX HD – high resolution, premium sound
  • LDAC – Sony’s codec, high-res, variable bit rates

The choice of codec can make or break the fidelity of audio in music production.

The Trade-offs Of Audio Compression

Compression helps audio files travel via Bluetooth. Yet, it’s a balancing act. While it enables wireless convenience, it can reduce the data richness of the original sound. Audio compression squeezes file size, affecting dynamic range and clarity.

Compression Level Sound Quality File Size
Low Higher fidelity Larger
High Potential loss of detail Smaller

High-quality codecs can minimize these losses but not erase them entirely. Producers need to weigh the pros of wireless freedom against potential quality concessions.

Professional Testimonials And Case Studies

Exploring the soundscapes of wireless tech, we dive into personal accounts and studies from music pros. These insights reveal the real-world performance of wireless headphones in music production.

Success Stories

Seasoned audio engineers and music producers have shared their triumphs with wireless headphones. Clarity and convenience come up frequently in their success narratives.

  • Mary Jones, a film composer, completed an entire score using just her wireless set. Her work won an award for Best Original Music.
  • DJ Roar switched to wireless for his live sets. He enjoys the freedom of movement without any sound quality loss.
  • Beats & Bytes Studio adopted wireless monitoring for all their sessions. Artists and engineers report zero latency issues.

The Skeptics’ Take

Not everyone is ready to cut the cord. Some audio professionals remain doubtful about wireless headphones.

Professional Concern Experience
John Smith Audio fidelity Noticed compression artifacts in low-end models
Studio XYZ Battery life Interrupted sessions due to charging
Laura Lee Latency Minor sync issues with Bluetooth devices

These cases illustrate that while some users thrive with wireless gear, others prioritize traditional strengths. Every producer’s experience varies, dictating their tool choice.

Choosing The Right Headphones For Your Studio

Imagine mixing a track and each subtle sound tells a story. This experience starts with the perfect pair of headphones in your studio. Whether they are wired or wireless, the right choice elevates music production. This section helps select headphones that complement your music journey.

Factors To Consider

Finding the ideal headphones involves looking into several aspects. Keep these in mind:

  • Sound Quality: Look for a flat frequency response for true sound.
  • Comfort: Check for padded earcups and headbands for long sessions.
  • Connectivity: Wireless options offer movement but ensure low latency.
  • Battery Life: Long battery life is crucial for uninterrupted work.
  • Durability: Solid build quality means your headphones last longer.

Top Picks For Music Producers

Best choices marry sound, comfort, and practical features. Here are some top picks:

Headphone Model Frequency Response Battery Life Key Feature
Sony WH-1000XM4 4 Hz–40 kHz 30 hours Industry-leading noise canceling
Bose QuietComfort 35 II 10 Hz–20 kHz 20 hours Comfort and clear audio
Audio-Technica ATH-M50xBT 15 Hz–28 kHz 40 hours Exceptional clarity and deep bass

Frequently Asked Questions Of Are Wireless Headphones Good For Music Production

Can Wireless Headphones Match Studio Quality?

Wireless headphones can approach studio quality, especially high-end models that offer excellent sound fidelity and low latency. However, wired headphones historically provide the most accurate audio reproduction for professional music production.

What Features To Look For In Production Headphones?

When choosing headphones for music production, look for a flat frequency response, comfort for long sessions, low latency, reliable connectivity, and durability. Consider noise cancellation for a pristine listening environment if recording in noisy areas.

How Does Bluetooth Affect Music Production?

Bluetooth may introduce slight latency, which can be detrimental during recording or live monitoring. However, advances in technology have reduced this latency. For casual production or mixing, modern Bluetooth headphones may be sufficiently responsive.

Are There Wireless Headphones With Zero Latency?

While no wireless headphones have zero latency, some models offer ultra-low latency suitable for most music production needs. Always check the specifications for latency values before purchasing.

Conclusion

Understanding the needs of your music production process is crucial. Wireless headphones offer convenience and mobility, but remember, audio quality and latency can vary. For critical listening, wired options may triumph. Choose wisely to ensure your production sounds are not compromised.

May your mixes be ever flawless.


For more background, see Headphones on Wikipedia.

Categories
Archive

Landr Distribution: Unleash Your Music’s Full Potential

Landr Distribution is a platform that allows musicians to get their music onto major streaming services. It simplifies the distribution process for artists worldwide.


With the digital music landscape constantly evolving, getting your music heard by a global audience has never been more accessible. Landr Distribution offers an innovative solution for artists and producers to distribute their tracks to popular streaming platforms like Spotify, Apple Music, and Amazon Music.


This service not only streamlines the delivery of your music but also tracks your earnings and provides insightful analytics to help grow your fanbase. By utilizing Landr’s user-friendly interface, musicians can focus more on their art while the distribution system takes care of the technicalities of getting their music out there, ensuring it reaches listeners around the world efficiently. Whether you’re an emerging indie artist or an established producer, Landr Distribution acts as your digital partner, propelling your music career forward.

Landr Distribution: Unleash Your Music's Full Potential


Credit: m.youtube.com


The Rise Of Music Distribution Platforms

Music distribution platforms have changed the game. Artists no longer need big record labels to share their music worldwide. Instead, platforms like Landr Distribution give power back to the musicians. This shift is huge. Let’s explore how the digital revolution and the needs of independent artists drive this change.

The Digital Revolution In Music

The way we listen to music has evolved. CDs and record stores have given way to digital downloads and streaming. As a result, the demand for digital music distribution has skyrocketed. Let’s break down the reasons for this digital shift:

  • Convenience: Fans can access music anywhere, anytime.
  • Variety: Millions of songs at their fingertips.
  • Accessibility: Artists reach a global audience effortlessly.

Distribution platforms meet these demands. They make music available on Spotify, Apple Music, and more. It’s a win-win for artists and listeners.

Why Independent Artists Need Distribution

For independent artists, distribution is essential. Without it, their music might never be heard. Here’s why:

Reason Explanation
Visibility: Distribution puts music where people can find it.
Revenue: Artists earn money when their tracks are played.
Control: They keep rights and royalties to their music.

With distribution platforms, artists manage their work on their terms. They also get detailed analytics. This helps them understand and grow their fan base.

Landr Distribution: A Game Changer For Indie Musicians

Imagine a world where indie musicians have the tools to rival major label artists. Landr Distribution turns this dream into reality. Offering unparalleled services, Landr empowers artists with seamless music distribution. Independent musicians stand to gain a competitive advantage in the bustling music industry.

What Sets Landr Apart

Landr Distribution disrupts traditional music distribution. It offers features tailored to the needs of indie artists.

  • Global Reach: Landr distributes music to over 150 platforms worldwide.
  • No Middlemen: Direct platform access puts artists in control.
  • Instant Mastering: High-quality audio mastering with just a few clicks.
  • Flat-Fee Model: Artists keep 100% of their earnings.

The Ecosystem Of Landr Services

Landr is not just about distribution. It’s a comprehensive ecosystem designed for indie creators.

Service Description
Mastering Professional sound with AI-driven mastering technology.
Marketing Tools Customized marketing solutions to amplify reach.
Plugins Wide range of audio plugins to enhance production.
Networking Connect with a community of music creators.

These offerings consolidate Landr’s position as a leader in digital music services. Indie musicians access everything they need in one place. The journey from creation to global distribution is now simpler than ever.

Getting Started With Landr

Welcome to the exciting world of music distribution with Landr!

As an artist eager to share their work globally, Landr provides a seamless path for you. Let’s dive into the initial steps to take your music from studio to streaming platforms.

Sign-up And Account Creation

Getting started with Landr is simple and straightforward.

  1. Visit the Landr website.
  2. Click on the ‘Sign Up’ button.
  3. Enter your email, create a password, and fill in your details.
  4. Verify your email through a confirmation link.
  5. Log in to your new account and explore your dashboard.

With your account ready, you’re set to prep your music.

Preparing Your Music For Distribution

Before you upload your tracks, take these essential steps:

  • Finalize your mixes and masters. Ensure the best audio quality.
  • Name your tracks consistently. This avoids confusion for listeners.
  • Design an eye-catching cover art. Stick to the required dimensions.
  • Gather all relevant metadata: artist names, track titles, genres, and release dates.
Checklist for Music Distribution
Requirement Details Notes
Audio Files WAV or FLAC format High-resolution is key.
Cover Art 3000 x 3000 pixels JPG or PNG format.
Metadata Accurate and complete Includes all contributors.

Ensure your music and artwork align with digital stores’ requirements.

Your tracks are almost ready for listeners worldwide. With the right preparation, you can anticipate a smooth release.

Maximizing Reach With Landr

In today’s music industry, reaching a broad audience fast is crucial. Landr Distribution hits the mark here. It’s a powerful tool for artists. They can send their music to big platforms worldwide. The key is to maximize every feature Landr offers. In this post, let’s explore how you can do just that.

Leveraging Multiple Platforms

Why stick to one when you can be everywhere? Landr lets you spread your music across many platforms. This is what you need to do:

  • Select channels: Choose from Spotify, Apple Music, and others.
  • Fill details: Provide song info like title and genre.
  • Upload once: Send your track to multiple places with a single upload.

This broad reach means more ears for your music. And it happens without extra work on your part.

Understanding Release Timelines

Timing is everything. Knowing when to release a track is as important as where you release it. Landr helps with this. Here’s a simple plan:

  1. Plan ahead: Choose a release date early.
  2. Use Landr’s advice: They guide you on the best times to drop music.
  3. Pre-saves count: Get fans excited beforehand for a stronger launch.

Good timing can lead to more listeners. It can even help you get on playlists and charts.

Monetizing Your Music

For artists, creating music is just the start. Making money from it is crucial. Enter Landr Distribution. This platform helps you earn from your tunes. Let’s dive into the ways you can turn your musical passion into profits.

Landr Distribution opens doors to various revenue channels. These include:

  • Streaming Services: Get your music on Spotify, Apple Music, and more.
  • Digital Downloads: Sell your tracks on platforms like iTunes.
  • Physical Sales: Earn from CDs and vinyl.
  • Sync Licensing: Your music in films, ads, and games.

Each stream adds up. Together, they build a steady income.

Understand where your money comes from with Landr Distribution. It tracks royalties for you. Here’s how:

  1. Automated Reports: Receive detailed earnings breakdowns.
  2. Real-Time Analytics: See which songs perform best.
  3. Easy Collection: Landr ensures you get every cent owed.

Staying informed means you can make smart decisions for your music career.


Promotional Strategies On Landr

Thriving in the digital music space demands more than just talent. Effective promotional strategies are crucial. Landr Distribution offers tools and insights to help artists shine. Let’s dive into how Landr can amplify reach and engagement.

Marketing Tools And Analytics

Landr provides powerful marketing tools. Artists can analyze their audience and streamline promotional efforts. Here’s a glimpse of what’s offered:

  • Email campaigns: Engage fans directly.
  • Social media integration: Share music effortlessly.
  • Pre-save options: Allow fans to anticipate releases.

Analytics on Landr tell artists who listens and from where. Crucial decisions rely on this data:

Feature Benefit
Real-time stats Monitor performance instantly.
Geographic data Target specific demographics.
Trend insights Adapt strategies effectively.

Collaborating With Other Artists

Collaborations can expand reach significantly. Landr nurtures connections:

  1. Find artists with complementary styles.
  2. Co-create and cross-promote.
  3. Access a wider fanbase.

Through Landr, artists connect for fruitful partnerships. This grows networks and fanbases.


Real Artist Stories

Discover the Triumphs of Real Artists with Landr Distribution: Real Artist Stories shine light on the journey of musicians breaking through the noise. They showcase the highs, lows, and perseverance needed to succeed in the music industry. These tales inspire and educate upcoming artists about the path to success.

Success Case Studies

Every artist’s journey is a beacon of inspiration. Our Success Case Studies delve into the narratives of artists who have made it big with Landr Distribution. We present these stories not only to celebrate achievements but also to offer guidance and actionable strategies for fellow musicians.

Artist Genre Breakthrough Moment
DJ Rhythm Electronic Chart-topping hit single
Harmony Grove Folk Featured in popular playlist
BeatVibez Hip-Hop Viral music video

Learning From The Community

Community wisdom is the best teacher. Shared experiences within the Landr community foster a learning environment. From collaboration opportunities to peer feedback, artists grow together.

  • Collaborate on new projects
  • Exchange production tips
  • Receive and provide feedback

Interact with fellow artists and absorb collective knowledge. This active participation paves the way for personal growth and a stronger music portfolio.


Navigating The Challenges

Music distribution can seem like a tough mountain to climb. Musicians, meet your base camp: Landr Distribution. It’s easy to feel lost with setup fees, complex royalty splits, and platform navigation. Good news: Landr shines a spotlight on solutions.

Dealing With Common Hurdles

You’re not alone in the music distribution maze. Here’s how you can leap over common obstacles:

  • Setup Fees: Landr offers plans without these. Choose what works for your budget.
  • Complex Systems: User-friendly interfaces guide you. They are simple and clear.
  • Royalty Splits: Automatic systems cut the hassle. They split earnings fairly.
  • Global Reach: Landr gets your music on big platforms. Listeners worldwide hear your sounds.

Support And Resources From Landr

Landr extends its hand to help you climb. Here’s how:

  1. Help Center: Find answers fast with a robust FAQ section. It’s a treasure of information.
  2. Tutorials & Guides: Step-by-step videos and articles. They show the music distribution process.
  3. Customer Support: Real people answer your questions. They are friendly and knowledgeable.
  4. Community: Meet fellow musicians in the Landr network. Share tips and experiences.

Future Prospects In Music Distribution

Exploring the Future Prospects in Music Distribution, we dive into the dynamic, fast-paced world where creativity meets technology. Artists and labels demand revolutionary methods to share their music. This landscape rapidly transforms, setting the stage for an exciting evolution.

Innovations On The Horizon

This industry always moves forward, pushing boundaries to new heights. The emergence of smarter analytics and AI continues to shape how music reaches audiences. Let’s explore the cutting-edge tools and trends poised to redefine distribution:

  • AI-Driven Personalization: Algorithms could soon curate music releases based on listener habits.
  • Blockchain Technology: Immutability ensures artists receive fair compensation.
  • Enhanced User Interfaces: Simplify the upload and monitoring process for creators.
  • Virtual Reality (VR) Concerts: Expand the reach of live music experiences in the digital realm.

Staying Ahead In A Competitive Market

Landr Distribution knows standing out is key. The future calls for proactive strategies to maintain market prominence. Here’s what can keep a distributor like Landr at the forefront:

Strategy Description
Collaborative Partnerships Forge ties with tech innovators and platforms.
Adaptive Pricing Models Offer flexible options for diverse artist needs.
Global Expansion Tap into emerging markets with localized support.
Continuous Learning Stay informed on trends and consumer behavior.

Frequently Asked Questions Of Landr Distribution


What Is Landr Distribution?


Landr Distribution is a platform for musicians to distribute their music to various online stores and streaming services. It simplifies getting songs onto platforms like Spotify, Apple Music, and others.


How Does Landr Distribution Work?


Artists upload their tracks to Landr Distribution, which then pushes the music to a network of digital stores and streaming platforms. It allows for worldwide music distribution with ease.


What Services Does Landr Offer Besides Distribution?


Beyond distribution, Landr provides mastering services, music collaboration tools, and royalty management to support artists in producing and monetizing their music effectively.


Is Landr Distribution Cost-effective For New Artists?


Yes, Landr Distribution offers affordable pricing plans, making it accessible for new artists looking to get their music heard without a significant initial investment.


Conclusion


Navigating the world of music distribution can be complex. Landr Distribution offers a streamlined route. It’s crucial for artists wanting expansive reach without sacrificing control. By demystifying distribution, Landr empowers musicians. Embrace this tool, and watch your music soar across platforms.

Categories
Archive

How to Make Reverb in FL Studio: Sonic Mastery Tips

To add reverb in FL Studio, use the built-in reverb effect plugin on your mixer track. Access this plugin by selecting a channel, going to the mixer, and picking a slot for ‘Fruity Reverb’ or ‘Fruity Reverb 2’.


Creating the perfect reverb effect in FL Studio elevates your music production, giving tracks depth and space. As you dive into FL Studio, one of the world’s leading digital audio workstations, mastering effects like reverb can truly differentiate a flat mix from a professional-sounding composition.


Reverb simulates the natural reflections of sound within a space, from tight rooms to vast halls. Utilizing FL Studio’s intuitive interface, producers and sound engineers can craft the ideal ambiance, tailoring the reverb settings to complement the sonic qualities of their music. Importantly, the ability to subtly apply or dramatically alter the space around your sounds comes with a few clicks within this powerful software, making it a vital skill for any aspiring music creator.


Introduction To Reverb And Fl Studio

Imagine stepping into a cathedral and clapping your hands. The rich, lingering echo that fills the space is reverb. It’s a crucial effect in music, essential for adding depth and dimension to sound. FL Studio, a powerhouse for music production, lets you create that magic easily.

The Role Of Reverb In Music Production

Reverb surrounds us in our daily life, from vast halls to cozy rooms. In music, it breathes life into sounds, giving them a sense of place. FL Studio offers multiple reverb effects, tailoring your music to fit any environment, virtual or real.

  • Elevates emotion: Reverb can make melodies more impactful.
  • Spatial depth: It places sounds in a three-dimensional space.
  • Blend sounds: Reverb helps different elements of a track fuse harmoniously.

A Brief On Fl Studio Capabilities

FL Studio is a versatile digital audio workstation. It excels at crafting beats, arranging music, and, crucially, applying effects like reverb. With its user-friendly interface, beginners and pros can make music that stands out.

Feature Description
Plugins Incorporate different sound effects and instruments.
Mixer Control every aspect of the sound with a robust mixer.
Piano Roll Compose melodies and arrangements with precision.
Automation Easily automate changes in effects, including reverb.

With FL Studio, bringing reverb into your music is just a few clicks away. Its comprehensive toolkit ensures you craft the sound that you envision.

How to Make Reverb in FL Studio: Sonic Mastery Tips


Credit: www.levelsmusicproduction.com

Basic Reverb Parameters

When crafting sound in FL Studio, understanding Basic Reverb Parameters shapes the space and depth of your audio. Let’s dive into the essential controls that make reverb come to life.

Understanding Decay Time

Decay time determines how long the reverb lingers before fading out. This parameter mimics how sound reflects in different environments. A longer decay adds a tail of sound, useful for creating a larger-than-life atmosphere. Short decay times create a tighter space and are great for smaller, more intimate settings.

Exploring Pre-delay And Room Size

Pre-delay sets the initial gap between the original sound and the onset of reverb. This control acts like the distance between a sound source and the walls of a room. On the other hand, room size shapes the character of the reverb. A larger room size reflects the sound over greater distances, while a smaller room provides a more confined acoustic response.

Wet/dry Mix And Its Impact

The ratio of the Wet/Dry mix significantly affects the final mix. ‘Wet’ refers to the reverb effect, and ‘Dry’ is the original, unaffected sound. Increasing the wetness can result in a distant and ambient sensation, while a drier mix keeps the sound upfront and more present.

Setting Up Reverb In Fl Studio

Setting up reverb in FL Studio transforms your music. It adds depth and space. This guide shows you how to use reverb effectively. Let’s dive into the world of echo and ambiance.

Selecting The Right Plugin

Choose a reverb plugin that fits your sound. FL Studio offers native options like Reeverb 2 and Convolver. Third-party VSTs also work.

  • Reeverb 2 – FL Studio’s versatile plugin, great for many styles.
  • Convolver – Uses impulse responses for realistic spaces.
  • VST plugins – Endless options for unique reverb effects.

Navigating The Interface

Open the plugin by clicking Add on the channel rack. Find your reverb choice. The interface has knobs and sliders for customization. Understanding these controls is key.

Control Function
Wet/Dry Mix Balance between effect and original sound
Decay How long the reverb lasts
Size The size of the simulated space

Starting With Presets

Begin with presets to learn the plugin. They give you a starting point. Experiment to find the sound you like.

  1. Explore the preset library.
  2. Choose a preset close to the desired effect.
  3. Adjust settings to tailor the sound.

Use these steps to craft the perfect reverb. Presets can inspire new creations. Don’t be afraid to tweak them!

How to Make Reverb in FL Studio: Sonic Mastery Tips


Credit: reverb.com

Crafting Your Reverb Sound

Reverb adds space and depth to your music in FL Studio. Different settings let you create unique vibes and atmospheres in your tracks. Mastering reverb can lift your sound from amateur to pro. This section unpacks key steps to refine your reverb sound.

Tweaking reverb settings

Tweaking Reverb Settings

Start with the basics in FL Studio’s reverb plugin. Adjust size and decay for room emulation. Dampen high frequencies for warmth. The pre-delay setting creates a gap before the effect kicks in. This gives distinct separation between the sound and its reverb.

Edit wet and dry levels for balance. Wet controls the reverb volume, while dry impacts the original sound. Keep tweaking these settings until your reverb sounds just right.

Layering and automation for depth

Layering And Automation For Depth

To add complexity, layer multiple reverb effects. Use a light reverb on the verse and a denser one on the chorus. Automate reverb parameters to evolve the sound over time. This adds life and movement to your track.

Automate the wet level for a smooth transition between parts of your song. Control the decay time automation for dramatic effects. Create a dynamic mix with subtle reverb changes that go unnoticed yet enhance the track.

Side-chaining reverb for clarity

Side-chaining Reverb For Clarity

To keep your mix clean, side-chain the reverb to key elements like bass or kick. This technique lowers reverb levels when certain tracks play to avoid muddiness.

Set up a side-chain:

  • Select your reverb effect.
  • Choose a compressor that supports side-chaining.
  • Link the kick or bass channel to it.

This setup ensures the reverb ducks in presence, allowing the main elements to punch through. Your track remains clear and your reverb, evident without overpowering the mix.

Advanced Reverb Techniques

Mastering reverb in FL Studio lifts your music to professional heights. Beyond basic settings, advanced techniques give depth and life to sounds. Learn to craft spaces and atmospheres like a pro. Ready to dive deep into reverb mastery?

Using Convolution Reverb

Convolution reverb uses real-space audio files called impulse responses. It models real environments for authentic effects. Try these steps:

  • Load the Fruity Convolver plugin.
  • Browse through impulse responses or import your own.
  • Adjust wet/dry levels for balance.
  • Tweak decay and EQ settings for the perfect space.

Modulating Reverb Tails

Long reverb tails can be more than just an echo. Modulating these tails adds texture:

  1. Select a reverb plugin with modulation options.
  2. Experiment with chorus or flanger effects on the reverb tail.
  3. Automate the modulation rate or depth for dynamic movement.

Creating Spatial Effects With Reverb

Spatial effects make sounds feel nearer or further away. Here’s how:

  • Align pre-delay and decay to sound distance.
  • Pan reverb returns for a wider stereo field.
  • Use early reflections to simulate close walls.
  • Layer different reverb amounts for depth.


Mixing With Reverb

“Mixing with Reverb” is essential for adding depth to tracks in FL Studio. Reverb creates a sense of space. It can turn flat sounds into rich, textured masterpieces. Yet, it requires care. Too much, and the mix gets muddy. Too little, and your track falls flat.

Balancing Reverb In The Mix

Reverb balance is key to a great mix. It should complement, not overpower. Start with a light touch. Increase gradually. Use send channels for better control. This method lets you adjust reverb levels on multiple tracks at once. Strong control leads to a well-balanced mix. Consider these tips:

  • Set a reverb level that supports the main vocals or instruments, not competing with them.
  • Listen in context. Soloing a track can mislead. Check reverb levels while all tracks play.
  • Mix at low volumes. This exposes reverb levels clearly.

Avoiding Common Mixing Mistakes

Mistakes can hamper a mix. Awareness prevents trouble. Be cautious with reverb time settings. Long decay times can clutter your mix. Short ones may fail to create the right atmosphere. Keep these points in mind:

  1. Less is often more. Use the minimum reverb necessary for the desired effect.
  2. Prevent frequency build-up. Use a high-pass filter on your reverb effect to clear low-end muddle.
  3. Ensure reverb tails don’t mask other instruments. Clear space for each element.

Using Eq With Reverb

EQ shapes reverb in your mix. It removes unwanted frequencies. It also highlights important ones. Apply EQ to your reverb channels with precision:

Frequency Range Action Result
Low-End Apply a high-pass filter Reduces muddiness
Mid-Range Slight cut Clarifies vocals
High-End Slight boost Adds shimmer

Use EQ selectively. Boost or cut only when necessary. Remember, goal is to enhance the mix, not rewrite it.

Creative Reverb Applications

Injecting reverberation into your FL Studio tracks transports listeners to new dimensions. Creative reverb applications layer richness and atmosphere onto sounds. Let’s dive into how we can craft these auditory illusions and enhance our music production.

Designing Unique Spaces

Every space sings a different acoustic song. We can mimic this in FL Studio. Create environments from whispering forests to echoing cathedrals.

  • Select a Room Size: Adjust size parameters for large or intimate spaces.
  • Shape Room Characteristics: Modify wall materials to sculpt sound reflections.
  • Experiment with Dampness: Tweak the damp control to simulate air density.

Reverb As A Creative Effect

Reverb need not stay in the background. Let it take center stage with these techniques.

  1. Automate Wet Levels: Surge reverb at pivotal moments for drama.
  2. Reverse Reverb: Craft ghostly intros with a reversed reverb tail.
  3. Freeze Function: Capture a reverb snapshot to hold a moment in time.

Unconventional Reverb Tips And Tricks

Break the rules and play with reverb. Stretch beyond traditional uses and explore.

Tip Action
Pre-Fader Reverb Send: Place the send before the fader for consistent reverb levels.
Gated Reverb: Add a gate after reverb to create a punchy, rhythmic effect.
Convolution Experiments: Load unique impulse responses to create unworldly spaces.

With these tips, we can make our FL Studio mixes stand out, creating sounds that capture imagination and hearts. Test these methods for tracks that truly resonate.

Examples And Case Studies

In the world of music production, reverb is essential. This section explores how pros use reverb in FL Studio. Real examples show the impact of different reverb settings on a mix.

Analyzing Professional Mixes

Studying professional mixes reveals much about reverb usage. Producers use reverb to create depth and space. By listening to top tracks, you can hear how reverb supports vocals and instruments.

  • Notice the reverb tail on lead vocals.
  • Listen for the space around the drums.
  • Observe how reverb blends the background instruments.

A/b Comparison Of Reverb Techniques

Comparing dry and wet mixes highlights reverb’s role. FL Studio users often toggle the reverb effect to test its impact. Here is a step-by-step guide for A/B testing:

  1. Apply reverb to a channel and adjust parameters.
  2. Bypass the effect to compare with the unprocessed signal.
  3. Listen carefully to perceive the differences.

From Subtle To Extreme – Reverb Settings Walkthrough

Reverb settings can range from barely there to all-encompassing. This walkthrough guides you through various settings for different outcomes:

Setting Type Description Use Case
Subtle Low mix level and short decay. Gives slight warmth to vocals.
Moderate Medium mix level and decay time. Brings instruments to life.
Extreme High mix level and long decay. Creates otherworldly sounds.

Varying the room size, dampening, and pre-delay creates diverse results. Start with a preset and tweak to fit your track.

Conclusion And Further Resources

Our journey through the reverberating world of FL Studio now reaches an end. Let’s wrap up with the core points to remember, extend our knowledge base with more resources, and dive into the vibrant FL Studio community for continued support.

Summing Up Key Takeaways

  • Reverb adds depth and space to sounds in FL Studio.
  • FL Studio’s Reverb 2 is a go-to effect for achieving this.
  • Explore presets and settings to shape your sound.
  • Experimentation is key to success.

Additional Learning Materials

Strengthen your skills with these resources:

  1. FL Studio Manual: Refer to the official guide.
  2. Online Tutorials: Watch expert-led videos on YouTube.
  3. eBooks: Read in-depth guides and tips.
  4. Workshops: Join webinars for live demonstrations.

Fl Studio Community And Support

Connect with other creators for help:

  • Forums: Engage with FL Studio forums.
  • Social Media: Follow FL Studio on Twitter and Facebook.
  • User Groups: Meet users on Discord and Reddit.
  • Support Tickets: Get official help from Image-Line.

Frequently Asked Questions Of How To Make Reverb In Fl Studio

What Is Reverb In Fl Studio?

Reverb, or reverberation, in FL Studio simulates the echoes that occur in a physical space. This effect can make sounds appear more natural and spacious, adding depth to your music production.

How Do You Add Reverb To Fl Studio?

To add reverb in FL Studio, open the mixer, select the channel you want, click on an empty slot in the ‘FX’ section, and choose a reverb effect like ‘Fruity Reeverb’ or ‘Fruity Reeverb 2’.

Can You Automate Reverb In Fl Studio?

Yes, you can automate reverb in FL Studio. Right-click the reverb parameter you want to control, choose ‘Create automation clip’, and then adjust the points in the clip to change the effect over time.

What Are The Best Reverb Settings In Fl Studio?

The best reverb settings depend on your project. Generally, adjust the ‘Wet’ level for intensity, ‘Decay’ time for echo duration, and ‘Size’ to simulate the room’s dimensions. Start with presets and tweak to taste.

Conclusion

Crafting the perfect reverb in FL Studio enhances your tracks, adding depth and ambiance. Remember, subtlety is key; overdoing it can muddy your mix. Experiment with presets, tweak settings, and trust your ears to achieve that professional sound. Elevate your music production by mastering reverb — your mixes will thank you.


Ready, set, create!

Categories
Archive

Music Production Headphones vs Speakers: Best Studio Choices

Music production headphones offer precise audio detail and isolation, whereas speakers provide a more natural soundstage. Personal preference and studio space influence the choice between the two.


Exploring the essentials of music production often leads to the debate between headphones and speakers (also known as monitors). Both tools are crucial for audio work, but they serve different purposes and cater to various aspects of the production process.


Headphones are ideal for detailed audio work and monitoring in noisy environments, allowing the producer to hear the minutest elements of the mix. On the flip side, speakers deliver a natural representation of sound as it spreads in space, which is vital for understanding how a track will sound in real-world environments. Producers typically rely on both throughout the production stages to achieve the perfect balance in their mixes, and the preference largely depends on specific scenarios like recording, mixing, or mastering.

Music Production Headphones vs Speakers: Best Studio Choices


Credit: producelikeapro.com

The Quest For Accurate Sound

In the realm of music production, the quest for accurate sound is paramount. Whether it’s producers mixing tracks or audiophiles enjoying their favorite album, the clarity and precision of sound are non-negotiable. This quest influences whether a sound engineer chooses headphones or speakers as their primary tool. It’s a decision wrapped up in technical considerations and personal preferences, all with the aim of achieving the truest sound possible.

Balancing Sound Fidelity

Achieving true sound fidelity requires a balance. On one side are headphones, offering a direct and intimate sound experience. They bring out details that might get lost in open air. On the other side are speakers, providing a more natural listening environment by filling the room with sound. Both have merits, but taking a deep dive into their capabilities reveals which is superior for accurate audio reproduction.

  • Headphones isolate audio, reducing external noise.
  • Speakers allow for sound to interact with the environment.
  • Stereo imaging is palpable with speakers.
  • Headphones can expose minute details in audio.

Environment And Acoustic Influence

The environment plays a crucial role in the quest for accurate sound. A space’s acoustics have a dramatic effect on what you hear. With headphones, the environment’s influence is minimized. With speakers, the room’s shape, size, and surface materials can alter the sound waves, creating a unique listening experience.

Aspect Headphones Speakers
Room Acoustics Minimal effect Highly sensitive
Sound Interaction Isolated Engages the environment
Portability Easy to relocate Varies with size

Understanding these differences helps producers and enthusiasts in their quest for the most accurate and pleasing sound. The ultimate choice between headphones and speakers often boils down to personal preference and specific production needs.


Headphones In The Studio

Music production requires acute attention to detail. When fine-tuning a track, artists often choose between using headphones or speakers. Headphones offer intimate sound, allowing producers to pick up on subtleties in the music. Let’s explore the role of headphones in the studio.

Pros And Cons Of Headphone Use

Using headphones in the studio enhances audio precision. They provide a consistent listening environment, crucial for scrutinizing a mix. Headphones also isolate audio effectively, blocking out external noise.

  • Sound Isolation: Superb for focusing on minute details.
  • Consistency: Offers constant audio quality regardless of room acoustics.
  • Portability: Easy to transport, allowing work from any location.

Despite the perks, headphones have drawbacks. They can cause ear fatigue during prolonged use. Headphones also deliver sound directly to the ears, which can distort how a mix translates to speakers.

  • Ear Fatigue: Long sessions may become uncomfortable.
  • Stereo Imaging Challenges: Might misrepresent spatial cues in a mix.
  • Bass Response: Sometimes, bass frequencies are not as accurate as with speakers.

Closed-back Versus Open-back Headphones

Not all studio headphones are the same. Closed-back and open-back headphones serve different purposes.

Closed-Back Open-Back
Excellent sound isolation More natural, spacious sound
Minimal sound leakage: great for recording Better air flow: reduces ear fatigue
Can overemphasize bass Leak sound: not ideal for recording

Producers must select headphones based on their specific needs. Closed-back headphones suit recording sessions, preventing microphone bleed. Open-back headphones are preferable for mixing, offering a truer representation of sound.

Speakers For Music Production

Choosing the right gear in music production is crucial for sound quality. Speakers play a key role in how music sounds in different environments. Let’s explore the use of speakers in music production and why they are important.

Advantages Of Studio Monitors

Studio monitors are essential for producers. They bring several benefits:

  • Accurate sound reproduction ensures mixes translate well across various playback systems.
  • Flat frequency response gives a true picture of the mix, without added coloration.
  • Enhanced stereo imaging allows for precise placement of instruments in the mix.
  • Having critical listening is easier with monitors designed for studio environments.

Understanding Speaker Placement

Speaker placement can affect sound quality massively. Right positioning leads to a better mix. Here’s what to know:

Placement Tip Reason
Equilateral Triangle Creates a sweet spot, enhancing stereo image.
Ear Level Ensures direct sound reaches ears without reflections.
Avoid Corners Reduces bass build-up and muddiness in sound.
Proper Isolation Prevents vibrations and interference from surfaces.

Remember, every room is unique. Testing different spots helps find the perfect placement.

Critical Listening: Headphones Or Speakers?

When diving deep into music production, every detail matters. Producers often wonder whether to mix with headphones or speakers for the best quality. Both options have strengths and shortcomings. This choice is crucial in critical listening. Let’s explore headphones and speakers in detail.

Sound Stage And Imaging

Imagine where each instrument sits while listening to music. This is sound stage. Headphones offer a unique experience here. They create a sound stage right inside your head. But speakers bring the alive feeling of a performance. They project sound, filling your environment.

  • Headphones:
    • Intimate sound stage
    • Clear left and right separation
  • Speakers:
    • Spacious sound stage
    • Natural blending of sounds

Frequency Response And Isolation

The response to different pitches is frequency response. Headphones can provide a close-up on clarity across frequencies. Isolation in headphones means outside noise stays out. This lets you focus on every detail.

Headphones Speakers
  • Consistent frequency
  • High isolation
  • Room influences sound
  • Less isolation

Speakers mirror real-world listening. The room’s acoustics can color the sound. So, fine-tuning with speakers requires acoustic treatment of your studio. On stage, the difference in sound quality is noticeable. In your mix, details shine through clearly.

Comfort And Long Sessions

When making music, comfort matters during those long studio sessions. Choosing between headphones and speakers involves more than just sound. It’s a battle of endurance for your ears and neck. Let’s dive into how each fares for those epic hours of mixing and mastering.

Ergonomics Of Headphone Usage

Headphones hug your ears. They keep sounds close and personal. But, are they comfy for hours? Here’s what to check:

  • Headband tension: A tight fit might press too much, while a loose pair could slip off.
  • Ear cup size: Look for cups that encompass your ears fully. Over-ear designs typically win for comfort.
  • Weight: Lighter headphones mean fewer neck strains.
  • Materials: Soft padding and breathable fabrics reduce sweat and irritation.

With the right build, headphones can feel almost invisible even after hours of wear.

Listening Fatigue With Speakers

Speakers fill the room with sound. They let your ears breathe. Yet, can they tire you out? Here’s what to consider:

Volume levels:
Loud speakers for long periods can lead to fatigue. Keep volumes moderate.
Speaker placement:
Correct positioning prevents straining to hear. It also ensures an even sound distribution.
Room acoustics:
Hard surfaces may reflect sound, causing harshness. Soft materials in the room can dampen this.

Speakers, when set up right, can be a joy for long sessions without the squeeze on your head.

Budget Considerations

When venturing into music production, setting up your audio gear forms one of the essential steps. Choosing between headphones and speakers may come down to your budget constraints. Let’s explore the financial aspects that can guide your decision-making process.

Cost Differences Between Headphones And Speakers

Understanding the cost differences is vital before investing in audio equipment.

  • Headphones generally offer a more affordable entry point.
  • Speakers require a larger initial investment for quality results.
Equipment Type Low-End Cost High-End Cost
Headphones $50 $500+
Speakers $100 $1000+

It’s clear that headphones can be more budget-friendly for beginners.

Investment In Quality

While starting with less costly gear is tempting, consider the long-term view.

  1. Paying more for high-quality audio gear pays off over time.
  2. Durable equipment withstands frequent use and offers better performance.

Quality headphones can provide accurate sound for personal monitoring.

Investing in quality speakers can lead to improved mixing experiences.

Balance cost and quality to make a sound decision that aligns with your production needs and financial capacity.

Hybrid Approaches In Music Production

Creating music today involves a mix of technologies. Producers toggle between headphones and speakers. Each has its strengths. A hybrid approach leverages both to produce outstanding audio works. Let’s explore how embracing both can transform music production.

Combining Headphones And Speakers

Headphones offer precision; speakers bring space. Using them together, producers get the best of both worlds. Headphones isolate sounds for detailed editing. Speakers allow for room acoustics and natural sound relations. The result? A well-rounded sound profile.

  • Detail work: Use headphones for intricate editing.
  • Big picture: Use speakers to understand spatial dynamics.

Workflow Enhancements

Integrating headphones and speakers streamlines workflows. Producers switch between the two based on the task. This adaptability leads to efficiency and creativity. Below are tips to enhance music production workflows with a hybrid setup:

Phase Recommended Tool Reason
Editing Headphones Isolate sounds for precise adjustments
Mixing Speakers Hear the mix in a natural environment
Mastering Both Verify the sound quality on various outlets

Making The Choice: Personal Preferences

When diving into the world of music production, choosing between headphones and speakers becomes a critical decision. Your personal preferences play a significant role in this choice. Think about your listening habits, work environment, and what you feel most comfortable with. We’ll explore how genre, lifestyle, and mobility can influence your decision.

Genre-specific Requirements

Different music genres can demand distinct audio production needs. Consider the intricacies of the genre you work with:

  • Electronic and bass-heavy music might benefit from headphones that highlight low-end frequencies.
  • Acoustic and classical pieces tend to shine with speakers that have transparent mid-range clarity.
  • Rap and hip hop production can rely on either, depending on the depth of the mix.

Producer’s Lifestyle And Mobility

Where and how you produce music greatly affects your gear choice. Do you move around a lot, or is your studio your sanctuary?

Headphones Speakers
Perfect for on-the-go lifestyles and small spaces. Best for a dedicated, acoustically-treated environment.
Easy to pack and carry for mobile and live setups. Suited for stationary setups and offers a room-filling sound.

Future Trends In Music Production Gear

As the music production landscape constantly evolves, the gear we use transforms as well. Audio producers and enthusiasts eagerly anticipate the latest trends in production equipment. Two critical components in any studio setup are headphones and speakers. Each has a significant role in mixing, mastering, and sound design. Future trends in these gear promise exciting developments.

Technological Advancements In Headphones

  • Integration with Virtual Reality: Upcoming headphones will offer more immersive experiences for producers, with 3D audio and head tracking features.
  • Enhanced Noise Cancellation: Advanced algorithms will provide even more isolation allowing producers to focus on the finer details of their sound.
  • Personalized Sound Profiles: Future models will use AI to create custom sound signatures, adjusting to the user’s hearing and preferences.
  • Wireless Freedom: Expect to see studio-grade, lossless audio transmission in wireless headphones.
  • Improved Battery Life: Longer-lasting batteries will make wireless production headphones even more practical.

Innovations In Speaker Design

  • Room Calibration: Speakers will automatically adjust to the room’s acoustics, delivering optimal sound no matter the space.
  • Modular Systems: The evolution will see speakers becoming more customizable, letting producers tailor their setup.
  • Eco-Friendly Materials: The push for sustainability will influence speaker manufacturing, with recyclable components becoming standard.
  • Smart Connectivity: Upgraded connectivity options will align speakers with smart home ecosystems and studio hardware, effortlessly.
  • Enhanced Portability: Professional-grade sound will come in compact sizes, making high-quality speakers more portable.

Music Production Headphones vs Speakers: Best Studio Choices


Credit: www.amazon.com

Frequently Asked Questions For Music Production Headphones Vs Speakers

What’s The Difference Between Headphones And Speakers?

Headphones offer a private listening experience and are typically used for detailed audio work. Speakers provide a room-filling sound and are better for assessing how music will sound in an open environment.

Are Studio Monitors Better Than Headphones For Mixing?

Studio monitors provide a more accurate soundstage, which is essential for mixing. Headphones can be deceiving with stereo imaging and may hide certain frequency details that speakers reveal.

Can I Mix Music Using Just Headphones?

Yes, you can mix music with headphones, but it’s recommended to cross-reference with speakers. Headphones may not accurately represent bass frequencies and spatial dynamics.

Should I Buy Open-back Headphones Or Closed-back For Production?

Open-back headphones are preferred for their natural sound and better soundstage, which is beneficial for critical listening during music production. However, they leak sound and offer less isolation.

Conclusion

Choosing between headphones and speakers for music production boils down to your personal needs and environment. Both have distinct advantages that cater to different aspects of sound work. To make the best decision, consider your budget, space, and the level of detail required for your projects.


Remember to test with both, ensuring your music translates well across various listening devices. Whichever you select, focusing on quality and comfort will amplify your music production journey.