Categories
Archive

What Is Line Level Signal: Unveiling Audio Essentials

A line level signal refers to the standardized voltage output intended for processing by audio equipment. It is the main type of audio signal that components use to interact with each other.


Audio enthusiasts and professionals encounter line level signals when connecting devices such as mixers, amplifiers, and processors in a sound system. Characterized by its relatively high voltage compared to mic level signals, a line level typically ranges from 0. 316 to 2 volts.


Balancing power and fidelity, line level signals ensure minimal noise and loss over transmission, making them a cornerstone of both recording and playback processes. Grasping the concept of line level is crucial for setting up audio equipment properly, ensuring optimal sound quality, and preserving the integrity of audio signals throughout a system. Understanding this facet of audio engineering helps maintain a standardized approach during the interfacing of various electronic audio devices.


Introduction To Line Level Signal

Understanding line level signal is key in the world of audio. It spans from the music studios to your home theater systems. This signal is a standard for analog audio signals. Knowing about it ensures your equipment matches for the best sound quality.

The Concept Of Audio Signals

Audio signals carry sound through electronic devices. There are different types of audio signals. Each type has its use. Line level is one of the main types we encounter.

  • Mic level: This is the weakest, from microphones.
  • Instrument level: Stronger, from electric guitars.
  • Speaker level: The most powerful, for speakers.

Line Level Signal In The Audio Hierarchy

In the audio signal hierarchy, line level holds a special place. It is the reference point for audio quality. Devices need preconditioning to send or receive line level.

Signal Type Level
Mic Level Lowest
Instrument Level Medium
Line Level Standard Reference
Speaker Level Highest

Devices like mixers, processors, and recorders mostly use line level. It lets them interface with each other without noise or distortion issues. Always check to match the levels for perfect audio output.

Types Of Line Level Signals

Line level signals are crucial in audio production. They refer to the electrical signals coming from audio sources like keyboards, mixers, or media players. These signals are not strong enough to power speakers. Yet, they play a key role in audio clarity and quality.

Consumer Line Level

This type refers to devices like home theaters or CD players. Often called “-10dBV,” consumer line level signals have weaker voltage compared to professional gear. Here’s what you need to know:

  • Common in home audio equipment
  • Voltage level typically around 0.316 volts
  • Uses RCA connectors or 3.5mm jacks

Professional Line Level

In contrast to consumer line level, professional line level signals are more robust. Known as “+4dBu,” these signals maintain audio integrity over longer distances. Look at the key details:

Characteristic Detail
Standard +4dBu
Voltage Around 1.23 volts
Connectors XLR or 1/4-inch TRS

Comparing Line Level With Mic And Instrument Levels

When it comes to recording and sound systems, signals matter a lot. They determine the quality and clarity of the output. We often talk about ‘Line Level’ without knowing how it differs from ‘Mic Level’ or ‘Instrument Level’. Let’s explore these levels and uncover the distinctions.

Understanding Mic Level

Mic Level refers to the audio signal generated by microphones. It’s quite weak and needs amplification. Think of it as a tiny voice that needs a boost to be heard.

  • Lowest signal level
  • Requires preamplification
  • Measured in millivolts (mV)

Instrument Level Distinctions

Electric guitars and basses use Instrument Level signals. They’re stronger than Mic Level but still not as high as Line Level.

  • Higher than Mic Level
  • Needs some boosting
  • Measured in volts (V), but lower than Line Level

Conversion Between Levels

To use these signals together, convert levels with the right gear. Preamps boost Mic to Line Level. DI boxes often change Instrument to Line Level.

Original Level Device for Conversion Converted Level
Mic Level Preamp Line Level
Instrument Level DI Box Line Level

Remember, proper level matching is key to top-notch audio quality.

The Importance Of Line Level In Recording

Understanding line level is key in the world of recording. Line level refers to the standard signal strength used to transmit audio between various audio components. Without the correct line level, recordings can suffer in quality, and audio might not blend well.

Achieving Optimal Audio Quality

Optimal audio quality hinges on proper line level. It ensures signals are clear and strong. This avoids unwanted noise or distortion. Proper levels lead to crisp, professional-sounding audio.

  • Consistent volume: Keeps the audio smooth.
  • Lower noise: Reduces background hiss.
  • Better dynamic range: Captures soft and loud sounds effectively.

Integrating Different Audio Sources

The right line level allows for seamless audio source integration. Devices like microphones, keyboards, and mixers can connect without issue. Balanced sound across all inputs is vital.

Device Role Connection
Microphones Capture sound Preamps adjust level
Keyboards Add melody Direct line level input
Mixers Blend signals Match levels for output

Each device plays a role in the final sound. Coordinating their levels is essential for a harmonious mix. This can make or break a recording session’s success.

Connectors And Cables For Line Level

Connectors and Cables for Line Level are crucial elements in audio setups. They ensure that signals from audio devices transmit with high fidelity. For optimal sound quality, understanding the different types of connectors and how to maintain your cables is essential. Let’s delve into the specifics.

Common Connectors Used

  • RCA: Often found in home audio equipment.
  • TS (Tip-Sleeve): A common mono connector, usually for guitars.
  • TRS (Tip-Ring-Sleeve): Delivers stereo sound or balanced mono signals.
  • XLR: Professional-grade connector that provides balanced audio.

Cable Selection And Maintenance

Selecting the right cable involves considering length, durability, and quality. Shorter cables can reduce signal loss. Thicker cables might offer better shielding.

Maintenance tips ensure longevity:

  1. Regularly check connectors for rust or dirt.
  2. Untangle cables to prevent damage.
  3. Store properly to avoid kinks and breaks.

By choosing the proper connectors and maintaining your cables, you ensure clear, uninterrupted audio signals in your setup.

Amplifying And Attenuating Line Level Signals

Audio signals flow through our devices at different levels. A line level signal is common in audio production. It bridges sources like CD players and amplifiers. Yet, these signals often need tweaking. That’s where amplifying and attenuating come in.

Preamplifiers And Their Role

A preamplifier, or preamp, gets a signal ready for further amplification. It deals with weak signals. It boosts them without noise or loss. Most audio devices have built-in preamps. They handle tasks like:

  • Boosting microphone levels to line level
  • Equalizing audio signals for quality
  • Connecting multiple sources and managing inputs

The Need For Attenuation

Sometimes signals are too strong. That’s not good. It can cause distortion or damage equipment. Attenuation is the solution. It lowers the signal level. This process is key in:

  • Preventing signal clipping and distortion
  • Maintaining audio fidelity across devices
  • Matching levels for different equipment

Troubleshooting Line Level Issues

When your audio setup does not sound right, the issue may involve line level signals. “Troubleshooting Line Level Issues” is crucial for smooth audio performance. Know how to spot and fix problems fast.

Identifying Common Problems

Several signs point to line level issues.

  • Hiss or hum in the audio output
  • Unexpectedly low or high volume
  • Distorted sound quality
  • No sound output whatsoever

These symptoms often signal an incorrect line level setup.

Steps For Effective Troubleshooting

Follow these steps to troubleshoot line level issues:

  1. Check cable connections between devices
  2. Inspect cables for damage or wear
  3. Ensure the output device is at the correct level
  4. Test with alternative cables or devices
  5. Adjust settings on the sound source and receiver

Try these fixes one by one to locate the problem.

Remember the right tools. Use a multimeter to check signal strength. An oscilloscope can show signal quality too.

Maintain your gear. Clean connectors often. Dust and grime can cause issues.

Keep software updated. Outdated software leads to conflicts or malfunctions.

With patience and careful steps, fixing line level issues is straightforward.
What Is Line Level Signal: Unveiling Audio Essentials


Credit: www.waves.com


Advanced Applications Of Line Level

In the realm of audio engineering and sound production, the concept of a line level signal becomes more intriguing as we delve into its advanced applications. These signals are the backbone of audio interconnectivity. They travel between various audio equipment like mixers, signal processors, and amplifiers in both consumer and professional domains. With its vital role in achieving high-quality sound, understanding line level’s advanced applications is essential for any audio professional.

Line Level In Professional Settings

Professional audio environments demand pure sound quality and zero tolerance for noise. Line level signals are paramount in these settings. Studios, live venues, broadcasting houses, and concert halls rely on the standardized levels for seamless signal transmission. Professional gear typically operates with +4 dBu line level, offering a balance between strong signal quality and minimal noise interference.

  • Connecting multiple devices like microphones, mixers, and amplifiers.
  • Optimal signal routing ensures that audio paths are noise-free and clear.
  • Professional recording and mastering studios use specialized equipment.

Integrating Consumer And Professional Equipment

Combining home electronics with pro gear invites challenges. Different line level standards can cause signal mismatches. Consumer devices often operate at -10 dBV, while professional devices work at +4 dBu. To bridge the gap:

  1. Use a line level shifter or interface box to adjust signal levels.
  2. Check your equipment specifications to ensure compatible connectivity.
  3. Audio interfaces can help in converting these different signals.

Therefore, integrating gear effectively ensures optimal performance. This combination brings out the best in both worlds: the richness of professional audio with the versatility of consumer devices. Comprehending the dynamics of line level signals fortifies the foundation for any aspiring or professional audio engineer.


Frequently Asked Questions For What Is Line Level Signal


What Defines A Line Level Signal?


A line level signal refers to a specific strength of an audio signal used to transmit analog sound between audio components. It’s typically used in the outputs of audio sources like CD players and mixers.


How Does A Line Level Differ From Mic Level?


Line level signals are much stronger than mic level signals, which come directly from microphones. Mic level requires a preamp to reach line level for use in mixing boards or recording devices.


Can You Convert Speaker Level To Line Level?


Yes, you can convert speaker level to line level by using a speaker-to-line level converter. This device reduces the power of the signal, making it compatible with line level audio inputs on other equipment.


Are There Different Types Of Line Level Signals?


Yes, there are two types: consumer and professional. Consumer line level, also called -10dBV, is commonly used in home audio equipment. Professional line level, known as +4 dBu, is used in pro audio gear.


Conclusion


Understanding line level signal is crucial for optimal audio setup. It’s the standard for pro-audio gear interconnectivity. Remember, correct levels ensure clear sound without distortion. Mastering its use elevates recording and playback quality. Dive into your audio endeavors with confidence, armed with this knowledge!


Categories
Archive

Distortion Vs Overdrive: Unraveling the Truth

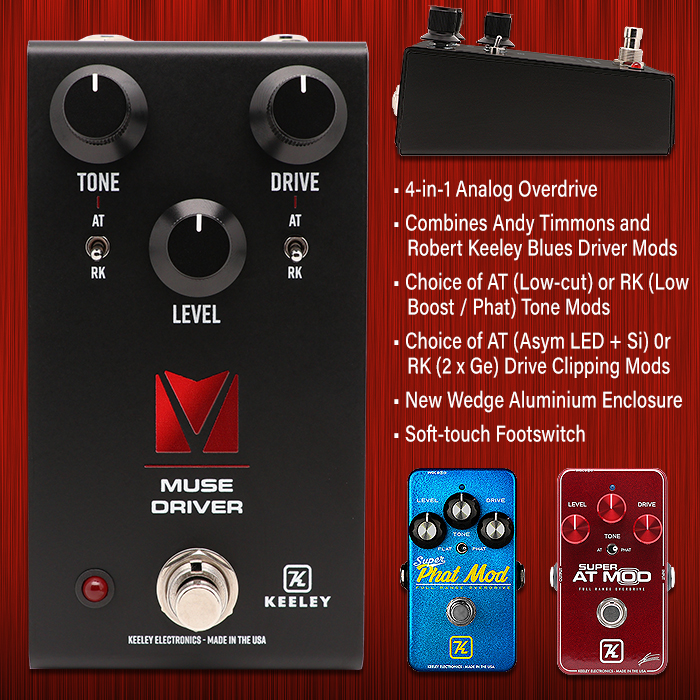
Distortion vs overdrive comes down to how two effects change the sound of an electric guitar. Distortion creates a ‘fuzzier’ sound, while overdrive boosts the signal for a warm, natural breakup.


Also, Guitarists and musicians often seek to color their sound with various effects, and among the most popular are distortion and overdrive. Distortion is the effect of choice when a gritty, aggressive tonal edge is desired. Also, Overdrive subtly increases the gain, pushing an amp just beyond its clean level, resulting in a smooth, clipped tone synonymous with blues and rock.

Related reading: Get Big Sounding Drums With Distortion and How To Reduce Distortion When Mastering. For background, see the Wikipedia article on Distortion.


Incorporating these effects not only enhances musical expression but also defines a player’s sound. In addition, by manipulating the intensity and mix of these effects, artists can traverse a vast landscape of aural textures, from the rough rebellion of punk to the soulful cries of blues. Moreover, choosing the right balance of distortion and overdrive can turn a simple riff into a signature hook that resonates with listeners.


Distortion And Overdrive: The Bedrock Of Electric Guitar Tone

When you think of rock and roll, the growl of distortion or the warm push of overdrive often come to mind. For example, these effects are not just accessories; they are the foundation that gives the electric guitar its character. In addition, musicians have long sought the perfect blend of grit and melody, using these tools to express emotions and craft sonic landscapes. Let’s dive into how these effects have shaped the sound of music and continue to influence guitarists in their quest for the ideal tone.

Iconic Tones Shaping Music History for Distortion vs Overdrive

Furthermore, the electric guitar’s voice is synonymous with some of the most memorable riffs and solos in history. As a result, Distortion and overdrive have fueled genres like rock, blues, and metal. Think of the unmistakable crunch in “Whole Lotta Love” or the piercing lead in “Sweet Child O’ Mine.” These tones are legendary.

  • Additionally, chuck Berry : Pioneered the use of overdrive in “Johnny B. Goode.”
  • Also, jimmy Page : Mastered distortion’s art in Led Zeppelin’s hits.
  • Moreover, kirk Hammett : Used a mix of both for Metallica’s heavy sound.

The Eternal Quest For The Perfect Guitar Sound

In addition, Guitarists are always searching for that unique tone that sets them apart. However, the journey involves experimenting with various guitar pedals, amps, and settings. Every twist of a knob or stomp on a pedal can open up a new spectrum of sounds. This pursuit is endless, as each player seeks to etch their sound in the annals of music history.

Furthermore, players often start with classic setups and tweak from there:

Amp Model Distortion Overdrive
Marshall Plexi High Low
Fender Bassman Medium High
Mesa Boogie Variable Variable

Additionally, it is the combination of distortion and overdrive that gives the electric guitar its voice. Then, one that speaks the language of legends and whispers the promise of undiscovered sonic territories.

Anatomy Of Guitar Tone: Getting Technical

Also, understanding the nuances of guitar tone requires a deep dive into the technical world of signal processing . In short, whether you’re aiming for the smooth, rich sound of overdrive or the aggressive crunch of distortion, the key lies in how you manipulate your guitar’s signal. Let’s unpack the complexities behind these iconic sounds.

How Signal Processing Affects Tone

Moreover, Signal processing is critical in shaping the personality of your guitar tone . Similarly, this encompasses everything from the effects you use to the way your amplifier interprets your guitar’s signals. Below, explore the aspects that mold your unique sound:

  • In addition, gain Staging : The levels set at different points in your signal chain.
  • Furthermore, effect Order : How the sequence of pedals alters the resulting tone.
  • Additionally, EQ Settings : Controlling the balance of frequencies.

Waveforms And Clipping: A Scientific Insight

Also, getting to the heart of distortion and overdrive, waveforms and clipping are vital concepts. Here’s a brief explanation:

Term Description
Waveforms The shape of the sound signal as it travels.
Clipping Occurs when the signal exceeds the amp’s capacity, creating distortion.

Moreover, soft clipping yields overdrive’s warm tones. Also, by contrast, hard clipping results in distortion’s edgier vibe. This manipulation of waveforms is a cornerstone in the art of guitar tone crafting.


Origin Tales: A Brief History

In addition, the soundscape of modern music pulses with the lifeblood of distortion and overdrive . In addition, to grasp the full picture, a dive into the past reveals the roots of these iconic effects.

Evolution Of Distortion In Rock Music

Furthermore, rumbling through time, distortion found its voice in the mid-20th century.

  • The first distorted guitar tones emerged not by design, but from amplifier malfunctions.
  • Additionally, artists like Link Wray pierced music with intentional distortion in the 1950s.
  • Also, giving rise to a bolder rock sound, the fuzz box became a staple.
  • Moreover, the 60s and 70s saw a surge in heavier music, cementing synthesisers’list-itemistrongteatroustrong on.

Overdrive: From Blues To Mainstream

In addition, starting in the heart of blues, overdrive completed the journey to mainstream music .

  1. Furthermore, a quest for volume in small venues led blues guitarists to push amps beyond their limits .
  2. Additionally, the sweet, warm tones seduced even the early rock ‘n’ rollers .
  3. Also, from Clapton to Hendrix , legends harnessed overdrive for its expressive power .
  4. Moreover, progressing through the decades, it became the backbone of classic rock .


Distortion Unveiled: Character And Use

In addition, in the electrifying world of guitar effects, distortion reigns supreme. For example, Distortion crafts the rich, harmonic-laden tones that define many music genres. Guitarists unleash this powerful effect to tailor their sound.

The Aggressive Edge: Traits Of Distortion

Furthermore, Distortion is synonymous with power and intensity. It amplifies the guitar signal until it clips, creating a thick, aggressive tone. As a result, the characters of distortion include:

  • Sustain boost for longer notes
  • Harmonic richness for fuller sound
  • Volume increase for standout solos

Genre Associations And Famous Pedals for Distortion vs Overdrive

Additionally, from rock to metal, distortion is vital. However, genres like punk and grunge thrive on its gritty texture.

Genre Famous Pedal
Rock ProCo Rat
Metal Boss Metal Zone MT-2
Punk Electro-Harmonix Big Muff

Overdrive Explored: Subtlety And Warmth

Also, Overdrive adds rich texture to guitar sound. It boosts signals, but with care. Then, this creates soft, warm tones. It doesn’t mask the guitar’s true voice. Instead, it enhances its expressiveness.

Smoothness And Dynamics In Overdrive

Want your guitar to sing? Overdrive is your partner. In short, let’s talk about its smoothness. Moreover, picture a gentle slope, not a steep hill. This is overdrive.

  • Touches every note softly.
  • In addition, lets gentle plucks and hard strums shine.

And dynamics? Similarly, this is the heart of music. Furthermore, with overdrive, pick softly for whispers. Strum harder for roars. Complete control stays in your hands.

Blues To Indie: Overdrive’s Versatility

  1. Blues players adore overdrive. Additionally, it breathes life into every bent note.
  2. Rock musicians rely on it. It creates anthems.
  3. Indie artists find it perfect. It underscores raw emotion.

Every style wins with overdrive. Also, it’s a chameleon on your pedalboard. Whether you aim for grit or whisper tones, overdrive adapts.

Details Matter

Genre Overdrive Setting Tone Result
Blues Low gain Smooth, expressive
Rock Medium gain Bold, powerful
Indie Variable gain Flexible, emotive


Setting The Stage: Live And Studio Applications

Distortion and overdrive are the cornerstones of guitar tone. In addition, both live performances and studio recordings use these effects. They shape the music’s mood and style. This section uncovers how to optimize distortion and overdrive for any stage or studio session.

Crafting Live Tones: Tips And Tricks

Live settings test a musician’s mastery of their gear. For example, Perfect balance between clarity and grit is key. Here are ways to achieve that:

  • Start with a clean slate by setting your amp to a neutral base tone.
  • Adjust overdrive and distortion knobs in small increments for precision.
  • Amp settings can make or break your live sound—experiment during soundchecks.
  • Use individual pedals for more control over each effect.

Recording Sessions: Capturing The Essence Of Overdrive And Distortion

Recording studios offer controlled environments to craft perfect tones. As a result, keep these points in mind:

      1. Layer tracks with varying levels of effects for depth.
      2. Mic placement can greatly alter the captured sound of your amp.
      3. Combine different types of overdrive and distortion for unique textures.
      4. Direct input recording is an option for clear and consistent tones.

Create separate tracks for clean and effect-laden takes. However, blending them post-recording gives freedom to adjust.

Pedalboard Dynamics: Combining Effects

For musicians looking to create distinctive and compelling soundscapes, understanding the interaction between different guitar pedals is key. Then, Distortion and overdrive sit at the heart of many iconic tones, and their combination can unlock a universe of aural textures. Crafting the perfect guitar tone involves not just selecting individual effects but also knowing how to blend them effectively.

Strategic Stacking: When Distortion Meets Overdrive

The order in which pedals are stacked on a pedalboard plays a pivotal role in the resulting sound. In short, Distortion into overdrive , or vice versa, yields different outcomes.

  • Distortion first: Pushes the overdrive pedal with a stronger signal, offering a more saturated and compressed tone.
  • Overdrive first: Drives the distortion with a smoother, more dynamic signal, leading to a richer and more complex sound.
Stacking Order Sound Characteristic
Distortion » Overdrive Saturated and Compressed
Overdrive » Distortion Rich and Complex

Creating Unique Tones With Pedal Combinations for Distortion vs Overdrive

Diversity in tone is the spice of music, and combining pedals can create unique sonic signatures. Similarly, experimentation is the key to finding the combination that resonates with your musical expression.

  1. Start with mild overdrive to add warmth.
  2. Stack with distortion for gain-heavy sections.
  3. Adjust the EQ settings on each pedal for refinement.
  4. Use the pedal’s volume controls to balance the effect levels.

The right combination of pedals can turn a good tone into a great one, making your music stand out. Also, by playing around with pedal order and settings , the sonic possibilities become nearly endless. Embrace the art of pedal stacking and define your unique style.

Artists And Their Signatures: A Legacy Of Tone

The sound of electric guitars has defined eras and shaped music history. In addition, artists and Their Signatures: A Legacy of Tone dives into the heart of this impact. Distortion and Overdrive make the signature sound of many legendary guitarists. It’s not just a way to play louder; it’s how they speak through their instruments. Their choice between distortion and overdrive has been as personal as their playing styles.

Famous Guitarists And Their Preferences for Distortion vs Overdrive

Bold, fiery, and often revolutionary, the tones that have carved their names into the annals of music continue to inspire. For example, each guitarist’s pick between distortion and overdrive has played a pivotal role in crafting their unique sound. Let’s look at some giants of the six-string and their personal favorites:

  • Jimmy Page (Led Zeppelin): Overdrive to harness the bluesy textures beneath the rock monoliths.
  • Jim Hendrix: A maestro of distortion for his otherworldly solos and transcendent sounds.
  • Angus Young (AC/DC): Overdrive, for a crisp crunch that cuts through the mix with a razor’s edge.
  • Eddie Van Halen: Distortion for powerful shreds that define hard rock.

How Iconic Tones Influenced Generations

The signature sounds of guitar heroes didn’t just shape their music—they ignited movements. As a result, Iconic tones have become the blueprint for countless musicians who followed the trails blazed by their forebearers:

Artist Influenced Genres Signature Tone
Kurt Cobain (Nirvana) Grunge, Alternative Rock Distortion
Stevie Ray Vaughan Blues, Rock Overdrive
John Frusciante (Red Hot Chili Peppers) Funk Rock, Alternative Overdrive and Distortion
Jack White (The White Stripes) Garage Rock, Blues Rock Distortion

Future Trends: The Evolving World Of Guitar Effects

The landscape of guitar effects continuously shapes the music industry. However, Distortion and overdrive, quintessential for creating unique sounds, are now at the brink of a transformative era. Artists and engineers seek innovative ways to refine and redefine the sonic signature of these beloved effects. Let’s explore cutting-edge developments that signal the future of guitar effects.

Innovations In Tone Technology for Distortion vs Overdrive

The quest for the perfect guitar tone has led to groundbreaking advancements. Then, current trends indicate a push towards hyper-realistic soundscapes and versatile performance . Here are key innovations:

  • Analog-mimicking circuits: Designers optimize these for a warm, rich sound.
  • Multi-effect integrated systems: These provide all-in-one solutions for diverse tonal needs.
  • Customizable pedalboards: Enhanced with downloadable presets and effect algorithms.

The Digital Frontier: Emulating The Classics

Digital technology now mirrors the charming nuances of classic analog tones. In short, the emulation of vintage distortion and overdrive has achieved striking levels of accuracy . Here’s what stands out:

  1. High-fidelity modeling: Software algorithms recreate legendary pedal and amp sounds.
  2. Plugin integration: Access to iconic effects in a simple, streamlined digital workspace.
  3. Smartphone apps: They transform mobile devices into portable effect processors.


Choosing Your Camp: Tips For Aspiring Guitarists

Jumping into the world of electric guitar effects can be exhilarating. Similarly, choosing the right effects for your style shapes your signature sound. Every guitarist must make a fundamental decision between two iconic effects: distortion and overdrive. This section helps you navigate this choice.

Identifying Your Sound: Distortion or Overdrive?

Identifying Your Sound: Distortion Or Overdrive?

Also, identifying your unique sound plays a crucial role in music. Also, Distortion packs a punch with its aggressive and heavy tones. It’s perfect for hard rock and metal grooves. Overdrive, on the other hand, offers a warmer, smoother boost. It mirrors the sound of a tube amp cranked up high. Choose distortion for raw power or overdrive for classic vibes.

  • Classic Rock & Blues – Overdrive is often better
  • Metal & Punk – Choose distortion
  • For versatility – Try both and mix

Essential Considerations For Buying Pedals for Distortion vs Overdrive

When buying pedals, certain considerations ensure you get the best fit for your sound and budget.

  • Analog vs. Digital: Analog pedals offer warmth while digital provides precision.
  • True Bypass: This feature maintains signal integrity when the pedal is off.
  • Features & Controls: More knobs mean more customization but can add complexity.
  • Build Quality: Durability is key for gigging musicians.
  • Budget: Define how much you can spend and compare options.
Type Sound Characteristic Best For
Distortion Aggressive, Saturated Metal, Hard Rock
Overdrive Warm, Smooth Classic Rock, Blues

Frequently Asked Questions Of Distortion Vs Overdrive


What’s The Difference Between Distortion And Overdrive?


Distortion and overdrive are effects used to alter the sound of electric guitars. In addition, Distortion renders a more intense, aggressive tone by heavily amplifying the signal. Overdrive subtly pushes your amp harder, producing a warm, natural-sounding drive similar to a slightly overdriven tube amp.


Can Overdrive Pedals Create Distortion?


Yes, overdrive pedals can create distortion when used at higher settings. For example, they push the amplifier harder, which naturally leads to a distorted sound. However, this distortion is usually softer and more subtle compared to dedicated distortion pedals.


Is Distortion Or Overdrive Better For Metal?


Distortion is generally preferred for metal due to its heavier, more saturated tone. As a result, it provides the aggressive sound that metal guitarists seek. Overdrive, while useful, typically doesn’t achieve the same level of intensity required for metal.


How Do I Choose Between Overdrive And Distortion?


Choosing between overdrive and distortion depends on your desired sound. However, if you want a gentle, bluesy drive, overdrive is ideal. For a hard-edged, rock or metal sound, go for distortion. Consider your genre and playing style before deciding.


Conclusion


Selecting between distortion and overdrive boils down to personal taste and musical needs. Then, these effects shape your sound’s character, crafting tones that resonate with audiences. Embrace experimentation to discover your signature style. Remember, the perfect pedal can elevate your music to new sonic heights.


Choose wisely, rock on!

Categories
Archive

What Is Midi: Unlocking the Secrets of Digital Music

MIDI is a technical standard for music devices to communicate. It stands for Musical Instrument Digital Interface.


Also, MIDI revolutionized music production and performance by enabling various electronic instruments, computers, and other devices to synchronize and share musical information. Also, this protocol encompasses messages that convey notes, rhythms, and controls, allowing for intricate composition and live performances with multiple interconnected devices.


Moreover, as a digital interface, MIDI efficiently translates musical actions into a language that electronics understand, without producing actual sound. Instead, it directs hardware or software instruments to generate audio. In addition, this process gives musicians immense creative control, fostering endless possibilities in arrangements and sound design. Adopting MIDI ensures compatibility and flexibility across a wide range of equipment, making it a staple in modern music creation and a critical tool for artists, producers, and hobbyists alike.


Origins Of Midi

In addition, the ‘Origins of MIDI’ tracks back to the need for a universal language. For example, this language connects electronic musical instruments and technology. Let’s dive into its roots.

Early Attempts At Electronic Music

Before MIDI, creating music with electronic devices was a challenging task. As a result, artists used various, often incompatible, systems. Furthermore, this fragmentation meant musicians struggled to integrate devices from different manufacturers. Innovators began experimenting to solve this issue.

  • Additionally, synthesizers and drum machines needed a way to communicate.
  • Also, companies produced unique control interfaces , limiting compatibility.
  • Moreover, Electronic music pioneers drove the push for a unified system.

The Birth Of A Standard

In addition, the breakthrough came in the early 1980s . However, leading companies of the day, including Roland and Yamaha , joined forces. Their goal: to create a universal protocol. This alliance marked the start of MIDI.

Year Event
1981 Discussions to create a standard begin.
1982 First demonstration of the MIDI protocol.
1983 Official release of the MIDI 1.0 specification.

Furthermore, the debut of MIDI revolutionized music production. Then, it allowed seamless integration between equipment, irrespective of the brand. This single invention transformed the electronic music landscape forever.

Demystifying Midi

Additionally, MIDI, or Musical Instrument Digital Interface, often puzzles music creators. In short, it’s a powerful tool in music production , yet its digital nature can be intimidating. Let’s unwrap the mystery of MIDI and understand why it’s a staple in the music industry.

Midi Versus Audio Files

Also, MIDI and audio files are not the same . People often confuse them, but they serve different purposes. Audio files, like WAV or MP3, contain actual sound data – the recorded sound of instruments or vocals. MIDI files, on the other hand, do not contain sound. Instead, they have digital instructions for music creation. Think of a MIDI file as a music sheet for computers and digital instruments.

  • Audio Files:
    • Contain recorded sounds.
    • In addition, ready to play on any audio player.
    • Larger file size.
  • MIDI Files:
    • Contain data with instructions.
    • Additionally, need a MIDI-compatible device to produce sound.
    • Also, smaller file size, easier to edit.

The Anatomy Of Midi Messages

Moreover, to fully grasp MIDI, understanding its messages is key. Also, a MIDI message consists of bits that tell digital instruments what to do. These bits of data include crucial information like note pitch, duration, and velocity (how hard a note is played).

Type of Message Description
Note On Triggers a note.
Note Off Releases a note.
Control Change Modifies parameters like volume.
Program Change Changes instrument sounds.
Pitch Bend Alters the pitch of a note.

In addition, these messages form the backbone of MIDI communication , transforming simple data into complex musical compositions. In addition, each message is crafted with precision to ensure the accurate rendition of digital music.


Midi In Modern Music Production

Furthermore, Musical Instrument Digital Interface, or MIDI , has revolutionized the way we create music. For example, this powerful tool enables musicians and producers to communicate with a range of musical hardware and software. This results in superior control and flexibility during the music production process. Thanks to MIDI, you can compose, edit, and record music with astonishing precision and creativity.

Sequencers And Daws

Additionally, sequencers and Digital Audio Workstations (DAWs) are the backbone of MIDI music production. Sequencers allow for detailed arranging of MIDI events, while DAWs provide a comprehensive platform for combining MIDI sequences with audio tracks. As a result, this duo forms a robust framework for crafting complex musical pieces. Many popular DAWs include:

  • Also, Ableton Live – Known for its intuitive interface and live performance capabilities.
  • Moreover, FL Studio – Offers a seamless workflow for beat making and loop-based compositions.
  • In addition, Logic Pro – Favored for its sophisticated MIDI editing and vast library of virtual instruments.

Virtual Instruments And Plugins

Furthermore, virtual instruments and plugins breathe life into MIDI compositions. However, these software synthesizers and samplers emulate a wide range of sounds, from classic piano to electronic beats. They respond to MIDI information to produce audio that can rival traditional instruments. Notable virtual instruments include:

  1. Additionally, native Instruments Kontakt – Offers a multitude of sampled instruments with incredible realism.
  2. Also, spectrasonics Omnisphere – Known for its vast array of synth sounds and versatility.
  3. Moreover, xfer Records Serum – Top choice for electronic music producers seeking rich and intricate wavetable synthesis.

Plugins, such as effects processors and sound modifiers, further enhance MIDI tracks. Then, they allow producers to mold and shape the sound, bringing the final touch to a music production masterpiece. In addition, with virtual instruments and plugins, the possibilities are endless.

What Is Midi: Unlocking the Secrets of Digital Music


Credit: www.levelsmusicproduction.com


Midi Controllers Explained

Furthermore, at the heart of modern music production, MIDI controllers are essential tools. In short, they translate physical actions into digital signals. This makes creating beats or melodies on a computer easy.

Types Of Midi Controllers

Additionally, diverse MIDI controllers cater to different needs. Similarly, let’s dive into the variety that pushes music creation boundaries:

  • Also, keyboard Controllers: Resemble traditional pianos with keys that send MIDI data.
  • Moreover, pad Controllers: Feature pads sensitive to touch for beat-making and sampling.
  • In addition, wind Controllers: Allow wind instrument players to connect with music software.
  • Stringed Controllers: Suit guitarists keen on MIDI compatibility.
  • Control Surfaces: Provide knobs and faders to tweak software parameters.
  • Drum Controllers: Mimic drum kits for natural rhythm programming.

How Controllers Enhance Creativity

MIDI controllers open new doors for artists. Also, below are the ways they fuel creative fires:

  • Offer hands-on control over virtual instruments.
  • Enable expressive performances with velocity and pressure-sensitive pads.
  • Allow for spontaneous tweaks with real-time controls.
  • Support endless possibilities with programmable actions.
  • Make complex tasks simpler with dedicated hardware.

The Role Of Midi In Live Performance

MIDI revolutionizes how musicians perform on stage. In addition, with MIDI, artists create rich, dynamic shows. Think of MIDI as the digital maestro, coordinating every sound and visual. Now, let’s dive into how MIDI brings live performances to life.

Midi For Live Triggering

Picture performers tapping a button and triggering an entire orchestra. For example, that’s MIDI for live triggering . It allows artists to play complex passages with a single action.

  • Instant sound effects: Artists hit pads to add drama.
  • Layering tracks: Performers layer sounds live.
  • Seamless transitions: Smooth changes between songs.

Synchronizing Instruments And Visuals

MIDI syncs beats and graphics in real-time. As a result, performers enjoy synced light shows and visuals, enchanting audiences.

Function Benefit
Timed light cues Visuals match the beat
Automated scene changes Seamless visual storytelling

As a result, musicians deliver unforgettable live experiences. However, the crowd sees and hears a show in perfect harmony, thanks to MIDI.

What Is Midi: Unlocking the Secrets of Digital Music


Credit: www.rpmusicstudios.com


Midi And Music Education

MIDI, or Musical Instrument Digital Interface, is a powerful tool in music education. Then, it connects musical instruments to computers. This technology allows for interactive learning experiences. It can make understanding music more accessible and fun for students of all ages. Let’s explore how MIDI can be used in teaching music theory and practical training.

Teaching Music Theory With Midi

MIDI technology can bring music theory to life. In short, it turns abstract concepts into something students can hear and manipulate. Through MIDI keyboards and software, music theory becomes a hands-on experience. Here are some of the benefits:

  • Visual Representation: Notes and chords appear on-screen, allowing students to see music theory in action.
  • Interactive Exercises: MIDI software can provide instant feedback, which helps students learn faster.
  • Composition: Students can compose and hear their own creations.

Practical Training And Midi

MIDI is also invaluable for practical music training. Similarly, with MIDI instruments and devices, students can practice anytime without needing physical instruments. Let’s see how MIDI enhances practical learning:

Benefit Description
Real-time Feedback Software can highlight mistakes and track progress.
Play Along Tracks Students can play with backing tracks, improving timing and performance.
Simulated Instruments Access a wide range of instrument sounds without physical limitations.

MIDI devices can be connected to computers or tablets. Also, they make practicing engaging and highly productive.

Troubleshooting Common Midi Issues

Musical Instrument Digital Interface (MIDI) connects electronic instruments. In addition, sometimes, you may face MIDI issues. Let’s fix them together! Below are ways to solve common MIDI problems.

Connectivity Problems

Connectivity issues can stop your music. For example, here are simple steps to solve them:

  • Check cables: Ensure all MIDI cables are fully inserted into the ports.
  • Restart devices: Turn off your equipment and turn it back on.
  • Update drivers: Make sure your device drivers are up to date.
  • Test with other cables: Sometimes, the problem is just a bad cable.

Midi Latency And How To Reduce It

MIDI latency can delay your music. Use these quick fixes:

Action Result
Lower buffer size Reduces the delay
Close background apps Improves computer speed
Optimize your DAW Makes software more efficient
Use a faster interface Increases data transfer speed

Note: Every computer is different. What works for one, might not work for another.

The Future Of Midi

The musical landscape continues to evolve with MIDI (Musical Instrument Digital Interface). As a result, this protocol bridges the gap between music and technology. As we look to the future, we can expect MIDI to enhance how musicians create and interact with music. New advancements bring exciting possibilities to composers, producers, and hobbyists.

Midi 2.0 And What It Brings

MIDI 2.0 is a significant update to the MIDI protocol. However, it marks a new era for digital music. This upgrade offers features such as enhanced expressiveness and improved compatibility among devices. Here’s what MIDI 2.0 introduces:

  • Increased Resolution: It allows for more detailed musical expression.
  • Two-Way Communication: Devices can talk back and forth, not just one way.
  • Profile Configuration: Simplifies the setup process for various instruments.
  • Property Exchange: Musicians can now fine-tune their instruments via software.

Emerging Trends In Digital Music

Digital music continues to shape the sounds we love. Then, new tools and technologies emerge, changing how we produce music. These trends include:

Trend Impact on Music Production
Artificial Intelligence AI helps create complex compositions with minimal input.
Virtual Reality VR transforms how we experience and create immersive musical performances.
Cloud Collaboration Musicians worldwide can work together in real time.

As MIDI technology advances, these trends are set to redefine the creative process in exciting ways.


Frequently Asked Questions On What Is Midi


What Is Midi In Music Production?


MIDI, short for Musical Instrument Digital Interface, is a technical standard. In short, it allows musical instruments and computers to communicate. MIDI conveys messages about pitch and intensity, enabling control over music production.


How Does Midi Enhance Music Creation?


MIDI enables precise control over various musical elements. Similarly, it allows editing notes, dynamics, and instrumentation post-recording, paving the way for complex compositions and arrangements in music creation.


Can Midi Be Used For Live Performances?


Yes, MIDI is widely used in live performances. Also, it allows musicians to trigger sounds from synthesizers and control lighting, enhancing the live music experience.


What Devices Are Compatible With Midi?


MIDI is versatile and compatible with many devices. In addition, this includes synthesizers, drum machines, computers, and even digital audio workstations (DAWs) for producing music.


Conclusion


Understanding MIDI is crucial for any music enthusiast or producer. For example, it’s the backbone of digital music creation, allowing for seamless communication between instruments and software. Embracing MIDI technology opens up a world of creative possibilities. Remember, MIDI isn’t just a tool—it’s the key to unlocking your musical potential.

For more background, see MIDI on Wikipedia. You may also like our guide: How to Make Music with a MIDI Keyboard: Master Tunes!.

Categories
Archive

What Is An 808: Unveiling the Beat Behind the Music

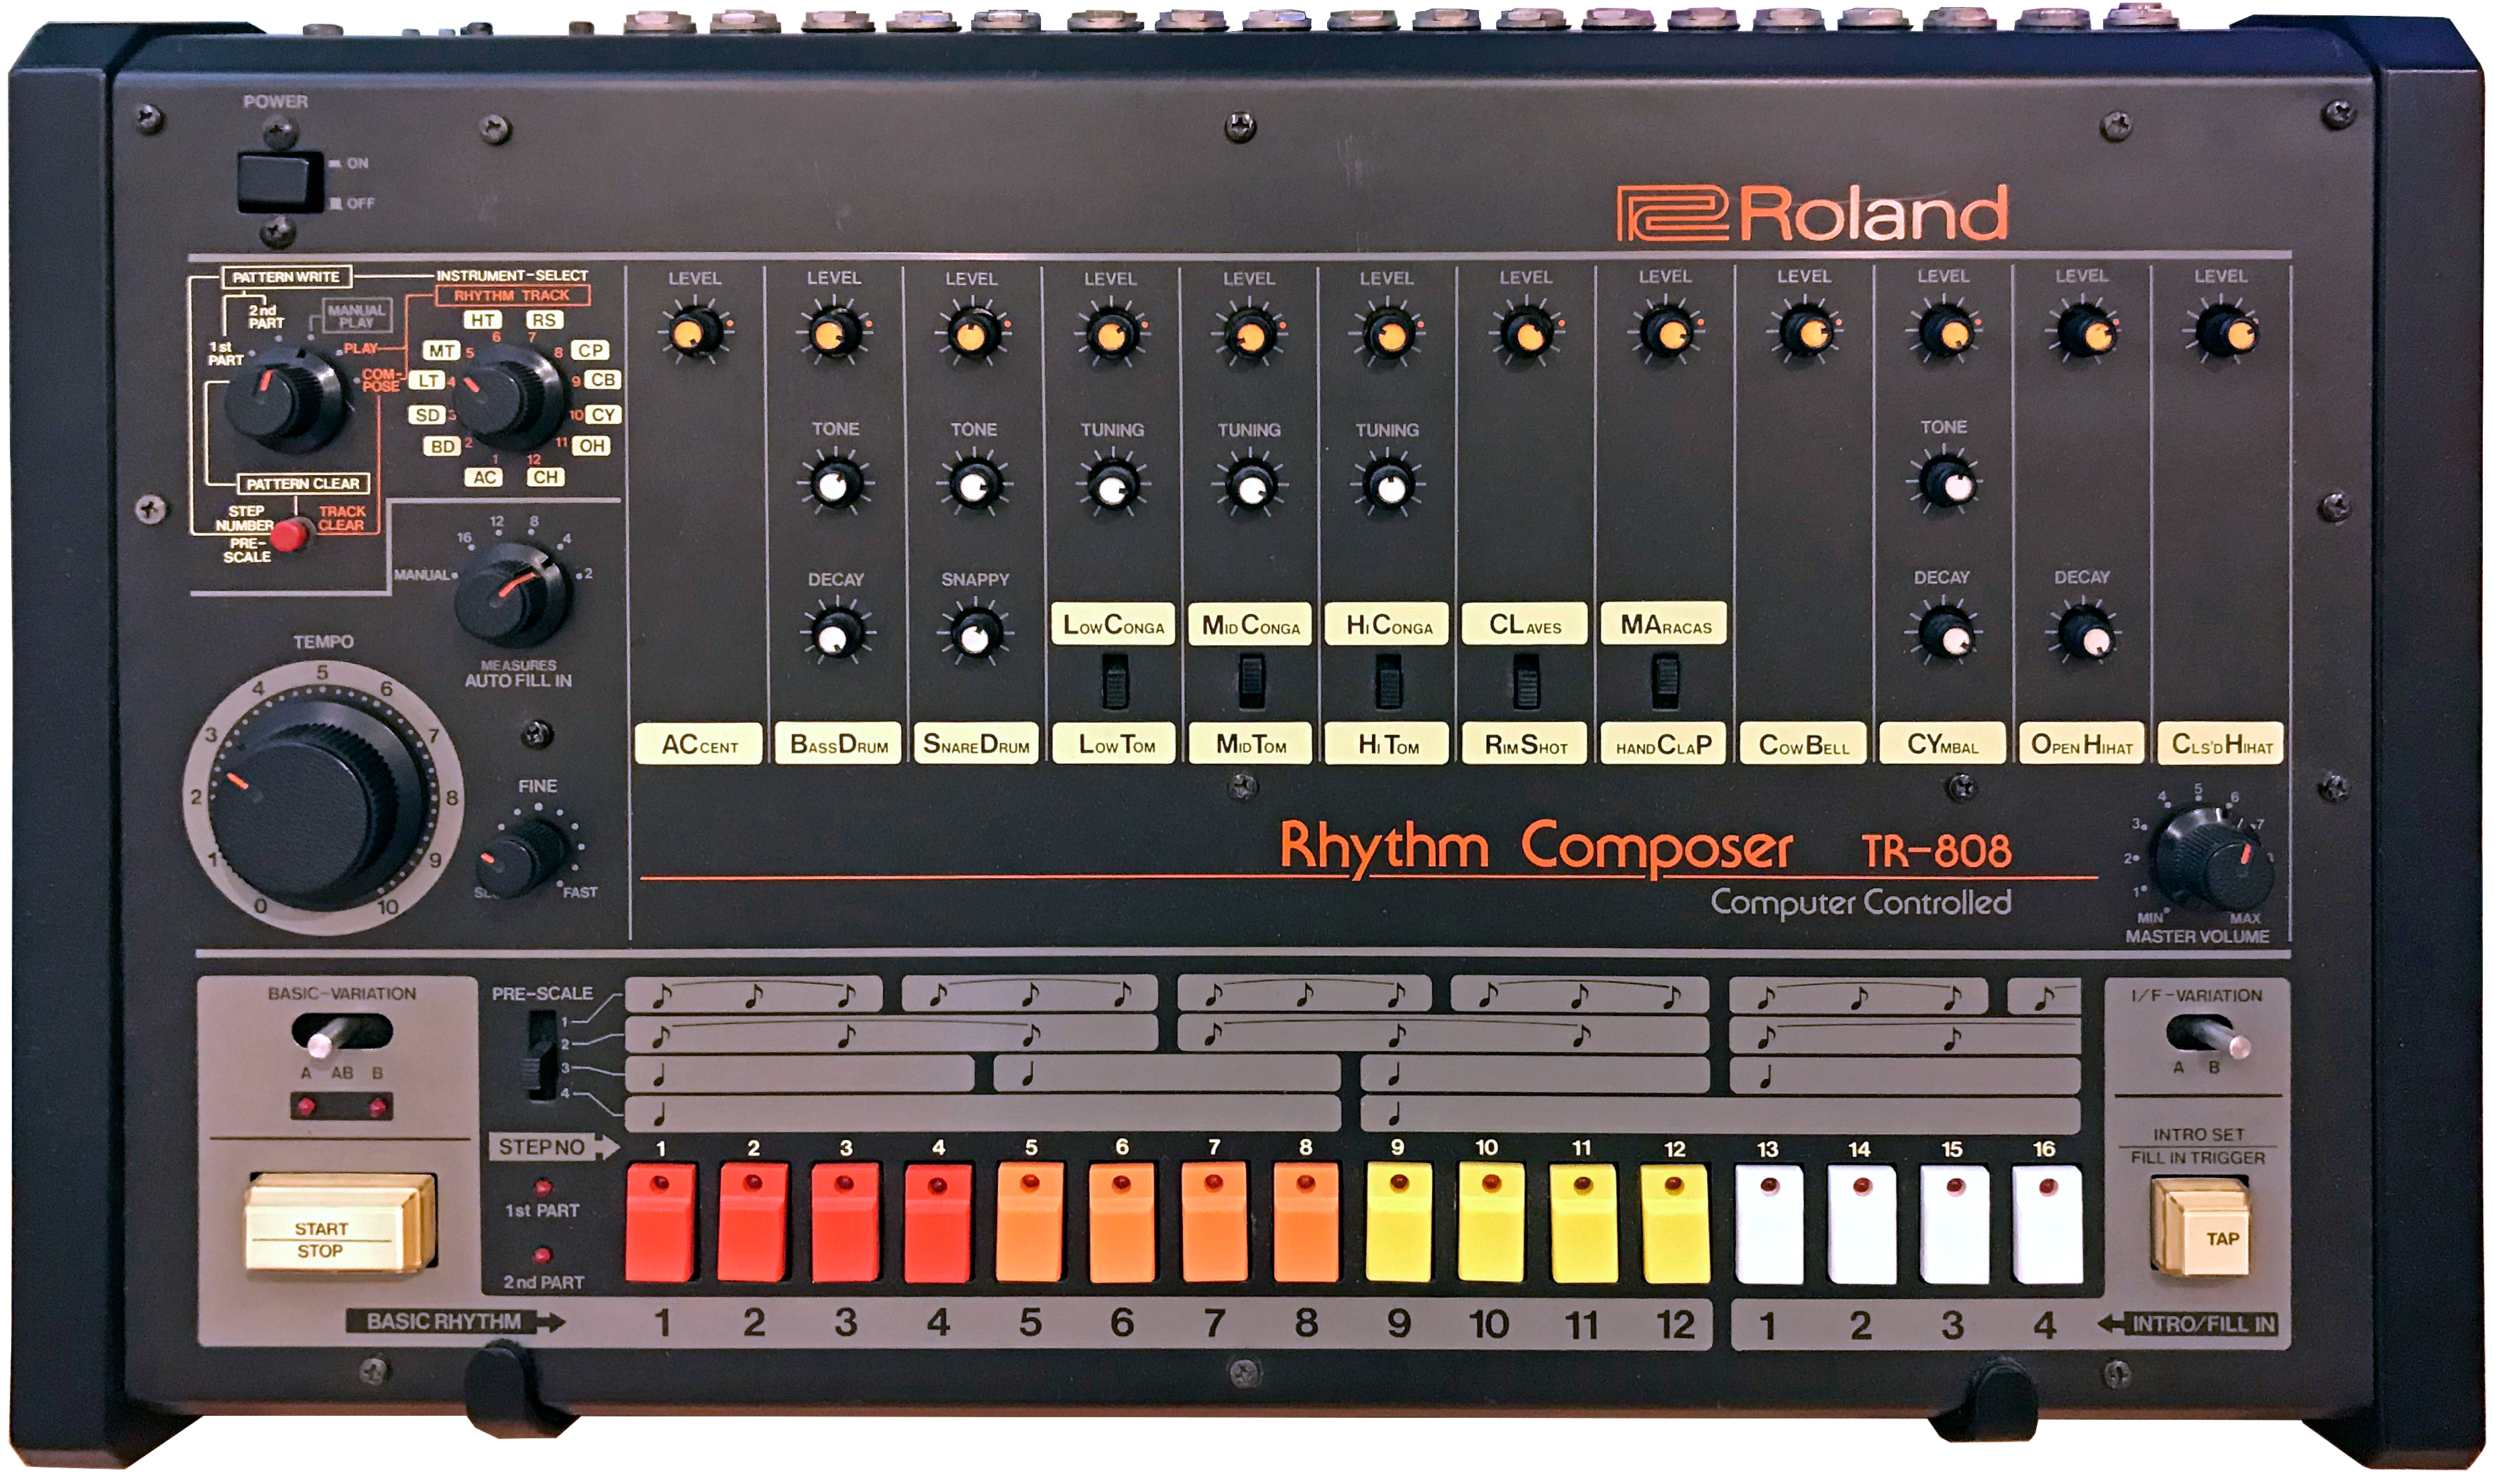
An 808 refers to the iconic Roland TR-808 Rhythm Composer drum machine. Popular in music production, it’s known for its distinctive bass drum sound.


The Roland TR-808 revolutionized music creation with its unique ability to synthesize deep, booming basslines and crisp snare hits. Originating in the early 1980s, this drum machine became an integral part of hip hop, dance, and electronic music genres. Producers cherish it for the warm analog beats that digital machines often struggle to replicate.


The 808’s influence extends well beyond its production years, cementing its legacy in modern music culture. Musicians and beatmakers continue to emulate the classic 808 sounds using software and updated hardware versions, proving the 808’s timeless appeal in music production.


The Beat That Defined A Generation

The Beat that Defined a Generation resonates through the deep, distinctive boom of the 808 drum machine. This iconic sound machine didn’t just play beats; it created a cultural tide that swept through music genres, fashion, and technology. It was the heartthrob of hip-hop, the pulse of pop, and the rhythm of electronic music that still echoes today.

Origins Of The 808 Drum Machine

The story of the 808 begins in the early 1980s. The Roland Corporation, a Japanese company, introduced the TR-808 Rhythm Composer. Musicians loved its affordability and unique sounds. The 808 was unlike anything else, due to its analog synthesis. It allowed users to create a vast array of beats. Yet, its commercial success did not come immediately. It was only after creative musicians took advantage of its distinctive sounds that the 808 gained fame.

The 808’s Influence On Music Culture

The 808 drum machine carved a niche in the music scene that would change the trajectory of modern music. Its deep, booming bass drum became the backbone of hip-hop. Artists like Afrika Bambaataa and Marvin Gaye fashioned hits that highlighted the 808’s unique sound profile. The 808’s influence didn’t stop there. It permeated pop, dance, and even rock music, cementing its status as a musical mainstay. The 808 was not just an instrument; it was a revolution.

  • Became essential in hip-hop production
  • Transformed pop music’s sound landscape
  • Inspired whole new genres like Miami bass and trap
  • Continues to influence music production today


Anatomy Of The 808 Drum Machine

If beats are the heart of modern music, the 808 drum machine is the pulse that set a revolution. Introduced by Roland in 1980, the TR-808 Rhythm Composer created a new beat-making anatomy. This iconic machine has shaped various music genres, from hip hop to electronic. Understanding its inner workings reveals why the 808 remains a production powerhouse even decades later.

Technical Specifications

At its core, the 808 featured impressive tech for its time. It was one of the first drum machines to allow users to program rhythms instead of preset patterns. Here’s a snapshot of what the 808 brought to the musical table:

  • Programmable Patterns: 32 user patterns, 256 rhythm patterns.
  • Connectivity: Individual outputs, DIN sync.
  • Sound Generation: Analog synthesis.
  • Memory: Volatile, it doesn’t save after power down.

Signature Sounds And Patterns

The 808’s sounds are unmistakable. Key to its appeal is the selection of deep bass kicks, sharp snares, and tinny hi-hats. Its signature sounds include:

Sound Component Description
Bass Drum Booming and deep, it packs a punch.
Snare Drum Sharp with a distinctive clap sound.
Hi-Hat (Open/Closed) Crisp and metallic, cutting through the mix.
Cowbell Woodblock-like, it’s a classic 808 feature.

The 808’s rhythms became the backbone for countless songs. Famous patterns include the classic “four on the floor” and syncopated beats that are essential in genres like trap and EDM. Let’s dive into some commonly used patterns:

  1. Four to the Floor: Steady kick drum on every beat.
  2. Trap Patterns: High-tempo, swiftly rolling hi-hats.
  3. Booming Basslines: Long, drawn-out bass kicks for impact.

Historic Tracks Driven By The 808

The iconic 808 drum machine has left a substantial mark on music. Crafting beats that can still be felt today, the 808’s bass-heavy thumps and robotic claps stand as a backbone of countless hits. Let’s delve into some of the historic tracks that were driven by the irresistible 808 sound.

Landmark Recordings

Key tracks define musical eras. The 808’s presence in these songs changed the landscape of rhythm and influenced genres deeply.

  • “Planet Rock” by Afrika Bambaataa & The Soulsonic Force
  • Marvin Gaye’s “Sexual Healing” layers soothing vocals over precise 808 beats.
  • “Paul Revere” by Beastie Boys boasts a backwards 808 pattern that’s unforgettable.

Artists Defined By The 808 Sound

Certain artists not only embraced the 808 but molded their musical identity around its distinct sound. These acts stand out:

Artist Notable 808-Driven Track
Kanye West His album “808s & Heartbreak” pays homage to the instrument.
Phil Collins “In the Air Tonight” showcases the 808’s versatility in pop rock.
Dr. Dre Tracks like “Still D.R.E.” fuse the 808 with West Coast hip-hop.
What Is An 808: Unveiling the Beat Behind the Music


Credit: en.wikipedia.org


The Resurgence Of The 808

The throbbing beats that once ruled the airwaves in the ’80s are thundering back into the limelight. The iconic 808 drum machine has staged an impressive comeback, resonating with a new generation of music aficionados and beat makers. This relentless resurgence has established the 808 as an enduring emblem of sonic innovation.

Rebirth In Modern Music

The 808 drum machine has soared back into modern music’s echelons, bringing its unmistakable boom to various genres. Artists and producers zealously weave its sounds into hip-hop, electronic, and even pop tracks. As a cornerstone of contemporary music production, the 808’s punchy kicks and crispy snares serve as the heartbeat for numerous chart-toppers. This era witnesses a seamless fusion of classic vibes with fresh urban beats.

  • Hip-hop: Dominant bass lines
  • Electronic: Synthesized rhythms
  • Pop: Dance-worthy tracks

Technological Advancements And Emulations

Technology has gifted the legendary 808 sounds with a new lease on life. Cutting-edge software and hardware emulations allow for authentic 808 experiences without the vintage hardware’s limitations. Producers have access to these sounds at the click of a mouse, ensuring the 808’s legacy persists.

Advancement Impact
Software Emulators Accessible and versatile 808 sounds
Hardware Replicas True-to-original feel and textures
Sample Packs Pre-crafted 808 sounds ready for use

As tech evolves, the 808’s impact only deepens. These advancements ensure producers of all levels can infuse their music with the legendary ‘boom and snap’ of the 808.


Manipulating The 808: From Pure To Processed

The iconic 808 drum machine has defined the heartbeat of countless hits. Yet, the magic lies not just in its original thud, but also in its evolution. Ingenious tweaking transforms the 808 from a classic sound into a modern masterpiece. Let’s explore the art of shaping the 808 thump.

Techniques For Tweaking 808 Sounds

Tweaking 808 sounds opens up a universe of sonic textures. Adjusting pitch, decay, and distortion breathes new life into the bass. Compressors reshape dynamic ranges, crafting the perfect thump. Equalization carefully sculpts frequencies, ensuring the 808 cuts through mixes. Reverb adds spatial depth, digital plugins warp tones unimaginably. Each tweak delivers a unique flavor.

  • Distortion: Adds grit, emphasizes harmonics.
  • Compression: Tightens dynamics, adds punch.
  • Envelope manipulation: Alters attack, sustain, release.
  • Layering: Enhances texture, reinforces the beat.
  • EQ: Balances frequencies, cuts mud.

The Art Of Layering Drums

Layering drums takes the 808 beyond its vintage realm. Stacking different drum samples builds depth. A sharp snare layered over an 808 kick adds snap. Hi-hats contribute sizzle. Experimenting with layers forges signature sounds. Think of layering as stacking different colors to paint a compelling rhythmic picture.

  1. Select complementary sounds; avoid muddiness.
  2. Adjust volume levels for balance.
  3. Apply EQ to each layer for clarity.
  4. Pan elements for a wide stereo image.
  5. Experiment with phase to avoid cancellations.

Remember, the goal is to enhance, not overpower. The right layering supports the 808’s soulful thump. Synergy between layers shapes beats that captivate and energize. Dive in and find your 808’s perfect partners in rhythm.

Genre Transcendence: The 808’s Eclectic Reach

The 808 drum machine beat its way into music history with a thunderous boom. This iconic sound machine didn’t just leave footprints across genres; it hopped, skipped, and jumped over boundaries. It reshaped our musical landscape. Let’s dive into how the 808 drum’s thunderous pulse became the heartbeat of diverse music genres.

From Hip-hop To Electronic Dance Music

The 808’s influence began in the bustling streets of hip-hop culture. But it didn’t stop there. Bold and booming, it made its way into the pulsating glow of Electronic Dance Music (EDM). Here’s how:

  • The euphoric rise of house and techno welcomed the 808’s hypnotic rhythms.
  • Its seismic bass became the foundation for many EDM tracks.
  • EDM producers lean on the 808 for its unmistakable presence.

Unexpected Genres Embracing The 808

Surprisingly, the 808 found a home beyond the realms one would expect. Genres such as country to classical have flirted with the 808’s charm:

Genre Example of 808 Use
Country Accentuating beats in modern country pop
Classical Orchestral arrangements with a twist of 808 kicks
Jazz Fusion pieces that blend electronic with acoustic

The 808 has also popped up in indie pop and rock. Its versatility knows no bounds, making it a go-to for artists wanting to experiment with sound.

Producing Beats With An 808

The pulsing heart of many hit records can be traced back to the iconic sounds of the 808 drum machine. This legendary piece of equipment has been instrumental in shaping the landscape of genres like hip-hop, trap, and EDM. Whether you’re a seasoned producer or just starting, understanding how to craft beats with an 808 can amplify your music’s impact and deliver that professional edge.

Programming And Sequencing Tips

Unlocking the power of the 808 begins with mastering its programming and sequencing. Here are some essential tips:

  • Start with the basics: Familiarize yourself with kick, snare, hi-hat, and other percussive sounds.
  • Maintain rhythm: Ensure your beat is tight and grooves well, using the sequencer as your guiding tool.
  • Vary patterns: Experiment with different note lengths and accents to add dynamics.
  • Use a metronome: This keeps your beats consistent and in time.

Integrating 808s With Other Instruments

Bringing an 808 into a mix with other instruments requires both technology know-how and creativity.

  1. Tune your 808s to match the key of your song for a cohesive sound.
  2. Play with textures by combining 808s with live drums or synth pads.
  3. Sidechain the 808 kick with the bassline to create space and balance in the mix.
  4. Focus on EQ: Cut or boost frequencies to ensure clarity and prevent muddiness.

The harmony between an 808 and other instruments can elevate your track to a professional soundscape.

The Iconic 808 In Popular Culture

The Iconic 808 drum machine has seeped into popular culture like few musical instruments ever do. Its distinctive deep bass and snappy percussion sounds define a generation of music. Beyond the beats, the 808 has left an indelible mark on film, television, merchandise, and fashion, making it much more than a device and more an emblem of an era.

The 808 In Film And Television

The 808’s influence extends into the visual realm, imparting its unique sonic footprint on film and television soundtracks. It often signals a retro or urban vibe, letting audiences tap their feet to familiar beats. Directors bank on this audio signature to establish mood and character in scenes destined to stick with viewers.

  • 808 cameos: Spot the device on-screen in studios or as part of a character’s instrument collection.
  • Soundtracks: Numerous shows and movies feature tracks driven by 808 beats.
  • Documentaries: The drum machine has been the subject of documentaries, exploring its history and impact.

Merchandise And Fashion

In the realm of fashion and merchandise, the 808 is more than an icon—it’s a statement. T-shirts, hats, and even sneakers bear the machine’s imagery or shape, embracing the 808’s cultural symbolism.

Designers and brands ride the 808 waves, launching collections that honor the drum machine:

Item Description Brand/Artist
Apparel Tees and hoodies with 808 graphics Multiple streetwear labels
Accessories 808-inspired hats, bags, and phone cases Specialty music shops
Sneakers Shoes with design cues from the 808 Collaborations with major sports brands

Collectibles: From figurines to art prints, the 808 inspires a range of collectible items.

Future Of The Beat: What’s Next For The 808?

The 808 drum machine shook the world with its deep, booming bass and crisp snares. Its sound runs through decades of music history. As we gaze into the future, we question: What will the 808 become next? Will it evolve with new technology or inspire fresh sounds in music production? Let’s dive into emerging artists and future trends to forecast the beat’s trajectory.

Emerging Artists And Future Trends

Bright new talents are already pushing the 808 into uncharted territories. They blend its classic tone with digital advancements, crafting innovative beats. Expect to hear the 808 twisted in ways never imagined, as artists like these take center stage:

  • Kai Whiston – Morphing 808s with daring soundscapes.
  • SOPHIE – Infusing pop with punchy 808 kicks.
  • Jlin – Reinventing footwork with the 808’s raw power.

The 808’s future also includes fresh genres born from experimental blends and global influences.

Genre Description Example
Hyperpop High-energy, glossy beats. Gupi & Fraxiom
Trap EDM Bass-heavy drops. RL Grime

The Lasting Legacy Of The 808 Drum Machine

The iconic 808 lives on, not just in the hits of yesterday but in the classrooms, studios, and laptops of tomorrow. Music technologists find new ways to honor its sound. They inject the 808 with modern twists:

  1. Software emulations for accessible beat-making.
  2. Cutting-edge hardware revamps with extended versatility.
  3. Educational tools for aspiring producers to learn the ropes.

Across countries and cultures, the 808 remains indispensable, shaping beats to come. It is certain to inspire generations of music, from chart-toppers to underground anthems.


Frequently Asked Questions For What Is An 808


What Is An 808 In Music Production?


An 808 refers to the iconic Roland TR-808 drum machine. It’s famous for its distinctive bass sounds. These sounds are a staple in hip-hop, EDM, and pop music.


Why Do Producers Use 808 Kicks?


Producers use 808 kicks for their deep, resonant bass that can be felt physically. They are ideal for creating a strong rhythmic foundation in a track. 808s help in driving modern music genres forward.


How Do 808s Affect Modern Music?


808s have shaped genres like trap, hip-hop, and EDM. They provide a weighty bass that’s essential for the musical styles. 808s have influenced the texture and beat structure in contemporary productions.


Can You Create 808 Sounds Without A Drum Machine?


Yes, 808 sounds can be replicated with digital audio workstations (DAWs). Software plugins can emulate the 808’s distinctive tones. Thus, producers can create similar sounds without original hardware.


Conclusion


Understanding the 808 is key for any music enthusiast or producer looking to delve into the sounds that shaped modern music. This iconic drum machine transcends genres, infusing tracks with a timeless beat that continues to resonate. Embrace its legacy and let the 808’s distinct rhythm inspire your next creative project.

Categories
Archive

Best Studio Monitor Controllers: Top Audio Mastery

As an Amazon Associate I earn from qualifying purchases.

The Mackie Big Knob Series and PreSonus Monitor Station V2 are among the best studio monitor controllers on the market. Both offer robust control options and reliable performance for professional studios.


Studio monitor controllers play an essential role for audio professionals by providing precise volume control and seamless switching between audio sources and speakers. This specialized equipment helps to maintain the integrity of the mixing process, ensuring accurate sound reproduction and allowing for critical listening.


Whether you’re dealing with mixing, mastering, or just need an efficient way to manage your studio setup, a quality monitor controller is vital. With features like built-in talkback, multiple input and output options, and headphone amplification, these devices streamline studio workflow. The right controller can make a huge difference in your production efficiency, audio quality, and overall studio experience. Enabling better decision-making during the mixing process, it’s no wonder why the Mackie Big Knob and PreSonus Monitor Station V2 stand out as top choices for professionals seeking top-notch studio equipment.


Introducing Studio Monitor Controllers

In recording studios, sound clarity is crucial. Studio monitor controllers rise to the occasion. They are the command centers for speaker systems. Professionals use them to switch between monitors, adjust levels, and fine-tune sound. These devices ensure audio fidelity for mixing, mastering, and recording.

The Role In A Professional Studio

A studio monitor controller’s place in a studio is central. It serves crucial functions. Let’s explore:

  • Versatility: They allow connections to multiple audio sources and speakers.
  • Control: They provide hands-on manipulation of volume and tone.
  • Accuracy: They enable precise monitoring for critical listening tasks.

Key Features To Look For

Selecting a studio monitor controller requires careful consideration. Features matter.

Feature Benefit
Input/Output Options Connects various devices and speakers
Volume Control Smooth and precise adjustments
Build Quality Durable and reliable for long-term use
Talkback Functionality Communicate with artists during recording sessions

Always check for inputs/outputs, volume precision, and solid build. Talkback functions are also valuable for recording. The right controller can elevate studio work significantly.

Best Studio Monitor Controllers: Unveil Top Audio Mastery


Credit: www.soundonsound.com


Critique Of Analog Vs. Digital Controllers

When choosing the heart of your studio, the monitor controller, it’s essential to understand the differences between analog and digital models. Each type brings a unique set of features to the table. Let’s dive into the nuances of both to determine which might suit your sonic landscape best.

Sound Quality Face-off

Sound quality is paramount for any studio professional. The choice between analog and digital can affect the purity of your audio.

  • Analog controllers are known for their warmth and character.
  • Digital controllers often boast pristine clarity and accuracy.

Consider your needs: Do you crave the vintage vibes from analog or the crisp precision digital offers?

Ease Of Use And Flexibility

Usability can make or break the creative flow. Analog controllers typically offer straightforward functionality.

Digital controllers, on the other hand, introduce a higher level of complexity with expanded features.

Aspect Analog Digital
Interface Simple knobs Menus and screens
Learning Curve Lower Higher
Configurations Limited Extensive

Flexibility is a key advantage of digital controllers. They allow presets and multiple routing options.

Analog sticks to the classics with less to tweak but ease in spontaneous adjustments.

Top Picks For Budget-conscious Producers

Budding producers need great tools that don’t break the bank. Finding the best studio monitor controllers isn’t always easy on a tight budget. Manufacturers have honed in on this need, creating options that offer both affordability and quality. This guide highlights the top picks under $200. Let’s explore cost-effective choices that foster professional sound production.

Affordable Options Under $200

Great sound doesn’t have to come with a high price tag. Here’s a list of studio monitor controllers that keep expenses low while delivering solid performance:

  • Mackie Big Knob Passive
  • Behringer CONTROL2USB
  • PreSonus Monitor Station V2

Each offers unique features like multiple source inputs, integrated USB audio interfaces, and precise control. They are perfect for small studios and home setups.

Balancing Cost With Quality

Investing in a studio monitor controller is about finding the right balance. It should have essential features without unnecessary extras. Look for:

  1. Durable build
  2. Clear signal path
  3. Accurate volume control

Reliability and usability are key. Research user reviews and product specs to make an informed choice. Quality gear can be affordable and last years. Be sure to invest wisely.

Mid-range Controllers For The Aspiring Audiophile

Mid-Range Controllers for the Aspiring Audiophile bridge the gap. They offer advanced features. Professionals love these features. They fit a tighter budget. Experience sound control like never before. These controllers promise precision and ease of use. This guide highlights choices between $200-$500. They will change your audio game.

Best Controllers Between $200-$500

Start exploring these powerhouse controllers. They deliver quality without the hefty price tag. Our top picks for mid-range monitor controllers offer both value and performance. Let’s delve into the options that elevate your studio without draining your wallet.

Elevating Your Studio Without Breaking The Bank

Model Features Price
Mackie Big Knob Studio
  • Flexible source connections
  • Built-in USB interface
$219
PreSonus Monitor Station V2
  • Four headphone outs with independent mix
  • Onboard talkback microphone
$329
BEHRINGER CONTROL2USB
  • High-end VCA control
  • Built-in USB/MIDI interface
$149
Mackie Big Knob Passive
  • Passive audio path
  • No power supply needed
$69
TC Electronic Level Pilot C
  • Analog stereo control
  • Compact design
$79

These mid-range controllers shine through their features. Sound clarity and mix precision standout. They support multichannel inputs and outputs. Many come with USB interfaces. This ensures compatibility with modern setups. Professionals choose them for reliable performance.

Premium Selection For Audio Professionals

Audio professionals always seek the best tools to produce crystal-clear sound. A studio monitor controller is essential for precise volume adjustments, switching between sources, and monitoring different mixes. This post explores top-tier options well above the $500 mark, designed for those who demand nothing but the highest fidelity and functionality in their studio setup.

Elite Models Over $500

Elite studio monitor controllers deliver unmatched audio quality and durability. These units boast features like advanced connectivity, tailored calibration, and detailed sound control that professionals highly value. They are packed with high-end components, ensuring that every adjustment made is reflected in the output accurately.

  • Sturdy build to handle rigorous use
  • Multiple I/O options for various setups
  • Presise control for refined adjustments

Investing In Future-proof Gear

Investing in premium gear means looking towards the future of audio production. Premium monitor controllers are designed with expansion in mind, supporting additional gear as studio needs grow.

  1. Advanced tech with software integration
  2. Scalability for additional audio channels
  3. Lasting use with firmware updates

Future-proof equipment saves money in the long run, avoiding the need for frequent replacements.

Best Studio Monitor Controllers: Unveil Top Audio Mastery


Credit: www.soundonsound.com


An Exploration Of Connectivity Options

Welcome to ‘An Exploration of Connectivity Options’ in the world of studio monitor controllers. This crucial component in the audio signal chain offers control over your monitoring levels with precision. It’s time to delve into how these devices integrate with various studio setups and embrace digital enhancements.

Interfacing With Your Studio Setup

Studio monitor controllers serve as the fulcrum for your audio monitoring setup. They come in various connectivity flavors to match different studio needs:

  • XLR and TRS: Standard for professional environments, providing balanced connections.
  • RCA: Found in consumer-level gear, perfect for home studios.
  • MIDI: Allows seamless integration with digital equipment and software.
  • USB/Thunderbolt: Enables direct computer connection for digital workflows.

These interface options ensure seamless integration with analog and digital gear, making monitor controllers versatile for any setup.

Diving Into Digital Control Surfaces

Digital control surfaces take the classic studio monitor controller into the twenty-first century:

Feature Benefit
Touch-Sensitive Controls Precise adjustments and automation capabilities.
DAW Integration Streamlines workflow, with hands-on access to mixing levels.
Customizable Presets Saves settings for different sessions or projects.
Networking Capabilities Links multiple units for expansive setups.

These modern control surfaces offer digital precision with the feel of analog, crafting a fluid audio production experience.

Ergonomics And Design Impact

Understanding the impact of ergonomics and design on studio monitor controllers isn’t just about comfort—it’s crucial for efficiency and creativity. The perfect balance between style and practicality creates an environment where inspiration flows freely. Let’s explore how to achieve that equilibrium in your studio.

Studio Aesthetics Vs. Functionality

Striking the right balance is essential for any studio. A sleek design adds visual appeal but must not compromise functionality. Here are key points to consider:

  • Controller Size: Must fit your desk and be within easy reach.
  • Knob and Slider Placement: Designed for natural, intuitive use.
  • Color Scheme: Should complement your studio décor.
  • Durable Materials: Ensure longevity even with constant use.

Workspace Integration Tips

Efficient use of space and integration into your workflow is critical. Follow these tips:

  1. Analyze your movement to place the monitor controller for minimal reach.
  2. Minimize clutter by using cable management solutions.
  3. Consider mobility if you switch between standing and sitting.
  4. Test different layouts to find the most ergonomic setup.
Best Studio Monitor Controllers: Unveil Top Audio Mastery


Credit: vintageking.com


User Experiences And Reviews

When picking the perfect studio monitor controller, user experiences and reviews offer invaluable insight. These feedbacks highlight not just the product’s features, but how they perform in real-world scenarios. Let’s delve into what industry veterans have to say about their go-to tools.

Pros And Cons From Industry Veterans

Pros:

  • Sound Quality: Many users praise the transparent and accurate audio reproduction.
  • Build Quality: Sturdy designs meant to withstand the rigors of the studio environment earn commendation.
  • Features: Extras like talkback functionality and multiple outputs often receive positive remarks.

Cons:

  • Cost: Some veterans consider premium controllers to be overly pricey.
  • Complexity: A few users report a steep learning curve with feature-rich models.
  • Size: Controllers with larger footprints may not fit snugly in all studio setups.

Community Favorites And Why

Specific models consistently emerge as community favorites for various reasons:

Model Why it’s favored
Mackie Big Knob User-friendly interface and robust build make it a popular choice.
PreSonus Monitor Station Its detailed sound control and versatile connections are highly valued.
Behringer CONTROL2USB Affordability mixed with a wide set of features attracts many.

These controllers stand out largely due to their reliability, ease of use, and the value they bring to the studio. Each has its particular strengths that meet different user needs, from the budget-conscious to the feature-centric audiophile.


Future Trends In Monitor Controllers

The way we interact with sound is evolving rapidly. Studio monitor controllers stand at the crossroads of innovation. They are set to transform with groundbreaking features and smarter interfaces.

Predicting Technological Advancements

In the near future, studio monitor controllers will see vast improvements. These devices will not only act as audio traffic cops but as intelligent assistants too. They will likely embrace:

  • Touchscreen interfaces for intuitive control
  • Wireless connectivity to reduce clutter
  • Integrated room correction software for optimal sound
  • Customizable user presets for different scenarios

How Ai And Software Are Changing The Game

Artificial Intelligence (AI) is redefining monitor controllers. The fusion of AI with monitor control software paves the way for:

  1. Automated level adjustments based on the listener’s position and environment
  2. Smart recommendations to enhance mixing accuracy
  3. Learning user habits for a tailored audio experience
  4. Seamless integration with digital audio workstations

This synergy will make the creative process more fluid and precise. As software becomes more sophisticated, so too will the capabilities of monitor controllers.

Frequently Asked Questions On Best Studio Monitor Controllers


What Are Studio Monitor Controllers?


Studio monitor controllers are devices that manage audio signals. They allow producers to switch between monitors and control volume with precision. Essential for studio environments, they offer tactile control over listening experiences.


How Do Studio Monitor Controllers Improve Mixing?


They provide accurate volume control and source selection. This ensures consistent sound levels and a neutral listening environment. By minimizing distortion and coloration, they create a reliable mix reference, vital for professional audio production.


Can You Connect Multiple Monitors To One Controller?


Yes, most monitor controllers support multiple monitors. They allow for switching between different sets effortlessly. This is crucial for comparing mixes on various speaker systems.


What Features To Look For In Monitor Controllers?


Key features include multiple inputs/outputs, precise volume control, mono and dim functions, and talkback capabilities. Build quality and connectivity options are also important for integration with studio setups.


Conclusion


Selecting the right studio monitor controller enhances both your workflow and audio production quality. With the above options, finding your ideal match is simpler. Your choice should align with your studio’s specific needs and budget. Embrace the clarity in sound control and make the upgrade that could redefine your creative output.

Categories
Archive

What Is Latency In Audio: The Silent Disruptor

Latency in audio refers to the delay between an input signal and its audible output. It’s a critical factor in digital audio processing and live sound reinforcement.


Latency can significantly affect the performance of musicians and the user experience in various audio applications. Understanding and managing latency is essential in recording studios, live performances, and even consumer audio setups to ensure seamless audio playback and real-time audio processing.


It becomes a noticeable issue when it disrupts the timing of live performances or when using virtual instruments and digital audio workstations (DAWs). Minimizing latency is vital for professionals and enthusiasts alike to maintain audio fidelity and synchronicity. Technological advancements continue to provide solutions to reduce latency, making it an ongoing consideration for audio engineers and developers.

What Is Latency In Audio: Unraveling the Silent Disruptor


Credit: obkio.com


The Silent Disruptor In Audio

In the realm of audio, a ghost in the machine often goes unnoticed. Latency—the silent disruptor—affects how we experience sound. From professionals to casual listeners, everyone desires seamless audio. Latency prevents that. Let’s explore why it’s pivotal in the audio world.

Latency Defined Section

Latency Defined

Latency in audio is the delay before a transfer of sound begins. Imagine striking a drum and hearing the sound moments later. That gap is latency. It’s measured in milliseconds (ms) and can vary based on many factors. The goal in audio production is to keep latency low. This ensures a more authentic and responsive sound experience.

Why Latency Matters in Audio Section

Why Latency Matters In Audio

When latency is high, it disrupts the audio experience. Musicians struggle with timing, and listeners notice a disconnect. High latency can ruin live performances and recordings. Imagine a movie where the sound doesn’t match the actions. It feels off. Here are key points showing its importance:

  • Real-time audio processing needs low latency for authenticity.
  • Digital audio workstations (DAWs) rely on low latency for precise editing and mixing.
  • Streaming services must manage latency to sync audio and video.
  • Online gaming requires low latency for in-game communications.
  • Professional audio environments can’t afford latency-induced errors.


Causes Of Audio Latency

Audio latency can be a troubling issue for anyone working with sound. It’s that slight delay you hear between the moment an audio signal is created and when you actually hear it. This lag can disrupt recordings, live performances, and other audio tasks. Understanding the causes is the first step in tackling it effectively. Let’s explore the common sources of this pesky delay.

Hardware Limitations

Hardware limitations often play a vital role in audio latency. Here are the main factors:

  • Sound card quality: Low-end sound cards may not process audio as fast as professional ones.
  • Buffer size: This setting dictates how much audio your system processes at once. Smaller buffers mean less delay.
  • Connection type: USB, FireWire, and Thunderbolt connections vary in speed and can affect latency.
  • Device capability: Older or weaker devices struggle to keep up, leading to increased latency.

Software Processing Delays

Latency isn’t just about the physical gear. Software processing takes time too. Look at these factors:

  • Driver efficiency: Good audio drivers streamline the process, reducing latency.
  • Plugin use: Effects and virtual instruments can slow down processing.
  • Sample rate and bit depth: Higher rates and depths can mean more data and more delay.
  • System load: Running too many applications puts a strain on your computer, leading to latency.

Pinpointing specifics can be tricky, but with this insight, you’re closer to a silky-smooth audio experience. Review your setup and tweak as needed. Remember, a chain is only as strong as its weakest link. Your audio setup is no different!

Measuring Latency

Audio latency can affect the quality and timing of music or sound production. Understanding and measuring latency becomes crucial for professionals in the audio industry. Measuring latency helps in diagnosing and resolving audio delays for a seamless listening experience.

Common Units Of Measurement

Latency in the audio realm is commonly measured in milliseconds (ms). This unit quantifies the time delay between an input signal and its corresponding output. Shorter latency times mean quicker sound response, essential for real-time applications like live performances or recordings.

Milliseconds (ms)Microseconds (µs) for more precise measurementsSamples when referencing digital audio workstations (DAWs)

Tools For Assessing Latency

Various tools are available to measure audio latency. They range from software utilities to hardware devices designed specifically for monitoring audio delay.

Software Tools Hardware Tools
DAW PluginsLatency TestersMobile Apps Audio Interfaces with built-in latency indicatorsSignal Generators and AnalyzersDedicated Latency Meters

Effects On Listening Experience

The listening experience is as important as the visuals in any multimedia setup. Latency, or the delay between an audio signal input and output, affects the quality of the audio you experience. High latency can disrupt the flow of audio content, impacting everything from watching movies to playing video games.

Sync Issues In Multimedia

When audio and video are out of sync, the result can be distracting and can diminish the enjoyment of a media experience. Here are the impacts of latency:

  • Dialogue Misalignment: The characters’ movements won’t match their spoken words.
  • Sound Effects Discrepancy: Audio cues will not align with the on-screen action.
  • Music Timing Off: The emotional impact of music might be lost if it does not fit the scene correctly.

Impact On Gaming And Vr

For gamers, latency is a make-or-break factor. Here’s how:

  1. Reaction Time: Delayed audio can slow down reaction times in fast-paced games.
  2. Atmosphere: Immersive experiences rely on precise audio cues that latency can disrupt.
  3. Competitive Disadvantage: Every millisecond counts in competitive gaming, and latency can mean the difference between victory and defeat.

In virtual reality, the issue of latency becomes even more critical. Discrepancies in audio timing can lead to:

  • Reduced Immersion: For VR to feel real, audio must sync perfectly with visual cues.
  • Motion Sickness: Delayed audio can contribute to disorientation and nausea.
  • Interrupted Interactivity: Inconsistent audio feedback affects the natural flow of VR interactions.

Challenges For Musicians

For musicians, the term ‘latency’ can strike a nerve. It’s that pesky delay between when a note is played and when it’s heard. This delay causes several challenges, especially in the digital realm, impacting both live performances and the recording process.

Real-time Performance Difficulties

Imagine hitting a drum and hearing the sound a second later. That’s latency in action. It makes syncing with other musicians complex and can throw off an entire performance. For solo artists and bands alike, playing with backing tracks demands tight synchronization, which is disrupted by latency.

High latency turns simple tasks like keeping rhythm into daunting obstacles:

  • Compromises overall sound quality
  • Disrupts the timing needed for harmonized performances
  • Potentially leads to audience dissatisfaction

Live streaming platforms pose their own set of latency challenges, as they add another layer of delay, complicating live interactions with viewers.

Recording Studio Complications

In the studio, latency affects the recording process. Audio interfaces and digital audio workstations (DAWs) must work in harmony to minimize these delays. Musicians and producers face various complications:

Issue Impact
Latency Over Multiple Tracks Creates phasing and alignment issues
Delayed Monitoring Hampers performance; affects timing and pitch
Software Processing Time Slows down workflow; frustrates the artist

High-quality equipment can reduce these issues but can also be cost-prohibitive for many artists.

Ultimately, musicians require a near-zero latency environment to maintain creative flow and ensure the best possible recording.


Strategies To Minimize Latency

An audio setup without delays is crucial for a great experience. Delays in audio are known as latency. High latency can ruin recordings and live performances. Lowering latency makes sound crisp and in sync. Good news, there are ways to cut down this lag. Let’s explore how to get your audio snappy and seamless!

Hardware Improvements

Faster audio gear can reduce delays. Start with these tips:

  • Use quality audio interfaces: These are vital for low latency. They convert sound faster. Pick interfaces with low round-trip latency.
  • Upgrade your system: More RAM and better processors handle audio quicker. Solid-state drives (SSDs) also speed up load times.
  • Check cables and connections: Use high-quality cables. Ensure the connection ports on your gear support quick data transfer.
  • Optimize settings: Set your hardware buffer size to small or medium. This depends on your device’s power.

Software Optimizations

Software tweaks can also slash latency. Follow these pointers:

  1. Select low-latency modes: Many audio apps have these. Turn them on for better sync.
  2. Close background apps: They eat up CPU and slow down audio processing. Close them for a smoother run.
  3. Adjust your digital audio workstation (DAW) settings: Look for buffer size options. Lower values quicken response.
  4. Use ASIO drivers for Windows: ASIO bypasses the normal audio path. This leads to less delay.
  5. Update regularly: Keep drivers and software current. This helps in maintaining optimal performance.

Stay vigilant about updates and fine-tune settings for best results.


The Future Of Audio Latency

Imagine playing a video game or recording music with no delay between your actions and the sound. That’s where the future of audio latency is headed. Audio latency, the slight delay between a sound being played and being heard, has always been a challenge. But as we look ahead, exciting changes are on the rise.

Technological Advancements On The Horizon

Engineers and tech companies work hard to reduce latency. New chips and faster processors help make sound almost instant. Wireless technology, like Bluetooth, is also getting better. Faster internet speeds with 5G and fiber optics will change how we stream music and podcasts. Powerful software is in development too. It’ll help your devices talk to each other quicker.

Technology Role in Reducing Latency
New Chips Boost processing speeds
Wireless Advances Make connections faster
5G & Fiber Optics Speed up internet streaming
Software Enhance device communication

Predicting Zero Latency

One goal stands out: zero latency. This means instant sound, with no delay. Experts believe we can achieve this. They use Artificial Intelligence (AI) to predict sounds before they happen. This means your games, calls, and recordings feel real-time. Zero latency might sound like a dream, but it’s becoming more possible every day.

  • AI Predictions: AI can learn when sounds usually occur and play them earlier.
  • Hardware Sync: New devices will work together better to avoid delays.
  • Real-Time Streaming: Live shows and events may soon have no noticeable lag.

Get ready for sound that is crisp, clear, and immediate. Keep an ear out for updates in this fast-moving field. The future of audio latency looks bright, and the wait is getting shorter.

Real-world Applications

In the realm of audio, latency plays a critical role. Under the broad umbrella of ‘Real-World Applications,’ let’s look at how latency impacts specific areas. These areas include live broadcasting and interactive installations.

Live Broadcasting

Live broadcasting thrives on the illusion of real-time. Strong signals keep the magic alive. Avoid delays. Ensure a seamless flow. Here’s why latency matters in live broadcasting:

  • Instant Communication: Hosts and guests interact without awkward pauses.
  • Sync with Video: Audio must match moving pictures perfectly.
  • Live Editing: Directors mix feeds on-the-fly, requiring quick audio response.
  • Fan Engagement: Audiences demand a broadcast that feels live and vibrant.

Interactive Installations

Interactive installations use sound to create experiences. Touch, movement, and sound must sync. High latency can break immersion. Here’s how latency affects interactive installations:

  1. Art Exhibits: Soundscapes change with viewers’ actions.
  2. Games and VR: Players expect instant audio feedback to their actions.
  3. Educational Tools: Immediate audio reinforces learning and interaction.
  4. Retail Spaces: Personalized marketing messages require precise timing.

Frequently Asked Questions Of What Is Latency In Audio


What Does Latency Mean In Audio?


Latency in audio refers to the delay between a sound being created and being heard or processed. This can occur in recording, processing, or during playback, and may cause syncing issues between audio and video or other elements in a performance or recording situation.


How Does Latency Affect Recording?


Latency can disrupt the timing of recordings. For musicians, high latency can make it difficult to play along to a track because the feedback is not instantaneous. This timing mismatch can lead to performance issues and can be frustrating for anyone involved in the recording process.


What Causes High Audio Latency?


High audio latency can be caused by slow processing power, inadequate audio hardware, or buffer settings that are set too high. It can also be due to the cumulative delays introduced by digital audio processing and sound transmission through different devices.


Can You Reduce Audio Latency?


Yes, audio latency can be reduced. To do so, optimize your computer’s performance, use faster audio interfaces, lower buffer settings, and choose software or devices with lower inherent latency. Keeping system drivers up to date also helps in reducing latency.


Conclusion


Understanding latency in audio is crucial for a stellar listening or recording experience. By identifying and minimizing lag, we ensure seamless audio production and consumption. Embrace the tech solutions available and say goodbye to sound delays. This knowledge transforms your audio interactions, enhancing both creation and enjoyment.

Categories
Archive

Best Starter Bass Guitars: Unleash the Groove!

The Ibanez GSRM20 Mikro and Yamaha TRBX174 are among the best starter bass guitars. These models offer great playability and sound quality for beginners.


Embarking on a musical journey with the bass guitar requires an instrument that balances affordability, quality, and ease of use. Starter bass guitars should provide the new player with a comfortable playing experience while offering a sound that inspires continued learning and practice.


The Ibanez GSRM20 Mikro, with its shorter scale and lightweight body, is perfectly suited for players with smaller hands or those seeking a more manageable instrument. On the other hand, the Yamaha TRBX174 delivers robust tones and a classic design, allowing novices to learn on a bass that has a professional feel. Choosing the right bass as a beginner not only helps in honing one’s skills but also fuels the passion for music by ensuring the learning process is enjoyable and rewarding.


Introduction To Bass Guitars

The bass guitar, often simply called “the bass,” sets the foundation for most modern music. This instrument produces low-end frequencies that are crucial for a song’s rhythm and harmony. With its thick strings and long neck, the bass guitar is the heartbeat of a musical ensemble. For those eager to explore the world of music-making, beginning with the bass might be the perfect start. Let’s dive into the role of the bass and reasons to start playing it.

The Role Of Bass In Music

Bass guitars bring depth to sound and bridge the gap between melody and rhythm. A bass player’s role involves:

  • Creating a groove that moves the song forward.
  • Supporting drum patterns with syncopated basslines.
  • Enhancing the harmonic framework through chord progressions.

Without the bass, music would feel empty and lack the ‘glue’ that holds everything together.

Why Start Playing Bass

Picking up a bass guitar comes with many benefits. It is rewarding for any music enthusiast. Here are some top reasons:

  1. Less competition than other instruments means more opportunities to play.
  2. Easier to start with due to fewer strings than a guitar.
  3. Develops a strong sense of rhythm and musicality.
  4. Plays a crucial role in a band, often leading to a central position in group dynamics.

Furthermore, bass players are often in high demand. Starting on the bass ensures you stand out from the crowd.

Key Features Of A Starter Bass Guitar

Choosing the right starter bass guitar is crucial. It can ignite a lifelong passion for music. Great bass guitars have features that help beginners. New players need instruments that are easy, sound good, and are tough. This guide explores what makes a starter bass guitar perfect for newbies.

Simplicity And Playability

  • Lightweight Design: Easy to hold for long practice sessions.
  • Narrow Neck: Comfortable for smaller hands to grip and play.
  • Smooth Fretboard: Encourages effortless finger movement.
  • Adjustable Action: Low action helps to learn, play notes without strain.
  • Simple Controls: Fewer knobs make it easy to get a good sound.

Durability For Beginners

Bass guitars for beginners should withstand bumps and drops. They often have:

  • Solid Body Construction: Resists dings and scratches better than hollow bodies.
  • Hardwood Materials: Handles the rigors of frequent use.
  • Quality Tuning Machines: Keeps the bass in tune longer, less frustration.
  • Thick Finish: Protects the guitar’s appearance. Looks new for years.

A starter bass should be fun and inspiring. It must handle the learning curve. Look for these features, and the journey in music will be exciting!

Understanding Scale Length And Body Types

Are you ready to slap, pop, and groove on a bass guitar? Before jumping in, it’s crucial to understand scale length and body types. These elements shape the sound, playability, and comfort of your bass. It’s like finding the right pair of shoes – get the fit perfect and you’ll walk, or in this case play, with ease and confidence. Let’s dive into the world of short scale and long scale basses. We’ll also explore how body shapes and materials can affect your playing experience.

Short Scale Vs. Long Scale Basses

Bass guitars come in various scale lengths, influencing their feel and tone. A short scale bass typically measures around 30 inches, making it ideal for beginners or players with smaller hands. It’s easier to navigate due to its shorter neck. On the other hand, a long scale bass, usually at 34 inches or more, offers richer tones and is the standard chosen by many professionals.

  • Short Scale Basses: Easier to play, warm sound
  • Long Scale Basses: Broader tonal range, preferred by many pros

The Impact Of Body Shapes And Materials

The shape and material of a bass guitar’s body can greatly affect how it sounds and feels. A solid body bass is versatile and provides a punchy, clear tone. In contrast, a semi-hollow body bass offers a softer, more resonant sound preferred by some for its vintage vibe. The wood used in construction also matters. For instance:

Wood Type Tonal Quality
Alder Balanced with a full-bodied sound
Maple Bright with good sustain
Mahogany Warm and rich

Keep in mind that the wood’s density and the shape’s mass will influence the bass’s sustain and weight. Selecting the best starter bass guitar involves understanding these characteristics. Choose one that matches both your physical comfort and the music you aim to play.

Best Starter Bass Guitars: Unleash the Groove!


Credit: www.schoolofrock.com


The Essential Electronics And Hardware

Choosing the best starter bass guitar means looking at its heart and soul: the electronics and hardware. These components shape your sound and play. Knowing the differences helps you find your perfect match.

Pickups: Passive Vs. Active

Pickups influence your sound’s strength and clarity. Two common types exist:

  • Passive pickups are traditional, offering a warm, classic tone.
  • Active pickups need a battery, but give extra power and tone control.

A table to compare:

Passive Pickups Active Pickups
No battery needed Battery required
Warm sound High power output
Historic tone Precise tone shaping

Tuning Machines And Bridge Types

Tuning machines keep your strings tight and in tune.

  • Precision tuners are key for a steady pitch.
  • Look for robust construction.

The bridge anchors strings and transfers vibrations to the body.

  1. Fixed bridges maintain tuning and offer easy restringing.
  2. Adjustable bridges allow for height and intonation changes.

Here’s a simple overview:

Tuning Machines Bridge Types
Must be precise Fixed or Adjustable
Durable build Influences tone and stability

The right mix of electronics and hardware paves the way to a solid bass foundation.

Popular Brands And Models

Choosing the right starter bass guitar is crucial for any budding bassist. The journey to becoming a bass player begins with picking an instrument that resonates with your aspirations. Many reputable brands offer fantastic options for every skill level and budget. Among these, certain models stand out for their quality, playability, and affordability. Let’s dive into the world of popular brands and their most loved starter bass guitars.

Budget-friendly Choices

For those on a tight budget, the quest for an affordable yet reliable bass guitar can be daunting. Fortunately, industry giants like Squier and Ibanez offer some excellent choices that won’t break the bank.

  • Squier Affinity Series: Known for its comfortable neck and versatile tone.
  • Ibanez GSRM20 Mikro: A compact option with a punchy sound, perfect for players with smaller hands.
  • Yamaha TRBX174: Delivers standout quality with its impressive hardware and rich sound.

Mid-range Options

For those ready to invest a bit more, mid-range options offer enhanced features and richer tones. Brands like Fender and Yamaha stand at the forefront of this category with their well-crafted models.

Brand Model Highlights
Fender Player Series Precision Bass Iconic design, classic sound, and excellent craftsmanship for aspiring bassists ready for the next step.
Yamaha TRBX304 Sleek construction and versatile electronics cater to a modern player’s needs.

Setting Up Your Bass For Success

Imagine plucking a string and hearing the smooth, deep tones of your bass guitar resonate. To get there, your bass needs a great setup. It’s not just about playing; it’s about playing with ease and precision.

The Importance Of A Good Setup

A well-set-up bass guitar makes all the difference. It affects playability, comfort, and sound quality. It doesn’t matter if your bass is a budget model or a high-end instrument; a good setup is crucial.

  • Action: The string height affects how easily fingers glide over frets.
  • Intonation: Correctly set, each fret will be in tune across the fretboard.
  • Neck relief: Prevents buzzing and allows optimal string vibration.

Diy Setup Tips

Setting up your bass can be a rewarding experience. Here are essential DIY steps:

  1. Truss Rod Adjustment: Adjust the truss rod to straighten the neck and prevent string buzz.
  2. Bridge Action: Lower or raise the bridge saddles to find your comfortable string height.
  3. Intonation Tuning: Use a tuner to ensure the bass plays in tune along the fretboard.

Note: Always refer to your bass manufacturer guidelines or consult with a professional for complex adjustments.

Tool Use
Allen Wrench Truss rod and bridge saddle adjustment
Screwdriver Pickguard and electronic repairs
Tuner Precise intonation setup

Practical Accessories For Beginners

Starting your bass guitar journey is thrilling. But remember, a good bass guitar needs great accessories. Accessories help you play better and keep your instrument safe. Let’s talk about straps, stands, cases, tuners, and metronomes. They are must-haves for every novice bassist.

Straps

A comfortable strap is vital for playing with ease. It helps you hold the bass. This prevents dropping it.

  • Adjustable straps: Find one that fits your height.
  • Padded straps: These add comfort. They protect your shoulder.
  • Durable materials: Leather or synthetics last long.

Stands

Stands keep your bass safe when not in use. They save space in your room. Look for these features:

  • Stable design: It should not tip over.
  • Soft padding: This protects the bass finish.
  • Locking mechanism: It secures the bass.

Cases

A case guards your bass from damage. Transport your instrument safely. Cases come in two kinds:

  1. Hard cases: They offer more protection but are heavier.
  2. Soft gig bags: They are lighter and easier to carry.

Tuners And Metronomes

Tuners and metronomes are key for beginners. They help you stay in tune and keep time. You’ll need them:

Accessory Why It’s Important
Tuners Keep your bass sounding right.
Metronomes Help you play at the right speed.

Best Starter Bass Guitars: Unleash the Groove!


Credit: www.redandblack.com


Starter Tips And Resources

Welcome to the exciting journey of learning bass guitar! With the right instrument in hand, it’s important to pair it with useful tips and resources. These will help kick start your musical experience. Read on for essential learning resources and practice routines tailored for beginners.

Learning Resources

Finding great learning material can be a game changer. Check out these:

  • Online tutorials: Numerous free videos offer step-by-step lessons.
  • Music theory websites: Understand the basics of music to enhance playing.
  • Bass tablature sites: Easy-to-read tabs to practice your favorite songs.
  • Bass guitar apps: Interactive tools to learn notes and rhythms.
  • Community forums: Connect with other beginners for support and tips.

Practice Routines For Beginners

Consistent practice builds skills and confidence. Here’s a basic routine:

  1. Warm-up: Spend 5-10 minutes on finger exercises.
  2. Scale practice: Focus on a new scale each week.
  3. Song learning: Try learning simple bass lines from songs.
  4. Rhythm exercises: Practice keeping time with a metronome.
  5. Ear training: Listen to songs and try to play along by ear.

Remember to practice regularly, even if it’s just for a short period. Your skills will grow with time!

Advancing Your Skills

As your fingers dance on the fretboard and your ear tunes to the vibration of bass strings, a sign emerges—it’s time to level up. Advancing Your Skills on the bass guitar is not just about practice. It’s also about the tools you have and the community you’re part of. Ready to groove to a new beat?

Upgrading Your Instrument

Your first bass guitar was your companion on this musical journey. Now, seek a partner that matches your growing prowess. Here’s what to consider:

  • Quality of Wood: Better resonance equals better sound.
  • Electronic Components: Superior pickups capture a fuller range of tones.
  • Neck and Fretboard: Look for comfortable playability.
  • Hardware: Sturdy tuners and bridge enhance tuning stability and tonality.

Select a bass that feels right in your hands and sounds great to your ears. Try different models. Find one that elevates your performance.

Joining A Band Or Community

Growth amplifies when shared. Joining a group of fellow musicians sparks creativity and refines skills. Consider the perks:

  • Team Experience: Learn to synchronize with drummers, guitarists, and singers.
  • Live Feedback: Gain insights from bandmates and audiences.
  • Genre Exploration: Experiment with various music styles.
  • Social Connection: Build friendships and network within the music scene.

Discover local bands looking for bassists or join music communities online. Collaborate, learn, and enjoy the rhythmic journey with peers. Make your mark in the world of music.


Conclusion: Embrace The Bass Journey

The decision to learn bass guitar marks the start of an exciting adventure. As we explored the best starter bass guitars, remember that each one is a doorway to a world of rhythm and groove. Choosing the right bass is the first stride on a path filled with beats, practice, and musical discovery. Let’s round up some key takeaways and encourage you on this melodious journey.

Encouragement For New Bass Players

Picking up a new instrument can be daunting, but it’s also thrilling. Don’t let the uncertainty hold you back. Bass playing is about keeping the pace and connecting with your bandmates. Trust in your abilities and the chosen instrument. Progress comes with time and patience. Celebrate small victories and enjoy every note. Each thump of the string is a step forward on your bass playing path.

Next Steps In Your Musical Path

With your starter bass in hand, the next phase is all about growth. Practice regularly and listen to great bassists for inspiration. Consider lessons to sharpen your skills. Join groups with fellow beginners to exchange tips and tricks. Set goals and tackle them one by one:

  • Master the basics of bass
  • Perfect your plucking technique
  • Learn your favorite songs
  • Play along with recordings
  • Seek feedback from experienced players

Enjoy every jam session and practice run; they form the foundation of your musical journey.


Starter Bass Prices in 2026

To give you a real-world starting point, here are two popular beginner basses at manufacturer list prices (October 2026): the Squier Sonic Precision Bass is $269.99 at Fender, with a 34″ scale, a slim C-shaped neck, a 1.5″ nut and a split single-coil pickup. The Yamaha TRBX174 is $299.99 at Yamaha USA, with a 34″ scale, 24 frets and a P/J pickup pair for a wider range of tones. Prices change often, so check the retailer before you buy.

Frequently Asked Questions Of Best Starter Bass Guitars

What Are The Top Beginner Bass Guitars?

For beginners, notable bass guitars include the Ibanez GSR200, Squier by Fender Affinity, and Yamaha TRBX174. These models offer ease of playability, reliable craftsmanship, and are praised for their comfortable neck profiles and balanced tones, making them favorites among new players.

How Much Does A Starter Bass Guitar Cost?

Starter bass guitars can vary in price, but generally, you can expect to pay between $150 to $300. This price range includes quality instruments from trusted brands designed specifically for beginners, ensuring affordability without compromising on the fundamental aspects of sound and playability.

What Features Should A Beginner Bass Have?

A beginner bass should have a comfortable neck, light body, and simple controls. Ideally, it will feature a P-Bass or J-Bass pickup configuration for a versatile sound. Quality tuning machines and easily adjustable bridges to aid in tuning stability and setup are also important for a smooth learning experience.

Can I Learn Bass On A 4-string Model?

Absolutely, most beginners start on a 4-string bass. It’s the standard configuration, offering a straightforward layout that’s easier to master. The 4-string bass covers most musical genres and simplifies the learning process without overwhelming new players with too many string options.

Conclusion


Selecting the right bass guitar as a beginner shapes your musical journey. Our top picks offer quality, affordability, and versatility for newcomers. Remember to choose one that resonates with your style and comfort. Embark on your bass-playing adventure with confidence, equipped with the best starter instrument for your groove.

Categories
Archive

What Is Spring Reverb: Unveil Its Mystique

Spring reverb is an effect that simulates an echo by using a spring system within a metal tank. It adds depth and ambience to audio signals.


Spring reverb became a cornerstone of audio effects, initially found in guitar amplifiers and studio equipment dating back to the 1960s. Renowned for its distinctive twang and splashy sound, it originates from mechanical springs that resonate in response to audio vibrations.


Musicians and producers often seek out the unique acoustic signature of spring reverb to impart a classic warmth and space to their recordings. Incorporating this effect can dramatically enrich the sound of an instrument, bathing it in a sonically pleasing echo that enhances the listening experience. With its blend of nostalgia and acoustic charm, spring reverb remains a sought-after effect in both live and studio settings, a testament to its enduring impact on music production.


Origins Of Spring Reverb

The story of spring reverb is a fascinating chapter in music history. This iconic sound effect, known for its distinctive ‘boingy’ echo, revolutionized music production. From humble beginnings, spring reverb has carved its place in audio recording. Let’s plunge into the origins of spring reverb and its journey through the sonic landscapes of the past and present.

Invention And Early Usage

Spring reverb emerged in the mid-20th century. It was invented by Laurens Hammond, the creator of the Hammond organ. Hammond sought to reproduce the complex acoustics of large spaces. An ingenious mechanical system was the answer. Small springs transmitted sound, creating natural reverberations. Initially, this technology served organs in homes and churches. It mimicked the echoes of grand cathedrals in more intimate settings.

Adoption In Music Production

Soon, the effect transcended its original purpose. Spring reverb became a staple in recording studios. Guitar amplifiers incorporated it, adding depth to the sound. It provided a unique character instantly loved by musicians. Iconic tracks of the ’60s and ’70s would be unthinkable without this effect. Its adoption marked a period of sonic exploration. Artists could now blend reverberations with their music, creating lush soundscapes. This innovation was a game-changer for producers and engineers alike.

What Is Spring Reverb: Unveil Its Echoic Mystique


Credit: www.guitarpedalx.com


Mechanics Behind Spring Reverb

The Mechanics Behind Spring Reverb unlocks the magic of a rich, vintage sound. Let’s dive into how this captivating effect is achieved.

The Spring Reverb Unit Explained

Spring reverb is a system that uses springs to create a reverb effect, which mimics the way sound bounces in a physical space. The core of this system lies in its simplicity and the ingenious use of a few key components.

  • Input Transducer – Turns the original signal into physical vibrations.
  • Springs – The heart of the unit, these vibrate to generate the reverb effect.
  • Output Transducer – Converts vibrations back into an audio signal.
  • Mix Control – Balances the dry and wet signals.

Transducers And Tanks: How They Work Together

Transducers and tanks form a dynamic duo in spring reverb systems. Transducers, both input and output, are essentially speakers and microphones adapted for this unique purpose.

Component Function
Input Transducer Sends vibrations to the springs.
Spring Tank House of the springs that create the reverb.
Output Transducer Receives vibrations and sends them to the output.

In essence, the input transducer takes the audio signal and converts it into mechanical energy. This energy travels through the springs in the tank, creating the reverb effect. Finally, the output transducer captures the reverberated vibrations and turns them back into an electric signal. The result is that hauntingly beautiful, echo-like sound that gives music depth and warmth.

Spring Reverb Vs. Other Reverb Types

When we talk about spring reverb, we’re diving into a world of lush, distinctive sounds that have shaped music for decades. But how does it stand compared to other reverbs? Let’s explore these sonic landscapes.

Digital Reverbs

Digital Reverbs create echo effects using algorithms. They can mimic any environment, from a small room to a large hall. With the advances in technology, they offer versatility and convenience.

  • Programmable presets
  • Portability
  • Consistency in sound

Plate Reverbs

Plate Reverbs use a large metal plate to generate echo. These units give a smoother decay and a rich quality to the sound that’s often favored in studio recordings.

  • Luxurious, shimmering quality
  • Popular in professional settings
  • Less portable than digital

Room Reverbs

Room Reverbs replicate the natural acoustics of spaces. Whether it’s a tiny bathroom or an auditorium, room reverbs capture the essence of these environments.

  • Natural ambiance
  • Great for authentic sounds
  • Varies with each physical space

Characteristics Unique To Spring Reverb

Spring Reverb stands out with its twangy, metallic sound. A network of springs within a metal tank creates this effect, much loved in guitar amplifiers and vintage organs.

Feature Benefit
Boingy, splashy qualities Signature sound for vintage vibe
Physical feedback interaction Hands-on tweakability for artists
Distinctive decay patterns Unique sound not easily replicated digitally

The spring reverb breathes life into music with an irreplaceable character.

Iconic Uses In Music History

In the realm of music production, spring reverb stands as a testament to the timeless quality of analog effects. Its characteristic sound, a result of audio signals vibrating through metal springs, has graced countless recordings, infusing them with depth and warmth. Let’s explore some of the most iconic uses of spring reverb in music history.

Spring Reverb In Classic Rock

Classic rock anthems carry the unmistakable echo of spring reverb. This effect lent a sense of grandeur and space that became a sonic hallmark of the genre.

  • Led Zeppelin’s “When the Levee Breaks”: The driving rhythm infused with profound reverb.
  • Pink Floyd’s “Shine On You Crazy Diamond”: Atmospheric layers decorated with the lush tails of spring reverb.
  • The Rolling Stones’ “Gimme Shelter”: The haunting reverb adds to the track’s urgency.

Surf Music’s Signature Sound

Spring reverb became synonymous with surf music, defining the genre’s energetic and wet sound.

  1. Dick Dale’s “Miserlou”: Splashing waves of reverb create the song’s iconic texture.
  2. The Beach Boys’ “Good Vibrations”: Presents a smooth blend of vocal harmonies and reverb-soaked instrumentals.
  3. The Ventures’ “Walk, Don’t Run”: Showcases the crisp, splashy effect of spring reverb on guitars.

Spring Reverb In Modern Audio Production

Spring Reverb in Modern Audio Production breathes life into recordings by adding depth and character. Even in an era dominated by advanced digital technology, this classic effect remains pivotal. Producers and sound engineers continue to blend the vintage charm of spring reverb with contemporary music trends.

Analog Units In A Digital World

In a digital age, analog spring reverb units retain their allure. These devices use actual springs to create echoes. Sound waves travel through the springs, creating natural reverberations. Such units impart a warm, organic feel that digital tools struggle to replicate.

  • Physical vibrations result in unique sonic textures
  • Analog warmth is often preferred over digital sharpness
  • Real springs bring non-linearities, enriching the sound

Despite their size, producers highly regard these units for their distinctive sound. Many studios still feature a vintage reverb unit hooked up alongside modern equipment.

Virtual Emulations And Plugins

Virtual emulations aim to capture the essence of spring reverb in a plug-in format. These digital plugins simulate the physical properties of springs. They provide convenience and flexibility.

Benefits of virtual spring reverb:

  1. Easily adjustable parameters
  2. Vast preset libraries
  3. Consistent performance

Creators enjoy these digital tools without needing a physical unit. They bring classic sounds to modern productions with the click of a mouse. Popular DAWs readily support these plugins, making spring reverb accessible to any creator.

What Is Spring Reverb: Unveil Its Echoic Mystique


Credit: www.adsrsounds.com


Do-it-yourself Spring Reverb Projects

Do-It-Yourself Spring Reverb Projects let you dive into the world of audio effects with a hands-on approach. Crafting your own unit brings a sense of accomplishment. Plus, it personalizes your music production journey. For musicians and audiophiles alike, DIY spring reverb projects offer a perfect blend of science and art.

Building Your Own Reverb Unit

Creating a spring reverb from scratch is an exciting challenge. Start by gathering all the necessary components. You’ll need a reverb tank, transducers, and an amplifier circuit. Follow these steps:

  1. Select a Reverb Tank: Choose a size and type that fits your sonic preference.
  2. Install Transducers: Attach them at each end of the spring. They convert audio signals into vibrations.
  3. Build an Amplifier Circuit: This will drive the transducer and process the signal returned from the spring.
  4. Assemble the Housing: Protect the internals with a custom casing. Ensure the tank is secure.
  5. Test and Tweak: Adjust your setup for the best sound. Experiment with different springs for unique effects.

Remember to work methodically and safely. Precision is key to good performance.

Modifications And Customizations

Customizing your DIY reverb can unleash even more creativity. Here’s how you can make your reverb unit truly one-of-a-kind:

  • Swap Springs: Try different types for new reverberations. Each spring has its own “voice.”
  • Adjust Decay: Tweak the reverb tail’s length for short slaps or long, lush trails.
  • Add Controls: Implement knobs for dry/wet mix, tone, and feedback control.
  • Incorporate Stereo: For a wider sound field, design a stereo output system.

Experimenting with these modifications can yield a range of sounds. From surf guitar tones to avant-garde noise, the possibilities are vast.

Maintenance And Troubleshooting

Maintaining spring reverb units is crucial for sound consistency. Troubleshooting common issues keeps your music sounding its best. Let’s explore how to care for and fix spring reverbs.

Common Issues And Fixes

Spring reverbs may face several problems. Identifying and addressing these swiftly ensures long-lasting performance.

  • Noisy output: Check connections and cables for faults.
  • Weak reverb effect: Adjust reverb tank settings or replace springs.
  • Sudden volume drops: Inspect for loose springs or tank misalignment.
  • Hum or buzz: Secure tank grounding and eliminate power supply issues.

Consult the user manual for detailed troubleshooting steps. Specific fixes can depend on the reverb model.

Preserving The Reverb’s Sonic Quality

Preserving your spring reverb’s sound involves regular care. Follow these steps to maintain quality:

  1. Keep the unit clean from dust and debris.
  2. Handle springs with care to avoid damage.
  3. Regularly check for loose connections.
  4. Store the unit in a stable environment.

For deeper maintenance, consider professional servicing. This ensures every component functions properly.

What Is Spring Reverb: Unveil Its Echoic Mystique


Credit: articles.boss.info


Future Of Spring Reverb

The future of Spring Reverb promises an exciting blend of retro charm and modern innovation. As technology advances, so does the potential for this classic sound effect to evolve. Yet despite the tech surge, the vintage appeal of spring reverb remains timeless, ensuring its place in music production for years to come.

Innovations And Advancements

Spring reverb technology, once restrained by its physical components, is witnessing an era of renewal. Here are key innovations shaking up the scene:

  • Digital emulation: Precision algorithms now replicate spring reverb sounds without the need for actual springs.
  • Hybrid designs: New devices marry the warmth of analog with digital’s flexibility, offering the best of both worlds.
  • Modular units: Users can tweak individual components in real-time for a truly customizable experience.
  • Space-saving: Innovations lead to smaller footprints, making spring reverb accessible to home studios.
  • Connectivity: USB and Bluetooth allow seamless integration with modern DAWs and apps.

Musicians and producers eagerly await even more breakthroughs that will define the sounds of tomorrow.

The Ongoing Allure Of Spring Reverb

The enduring appeal of spring reverb resonates with music enthusiasts globally. Reasons why it remains sought-after include:

  1. Its distinct sound: Unmatched by digital effects, the physical spring creates a texture that artists love.
  2. Nostalgia: The classic tones invoke a sense of the golden age of rock and roll.
  3. Character: Each spring reverb unit has a unique signature, adding flair to recordings.
  4. Physical interaction: The tactile nature of spring units offers a hands-on approach missing from digital plugins.

Despite technological evolution, spring reverb retains its magical hold on the music industry, enchanting a new generation keen on blending the vintage with the modern.


Frequently Asked Questions For What Is Spring Reverb


What Is Spring Reverb In Music Production?


Spring reverb is an effect commonly used in music production to create a sense of space and depth. It simulates the sound reflection and reverberation you would hear if the sound were played in a physical space with metal springs that vibrate to produce a reverberant effect.


How Does A Spring Reverb Unit Work?


A spring reverb unit works by sending audio through one or more springs, which vibrate in response to sound waves. These vibrations travel through the springs and are then picked up by a transducer, creating a reverberation effect.


What Are The Common Uses Of Spring Reverb?


Commonly used in guitar amplifiers and recording studios, spring reverb adds warmth and character to the sound. Musicians and producers use it for creating ambience and depth on vocals, guitars, and other instruments.


Can Spring Reverb Be Replicated Digitally?


Yes, spring reverb can be digitally replicated with software plugins that emulate the physical properties of spring reverberation. These digital tools are designed to mimic the original hardware’s tonal characteristics.


Conclusion


Understanding spring reverb is key to grasping its unique sound. It shapes music, a testament to timeless audio effects. It’s not just a relic; it remains relevant across genres. Embrace its distinct vibe or explore digital alternatives, but never overlook its classic charm.


Discover your sound, where old-school cool meets modern music-making.

Categories
Archive

Best Wireless Microphones: Top-Notch Audio Picks!

The Shure SLX-D Digital Wireless System and the Sennheiser EW 100 G4 are among the best wireless microphones available. These systems offer superior sound quality and reliable performance for professionals.


Choosing the right wireless microphone requires considering several factors like range, sound quality, and ease of use. In the current market, where advanced technology meets user-friendly functionality, top brands like Shure, Sennheiser, Audio-Technica, and Rode stand out. These devices ensure that whether you’re presenting in a conference room, belting out vocals on stage, or recording in a studio, your voice is captured clearly and without interference.


With varying price points and features such as multi-channel support and rechargeable batteries, the best wireless microphones offer convenience without compromising on performance. Essential for entertainers, educators, and professionals, these mics cater to a wide array of audio needs.


Unraveling The World Of Wireless Microphones

Welcome to the captivating world of wireless microphones, where untethered freedom meets quality sound. As more creators and professionals seek mobility and flexibility, the shift towards wireless audio solutions is on the rise. Here is a guide to understanding what sets wireless mics apart, and what features distinguish the best from the rest.

Wireless Vs. Wired Microphones

Wireless microphones offer unparalleled portability and convenience. Unlike wired microphones, they do not require physical cables. This freedom allows for unrestricted movement and versatile placement. Therefore, wireless systems are ideal for events that involve walking or interactive performances.

Wireless Microphones Wired Microphones
Easy to move around Limited by cable length
Quick setup and breakdown More time-consuming setup
Requires battery or charging Powered by audio equipment
Can be prone to interference Generally less prone to noise

Key Features Of Premium Wireless Microphones

The best wireless microphones blend exceptional audio quality with robust features. Users should look for:

  • UHF Band: Greater frequency range for fewer interferences
  • Diversity Receivers: Minimizes dropouts for consistent audio
  • Build Quality: Durable materials for longevity and reliability
  • Battery Life: Long-lasting performance for extended use
  • Connectivity Options: Compatibility with various devices and setups

Advanced models may also offer encryption for secure transmission and multiple channels to cater to different environments. A combination of these features ensures top-notch performance and a seamless experience.


Expert Picks: Top Wireless Microphones For Professionals

Imagine stepping on stage with confidence, not a single cord in sight, your voice crystal clear. Professionals know the right wireless microphone makes this dream a reality. From concert halls to conference rooms, the perfect mic ensures your message reaches every ear in the audience. Let’s dive into the crème de la crème of wireless microphones, beloved by industry experts.

Industry Giants And Their Flagship Models

When talking faithful sound and robust features, industry giants lead the pack. Their flagship models offer unparalleled reliability and quality.

Brand Model Key Features
Shure ULXD2/SM58 Digitally encrypted, long range, iconic vocal clarity
Sennheiser EW 500 G4 Flexible configurations, true diversity receiver
Audio-Technica System 10 ATW-1102 24-bit/48 kHz, automatic frequency selection

Shure’s ULXD2/SM58: A robust option for those who value durability and sound fidelity. Sennheiser’s EW 500 G4: Offers versatility for various performance conditions. Audio-Technica’s System 10 ATW-1102: Delivers impeccable audio clarity with easy setup.

Emerging Brands Making Waves

New players are showing up with tech that rivals the old guard. They impress with innovation and competitive pricing.

  • Rode – RODELink Performer Kit: Crystal clear digital transmission
  • Samson – Samson Go Mic Mobile: Mobile content creation made easy
  • Deity Microphones – Deity Connect: Robust build with multiple RF outputs

Rode’s innovation caters to both live performances and mobile journalists. Samson focuses on on-the-go creators. Deity Microphones break through with adaptable setups for various recording scenarios. Each brand infuses fresh features into the wireless microphone market.

Comparative Analysis: Sound Quality And Performance

In the quest for the best wireless microphone, sound quality and performance stand at the forefront. This analysis slices through the noise, comparing top contenders. It focuses on two critical aspects: audio clarity and range, as well as interference management capabilities, which make or break a wireless microphone’s performance.

Decoding Audio Clarity And Range

Crystal-clear audio is a must for any premium wireless microphone. A comparative scrutiny reveals varying levels of performance. The range of the device dictates how far you can be from the receiver without losing sound quality.

  • Frequency response: Look at the spectrum of sounds each microphone captures.
  • Signal-to-noise ratio: A higher ratio means a clearer sound.

Each microphone has a unique frequency range. Higher-end models often boast a wider range, capturing more subtle tones. Lower frequencies ensure better penetration through obstacles, leading to more consistent performance in diverse settings.

Interference Management Capabilities

Wireless microphones battle with potential interference daily. Good microphones use sophisticated technologies to maintain signal integrity.

  1. Automatic frequency hopping: Switches frequencies to dodge interference.
  2. Diversity reception: Utilizes multiple antennas to improve reception and reduce dropouts.

Advanced systems scan and pick the clearest channel automatically. They ensure seamless performance even in RF-hostile environments. Table 1 summarizes the capabilities of various microphones in managing interference.

Table 1: Interference Management in Wireless Microphones
Microphone Model Frequency Hopping Diversity Reception
Model A Yes Yes
Model B No Yes
Model C Yes No
Best Wireless Microphones: Unveil Top-Notch Audio Picks!


Credit: www.amazon.com


Design Aspects: Style Meets Functionality

Choosing the best wireless microphone involves more than sound quality. Design determines how it feels, looks, and lasts. Users seek devices that balance stylish appeal with practical features. Ergonomics and aesthetics play vital roles. Let’s explore how the top wireless microphones blend these elements.

Ergonomics And Comfort Of Use

User comfort can make or break a performer’s experience. Designers focus on how the mic feels in hand or on the body. A well-designed wireless microphone should feel like an extension of the performer. Lightweight materials and contour grips are essential for ease of use. Hands-free models must fit snugly, without slipping or causing strain.

  • Balanced weight distribution minimizes hand fatigue.
  • Adjustable features cater to different users and usage scenarios.
  • Intuitive controls allow quick adjustments without looking away.

Aesthetics And Durability Factors

The appearance of a microphone often reflects the brand’s image. Users prefer a sleek, modern, and professional look. But aesthetics must not sacrifice durability. High-quality microphones combine both, featuring robust materials like hardened plastics or metals. They withstand drops, impacts, and the stress of regular use.

Material Benefits
Metal Durable, premium feel, and heavyweight
Plastic Light, resilient, and versatile
Reinforced compounds Impact resistance, and long-lasting

Design choices also include water and dust resistance. Such features protect against outdoor elements and indoor mishaps.

  • Coated electronics shield against moisture.
  • Tight seals keep out dust and debris.


Connectivity And Compatibility

Connectivity and Compatibility make or break your experience with wireless microphones. A mic must link effortlessly with various devices. It should adapt to diverse frequencies. Here, explore key factors ensuring your wireless microphone enhances every performance.

Ensuring Seamless Pairing With Devices

Seamless pairing stands central to a wireless microphone’s user experience. High-quality mics offer one-touch connectivity. This allows quick links to smartphones, tablets, and sound systems. Look for microphones supporting Bluetooth 5.0 for the best performance.

  • Bluetooth/NFC support
  • Plug-and-play receivers
  • Compatibility with iOS, Android, and Windows

Frequency Agility And Multichannel Options

Mics with frequency agility avoid signal interference. This lets you find clean channels effortlessly. Multichannel wireless microphones work well for events requiring multiple speakers. They ensure clear, uninterrupted audio.

Feature Benefit
Auto Frequency Scan Locates interference-free channels
Dual-Channel Two mics on one receiver
Multi-System Support Handles multiple mics simultaneously
Best Wireless Microphones: Unveil Top-Notch Audio Picks!


Credit: www.tatacapital.com


Battery Life And Power Management

Imagine a scenario where a wireless microphone dies mid-performance. Unthinkable, right? Well, fear not. Understanding the battery life and power management of wireless microphones can ensure that the music never stops. Wireless microphones come with varying battery lives. Picking a wireless microphone isn’t just about sound quality; it’s also about how long it can go between charges.

Longevity For Extended Sessions

No one wants their equipment to fall flat during the grand finale. Look for wireless microphones with extensive battery life. Some top-of-the-line microphones boast up to 8 hours of continuous use. Professionals may need even more. Here’s a quick bullet list of what to watch for in battery longevity:

  • Manufacturers’ specs on maximum battery life
  • User reviews for real-world battery usage
  • Type of battery used (lithium-ion, AA batteries, etc.)
  • Availability of battery life indicators on the device

Charging Solutions And Power Saving Tips

The best wireless microphones offer convenient charging solutions. You save time and keep the show running smoothly.

Type Charging Time Usage Time
USB Charging 2-3 Hours 5-6 Hours
Dock Charging 3-4 Hours 8+ Hours
Replaceable Batteries N/A Varies

Here are some optimal power-saving tips:

Sleep Modes – select microphones with automatic sleep mode to save power when not in use.

Mute Function – use the mute button liberally during breaks to conserve energy.

Manage Usage – use your microphone strategically, turning it off when not needed.

Smart management extends your wireless microphone’s life, both in session and over the years. Battery care can’t be an afterthought. Choose wisely and manage power effectively for the best performance every time.

User-friendly Features And Controls

Finding the right wireless microphone can be a game-changer. Whether you’re a budding musician, a professional speaker, or just hosting a party, the ease of use can make or break your experience. Let’s look at wireless microphones that combine top-notch quality with user-friendly operation.

Intuitive Interfaces For All Skill Levels

The best wireless microphones come with interfaces designed for everyone. They make setup quick and effortless. Features like clear labels, simple menus, and one-touch pairing stand out. These mics are perfect for both novices and pros.

  • Easy-to-read LED displays show battery life and signal strength.
  • Microphones with a ‘mute’ button prevent unwanted sound.
  • Volume dials are accessible for quick adjustments.

Customization And Personalization Possibilities

Customizable settings can enhance your audio experience. Personalized controls allow tailoring the microphone to your preferences. Users appreciate mics that can remember settings. Here’s what to look for:

Feature Benefit
Adjustable EQ Tune your sound profile to the event.
Savable presets Switch between setups effortlessly.
Interchangeable batteries Swap batteries quickly to keep talking.

Microphones with these user-friendly features take the stress out of audio setup. They give you confidence, whether you’re at home or on stage. Now, let’s find your perfect wireless microphone.

Customer Experiences And Reviews

Choosing the best wireless microphones isn’t just about specs and prices. Real people’s experiences give life to raw data. Users like you and I have tested these devices in various settings. Their shared reviews are gold mines of information.

Real-world Usage And Feedback

Users love bringing wireless microphones to life. They test them in home studios, outdoor events, and conference halls. Here are key takeaways from their stories:

  • Sound quality remains a top consideration. Crisp, clear audio makes or breaks a wireless mic.
  • Many appreciate long battery life for uninterrupted sessions.
  • User-friendly design can ease setup stress, ensuring quick and efficient use.
  • Range and connectivity get praise, especially in mics that stay reliable over distance.
Feature User Comments
Durability “It’s been dropped more times than I can count, still works like a champ!”
Compatibility “Connected effortlessly to different devices, a true plug-and-play experience.”

After-sales Support And Warranty Policies

Great microphones come with great support. Users often overlook after-sales service until they need it. Here’s what customers are saying:

  • Responsive customer service wins hearts. Brands that listen and help get thumbs up.
  • Clear warranty policies help users feel secure in their investment.
  • Easy access to replacement parts keeps the show going when accidents happen.

Microphone brands with positive feedback on support have these things in common:

  1. They offer extensive warranties that cover various issues.
  2. Providing quick solutions to problems is part of their promise.
  3. Customer satisfaction is their top priority.

Shopping Smart: Must-know Buying Tips

When choosing the perfect wireless microphone, smart shopping is key. Consider your needs and budget and look for a device that can grow with technology. Let’s dive into essential buying tips that guarantee a sound investment in quality audio.

Assessing Your Audio Needs And Budget

Every purchase should start with self-questioning. What’s the use case? What’s your budget? Here’s a quick guide to help you:

  • Usage Scenario: Identify if you need a mic for music, speech, or both.
  • Environment: Consider where you’ll use it; different mics suit varying spaces.
  • Budget: Set a realistic price range and stick to it.
  • Features: Decide which features are non-negotiable, such as range and battery life.

Match your needs with the right mic by using this checklist. A well-thought-out purchase saves money and ensures satisfaction.

Future-proofing Your Investment

To ensure your microphone stands the test of time, think ahead. Technology evolves, so your mic should, too. Here’s how to make a future-proof choice:

Aspect What to Look For
Compatibility Check mic compatibility with current and future devices.
Adaptability Select a mic with firmware that can be updated.
Durability Opt for sturdy build quality to withstand years of use.
Brand Support Choose brands with a reputation for long-term support.

Investing in a future-ready mic means less spending later. It’s about making smart choices now to reap benefits for years.

Frequently Asked Questions On Best Wireless Microphones


What Are The Top Wireless Microphone Brands?


Leading brands for wireless microphones include Shure, Sennheiser, Audio-Technica, and AKG. These brands are known for their reliable performance, sound quality, and durability. Each offers a range of models for different needs and budgets.


How To Choose The Best Wireless Microphone?


When selecting a wireless microphone, consider the usage environment, microphone type (handheld, lavalier, headset), frequency range, battery life, and connectivity options. Evaluate your specific needs against these criteria to find an ideal match.


What Is The Battery Life Of Wireless Microphones?


Battery life for wireless microphones varies by model but generally ranges from 4 to 8 hours. Some high-end models may offer longer battery life, while rechargeable options can provide additional convenience and cost savings over time.


Are Wireless Microphones Reliable For Live Performances?


Yes, modern wireless microphones are extremely reliable for live performances. Look for models with strong signal stability, and multi-frequency options to avoid interference, delivering consistent audio quality throughout the event.


Conclusion


Selecting the ideal wireless microphone can truly enhance your audio experience. Whether for professional use or personal enjoyment, the right mic makes a difference. Remember, consider sound quality, range, and reliability before purchase. Embrace the freedom of going wireless and let your voice be heard with clarity and confidence.


Choose wisely, and happy broadcasting!

Categories
Archive

Convolution Reverb: Revolutionizing Spatial Audio

Convolution reverb is a processing technique used to digitally simulate the reverberation of a physical space. It utilizes impulse responses from real-world spaces to create authentic-sounding reverb effects.


Implementing convolution reverb in audio production can significantly enhance the realism of a virtual acoustic environment. This technology captures the unique characteristics of a location’s sound reflections by recording an acoustic signal, typically a sharp noise or a balloon pop, that encompasses all angles of the space.


These recordings, known as impulse responses (IRs), faithfully reproduce the spatial audio characteristics once applied to any audio signal. Producers and sound engineers prefer convolution reverb for its ability to bring a life-like depth and dimension to music, films, and video games, offering immense creative flexibility. It enables mixers to place sounds into specific venues’ virtual acoustics, from the intimacy of a small chapel to the vast expanse of a grand hall, without ever leaving the studio.


The Birth Of Convolution Reverb

Imagine capturing the sound of any space, from a tiny closet to a grand cathedral. This magic is possible with a technology called Convolution Reverb. It’s like a sonic photograph of a location. Let’s dive into how this audio revolution began.

Early Experiments In Acoustic Modeling

Long ago, scientists and engineers sought to recreate the sounds of different spaces. They experimented with echo chambers and spring devices. These early attempts laid the groundwork for digital breakthroughs. The aim was to understand how sound bounces around in a room.

  • Echo chambers used reflective surfaces.
  • Spring reverbs captured vibrations.
  • Plate reverbs simulated larger spaces.

From Physical To Digital: The First Convolution Algorithms

The leap from analog to digital was huge. It started with mathematicians and their formulas. In the 1960s, computers began to process these formulas. They used a technique called Fast Fourier Transform. With these, engineers could now simulate the acoustics of real rooms.

Year Milestone
1960s Introduction of digital processing
1970s Development of first Convolution algorithms

Breaking Down The Tech

Imagine stepping into a grand cathedral and clapping your hands. The rich, textured echo that dances back at you is unique to that space. Convolution Reverb is a digital effect that captures and recreates that very acoustic signature in your audio productions, allowing you to place sounds in different virtual spaces. Let’s delve into the technology that makes this possible.

How Convolution Reverb Works

Convolution Reverb uses a process known as convolution to combine two signals. It applies the properties of a real space to any audio that you choose. Think of it as a sonic blend, adding the acoustic fingerprint of a specific location to your sound.

  • Capture an impulse response from a space.
  • Load the impulse response into the reverb software.
  • Process your desired audio with the convolution algorithm.

Impulse Responses: Capturing Sound Signatures

At the heart of convolution reverb are the Impulse Responses (IRs), recordings of a space’s acoustic characteristics. These are not just any recordings. They are detailed snapshots of how a space responds to sound.

Step Action Result
1 Emit a sound in the space Space reacts to sound
2 Record the reaction Impulse Response created
3 Use in software Unique reverb applied

A starter pistol or a clap, recorded with high-quality gear, serves to capture an IR. This Impulse Response is then used by the convolution reverb software to generate the reverb effect, making any recording sound as if it occurred within the original space.

Spatial Audio In Entertainment

Convolution Reverb is changing how we experience sounds in entertainment. This technology brings us closer to real-life experiences in games, movies, and virtual reality. Let’s explore how.

Immersive Experiences In Gaming

Gamers now dive into virtual worlds that feel more real than ever before.

  • Real-time audio rendering makes each step and action sound unique.
  • Game environments use actual space recordings to create echo and depth.
  • Players experience the sound that adjusts to their movements.

Realistic Soundscapes In Film And Virtual Reality

Films and VR transport viewers to different worlds with Convolution Reverb.

  1. Movie soundtracks mimic real locations for believable scenes.
  2. Virtual spaces resonate with natural acoustics, enhancing immersion.
  3. Audio cues are spatially accurate, guiding audiences through stories.


Convolution Reverb In Music Production

Imagine stepping into a cathedral or an underground tunnel. Your voice echoes, creating a unique blend of sounds. That’s the magic of reverb. With convolution reverb, producers bring these natural echoes into their music. This digital process captures the sound of real spaces. It allows musicians to create tracks as if they were recorded in acoustic environments around the world.

Crafting Unique Spaces For Mixes

In music, the right ambience is vital. Convolution reverb lets producers craft spaces that fit their music perfectly. They can choose from libraries of real-world spaces or design their own. Below are key points about creating unique acoustic environments:

  • Uses real sound profiles (called “impulse responses”)
  • Enables precise control over the reverberation
  • Mixes can mimic specific locations (like famous concert halls)

Producers often look out for high-quality samples. These samples contribute to the depth and texture of a track. They give a mix its own identity.

Advantages For Live Performances

Live music thrives on atmosphere. Convolution reverb offers several advantages:

  1. Delivers studio-quality acoustics on stage
  2. Enhances the audience experience with rich, immersive sound
  3. Artists can perform with the same reverb used in their recordings

This technology is particularly useful for concert environments. It adapts based on room size and crowd noise. This flexibility ensures the live sound is always top-notch.

Real-world Applications And Impact

Convolution Reverb is a groundbreaking audio technology. It captures the essence of real-world spaces. Producers and engineers use it to create vibrant soundscapes. Its rich reverberation mimics actual environments with stunning accuracy. This technology has vast impact across multiple sectors.

Architecture And Acoustics Planning

Architects and designers gain a powerful tool with Convolution Reverb. They predict and shape the acoustic properties of spaces before they are built. This pre-construction insight saves time and resources. Here’s how this technology aids in planning:

  • Auditoriums: Craft perfect sound environments for audience enjoyment.
  • Public spaces: Optimize sound to promote clear communication and atmosphere.
  • Residential: Enhance living spaces for comfort and acoustic privacy.

Enhancing Virtual Meetings And Telecommunications

Crystal-clear audio is vital in the digital age. Convolution Reverb enhances virtual communication. It adds natural-sounding reverb to audio in virtual meetings. This improvement leads to better clarity and reduced listener fatigue.

Let’s delve into its impact:

  1. Remote Work: Empowers telecommuters with clear and lifelike sound.
  2. Education: Transforms e-learning with environments that sound like real classrooms.
  3. Telehealth: Offers patients and professionals a clear line of communication.


Software And Hardware Innovations

The world of audio processing has grown leaps and bounds thanks to convolution reverb. This technology allows users to recreate the acoustics of real spaces. It does so with high precision and flexibility. Innovations in software and hardware are driving the industry forward. They offer better integration and more realistic soundscapes.

Leading Convolution Reverb Plugins

Digital audio professionals seek the most authentic sound environments. The quest has led to impressive plugin development. These plugins provide immersive sonic experiences.

  • Altiverb – It’s famous for its wide collection of impulse responses.
  • Spaces II – Known for its high-definition sounds and easy controls.
  • Waves IR1 – Offers advanced customization and a vast library.

Integration Into Audio Workstations And Sound Boards

Seamless integration into existing systems marks a major advancement. Modern DAWs (Digital Audio Workstations) and sound boards feature built-in convolution reverb. This allows for faster workflow and creative experimentation. Table 1 showcases popular DAWs with convolution reverb.

DAW Convolution Reverb Feature
Logic Pro X Space Designer
Ableton Live Max for Live Convolution Reverb
Pro Tools Space

Live sound engineering also benefits from hardware units. These units carry convolution reverb algorithms. Users can swiftly tweak settings during performances. They provide audiences with unparalleled auditory environments. Notable entries include the Bricasti Design M7 and the Lexicon PCM96.

Challenges And Limitations

Convolution reverb creates lush soundscapes, but this technology does face several hurdles. From the need for high processing power to debates over authenticity, these challenges are crucial to understanding and using convolution reverb effectively.

Processing Power And Latency Issues

One major challenge in convolution reverb is the demand for significant processing power. As it calculates complex impulse responses, devices require robust CPUs to avoid performance issues. This demand results in two primary concerns:

  • Increased latency, which can disrupt the workflow,
  • Higher CPU load, potentially slowing down the entire system.

This can be especially problematic in live performance settings, where quick response times are essential.

Authenticity Vs. Artistic Control

Another challenge comes in the form of a debate: authenticity against artistic control. Convolution reverb offers precise recreation of real spaces, posing the question:

  1. Should producers seek absolute authenticity in sound?
  2. Or is the goal to use the technology for greater artistic expression?

Choosing authentic sounds can sometimes lead to less flexibility. On the other hand, prioritizing control may yield sounds that diverge from the natural acoustics they’re meant to replicate.

The Future Of Spatial Audio

The quest for immersive audio experiences has led us to the edge of a thrilling frontier: spatial audio. Convolution reverb, a groundbreaking technology, recreates acoustic spaces with astonishing realism. This technology promises to revolutionize the way we engage with sound, transforming every nuance of the listening experience. As we look to the horizon, the potential applications in augmented reality and wearables, enhanced by AI and machine learning, hint at a future where audio design is limited only by our imagination.

Expanding Into Augmented Reality And Wearables

Augmented reality (AR) and wearables are set to offer unprecedented soundscapes. Convolution reverb brings these realms to life with incredibly lifelike echoes and reverberations. As users navigate through virtual worlds or mixed-reality environments, the precise audio reflections enhance the sense of presence. This not only boosts user engagement but also opens up new doors for interactive gaming, education, and virtual social interactions.

  • Wearable technology such as AR glasses will deliver customized sound based on the user’s surroundings.
  • Dynamic sound adjustments will cater to activities like gaming or virtual meetings.
  • Convolution reverb ensures audio accuracy whether indoors or outside.

Artificial Intelligence And Machine Learning In Audio Design

The synergy between artificial intelligence (AI) and convolution reverb is crafting the future soundscape. Machine learning algorithms enable systems to learn and adapt to various acoustic environments. This results in highly refined spatial audio, tailored to any scenario.

AI Function Benefit in Spatial Audio
Sound recognition Personalizes reverb settings
Environmental adaptation Matches audio to physical spaces
Real-time learning Improves audio fidelity continuously

Through these AI-driven advancements, audio designers can craft bespoke acoustic environments with a few clicks. The technology adjusts to listener movements, head positions, and even the acoustic properties of different materials in the real world.


Convolution Reverb: Revolutionizing Spatial Audio Design


Credit: www.linkedin.com


Frequently Asked Questions On Convolution Reverb


What Is Convolution Reverb?


Convolution reverb creates realistic acoustic simulations by using sampled real-space reverbs. It uses impulse responses, capturing echoes from actual rooms or spaces to create authentic sounding reverberation effects digitally.


How Does Convolution Reverb Work?


Convolution Reverb works by mathematically combining an audio signal with an impulse response. The impulse response is essentially a recording of a space’s acoustic characteristics, allowing the reproduction of natural reverbs.


What Are Impulse Responses In Reverb?


Impulse responses are audio recordings that capture the reverberation characteristics of real physical spaces. They are used in convolution reverb to emulate the sound of different environments accurately.


Can Convolution Reverb Be Used Live?


Yes, convolution reverb can be used in live settings, but it requires high processing power. Modern software and hardware can handle the demanding nature of real-time convolution processing for live sound reinforcement.


Conclusion


Embracing convolution reverb elevates your audio experiences to new heights. It adds authentic acoustic environments to your mixes with unparalleled realism. Whether you’re a producer, sound engineer, or a music enthusiast, this tool is indispensable for creating immersive soundscapes. Dive into the world of convolution reverb and watch your sonic creations come alive.