Categories
Archive

Should You Mix Vocals in Mono Or Stereo: Master the Sound Space

Mixing vocals in mono can help ensure better phase coherence and mono compatibility. However, mixing vocals in stereo allows for wider soundscapes and spatial effects, enhancing the overall depth of the mix.

Whether to mix vocals in mono or stereo depends on the specific needs and goals of the production. Understanding the differences, advantages, and potential drawbacks of each approach is crucial for achieving the desired sound and impact in the final mix.

By exploring these considerations, you can make informed decisions about how to best approach vocal mixing in your projects. This article will delve into the factors to consider when deciding whether to mix vocals in mono or stereo and provide insights to help you achieve the best results for your music.

Understanding Mono And Stereo

The decision to mix vocals in mono or stereo can significantly impact the overall sound of a recording. To make an informed choice, it’s crucial to understand the fundamental differences between the two – mono and stereo. Let’s delve into the intricacies of mono and stereo sound to gain insights into which one may be more suitable for mixing vocals.

Mono Vs Stereo

When it comes to audio production, mono refers to a single channel where all sounds are mixed together and output through a single speaker. Conversely, stereo involves two separate channels, allowing for a more spatial and immersive sound experience. Each channel may carry different elements of the audio, contributing to a multi-dimensional sonic landscape.

How Sound Space Is Created

Understanding how sound space is created is vital in deciding whether to mix vocals in mono or stereo. In mono, the sound is centered and has a narrower spatial presence, whereas stereo provides a richer, multi-directional sound. The spatial positioning of sounds in stereo can enhance the depth and realism of vocals, making them sound fuller and more engaging to the listener.

Benefits Of Mixing Vocals In Mono

Mixing vocals in mono can have several benefits. It can enhance the clarity and focus of the vocals, improve their presence in the mix, and ensure better compatibility across different playback systems. Additionally, mono mixing can make the vocals stand out in a crowded mix and create a more cohesive sound overall.

Clarity In The Mix


clarity in the mix is enhanced.


listener to enjoy.

Mono Compatibility


systems, eliminating any phase issues.

regardless of the device used to listen.

Challenges Of Mixing Vocals In Mono

Mixing vocals in mono poses challenges due to the lack of stereo width. It may affect the overall presence and depth of the vocals, making it crucial to make strategic EQ and effects adjustments for a balanced mono mix.

Mixing vocals in mono can present a set of challenges that may affect the overall quality of the sound. It is important to understand these challenges to make an informed decision on whether to mix vocals in mono or stereo. Two main challenges include limited spatial depth and potential loss of richness. Let’s explore each of these challenges in more detail:

Limited Spatial Depth

Mixing vocals in mono restricts the spatial depth of the sound. In stereo mixing, vocals can be panned across the stereo field, creating a sense of width and depth. However, in mono, all elements, including vocals, are projected from a single point, resulting in a narrower soundstage. This limited spatial depth can make the vocal performance feel less immersive and less dynamic. The vocals may lack the presence and clarity that can be achieved through stereo mixing, where different elements can be placed strategically across the stereo spectrum.

Potential Loss Of Richness

When vocals are mixed in mono, there is a potential for the sound to lose its richness and fullness. In stereo mixing, the vocals can be processed using effects like reverb and delay, which enhance the overall timbre and texture of the sound. These effects can add depth and dimension to the vocals, making them sound more vibrant and spacious. However, in mono mixing, the ability to apply such effects is limited. The mono signal captures the vocals in a more direct and straightforward manner, often resulting in a more upfront and centered sound. This can sometimes lead to a loss of the subtle nuances and intricate details that make the vocals truly captivating. To overcome these challenges, it is important to consider the context in which the vocals will be heard. If the intended medium is mono-compatible or if the spatial depth and richness are not crucial for the overall mix, mixing vocals in mono can be a viable option. However, if you aim for a more dynamic and immersive vocal sound, stereo mixing might be the way to go. Ultimately, the decision between mono and stereo mixing should be based on the desired sonic characteristics and the specific requirements of the project. It is important to weigh the advantages and challenges of each approach to ensure the vocals stand out in the mix and enhance the overall listening experience.
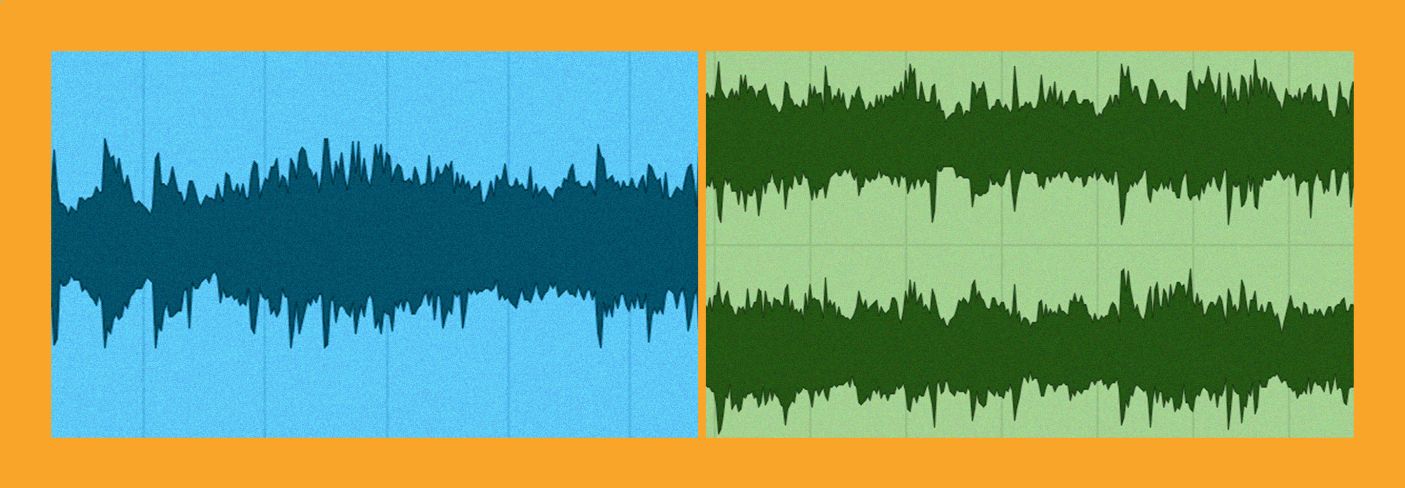
Should You Mix Vocals in Mono Or Stereo: Master the Sound Space

Credit: www.izotope.com

Advantages Of Mixing Vocals In Stereo

Mixing vocals in stereo can offer several advantages that can greatly enhance the overall quality of your music. By utilizing stereo panning and spatial effects, you can create a more immersive and dynamic listening experience for your audience. In addition, mixing vocals in stereo provides the opportunity for greater artistic freedom in shaping the sound of your vocals. Let’s explore these advantages in more detail:

Enhanced Spatial Representation

Mixing vocals in stereo allows for an enhanced spatial representation of the soundstage. By utilizing the stereo field, you can position the vocals in a way that simulates a live performance, with the vocals positioned in the center and other elements surrounding them. This creates a sense of depth and realism, giving the listener the feeling of being surrounded by the music. It can also help to distinguish the vocals from other elements in the mix, making them stand out and ensuring clarity and intelligibility.

Wider Artistic Freedom

Mixing vocals in stereo provides wider artistic freedom, allowing you to experiment with different effects and creative techniques. With stereo mixing, you have the ability to tailor the width of the vocals and create interesting spatial effects, such as widening the vocals to give them a larger-than-life presence or narrowing them to provide a more intimate and focused sound. This added versatility can help you express your artistic vision and bring your vocals to life in a unique and captivating way.

Overall, mixing vocals in stereo can significantly enhance the spatial representation and artistic freedom of your music. Utilizing the stereo field allows for a more immersive and dynamic listening experience, while opening up a world of creative possibilities. By harnessing the advantages of stereo mixing, you can take your vocals to new heights and create a truly memorable sonic experience for your audience.

Drawbacks Of Mixing Vocals In Stereo

Phase Issues

When vocals are mixed in stereo, phase issues can arise, leading to muddiness and loss of clarity.

Incompatibility With Mono Systems

Mixing vocals in stereo may cause problems on mono playback systems, resulting in imbalanced sound.

Finding The Balance

Discovering the right approach for mixing vocals can significantly impact the overall sound of your music. Understanding when to use mono or stereo can enhance the balance and clarity in your tracks. Experiment with both techniques to find what works best for your unique style and preferences.

Finding the Balance Utilizing Both Mono and Stereo Mixes When mixing vocals, utilizing both mono and stereo mixes adds depth and dimension to your sound. Taking advantage of the precise control of panning and spatial effects in stereo mixes can create a wide, immersive vocal presence. On the other hand, the tight focus and clarity of mono mixes can ensure that the vocals remain prominent and clear. By using both, you can strike a balance between a broad, spacious sound and a focused, impactful vocal performance. Adapting to Different Playback Systems Different playback systems and environments can have a significant impact on how your mixed vocals are perceived. For instance, while stereo mixes may sound impressive on headphones or high-quality speakers, they might lose their impact when played on mono devices such as smartphones or older car stereos. By adapting your mixes to accommodate both mono and stereo playback systems, you can ensure that your vocals sound consistent and impactful across a variety of listening environments. In conclusion, finding the right balance between mono and stereo mixes for your vocals can enhance the overall quality and impact of your audio productions. By utilizing both approaches and adapting to different playback systems, you can create versatile and impactful vocal mixes that sound great in any context. “`

Experimentation And Best Practices

Testing Mixes In Various Playback Environments

When testing your vocal mixes, it’s crucial to do so in a variety of playback environments. This includes listening in headphones, studio monitors, car stereo systems, and even smartphone speakers. The goal is to ensure that your vocal mix translates well across different platforms. By doing so, you can catch any potential issues and make necessary adjustments to optimize the vocals for a broad range of listening scenarios.

Utilizing Panning And Stereo Imaging

When deciding between mono and stereo mixing for vocals, it’s essential to leverage panning and stereo imaging techniques effectively. Utilizing panning can help create a sense of space and depth in your mix, giving the vocals the right placement within the overall soundstage. Experiment with different levels of panning to find the sweet spot for your vocals, ensuring they are well-balanced and complement the other elements of the mix.

Should You Mix Vocals in Mono Or Stereo: Master the Sound Space

Credit: www.masteringthemix.com

Should You Mix Vocals in Mono Or Stereo: Master the Sound Space

Credit: www.masteringthemix.com

Frequently Asked Questions On Should You Mix Vocals In Mono Or Stereo

Should Vocals Be Mixed In Mono Or Stereo?

Mixing vocals in mono can enhance clarity and focus, while stereo adds depth and width to the soundstage. Experiment with both options to find the best balance for your mix.

Is It Better To Mix Vocals In Mono For Compatibility?

Mixing vocals in mono ensures compatibility across various playback systems, making it a safer choice for ensuring a consistent listening experience for all listeners.

How Does Mixing Vocals In Stereo Affect The Overall Sound?

Mixing vocals in stereo can create a spacious and immersive sound but may also result in phasing issues if not properly managed. Careful attention to panning and stereo imaging is crucial.

Can Mixing Vocals In Mono Simplify The Mixing Process?

Mixing vocals in mono can simplify the mixing process by focusing on the core sound without distractions from stereo effects. This approach can help achieve a cleaner and more balanced mix.

Conclusion

Deciding whether to mix vocals in mono or stereo depends on the desired effect. Experiment and trust your ears for the best sound. Balance is key, so consider the overall mix and adjust accordingly. Remember, there is no one-size-fits-all approach – go with what suits the song best.


Categories
Archive

How to Make Vocals Stand Out in a Mix: Mastering the Art

To make vocals stand out in a mix, use EQ to remove low-end rumble and boost high frequencies for clarity and presence. Achieve balance with compression and adjust reverb and delay settings to create depth and space, enhancing the vocal’s impact and prominence in the mix.


When it comes to creating a professional-sounding music production, ensuring that the vocals stand out is crucial. A well-mixed vocal track can captivate listeners and elevate the overall quality of a song. Whether you’re a seasoned producer or just starting out, knowing how to effectively emphasize vocals can make a significant difference in the impact of your music.


We’ll delve into specific techniques and strategies for making vocals stand out in a mix, enabling you to create compelling and engaging audio productions. Let’s explore the essential steps to achieve a captivating vocal presence in your mixes.


Understanding Vocal Mixing

Understanding Vocal Mixing is a crucial aspect of music production. Achieving a balanced and professional sound requires careful attention to the vocals in a mix. By understanding the intricacies of vocal mixing, producers can ensure that the vocals stand out and communicate the emotional nuances of the song effectively.

The Importance Of Vocal Clarity

Vocal clarity is essential for ensuring that the lyrics are intelligible and that the emotional performance of the singer is conveyed to the listener. To achieve clarity, it is vital to pay attention to the EQ of the vocals, removing any frequencies that may cause muddiness or masking. Additionally, using a de-esser can help control sibilance, further enhancing the clarity of the vocals.

Balancing Vocals With Instrumentals

Balancing vocals with instrumentals is a delicate task that can greatly impact the overall sound of the mix. Proper panning and volume adjustments can create space for the vocals to shine without being overwhelmed by the instrumental elements. Utilizing techniques such as side-chain compression to momentarily lower the volume of the instruments when the vocals are present can also help in maintaining clarity and prominence of the vocals within the mix.


Preparing The Vocals

Editing And Compiling Vocal Takes

Run vocal recordings through editing software for cleanup and compilation.

Understanding Vocal Range And Key

Identify the vocal range and key to enhance the mix’s cohesiveness.

Utilizing Eq And Compression

When it comes to mixing vocals, using EQ (equalization) and compression techniques can make a significant difference in how the vocals stand out in a mix. These two powerful tools allow you to shape the sound of the vocals and ensure they sit perfectly in the overall mix, enhancing both their presence and consistency. Let’s dive into how you can utilize EQ and compression for optimal results.

Applying Eq To Enhance Vocal Presence

EQ is a crucial tool for enhancing the presence of vocals and giving them the necessary clarity and definition. By carefully selecting the right EQ settings, you can eliminate unwanted frequencies and emphasize the desirable ones, making the vocals cut through the mix. Here’s how you can use EQ effectively:

  1. Identify problem frequencies that muddy the vocal sound.
  2. Using a parametric EQ, attenuate or eliminate these problem frequencies.
  3. Boost the frequencies that contribute to the vocal’s presence and articulation.
  4. Experiment with a gentle high-frequency shelf boost to add airiness and sparkle to the vocals.
  5. Make subtle adjustments to find the sweet spot where the vocals sound clear and balanced, without sounding harsh or unnatural.

By applying these EQ techniques, you can enhance the vocal presence and ensure they stand out in the mix.

Using Compression For Consistency

Alongside EQ, compression is an essential tool for achieving a consistent and controlled vocal sound. Compression helps to even out the dynamic range of the vocals, making them sound more polished and professional. Here’s how you can effectively use compression on vocals:

  1. Start with a moderate threshold setting to catch the louder parts of the vocals.
  2. Set a ratio that balances the dynamic range without squashing the vocals.
  3. Adjust the attack and release times to control how quickly the compression is applied and released.
  4. Experiment with the makeup gain to bring up the overall level of the vocals.

By applying compression with care, you can achieve a consistent vocal sound throughout the mix, ensuring every word and phrase is heard clearly.

By utilizing EQ and compression techniques, you can take your vocal mixes to the next level. Remember to experiment and trust your ears to find the perfect balance, ultimately making the vocals stand out and shine in the overall mix.


Adding Effects For Enhancement

When it comes to making vocals stand out in a mix, adding effects for enhancement can play a crucial role. By implementing reverb and delay as well as using creative vocal effects, you can elevate the overall sound and create a distinctive vocal presence in your mix. Let’s explore these techniques in more detail.

Implementing Reverb And Delay

Reverb and delay are essential tools for enhancing vocals in a mix. They can add depth and space, creating a sense of ambiance and dimension. When using reverb, it’s important to adjust the decay time and pre-delay to suit the vocal track. For delay, experiment with different settings such as feedback and timing to achieve the desired effect.

Creative Use Of Vocal Effects

Aside from traditional reverb and delay, there are numerous creative vocal effects that can be utilized to make vocals stand out. This can include pitch shifting, chorus, flanging, and vocal doubling. These effects can add character and uniqueness to the vocals, making them more engaging and memorable in the mix.

Employing Automation Techniques

Vocals are often the centerpiece of a song, and it’s essential to make them stand out in a mix. One effective way to achieve this is by employing automation techniques. Automation allows you to control various aspects of the vocal track, such as volume, panning, and EQ adjustments, throughout the song. In this article, we will explore two powerful automation techniques – automating levels for emphasis and dynamic panning for depth.

Automating Levels For Emphasis

Automating levels is a technique that involves adjusting the volume of the vocal track at specific points in the song to create emphasis and highlight certain phrases or words. By carefully controlling the volume, you can draw the listener’s attention to the vocals and make them stand out.

To automate levels, you can use a digital audio workstation (DAW) like Ableton Live or Logic Pro. These DAWs provide automation lanes where you can draw or record volume changes over time. For example, during a chorus, you might increase the volume of the vocals to give them a more impactful presence. Conversely, you can decrease the volume in verses to create a sense of intimacy.

Remember, subtlety is key when automating levels. Gradual volume changes are usually more effective than sudden jumps. Take the time to experiment and find the right balance that complements the song.

Dynamic Panning For Depth

Dynamic panning is another automation technique that can add depth and dimension to vocals in a mix. By automating the panning position, you can create a sense of movement and space that enhances the overall listening experience.

When using dynamic panning, imagine the stereo field as a canvas where you can position the vocals anywhere within the soundstage. For example, you can pan the vocals slightly to the left during the verse to give them a focused presence, and then pan them wider during the chorus to create a sense of width and excitement.

Experiment with different panning movements to find what works best for your mix. Keep in mind that subtlety is often more effective than extreme panning. By dynamically panning the vocals, you can create a dynamic and engaging mix that keeps the listener captivated.

Ensuring Clarity In The Mix

Your vocals can easily get lost in the mix, but with the right techniques, you can make them stand out. Two essential methods for achieving clarity are de-essing and addressing frequency masking issues.

De-essing For Taming Harsh Sibilance

De-essing involves reducing the harsh “s” sounds that can distract from the vocals. Use a de-esser plugin to target and tame those sibilant frequencies.

Frequency Masking Solutions

Frequency masking occurs when certain frequencies overpower others, causing elements to compete in the mix. Utilize EQ to carve out space for your vocals and ensure they cut through clearly.


Harnessing Vocal Layering And Doubling

Creating a captivating vocal sound is crucial for a professional-sounding mix. By harnessing the power of vocal layering and doubling, you can take your vocals to the next level, making them stand out in a crowded mix. These techniques allow you to add depth, richness, and texture to your vocals, making them more interesting and impactful for your listeners.

Creating Depth With Vocal Layering

Vocal layering involves recording multiple vocal tracks and blending them together in the mix. This technique adds depth and dimension to your vocals, making them sound larger than life. To create depth with vocal layering, follow these steps:

  1. Start by recording your main vocal track, which will serve as the foundation.
  2. Record additional vocal tracks, experimenting with different harmonies or variations of the melody.
  3. Blend the additional vocal tracks with the main vocal, adjusting their volume levels to achieve the desired effect.
  4. Consider panning the additional vocal tracks slightly to the left or right, creating a sense of space and separation.
  5. Apply subtle effects, such as reverb or delay, to the additional vocal tracks to enhance their presence without overwhelming the mix.

By layering your vocals, you can create a rich and immersive sound that captures the listener’s attention and adds depth to your mix.

Utilizing Doubling For Richness

Doubling is another effective technique to make vocals stand out. It involves recording the same vocal part twice and panning the duplicated tracks to create a sense of width and thickness. Here’s how you can utilize doubling to enhance the richness of your vocals:

  1. Record your main vocal track as the foundation.
  2. Record a duplicate of the main vocal, trying to match the timing and tone as closely as possible.
  3. Pan the duplicated vocal tracks slightly to the left and right, widening the stereo image.
  4. Adjust the volume levels of the duplicated tracks to blend them with the main vocal, ensuring they complement each other.
  5. Consider applying subtle effects, such as chorus or modulation, to the duplicated tracks to create a sense of movement and depth.

By utilizing doubling, you can give your vocals a luscious and full-bodied sound that cuts through the mix and grabs the listener’s attention.

Mastering The Final Vocal Mix

When mixing vocals, it’s crucial to master the final vocal mix to make sure the vocals stand out in the overall sound. Achieving a well-balanced and impactful vocal mix requires attention to detail and meticulous final touches.

Balancing Vocal Effects In The Mix

Start by ensuring that the vocal effects such as reverb and delay are subtly balanced to enhance the vocals without overpowering them. Utilize EQ to carve out space for the vocals and ensure the effects complement the vocal performance.

Final Checks For Vocal Clarity And Impact

  • Check the overall EQ of the vocal track to address any frequency buildup or muddiness that may be affecting clarity.
  • Ensure that the vocals are properly leveled in the mix, staying consistent throughout the song to maintain impact and continuity.
  • Perform A/B comparisons with reference tracks to gauge the overall vocal presence and make necessary adjustments.
  • Finalize the vocal mix by applying subtle compression and automation to polish the dynamics and ensure a cohesive sound.
How to Make Vocals Stand Out in a Mix: Mastering the Art


Credit: blog.native-instruments.com


Frequently Asked Questions For How To Make Vocals Stand Out In A Mix


How Can I Make Vocals Stand Out In A Mix?


To make vocals stand out in a mix, use EQ to boost the vocal frequencies, add a touch of reverb to create depth, and use compression to even out the dynamic range.


Why Are Vocals Important In A Music Mix?


Vocals are the focal point of a song, conveying emotion and lyrics to the listener. Clear vocals enhance the overall impact and connection with the audience.


What Is The Role Of Effects In Vocal Mixing?


Effects like delay and chorus can add character and dimension to vocals, while subtle use of effects can enhance the overall sound without overpowering the vocals.


How Can I Prevent Vocals From Getting Lost In The Mix?


Adjust the volume levels of other instruments to create space for vocals, pan instruments to different positions in the stereo field, and use automation to emphasize important vocal parts.


Conclusion


Achieving a standout vocal mix involves balancing clarity, presence, and emotion. By implementing EQ, compression, and effects strategically, you can enhance vocals in your music production. Experiment with different techniques to find what works best for your unique style and sound.


Remember, practice makes perfect when it comes to creating impactful vocal mixes.

Categories
Archive

Can You Mix Vocals in FL Studio? Unleash Your Vocal-Producing Wizardry!

Yes, you can mix vocals in FL Studio. FL Studio is equipped with powerful tools to help you mix and enhance vocals for your audio projects.


From adjusting levels and adding effects to using automation and equalization, FL Studio provides all the necessary features for professional vocal mixing. FL Studio, a popular digital audio workstation, offers a comprehensive set of tools and features specifically designed for mixing vocals.


Whether you’re a beginner or an experienced producer, FL Studio provides a user-friendly interface and a wide range of effects and plugins to help you achieve the perfect vocal mix. We’ll explore the steps and techniques for mixing vocals in FL Studio, along with some tips to enhance the overall quality of your vocal recordings. Whether you’re working on music production, podcasting, or voiceover projects, mastering vocal mixing in FL Studio can take your audio quality to the next level.


Getting Started With Vocal Mixing

When it comes to mixing vocals in FL Studio, getting started can be a daunting process for beginners. It’s crucial to understand the fundamental aspects of vocal mixing, from setting up your FL Studio workspace to preparing your vocals for a professional sound.

Setting Up Your Fl Studio Workspace

Before diving into vocal mixing, it’s essential to organize your workspace in FL Studio for a seamless and efficient workflow. Here are some key points to consider:

  • Utilize multiple mixer tracks for vocals, effects, and buses to manage them independently.

Preparing Your Vocals For Mixing

Prior to mixing vocals, it’s imperative to prepare your vocal recordings to ensure optimal quality and compatibility with the mixing process. Here’s how to prepare your vocals:

  1. Record vocals with a quality microphone in a acoustically-treated space.

Essential Tools For Vocals In Fl Studio

When it comes to producing music in FL Studio, having a solid understanding of the essential tools for vocals is crucial for achieving professional-sounding results. With the right techniques and tools, you can elevate your vocal recordings and create a polished sound that stands out. Let’s explore the essential tools for vocals in FL Studio and how to effectively utilize them.

Understanding Eq And Compression For Vocals

EQ (Equalization) plays a vital role in shaping the tonal characteristics of vocals. In FL Studio, the Parametric EQ 2 is a powerful tool for adjusting the frequency spectrum of vocal recordings. Use it to boost or cut specific frequencies to enhance clarity, presence, and overall balance of the vocals. Additionally, compression is essential for controlling the dynamic range of vocals, ensuring a consistent level. The Fruity Limiter and Fruity Compressor plugins in FL Studio enable precise control over vocal dynamics, helping to smooth out inconsistencies in the vocal performance.

Working With Reverb And Delay Effects

Reverb and delay effects are indispensable for adding depth and dimension to vocal tracks. In FL Studio, the Fruity Reverb 2 and Fruity Delay 3 plugins offer a wide range of parameters to tailor the spatial characteristics of vocals. Adjust the decay time, pre-delay, and diffusion to create a convincing sense of space around the vocals. Experiment with different reverb types and delay timings to find the perfect balance between ambiance and clarity in your vocal mixes.

Advanced Techniques For Vocal Mixing

Discovering new and advanced techniques for achieving standout vocals in FL Studio can take your tracks to the next level.

Utilizing Automation For Dynamic Vocals

Automation brings dynamic movement and expression to vocals, enhancing their impact in the mix.

Exploring Vocal Tuning And Harmonization

Fine-tune vocals with precision and explore creative harmonization techniques for a polished sound.


Creating Depth And Space In Vocals

Vocals play a crucial role in any song, and giving them depth and space can elevate the overall mix. With FL Studio, you have a range of tools and techniques at your disposal to achieve this. In this section, we’ll explore two important methods: using panning and spatial effects, and incorporating vocal adlibs and background vocals. Let’s dive in!

Using Panning And Spatial Effects

Panning refers to the placement of sound across the stereo field, allowing you to create a sense of width and movement in your vocals. By strategically panning different vocal tracks, you can make the listener perceive the vocals as coming from different directions. This adds depth and dimension to the mix.

In FL Studio, you can easily adjust the panning of your vocal tracks using the mixer. Simply load your vocal tracks into individual mixer channels and use the pan knobs to position them in the stereo field. Experiment with different panning positions to find the balance that works best for your song.

In addition to panning, spatial effects like reverb and delay can further enhance the sense of depth in your vocals. Reverb adds a natural ambience, simulating the sound of a room or space. Delay creates echoes, adding an airy feel to the vocals. By tweaking the parameters of these effects, you can create a sense of space and make the vocals feel larger than life.

Incorporating Vocal Adlibs And Background Vocals

Vocal adlibs and background vocals are an excellent way to add richness and texture to your vocal mix. Adlibs are short, spontaneous vocal phrases or sounds that complement the main vocals. They can be placed strategically throughout the song to create interest and fill empty spaces.

In FL Studio, you can record adlibs separately and place them in the mix at appropriate moments. To ensure they don’t overpower the main vocals, adjust their volume and panning accordingly. Experiment with different adlib ideas and placements to find the ones that enhance your song the most.

Background vocals, on the other hand, are harmonies or supporting vocal lines that add depth to the main vocals. These can be recorded or programmed in FL Studio using virtual instruments or samples. By layering multiple vocal tracks and arranging harmonies, you can create a lush and dynamic vocal sound.

Remember, when incorporating adlibs and background vocals, pay attention to their positioning in the stereo field. Panning them slightly away from the main vocals will give them their own space and prevent muddiness in the mix.

Achieving Clarity And Balance

Mixing vocals effectively is crucial to creating a polished and professional-sounding track in FL Studio. By achieving clarity and balance in the vocals, you can ensure that the vocals sit well in the mix and are easy for listeners to engage with. In this article, we will discuss two important aspects of vocal mixing that contribute to clarity and balance: balancing levels and frequencies, and avoiding common pitfalls in vocal production.

Balancing Levels And Frequencies In Vocal Mixing

When it comes to mixing vocals, finding the right balance of levels is key. You want the vocals to be audible and clearly heard without overpowering other elements of the mix. To achieve this, start by adjusting the volume fader of the vocal track so that it sits well in relation to the rest of the instruments.

Here are some tips for balancing vocals:

  1. Use reference tracks to gauge how the vocal level should sound in relation to the other elements in the mix.
  2. When adjusting the vocal level, listen to the track as a whole to ensure that it still sounds balanced.
  3. Consider using automation to control vocal levels within individual phrases or sections of the song for greater control.

Beyond levels, paying attention to the frequencies in the vocal mix is equally important. Here are some techniques to achieve a balanced vocal sound:

  • Use equalization (EQ) to shape the tone of the vocal. Cut any unwanted frequencies that might introduce muddiness or harshness. Boosting the desirable frequencies can enhance the presence and clarity of the vocals.
  • Consider using a de-esser to tame sibilant sounds, which are the high-frequency “sss” or “shh” sounds that can be harsh or distracting.
  • Utilize compression to control the dynamic range of the vocals. This can help even out the inconsistencies in the vocal performance and make them sit more uniformly within the mix.

Remember, achieving a balanced vocal mix is an iterative process. Continuously listen and make adjustments until you achieve the desired clarity and balance.

Avoiding Common Pitfalls In Vocal Production

While working on vocal production in FL Studio, it’s important to be aware of common pitfalls that can hinder the clarity and balance of the vocals. Here are a few pitfalls to watch out for:

  1. Over-processing: Applying too many effects, such as excessive reverb or delay, can negatively impact the clarity of the vocals. Use effects sparingly and purposefully.
  2. Inadequate editing: Make sure to edit the vocal recordings to remove any unwanted noise, breaths, or mouth clicks. Also, correct any pitching or timing issues using tools like pitch correction and time stretching.
  3. Insufficient vocal comping: Vocal comping involves selecting the best parts from multiple takes to create a composite, flawless vocal performance. Take the time to comp the vocals for a more polished and refined result.
  4. Lack of attention to background vocals: If your track includes background vocals, pay attention to their levels, panning, and overall integration with the lead vocal.

Can You Mix Vocals in FL Studio? Unleash Your Vocal-Producing Wizardry!


Credit: www.sweetwater.com

Mastering Your Vocal Mix

In FL Studio, achieving a professional quality vocal mix is essential for an impactful and polished sound. Mastering your vocal mix involves meticulous attention to detail and fine-tuning to ensure that the vocals stand out and complement the overall track.

Finalizing Your Vocal Mix In Fl Studio

Finalizing your vocal mix in FL Studio is crucial for a cohesive sound. Utilize the built-in tools and effects to refine the vocals and create a well-balanced mix.

Tips For Polishing Your Vocals To Perfection

  • Utilize EQ to enhance vocal clarity and remove unwanted frequencies
  • Apply compression to control dynamics and ensure consistent volume
  • Add reverb and delay for depth and dimension
  • Experiment with vocal doubling and harmonies for a richer sound
  • Use automation to adjust levels and add movement to the vocals

Frequently Asked Questions Of Can You Mix Vocals In Fl Studio

Can You Mix Vocals In Fl Studio?

Yes, FL Studio is a versatile DAW that offers powerful mixing capabilities for vocals. With features like multi-track audio recording, mixer tracks, effects, and automation, you can achieve professional vocal mixes in FL Studio. Use EQ, compression, reverb, and other tools to enhance the vocals and create a polished sound.

How Do You Mix Vocals In Fl Studio?

To mix vocals in FL Studio, start by adjusting the levels of the vocal tracks to ensure they sit well in the mix. Then, use EQ to shape their tone and reduce any unwanted frequencies. Apply compression to control the dynamics and add consistency.


Experiment with effects like reverb and delay to give the vocals depth and space. Lastly, automate parameters to create movement and enhance certain parts.

What Plugins Are Best For Vocal Mixing In Fl Studio?

FL Studio offers a range of plugins that are great for vocal mixing. The Parametric EQ 2 is versatile for shaping the vocal tone, while the Fruity Compressor provides transparent dynamic control. For adding warmth and character, the Fruity Reverb and Fruity Delay 3 are excellent choices.


The Fruity Limiter is also helpful for maximizing loudness without distortion.

Conclusion

To sum up, mixing vocals in FL Studio can elevate your music production game. Experiment with different effects and techniques to enhance the sound. Don’t be afraid to get creative and trust your ears. With dedication and practice, you can achieve professional-sounding vocal mixes.


Keep honing your skills!

Categories
Archive

Unlock Your Musical Genius: Best Way to Get Fl Studio for Free

To get FL Studio for free, visit the official FL Studio website and download the trial version. FL Studio is a popular software choice for music producers due to its versatile features and user-friendly interface.


However, the full version comes with a price tag, leaving many aspiring musicians searching for ways to access the software without breaking the bank. While there are illegal methods to obtain FL Studio for free through torrents or cracked versions, these come with risks of viruses and legal consequences.


For a legitimate option, users can download the trial version from the official website, which offers limited functionality but can be a good starting point for beginners to explore the software before committing to a purchase.


The World Of Fl Studio

A Powerful Digital Audio Workstation

FL Studio is a powerful DAW used for music production.

It offers a wide range of features for creating music tracks.

FL Studio allows for seamless workflow and creativity.

Popularity Among Music Producers

FL Studio is highly popular among music producers worldwide.

It is favored for its user-friendly interface and versatility.

Many top producers rely on FL Studio for their music production needs.

With FL Studio, music production becomes accessible and efficient.

Understanding Fl Studio Licensing

Types Of Fl Studio Licenses

FL Studio offers several license types to cater to various user needs. These include:

  • FL Studio Demo Version
  • Fruity Edition
  • Producer Edition
  • Signature Bundle

Pricing And Restrictions

License Type Pricing Restrictions
FL Studio Demo Version Free Limited features and functionality
Fruity Edition $99 Basic features with some limitations
Producer Edition $199 Advanced features for music production
Signature Bundle $299 Includes all plugins and features

It’s important to choose the right FL Studio license based on your production requirements and budget.


Exploring Free Options

When it comes to exploring free options for FL Studio, there are several avenues to consider. Whether you’re not ready to commit to a purchase or simply want to try it out before investing, it’s possible to access FL Studio for free. This article explores different free options available for FL Studio, including trial versions and completely free FL Studio versions.

Trial Versions

FL Studio offers a free trial version, allowing users to experience the software’s capabilities before deciding to commit to a purchase. The trial version provides access to the full range of features, giving users a comprehensive understanding of what FL Studio has to offer.

Free Fl Studio Versions

For those looking for a completely free option, FL Studio also provides limited editions that offer essential features without the hefty price tag. These free versions are perfect for beginners or those on a tight budget, allowing them to explore FL Studio’s basic functionalities without any financial commitment.

Risks And Pitfalls

When it comes to getting FL Studio for free, there are a number of risks and pitfalls that you should be aware of. While the idea of getting a popular software for free may be tempting, it’s important to consider the potential consequences. In this article, we will discuss the legality and ethical concerns, as well as the security risks associated with obtaining FL Studio for free.

Legality And Ethical Concerns

Legally, acquiring FL Studio for free is considered piracy and is therefore illegal. Using pirated software violates copyright laws, which can lead to severe penalties, including fines and even imprisonment. Additionally, it’s important to recognize the ethical concerns associated with piracy. By using pirated software, you are depriving the creators and developers of their rightful income for their hard work.

Security Risks

Security risks should also be taken into consideration when obtaining FL Studio for free. Pirated software often comes bundled with malware, viruses, and other harmful programs that can compromise your computer’s security. These malicious programs can steal your personal information, damage your device, or even give hackers unauthorized access to your computer. It’s important to protect your privacy and security by avoiding pirated software.

Community And Support


Discover the best way to get FL Studio for free through a supportive community that offers tips, resources, and guidance every step of the way. Connect with fellow music enthusiasts to explore the vast possibilities of this popular music production software.

Community and Support are vital components when considering the best way to obtain Fl Studio for free. Being part of a community allows users to connect with like-minded individuals, exchange ideas, and seek assistance when faced with challenges or questions. Moreover, the support of the community contributes to a better understanding of the software and helps users maximize their experience. In this section, we will explore two key aspects of community and support: Online Forums and Communities, and Tutorials and Resources.

Online Forums And Communities

Online forums and communities play a crucial role in the Fl Studio user experience. These platforms provide a space where users can share their knowledge, ask questions, and exchange tips and tricks. Joining these communities not only provides an avenue for support but also promotes collaboration and learning from the experiences of others. When searching for online forums and communities related to Fl Studio, some notable options include:

  • The official Image-Line forum, where users can connect with other Fl Studio enthusiasts, professionals, and developers to share their experiences and seek help.
  • Reddit’s r/FL_Studio community offers a vibrant and active platform for users to engage in discussions, share their work, and seek guidance from experts.
  • Other popular online forums such as KVR Audio and Studio One Expert provide dedicated sections for Fl Studio users to interact, seek support, and stay updated with the latest news and updates.

By actively participating in these online forums and communities, Fl Studio users can tap into a vast network of knowledge and expertise, enhancing their skills and staying connected with the software’s ever-evolving community.

Tutorials And Resources

In addition to online forums and communities, tutorials and resources are another invaluable source of support for Fl Studio users. These tutorials can help users navigate through the software’s features, understand advanced techniques, and expand their creative boundaries. When it comes to finding tutorials and resources for Fl Studio, one can explore the following options:

  1. YouTube channels like “In The Mix” and “FL Studio Guru” offer in-depth tutorials, tips, and creative ideas to help users make the most out of the software.
  2. Image-Line’s official website provides an extensive collection of step-by-step tutorials, articles, and documentation for users at all skill levels.
  3. Websites like “Production Music Live” and “Busy Works Beats” offer comprehensive tutorial courses tailored to different genres and workflows.

These tutorials and resources provide a rich learning experience, equipping users with the necessary skills to navigate through Fl Studio and unleash their creativity. Regularly exploring these resources can help users stay updated with the latest features and techniques, keeping their production skills sharp and innovative. In conclusion, the community and support surrounding Fl Studio offer an extensive network of knowledge and assistance for users seeking the best way to obtain Fl Studio for free. Engaging with online forums and communities allows users to connect with experts, seek guidance, and learn from others’ experiences. Additionally, leveraging tutorials and resources helps users navigate the software’s features and expand their creative boundaries. By tapping into these valuable resources, users can enhance their Fl Studio experience and unlock their true potential.

Alternative Free Daws

Looking for a free, alternative digital audio workstation (DAW) to FL Studio? There are several robust options available that offer similar features and functionality without the price tag. In this section, we will explore the Comparison with Other Free Digital Audio Workstations and learn about their Features and Limitations.

Comparison With Other Free Digital Audio Workstations

When it comes to alternative free DAWs, it’s important to weigh the options and find the best fit for your music production needs. Here’s a comparison of some popular free DAWs:

DAW Features Limitations
Audacity Basic audio editing, recording, and mixing Limited MIDI capabilities, lacks advanced production tools
Cakewalk by BandLab Pro-level features, unlimited tracks, powerful audio editing Steep learning curve, high system requirements
Ardour Multichannel recording, flexible routing, plugin support Complex interface, lacks built-in virtual instruments

Features And Limitations

Each free DAW comes with its own set of features and limitations, offering a unique user experience. In addition to the Comparison with Other Free Digital Audio Workstations mentioned above, consider the following aspects when evaluating alternative DAWs:

  • Audacity: Intuitive interface, ideal for simple recording and editing tasks, but lacks complex production tools
  • Cakewalk by BandLab: Professional-grade features, but may require a powerful computer and a steep learning curve
  • Ardour: Suitable for multichannel recording and mixing, although beginners may find its interface challenging

Making The Decision


Discover the best way to access FL Studio for free and make your decision confidently. Get professional-level music production software without breaking the bank. Unleash your creativity today.

Personal Ethics And Values

Consider your moral compass when deciding how to obtain FL Studio for free.

Assess if the method aligns with your personal beliefs and values.

Ensure that you are comfortable with your chosen approach ethically.

Long-term Goals

Evaluate how getting FL Studio for free fits into your long-term objectives.

Consider if this method will support your music production ambitions.

Reflect on the potential consequences of your decision in the future.

Conclusion And Final Thoughts

Balancing Accessibility And Integrity

FL Studio offers a balance of accessibility and integrity, providing users with a free version that allows for exploration without compromising on quality.

Embracing Creativity Within Boundaries

With FL Studio, creativity is encouraged within boundaries, guiding users to explore and experiment while respecting the integrity of the software.

Frequently Asked Questions For Best Way To Get Fl Studio For Free


Can I Get Fl Studio For Free Legally?


Yes, you can get FL Studio for free legally by downloading the trial version from the official website. However, the trial version has a limited feature set and time restriction. To access the full version for free, there are illegal methods available, but we strongly discourage piracy and recommend supporting the developers by purchasing a genuine license.


Are There Any Alternative Free Software Similar To Fl Studio?


Yes, there are several free alternatives to FL Studio that offer similar functionality. Some popular options include Audacity, Cakewalk by BandLab, LMMS, and Tracktion T7. These programs provide a range of features for music production and are great options for those on a budget or looking to explore different software.


What Are The Risks Of Downloading Fl Studio From Unofficial Sources?


Downloading FL Studio from unofficial sources poses significant risks. These sources often distribute modified or infected versions of the software that may contain malware or other malicious elements. Additionally, using unauthorized copies of FL Studio is illegal and can result in serious legal consequences.


It is always best to download software directly from the official website to ensure safety and legality.


Can I Upgrade From The Trial Version To The Full Version Of Fl Studio?


Yes, you can upgrade from the trial version to the full version of FL Studio by purchasing a license. Once you have purchased a license, you will receive a registration key that can be used to unlock all the features of the software.


This allows you to continue using FL Studio without any limitations or time restrictions.


Conclusion


There are reliable ways to access FL Studio for free without compromising legality or safety. By utilizing trial versions, student discounts, or purchasing a license later, you can explore the software at minimal cost. Remember to also consider the ethical implications and potential consequences when seeking out free software options.


Happy music making!

Categories
Archive

Cubase Can’t Find VST Instrument: Troubleshooting Made Easy

If Cubase can’t find a VST instrument, check the plugin’s installation and scan for new plugins. Many beginners and even experienced users of Cubase often face the issue of the software not being able to locate a VST instrument.


This problem can be frustrating, but it can usually be resolved with a few simple steps. I will discuss the common reasons why Cubase can’t find VST instruments and provide solutions to troubleshoot and fix this issue. By following these tips, you’ll be able to successfully integrate VST instruments into your Cubase projects and enhance your music production experience.


Let’s dive into the troubleshooting process to ensure that Cubase recognizes and loads your VST instruments seamlessly.


Common Reasons For Vst Instrument Issues

Incorrect Installation

One of the common reasons for Cubase not finding VST instruments is an incorrect installation. This can occur if the VST plugin was not installed properly or if there was an error during the installation process. Incorrect installation can lead to the plugin not being recognized by Cubase, leading to issues in locating the instrument.

Compatibility Issues

Compatibility issues between the VST instrument and Cubase can also result in Cubase being unable to find the VST instrument. This can happen if the VST instrument is not compatible with the version of Cubase being used. Incompatibility can lead to the instrument not being detected by Cubase, causing it to not appear in the plugin list.

File Path Errors

File path errors can also contribute to Cubase not finding VST instruments. If the file path to the VST instrument is not correctly set within Cubase, the software will not be able to locate the instrument when attempting to load it into a project. This can result in the instrument not being found or failing to load properly.

Cubase Can't Find VST Instrument: Troubleshooting Made Easy


Credit: m.youtube.com


Checking Installation And Compatibility

Verifying Installation

To start troubleshooting the issue of Cubase not finding a VST instrument, it’s important to first verify the installation of the VST instrument. Ensure that the instrument has been properly installed in the correct directory within Cubase’s VST folder. This can be done by checking the installation path in the plugin manager. Additionally, ensuring that the VST instrument’s application files are located in the correct directory is crucial to its recognition by Cubase.

Checking System Requirements

Another aspect to consider is whether the VST instrument meets the system requirements of your Cubase software. Refer to the software documentation or the website of the VST instrument’s manufacturer to verify compatibility with your Cubase version. Checking that the system requirements for the VST instrument align with your computer’s specifications is essential to ensure seamless integration and functionality within Cubase.

Reviewing Plugin Compatibility

Compatibility issues can also arise if the VST instrument is not compatible with the version of Cubase being used. It’s essential to review the plugin compatibility with your specific version of Cubase. Furthermore, ensuring that the VST instrument is compatible with your operating system is crucial for a successful integration. Cross-referencing the compatibility of the VST instrument with both Cubase and your operating system can help troubleshoot any conflict that may be preventing it from being found within the software.

Resolving File Path Errors


Having trouble with Cubase not locating your VST instrument? Easily fix file path errors with these simple steps. Solve the issue and get your music production back on track.

Finding The Correct Vst Folder

When Cubase is unable to find a VST instrument, it often indicates a file path error. Don’t worry, though, resolving this issue is simpler than it may seem. To begin, let’s focus on finding the correct VST folder.

Follow these steps to locate the correct VST folder:

  1. Open Cubase and navigate to the “Studio” menu at the top of the screen.
  2. From the drop-down menu, select “VST Instruments”.
  3. A window will appear, displaying the current VST instruments and their file paths.
  4. Take note of the file path of the missing VST instrument.
  5. Next, open the “Devices” menu and select “Plug-in Information”.
  6. In the Plug-in Information window, locate the “VST 2 Plug-in Paths” section.
  7. In this section, you will find the file path that Cubase is currently scanning for VST instruments.

Setting Up Custom Vst Folder

If the missing VST instrument is located in a different folder than the one Cubase is scanning, you may need to set up a custom VST folder. Here’s how:

  1. Create a new folder in a convenient location on your computer, such as the Desktop or a dedicated folder for VST instruments.
  2. Name the folder something recognizable, like “Custom VST Folder”.
  3. Move the missing VST instrument file into the newly created folder.
  4. Now, go back to Cubase and open the “Devices” menu, followed by “Plug-in Information”.
  5. In the Plug-in Information window, click on the “VST 2 Plug-in Paths” tab.
  6. Click the “Add…” button and navigate to the custom VST folder you created.
  7. Select the folder and click “OK” to add it as a custom VST folder.
  8. Ensure the newly added folder is listed in the VST 2 Plug-in Paths section.

Rescanning Vst Plugins

Now that you have found the correct VST folder or set up a custom VST folder, it’s time to rescan the VST plugins in Cubase. Follow these steps:

  1. Close the Plug-in Information window if it’s still open.
  2. From the “Devices” menu, select “Plug-in Manager”.
  3. In the Plug-in Manager window, click on the “VST 2.x Plug-ins” tab.
  4. Click the “Update” button located at the bottom of the window.
  5. Cubase will now rescan the VST plugins, including the newly added or relocated ones.
  6. Once the rescan is complete, check the list of VST instruments in the “VST Instruments” window again.
  7. The missing VST instrument should now appear without any file path errors.

By following these steps, you can resolve file path errors and ensure Cubase finds your VST instrument without any issues. Now you can get back to creating music and enjoying the full potential of Cubase’s powerful features.

Cubase Can't Find VST Instrument: Troubleshooting Made Easy


Credit: forums.steinberg.net


Troubleshooting Within Cubase

When it comes to using Cubase, one common issue that users may encounter is when the program can’t find the VST instrument. This can be frustrating, especially when you’re in the middle of a creative session. However, fear not! There are several troubleshooting steps you can take within Cubase to resolve this issue and get back to making music.

Updating Cubase

If you’re experiencing trouble finding your VST instrument in Cubase, it might be due to an outdated version of the software. Updating Cubase to the latest version can often address compatibility issues and ensure that all features, including VST instruments, are working properly.

Resetting Plugin Information

Another troubleshooting step worth exploring is resetting the plugin information within Cubase. This can be done by following these simple steps:

  1. Open Cubase and go to the ‘Devices’ menu.
  2. Select ‘Plugin Manager’ from the dropdown menu.
  3. In the Plugin Manager window, click on the ‘Settings’ tab.
  4. Click on the ‘Update’ button to rescan your VST plugins.
  5. Once the scanning process is complete, restart Cubase and check if the VST instrument is now detected.

Checking Audio Connections

In some cases, the issue might not be with Cubase or the VST instrument itself but rather with the audio connections. It’s important to ensure that the audio inputs and outputs are correctly set up. Follow these steps to check your audio connections:

  1. Open Cubase and go to the ‘Devices’ menu.
  2. Select ‘Device Setup’ from the dropdown menu.
  3. In the Device Setup window, click on the ‘VST Audio System’ tab.
  4. Make sure that the correct audio device is selected as the ASIO driver.
  5. Check if the input and output connections are properly configured.

By following these troubleshooting steps within Cubase, you can often resolve the issue of the program not finding your VST instrument. Remember to keep your software updated, reset plugin information if needed, and double-check your audio connections. With these steps, you’ll be back to creating music in no time!

Managing Vst Instrument Dependencies

VST instruments can sometimes have trouble locating their required plugins. To manage these dependencies effectively, it’s crucial to understand plugin dependencies, try reinstalling VST instruments, and address missing DLL files.

Understanding Plugin Dependencies

Identifying which plugins are necessary for each VST instrument to function properly.

Knowing the dependencies helps in troubleshooting any issues that may arise.

Reinstalling VST Instruments

Reinstalling the VST instrument can help resolve dependency-related problems.

Resolving Missing DLL Files

Locate and replace missing DLL files to ensure VST instruments function correctly.

Utilizing Cubase Diagnostic Tools

Using Vst Plugin Manager

VST Plugin Manager: A feature in Cubase to manage VST instruments easily.

  • Access the VST Plugin Manager from the Devices menu.
  • Scan for new or updated plugins to ensure they are recognized by Cubase.

Analyzing Vst Performance

VST Performance: Monitor the performance of VST instruments in real-time.

  1. Check the VST Performance window for CPU and disk usage.
  2. Optimize settings and disable unnecessary plugins to improve performance.

Monitoring Vst Blacklist

VST Blacklist: Identify plugins causing issues and crashes in Cubase.

  1. Review the VST Blacklist to see which plugins are disabled.
  2. Update or remove blacklisted plugins to resolve compatibility problems.

Seeking Help From Community And Support

When you encounter the frustrating issue of Cubase not being able to find a VST instrument, don’t worry, you’re not alone. Many users have faced this problem before, and the good news is that there are community forums, customer support, and even VST developers who are ready to assist you. In this section, we will explore the various avenues you can take to seek help and resolve this issue.

Engaging Cubase Forums

One of the best resources for finding assistance is the Cubase forums. These forums are packed with experienced users and experts who have likely encountered and solved the same issue you’re facing. By posting a question or describing your problem on the forum, you open up the opportunity for others to share their knowledge and give valuable solutions. Make sure to provide clear and detailed information about the problem you’re facing so that the community can better understand your situation.

Here are some tips for engaging the Cubase forums effectively:

  1. Use a descriptive subject line that clearly summarizes your issue.
  2. Include relevant information such as your Cubase version and the VST instrument you are having trouble with.
  3. Provide any error messages or symptoms that you have encountered.
  4. Be polite and grateful when receiving responses and make sure to thank those who provide assistance.

Contacting Customer Support

If you prefer a more direct route, reaching out to Cubase customer support can be a viable option. The support team is trained to handle a wide range of issues, including problems with VST instruments. Whether you choose to contact them by email, phone, or through their website, make sure to provide them with all the necessary details regarding the issue you’re experiencing.

Here are some helpful pointers when contacting Cubase customer support:

  • Be prepared to provide information about your system specifications, Cubase version, and the specific VST instrument you are having trouble with.
  • Describe the steps you have already taken to troubleshoot the issue so that the support team can provide relevant guidance.
  • Take note of any error messages or unusual behavior you have noticed.
  • Be patient and understanding, as the support team may take some time to analyze and resolve your issue.

Seeking Assistance From Vst Developers

If the issue persists and you suspect that it may be related to the specific VST instrument, consider reaching out to the developers directly. VST developers are often dedicated to providing support to their users and can offer valuable insights into resolving compatibility or functionality problems.

Here is how you can seek assistance from VST developers:

Step Description
1 Visit the developer’s website and look for a support section or contact page.
2 Provide detailed information about your issue, including your Cubase version, system specifications, and any error messages you have encountered. Be specific and concise.
3 Attach any relevant screenshots or project files that may help the developer understand your problem better.
4 Check for any FAQs or user forums on the developer’s website, as they may already have solutions or workarounds for common issues.

Remember, seeking help from the community and support channels can greatly increase your chances of resolving the Cubase-VST instrument issue you are facing. By engaging the Cubase forums, contacting customer support, and seeking assistance from VST developers, you’ll have a better chance of getting back on track and unleashing the full potential of your Cubase software.

Preventive Measures For Future Vst Issues


To prevent future VST issues with Cubase not locating instruments, ensure all plugin folders are correctly set up and regularly updated. Double-check plugin paths and scan for any conflicting VST plugins or outdated versions. Regularly maintain and organize your VST library to avoid potential conflicts and streamline the workflow.

Encountering VST instrument issues can be frustrating, but with the right preventive measures, you can minimize the chances of running into these problems in the future. By following these simple tips, you can ensure a smooth and hassle-free experience with Cubase.

Regular System Maintenance

Maintaining your system regularly can go a long way in preventing VST instrument issues. Keeping your computer clean from unnecessary files and performing regular antivirus scans can help optimize your system’s performance and reduce the chances of encountering any VST-related problems.

Backup And Restore Vst Instruments

Backing up your VST instruments is crucial to avoid losing your valuable work in case of any unforeseen issues. Regularly create backups of your VST libraries and instruments, ensuring they are saved in a secure location. In the event of a VST instrument issue, you can easily restore your backups and continue working seamlessly.

Keeping Vst Plugins Updated

Regularly updating your VST plugins is essential to ensure compatibility with the latest software updates and improvements. Developers frequently release updates that address compatibility issues and enhance performance. By keeping your VST plugins up to date, you can prevent potential conflicts and bugs that could otherwise disrupt your workflow.

Remember, an ounce of prevention is worth a pound of cure. By incorporating these preventive measures into your workflow, you can minimize the risk of encountering VST instrument issues, allowing you to focus on creating music without any interruptions.

Frequently Asked Questions Of Cubase Can’t Find Vst Instrument


Why Is Cubase Unable To Find The Vst Instrument?


Cubase may not find the VST instrument due to incorrect plugin paths or missing installation. Check plugin settings in Cubase preferences to ensure the correct VST folder path is set.


How Can I Troubleshoot The Issue Of Cubase Not Detecting Vst Instruments?


To troubleshoot, rescan the plugin folders in Cubase, update the plugin database, and restart the software. Ensure the VST instrument is properly installed and compatible with your version of Cubase.


Is It Important To Regularly Update Cubase And Vst Plugins?


Yes, updating Cubase and VST plugins is crucial for compatibility, stability, and new features. Regular updates can also address any issues related to finding VST instruments within Cubase.


Conclusion


If Cubase can’t find VST instruments, try troubleshooting steps. Stay updated, backup files regularly. Reinstall software if needed. Contact customer support if issues persist. Remember, patience and persistence are key in resolving technical challenges. Keep making music seamlessly with Cubase.


Categories
Archive

How to Mix Vocals Step by Step: Master Your Vocal Mixing Skills

To mix vocals step by step, start by cleaning up the audio tracks and adjusting the volume levels. Then, apply EQ to enhance the clarity and remove unwanted frequencies, followed by compression to control the dynamics and add depth.


Next, add reverb and delay to create space and ambiance, and finish by automating the levels for a polished sound. If you want to achieve professional-quality vocal mixing, it’s essential to follow a systematic approach. By carefully addressing each aspect of the vocal track, including cleaning, EQ, compression, effects, and automation, you can enhance the overall sound and make the vocals stand out in the mix.


Whether you’re a beginner or an experienced music producer, mastering the art of vocal mixing can take your music to the next level.

How to Mix Vocals Step by Step: Master Your Vocal Mixing Skills


Credit: blog.native-instruments.com

Setting The Foundation

When it comes to mixing vocals, setting the foundation is crucial for achieving a professional sound. This stage involves preparing the recording environment and understanding the importance of a good recording.

Preparing The Recording Environment

The recording environment plays a vital role in capturing clean and clear vocals. Here are some key factors to consider:

  • Ensure the room is acoustically treated to minimize unwanted reflections.
  • Use a high-quality microphone and position it correctly to capture the best sound.
  • Eliminate background noise and distractions to maintain focus and clarity.

Understanding The Importance Of A Good Recording

A good recording forms the bedrock of a well-mixed vocal track. It sets the tone for the entire mixing process. Consider the following:

  1. Invest in a reliable audio interface to maintain a high-quality signal chain.
  2. Encourage the vocalist to deliver a consistent and emotive performance.
  3. Capture multiple takes to ensure there are options for comping and editing.

Editing And Comping

Editing and comping are crucial steps in mixing vocals to achieve a polished and professional sound. By cleaning up vocal takes and creating a comp of the best parts, you can ensure a seamless and cohesive vocal performance.

Cleaning Up Vocal Takes

  • Trim and remove any unwanted noise or breaths to enhance vocal clarity.
  • Use a noise gate to eliminate background noise between vocal phrases.
  • Apply corrective processes like pitch correction and time alignment if needed.
  • Normalize the vocal levels to ensure consistency across the recording.

Creating A Comp Of The Best Vocal Takes

  1. Listen to each vocal take and select the best sections from each.
  2. Arrange the chosen sections in a new track to create a composite or comp track.
  3. Smooth out transitions between different vocal takes for a natural sound.
  4. Enable crossfades between the sections to avoid any abrupt changes in vocals.

Adjusting Levels And Panning

Adjusting levels and panning is crucial when it comes to mixing vocals step by step. By carefully balancing the volume and placement of each vocal track, you can create a well-balanced and immersive sound experience.

Adjusting Levels and Panning are crucial steps in the process of mixing vocals. Balancing the vocal levels is the first step to achieving a clean and professional sound. Utilizing panning techniques is equally important as it allows for depth and width in the stereo image. Let’s explore each of these steps in detail.

Balancing The Vocal Levels

To start, it’s important to ensure that all the vocal tracks are balanced correctly. This involves adjusting the volume levels of each vocal track so that they blend seamlessly together. Here’s a step-by-step process to achieve the desired vocal balance:

1. Begin by soloing each vocal track individually and listening carefully to its volume level. Adjust the fader of each track until the vocals sound clear and prominent, but not overpowering.

2. Once you’ve set the individual levels, unmute all the vocal tracks and listen to them together. Pay close attention to any inconsistencies or imbalances in volume. Make small adjustments to the faders of each track to achieve a consistent and balanced overall vocal sound.

3. Check the vocals against the other elements in the mix, such as the music and any accompanying instruments. Ensure that the vocals are at an appropriate level and sit well within the mix.

Remember, balance is key when it comes to mixing vocals. Taking the time to properly level each individual track will result in a well-blended and professional vocal sound.

Utilizing Panning For Depth And Width

Panning is a powerful tool that allows you to create depth and width in the stereo image. By placing vocals at specific positions within the stereo field, you can add interest and dimension to your mix. Follow these steps to utilize panning effectively:

1. Start by selecting a lead vocal track or the primary vocal track in your mix. Experiment with panning the vocal slightly off-center to create a more centered and focused sound.

2. For backing vocals or harmonies, try panning them slightly to the left or right. This will create a sense of width and separation, making your vocals sound more immersive.

3. Avoid panning vocals too far to the left or right, as it can result in an unbalanced mix. Keep in mind that it’s essential to maintain a strong center image with the lead vocal always being the focal point.

4. Consider using automation to add movement and variation in the panning of vocals throughout the song. This can help to keep the listener engaged and add a dynamic element to the mix.

By utilizing panning techniques, you can create a spacious and immersive vocal sound. Experiment with different placements and find what works best for your mix. Remember, subtlety is often the key to achieving a natural and balanced stereo image.

In conclusion, adjusting levels and panning are essential steps in the process of mixing vocals. Balancing the vocal levels ensures that they blend well together, while panning adds depth and width to the overall sound. By following these step-by-step techniques, you can achieve a professional and polished vocal mix.


Adding Eq And Compression

Learn how to mix vocals step by step by incorporating EQ and compression techniques. These essential tools allow you to enhance the clarity and balance of the vocals, resulting in a polished and professional sound.

Understanding Eq For Vocals

Before diving into the process of adding EQ and compression to vocals, it’s essential to understand the role of EQ in achieving a clean and polished vocal sound. EQ, short for equalization, is a powerful tool that allows you to shape the frequency response of the vocals, enhancing certain frequencies and reducing others.

By doing so, you can create a balanced and clear vocal mix that stands out in the song while fitting seamlessly with the rest of the instruments. To effectively use EQ for vocals, follow these simple steps:

  1. Identify problematic frequencies: Analyze the vocal recording to determine any frequencies that need adjustment. This can be done by listening for harshness, muddiness, or any other unwanted tonal qualities.
  2. Apply subtractive EQ: Use a parametric EQ plugin to subtractively remove or reduce the problematic frequencies. Start by making narrow cuts or dips in the EQ curve, gradually sweeping across the frequency spectrum until you find the exact frequencies that need adjustment.
  3. Enhance desirable frequencies: Once you’ve eliminated the problematic frequencies, it’s time to enhance the desirable aspects of the vocal. Boosting the presence around 2-4 kHz can add clarity and definition, while gentle boosts in the low end can add warmth and body to the vocals.
  4. Use high-pass filters: To reduce low-frequency rumble or unwanted plosives, apply a high-pass filter in the EQ chain. This will help clean up the vocal mix and make room for other instruments in the lower frequency range.

Applying Compression Techniques

After fine-tuning the vocals using EQ, it’s time to move on to compression. Compression is a dynamic processing technique that ensures a consistent and controlled vocal performance throughout the song. Here are the steps to apply compression effectively:

  1. Set the threshold: Start by setting the threshold level at a point where the compression engages whenever the vocal exceeds that level. This allows you to control the dynamic range and keep the vocal performance balanced.
  2. Adjust the ratio: The compression ratio determines how much the vocal gets compressed once it crosses the threshold. Experiment with different ratios to find the right balance between controlling peaks and maintaining the natural dynamics of the vocals.
  3. Tweak attack and release: The attack time defines how quickly the compressor responds to the vocal transients, while the release time determines how long it takes for the compressor to stop compressing. Adjust these settings to achieve the desired level of transparency and control.
  4. Apply makeup gain: Since compression can reduce the overall level of the vocals, use the makeup gain control to bring the compressed vocals back up to the desired level.

Working With Reverb And Delay

Adding reverb to vocals can create a sense of space and depth.

Adjust the reverb amount to complement the vocal without overpowering it.

Using delay can add texture and a repeating effect to vocals.

Experiment with delay timing and feedback settings for different effects.

Applying Special Effects

When it comes to mixing vocals, applying special effects plays a crucial role in enhancing the overall sound. By utilizing creative effects and enhancing vocal dynamics, you can achieve a professional and polished result. In this section, we will explore the process of applying special effects in detail.

Utilizing Creative Effects

Applying creative effects to vocals can add depth and interest to the sound. Some popular creative effects include:

  • Delay: Delay can create an echo effect, adding a sense of space to the vocals.
  • Reverb: Reverb adds an ambient quality, making the vocals sound more natural and full.
  • Vocal Doubling: Vocal doubling creates a thicker vocal texture by adding a slightly delayed and pitch-shifted version of the original vocals.

Enhancing Vocal Dynamics

Enhancing vocal dynamics is essential for ensuring that the vocals stand out in the mix. Some techniques for enhancing vocal dynamics include:

  1. Compression: Compression helps to even out the volume of the vocals, making them more consistent and present in the mix.
  2. Automation: Automation allows you to manually adjust the volume and effects of the vocals throughout the song, ensuring that they fit seamlessly with the music.
  3. Equalization: Equalization can be used to boost or cut certain frequencies in the vocals, enhancing clarity and tonal balance.

Finalizing The Mix

Finalizing the vocal mix is a crucial step in achieving a professional sound. It involves fine-tuning the vocal balance and using automation to polish the overall sound. By applying these techniques, you can ensure that your vocals stand out and blend seamlessly with the rest of the mix.

Fine-tuning The Vocal Balance

To achieve the perfect vocal balance, adjust the levels of the lead and background vocals. Use EQ to enhance the clarity and presence of the lead vocal, while ensuring the background vocals provide support without overpowering the lead. Experiment with panning to create a sense of space and depth within the vocal mix.

Automation For A Polished Sound

Utilize automation to refine the dynamics of the vocals. Automate the volume levels to maintain a consistent presence throughout the song. Add subtle automation to elements such as reverb and delay sends, ensuring that the vocals evolve naturally without becoming distracting. Employ automation to highlight certain phrases or words for additional impact.

How to Mix Vocals Step by Step: Master Your Vocal Mixing Skills


Credit: www.renegadeproducer.com

Frequently Asked Questions For How To Mix Vocals Step By Step

How Can I Prepare Vocals For Mixing?

To prepare vocals, clean any unwanted noises, use proper gain staging, apply light compression, and ensure good microphone technique.

What Eq Settings Work Best For Vocals?

Start by cutting unwanted frequencies, enhance presence with a slight boost around 2-5kHz, and use a high-pass filter to remove rumble.

Why Is Parallel Compression Useful For Vocals?

Parallel compression helps maintain dynamics while adding punch and presence to vocals without sacrificing the original performance.

When Should I Use Reverb On Vocals?

Use reverb sparingly to create depth and space, but be careful not to drown out the vocals or make them sound too distant.

Conclusion

To sum up, mastering vocal mixing takes practice and patience. By following these steps, your vocals will sound professional and polished. Don’t forget to trust your ears and keep experimenting with different techniques. With time and dedication, you’ll achieve the perfect vocal mix for your music.

Categories
Archive

How to Master the Art of Vocal Mixing on a Beat: Expert Techniques

De-esser plugin used for vocal mixing on a beat

To mix vocals to a mastered beat, start by adjusting the gain levels of the vocal track to fit well with the beat. Use EQ to carve out space for the vocals in the mix and apply compression to control dynamics.


Then, add reverb and delay to create depth and ambiance. Also, Mixing vocals to a mastered beat requires careful attention to levels, EQ, compression, and effects. By following these steps, you can ensure that the vocals sit seamlessly within the beat, enhancing the overall sound of the track.

Related reading: Mixing Rap Vocals and Hip Hop Vocal Mixing. For background, see the Wikipedia article on Audio mixing.


Also, proper vocal mixing is essential for achieving a professional and polished sound that complements the beat and captivates the listener.


Understanding Vocal Mixing


Moreover, discover how to blend vocals seamlessly with a mastered beat. In addition, learn techniques to elevate vocal clarity and presence in your mix. Enhance your music production with expert vocal mixing skills.

In addition, understanding Vocal Mixing Vocal mixing is a crucial aspect of music production that involves blending the vocals with a mastered beat to create a cohesive and professional-sounding track. For example, it requires a deep understanding of various audio processing techniques and a keen ear for detail. Let’s delve into the intricacies of vocal mixing and explore its significance in the realm of music production. “`html

The Importance Of Vocal Mixing

“` Enhancing Clarity: Proper vocal mixing ensures that the vocals are clear and intelligible, allowing the listener to fully grasp the lyrical content and emotion conveyed in the song. Creating Balance: It enables the vocals to harmoniously complement the instrumental arrangement, striking a perfect balance in the overall sound of the track. Furthermore, emphasizing Emotions: Effective vocal mixing can enhance the emotional impact of the song. This allows the singer’s expression and delivery to resonate deeply with the audience. “`html

Common Challenges In Vocal Mixing

“` Frequency Competition: The vocals often compete with the underlying beat in the frequency spectrum, making it challenging to ensure both elements shine without overpowering each other. Dynamic Range Management: Balancing the dynamic range of vocals to maintain consistency throughout the performance while preserving the natural dynamics can be a complex task. Additionally, spatial Integration: Achieving spatial cohesion between the vocals and the beat. This ensures they occupy the same sonic space without clashing, requires meticulous attention and skillful processing techniques. In this world of digital music production, understanding vocal mixing is indispensable for delivering professional and captivating musical experiences.


Setting The Foundation for Vocal Mixing on a Beat

Preparing The Raw Vocal Tracks

Before you dive into mixing vocals with a mastered beat, ensure the raw vocal tracks are clean and ready.

Understanding The Beat

Get familiar with the nuances of the beat to enhance the vocal arrangement and overall cohesion.

Essential Techniques For Vocal Mixing


Learn essential techniques for vocal mixing with a focus on achieving the perfect balance when mixing vocals with a mastered beat. Discover how to use EQ, compression, reverb, and delay to make vocals stand out in the mix while maintaining clarity and presence.


Also, master the art of vocal mixing for professional-sounding tracks.

Balancing Vocal Levels

Moreover, one of the essential techniques for vocal mixing is balancing the vocal levels with the rest of the instruments in the mix. Then, this process ensures that the vocals can be heard clearly without overpowering or getting lost in the music.

In addition, to achieve a balanced mix, start by adjusting the volume fader of the vocal track. Increase the vocal level until it is audible but not dominating the other elements of the song. In short, keep in mind that the vocals should be the focal point of the track. But they still need to blend harmoniously with the instrumentation.

Another way to balance vocal levels is by using panning. Similarly, by placing the vocal track slightly to the left or right in the stereo field, you can create a sense of space and depth in the mix. Furthermore, experiment with different panning positions to find the sweet spot that works best for your song.

Applying Compression And Eq for Vocal Mixing on a Beat

Additionally, Compression and EQ are two powerful tools for shaping the sound of vocals in a mix. Also, Compression helps to control the dynamic range of the vocals, making the softer parts more audible and taming any harsh peaks.

Also, start by inserting a compressor on the vocal track and adjust the settings to achieve a balanced and controlled sound. In addition, set the threshold to catch the louder parts of the vocals and apply gentle compression with a ratio of around 2:1 to 4:1. This will help to even out the vocal performance and make it sit well in the mix.

Next, use EQ to enhance the clarity and tonal balance of the vocals. For example, identify any frequency buildup or harshness in the vocal track and use a narrow Q setting to cut or attenuate those frequencies. On the other hand, you can boost the presence or warmth of the vocals by gently increasing the desired frequencies.

Adding Creative Effects for Vocal Mixing on a Beat

Once you’ve achieved a balanced and polished vocal sound, it’s time to add creative effects to enhance the overall vibe of the track. As a result, effects like reverb, delay, and modulation can bring depth, space, and excitement to the vocals, making them more interesting and engaging for the listeners.

Experiment with different types and settings of reverb to create a sense of space that suits the song. Use delay to add rhythmic or atmospheric effects to certain parts of the vocals. Modulation effects like chorus or flanger can provide a unique character and movement to the vocals.

Remember to use these creative effects tastefully and in moderation. Overusing effects can clutter the mix and distract from the main focus, which is the vocals.

Advanced Tips And Tricks

When it comes to mixing vocals to a mastered beat, there are several advanced tips and tricks that can take your mixes to the next level. By utilizing automation for dynamic mixes and incorporating parallel processing for depth and impact, you can achieve professional-quality results. In this section, we will explore these techniques in detail.

Utilizing Automation For Dynamic Mixes for Vocal Mixing on a Beat

Automation is a powerful tool that allows you to control the volume, panning, and effect parameters of individual vocal tracks over time. By automating these settings, you can create a more dynamic and engaging mix that brings out the emotion and expression in the vocals.

Here are some key points to keep in mind when using automation for dynamic mixes:

  • Automate the volume: Adjusting the volume of the vocal tracks at different parts of the song can help highlight important phrases or create a sense of movement.
  • Pan automation: Experimenting with panning automation can add width and dimension to your vocals. Try gradually panning the vocals from left to right or vice versa to create a stereo effect.
  • Effect automation: Automation can also be used to control the parameters of effects such as reverb, delay, or modulation. By automating these effects, you can create interesting textures and enhance specific parts of the vocals.

Parallel Processing For Depth And Impact

Parallel processing is a technique that involves blending multiple instances of the same vocal track, each processed differently, to create a larger and more impactful sound. This approach can add depth, dimension, and presence to your vocal mix.

Here are some ways you can use parallel processing to enhance your vocals:

  • Parallel compression: Apply heavy compression to a duplicate of the vocal track and blend it with the original. This can help control the dynamic range of the vocals and add intensity and sustain.
  • Parallel saturation: Duplicate the vocal track and apply saturation or distortion effects to the duplicate. By blending this processed track with the original, you can add warmth, richness, and harmonics to the vocals.
  • Parallel reverb/delay: Create a duplicate of the vocal track and apply reverb or delay effects to the duplicate only. By blending this processed track with the dry vocals, you can add depth, ambience, and space to the vocals.

By implementing these advanced tips and tricks, you can elevate your vocal mixes and achieve a professional sound. Experiment with automation and parallel processing to add dynamics, depth, and impact to your vocals, and let your creativity shine.

Working With The Beat

When it comes to mixing vocals to a mastered beat, working with the beat is crucial. This involves integrating vocals seamlessly with the instrumental and ensuring clarity and presence.

Integrating Vocals With The Instrumental

  • Align vocal tracks to the rhythm of the beat.
  • Adjust the volume to ensure vocals complement the instrumental.
  • Use EQ to carve out space for vocals in the mix.

Ensuring Clarity And Presence for Vocal Mixing on a Beat

  1. Apply compression to even out vocal dynamics.
  2. Add reverb and delay to enhance vocals without overpowering the beat.
  3. Experiment with panning to create a balanced stereo image.


Refining The Mix for Vocal Mixing on a Beat

Refining the mix of vocals to a mastered beat is crucial to achieve a professional sound. After balancing the levels and ensuring the vocals sit nicely in the mix, the next step involves fine-tuning the EQ and dynamics, and creating vocal space with reverb and delay.

Fine-tuning Eq And Dynamics

Adjust the EQ to enhance the vocal tonality. Sweep for problematic frequencies and reduce them. Boost the presence frequencies for clarity. Work on the dynamics by using compression to even out the vocal performance.

Creating Vocal Space With Reverb And Delay

Apply reverb to create a sense of space. Adjust the reverb time to match the vibe of the track. Use delay to add depth and dimension to the vocals. Experiment with different delay times to find the sweet spot.

Collaborating With Producers for Vocal Mixing on a Beat

When mixing vocals to a mastered beat, collaborating with producers is key to achieving the best possible sound. The producer’s input and feedback can greatly enhance the final mix, resulting in a polished and professional sound.

Clear and effective communication with the producer is vital throughout the mixing process. It is crucial to understand their vision for the vocals and the desired outcome of the mix. Listen to their ideas, preferences, and suggestions attentively, and ask the right questions to clarify any uncertainties.

Regularly providing updates and seeking feedback from the producer ensures that you are on the same page and they are satisfied with the progress. Feedback from the producer will help you make necessary adjustments and improvements to achieve the desired sound, enhancing the overall quality of the mix.

To create a seamless blend between the vocals and the mastered beat, it is important to optimize the mix specifically for the beat. Consider the following tips:

  1. Balance the levels: Adjust the volume of the vocals and the beat so they complement each other. Ensure that neither one overpowers the other, creating a harmonious balance.
  2. Pan the vocals: Experiment with panning the vocals to create depth and width in the mix. This can add a sense of space and separation between the vocals and the beat.
  3. EQ and Compression: Use equalization to enhance the tonal qualities of the vocals and ensure they sit well within the mix. Compression can be used to control the dynamics and add consistency to the vocals.
  4. Add effects strategically: Consider using reverb, delay, and other effects to enhance the vocals and give them a sense of depth and character. However, be mindful not to overpower the vocals or the beat with excessive effects.
  5. Listen with fresh ears: Take breaks during the mixing process and come back to the mix with fresh ears. This will help you identify any areas that need improvement and make necessary adjustments to optimize the mix for the beat.

Practical Tips

By collaborating effectively with the producer and optimizing the mix specifically for the beat, you can ensure that the vocals blend seamlessly with the mastered beat, resulting in a professional and polished final product. Pay close attention to the producer’s feedback and vision, and use it as a guiding force in shaping the mix to perfection.

Mastering The Final Mix for Vocal Mixing on a Beat

The final step in mixing vocals to a mastered beat is mastering the final mix. This is where you fine-tune the overall sound and ensure that everything is balanced and ready for release. In this section, we will cover two important aspects of mastering the final mix: quality control and final adjustments, as well as exporting and delivering the mastered track.

Quality Control And Final Adjustments

Before exporting the final mix, it is crucial to conduct quality control and make any necessary final adjustments. This involves carefully listening to the entire track and identifying any issues or areas that need improvement. Here are some key steps to follow:

  1. Check for any noticeable audio glitches or artifacts that may have occurred during the mixing process. These could include clicks, pops, or unwanted noise.
  2. Ensure that the vocals are well-balanced with the beat and are sitting comfortably in the mix. Adjust the volume levels if necessary to achieve a cohesive sound.
  3. Listen for any EQ imbalances or frequency clashes that may be affecting the clarity and overall tonality of the vocals. Make subtle adjustments to the EQ settings to enhance the vocal presence.
  4. Pay attention to the dynamics of the vocals and make sure that they are consistent throughout the track. Use compression and automation to even out any volume variations.
  5. Apply any additional effects or processing that may be needed to enhance the vocals. This could include reverb, delay, or subtle saturation to add depth and character.

Exporting And Delivering The Mastered Track for Vocal Mixing on a Beat

Once the final adjustments have been made, it’s time to export and deliver the mastered track. This ensures that the track is ready for distribution and can be played on various platforms. Here’s how to do it:

  1. Ensure that the export settings are appropriate for the intended use. For example, if the track will be uploaded to streaming platforms, choose the recommended file format and bit rate.
  2. Consider creating different versions of the mastered track to accommodate different platforms or purposes. For example, you may want to create a radio edit or an instrumental version.
  3. Organize the exported files in a logical and consistent manner. Use clear file names and include any necessary metadata, such as artist name, track title, and album artwork.
  4. Double-check the exported files for any audio issues or glitches that may have occurred during the export process. Listen to the tracks on different devices to ensure they sound as intended.
  5. Finally, deliver the mastered track to the intended recipients or upload it to the desired platforms. This could involve sending the files to an engineer for further mastering or uploading them directly to streaming services or digital music stores.

By following these steps and paying attention to quality control and final adjustments, you can ensure that your vocals are mixed flawlessly with the mastered beat and that your final track is ready to make an impact.


Frequently Asked Questions On How To Mix Vocals To A Mastered Beat


How Can I Mix Vocals To A Mastered Beat?


To mix vocals to a mastered beat, start by setting the levels for the vocals and the beat. Use EQ to shape the sound and make sure the vocals stand out. Apply compression to control the dynamics, and add reverb and delay for depth and space.


Experiment and adjust until you achieve the desired balance and clarity.


Conclusion


Mastering the art of mixing vocals to a mastered beat is crucial for perfecting your music. By following these steps, you can enhance the overall quality of your tracks. Remember to adjust levels, carve out space, use effects strategically, and always trust your ears.


Elevate your sound today!


Categories
Archive

How to Make Vocals Blend With Music: Mastering the Art

To make vocals blend with music, use EQ to carve out space for vocals, apply reverb and delay for depth, and use compression to control dynamics. Ensuring the vocals are in the same space as the music can help create a cohesive sound.


Creating a seamless blend between vocals and music is crucial for a well-produced track. When vocals and music are properly integrated, it can elevate the overall quality of the song. By implementing specific techniques such as EQ adjustments, reverb and delay application, and compression for dynamic control, you can achieve a balanced and harmonious mix.


In this guide, we’ll delve into the essential strategies for making vocals blend seamlessly with music, offering practical tips to achieve a professional sound. Whether you’re an aspiring producer or a seasoned sound engineer, mastering the art of vocal integration is key to creating a captivating musical experience for your listeners.


Understanding Vocal Range And Music Genre


Understanding vocal range is crucial for blending vocals with different music genres. By knowing the vocal range, singers can adjust their voice to match the style of music, ensuring a harmonious blend. This knowledge helps singers to deliver their best performance while enhancing the overall musical experience.

Understanding Vocal Range and Music Genre The vocal range of a singer and the music genre being performed are critical aspects to consider when aiming to achieve a seamless blend of vocals with music. Matching Voices to Instruments and Consideration of Genre play a crucial role in this process. Matching Voices to Instruments When incorporating vocals into a piece of music, it’s essential to consider the range of the singer’s voice. For instance, a soprano voice might not harmonize as well with the deep resonance of a bass guitar compared to a tenor or alto voice. Similarly, for a song with a gentle, soothing melody, a voice with a lower tone may be more suitable, ensuring a harmonious fusion between the vocals and the instruments. Harnessing the power of matching voices to instruments is about creating cohesion throughout the composition. By aligning the vocal range with the instruments used in the arrangement, a smoother blend can be realized, captivating the audience with a seamlessly integrated performance. Consideration of Genre Another significant consideration in achieving the perfect blend between vocals and music is the genre of the music itself. Each genre comes with its own set of vocal characteristics that best complements the accompanying instrumentation. For instance, in a rock or metal genre, a powerful, bold vocal range with intense dynamics may be more fitting, while in a jazz or blues genre, the emphasis might be on emotional depth and tonal variety. Furthermore, understanding the essence of the music genre enables the selection of instruments and vocal styles that are inherently compatible, resulting in a harmonious and captivating musical experience for the audience. In conclusion, understanding vocal range and music genre is pivotal in creating a seamless blend between vocals and music. By matching voices to instruments and taking the genre into consideration, a harmonious integration can be achieved, elevating the overall quality of the musical composition.

How to Make Vocals Blend With Music: Mastering the Art


Credit: www.mellostudio.com


Techniques For Seamless Integration

Layering And Eq Adjustments

Layering vocals involves recording multiple takes of the same vocal part and blending them together to create a fuller, richer sound. When layering vocals, it’s important to consider the EQ adjustments to ensure each layer complements the others. By carving out space for each layer in the EQ spectrum, you can prevent muddiness and create a cohesive blend of vocals.

Use Of Effects Like Reverb And Delay

The use of effects such as reverb and delay can enhance the seamless integration of vocals with the music. Reverb can create a sense of space and depth, while delay can add a sense of movement and dimension to the vocals. By applying these effects judiciously, you can create a cohesive sonic landscape where the vocals are integrated seamlessly with the music.

Importance Of Mixing And Mastering

The Importance of Mixing and Mastering

Mixing and mastering play a crucial role in ensuring vocals blend seamlessly with music. To achieve a professional and polished sound, it is vital to focus on the meticulous process of mixing and mastering.

Balancing Levels And Panorama

Balancing levels of vocals and instruments is essential for a harmonious sound. Utilize the panorama to place different elements within the stereo field effectively.

Enhancing Clarity And Depth

Enhance the clarity and depth of vocals by using EQ and reverb. This creates a sense of space and brings out the nuances in the vocals.


Collaboration And Communication


To ensure seamless blending of vocals with music, effective collaboration and communication among the vocalist, producer, and sound engineer are crucial. Clear communication on desired vocal style and sound, along with regular feedback and adjustments, leads to a cohesive and harmonious final product.

Collaboration and communication play a crucial role in ensuring that vocals blend seamlessly with music. When working on a music project, it is essential to establish effective communication channels and foster a collaborative environment that brings together vocalists and musicians. This article explores two important aspects of collaboration and communication: working with vocalists and musicians and creating a feedback loop for continuous improvement.

Working With Vocalists And Musicians

Collaborating with vocalists and musicians requires clear communication and mutual understanding. Here are a few tips to make the process smoother:

  • Establish a shared vision: It’s important to align on the creative direction and goals of the project right from the start. This ensures that everyone is on the same page and working towards the same sonic vision.
  • Encourage open dialogue: Create an environment where vocalists and musicians feel comfortable expressing their ideas, concerns, and preferences. Encouraging open dialogue fosters creativity and helps to refine the musical arrangement.
  • Respect individual expertise: Each member of the team brings unique skills and talents to the table. Acknowledge and appreciate the expertise of vocalists and musicians, as their contributions will enhance the overall quality of the final product.
  • Collaborative decision-making: Involve vocalists and musicians in the decision-making process when it comes to melodies, harmonies, and arrangement choices. This ensures that everyone feels valued and has a sense of ownership over the project.
  • Regular check-ins: Schedule regular check-ins to discuss progress, address any challenges, and refine the vocal and musical elements. Consistent communication helps to foster a harmonious working relationship and avoids any misunderstandings along the way.

Feedback Loop For Improvement

Establishing a feedback loop enables continuous improvement in vocal and musical blending. Implementing the following strategies can help facilitate an effective feedback loop:

  1. Constructive feedback: Provide specific, constructive feedback to vocalists and musicians regarding their performance and how it fits within the overall musical composition. This helps them understand the desired outcome and improve their delivery.
  2. Encourage self-reflection: Encourage vocalists and musicians to reflect on their own performances and identify areas for improvement. By engaging in self-reflection, they can take ownership of their progress and actively work towards enhancing their vocals or musical skills.
  3. Objective evaluation: Create an objective evaluation process using clear criteria and benchmarks to assess the blending of vocals with music. This allows for consistent assessment and feedback that facilitates growth.
  4. Timely feedback: Offer feedback promptly after a performance or recording session. Timely feedback ensures that adjustments can be made quickly, minimizing the need for extensive rework in the later stages.
  5. Positive reinforcement: Recognize and highlight successful instances of vocal and musical blending. Celebrate achievements and provide positive reinforcement to motivate and inspire further improvement.

By embracing collaboration and communication, and establishing a feedback loop, you can enhance the cohesion between vocals and music, resulting in a harmonious and captivating sound that resonates with your audience.

Creative Approaches To Vocal-music Blending

When it comes to creating a well-balanced and cohesive sound in your music, blending vocals with the accompanying music is key. By carefully integrating the vocals with the instrumental elements, you can enhance the overall impact of your song. In this article, we will explore some creative techniques that can help you achieve a seamless blend between vocals and music.

Experimental Techniques

If you’re looking to add an unconventional and unique touch to your vocal-music blending, experimenting with different techniques can yield exciting results. Some experimental approaches you can try include:

  1. Reverse Reverb: This technique involves applying a reverb effect to the vocals, but in reverse. It creates a dreamy and ethereal sound, adding depth and atmosphere to your vocals.
  2. Vocal Chops: Shifting the pitch and time of vocal snippets can lead to interesting rhythmic patterns and textures. This technique is commonly used in genres like EDM and hip-hop.
  3. Vocal Sampling: Sampling fragments of vocal recordings and incorporating them throughout the song can create a cohesive and dynamic vocal-music blend.

Incorporating Harmonies

Adding harmonies to your vocals is a powerful way to enhance the richness and depth of your vocal-music blend. Here are some approaches to consider:

  • Layering Vocals: Record multiple vocal tracks performing the same melody, and experiment with different harmonies. This adds complexity and depth to the vocal sound.
  • Counter-Melodies: Instead of traditional harmonies, try introducing counter-melodies that complement the main vocal line. This can create a unique and captivating blend.
  • Call and Response: Incorporate call and response sections where the vocals interact with the music, creating a dynamic and engaging blend.

By incorporating harmonies and experimenting with unconventional techniques, you can take your vocal-music blending to new heights. Remember, the key is to let your creativity flow and find what works best for your unique sound. Dive into your creative process and explore the endless possibilities of vocal-music blending!


Challenges And Solutions

The challenges of blending vocals with music can be overcome through specific techniques and adjustments. Let’s delve into the common obstacles faced and the solutions that can help achieve a harmonious balance between vocals and music.

Dealing With Conflicting Frequencies

Conflicting frequencies between vocals and music can result in a muddy sound. To address this issue, eq utilise EQ to carve out space for vocals in the mix. Cut back Reduce frequencies in instruments that clash with the vocals. Use a spectrum analyzer to identify overlapping areas.

Adjusting For Live Performances

Live performances require different adjustments than studio recordings. Ensure that the soundcheck soundcheck is thorough. Adjust Adjust levels in real-time to account for the venue’s acoustics. Use Utilize vocal effects sparingly to prevent overpowering the live mix.

Frequently Asked Questions On How To Make Vocals Blend With Music


How Do You Blend Vocals With Music?


To blend vocals with music, start by using EQ to cut any frequencies that clash with the instruments. Apply compression to even out the vocal volume. Use reverb and delay to create depth and space for the vocals. Experiment with panning and stereo imaging to place the vocals in the mix.


Finally, adjust the levels to ensure the vocals sit well with the music.


What Is The Role Of Eq In Blending Vocals With Music?


EQ in blending vocals with music helps remove muddiness and frequency clashes. By cutting unwanted frequencies and boosting desired ones, EQ allows the vocals to occupy a clear space in the mix and blend harmoniously with the music.


How Does Compression Improve Vocal Blending?


Compression in vocal blending evens out the vocal volume, making it more consistent throughout the performance. By reducing the dynamic range, compression helps the vocals sit well in the mix and prevents them from getting lost or overpowering the music.


Conclusion


Achieving a seamless blend of vocals and music is essential for a captivating sound. By following these techniques, you can enhance the harmony and cohesiveness of your tracks effortlessly. Experiment with EQ, compression, and reverb to find the perfect balance that elevates your music production to the next level.


Categories
Archive

Best Way to Backup FL Studio Projects: Foolproof Strategies

The best way to back up FL Studio projects on Reddit is to use cloud storage options like Dropbox or Google Drive. These platforms offer secure and convenient storage for your files.


Also, for FL Studio users looking to ensure their projects are safeguarded and easily accessible, utilizing cloud storage solutions is a reliable and efficient method. Also, by uploading your projects to these platforms, you protect your work from data loss and hardware failures.

Related reading: Where Does Fl Studio Save Projects and FL Studio 21 – The Best Music Production Software?. For background, see the Wikipedia article on Backup.


Additionally, cloud storage allows for seamless collaboration among team members and convenient access from any device with an internet connection.


Manual Backup Methods

Moreover, manual backups protect your FL Studio projects from losing hours of hard work. In addition, these methods provide an extra layer of protection for your projects. This allows you to recover them if something goes wrong with your main files. In this post, we’ll outline the best manual backup methods for FL Studio projects. This ensures you can maintain your work’s integrity and creativity.

How To Save Projects Locally

In addition, saving your FL Studio projects locally on your computer ensures that you have a backup readily available in case of any unforeseen issues. For example, to do this, simply navigate to the File menu in FL Studio and select Save As . Choose a location on your computer, preferably an external hard drive or a dedicated folder, and click Save. It’s essential to do this regularly to keep your backup up to date with your latest changes.

Exporting Projects To External Drive

Another effective manual backup method is to export your FL Studio projects to an external drive. As a result, this provides an additional layer of security by keeping a copy of your projects separate from your computer’s local storage. To export your projects, select File and then Export. Furthermore, choose the location of your external drive and click Save . Consider creating a specific folder on the external drive for your FL Studio backups to keep them organized and easy to access.

Automated Backup Solutions

Additionally, Backing up your FL Studio projects is crucial to ensure that your hard work and creativity are protected from unforeseen events like computer crashes or accidental deletions. While manual backups can be time-consuming and easily forgotten, automated backup solutions offer a convenient and reliable way to safeguard your projects. However, in this blog post, we will explore the best automated backup options for FL Studio projects, starting with setting up scheduled backups.

Setting Up Scheduled Backups

Also, scheduling automatic backups can save you time and provide peace of mind, knowing that your FL Studio projects are regularly backed up. Then, with FL Studio’s built-in backup feature, you can easily configure scheduled backups.

Moreover, to set up scheduled backups, follow these simple steps:

  1. In addition, open FL Studio and navigate to the “Options” menu.
  2. Furthermore, select “File Settings” and click on the “Backup” tab.
  3. Additionally, enable the “Auto-Backup” option and specify the backup interval that suits your needs.
  4. Also, choose the location where you want to keep your backups.
  5. Click on “OK” to save the settings.

Once you have set up scheduled backups, FL Studio will automatically create backup files at the specified interval. In short, this ensures that your projects are always protected.

Cloud Storage Options for Backup FL Studio Projects

Cloud storage services provide an excellent solution for backing up your FL Studio projects, offering secure and off-site storage that can be accessed from anywhere. Similarly, here are some popular cloud storage options you can consider:

Cloud Storage Provider Storage Capacity Free Plan Available
Google Drive 15GB Yes
Dropbox 2GB Yes
OneDrive 5GB (Free) Yes

These cloud storage services offer seamless integration with FL Studio, allowing you to directly save your projects to the cloud. Your projects then sync and back up automatically, which adds another layer of protection.

Automated backup solutions, such as scheduled backups and utilizing cloud storage options, are essential for ensuring the safety and accessibility of your FL Studio projects. Also, by implementing these backup strategies, you can focus on your music production knowing that your hard work is secure.

Version Control For Fl Studio

Version control is an essential aspect of managing your FL Studio projects effectively. In addition, by implementing a version control system, you can ensure the integrity and safety of your project files. This enables you to efficiently manage changes and collaborate with others. One popular version control system for FL Studio is Git, a powerful and flexible tool that offers numerous benefits.

Benefits Of Version Control for Backup FL Studio Projects

Implementing version control for your FL Studio projects brings several advantages:

  • Keeps track of changes: Version control allows you to track and log every modification made to your project files. This makes it easy to identify who made the changes and when they were made.
  • Enables collaboration: With version control, multiple users can work on the same project simultaneously, seamlessly merging their changes without any conflicts.
  • Revert to previous versions: Made a mistake? Version control lets you roll back changes and restore an earlier state.
  • Backup and restore: Version control serves as a reliable backup mechanism. This ensures that your project files are safely stored and easily recoverable in case of data loss.
  • Branching and merging: Version control systems like Git allow you to create branches for experimenting or working on new features without affecting the main project. Once ready, you can merge these branches back into the main project.

Using Git With Fl Studio

Git is a popular version control system that is well-suited for managing FL Studio projects. For example, to use Git with FL Studio, you need to follow these steps:

  1. Install Git: Start by installing Git on your computer from the official website (https://git-scm.com/). Git is compatible with both Windows and macOS.
  2. Create a Git repository: Once Git is installed, navigate to your FL Studio project folder in the command line or a Git GUI tool and run the command “git init” to create a new Git repository.
  3. Add files to the repository: Use the command “git add ” to add your FL Studio project files to the repository. You can also use “git add .” to add all files in the current directory.
  4. Commit changes: After adding files, commit your changes using the command “git commit -m ””. This creates a new commit and saves the current state of your project.
  5. Collaborate and manage versions: Git lets you collaborate, create branches and merge changes in your FL Studio projects.

Collaborative Backup Strategies

Collaborative backup strategies are crucial for FL Studio users who want to ensure the safety and accessibility of their projects. As a result, working together on music production often requires a seamless way to share and back up projects, keeping them secure and organized. Utilizing online collaboration tools and establishing secure sharing methods is essential for safeguarding FL Studio projects and enhancing teamwork.

Online Collaboration Tools for Backup FL Studio Projects

When it comes to collaborating on FL Studio projects, using online collaboration tools can greatly streamline the process. However, utilizing platforms such as Splice and Google Drive allows multiple users to access, edit, and backup projects from anywhere with an internet connection. These tools provide essential version control and real-time syncing, ensuring that all collaborators are working with the latest project data.

Sharing Projects Securely

Sharing FL Studio projects securely is paramount to protecting intellectual property and preserving project integrity. When sharing project files, it’s important to utilize secure, encrypted file sharing services such as MEGA and WeTransfer. Before sending files, consider compressing them with RAR or ZIP formats and securing them with a password to add an extra layer of protection.

Disaster Recovery Planning for Backup FL Studio Projects


Disaster Recovery Planning is essential for backing up FL Studio projects on Reddit, ensuring the safe storage and accessibility of your work. Then, proper planning guarantees the protection and recovery of your valuable music projects in case of any unforeseen events.

Preparing For Data Loss for Backup FL Studio Projects

Create a backup plan to protect your FL Studio projects from unforeseen incidents.

Prepare for data loss by regularly backing up your projects to ensure continuity.

Creating Backup Redundancy

Ensure backup redundancy by saving copies of your projects in multiple locations.

Use external hard drives, cloud storage, or USB drives for added security and peace of mind.

Incorporate disaster recovery planning to safeguard your FL Studio projects.

Best Practices For Backup

Best Practices for Backup should be a top priority when handling FL Studio projects. In short, every FL Studio user should safeguard their projects against data loss.

Regularly Testing Backups

Test your backups regularly so you know you can restore them without issues. Perform test restores on a separate system to verify the integrity of the backup files.

Implementing A Backup Policy

Implementing a backup policy includes defining a schedule for backups based on the frequency of project updates. Establish clear guidelines for storing backups securely.

Frequently Asked Questions For Best Way To Backup Fl Studio Projects Reddit


How Can I Back Up Fl Studio Projects Effectively?


To your sessions, simply save them to a dedicated folder on an external hard drive regularly. Maintain a backup schedule to prevent data loss. You can also use cloud storage services for additional redundancy.


What Are The Benefits Of Backing Up Fl Studio Projects?


Backing up projects ensures you never lose your hard work due to file corruption or hardware failure. It provides peace of mind and allows easy access to previous project versions for future reference or collaborative work.


Is It Necessary To Backup Fl Studio Projects?


Yes, it is crucial to project files regularly to protect your work from unexpected data loss. By establishing a backup routine, you safeguard your creative endeavors and minimize the risk of losing valuable music projects.


Can I Automate The Backup Process For Fl Studio Projects?


Yes, you can automate the backup process by utilizing backup software or setting up scheduled tasks within Fl Studio itself. Automation streamlines the backup procedure, so your projects stay secure without manual work.


Conclusion


Backing up your FL Studio projects is crucial for safeguarding your work. By following the step-by-step guide from professionals and utilizing cloud storage solutions, you can ensure the security and accessibility of your projects. Embracing this approach will offer peace of mind and allow you to focus on your creativity without worrying about data loss.


Categories
Archive

How to Perfectly Mix Vocals to a Beat: Pro Tips for Stellar Sound

To mix vocals to a beat, start by adjusting the volume levels and panning to fit the music. Then, apply EQ and compression to enhance the vocal presence and dynamics.


Mixing vocals to a beat is a crucial step in producing music that sounds professional and polished. When done properly, it ensures that the vocals blend seamlessly with the instrumental track, creating a cohesive and harmonious sound. By following a few essential steps, you can achieve a balanced and impactful vocal mix that complements the beat.


In this guide, we will explore the techniques and strategies for effectively mixing vocals to a beat, helping you elevate the overall quality of your music productions. Whether you are a novice or an experienced producer, mastering the art of vocal mixing can greatly enhance the impact and appeal of your music.


Setting The Stage

Vocals can truly make or break a track, and when mixed properly, they can seamlessly blend with the beat to create a polished and professional sound. Setting the stage for a successful vocal mix involves careful preparation and attention to detail. In this guide, we’ll cover the essential steps to effectively mix vocals to a beat, starting with the crucial initial stages.

Preparing Your Daw

Before diving into the vocal mixing process, it’s essential to set up your Digital Audio Workstation (DAW) for optimal performance. Ensure that your project is organized and all necessary plugins and tools are readily accessible. This preparatory step will streamline the mixing process and contribute to a more efficient workflow.

Importance Of Good Recording

Quality starts at the source when it comes to vocal mixing. A well-recorded vocal track forms the foundation for a successful mix. Ensure that the vocalist is in a suitable environment, with minimal background noise and proper microphone technique. Additionally, encourage multiple takes to capture the best possible performance, as this allows for flexibility during the mixing stage.


Understanding Vocals And Beat

Analyzing Vocal Characteristics

When it comes to mixing vocals with a beat, it is essential to understand the unique characteristics of the vocals. Analyzing vocal characteristics involves paying close attention to the tonal quality, intensity, and dynamic range of the vocals. By identifying the unique nuances of the vocals, such as breathiness, raspiness, or smoothness, you can tailor the mixing process to enhance and showcase the vocal performance effectively.

Matching Vocals To The Beat

Matching vocals to the beat involves more than simply aligning the vocal track with the rhythm of the music. It’s about creating a harmonious fusion of vocals and beat that complements and elevates the overall listening experience. When matching vocals to the beat, it’s crucial to consider the tempo, groove, and emotional resonance of the vocals with the musical arrangement. By adjusting the timing and phrasing of the vocals, you can achieve seamless integration with the beat, ensuring that the vocals and beat work together cohesively to convey the intended mood and message of the song.

Tools Of The Trade

Essential Plugins for Vocal Mixing are crucial for achieving professional sound quality. These plugins offer various features to enhance vocals.

Equalizers

Equalizers help adjust the frequency balance of vocals for clarity. Parametric and graphic EQs are commonly used in vocal mixing.

Compressors

Compressors are essential for controlling dynamics and evening out vocal volume. Settings like threshold, ratio, attack, and release are important.

Advanced Techniques And Effects

Reverb And Delay

Reverb adds depth, while delay creates a sense of space in vocals. Adjusting these effects can enhance the vocal sound significantly.

Pitch Correction

Pitch correction plugins can fix pitch imperfections in vocals subtly or create vocal effects like robotic vocals.

Special Fx

Using special effects like distortion, modulation, and harmonizers can add creativity and uniqueness to vocal tracks.

How to Perfectly Mix Vocals to a Beat: Pro Tips for Stellar Sound


Credit: www.amazon.com

Balancing Act

In the world of music production, mixing vocals to a beat is a delicate balancing act. This crucial step ensures that both the vocals and the beat blend harmoniously, allowing the lyrics to shine while maintaining the energy and impact of the instrumental. To achieve this balance, you need to pay attention to two key areas: setting levels and panning, and achieving clarity with EQ. Let’s dive deeper into each of these techniques to help you master the art of mixing vocals to a beat.

Setting Levels And Panning

When it comes to setting levels for vocals, aim to achieve a sweet spot where the vocals are prominent enough to be heard clearly but not overpowering the beat. Start by adjusting the volume fader for the vocal track, gradually increasing or decreasing it until it sits comfortably in the mix. Remember, the vocals should be the focal point, but they should still blend seamlessly with the instrumental.

Panning is another powerful tool for balancing your mix. By placing certain elements, such as ad-libs or background vocals, slightly to the left or right of the stereo field, you can add depth and spaciousness to your mix. Experiment with panning these elements in a way that complements the main vocal track and the beat without overshadowing them.

Achieving Clarity With Eq

EQ, short for equalization, plays a crucial role in achieving clarity in your mix. Start by using a high-pass filter to remove any unnecessary low-end rumble or unwanted frequencies that may clash with the beat. This will ensure that the vocals sit cleanly on top of the instrumental without any muddiness.

Next, perform frequency carving using a parametric EQ. Identify any frequency areas that need adjustment, such as boosting the presence or cutting harshness in the vocals. Pay close attention to the context of the beat and the style of the vocals, making subtle adjustments to enhance the overall balance and clarity without altering the natural character of the sound.

By utilizing these techniques – setting levels and panning, and achieving clarity with EQ – you can achieve a well-balanced mix that showcases the vocals while complementing the beat. Remember to trust your ears and experiment with different settings until you find the perfect blend that brings your vocals to life and elevates your overall production.

Adding Depth And Dimension

When it comes to mixing vocals to a beat, adding depth and dimension is crucial. It helps create a sense of space and impact, elevating the overall sound quality. In this section, we will explore two powerful techniques that can take your vocal mixes to the next level: creating space with reverb and utilizing delay for impact.

Creating Space With Reverb

One of the most effective ways to add depth to vocals is through the use of reverb. Reverb adds a sense of space by simulating the reflections of sound in a room. By applying reverb to your vocal tracks, you can create a natural ambience that gives the impression of a larger space.

To create space with reverb, follow these steps:

  1. Insert a reverb plugin on your vocal track.
  2. Adjust the reverb settings to achieve the desired level of ambience. Experiment with parameters such as decay time, predelay, and mix to find the right balance.
  3. Consider the style of the song and the emotion you want to convey. For example, a longer decay time might work well for a ballad, while a shorter decay time could be suitable for a more upbeat track.
  4. Be mindful not to overdo it with reverb. Too much reverb can make the vocals sound distant and muddy. Use it subtly to enhance the vocals without overwhelming them.

Utilizing Delay For Impact

Delay is another powerful tool for adding dimension to your vocal mixes. It creates a sense of repetition, which can bring energy and impact to certain parts of the song. By carefully applying delay, you can make vocals stand out and grab the listener’s attention.

Here’s how you can utilize delay for impact:

  1. Insert a delay plugin on your vocal track.
  2. Adjust the delay settings to achieve the desired effect. Experiment with parameters such as delay time, feedback, and mix to find the right balance.
  3. Consider the timing and rhythm of the song. Syncing the delay to the beat can create a cohesive and rhythmic feel.
  4. Use delay strategically on specific phrases or words to emphasize them. This can add an extra layer of impact and catch the listener’s ear.

Remember, moderation is key when using delay. Too much delay can clutter the mix and distract from the vocals. Use it thoughtfully to enhance specific moments and make them shine.


Polishing The Mix

Fine-tuning Dynamics With Compression

Increase clarity by compressing vocals to even out loud and soft parts.

Adjust settings like threshold and ratio to control compression levels.

  • Check vocal levels before and after applying compression.
  • Experiment with attack and release times for desired effects.

Automation For A Professional Finish

Automate volume, EQ, and effects to enhance vocal presence in the mix.

Use automation to fix volume inconsistencies and add depth to vocals.

  1. Create automation points for precise control over vocal nuances.
  2. Smooth transitions between different vocal sections with automation.

Listening And Tweaking

When it comes to mixing vocals to a beat, the process of listening and tweaking is crucial. This is where the magic happens, as subtle adjustments can make a world of difference in achieving the perfect blend between the vocals and the instrumental track.

Tips For Critical Listening

Before getting into the nitty-gritty of tweaking, it’s essential to engage in critical listening. This involves actively focusing on the details of the vocal track and how it interacts with the beat. Here are some tips to enhance your critical listening skills:

  • Use high-quality studio monitors or headphones to accurately hear the nuances of the vocals and the beat.
  • Pay attention to the dynamics, tonal balance, and spatial placement of the vocals in relation to the beat.
  • Take frequent breaks to prevent ear fatigue and maintain a fresh perspective while listening.

Iterative Approach To Refinement

After gaining insights from critical listening, it’s time to adopt an iterative approach to refinement. This involves making incremental adjustments to the vocal mix and continuously evaluating the results. Here’s how to effectively refine the vocal mix:

  1. Start with basic level and panning adjustments to ensure the vocals sit well within the mix.
  2. Experiment with EQ settings to carve out space for the vocals and address any frequency clashes with the beat.
  3. Apply subtle compression and effects to enhance the vocal presence without overpowering the beat.
  4. Regularly compare the vocal mix with the beat, making fine-tuned tweaks to achieve seamless integration.

Frequently Asked Questions For How To Mix Vocals To A Beat

How Do You Mix Vocals To A Beat?

To mix vocals to a beat, start by EQing the vocals to remove unwanted frequencies. Then, apply compression to control dynamic range. Use reverb and delay to create space and depth. Finally, use automation to make the vocals sit well with the beat throughout the song.

What Is The Importance Of Eq In Vocal Mixing?

EQ is crucial in vocal mixing as it helps to remove unwanted frequencies, enhance desired frequencies, and create a balanced sound. By cutting out muddiness and boosting clarity, EQ allows the vocals to shine and fit better in the mix.

Why Is Compression Essential In Vocal Mixing?

Compression is vital in vocal mixing as it evens out the dynamic range of the vocals, making them more consistent and easier to control. It also helps to prevent peaking and ensures the vocals stand out in the mix without overpowering other elements.

Conclusion

To perfectly blend vocals with a beat, attention to detail is key. Remember to adjust levels, utilize EQ effectively, and experiment with reverb. By following these techniques, you can achieve a professional sound that enhances your music production. Practice and patience will lead to mastering vocal mixing skills.