Categories
Archive

Vocal Reversed Reverb Effect Ableton Live Tutorial

Learn how to create a vocal reversed reverb effect in Ableton Live with this tutorial. We will go through the step-by-step process of creating a unique vocal effect using Ableton Live.


Also, creating the reverse effect effect on a vocal track can add a unique and interesting touch to your music production. Also, this effect can be used to create a buildup or fill in a transition. You can also use this technique to add variation to an otherwise plain vocal track.

Related reading: Reverb Types and Why Use Reverb. For background, see the Wikipedia article on Reverberation.


Moreover, in this tutorial, we will explore how to create the effect using Ableton Live. The article will cover how to record a vocal track, reverse the audio, add reverb, and finally, reverse the audio once more to create the desired effect. In addition, read on to learn how to create a vocal reversed reverb effect in Ableton Live.


Getting Started for Reversed Reverb

In addition, if you are looking to add an interesting effect to your vocals, reversed reverb can be a great option. For example, this effect creates a unique sound by mixing the tail end of a reverb with the original vocal track played in reverse. In this Ableton Live tutorial, we will show you how to create this effect step-by-step.

Setting Up Your Project In Ableton Live

Before we start, make sure you have a project open with a vocal track in it. To create a new project, go to “File” and select “New Live Set”. Furthermore, if you have a project open, make sure that the vocal track is highlighted and selected.

Selecting The Vocal Track To Apply The Effect

After selecting the vocal track, create a new return track by clicking “Create” and selecting “Return Track”. Rename the new return track “Reverb” and drag Ableton’s “Reverb” audio effect onto the new track.

Also, once the reverb effect is on the return track, adjust the settings to your liking. Then, for reversed reverb, you will want to have a longer decay time and a moderate to high level of wetness. These settings will create a longer tail end on the reverb.

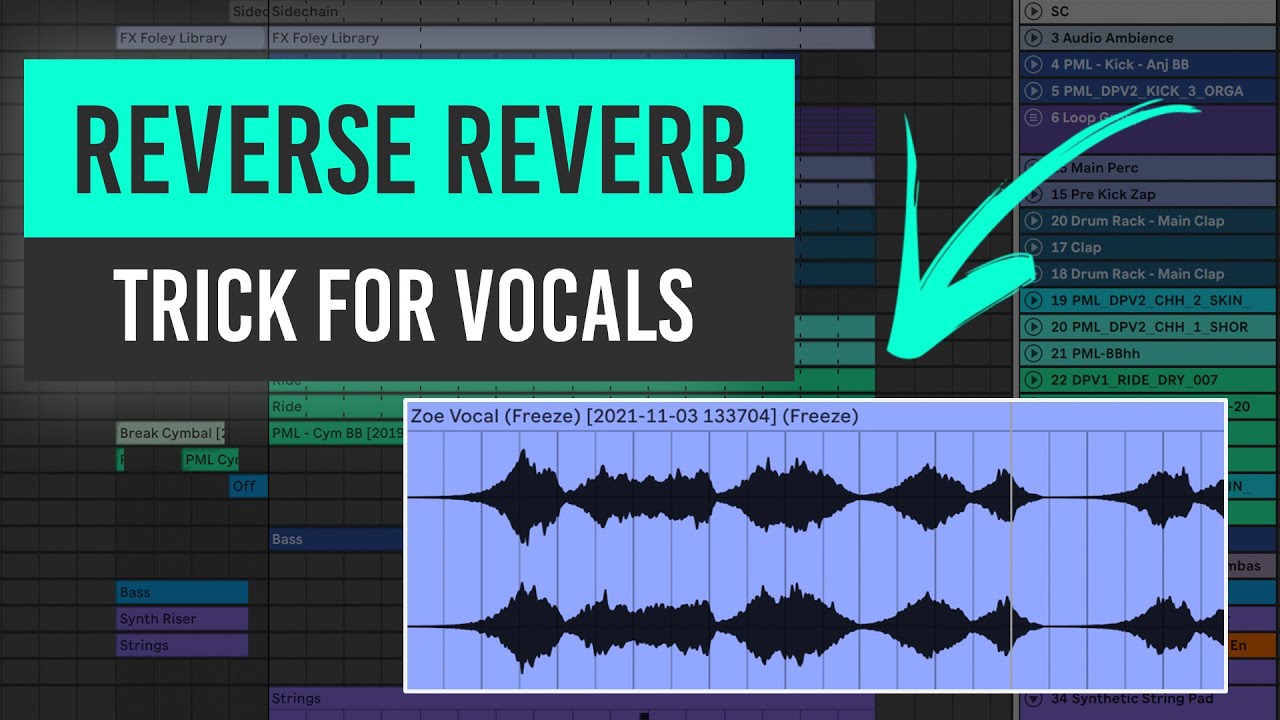
Next, right-click the vocal track and select “Freeze Track”. Once the track is frozen, right-click again and select “Flatten”. This creates a new audio clip that incorporates any effects you have applied to the track.

Now that the vocal track has been flattened, right-click the new clip and select “Reverse”.

Finally, click and drag your reversed vocal clip onto the reverb return track to create the reversed reverb effect.

You can further adjust the sound by adjusting the levels of the vocal track and the reverb track until you achieve the desired effect.

Conclusion

Furthermore, Reverse reverb is an interesting vocal effect that can add some extra character to your tracks. By following these simple steps, you can easily create this effect in Ableton Live.

Creating The Reversed Reverb Effect


Additionally, learn how to create the reversed reverb effect for your vocal tracks with this easy-to-follow Ableton Live tutorial. Similarly, perfect for creating a dreamy, ethereal sound, this effect is a must-try for music producers and sound engineers alike.

Also, creating the Reversed Reverb Effect: In the world of music production, the reversed reverb effect is a popular way to create a unique and mesmerizing sound. Also, with Ableton Live, you can easily create this effect on your vocal tracks and take your music to the next level. In this tutorial, we’ll walk you through the step-by-step process of creating the reversed reverb effect on your vocal tracks using Ableton Live. Reversing the chosen vocal track: To start, you need to choose the vocal track that you want to apply the reversed reverb effect to.

Once you have selected the track, simply right-click on it, and select “reverse” from the drop-down menu. In addition, this will reverse the audio of your vocal track and create a unique starting point for the reversed reverb effect. Applying reverb to the reversed track: Now that your vocal track is reversed, you need to apply reverb to it. To do this, you need to add a reverb effect to the reversed track. You can do this by dragging and dropping the reverb effect onto the track or by selecting the Reverb effect from the audio effects menu.

Practical Tips

Once the reverb is applied, adjust the parameters to achieve your desired sound. For example, here are a few tips for applying reverb to the reversed track: – Use high-quality reverb effects to get a clean and crisp sound – Carefully adjust parameters such as decay time and pre-delay to achieve the perfect balance – Experiment with different types of reverb effects such as plate, hall, or room to achieve the desired sound. Conclusion: Creating the reversed reverb effect in Ableton Live is a quick and easy process.

By reversing your vocal track and applying reverb, you can create a unique sound that will make your music stand out. As a result, with a little creativity and experimentation, you can take your music to the next level and create some truly mesmerizing tracks.

Adjusting The Effect


To achieve the desired vocal reversed reverb effect in Ableton Live, adjusting the effect is crucial. However, this tutorial will guide you step by step on how to fine-tune the effect to get the perfect sound.

Adjusting the Effect: The vocal reversed reverb effect is a powerful tool that can greatly enhance any vocal track. Then, to get the most from this effect, learn to adjust it for each project. In this tutorial, we will focus on two key adjustments: changing the length of the reverb and adjusting the dry/wet mix of the effect. Changing the length of the reverb: One of the primary ways to adjust the vocal reversed reverb effect is by changing the length of the reverb.

This will determine how much of the sound is affected by the effect and how long the reverb lasts after the vocal has stopped. In short, to adjust the length of the reverb in Ableton Live, follow these simple steps: 1. Click on the vocal track in the Arrangement View or Session View. 2. Navigate to the audio effects section of the browser and select the “Reverb” effect. 3. In the Reverb effect window, adjust the “Decay Time” and “Size” parameters to adjust the length of the reverb.

Putting It Into Practice

Adjusting the dry/wet mix of the effect: Another important adjustment to consider is the dry/wet mix of the effect. Similarly, this will determine how much of the dry, unaffected vocal is present in the final mix compared to the wet, affected reverb. To adjust the dry/wet mix in Ableton Live, follow these steps: 1. Click on the vocal track in the Arrangement View or Session View. 2. Navigate to the audio effects section of the browser and select the “Reverb” effect. 3. In the Reverb effect window, adjust the “Dry/Wet” parameter to adjust the balance between the dry and wet signals.

It is important to note that the ideal settings for these adjustments will vary depending on the specific project and goals. Also, try experimenting with different settings to find the perfect balance for your vocal reversed reverb effect.
Vocal Reversed Reverb Effect Ableton Live Tutorial


Credit: m.youtube.com


Adding Additional Effects

The Vocal Reversed Reverb Effect in Ableton Live is an excellent technique for creating unique sounds in your music. However, you can take it one step further by adding additional effects to enhance the overall sound and create depth. In addition, here are some tips to help you use EQ and delay to improve your Vocal Reversed Reverb Effect in Ableton Live.

Using Eq To Enhance The Effect for Reversed Reverb

EQ is a great tool for helping you shape the sound of your Vocal Reversed Reverb Effect. For example, by adjusting the EQ, you can cut out unwanted frequencies and boost the ones you want to emphasize. Here’s how to use EQ effectively:

  • Start by loading an EQ plugin into the effects rack.
  • Adjust the low frequencies to remove any mud or unwanted rumble.
  • Middle frequencies are ideal for creating presence in the mix, so adjust these carefully to get the desired effect.
  • High frequencies can sound harsh if overused, so be careful not to overdo it. Use them sparingly to add some sparkle to the mix.

Adding Delay For Depth

Delay is another powerful tool for adding depth to your Vocal Reversed Reverb Effect. As a result, by adding a delay effect, you can create an echo-like effect that adds depth and interest to the sound. Here are some tips to help you add delay:

  • Load a delay effect into your effects rack.
  • Adjust the delay time to match the tempo of your track.
  • Use feedback to adjust the number of repeats, but be careful not to overdo it.
  • Adjust the dry/wet balance to control the amount of delay in the mix.

By using EQ and delay, you can enhance the Vocal Reversed Reverb Effect in Ableton Live to create a unique and interesting sound. Experiment with the settings to find the right balance for your music, and your listeners will be sure to notice the difference.

Fine-tuning The Effect

In the previous section, we looked at how to create a vocal reversed reverb effect in Ableton Live. In this section, we’ll explore how to fine-tune the effect to ensure it sounds just right. By experimenting with different parameters and adding automation, we can create a dynamic effect that enhances our vocals.

Experimenting With Different Parameters

To fine-tune the effect, we need to experiment with different parameters. Ableton Live offers a range of options to customize the effect including:

Parameter Description
Decay Time Adjusts the length of the reverb tail
Dry/Wet Controls the balance of the dry source and the effect
Gain Amplifies or attenuates the effect
Pitch Changes the pitch of the reverb tail

Adding Automation For A Dynamic Effect

Now that we’ve experimented with the parameters, we can add automation to create a more dynamic effect. Adding automation allows us to modify the effect over time, ensuring our vocals blend seamlessly with the track. For example, we can automate the reverb tail length to increase as the vocal builds, or automate the pitch to create a surreal effect.

To add automation, we need to:

  1. Select the parameter we want to automate
  2. Click on the “A” button to enable automation mode
  3. Draw in or record the automation by clicking and dragging on the automation line

By experimenting with different parameters and adding automation, we can create a vocal reversed reverb effect that enhances our vocals and adds depth to our tracks.

Vocal Reversed Reverb Effect Ableton Live Tutorial


Credit: m.youtube.com


Vocal Reversed Reverb Effect Ableton Live Tutorial


Credit: www.productionmusiclive.com


Frequently Asked Questions On Vocal Reversed Reverb Effect Ableton Live Tutorial


How To Do Reverse Reverb On Ableton?


To do reverse reverb on Ableton, first record the audio you want to apply the effect to. Then, create a new audio track and add a reverb effect onto it. Reverse the audio clip by clicking “Reverse” under “Clip” in the Ableton toolbar.


Finally, drag the reversed audio clip onto the reverb audio track and adjust the settings as desired.


How Do You Reverse Vocal Effects?


Reverse vocal effects can be achieved by using audio editing software that has a reverse effect function. Simply select the section of audio with the vocal effect and apply the reverse effect. It’s important to note that this process can result in a completely different sound to the original effect, so experimentation is necessary.


How Do I Add Reverb To Vocals In Ableton?


To add reverb to vocals in Ableton, you first need to insert a reverb plugin onto the vocal track. Then adjust the reverb settings to your liking, such as decay time, wet/dry mix, and high/low cut filters. You can also experiment with different reverb types and presets until you find the desired effect.


How Do You Reverse Audio In Ableton?


To reverse audio in Ableton, select the audio clip and go to the Clip View window. Click on the “Reverse” button located under the “Sample” section. You can also use the shortcut “Ctrl+Alt+R” or “Cmd+Option+R” for Mac users.


Conclusion


The vocal reversed reverb effect is a unique technique that can add depth and texture to vocals in Ableton Live. By following the steps outlined in this tutorial, you can easily create this effect in your own music productions. Remember to experiment and tweak the settings to achieve the desired sound.


With practice, this technique can become a valuable tool in your production arsenal. Start using it today and take your vocals to the next level!



Categories
Archive

Equinox Progressive Melodic Techno Ableton Template

The Equinox Progressive Melodic Techno Ableton Template is a pre-made template for producing techno music in Ableton Live. This template gives you drums, basslines, synth patterns and more to get started.


If you’re an aspiring techno producer, then you know just how challenging it can be to create a track from scratch. Also, that’s where templates like this one come in handy, as they provide a solid foundation to work from. The Equinox template is particularly useful for those looking to create a progressive and melodic sound. Meanwhile, it includes instruments and effects built for this style of music.

Related reading: Setup Template Studio One and Where are Cubase Templates Stored?. For background, see the Wikipedia article on Techno.


Also, whether you’re a beginner or an experienced producer, the Equinox Progressive Melodic Techno Ableton Template is definitely worth checking out.


Overview Of Equinox Progressive Melodic Techno Ableton Template

Moreover, for a complete Ableton Live template for this genre, check out Equinox Progressive Melodic Techno Ableton Template. In addition, this template is designed in a way that it can help all producers in making the next level melody-driven tracks. The Equinox Progressive Melodic Techno Ableton Template is not only great for enhancing your skills but also it can save you a lot of time by providing you a pre-designed framework that’s ready to be filled and tweaks to your liking. Below, we will discuss the Features and Benefits of using the Equinox Progressive Melodic Techno Ableton Template.

Features Of The Template

In addition, the Equinox Progressive Melodic Techno Ableton Template has a plethora of features that make this template a must-have for budding producers. For example, below are some of the features of the Equinox Progressive Melodic Techno Ableton Template:

Features Benefits
The template is well-organized and fully customizable. Saves time and increases workflow by having a pre-designed framework that is easy to adjust and modify.
The template includes a full arrangement of a Progressive Melodic Techno track. Provides users with an easy-to-follow structure that acts as a foundation for their tracks, making the overall production process faster and more efficient.
The template comes with fully loaded instruments, effects, and samples. Users can experiment with a variety of effects, samples, and instruments to create their signature sound.
The template has a professional sound quality. Users can create tracks that have the same level of audio production quality as professional producers.

Benefits Of Using The Template

Using the Equinox Progressive Melodic Techno Ableton Template can significantly benefit producers at different stages of their music production careers. As a result, below are some of the advantages of using this template:

  1. Furthermore, enhances user’s skills: The template provides insightful knowledge into music composition and sound design. Producers can learn how to create a well-arranged track by studying the workflow and structure of the template.
  2. Additionally, saves time and money: The template saves time by providing a semi-finished track that can be edited to suit the producer’s taste. It saves money by eliminating the need to purchase expensive samples, synthesizers, and effects.
  3. Also, allows creativity to flow: The template acts as an outline. This allows producers to put their creativity into practice and develop their music styles..
  4. Moreover, produces high-quality tracks: The template has been designed and developed by professionals in the music industry to ensure that the tracks produced with it have a professional quality sound.

In addition, the Equinox Progressive Melodic Techno Ableton Template acts as a fast track to music composition and production. However, with its complete set of features and benefits, this template offers an excellent opportunity for producers to enhance their skills and catalyze their journey to the top.


How To Install The Template In Ableton


Furthermore, installing the Equinox Progressive Melodic Techno Ableton Template is a breeze. Then, simply drag and drop the template file into your Ableton Live session and you’re good to go! The template contains everything you need to create your own stunning melodic techno tracks. This includes MIDI files, loops, and custom effects.

Installing Ableton Live for Equinox

Before installing the template, make sure Ableton Live is on your computer. In short, to do this, simply go to the official Ableton website and download the version that suits your needs.

Locating And Installing The Template File for Equinox

After downloading and installing Ableton Live, let’s proceed to locate and install the Equinox Progressive Melodic Techno Ableton Template. Follow these simple steps:

  1. Open Ableton Live on your computer.
  2. Navigate to ‘File’.
  3. Select the ‘Open Project’ option.
  4. Find the folder where you downloaded the Equinox Progressive Melodic Techno Ableton Template file.
  5. Double-click on the file to open it in Ableton.

Conclusion

That’s it. Similarly, you can now enjoy exploring the Equinox Progressive Melodic Techno Ableton Template and create your own unique tracks in this genre. The installation process is straightforward and easy to follow. Start producing music like a pro with this Ableton Template.

Inside The Template


The Equinox Progressive Melodic Techno Ableton Template takes you on a journey inside its intricate and complex sound design. Also, this template provides inspiration for producers to create their unique take on the genre.

Equinox Progressive Melodic Techno Ableton Template is an excellent tool for electronic dance music enthusiasts who want to create their own quality tracks easily. In addition, this template will bring professional-level quality to your tracks with its well-organized structure and production-ready sounds. To give you an overview of what the template has to offer, let’s dive into the different aspects of the template in detail.

Breaking Down The Tracks for Equinox

This Ableton template includes eight tracks, each of which has been meticulously designed to give you a head start in your music production journey. For example, whether you’re a beginner or a professional, these tracks will save you a lot of time and effort. The template splits tracks into melodic, percussion, bass and FX groups.

Exploring The Instruments And Effects Used for Equinox

The Equinox template utilizes a plethora of synthesizers and samplers. As a result, all the instruments used in the template are placed in Instrument Racks which can be easily customized and edited to suit your preferences. The template also comes with various audio effects such as reverb, delay, and distortion which can add depth and complexity to your tracks.

Understanding The Audio And Midi Clips for Equinox

The Equinox Template consists of MIDI and audio clips that enable you to experiment with different sounds. However, the audio files follow the project’s BPM. This makes it easy to drop them into your tracks. The MIDI clips are also created with the same precision and can easily be edited to change the melody or instrument choice. In conclusion, the Equinox Progressive Melodic Techno Ableton Template has made the production process a lot easier for Producers. Even if you’re new to music production, this powerful template can help you create professional-quality tracks with ease. The template’s organized structure, production-ready sounds, and detailed worksheets make it an excellent tool for anyone serious about electronic dance music production.

Equinox Progressive Melodic Techno Ableton Template


Credit: www.productionmusiclive.com


Customizing The Template for Equinox

Equinox Progressive Melodic Techno Ableton Template is a great starting point for anyone wishing to create their own progressive techno track. While the template provides a solid foundation for your track, it is important to customize it to make your music stand out and reflect your unique style. Then, in this section, we will explore some tips on how to customize the template to make it your own.

Adding Your Own Melodies

The template comes with a set of great melodies. But if you really want to make your track your own, you should add your own melodies. In short, this will give your track a unique identity and help it stand out from others. To add your own melodies, simply drag and drop your MIDI files into Ableton Live and use them to control the instrument racks in the template.

Adjusting The Mix And Effects

The mix is the balance of all the different elements in your track. Similarly, to make your own track, you’ll want to adjust the mix to achieve the right balance that suits your style. The template comes with a set of effects that you can customize to your liking. This can include adjusting the stereo width, adding reverb or delay, and fine-tuning the EQ. The key is to experiment and find the right mix and effects that suit your track the best.

Changing The Song Structure

The template comes with a predefined structure, but you can change this according to your preferences. Also, you can create breakdowns, bridges, and other elements to make the song structure more dynamic. Changing the structure can also make the track more interesting and prevent it from becoming too repetitive. Experiment with different arrangements until you find the one that works best for your track.

Customizing the Equinox Progressive Melodic Techno Ableton Template is an excellent way to unleash your creativity and create something unique. In addition, add your own melodies, tweak the mix and change the structure. Your track will stand out to listeners.


Using The Template In Your Own Productions


The Equinox Progressive Melodic Techno Ableton Template can work in your own productions to create amazing techno tracks with ease. For example, the template features professionally mixed channels, MIDI clips, and advanced automation techniques. This makes it perfect for both beginners and experienced producers.


Start creating your own unique sound with the help of this powerful template today.

Are you ready to take your music production skills to the next level? As a result, the Equinox Progressive Melodic Techno Ableton Template is an excellent tool to help you achieve this goal. Using this template, you can instantly dive into producing high-quality music with a strong foundation to build upon. Here are some tips on how you can use this template in your own productions.

Building On The Foundation Of The Template

The Equinox Progressive Melodic Techno Ableton Template gives you a starting point for your own productions. It provides you with all the necessary elements to create a professional-sounding track. This includes a driving bassline, punchy drums, and atmospheric pads. However, you should not be afraid to experiment and build upon this foundation with your own ideas. You can add your own unique melodies, synths, and effects to create a sound that is truly your own.

Incorporating Your Own Style And Sound

One of the advantages of using a template is that it can save you time and effort in creating the basic structure of a track. With this extra time, you can incorporate your own style and sound into the production. You can experiment with different chord progressions, scales, and rhythms to create a track that reflects your individuality. By doing this, you can create a unique sound that sets you apart from other producers.

Exporting Your Own Track

Once you have built upon the template and incorporated your own style and sound, it’s time to export your track. You should take special care to ensure that your finished product is of the highest quality. Make sure to mix and master your track, so every element sits in balance. You should also check the overall volume levels and ensure that your track is suitable for different listening environments. By doing so, you can create a track that will impress both yourself and your audience. In conclusion, using Equinox Progressive Melodic Techno Ableton Template can be an excellent way to jumpstart your music production journey. By building on the template, incorporating your own style and sound, and exporting your final track, you can create high-quality music that reflects your individuality as an artist.


Frequently Asked Questions On Equinox Progressive Melodic Techno Ableton Template


Where To Find Ableton Templates?


You can find ableton templates on various websites such as Abletunes, Loopmasters, and Splice. They offer a variety of pre-made templates for different genres, styles and purposes. A quick search on Google or through the Ableton Live browser can also lead to numerous results for free or paid templates.


What Is Equinox Progressive Melodic Techno Ableton Template?


Equinox Progressive Melodic Techno Ableton Template is a pre-built music project for electronic music producers designed to help them create original techno music with a cutting-edge sound. It comes with all the necessary audio files, MIDI files, and plugins you need to produce high-quality techno music.


Is The Equinox Progressive Melodic Techno Ableton Template Beginner-friendly?


Yes, the Equinox Progressive Melodic Techno Ableton Template is beginner-friendly and suitable for producers of all skill levels. The template includes detailed documentation and support that helps you understand and use the product more effectively.


Can I Customize Equinox Progressive Melodic Techno Ableton Template To My Liking?


Yes, you can customize every aspect of the Equinox Progressive Melodic Techno Ableton Template to fit your style and preferences. The template stays flexible and adaptable. This allows you to easily modify the sounds, plugins, and other elements to create unique music.


Conclusion


To sum up, the Equinox Progressive Melodic Techno Ableton Template is an exceptional tool for producers looking to create powerful and intricate techno tracks. With its expertly crafted sounds and intuitive design, the template takes the headache out of starting a project from scratch.


By utilizing the included features and tweaking them to your liking, you can produce unique tracks that will stand out in today’s saturated techno market. Give the Equinox template a try and unlock your true creative potential!

Categories
Archive

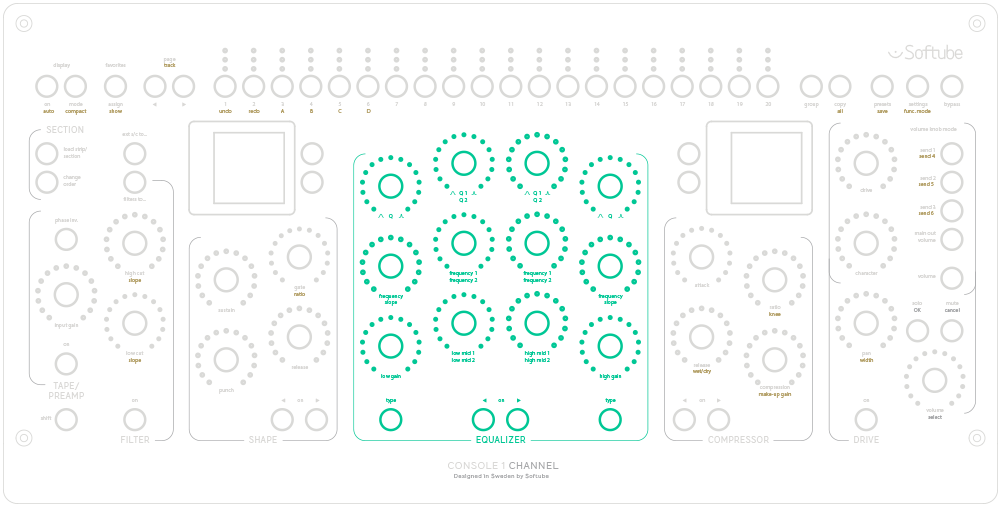
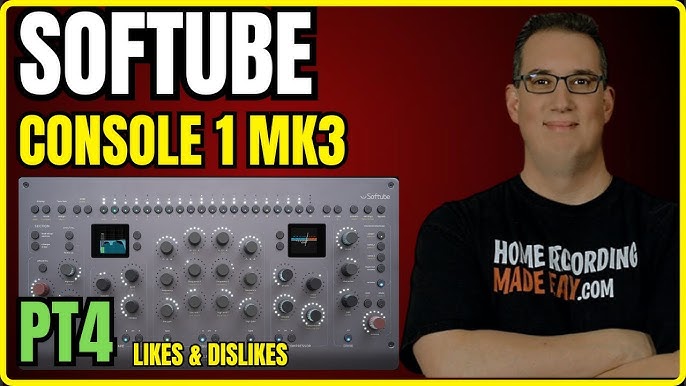
Softube Console 1 Mk Iii Core Mixing Suite

The Softube Console 1 Mk III Core Mixing Suite is a high-quality mixing console for music producers and audio engineers. It features a versatile plug-in platform that provides several top-quality EQ, compressor, saturation, and channel strip modules.


The software offers advanced routing capabilities and tight integration with several digital audio workstations. With its intuitive user interface and critically acclaimed sound quality, the Softube Console 1 Mk III Core Mixing Suite is an excellent tool for professional mixing and mastering tasks.


We will explore the features, benefits, and drawbacks of this mixing suite and explain why it is a top choice for many music industry professionals.


Design & Features


Softube Console 1 Mk III Core mixing suite offers top-notch design and features. It includes high-quality emulations of famous console classics and offers an intuitive workflow with an ergonomic hardware controller. The suite provides exceptional sound and flexibility for recording and mixing professionals.

Design & Features: Physical Design The Softube Console 1 Mk III Core Mixing Suite has an ergonomic design that allows for easy and intuitive usage. Its compact body size (measuring only 40 x 33.5 x 10cm) is perfect for small studio spaces or home studios. It has a sleek black finish that looks seamlessly professional and is built with durability in mind. Workflow Enhancements The Softube Console 1 Mk III Core Mixing Suite boasts significant workflow enhancements over its predecessors. This new version features three new workflow enhancement features: the Insert Edit Mode, the Channel Strip Control Mode, and the Unassigned Mode. These enhancements make it easy for sound engineers to work with plug-ins and EQ settings. Plugin Compatibility The Softube Console 1 Mk III Core Mixing Suite is compatible with an extensive range of top-quality audio plugins from renowned brands, which gives users the flexibility to customize their sound to suit their specific preferences. This compatibility includes plugins from top brands such as Waves, Universal Audio, and Softube’s own plugins. In conclusion, the Softube Console 1 Mk III Core Mixing Suite is a game-changing mixing suite that offers tremendous value to sound engineers. Its ergonomic design, significant workflow enhancements, and plugin compatibility make it an excellent choice for professionals in the audio industry.

Softube Console 1 Mk Iii Core Mixing Suite


Credit: www.softube.com


Channel Strip


The Softube Console 1 Mk III Core Mixing Suite is a powerful channel strip designed for recording and mixing engineers. It features a collection of high-quality plugins and a hardware controller that allow you to easily shape and enhance your sound.


With its intuitive interface and analog-style workflow, it’s a must-have tool for any serious audio professional.

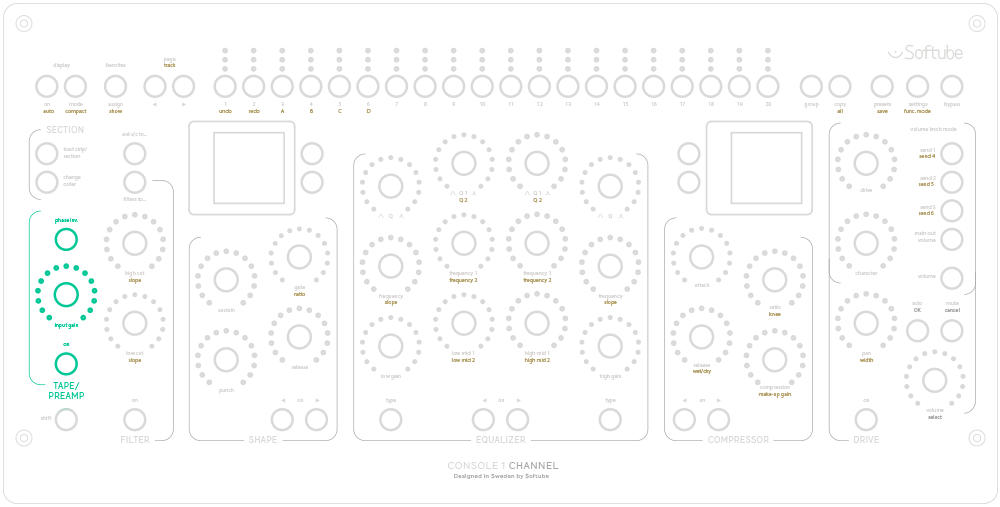
Softube Console 1 Mk III Core Mixing Suite brings the classic mixing console vibe right to your fingertips. Complete with the ‘Channel Strip’ in your software studio, Console 1 Mk III Core allows easy access to all the essential mixing tools that you need for superior sonic results. The Channel Strip comprises H3 headings of the EQ, Dynamics, Filter, and Saturation controls that make mixing and sound shaping effortless.

Eq

The Softube Console 1 Mk III Core EQ offers a classic, yet modern sound with eight bands – four of which are completely new and exclusive to Console 1 Mk III Core. These bands cover frequencies from 20 Hz to 20 kHz and include four bell filters, two shelf filters, and two filters with TUBE DRIVE. In addition, the EQ has a separate high-pass and low-pass filter section, and you can customize each filter band by adjusting their respective settings.

Dynamics

The Dynamics section of Softube Console 1 Mk III Core brings together the compressor and limiter, so you can achieve the right balance of dynamics and volume for your mix. The compressor is a flexible design that allows you to switch between VCA, FET, and opto, and it has all the essential parameters, including attack, release, ratio, and threshold. The limiter, on the other hand, allows you to control peaks, add color, and protect your mix from clipping.

Filter

The Softube Console 1 Mk III Core Filter features high-pass and low-pass filters as well as a unique ‘low-cut’ filter that helps clean up your audio by removing unwanted low-frequency rumble. The ‘low-cut’ filter allows you to adjust the cutoff frequency, and you can use the high-pass and low-pass filters to shape your musical elements to your desired frequency spectrum.

Saturation

The Saturation control of Softube Console 1 Mk III Core is the final piece of the Channel Strip. This feature allows for the addition of warmth, character, and harmonic distortion to individual channels and the mix bus. The Saturation control is especially effective when working with digital recordings as it helps to bring out the analog sound that is unique and warm. Overall, the Softube Console 1 Mk III Core Mixing Suite and its Channel Strip can help you achieve an authentic analog sound in your digital recordings. With intuitive controls and great sound quality, this software tool is a must-have for any mixing and mastering engineer.

Master Section


Softube Console 1 Mk III Core Mixing Suite enhances the mixing experience by providing hands-on control of your DAW. The Master Section allows for quick adjustments of key parameters, including volume, pan, mute, and solo. With the added functionality of plugins and effects, the Console 1 Mk III is an all-in-one solution for intuitive and efficient mixing.

Softube Console 1 Mk III Core Mixing Suite is an all-in-one mixing solution providing users with the feel of mixing on a console. One of the crucial aspects of the Softube Console 1 Mk III Core Mixing Suite is the Master section. It’s where the final touches are given to the mix, and it’s what elevates the track to its full potential. The Master section is divided into three parts – Bus Processing, Spatial Effects, and Metering, all of which play a significant role in delivering a great mix. Let’s delve into the details of these three parts below.

Bus Processing

The Bus Processing section of the Softube Console 1 Mk III Core Mixing Suite Master section is where users get to control the output levels of their mix. It gives users complete control over their mix’s levels, ensuring the output is loud enough to be heard without distorting the sound. With the Bus Processing section, users can add a touch of compression, which helps bring the overall mix together, making it sound cohesive. Additionally, the Bus Processing section includes side-chain filters that allow users to fine-tune the levels of their mix, making it sound more balanced.

Spatial Effects

The Spatial Effects section of Softube Console 1 Mk III Core Mixing Suite Master section helps users add a sense of space to their mix. It includes four different reverbs that give users the power to add depth and dimension to their tracks. The Spatial Effects section also includes a stereo enhancer that gives users the ability to widen their mix, making it sound more open. With the Spatial Effects section, users can get creative and add a unique touch to their mix, making it stand out from the crowd.

Metering

The last part of the Softube Console 1 Mk III Core Mixing Suite Master section is the Metering section. In this section, users can monitor the levels of their mix, ensuring the output is not too loud or too quiet. It includes a peak meter that helps users keep their mix from clipping, which can distort the sound. The Metering section also includes a LUFS meter, which displays the loudness levels of the mix, helping users optimize the output for different platforms. In conclusion, the Softube Console 1 Mk III Core Mixing Suite Master section is a powerful tool that helps users add the final touches to their mix. The Bus Processing, Spatial Effects, and Metering sections provide users with complete control over their mix’s levels and sound. With Softube Console 1 Mk III Core Mixing Suite Master section, users can create a mix that sounds great and stands out from the crowd.

Integration

If you are looking for a seamless mixing experience, then Softube Console 1 Mk III Core Mixing Suite is the way to go. This mixing suite boasts of incredible integration with various DAWs, providing complete control over your mix with an ergonomic and user-friendly interface. Moreover, the console has additional compatibility options for control surface integration, making it easier to work with a physical mixer and giving you the flexibility to switch between a traditional mixing setup and a digital one, without any loss of workflow.

Daw Compatibility

With Softube Console 1 Mk III Core Mixing Suite, you can be sure that your favorite DAW is compatible, with seamless integration. The Console 1 Mk III Core is compatible with leading DAWs like Pro Tools, Logic Pro X, Ableton Live, Cubase, and more. This integration allows you to control your mix using the Console 1 Mk III hardware, without reaching out for your mouse or keyboard.

Control Surface Integration

Softube Console 1 Mk III Core Mixing Suite is designed to provide you with the best of both worlds. The plugin’s hardware has sophisticated control surface integration options, making it easier for you to work with a mixing console. The hardware has pre-mapped controls for channel levels, EQ controls, and compression, allowing you to adjust settings quickly and efficiently. Moreover, the console can integrate with leading mixing consoles like SSL, Neve, and more. So if you prefer a traditional mixing setup, Softube Console 1 Mk III Core Mixing Suite gives you the flexibility to switch between a physical mixer and a digital workflow without losing your project settings.

Expandability Options

If you need a more extensive mixing setup, Softube Console 1 Mk III Core Mixing Suite provides you with expandability options. You can add more channels to your mix using add-on channel strips. The channel strips can integrate with the Console 1 Mk III hardware seamlessly, allowing you to have more control over your mix. Moreover, the console’s expandability options do not end there. You can also integrate the Console 1 Mk III Core with other Softube plugins for a more comprehensive mixing solution.

Sound Quality


Sound quality is ensured with the Softube Console 1 Mk III Core mixing suite. This suite offers a high level of precision and control over your sound, with a user-friendly interface that makes the audio mixing process a breeze. Whether you’re a professional or a beginner, this software suite can help you achieve the sound you’re looking for.

Softube Console 1 Mk III Core Mixing Suite is undoubtedly one of the most powerful mixing suites available in the market. Its incredible sound quality is something that attracts all budding and professional music producers alike.

Analog Emulation

Softube Console 1 Mk III Core Mixing Suite accurately emulates the sound of classic analog mixing consoles, adding warmth, color, and character to your mixes. The analog emulations are so precise that it’s hard to differentiate from the real analog console. This is achieved with the help of Softube’s meticulously crafted algorithms that replicate the sound of some of the most iconic analog mixing consoles ever made, such as the SSL 4000E and the Neve 1073.

Processing Power

Softube Console 1 Mk III Core Mixing Suite is loaded with powerful processing capabilities that make it the perfect tool for mixing music projects of any size. The Suite comes equipped with an FPGA-powered Console 1 system that offers zero-latency processing, ensuring that any changes made are immediately reflected in the mix. This way, you can work with precise accuracy and speed, making your workflow that much more efficient.

User Experience

Softube Console 1 Mk III Core Mixing Suite is designed to offer users the most intuitive and efficient music mixing experience possible. The Suite’s interface is clean, uncluttered and easy to navigate, with large, high-resolution screens that display all the necessary information at a glance. The software also features drag-and-drop functionality, making it easy to move and adjust plugins and effects within the mix. Additionally, with support for many DAWs, Console 1 Mk III is an excellent tool that can integrate seamlessly with your existing setup. In conclusion, Softube Console 1 Mk III Core Mixing Suite is a fantastic tool that can take your music production to the next level—whether you’re a professional mixing engineer or an amateur producer, this software can help you achieve your sonic goals.

Softube Console 1 Mk Iii Core Mixing Suite


Credit: www.softube.com


Softube Console 1 Mk Iii Core Mixing Suite


Credit: m.youtube.com


Frequently Asked Questions For Softube Console 1 Mk Iii Core Mixing Suite


Does Softube Console 1 Work With All Plugins?


Softube Console 1 is compatible with all Softube plugins, but it may not work with third-party plugins. It’s always worth checking the compatibility of individual plugins before purchasing them.


Does Softube Console 1 Work With Reaper?


Yes, Softube Console 1 is fully compatible with Reaper. You can easily integrate it into your workflow and use it as your go-to mixing console.


Does Softube Console 1 Work With Luna?


Yes, Softube Console 1 works with Luna. It allows easy and hands-on control of mixing in the Luna environment, providing users with the classic sound of analog gear.


What Is Softube Console?


Softube Console is a software plugin that emulates classic analog mixing consoles. It captures the distinct sound and feel of popular consoles and allows users to mix and process audio tracks within their preferred digital audio workstation (DAW). Its intuitive interface and authentic analog sound make it a go-to mixing tool for music producers and engineers.


Conclusion


The Softube Console 1 Mk III Core Mixing Suite is a powerful tool for both novice and professional audio engineers. Its intuitive interface, extensive range of plugins, and compatibility with a wide range of DAWs make it a must-have for anyone serious about producing high-quality mixes.


With its impeccable sound quality and versatile functionality, the Console 1 Mk III Core is an investment that can significantly elevate your music production game.


For more background, see Mixing console on Wikipedia. You may also like our guide: Use Softubes Console 1.

Categories
Archive

How To Make Your Kick Drum Sound Better Great Tricks

To make your kick drum sound better, try EQing, compression, and adding some distortion or saturation. These tricks can enhance the low-end punch and add warmth to your drum sound.


If you’re a music producer or sound engineer, you know how crucial the kick drum is to the foundation of your mix. It’s the backbone of your rhythm section, and if it doesn’t stand out, your entire track can feel lackluster.


Fortunately, there are some simple techniques to make your kick drum sound better. By tweaking the EQ, compressing it to control dynamics, and adding some distortion or saturation, you can give your kick drum that extra edge it needs to cut through the mix. This article will provide some great tips and tricks to take your kick drum sound to the next level.


Find The Right Sample

Kick drums play a critical role in any music production. Having a great sounding kick drum can be the difference between a bland track and a catchy one. One easy way to improve your kick drum sound is by using the right sample. In this article, we’ll discuss how to find the right sample for your music production.

Choose The Right Sample Type

When looking for the right kick drum sample, consider the type of sample that suits your music production. It’s essential to choose the right kick drum sample type like acoustic or electronic samples, depending on the genre of music you’re producing. Different genres of music require different types of kick drums, so it’s essential to choose the sample type wisely.

Understand Acoustic Vs. Electronic Samples

Acoustic and electronic kick drums have different characteristics that can affect your music production. An acoustic kick drum provides a more natural sound and works well with genres such as rock, metal, and blues. On the other hand, electronic kick drums have a synthetic sound and are perfect for genres such as EDM, techno, and hip-hop.

If you want a kick drum that feels more natural, then an acoustic sample is the way to go. But if you’re looking for a more synthetic sound, then electronic samples are the way to go. Regardless of the type, make sure the sample complements your music production.

Use Drum Replacement Plugins

If you can’t find the perfect sample for your music production, then drum replacement plugins can come in handy. These plugins allow you to replace your kick drum sound with a sample that suits your music production. You can choose from a wide array of samples and tweak them to match your track’s tonality.

Drum replacement plugins offer incredible flexibility, but it’s essential to use them with caution. Ensure that the sample you choose complements your track’s overall sound and doesn’t make it sound out of place.

In conclusion, finding the right sample is critical to improving your kick drum sound. By considering the sample type, understanding acoustic vs. electronic samples, and using drum replacement plugins, you can transform your bland kick drum sound into a catchy one that resonates with your audience.

Enhance The Attack


Want to enhance the attack of your kick drum? Check out these great tricks for making it sound better, including adjusting the EQ, adding compression, and experimenting with distortion. With a few simple tweaks, you can take your drum sound to the next level.

If you want to make your kick drum sound punchier, then it’s all about enhancing the attack. The attack is the initial point where the sound is amplified and really hits the listener’s ear. In this section, we will explore three ways you can enhance the attack of your kick drum: using EQ to boost high-end frequencies, adding compression to control the dynamic range, and using transient shaping plugins.

Use Eq To Boost High-end Frequencies

EQ is a great tool for enhancing the attack of your kick drum. The high frequencies in a kick drum are what provide the initial attack, so it’s important to boost these frequencies. However, too much high-end can make the kick drum sound too thin or harsh, so it’s crucial to EQ carefully. To enhance the attack with EQ, start by adding a high shelf filter to boost frequencies around 5-8 kHz. Then, add a narrow peak filter to boost frequencies around 2-4 kHz. Adjust the frequencies and the amount of boost until you find the sweet spot where the attack of the kick drum is enhanced without making the kick drum sound too thin.

Add Compression To Control Dynamic Range

Compression is another great tool for enhancing the attack of your kick drum. Compression allows you to control the dynamic range of the kick drum, making the quieter parts louder and the louder parts quieter, resulting in a more consistent and punchy sound. To enhance the attack with compression, start by setting a fast attack time to allow the initial transients to come through. Then, set a high ratio to compress the louder parts of the kick drum. Finally, adjust the threshold and makeup gain until you find the sweet spot where the attack of the kick drum is enhanced without making the kick drum sound too compressed or distorted.

Use Transient Shaping Plugins

Transient shaping plugins are a relatively new tool that can enhance the attack of your kick drum in a more precise way than EQ or compression. These plugins allow you to shape the initial transients of the kick drum, making them sound punchier or softer, depending on your desired effect. To enhance the attack with transient shaping plugins, start by choosing a plugin that allows you to shape the initial transients. Then, adjust the attack and sustain controls until you find the sweet spot where the attack of the kick drum is enhanced without making the kick drum sound too unnatural or distorted. In summary, enhancing the attack of your kick drum is crucial for making it sound punchier and more impactful in your mix. Use EQ to boost high-end frequencies, add compression to control dynamic range, and use transient shaping plugins for precise control over the initial transients. By applying these techniques, you can take your kick drum sound to the next level.

Add Sustain And Body

If you’re a drummer, you know how important it is to have a great sounding kick drum. It’s the heartbeat of your entire kit and sets the foundation for the rest of your sound. However, getting the perfect kick drum sound can be time-consuming and frustrating even with the best drum kits in the world. Luckily, there are several tricks you can use to add sustain and body to your kick drum, and we’re going to explore them in this article.

Use Eq To Boost Lower Frequencies

EQ is one of the most powerful tools at your disposal to enhance your kick drum sound. By selectively boosting or cutting certain frequencies, you can achieve a wide range of sounds with your kick drum. When it comes to adding more body and sustain to your kick drum, you’ll want to focus on boosting the lower frequencies.

A general rule of thumb is to boost somewhere around 60-80Hz to add more body and fullness to your kick drum. You might also want to experiment with boosting around 3-5kHz to bring out some of the attack and high-end harmonics. However, be careful not to overdo it, or your kick drum can start to sound muddy and indistinct.

Consider Using A Sub-kick Microphone

If you want to take your kick drum sound to the next level, consider using a sub-kick microphone. This type of microphone is specifically designed to capture the low-end frequencies of your kick drum and can add a significant amount of body and sustain to your sound.

The sub-kick microphone can be placed either inside or outside your kick drum, depending on your preference. Just like with EQ, be careful not to overdo it with the sub-kick microphone, or your kick drum can start to sound boomy and out of control.

Add Reverb And Delay Effects

If you want to add even more sustain and body to your kick drum sound, consider using some reverb and delay effects. These types of effects can help create the illusion of a larger space and add some extra depth and richness to your kick drum sound.

When it comes to using reverb and delay effects, be careful not to overdo it, or your kick drum can start to sound washed out and distant. Start with a subtle amount of reverb and delay and gradually increase the settings until you achieve the desired effect.

With these great tricks, you can easily make your kick drum sound better and enhance your overall sound. Experimenting with these techniques can help you find the perfect sound for your style and musical preferences.

How To Make Your Kick Drum Sound Better Great Tricks


Credit: www.youtube.com


Experiment With Tuning


Experimenting with tuning can greatly improve the sound of your kick drum. Try adjusting the drumhead tension and experimenting with different beater types for a unique sound.

Tuning your kick drum is an essential step in enhancing its sound. Your kick drum’s pitch should be in harmony with the other instruments in the mix, and it’s not just a matter of retuning it to the standard pitch. That said, experimenting with tuning and pitch can help you find an exceptional sound that fits your track.

Learn How Tuning Affects The Sound

Before you begin tuning your kick drum, it’s necessary to have a basic understanding of its impact on the sound. Tuning your drums to the key of the song can help your tracks sound more cohesive and will fix any frequency clashes. For example, lower tunings will give you a deeper and more resonant kick drum sound, while higher tunings will give you a punchier kick drum.

Use Tuning Tools To Fine-tune Your Kick Drum

Once you have a basic understanding of tuning and its effect on sound, you can use various tuning tools to get the perfect kick drum sound you desire. Tuning tools typically include devices like drum dial or lug-based tuners that provide a digital reading of each drum’s pitch. You can use these tuners to match the kick drum pitch with the song’s key and ensure your kick drum complements the overall mix.

Try Pitch-shifting Plugins For Creative Effect

Pitch-shifting is an excellent technique that creates a unique sound for your kick drum. If you want to experiment with pitch without impacting the pitch of the song, using pitch-shifting plugins is an excellent way to do it. These plugins allow you to change the pitch of the kick drum without affecting its timing and gain. You can use this technique to create different accents and transitions in the song, giving it a fresh and unique feel. In conclusion, tuning and pitch are critical elements in achieving your desired kick drum sound. By experimenting with tuning, using tools to fine-tune your kick drum and trying pitch-shifting plugins, you’ll be on your way to finding the perfect kick drum sound for your track.

Layer Your Sounds


Layering sounds can bring depth and complexity to your kick drum, making it sound fuller and more interesting. Experiment with adding different types of sounds, such as a high-pitched click or a low-end boom, to create a unique and professional sound.

Layering your kick drum sounds is a great way to enhance your track and give it a more unique and professional sound. To create a fuller and richer kick sound, you can layer multiple samples on top of each other. Here are some ways to layer your sounds effectively:

Layer Multiple Samples To Add Depth

Layering multiple samples of different frequencies and characteristics can add depth and complexity to your kick drum sound. For instance, using a low frequency sample for the sub-bass and a high frequency sample for the attack of the kick can create a sonic contrast that makes the sound more interesting. You can blend the samples together in your DAW until you find the perfect balance.

Use Different Sample Types For A Unique Sound

Using different types of samples can help you achieve a unique and interesting kick drum sound. For example, you can blend a clean kick sample with a distorted one, or layer an acoustic kick with an electronic one. This can add character and personality to your track, and make your kick stand out from the crowd.

Blend In Percussive Elements For Added Texture

By blending in percussive elements like shakers, tambourines, and claps, you can add texture and depth to your kick drum sound. These elements can also help your kick cut through the mix and make it more prominent. You can experiment with different percussive elements and find the ones that work best for your track. In conclusion, layering your kick drum sounds is an effective way to create a more interesting and dynamic track. By using multiple samples, different sample types, and percussive elements, you can enhance your kick drum sound and make it stand out. Try these techniques out in your next track and see how they can improve your sound!

How To Make Your Kick Drum Sound Better Great Tricks


Credit: www.wearevelveteen.com


Use Sidechain Compression

When it comes to making the perfect kick drum sound, utilizing sidechain compression is a great trick that can help create a more dynamic and professional-sounding track.

Understand Sidechain Compression

Firstly, it’s important to understand what sidechain compression actually is. Essentially, sidechain compression allows you to control the volume of one track based on the volume of another track. This means you can use it to create a “pumping effect” with other tracks, or to clean up any clashing frequencies between tracks.

Use It To Create A Pumping Effect With Other Tracks

If you want to use sidechain compression to create a pumping effect, you’ll first need to set it up on the track you want to control (usually a bass track). Then, you’ll need to choose the trigger track (usually the kick drum) and select it as the sidechain source. By doing this, you can control the volume of the bass track, creating a “pumping” effect that matches the rhythm of the kick drum track.

Steps to Create a Pumping Effect:
1. Set up sidechain compression on the track you want to control.
2. Choose the trigger track and select it as the sidechain source.
3. Control the volume of the bass track to create a matching rhythm with the kick drum track.

Use It To Clean Up Clashing Frequencies With Other Tracks

If you’re trying to clean up clashing frequencies between tracks, sidechain compression can also be incredibly useful. In this case, you may want to set up a sidechain compressor on the track that’s causing issues (usually a synth or vocal track) and choose the source track (again, usually the kick drum) as the sidechain source. By doing this, you can effectively “duck” the vocal or synth track every time the kick drum hits, minimizing any overlapping frequencies and cleaning up the overall sound of the mix.

Steps to Clean Up Clashing Frequencies:
1. Set up sidechain compression on the track that’s causing issues.
2. Choose the source track as the sidechain source (usually the kick drum).
3. “Duck” the vocal or synth track every time the kick drum hits to minimize any overlapping frequencies.

Consider Eq Matching


Consider using EQ matching to improve the sound of your kick drum. This technique allows you to match the frequency profile of your kick drum to that of a professionally mixed and mastered track, resulting in a more polished and professional sound.

Consider EQ Matching – Learn How EQ Matching Works One of the best techniques to make your kick drum sound great is to consider EQ matching. EQ matching is an effective way to match the tonal balance of a reference track to your kick drum. It can quickly improve the overall sound of the mix and make your kick drum sound better. To learn how EQ matching works, you need to understand that each audio track has a frequency spectrum. The frequency spectrum is the range of frequencies produced by any audio signal. EQ matching is a process where you adjust the frequencies and volume levels of your kick drum to match the reference track. Use it to Match Your Kick Drum to a Reference Track Now that you know how EQ matching works, it’s time to apply it to your kick drum. Start by finding a reference track with a kick drum that is similar to the sound you want to achieve. Import both your kick drum and reference track into your digital audio workstation (DAW). Open an EQ matching plugin and load the reference track into it. Next, insert an EQ plugin into your kick drum channel strip. Start by soloing your kick drum and listening to it together with the reference track. Now, adjust the EQ plugin on your kick drum channel to match the reference track frequency spectrum as closely as possible. Experiment with Different EQ Matching Plugins There are many EQ matching plugins available, so it’s worth experimenting with a few to find the one that works best for your needs. Each plugin has its own unique features and interface, so it’s essential to find the one that suits your workflow and produces the desired results. In conclusion, EQ matching is an excellent technique to make your kick drum sound better and blend nicely with the rest of your mix. It’s an effective way to match your kick drum to a reference track and achieve impressive results quickly. Try different EQ matching plugins and experiment until you find the one that works best for you.

Get Creative With Sound Design


Crafting the perfect kick drum sound can make all the difference in your music production. Get creative with sound design by using tricks like layering, EQing, and distortion to take your kick drum to the next level.

If you’re looking to take your kick drum sound to the next level, it’s time to get creative with sound design. Experimenting with different techniques can help you achieve a more unique and professional sound. Here are three tricks to try out:

Experiment With Synthesizing Your Own Kick Drum Sounds

One way to create a distinct kick drum sound is to synthesize it from scratch. Using a synthesizer or software plugin, you can generate your own unique tones and create a sound that is truly your own. Start by experimenting with different waveforms, envelopes, and filters to find the perfect combination.

Use Modulation And Effects To Create Unique Textures

Modulation and effects can be used to add more depth and texture to your kick drum sound. Try adding a bit of distortion, reverb, or delay to create a more dynamic and interesting sound. You can also experiment with manipulating the pitch or adding some sidechain compression to give the kick drum even more punch.

Incorporate Organic Elements For A Hybrid Sound

Another way to make your kick drum sound stand out is to incorporate organic elements into your sound design. This could include recording the sound of a kick drum or other percussive instruments and layering it with your synthesized kick drum sound. By blending these together, you can create a hybrid sound that has the best of both worlds. In conclusion, getting creative with sound design is the key to making your kick drum sound better. Experiment with synthesizing your own sounds, adding modulation and effects, and incorporating organic elements for a hybrid sound that is truly unique. With these techniques, you can create a professional and distinct sound that sets you apart from the rest.

How To Make Your Kick Drum Sound Better Great Tricks


Credit: www.productionmusiclive.com


Frequently Asked Questions For How To Make Your Kick Drum Sound Better Great Tricks


How Can I Improve My Kick Drum Sound?


To improve your kick drum sound, you can try the following tips: 1. Experiment with different drum heads and tuning techniques to find the right sound. 2. Use a dampening technique to control the resonance and sustain of the kick drum.


3. Use a quality microphone to capture a full and balanced sound. 4. Process the kick drum sound with EQ, compression, and possibly distortion to enhance its impact and clarity. 5. Consider using a trigger or sample replacement to enhance the consistency and punchiness of the sound.


How Can I Make My Drumming Sound Better?


To improve the sound of your drumming, try incorporating the following tips: practice regularly, focus on timing and rhythm, tune your drums properly, invest in quality drumsticks and heads, and experiment with different styles and techniques. These simple steps can help you enhance your drumming sound and take your skills to the next level.


How Do You Get A Good Live Kick Drum Sound?


To get a good live kick drum sound, you need to consider several aspects, such as the drummer’s playing technique, the drum’s hardware and tuning, and microphone selection and placement. Experiment with different microphones and positions until you find a combination that captures the kick drum’s natural tone with clarity and punch.


How Do I Make My Kick Drum More Punchy?


To make your kick drum more punchy, start by EQ’ing it to remove competing frequencies. Then, add compression to bring out the sustain and increase its attack. Using a transient shaper can also help add more punch to the attack.


Finally, consider using parallel processing or layering to add even more depth and impact to the sound.


Conclusion


So, these are some excellent tricks to make your kick drum sound better. Incorporating these techniques will take your music to the next level. By applying a combination of EQ and compression, adding samples, adjusting the attack and sustain, and incorporating parallel processing, you can get the perfect kick tone for your mix.


Practice, experiment, and most importantly, listen carefully to the sound, don’t give up until you find precisely what you’re looking for. Remember to revisit your kick drum after mixing everything else, as you’ll undoubtedly have new ideas for making it even better.


Give these techniques a try, and let your creativity soar.


More in our Drums & beats guide.

Categories
Archive

Should I Get a Midi Controller Or a Synth

For versatility in music production, get a MIDI controller for precise control over software instruments. A synth is best for creating unique analog sounds that can stand on its own, whether live or recorded.


Both have their advantages and it comes down to personal preference and music production needs. Musicians and producers are often faced with the question of whether to invest in a MIDI controller or a synth. Both can improve music production and lead the way to unique sounds.


A MIDI controller gives precise and fine-tuned control over software instruments and all the features of a DAW. On the other hand, a synth is best for producing analog sounds that can stand on their own. The decision depends on personal taste and your sound library. We will explore the benefits and features of both MIDI controllers and synths to help you make an informed decision.

Should I Get a Midi Controller Or a Synth


Credit: www.makeuseof.com


Defining Midi Controller And Synth

Midi Controller and Synth are two indispensable devices in the music industry. These devices help musicians and sound engineers manipulate sounds and create unique music tracks. Both devices are essential, but what is the difference between the two, and which one should you get?

Midi Controller

A MIDI (Musical Instrument Digital Interface) controller is an electronic device that sends MIDI messages to control sound parameters on an electronic device or software. It does not have built-in sound generators. Instead, it is designed to manipulate music software or other electronic devices that create sound. It resembles a keyboard and often features pads, knobs, faders, and other physical controls used to create MIDI signals to an external sound module or software.

Synth

A synthesizer, on the other hand, is an electronic device or software that generates sound signals. Synths can be analog or digital and are designed to produce different types of sounds such as pads, leads, bass, drums, FX and more. They are playable and often come with a built-in keyboard. Synthesizers are standalone devices that do not require interfaces to manipulate sounds.

If you are primarily interested in manipulating music software, then a midi controller is an excellent choice. If you want to create unique sounds, producing music from scratch without the use of a computer, then a synth is the best choice. However, both devices complement each other and can be used together to create complex compositions.

Conclusion

Whether you choose a midi controller or a synth largely depends on your specific needs. It is important to consider factors such as your budget, intended use, and preference. With the information provided above, you can now make an informed decision and select the device that better suits your workflow and style.

Benefits Of Midi Controller


A midi controller provides benefits such as versatility, portability, and affordability as compared to a synth. It allows you to manipulate sounds and create music using virtual instruments. With its compact size, it’s easy to carry and set up in any location, making it an ideal choice for music production and performances.

Versatility

Midi controllers are highly versatile and can be used to control any MIDI-compatible software or instrument. With a midi controller, you can easily switch between different sounds and adjust various parameters such as volume, pitch, and tone to create a unique sound. You can also use midi controllers to control virtual instruments, recording software, and hardware synthesizers.

Customization

Midi controllers offer a high level of customization. You can map the buttons, knobs, and faders to different functions and even create custom mappings. This allows you to have total control over your software or synthesizer, making it easy to create your own unique sounds and music.

Ease Of Use

Midi controllers are extremely easy to use, and they require very little setup. Simply plug in your controller, and you’re ready to start making music. With their intuitive interface, you can easily access different functions and settings, making it easy to experiment with different sounds and ideas. In conclusion, a midi controller offers versatility, customization, and ease of use, making it an excellent choice for musicians, producers, and anyone looking to create their own unique sounds and music.

Benefits Of Synth

If you’re thinking about investing in a MIDI controller or synth, you might be wondering about the benefits of choosing a synth. While a MIDI controller can be an excellent tool for controlling your digital audio workstation (DAW), a synth offers a different set of advantages. Let’s take a closer look at some of the benefits of choosing a synth over a MIDI controller.

Sound Creation

One of the biggest advantages of a synth is its ability to create unique sounds. While a MIDI controller can help you manipulate existing sounds, a synth allows you to create new ones. Synthesizers come with a vast array of sound engines that allow you to shape and sculpt your sounds in a way that a MIDI controller can’t. You can create everything from traditional analog-style synthesizer sounds to futuristic textures and soundscapes.

Built-in Effects

In addition to their unique sound creation abilities, synths typically come with built-in effects processors. This means you can add delay, reverb, distortion, and other effects to your sounds without needing to invest in additional hardware or plugins. Built-in effects also allow you to experiment with different sounds and effects without having to leave your synth’s interface.

Performance Features

Another benefit of choosing a synth is their performance features. Some synths have features like arpeggiators, sequencers, and even built-in keyboards, making them excellent tools for live performance. MIDI controllers, on the other hand, are typically designed for studio use and lack many of these live performance features.

In conclusion, while a MIDI controller can be an excellent tool for DAW control, if you’re looking to create unique sounds, experiment with effects, and perform live, a synth is a more versatile and powerful tool. With its unique sound creation abilities, built-in effects, and performance features, a synth can help you take your music production to the next level.

Factors To Consider

Choosing between a midi controller and a synth can be a challenging decision to make, especially for an amateur musician. The decision usually depends on several factors that you should consider carefully. These include your musical goals, budget, and musical preferences. In this post, we will explore these factors in more detail to help you decide which one works best for you.

Musical Goals

Your musical goals play a critical role in helping you choose between a midi controller and a synth. For instance, if you’re a beginner, a midi controller might be a better option because it allows you to create music using a computer-based digital audio workstation (DAW). On the other hand, if you’re an experienced musician, a synth may be a better fit because it allows you to experiment with various sounds and effects.

Budget

Another critical factor to consider when choosing between a midi controller and a synth is your budget. If you’re working on a tight budget, a midi controller might be a better option than a synth because it’s less expensive and still offers an excellent platform for music production. However, if you have enough money to spend, a synth would be a better fit because it offers more advanced features and sound quality.

Musical Preferences

Your musical preferences also play a crucial role in choosing between a midi controller and a synth. If you prefer creating sounds and experimenting with different effects, a synth would be a better fit. For instance, you can use a synth to create unique sounds from scratch that a midi controller might not offer. On the other hand, if you prefer using pre-existing sounds from different instruments, a midi controller would be a better choice.

In conclusion, whichever option you choose, whether a midi controller or a synth, ensure that it aligns with your musical goals, preferences, and budget. That way, you can be sure that it will serve you well in your music production endeavors.


Which Is Right For You?

Which is Right for You?

When it comes to choosing between a MIDI controller and a synth, it all depends on your personal preferences, goals, and budget. Whether you are a beginner or an experienced musician, choosing the right device can make all the difference in terms of productivity, creativity, and satisfaction. In this post, we will discuss the main factors that you need to consider before making your decision.

Choosing Based On Goals

If your goal is to create electronic music, then a synth is the way to go. Synths are versatile instruments that allow you to produce a wide range of sounds and textures, from classic analog tones to cutting-edge digital effects. You can use a synth to create melodies, chords, basslines, and other elements of your composition. On the other hand, if your goal is to control virtual instruments on your computer or DAW, then a MIDI controller is the ideal choice. A MIDI controller allows you to control the parameters of your virtual instruments with physical knobs, sliders, pads, and keys, giving you a more tactile and expressive experience.

Choosing Based On Budget

If you are on a tight budget, then a MIDI controller is a more affordable option. You can find a decent MIDI controller for less than $100, while a good quality synth can cost you several hundred dollars or even more. However, if you are willing to invest in a high-end synth, you can enjoy a richer and more authentic sound that can add a lot of value to your music. Additionally, some synths offer advanced features such as sequencers, arpeggiators, and effects that can enhance your creativity and workflow.

Choosing Based On Preferences

Your personal preferences also play a role in your decision-making process. If you prefer the feel and sound of analog hardware, then a synth might be the perfect fit for you. If you prefer the flexibility and mobility of digital devices, then a MIDI controller might be more suitable for your needs. Also, consider the size, weight, and design of the device, as well as its compatibility with your computer or DAW.

In conclusion, both MIDI controllers and synths have their own advantages and disadvantages, and the choice depends on your individual needs and preferences. Whether you choose a MIDI controller or a synth, make sure to do your research, try them out if possible, and invest in a device that fits your budget and goals.

Should I Get a Midi Controller Or a Synth


Credit: www.reddit.com


Should I Get a Midi Controller Or a Synth


Credit: blog.burtonacoustix.com


Frequently Asked Questions For Should I Get A Midi Controller Or A Synth


Do I Need A Midi Keyboard If I Have A Synth?


While a synth can work on its own, a MIDI keyboard can provide more flexibility and control over the sound. It allows for easier manipulation of parameters like pitch, volume, and modulation. So while not strictly necessary, a MIDI keyboard can enhance the overall experience of using a synth.


What Is The Difference Between A Midi Controller And A Synth?


A MIDI controller is used to control sounds from an external MIDI source, while a synth generates its own sounds. MIDI controllers are typically keyboards or pads, while synths can be standalone physical instruments or software-based. In short, a MIDI controller is a tool to control sounds, whereas a synth is an instrument itself.


Do I Really Need A Midi Controller?


Yes, a MIDI controller is essential for musicians and producers who want to create digital music using software. It allows for hands-on control over numerous aspects of the music-making process, resulting in a better workflow and a more creative output.


MIDI controllers come in various sizes and configurations to suit different needs and budgets.


Should I Buy A Midi Keyboard Or A Normal Keyboard?


Buy a MIDI keyboard if you want to make music using digital audio workstations and software. It allows you to create, edit, and manipulate sounds. Buy a normal keyboard if you want to play and learn traditional keyboard instruments and music theory.


It is essential for performance-oriented music.


Conclusion


After weighing the pros and cons of owning a MIDI controller versus a synth, the decision ultimately comes down to personal preference and individual needs. While MIDI controllers offer versatility and convenience, synths provide unique sounds and the ability to create music from scratch.


Regardless of which option is chosen, the most important aspect is to have fun with the music-making process. So, go ahead and invest in your musical journey and unleash your creativity with the tool that suits you best!

Categories
Archive

Choosing And Using Mastering Plugins Effectively

To use mastering plugins effectively, choose the right plugin for your needs and use it sparingly. Mastering plugins are powerful tools that can enhance your mix, but should be used with care to avoid over-processing and degradation of your audio.


Mastering plugins are a common tool for audio engineers and producers looking to add polish and professionalism to their mixes. However, with so many options available, it can be difficult to choose the right plugin and use it effectively. The key is to choose a plugin that matches your desired outcome and use it sparingly to avoid over-processing and degradation of your audio.


With careful attention to your mix and a solid understanding of your chosen plugin, you can achieve the professional sound you’re after without sacrificing the integrity of your mix. We’ll explore some tips for choosing and using mastering plugins effectively.


Features Of High-quality Mastering Plugins

Mastering plugins are a fundamental tool in audio mastering. They help in adjusting, enhancing, and optimizing music tracks for release in a professional format. High-quality mastering plugins have features that are essential for proper mastering and produce a more polished sound.

Accuracy

The accuracy of a mastering plugin is a crucial factor in choosing the right one. It is essential to use a plugin that has high-level precision in its functions. A superior mastering plugin should be reliable and produce consistent results. This feature ultimately determines how significant the variations will be in how the music will sound. A precise plugin guarantees that the sound quality is not compromised.

Customization Options

A good mastering plugin should have customization options that allow the user to tailor the sound to suit their needs. These options include parameters such as EQ, dynamics, and reverb. These functions allow for comprehensive control of the sound in terms of the stereo image, tonal balance, and volume. Customization options are particularly useful for professional audio engineers who seek to achieve their distinctive sound.

Ease Of Use

The third essential feature of high-quality mastering plugins is ease of use. Plugins that are straightforward to navigate and operate are the best choice. An easy-to-use plugin saves time and streamlines the audio mastering process. It’s also essential to choose plugins that have intuitive interfaces and clear descriptions of the functions. This feature ensures that users can understand the plugin’s capabilities effectively and produce top-tier sound quality effortlessly.

Summary Table: Features of High-Quality Mastering Plugins
Feature Description
Accuracy A high-level precision in its functions that produces consistent results without compromising sound quality.
Customization options Options that allow the user to tailor the sound to suit their needs.
Ease of use Plugins that are straightforward to navigate and operate, saving time and streamlining the audio mastering process.

Choosing and using high-quality mastering plugins effectively can elevate the quality of your music production. It is essential to consider the accuracy, customization options, and the ease of use when selecting a mastering plugin. With these features in mind, you can achieve a professional and polished sound that will impress your listeners.

Factors To Consider When Choosing Mastering Plugins


Choosing the right mastering plugin can have a significant impact on the quality and overall sound of the final mix. When making a decision, it’s important to consider factors such as the plugin’s compatibility with your DAW, the level of control it offers, and its reputation amongst industry professionals.

As a music producer, choosing the right mastering plugins is crucial to achieving the perfect mix. With the ever-evolving music industry, finding the best plugins can be overwhelming at times. However, with proper research and careful consideration, you can find the plugins that will enhance your music production, and allow your tracks to stand out. Here are three crucial factors every music producer must consider when choosing mastering plugins: compatibility with your DAW, plugins bundle versus standalone plugins, and manufacturer support.

Compatibility With Your Daw

When choosing a mastering plugin, compatibility with your Digital Audio Workstation (DAW) is crucial. Not all plugins are compatible with all DAWs, so it’s essential to choose a plugin that works seamlessly with your software. Compatibility issues can lead to workflow disruptions and potential time and money losses. Before purchasing a mastering plugin, ensure that it’s compatible with your DAW.

Plugins Bundle Vs. Standalone Plugins

Plugins are available in bundle packages and standalone formats. Bundle packages include multiple plugins, and standalone plugins are sold individually. The decision on whether to buy a bundle package or a standalone plugin will depend on your needs as a music producer. Bundle packages can offer a cost-effective solution and a variety of plugins, while standalone plugins can provide more specialized features. Before making a purchase, research the available options and determine which one best suits your needs.

Manufacturer Support

Manufacturer support is essential when choosing mastering plugins. This includes the manufacturer’s technical support availability and documentation, such as user manuals, video tutorials, and community forums. With proper support, you can resolve any technical issues that arise during production and get the most out of your plugins. Before making a purchase, research the manufacturer’s reputation, seek recommendations, and read online reviews to confirm their commitment to customer service. In conclusion, finding the right mastering plugins can take time, but doing your research ahead of time and considering the factors listed above will help simplify the process. Choose plugins that align with your requirements, budget, and musical interests. Always take advantage of the manufacturer’s support and keep updating your plugins to take full advantage of all the features and functionalities. With the right mastering tools, your music will sound professional, polished, and competitive in today’s music industry.


Top 5 Mastering Plugins On The Market


Discover the top 5 mastering plugins on the market and learn how to use them effectively to enhance the quality of your audio productions. With a variety of options available, these plugins offer a range of features to help you achieve the perfect mix for your music.

Top 5 Mastering Plugins on the market: Mastering your music tracks is the final frontier in the music production process, where you make your masterpiece sound its best. Every producer, with the dream of making his music tracks outstanding, should understand the importance of using the correct mastering plugins. The market is brimming with mastering plugins, making choosing the right one very challenging. But worry no more as we bring you the top 5 mastering plugins on the market. H3: Plugin A Plugin A is undoubtedly the best mastering plugin on the block. It offers an array of utilities and features that make it every producer’s dream come true. It comes equipped with advanced algorithms that help you achieve a clear and polished sound, adding a professional touch to your music. Plugin A’s interface is user-friendly, and its flexible controls make mastering a breeze. H3: Plugin B Plugin B is an incredibly innovative and versatile mastering plugin that has taken the industry by storm. It has a unique set of processing tools that are precisely tailored to enhance your mix’s subtleties, adding a new dimension to your sound. Plugin B’s sleek and polished interface is easy to navigate, providing an excellent user experience. H3: Plugin C Plugin C is a mastering plugin that has proved to be a winner in the music production realm. It offers a comprehensive range of professional mastering tools and utilities at an affordable price. It has an intuitive interface that is easy to navigate, making it perfect for beginners. Plugin C empowers producers with advanced features, adding a new layer of polish to your music. H3: Plugin D Plugin D is a dynamic range compressor that is perfect for enhancing the overall sound of your music. It offers an excellent range of features that help you achieve a unique sound that stands out in the music industry. Plugin D’s interface is easy to use, and its advanced controls make mastering a fun experience. H3: Plugin E Plugin E is the ultimate mastering plugin, specifically designed for those looking for an ultra-high-end mastering experience. It boasts an array of advanced and innovative features that enable producers to create a sound that is unparalleled. Plugin E’s interface is sleek and sophisticated, providing an exceptional user experience that is second to none. In conclusion, mastering plugins are essential to achieving the perfect sound in music production. The top 5 mastering plugins mentioned above are exceptional tools that empower producers to create exceptional sound that commands attention. Whether you’re a beginner or a seasoned professional, these plugins are guaranteed to take your music production to the next level.

Tips For Effectively Using Mastering Plugins


Effectively choosing and using mastering plugins is vital for any music producer. To get the best results, research and select plugins based on their quality, compatibility with your DAW, and the type of sound you’re aiming for. Also, use them sparingly and with good judgement to enhance your mix without over-processing.

Mastering plugins can enhance the quality of your audio tracks, but like any audio tool, they need to be used correctly. In this blog post, we will go over some tips for effectively using mastering plugins to take your final mix to the next level.

Preparing Your Mix

Before using your mastering plugins, it’s crucial to ensure that your mix is well-balanced. This involves setting proper levels for each track, panning, and EQ’ing. You should also check for any distortion, clipping, or phase issues. It’s essential to have a clean mix before applying any mastering plugins.

Frequency Spectrum Analysis

Frequency spectrum analysis is an essential step in using mastering plugins effectively. It helps you identify any frequency imbalances that may exist in your mix. You can use frequency analysis tools like Ozone or Fabfilter to analyze your track and see where the low or high-frequency spikes occur. It’s important to have a balanced frequency spectrum before applying any mastering plugins.

Avoiding Overcompression And Limiting

Compression and limiting are important tools for mastering, but they can also be overused. Too much compression and limiting can lead to a flat and lifeless sound. To avoid overcompression and limiting, use a light touch and apply the plugins only where necessary. Always check the resulting sound on different playback systems to ensure that it sounds good on all devices.

Conclusion

By following these tips, you can use your mastering plugins more effectively and achieve a better final mix. Remember to prepare your mix, analyze the frequency spectrum, and avoid overcompression and limiting. With these tips, you can take your music to the next level.

Common Mistakes To Avoid When Using Mastering Plugins


Avoiding common mistakes is essential when choosing and using mastering plugins effectively. One of the most critical mistakes to avoid is failing to listen carefully to the mix. You should also avoid using too many plugins, not choosing the right ones for the job, and relying too much on presets.

Common Mistakes to Avoid When Using Mastering Plugins Using mastering plugins can help to enhance the overall mix of your audio tracks, but it’s important to be cautious when using them. Common mistakes can be easily avoided to ensure that your tracks are at their best. Here are some common mistakes to avoid when using mastering plugins. Overusing plugins It’s common to think that the more plugins you use, the better your track will sound. However, overusing plugins can result in a cluttered and muddied sound. Be selective when choosing your plugins and use a minimal amount to ensure your track has a clean and crisp sound. Using too much gain reduction Using too much gain reduction can result in a squashed and lifeless sound. It’s important to ensure that each plugin is only applying the necessary amount of gain reduction. If you find yourself using more than 5-6dB, it’s best to reconsider your approach before making additional adjustments. Neglecting the importance of headroom Headroom is the amount of space you have between the highest peak in your track and 0dB. Neglecting headroom can result in distortion and a loss of quality in your track. Aim for -6dB of headroom to ensure that you have enough room for additional processing. To avoid these mistakes, it’s important to take your time when using mastering plugins. Always strive for high-quality audio and practice using the appropriate amount of plugins, gain reduction, and headroom. When used correctly, mastering plugins can help take your track to a whole new level.

Choosing And Using Mastering Plugins Effectively


Credit: www.worldfinance.com


Choosing And Using Mastering Plugins Effectively


Credit: medium.com


Frequently Asked Questions For Choosing And Using Mastering Plugins Effectively


What Plugins Should I Use For Mastering?


For mastering, it is recommended to use plugins like FabFilter Pro-L2, iZotope Ozone, Waves L2 Ultramaximizer, and T-Racks 5. These plugins offer a range of features like limiting, EQ, compression, and stereo imaging to help you achieve a polished and professional sound.


It is important to remember that mastering is a complex process and it is best to seek the advice of a professional audio engineer if you are unsure.


What Should Your Mastering Chain Order Be For Music?


The ideal mastering chain order for music should be: EQ -> Compression -> Saturation -> Stereo Widening -> Limiting. It is important to note that this is not a fixed order and can be adjusted based on the needs of each track.


It’s also important to keep in mind the goal of the mastering process is to enhance the overall sound without altering the original intention of the artist.


What Are The Best Plugins For Mixing?


Some of the best mixing plugins include FabFilter Pro-Q 3, iZotope Ozone 9, Waves SSL E-Channel, UAD API 2500, and Soundtoys Decapitator. Each plugin offers unique features to help with equalization, compression, and adding warmth to your audio mix. Choose the ones that best suit your needs.


How To Master With Free Plugins?


To master with free plugins, follow these steps: 1. Choose plugins carefully based on your needs 2. Install and activate the plugins on your website 3. Customize the settings to meet your requirements 4. Test the plugins thoroughly before using them 5. Keep the plugins updated to ensure optimal performance.


Conclusion


Mastering plugins are essential for the final touches of a high-quality audio production. By understanding how these plugins work, choosing the appropriate ones for your mix, and utilizing them effectively, you can enhance the clarity, loudness, and overall impact of your music.


Remember to prioritize accuracy, consistency, and attention to detail in the mastering process to achieve professional-level results. With these tips in mind, you’ll be well-equipped to take your mixes to the next level.

Categories
Archive

How To Never Stop Improving Your Music Production

Improving your music production requires consistent effort and commitment. To keep progressing, focus on learning new techniques, seeking feedback, networking with other artists, and investing in quality equipment and software.


As a music producer, there is always room for improvement regardless of the level of expertise. Musicians strive to produce better and better sounds as they progress through their careers. It takes continuous effort and dedication to ensure that your music is up to the mark of your aspirations.


Even if you’re already succeeded in producing high-quality music, there is always something new to learn or another level to reach. You can adopt a few essential techniques, such as learning new production methods, mastering technical skills, taking feedback, connecting with other artists and engineers, investing in premium hardware and software tools, and keeping up with the latest trends in music production technology. We’ll explore how you can keep growing your music production skills to consistently deliver better and better music over time.


Set Goals That Are Measurable

As a musician, it is essential to continually improve your craft. One way to achieve this is by setting goals that can be measured. By doing so, you can track your progress, monitor your successes, and identify areas where you need to improve. In this article, we will discuss how to set goals that are measurable and help you to become a better music producer.

Identify Areas You Want To Improve

The first step in setting measurable goals is to identify the areas of music production that you want to improve. This could include learning a new instrument or software, refining your mixing skills, or improving your songwriting abilities. Once you have identified your areas of focus, write them down.

Areas to Improve
Learning a new instrument
Refining mixing skills
Improving songwriting abilities

Make A Realistic Timeline

After identifying the areas you want to improve, the next step is to set a realistic timeline for achieving your goals. Consider your schedule, work commitments, and other responsibilities while setting your timetable. If you have a busy schedule, create a realistic deadline to avoid putting unnecessary pressure on yourself. For example,

  • Learning a new instrument in three months
  • Refining mixing skills in four months
  • Improving songwriting abilities in six months

Measure Your Progress Regularly

Measuring your progress regularly is essential to achieving your music production goals. It helps you to monitor your success, understand how far you have come, and identify areas where you need to improve. Create a system for tracking your progress; it could be a simple spreadsheet or a more advanced software solution. Set specific metrics to measure, such as the number of songs created, the increase in skills, or the amount of time spent on practice. Regularly evaluate your progress and adjust your goals as necessary.

By setting measurable goals and tracking your progress, you can continuously improve your music production skills. Remember to break down large goals into smaller, achievable milestones, celebrate your successes, and stay motivated.

Continuous Learning And Experimentation


Constantly improving your music production can be achieved through continuous learning and experimentation. Trying out new techniques and tools, while also keeping in touch with industry trends, allows for both personal growth and evolution in your craft.

Continuous Learning and Experimentation Music production is a craft that requires continuous learning to improve your skills and stay relevant. The industry is constantly changing, and new technologies and techniques are being introduced regularly. To never stop improving your music production, you need to embrace continuous learning and experimentation. This means staying up to date with industry developments, trying new things and techniques, learning from your mistakes, and being open to constructive criticism. Stay up to date with industry developments The music industry is continually evolving, so it is essential to stay up to date with the latest trends and techniques. Reading music production magazines, attending industry events, or joining music production forums are useful ways to stay informed. By understanding the latest technologies and production practices, you will be better equipped to innovate and make informed decisions about your production techniques. Try new things and techniques Trying new things and techniques is critical to your growth as a music producer. It can help with finding new inspiration, unlocking new creative avenues, and breaking out from the same old routine. Experiment with new software, plug-ins, VSTs, and sample packs to find the one that best suits your style. It’s important to keep an open mind and not to be afraid of trying new things. Learn from your mistakes Making mistakes is a critical part of the learning process. No matter how experienced you are or how long you have been in the music industry, you will always make mistakes. It’s essential to embrace those mistakes, learn from them and figure out how to improve for next time. Analyze your past work and see where you can improve by identifying things you didn’t like and things others did not like. Through continuous learning and experimentation, you can improve your music production skills. To stay on top of your music game, stay informed, try new things, and learn from your mistakes. These steps will help you excel and improve your music production over time, helping you make better music and creating a unique style that differentiates your work from others.

Pay Attention To Quality Over Quantity

If you’re a music producer, you’re always looking to improve your skillset. It’s easy to get caught up in the endless cycle of creating and publishing music without taking the necessary steps to refine your craft. That’s why it’s crucial to pay attention to quality over quantity.

Focus On Improving One Thing At A Time

It’s essential to focus on one aspect of your production process and improve it before moving on to the next. This approach avoids feeling overwhelmed and helps break down your music creating cycle into more manageable parts. When you focus your attention on one thing, you can concentrate on perfecting it, resulting in a higher quality final product.

  • Start with one technique or one tool
  • Then once you’ve mastered that, move on to the next
  • This methodical approach ensures you consistently improve over time

Take Time To Refine Your Tracks

Taking time to refine your tracks sets them apart from amateurish productions. When you invest time in the refinement process, you improve your ability to hear subtle nuances that can make all the difference. Refining your tracks also helps you pay attention to small but crucial details that can add depth to your music production.

  1. Listen to your tracks and identify areas that can be refined
  2. Don’t rush the production phase, take time to edit and refine
  3. By doing this, you’ll produce tracks that reflect your attention to detail and dedication to your craft

Get Feedback From Trusted Sources

Getting feedback equals a valuable tool to improve your music production. Constructive criticism can help identify areas in your work that need improvement, offering an outside perspective that might help you identify blind spots. However, the feedback sources need to come from trusted people who you know have the experience and skill level to provide constructive criticism.

Here are some sources that can be trusted:

Other music producers The audience you are targeting
The experienced person in the music industry A coach or mentor

Feedback allows you to learn new ways to improve, experiment with new styles and techniques, so don’t be afraid to ask, be open to both positive and negative feedback, and continue improving your music production.

How To Never Stop Improving Your Music Production


Credit: www.reddit.com


Collaboration With Peers


Collaborating with peers is an effective way to continuously improve your music production skills. Working with fellow producers and musicians allows for feedback, fresh perspectives and new techniques to elevate your craft. Keep an open mind and embrace collaboration to enhance your production game.

Collaborating with peers is one of the best ways to improve your music production skills continuously. By collaborating with other musicians, you get to learn from their production process and understand new perspectives that can help you grow to become a better music producer. Below are some tips for collaborating with peers to improve your music production skills.

Seek Out Collaborators With Different Skill Sets

When collaborating with peers, it’s essential to seek out collaborators with different skill sets from yours. Look for people who specialize in different aspects of music production, such as sound design, mixing, or mastering. Working with people who have different skill sets allows you to gain a more holistic understanding of music production and become more versatile as a music producer.

Challenge Each Other To Grow

When collaborating with peers, it’s also essential to challenge each other to grow. Push each other out of your comfort zones and don’t settle for mediocrity. Set high goals and work hard to achieve them. By challenging each other, you’ll be able to learn new production techniques, experiment with different genres, and explore new creative avenues.

Learn From Their Production Process

When collaborating with peers, take the opportunity to learn from their production process. Observe how they work and ask questions to understand their techniques and thought processes. By learning from others, you’ll be able to expand your own skills and add new techniques to your production toolkit. In conclusion, collaborating with peers is an excellent way to improve your music production skills continuously. Seek out collaborators with different skill sets, challenge each other to grow, and learn from their production process. By doing so, you’ll become a versatile and skilled music producer, always striving for excellence in your craft.


Get Out Of Your Comfort Zone

Producing music can be a challenging yet rewarding experience. However, staying in your comfort zone can hinder your growth as a music producer. The key to improving your music production is to push yourself outside of your comfort zone.

Push Yourself To Try New Genres

Trying a new genre opens up new opportunities for you as a producer. Exploring unfamiliar genres can help you better understand the intricacies of different music styles and add a unique twist to your productions. By trying new genres, you might discover a new creative path you never thought existed.

Experiment With Unconventional Sounds

Experimenting with unconventional sounds can help you break free from the confines of typical music production techniques. Using unique sounds, samples, and synths adds a distinct flavor to your music and adds an element of surprise to your listeners. Don’t be afraid to be creative and think outside the box.

Travel To Gain New Perspectives

Traveling can deliver a wealth of inspiration for music producers. Visiting new places can provide a fresh perspective, allowing you to see and appreciate things differently. Traveling also allows you to experience new cultures, and different styles of music first-hand. These experiences can inspire you to create new and exciting pieces of music that wouldn’t have been possible otherwise.

Getting out of your comfort zone isn’t easy, but it’s important to remember that true growth and creativity stem from stepping beyond the familiar. Keep pushing yourself, and you’ll see significant progress in your music production.


Find Inspiration Everywhere

Being a music producer is not only about creating and releasing music but also about constantly improving your skills. One of the best ways to improve your music production skills is by finding inspiration everywhere. Inspiration is all around us, and as a music producer, it is important to look for it constantly. Here are some ways to find inspiration everywhere.

Listen To Different Genres

Listening to different genres is one of the best ways to get inspired. As a music producer, it is important to have a broad range of musical knowledge and experience. Exploring different genres can help you discover new sounds, rhythms, and melodies that you can incorporate into your music. You can create a playlist of different genres that you can listen to when you need an inspiration boost.

Go To Concerts And Music Festivals

Concerts and music festivals are great places to get inspired. Seeing other artists perform live can be a great way to discover new techniques and expand your musical knowledge. Attending concerts and festivals can also help you network with other music producers and artists, which can lead to collaborations and new opportunities.

Read Books And Watch Movies For New Ideas

Books and movies can be great sources of inspiration. There are many books and movies that are centered around music or have music as a theme. You can read music biographies, watch documentaries about music, or watch movies with great soundtracks to get inspired for your next project. Books and movies can provide you with new ideas and help you think about music in a different way.

Overall, finding inspiration is all about looking for it everywhere. As a music producer, you should be constantly looking for new sources of inspiration and incorporating them into your music. Making music is all about being creative and constantly pushing yourself to be better. So, find inspiration everywhere and never stop improving your music production skills.

Stay Organized And Consistent


To consistently improve your music production, it’s essential to stay organized. Keep your workspace and files in order, follow a consistent routine, and make a habit of reviewing and reflecting on your work. Staying organized will help you to stay on track and make progress towards your goals.

Creating great music is all about consistency and commitment to improvement. One of the best ways to achieve this is by staying organized and consistent. It helps to keep track of what works and what doesn’t, and to consistently work towards achieving your goals. In this post, we will discuss how to create a system that keeps you organized and consistent, helping you never stop improving your music production.

Create A System For Organizing Your Work

It’s essential to have a system for organizing your work. This can be either a physical or digital system. Some people prefer to use a notebook or a planner, while others prefer software like Trello, Asana or Notion. Whatever method you choose, ensure it works for you. The system should be simple, making it easy for you to keep track of dates and deadlines, as well as the progress of your work. You can also create folders to keep track of different stages of production, such as writing, recording, mixing, etc. This organization system will help you stay on top of things and ensure that nothing falls through the cracks.

Establish Routines For Practices And Experimentation

Establishing routines is a crucial part of ensuring consistency. Set aside time for practicing, experimentation, and working on new projects. Consistently work towards improving your skills and knowledge by dedicating specific time blocks for learning or practicing specific techniques. Use this time to experiment with new ideas and explore different genres and sounds that may help you develop your production skills. This consistency will help you develop a more refined approach to your music production and foster growth.

Stick To Your Goals And Timelines

Goals and timelines are essential elements to keep track of progress. Break down your goals into small, achievable targets and set a timeline for each target. Ensure that the timelines and goals are realistic and achievable. When you achieve your targets, celebrate them, and move on to the next phase. By sticking to your goals and timelines, you will develop focus and discipline, which will help you improve your music production skills in the long term. In conclusion, staying organized and consistent is crucial to never stop improving your music production skills. Creating a system for organizing your work, establishing routines for practices and experimentation, and sticking to your goals and timelines are essential steps to achieving success in music production.

Give Back To The Community

If you want to enhance your music production skills, there is no better way than giving back to the community. By supporting and sharing your knowledge with others, you create a positive impact on the music industry while increasing your own proficiency in the field.

Share Your Knowledge And Techniques With Others

One of the most effective ways to become better at music production is to share your techniques with others. Don’t shy away from divulging your secrets as it’s a mutually beneficial exchange. When you teach someone else, it reinforces your understanding of the topic and may lead to new insights as you verbalize the process. Teaching also helps you to identify weaknesses in your own knowledge, which you can address and solidify as you teach your method.

Participate In Online Communities And Forums

Being part of online communities and forums that focus on music production can give you access to an array of industry experts who can share their knowledge and skills. It can also give you a platform to showcase your work, receive constructive feedback, and engage in discussions that can enhance your understanding of the subject. Engaging with others in cooperative settings allows you to learn from someone else’s successes and mistakes.

Support Emerging Artists

Supporting emerging artists is a great way to give back to the community while also improving your skills as a producer. When helping emerging artists, you are bound to encounter new and different challenges, thus giving you a new perspective and expanding your knowledge. You may also learn from the experiences of the artists themselves and gain insight into how to deal with a range of situations, giving you a further opportunity to improve your production skills.

In conclusion, giving back to the music production community is an excellent way to enhance your skills while contributing positively to the industry. By sharing your knowledge, engaging with others, and supporting emerging artists, you not only bolster your abilities as a producer but also create a network of supportive peers that can help you accomplish more than you could achieve alone.

Frequently Asked Questions For How To Never Stop Improving Your Music Production


How Long Does It Take To Get Better At Music Production?


The amount of time it takes to get better at music production varies. With consistent practice, dedication, and an eagerness to learn, you can see significant improvement in 3-6 months. However, mastering this skill takes years of experience and practice.


Why Am I Not Getting Better At Music Production?


Not improving in music production may be due to a lack of consistent practice, not seeking feedback, not experimenting with different techniques, not staying updated with industry trends, or not having a clear goal. Focus on these aspects and dedicate time, effort, and determination to enhance your skills.


How Can I Improve My Music Production?


To improve your music production, you can follow these tips: 1. Continually educate yourself on music production techniques and software 2. Experiment with different sounds and genres 3. Collaborate with other artists and producers 4. Focus on quality over quantity 5.


Don’t be afraid to take risks and try new things. Keep learning and practicing to improve your skills.


Why Is It So Hard To Learn Music Production?


Learning music production requires extensive knowledge of multiple technical aspects, such as music theory, software tools, and the creative process. The steep learning curve can make it challenging for beginners to master the skills needed to create high-quality music. Practice, dedication, and a willingness to experiment are essential to overcoming this hurdle.


Conclusion


Incorporating these techniques and constantly seeking new sources of inspiration are crucial in the world of music production. Don’t let complacency hold you back from achieving your full potential. Embrace the power of continuous improvement, and always strive for excellence.


By doing so, you’ll not only develop your technical skills, but also refine your creative vision and make a lasting impact in the music industry. Remember, even the most successful producers are never truly satisfied with their work, and are always seeking ways to improve.

Categories
Archive

How Does The Online Mixing And Mastering Process Work

Online mixing and mastering is a process that involves fine-tuning and polishing audio recordings to produce a high-quality sound. This process is typically conducted by professional sound engineers through specialized software that allows for real-time adjustments to varying audio elements, such as volume, tonality, and effects.


During online mixing and mastering, sound engineers use audio files from clients to make precise adjustments to the mix, ensuring that all elements are balanced and create a cohesive sound. The engineer will then enhance the overall audio quality of the recording through mastering, which involves adjusting the track volume, EQ, compression, and other effects.


Once the mixing and mastering process is complete, the final product is delivered to the client for use in any desired medium, such as streaming or album production. This process has become increasingly popular due to the ease of use and accessibility of online mixing and mastering services.

How Does The Online Mixing And Mastering Process Work


Credit: www.audiomixingmastering.com


Benefits Of Online Mixing And Mastering


Online mixing and mastering is a convenient solution for musicians and artists who want to polish their music tracks without going to a physical studio. The process typically involves sending audio files to a professional online mixing and mastering service provider who cleans up the sound, balances the levels, and provides final touches to produce a high-quality finished product.


It saves time, money, and offers access to industry-standard equipment.

Saves Time And Money

Online mixing and mastering have revolutionized the music production industry, providing new ways for artists to record and produce their music. Among the major benefits of online mixing and mastering is the ability to save time and money. Musicians no longer have to travel to a studio or hire expensive professionals who charge high rates for their services. With online mixing and mastering, you can collaborate with professionals from the comfort of your home, allowing you to save time and significant amounts of money.

Allows For Remote Collaboration

Online mixing and mastering also offer a remote collaboration feature that allows musicians to work with professionals from anywhere in the world. You can send your tracks to the mixing engineer and receive feedback and revisions instantly. This means that even if you are working on a track in a different city or country, you can still get your mixing and mastering done by top talent worldwide.

Access To Top-of-the-line Equipment And Expertise

Online mixing and mastering provides access to top-of-the-line equipment and expertise, which is essential to achieving a high-quality final product. Professionals use high-end tools, equipment, and software to get the best results for your music. Online mixing and mastering services give you an opportunity to tap into this expertise and use the same tools that experts use to produce your music. In conclusion, the benefits of online mixing and mastering are immense, and they provide a great opportunity for musicians to achieve professional-sounding music without breaking the bank. Whether you want to save time and money, collaborate remotely, or access top-of-the-line equipment, online mixing and mastering is a game-changing solution for all musicians.

How Does The Online Mixing And Mastering Process Work


Credit: mixandmastermysong.com


How Does The Online Mixing And Mastering Process Work?

Online mixing and mastering is quickly becoming the norm for musicians, music producers, and audio engineers worldwide. In this digital age, where everything is available on the internet, it has made the traditional music recording process simpler and more convenient. The process involves uploading your files, discussing your goals and preferences, receiving a mix or master demo, providing feedback and revisions, and ultimately receiving the final product. Let’s take a closer look at each step.

Upload Your Files

The online mixing and mastering process starts with uploading your audio files to an online platform, usually a dedicated mixing and mastering service website. The platform usually accepts various audio file types such as .wav or .mp3. It’s essential to ensure that the files you upload are of high quality and free from any errors to make the process as smooth as possible.

Discuss Your Goals And Preferences

This step involves having a consultation with the mixing and mastering engineer to discuss what you want to achieve with your music. You can discuss what kind of sound you are going for, any specific effects you want to be added or removed, and what instruments or vocals you want to accentuate. It’s crucial to articulate your goals and preferences to avoid any misunderstandings later on.

Receive A Mix Or Master Demo

After the mixing or mastering engineer has gone through your music, they will send you a demo of the mix or master. This demo gives you a preview of how your music will sound after the process is complete. You can listen to the demo and decide if it meets your expectations. If it doesn’t, you can communicate any changes or revisions that you want.

Provide Feedback And Revisions

At this stage, you can provide feedback to the mixing and mastering engineer on any changes that need to be made. It’s essential to communicate your ideas and changes clearly and concisely. The engineer will make the revisions and send you back another demo for review. This process will continue until you’re satisfied with the final product.

Receive The Final Product

Once all the revisions are done, and you’re happy with the final product, the mixing and mastering engineer will send you the final version of your music. It’s essential to listen to the final version and ensure that everything sounds as you expected. If there are any discrepancies, make sure to communicate them to the engineer as soon as possible.


Choosing An Online Mixing And Mastering Service


To choose the right online mixing and mastering service, it’s important to understand the process. Once you’ve uploaded your audio files, the service will handle the technical aspects of mixing and mastering, using industry-standard techniques and software to ensure a polished final product that sounds great on any device.

Researching Options

When it comes to choosing an online mixing and mastering service, it’s important to do your research. Take the time to look for options that fit your specific needs and budget. Start by searching for popular online mixing and mastering services. You can also get recommendations from other musicians and producers within your network.

Comparing Pricing And Packages

Before making a decision, it’s important to compare pricing and packages from different online mixing and mastering services. Some services offer a variety of packages with different rates, while others may offer a one-time fee for a specific service. Consider the value of the packages or the individual services before finalizing your decision. Remember that the most expensive option is not always the best option.

Reading Reviews And Testimonials

Reading reviews and testimonials from other musicians and producers who have used the service can provide valuable insights into the quality of the work done by the online mixing and mastering service. Look for reviews and testimonials on the service’s website or other online platforms such as social media or forums. Check for a high percentage of positive reviews and avoid services with a significant number of negative reviews.

Assessing Communication And Customer Service

Effective communication and excellent customer service are crucial when choosing an online mixing and mastering service. Assess the service’s communication processes, such as how they communicate progress updates and revisions. Consider customer service factors like ease of booking, turnaround time, and responsiveness to customer inquiries. Look for services that prioritize excellent customer service to ensure that you have a positive experience throughout the process. In conclusion, choosing an online mixing and mastering service requires careful consideration and research. To make the best decision, take the time to compare pricing and packages, read reviews and testimonials, and assess communication and customer service. By following these steps, you can find an online mixing and mastering service that fits your specific needs and helps you achieve your musical goals.

Tips For Preparing Your Files For Online Mixing And Mastering


To prepare files for online mixing and mastering, it is crucial to provide high quality, uncompressed audio files in WAV or AIFF format. Make sure to label each file accurately and provide a reference mix as well to ensure the engineer understands your vision for the final product.


Following these steps will lead to a smooth and efficient online mixing and mastering process.

One of the most important factors for a successful online mixing and mastering process is ensuring that your files are properly prepared. This step is crucial for achieving the best possible final mix and ensuring that the process goes smoothly. Here are some tips to help you prepare your files for online mixing and mastering. H3: Organizing your tracks Organizing your tracks is an essential step when preparing your files for online mixing and mastering. Ensure that each track is clearly labeled and organized in a logical order. It is recommended to keep all files in one folder with clear and concise names. If you have multiple versions of the same track, label them with the relevant version number such as “v1”, “v2”, and so on. By keeping your tracks organized, you will make it easier for your mixing and mastering engineer to find and process each track efficiently. H3: Labeling your files properly Labeling your files properly is another important aspect of preparing your files for online mixing and mastering. Ensure that all the file names are easy to understand and that they match the labels that you have given to your tracks. You can use standard abbreviations such as “BD” for bass drum or “OV” for overheads. Make sure that all file labels are concise and relevant to the audio content they represent. Properly labeled files can save a lot of time and reduce the chances of mistakes. H3: Providing reference tracks Providing reference tracks is highly recommended as it can help your mixing and mastering engineer understand your preferences and desired outcome. These references can be songs that have the desired sound quality, volume, and any other required attributes. Be sure to provide your engineer with a clear brief along with any preferences that you have for the final mix. Providing reference tracks can help ensure that the final mix meets your expectations and preferences. H3: Preparing for different file formats When preparing your files for online mixing and mastering, it is important to ensure that you have the right file formats for the job. Different platforms may require different file types and formats. Ensure that you check with your engineer or provider for the required file types and formats. You may need to convert your files to the required format before sending them. Always ensure that you keep a copy of the original file format for future reference. In conclusion, preparing your files correctly is one of the most important steps in ensuring effective online mixing and mastering. Organizing your tracks, labeling your files clearly, providing reference tracks, and preparing for different file formats are all crucial steps to achieve the best possible final mix. By following these tips, you can ensure that your mixing and mastering process goes smoothly, and you achieve your desired outcome.

How Does The Online Mixing And Mastering Process Work


Credit: www.audioanimals.co.uk


Frequently Asked Questions Of How Does The Online Mixing And Mastering Process Work


How Does Online Mastering Work?


Online mastering is a process of fine-tuning and enhancing audio files to sound better for distribution. It involves uploading audio files to an online mastering service, where audio engineers use specialized software and equipment to adjust the levels, EQ, compression, and other parameters to achieve a balanced and polished sound.


The mastered track is then downloaded by the client for distribution.


How Does Mixing And Mastering Work?


Mixing and mastering are two separate processes of music production. Mixing involves balancing and adjusting the levels, panning, and EQ of each individual track. Mastering is the final step where the mixed track is enhanced and optimized for distribution. This involves volume normalization, processing with EQ, compression, and adding effects like reverb and stereo widening.


The goal is to make the track sound consistent and polished across different devices and platforms.


What Are The Steps To Mixing And Mastering?


The first step in mixing and mastering is to organize your session and set levels. Then, apply any necessary EQ, compression, and effects to individual tracks. Next, balance the levels of all tracks to create a cohesive mix. Finally, master the track by enhancing the overall sound with EQ, compression, and limiting, ensuring it meets industry standards for loudness.


What Is Online Mixing?


Online mixing is the process of blending and enhancing audio tracks, done through web-based software. It involves balancing levels, adjusting EQ and effects, and the overall sound quality, to produce a cohesive and professional-sounding mix. The process saves time and cost, as it eliminates the need for physical studio spaces and gear.


Conclusion


After understanding the online mixing and mastering process, it’s clear that it is a convenient and efficient way for musicians to improve the quality of their recordings. From the comfort of their own homes, artists can communicate with professional engineers, collaborate with other musicians, and achieve a professional level of sound production.


With the use of modern technology, anyone can access high-end equipment, skillful engineers, and top-notch sound quality. By choosing the right online mixing and mastering service, musicians can elevate their music to the next level and connect with their listeners on a deeper level.

Categories
Archive

How To Produce Industry Quality Songs At Your Home

To produce industry quality songs at home, invest in high-quality recording equipment and software, practice your skills, and collaborate with other musicians. With dedication and patience, you can create professional-sounding tracks without leaving your house.


As technology advances, it’s easier than ever to produce music from the comfort of your home. With a little creativity, hard work, and some basic equipment, you can create, record, and release your own music without ever leaving your house.


Through the power of the internet, you can even collaborate with other musicians and producers from around the world. We’ll explore the essential equipment needed to produce industry-quality songs, valuable tips for recording and mixing, and the importance of collaboration in making great music. So, whether you’re a seasoned musician or just starting out, get ready to produce your best work yet.

How To Produce Industry Quality Songs At Your Home


Credit: www.ft.com


Start With A Strong Foundation

A solid foundation is necessary to produce industry-quality songs from the comfort of your home. If you are an aspiring musician looking to make a name for yourself, then the first step towards producing professional-grade music is to start with a strong foundation.

Invest In A Good Computer

A good computer is necessary for recording, mixing, and mastering the music at your home studio. A faster processor, better RAM, and a high-end sound card are some of the essential features to consider when looking for a computer. Having a computer that can handle sizable audio files, and run multiple software programs simultaneously without slowing down is crucial.

Get A High-quality Daw

A Digital Audio Workstation (DAW) is a software application that allows you to record, edit, and produce audio files. Investing in a high-quality DAW is crucial to producing professional-grade music. There are several free and paid DAW options available in the market, each with its own set of features. Generally, paid DAWs offer a wider range of tools and plugins that help in creating better quality music.

Once you have a computer and DAW, you can start building your recording studio by investing in quality microphones, headphones, and speakers. Additionally, having a sound-treated room is important to minimize unwanted noise and reverberation. A solid foundation combined with quality equipment, experience, and expertise can help you produce industry-quality songs from your home studio.

How To Produce Industry Quality Songs At Your Home


Credit: www.linkedin.com


Set Up Your Recording Space

If you’re a musician or singer, having a home recording studio can be a game-changer. It can save you time and money, and give you the freedom to work on your music whenever you want. However, setting up a recording space at home can be a daunting task if you don’t know where to start. In this blog post, we’ll take you through the steps needed to produce industry-quality songs at your home.

Choose The Right Room

One of the most important aspects of setting up a recording space is choosing the right room. The room you choose should be spacious enough to fit all your equipment and allow you to move around freely. It’s also important to consider the acoustics of the room. A room with hard surfaces like tiles, concrete, and glass will create unwanted echoes and reverb that could affect the clarity of your recordings.

Therefore, look for a room with carpeted floors, curtains, and furniture, as this will help absorb some of the excess sound. Avoid rooms with low ceilings, as they can create a boomy sound. If possible, choose a room that is isolated from outside noise and foot traffic, as this can also affect the quality of your recordings.

Soundproof Your Space

Sounds that leak into your recording space from the outside environment can cause a problem. Therefore, soundproofing your space is necessary if you want to achieve high-quality music from home. There are several ways to do this, including:

  • Sealing off windows and doors with rubber weather stripping
  • Adding sound-absorbing panels to walls and ceilings
  • Investing in a vocal booth

Remember, soundproofing your room is an investment. It might cost you some money, but you will be able to produce better quality songs at home.

In conclusion, choosing the right room and soundproofing your space are crucial steps to setting up a recording space at home. With these steps in place, you will have a conducive environment for recording high-quality music from your home.

Invest In Quality Equipment


To produce industry quality songs, it’s crucial to invest in quality equipment. High-quality microphones, monitors, headphones, and production software are essential for creating professional-sounding tracks at your home studio. Don’t settle for subpar tools when investing in your music production career.

Investing in quality equipment is crucial if you want to produce industry-quality songs from your home studio. While having a great songwriting skill is important, having the right tools can help you take your music to the next level. In this blog post, we’ll discuss the three essential pieces of equipment you should invest in for your home studio: microphones, audio interface, and studio monitors.

Microphones:

A microphone is an essential recording tool that translates sound waves into electrical energy. The quality of your microphone can have a significant impact on the final product. While there are many types of microphones available in the market, two of the most commonly used in recording studios are condenser and dynamic microphones. The former is known for its high sensitivity, making it ideal for recording vocals and acoustic instruments. Dynamic microphones, on the other hand, are more rugged and can handle louder sources such as electric guitar amps and drums. Remember to look for microphones that have a flat frequency response and low noise for a better recording.

Audio Interface:

An audio interface is a device that converts analog audio signals to digital format and vice versa. It allows you to connect your microphones and other instruments to your computer for recording purposes. When choosing an audio interface, consider the number of inputs and outputs, the audio quality, and the compatibility with your computer. With an audio interface, you can record multiple tracks simultaneously, monitor your recordings with zero latency, and have better control over gain and levels.

Studio Monitors:

Studio monitors are specialized speakers designed to deliver accurate and flat sound, allowing you to hear every detail in your mix. Unlike consumer speakers that enhance certain frequencies, studio monitors reproduce the sound as accurately as possible. When choosing studio monitors, pay attention to the size, frequency response, and power rating. The size of the monitor determines the frequency range it can reproduce, while the power rating defines how loud it can go. For most home studios, a pair of 5- or 6-inch monitors is sufficient. In conclusion, investing in quality equipment is essential if you want to produce industry-quality songs at your home studio. While the above three pieces of equipment are essential, you can always add more gear as your studio expands. By choosing the right equipment, you can take your music production to the next level.

Learn The Basics Of Mixing

If you aspire to be a music producer, you need to learn the basics of audio mixing. Mixing is a crucial skill that involves creating a balance between different tracks of a song by adjusting their volume, tone and adding effects. It’s all about making each sound prominent, distinguishable and yet, melding everything together.

Eq

Equalization or ‘EQ’ is the tool used to balance the frequency of different sounds in a mix to help them distinctively stand out. In simple words, it is a means of adjusting the volume of specific parts of a sound spectrum. Knowing how to use an EQ can help you make a track sound more balanced and polished. Whether it’s removing unwanted frequencies, boosting bass or adding that extra spark, EQ comes in handy while mixing audio.

Compression

Compression helps balance out audio levels of different sounds. It helps control the dynamic range, meaning the difference between the loudest and the quietest points in a sound, making it sound more evenly cohesive. By using compression, you can make sure certain sections of a track like vocals always stay on top of the mix, or make sustained notes sound deeper and more defined.

Reverb

Reverb is a tool that creates a sense of space within a recording. It can add depth and atmosphere to a track and make it sound like it was recorded in an acoustic environment. Too much reverb can muddy a mix, and too little can make it feel flat and lifeless. However, used correctly, reverb can add an extra layer to a mix, taking the listener on a sonic journey.

In conclusion, learning the basics of mixing can make a huge difference to the quality of a song production. By understanding EQ, compression, reverb and other effects, you can produce industry-quality audio recordings right in your home studio. So, don’t skip the basics if you want to create the music of your dreams!

Record Your Tracks


Produce industry-quality songs from the comfort of your home with the Record Your Tracks method. This comprehensive guide covers everything from recording equipment to mixing techniques, helping you create professional-grade tracks without ever leaving your house.

Recording your tracks at home can be a fun and creative process, but it takes some technical know-how to ensure that your recordings sound professional. One of the most important aspects of recording is mic placement. The right mic placement can make all the difference in capturing the nuances of your musical performance.

Mic Placement

When it comes to mic placement, there are a few key things to keep in mind. First, make sure your mic is positioned correctly for the type of sound you want to capture. If you’re recording vocals, for example, you’ll want to place the mic at about mouth level and a few inches away from your face. If you’re recording an instrument, you’ll need to experiment with different mic placements to find the best sound. Another important consideration is the distance between the mic and the sound source. This will depend on how loud the sound is and how much room noise you want to capture. As a general rule, you’ll want to place the mic closer to the source for a louder sound and further away for a quieter sound.

Recording Techniques

Once you have your mic placement sorted, it’s time to think about recording techniques. One of the most important things you can do is to make sure you’re recording in a quiet environment. Background noise can be difficult to remove in post-production and can ruin an otherwise great recording. Another thing to keep in mind is the level of your recording. You’ll want to make sure that your levels are consistent throughout the recording to avoid any sudden jumps in volume. It’s also important to avoid clipping, which is when the level of the recording exceeds the maximum level that the recording device can handle. In addition to these basic techniques, there are also a variety of other recording techniques that you can use to add depth and dimension to your recordings. These might include things like double-tracking, using different mics for different instruments, or experimenting with different EQ settings.

In Conclusion

Recording your tracks at home can be a challenging but rewarding experience. By paying attention to mic placement and using basic recording techniques, you can create professional-quality recordings that sound great. Remember to experiment and have fun, and don’t be afraid to try new things to find the sound that works best for you.


Edit And Mix Your Tracks


Learn how to edit and mix your tracks to produce industry quality songs from the comfort of your home. With the right tools and techniques, you can create professional sounding music without expensive equipment or a recording studio.

Once you’ve recorded your tracks, the next step is editing and mixing. Editing involves cutting and arranging your tracks to create a cohesive sound, while mixing involves balancing the levels of each track and adding effects to improve the overall sound quality. By editing and mixing your tracks, you can take your songs from sounding like basic demos to industry-quality tracks that can stand up against the competition.

Cut And Edit Your Tracks

The first step in editing your tracks is to listen through each recording and identify any mistakes or areas that need improvement. To do this, you can use a digital audio workstation (DAW) such as Logic Pro or Pro Tools to cut and edit your tracks. Through the DAW, you can easily cut and arrange your tracks to create a polished and cohesive sound.

Add Effects

Once you’ve edited your tracks, adding effects can enhance the overall quality of your music. Effects such as compression, reverb, and EQ can help balance and shape the sound of your tracks. You can use plugins and presets within your DAW to add these effects, or you can experiment with third-party plugins to achieve a unique sound.

Balance Your Mix

To achieve a balanced mix, you need to ensure that each track is at the appropriate level in relation to the other tracks. This involves adjusting the volume and panning of each track to create a cohesive sound. You also need to ensure that each instrument and vocal is EQ’d properly to avoid any frequency clashes. In conclusion, editing and mixing your tracks can seem like a daunting task, but it’s an essential step in producing industry-quality songs from your home. By using a DAW, adding effects, and balancing your mix, you can turn basic recordings into polished tracks that sound like they were recorded in a professional studio. With dedication and practice, you can create music that stands up against the competition and showcases your unique sound.

https://www.youtube.com/watch?v=ujoXI_73yE4


Master Your Song

After spending hours recording and editing your music, it is time to make sure your song sounds industry-standard. Mastering your song is an essential step in the music production process. It involves fine-tuning the mix and adding finishing touches to enhance the sound quality across different devices.

Make Final Adjustments

During the final adjustments, you need to ensure that the volume levels of all tracks are consistent and balanced. You can use compression, equalization, and other mastering tools to achieve this. Additionally, you can also add effects such as reverb and delay to give your song a unique sound and character.

It is essential to have fresh ears during this stage. Take breaks to avoid ear fatigue, and come back to your song often to hear it from a different perspective. Remember, the mastering process is subjective, and there is no one-size-fits-all approach.

Prepare Your Song For Distribution

After mastering your song, the final step is preparing it for distribution. You need to ensure that you have the appropriate formats and metadata to upload your music on various platforms such as Spotify, YouTube, or SoundCloud.

You can use software such as iTunes or TuneCore to distribute your music to different streaming services. Ensure that you have a cover art that resonates with your music and attracts the attention of potential listeners. Make sure your song title, artist name, and genre are clear and accurate.

In conclusion, mastering your song is a critical step in the music production process. With the right tools, techniques, and knowledge, you can achieve industry-standard sound quality. Make final adjustments, prepare your song for distribution, and get ready to share your music with the world.

Promote Your Music

Producing a hit song is only half the battle. To truly succeed as a musician, you need to promote your music effectively. Fortunately, with today’s technology, it is easier to get your music out there than ever before. Here are some ways you can promote your songs:

Create A Social Media Presence

Social media is a powerful tool that can help you connect with your fans and reach new audiences. By creating social media accounts, you can keep your followers up-to-date on your latest music, share behind-the-scenes glimpses of your creative process, and interact with your listeners. Be sure to use hashtags and engage with your followers by responding to comments and messages.

Collaborate With Other Artists

Collaborating with other artists expands your reach and provides opportunities for cross-promotion. Partner with musicians who have a similar fanbase and share your music with each other’s followers. Not only does this help you gain new fans, but it also helps you build relationships with other industry professionals.

Submit Your Music To Blogs And Playlists

Submitting your music to blogs and playlists can help you reach even more listeners. Research blogs and music curators that cover your genre and submit your songs to them. If your music is selected, it can help you gain exposure and credibility within your music niche.

By creating a strong social media presence, collaborating with other musicians, and submitting your music to blogs and playlists, you can effectively promote your music and take your career to the next level.

Frequently Asked Questions Of How To Produce Industry Quality Songs At Your Home


How Can I Make Quality Music At Home?


To make quality music at home, you need to invest in good equipment such as a computer, audio interface, and microphone. Use software like Garageband or Ableton for recording and editing. Learn music theory and experiment with different genres and sounds.


Collaborate with other musicians for feedback and inspiration. Practice and be patient as it takes time and effort.


Can You Make Professional Music At Home?


Yes, it is possible to make professional music at home with the right equipment and software. With advancements in technology, anyone can set up their home studio and produce high-quality music. However, it requires a good understanding of music production and a commitment to perfecting your craft.


How Do You Make A Song High Quality?


To make a song high quality, focus on the production quality, mixing and mastering, use high-quality instruments and equipment, write a strong melody and lyrics, and aim to evoke emotion and connect with listeners.


How Do I Make My Home Studio Sound Professional?


To make your home studio sound professional, follow these five key guidelines: 1. Invest in quality equipment, including a good microphone, monitors, and acoustic treatment. 2. Set up your studio in a well-insulated, acoustically friendly space. 3. Use EQ, compression, and reverb sparingly and effectively.


4. Record in the highest resolution possible and mix and master your tracks carefully. 5. Continually educate yourself on recording techniques and stay up-to-date with industry trends.


Conclusion


Producing industry-quality songs from your home can be achieved with the right approach. By following some simple techniques, you can take your music to the next level and achieve professional-sounding results. With the advancements in technology, it’s now possible to create music from the comfort of your own home.


By focusing on the fundamentals like choosing the right software and hardware, setting up a suitable recording environment, and practicing regularly, you can unlock your full potential as an artist and create music that you can be proud of. So let your creativity flow and start the journey of producing high-quality songs from your home today!

Categories
Archive

How Long Does It Take to Mix And Master an Album

Mixing and mastering an album can take anywhere from a few days to a few months, depending on the complexity and size of the project. Mixing and mastering an album can be a lengthy and intricate process that can vary in time depending on various factors.


It involves several steps, from recording and editing individual tracks to finalizing the overall sound quality of the album. The mixing process focuses on blending different tracks, adjusting their levels, and creating a cohesive sound. Meanwhile, mastering is the final step, which involves enhancing the overall sound quality, balancing the levels, and ensuring that the album sounds great on all audio systems.


The time required for mixing and mastering an album can differ significantly based on the number of tracks, type of music, and the intended sound goal. We will explore the various factors that impact how long it takes to mix and master an album.


The Basics Of Mixing And Mastering


Mixing and mastering an album varies depending on various factors such as the number of tracks, complexity of the music, and the skill level of the audio engineer. Generally, it takes around a few weeks to a few months to complete the entire mixing and mastering process for an album.

Mixing and mastering are both crucial stages in the music production process. While they are different techniques, they work hand-in-hand to produce the final version of a song. Mixing deals with the individual tracks of a song, while mastering is the final touch that gives the entire album a polished and balanced sound. In this section, we’ll dive deeper into the basics of mixing and mastering to understand the two concepts.

What Is Mixing?

Mixing is the process of combining individual tracks of a song to create a cohesive sound. The goal of mixing is to balance and EQ the different tracks so that each instrument and vocal can be heard clearly. The mixing engineer will apply effects, such as reverb and compression, to enhance the sound and give it depth. It’s important to note that mixing isn’t just about making each individual track sound good, but also about how the tracks sound when played together.

What Is Mastering?

Mastering is the final step in the music production process. It’s the process of taking the final mix and enhancing the overall sound quality of the album. During mastering, the mastering engineer will apply EQ, compression, and limiting to ensure that each song on the album is consistent with each other in terms of volume, tonality, and loudness. Mastering also ensures that the album is ready for distribution in different formats such as CD, vinyl, and digital.

How Long Does It Take To Mix And Master An Album?

The time frame of mixing and mastering an album depends on various factors like the number of tracks, complexity, and quality. Typically mixing an album takes approximately one week for every 10 tracks. Mastering can be usually done within a few days. However, the duration of each process ultimately depends on the quality of the recording. An album with quality recordings may take less time than an album that requires extensive mixing and mastering work.

The Importance Of Hiring A Professional Mixing And Mastering Engineer

Mixing and mastering require an expert ear and years of experience to create a polished and balanced sound. Hiring a professional mixing and mastering engineer not only saves time but also ensures that the album reaches its full sonic potential. Thus, it’s imperative always to work with a professional mixing and mastering engineer for the best results.

How Long Does It Take to Mix And Master an Album


Credit: dewtour.com


Factors That Affect Album Mixing And Mastering Time


The time it takes to mix and master an album can be affected by several factors. The length of the album, the complexity of the tracks and the experience of the engineer are all crucial elements that can contribute to the length of the mixing and mastering process.


It’s important to find an experienced engineer who can balance quality and efficiency to deliver the final product within the desired timeline.

When it comes to creating a music album, there are many factors that affect the time it takes to complete the mixing and mastering stages. These factors can include the number of tracks on the album, the length of the album, the quality of recordings, the desired sound, and the experience and skill of the sound engineer.

Number Of Tracks And Length Of Album

The number of tracks and the length of the album are two of the most significant factors that determine the amount of time needed for mixing and mastering. As a general rule, the more tracks that need to be mixed, the longer it will take. Similarly, if an album is a double or triple album, the length of time required for mixing and mastering will be longer. A single album containing 10-12 tracks may take anywhere from a few days to a week to be completed, while a double album with 20-24 tracks could take up to one month.

Quality Of Recordings

The quality of the recordings also plays a significant role in the time required for mixing and mastering. If the recordings are of low quality, it may take additional time to clean up the tracks and make them suitable for mixing and mastering. In contrast, higher quality recordings may require less time, as there will be fewer issues that need to be corrected.

Desired Sound

The desired sound of an album is another factor that can affect the amount of time needed for mixing and mastering. If the sound is straightforward and requires little manipulation, the process will likely be quicker. However, if the desired sound is unique or complex, it may take additional time to achieve the desired end result.

Experience And Skill Of The Sound Engineer

Finally, the experience and skill of the sound engineer responsible for mixing and mastering the album will influence the amount of time required. A more experienced and skilled sound engineer may be able to work more quickly and efficiently, resulting in a shorter turnaround time. On the other hand, a less experienced sound engineer may require more time to complete the project. In conclusion, all of these factors combine to impact the amount of time required to mix and master an album. By understanding these factors, musicians can better plan and budget for the time required to create a quality album.

How Long Does Mixing An Album Take?


Mixing and mastering an album can take anywhere from a few days to several weeks, depending on the complexity and length of the tracks. A well-experienced audio engineer can work efficiently to balance the levels and achieve the desired sound, but the process can be time-consuming to ensure perfect results.

How Long Does Mixing an Album Take? Mixing and mastering an album is a crucial process in getting the perfect sound quality. Mixing involves balancing and adjusting the individual tracks, such as vocals, drums, guitars, etc., while mastering entails polishing and finalizing the overall sound of the entire album. Both are iterative and time-consuming processes, but in this section, we will be focusing on mixing and how long it takes to complete. Typical Time Range for Mixing an Album The time required to mix an album varies depending on various factors such as the number of tracks, recording quality, complexity of arrangements, genre, and experience level of the mixing engineer. Generally, a typical album with 10-12 songs can take anywhere from four to six weeks to mix. On average, it takes around eight hours to mix a single song completely. Factors That May Increase Mixing Time Some factors can extend the mixing time, resulting in delays. For example, a poorly recorded track with background noise and reverberation can take longer to mix as the engineer needs to remove these defects manually. Similarly, a complex arrangement with multiple layers of instruments and effects would require additional time to balance each track correctly. Also, if the mixing engineer is inexperienced, they may take more time to complete the task than expected. Factors That May Reduce Mixing Time Certain factors can make the mixing process more comfortable and faster. For instance, if the recording quality is good, the mixing engineer spends less time editing and refining the audio. Also, if the tracks have good separation, they can be mixed faster. A well-organized and detailed production process can save a lot of time and headache during mixing. In conclusion, there’s no set time it takes to mix an album. The factors mentioned above determine the time required. Nonetheless, a reasonable range for mixing and mastering a complete album with ten to twelve songs should be between four to six weeks. It’s crucial to work with an experienced mixing engineer who can guide you through the process and deliver top-notch quality sound.

How Long Does Mastering An Album Take?


Mastering an album typically takes around two to three days per track. However, this can vary based on factors such as the complexity of the music and the experience of the mastering engineer. Overall, mastering is a crucial stage in the album production process that ensures the final product sounds polished and professional.

How Long Does Mastering an Album Take? It’s a question that many music enthusiasts and industry professionals alike have asked. The truth is, the time it takes to master an album can vary depending on several factors. In this blog post, we’ll delve deeper into the mastering process and discuss the typical time range for mastering an album, factors that may increase or reduce mastering time.

Typical Time Range For Mastering An Album

On average, mastering an album may take between one and two weeks from beginning to end. However, this may not always be the case as there are several factors that can affect the amount of time it takes to master an album professionally. One of the primary factors that determine the length of time it takes to master an album is the size and complexity of the project. For instance, a project with several songs may take longer to master than an album with just a few tracks.

Factors That May Increase Mastering Time

Several factors may increase the time it takes to master an album. One of the most common factors is when finding a suitable experienced and reputable sound engineer who can provide high-quality mastering services. While it may be possible to find several audio engineers online, finding one with the necessary experience and expertise may take time. Moreover, the complexity of the project requirements may increase the time it takes to master an album. For example, if your album requires special effects, high-end editing or mixing, this can add extra time to the mastering process.

Factors That May Reduce Mastering Time

While several factors may increase mastering time, there are also several factors that may reduce mastering time. One of the factors is the experience and expertise of the sound engineer. An experienced and reputable sound engineer may be able to master an album more quickly than someone with less experience. The type of music genre your album falls under may also contribute to the mastering time. For instance, some genres, such as classical or jazz, may require a more detailed and intricate mastering process. This can make mastering time longer, but reduced if your album is classified under other music genres. In conclusion, mastering an album is an important process that takes time and effort. The time it takes to master an album may vary depending on several factors like the project’s size, the complexity involved, the expertise available in the market, and the music genre. However, with careful planning and the right sound engineer, you can ensure that your album is mastered to perfection in a timely manner.

The Importance Of Taking The Necessary Time


Ensuring the necessary time is taken in the mixing and mastering process is crucial for producing quality music. Rushing this stage can result in a subpar final product. Depending on the complexity of the album, it can take anywhere from a few weeks to several months to complete the mixing and mastering process.

When it comes to mixing and mastering an album, many musicians and producers often wonder how long the process takes. While the answer may vary depending on various factors, one thing that is certain is the importance of taking the necessary time. Rushing the process can lead to a subpar final product and may even have detrimental effects on the overall success of the album. On the other hand, allowing sufficient time for mixing and mastering can have numerous benefits, some of which we will discuss in this article.

Why Rushing The Process Can Be Detrimental

Rushing the mixing and mastering process may seem like a tempting approach, especially if you’re eager to release your album. However, doing so can often result in various problems. These include:

  • Inaccurate sound balance
  • Lack of attention to detail
  • Subpar sound quality
  • Loss of dynamics and energy

These issues can have a significant impact on the final sound of the album, resulting in an underwhelming listening experience for your audience. Therefore, it’s essential not to rush the process and take the time needed to achieve the best possible outcome for your music.

The Benefits Of Allowing Sufficient Time For Mixing And Mastering

Taking the time to properly mix and master your album can have many benefits. Here are a few:

  • Improved sound quality: Allowing sufficient time for mixing and mastering can enhance the quality of sound, making the music more enjoyable to listen to.
  • Consistency: Achieving a consistent sound throughout the album can help make it more cohesive and enjoyable to listen to.
  • Attention to detail: A proper mixing and mastering process allows for a meticulous approach, ensuring every detail of the music is polished and well-executed.
  • Professionalism: A well-mixed and mastered album reflects a professional and serious approach to music-making, which can positively impact your reputation and audience perception.

Overall, allowing sufficient time for mixing and mastering your album is essential to achieving the best possible sound quality and presenting a professional product. Rushing the process can have many detrimental effects, and it’s essential to take the time needed to perfect your music for its audience.

Tips For Streamlining Album Mixing And Mastering


Streamlining the mixing and mastering process is essential for album production efficiency. The length of time it takes to complete a project can depend on various factors such as the complexity of the tracks, quality of the recordings, and the skill level of the mixing and mastering engineer.


However, proper planning, communication, and using the right tools can significantly reduce the time it takes to complete this vital stage of album production.

Communicating Clearly With The Sound Engineer

Clear communication with your sound engineer is crucial for expediting the mixing and mastering process. It helps your sound engineer understand what your expectations are for the final product, and it ensures that they know precisely what needs to be done to achieve your desired sound. Before the mixing and mastering process begins, ensure that you have agreed on the mixing and mastering style. Be sure to ask questions on any confusion about the process. By doing so, you will help avoid unnecessary delays that may arise during the album’s mixing and mastering process.

Preparing The Required Materials In Advance

Preparation is key when it comes to album mixing and mastering. To ensure that the process runs efficiently, provide your sound engineer with all the necessary materials early in the process. This could include the raw audio files, notes on the sound and mixing preferences, and any other additional materials that may be required. By doing so, you’ll enable the sound engineer to work on the project without any delays or disruptions, and this will speed up the entire process.

Working Efficiently In The Studio

Working efficiently in the studio is essential in quickening the album’s mixing and mastering process. To make the most out of your time with the sound engineer, take care of all non-music related tasks before arriving at the studio. Arrive early, and ensure that everything is set up and ready to go before proceeding. By doing so, you will optimize the time you spend on the mixing and mastering process and thus maximize efficiency. In conclusion, Mixing and mastering an album takes time. However, with these tips, you’ll make the process faster and less frustrating. By taking time to communicate clearly, preparing the required materials in advance, and working efficiently in the studio, you’ll create a conducive environment which your sound engineer can thrive upon.

The Final Word: How Long To Expect For Your Album

The Final Word: How Long to Expect for Your Album

Factors To Consider Before Estimating Mixing And Mastering Time

Before we dive into the question you have been waiting for, let’s take a look at the factors that can influence the time it takes to mix and master an album:

  • Number of songs: Naturally, the more songs, the longer it will take to mix and master.
  • Complexity: If the songs are instrumentally complex or require a lot of separate tracks, it will take longer than a simpler, acoustic album.
  • Quality of recordings: If the recordings are not up to standard, mixing and mastering can take longer to clean up and enhance.
  • Experience of the engineer: An experienced engineer will be more efficient, which can save time.

Learning To Be Patient For The Best Possible Result

Now, onto the question at hand, how long does it take to mix and master an album? The answer is not straightforward, unfortunately, but the industry standard is one day per song. However, this can vary greatly depending on the factors mentioned above. It is important to recognize that quality is more important than speed. Rushing the process can lead to subpar results that you will not be satisfied with. So, be patient and trust the process.

The process can take anywhere from a few weeks to several months, depending on the factors mentioned earlier. It is important not to rush the process and allow the engineer to work their magic.

Ultimately, the length of time it takes to mix and master an album depends on many factors, but most importantly, the quality of recordings and the experience of the engineer. While it can be tempting to rush the process, it is crucial to be patient and ensure that the final product is the best it can be.

How Long Does It Take to Mix And Master an Album


Credit: www.facebook.com


How Long Does It Take to Mix And Master an Album


Credit: www.mixedbyel.com


Frequently Asked Questions On How Long Does It Take To Mix And Master An Album


How Much Does It Cost To Get An Album Mixed And Mastered?


The cost of getting an album mixed and mastered varies depending on the studio, engineer, and complexity of the project. However, on average, the cost can range from $500 to $5,000.


How Hard Is It To Mix And Master Music?


Mixing and mastering music can be challenging and requires technical expertise and experience. It involves adjusting the levels of different instruments and vocals, adding effects, and optimizing the sound quality. However, with proper knowledge and tools, it is possible to achieve professional-level results.


Do You Master An Album In One Session?


No, mastering an album typically takes more than one session. It depends on the complexity of the tracks and how much work needs to be done to achieve the desired sound quality. It’s common for mastering engineers to spend several hours on each track and then revisit them after taking a break to freshen their ears.


How Long Does It Take To Make A 12 Song Album?


The duration for making a 12 song album depends on various factors like the artist’s writing process, recording, mastering, and production time. It can take from a few months to a few years to finish a complete album. It also depends on the artist’s creativity, resources, and availability.


Conclusion


Overall, the process of mixing and mastering an album can take anywhere from a few weeks to a few months. However, the time it takes is dependent on various factors such as the complexity of the project, the expertise of the engineer, and the communication between the artist and the engineer.


To ensure a successful and timely outcome, it is crucial to establish clear goals and expectations from the start and to work with a reputable engineer who understands the artist’s vision. In the end, patience and effective collaboration are key to achieving a well-crafted final product that exceeds expectations.