Categories
Archive

What Makes A Successful Music Artist

A successful music artist is one who has talent, works hard and perseveres. Talent, hard work, and perseverance are some of the key factors that contribute to a successful career in the music industry.


The music industry is highly competitive, and becoming a successful artist requires more than just raw talent. A successful artist is someone who can connect with their audience, stay relevant, and consistently produce quality work. They need to be able to navigate the ever-changing industry landscape, adapt to new technologies and trends, and possess a strong work ethic.


In addition, having a supportive team and staying true to their authentic self are also important factors. We’ll delve into what makes a successful music artist and provide some key insights and tips for aspiring musicians.


Unique Style And Sound


A successful music artist stands out from the crowd by their unique style and sound. It takes creativity and originality to gain recognition in the music industry today. Through consistent hard work and dedication, a musician can make a name for themselves and establish a loyal fan base.

When it comes to making a name for oneself in the music industry, having a unique style and sound is crucial. This can be achieved in many different ways, but the three most important elements are a distinctive voice, innovative sound, and authenticity.

Distinctive Voice

A distinctive voice is one of the most recognizable traits of a successful artist. It sets them apart from others in the industry and helps them to stand out. A unique voice is not something that can be taught or replicated, but it can be cultivated over time. Some artists have a natural gift for it, while others work hard to develop theirs.

Innovative Sound

Beyond the voice, the sound created by an artist should also be distinctive and innovative. This can be achieved by experimenting with different genres, styles, and instruments. Successful artists take risks and are not afraid to try something new. They also work closely with producers and sound engineers to create a sound that is unique to them and sets them apart from others.

Authenticity

Finally, authenticity is key to creating a successful brand as a music artist. Fans can spot a fake from a mile away, and artists who are not authentic are unlikely to succeed in the long run. Authenticity comes from being true to oneself, expressing genuine emotions and experiences through music, and building a connection with fans that goes beyond just the music.

Distinctive Voice Innovative Sound Authenticity
Unique and recognizable Experimental with genres and instruments True to oneself and emotions
Cultivated or natural gift Takes risks and tries new things Builds a connection with fans

In conclusion, a unique style and sound are crucial to the success of a music artist. By developing a distinctive voice, experimenting with innovative sounds, and being authentic, artists can stand out from the crowd and build a loyal following.

What Makes A Successful Music Artist


Credit: www.amazon.com


Consistency And Versatility

In the music industry, success is not just defined by producing good music. Consistency and versatility are key factors that make a successful artist. Consistency refers to the ability to maintain a particular standard of output over an extended period, while versatility is the ability to adapt to new styles and trends in the industry.

Consistent Quality Output

One of the hallmarks of a successful music artist is the ability to produce consistent quality output. Consistent quality output means that the artist’s music meets the same high standard of quality, regardless of the genre or style. An artist who is consistent in output ensures their fans that they can always expect a certain level of quality from them.

For instance, Ed Sheeran is known for his consistency in producing quality music, irrespective of the genre. His music style ranges from Pop to Folk, Hip-hop to ballads and more. One of the secrets of his success is the consistency with which he produces quality music that resonates with his fans across genres.

Experimentation With Genres And Styles

Successful music artists are also those who are not afraid to experiment with genres and styles. Musicians who are not afraid to try new things often produce groundbreaking music and stand out from the rest.

For example, Madonna is known for her experimentation with various music genres, from Pop to Electronica, and even Folk. Her ability to merge different sounds and styles and still come up with a unique sound has made her one of the most successful artists in history.

Able To Adapt To Changing Trends

Innovation and evolution are characteristics of the music industry. A successful artist must be able to adapt to changes in the industry effectively. A musician who can keep up with the latest trends in the music industry is better positioned to remain relevant to their fans.

An example of such an artist is Beyoncé. She has been able to adapt her sound and style to keep up with the changing music industry trends. She has incorporated current music genres into her sound, such as Hip-Hop, R&B, and Pop, and has managed to maintain significant admiration from her loyal fans.

Conclusion

Consistency and versatility are two critical factors that contribute to the success of a music artist. Consistent quality output, experimentation with genres and styles, and the ability to adapt to changing trends are the qualities that set successful musicians apart. A successful artist knows how to deliver quality and innovation in their music, ensuring that their fans remain entertained and engaged throughout their careers.

Stage Presence And Performance


A successful music artist needs more than just great music. Stage presence and performance play a crucial role in captivating an audience. Confidence, energy, and engagement are key factors that make a memorable and successful music artist.

A successful music artist is not just someone who can sing or play an instrument well. In fact, stage presence and performance are among the key factors that make an artist stand out from the crowd. Engaging live performances, commanding stage presence, and the ability to connect with the audience are all crucial elements that a successful artist should possess. In this section, we will delve into these factors and explain why they are so important.

Engaging Live Performances

An engaging live performance is about more than simply singing or playing music. It involves creating an experience for the audience through the use of movement, energy, and expression. A great live performance can leave a lasting impression on the audience, making them more likely to become fans and loyal followers. It’s all about creating a connection with the audience and giving them something to remember.

Commanding Stage Presence

Commanding stage presence is essential for creating a memorable live performance. It involves projecting confidence and energy, and creating a sense of authority on stage. This can be achieved through the use of body language, eye contact, and vocal delivery. A musician with a commanding stage presence can take control of the room and captivate the audience from start to finish.

Ability To Connect With The Audience

The ability to connect with the audience is perhaps the most important factor in a successful live performance. It involves understanding your audience and tailoring your performance to their needs and desires. This can be accomplished through the use of storytelling, humor, and interaction with the crowd. A musician who can connect with their audience on a personal level can create a powerful emotional bond that can lead to long-term success. In conclusion, stage presence and performance are essential components of a successful music career. Engaging live performances, commanding stage presence, and the ability to connect with the audience are all important factors for any aspiring artist to consider. By focusing on these elements, musicians can create a memorable and impactful live show that can help launch their career to new heights.

Hard Work And Dedication

Being a successful music artist requires a combination of various factors such as talent, marketing strategies, and hard work. However, one of the most significant traits that sets apart successful artists from the rest is their hard work and dedication. Here is how hard work and dedication plays a significant role in the success of a music artist:

Commitment To Regular Practice And Training

Practice and training are crucial to enhancing an artist’s skills and perfecting their craft. A successful music artist understands the importance of dedicating time to practice regularly and continually evaluates their performance. They must strike a balance between practice and performance, which means rehearsing their performances, refining their technique, and perfecting their stage presence. Regardless of whether they have a live performance or not, they keep the commitment and dedication towards perfecting their craft and continuously refining their skill set.

Continuous Drive To Improve Skills

A successful music artist never stops developing and refining their skills. The music industry is highly competitive, and to remain relevant, an artist must be willing to improve and grow continuously. Successful music artists understand the importance of keeping their music fresh and staying up to date with the latest trends. They have a continuous drive to learn new techniques, experiment with different genres, and collaborate with other artists that share their visions.

Willingness To Put In The Hours

One of the most crucial factors that separate successful music artists from others is the willingness to put in extra hours of work. The music industry demands long working hours and requires an artist to invest their time, money, and energy into their careers. These hours may include practicing, attending rehearsals, composing new music, and recording sessions. A successful music artist understands that there is no substitute for hard work and doesn’t shy away from the time and effort it takes to craft their success.

Ultimately, dedication and hard work are essential ingredients for a successful music artist. While talent remains an integral factor, dedication, and hard work to perfect their craft, develop new skills and put in the hours to succeed result in successful music careers. This combination of attributes and qualities creates a solid foundation for an artist’s music career, ensuring their ongoing prosperity and longevity.

Effective Marketing And Promotion


A successful music artist develops a distinctive style and image that resonates with their target audience. Effective marketing and promotion strategies include building a loyal fan base through social media and live performances, collaborating with other artists, and utilizing streaming platforms to reach a wider audience.

Effective marketing and promotion strategies are crucial for a music artist to achieve success in the industry. Not only does it help the artist to stand out among competitors, but it also helps to build a strong loyal fan base. Here are some ways to ensure an effective marketing and promotion strategy:

Powerful Marketing Strategy

One of the greatest investments an artist can make is in a powerful marketing strategy. An effective marketing plan is a comprehensive blueprint that outlines an artist’s goals, target audience, and how to achieve those goals. It is essential to outline promotional tactics that align with the brand’s image and message. This may include features in music blogs, ads on social media or music sharing platforms, and radio or television interviews. This way, the artist exposes their music to a broader audience and increase its chances of success.

Active Promotion On Social Media

With social media platforms having vast user databases, it has become essential to develop a presence on these platforms and engage with fans actively. Artists should post and share behind-the-scenes and exclusive content with their fans to keep them interested. Consistency is crucial; one must focus on quality over quantity while still maintaining regular engagements. Active social media engagement can lead to a growing fan base. As a result, this could lead to further brand collaborations and perhaps expand the music artist’s repertoire.

Collaboration With Other Artists And Brands

Collaborating with other artists and brands could be one of the most significant moves an artist can make. As such, this can result in gaining followers who might not have known about the music artist’s work initially. It is essential to choose collaborations that align with the artist’s style and brand message. Working with other artists can lead to developing new music ideas, which may have a broader appeal. Collaborating with brands can also be great exposure, as brands have an online presence that artists can showcase their music to with ease. This way, both the artist and brand reach out to each other’s audience, ultimately resulting in a win-win situation. In conclusion, creating an effective music marketing strategy plan is essential for an artist’s success in the music industry. Harnessing the power of social media, collaborating with other artists, and branded partnership all play a crucial role in amplifying an artist’s career. By focusing on these aspects, an artist is on their way to creating a loyal fan base, increasing their following while building a long-term career in the music industry.


Fanbase And Community


Building a strong fanbase and community is one of the key factors that contribute to the success of a music artist. Engaging with fans on social media, hosting events, and providing exclusive content are just a few ways to create a loyal following and establish a lasting career.

When it comes to what makes a successful music artist, having a strong and loyal fanbase is crucial. Beyond just having a large number of followers, a successful music artist should focus on fostering an engaged and supportive community around their music. This means creating opportunities for fans to connect with the artist and with each other, both online and in-person.

Loyal Fanbase

A loyal fanbase is more valuable than a large one. These fans are the ones who will consistently support the artist, attend shows, and share their music with others. To build a loyal fanbase, artists need to consistently produce high-quality music and connect with their fans on a personal level. This could mean sharing behind-the-scenes content, responding to comments on social media, or even sending personalized messages to fans on special occasions.

Active Engagement With Fans

Active engagement with fans is key to building a strong community. This means providing opportunities for fans to connect with the artist and with each other, whether through meet-and-greets, fan clubs, or online forums. Artists who engage with their fans on a regular basis also gain valuable insights into what their fans want from their music and how they can better serve their audience.

Supportive Community

A supportive community is crucial for an artist’s success. This includes not only fans but also other artists, promoters, and industry professionals who can help promote and amplify an artist’s music. Building a community requires ongoing effort and dedication, but the rewards can be immense. By fostering a sense of belonging and shared passion around their music, artists can create a powerful network of support that can help drive their success for years to come.

Business Savvy


A successful music artist is one who is not only talented, but also business savvy. They understand the importance of branding, marketing, and networking to build their career and fan base. The ability to adapt to the ever-changing music industry is also crucial for maintaining success.

As much as music is an art form, it is also a business. A successful music artist must have a certain level of business savvy to effectively navigate the industry. Financial literacy, understanding of the music industry, and strong negotiating skills are crucial.

Financial Literacy

Managing finances is an integral part of any business, and the music industry is no exception. A successful music artist needs to have a good understanding of finance to make informed decisions about their investments, expenses, and profits. This includes budgeting, setting financial goals, and understanding financial statements. A financially literate music artist is more likely to make sound decisions and avoid potential financial pitfalls.

Understanding Of The Music Industry

The music industry is complex, and a successful music artist needs to have a clear understanding of how it operates. This includes knowledge of distribution channels, royalties, copyrights, licensing, and other legal aspects. An artist who has a good grasp of the inner workings of the industry is better equipped to navigate the landscape and make informed decisions.

Strong Negotiating Skills

Negotiation is a critical skill for any businessperson, and music artists are no exception. Successful music artists must be able to negotiate effectively with record labels, promoters, and other stakeholders. This includes being able to articulate their value proposition, set expectations, and secure favorable deals. Strong negotiating skills can be the difference between success and failure. In conclusion, a successful music artist must be business-savvy. This means having financial literacy, an understanding of the music industry, and strong negotiating skills. By developing these skills, music artists can make informed decisions, negotiate better deals, and ultimately succeed in the industry.

Passion And Drive

A passion for music is often the driving force behind successful music artists. This passion and drive fuels their creativity and helps them push through the challenges that come with pursuing a career in the music industry. Let’s take a look at some of the key aspects of passion and drive that contribute to the success of a music artist.

Pure Love For Music

The foundation of a successful music artist is a pure and genuine love for music. They don’t just see music as a career or a way to make money, but as a means of expressing themselves and connecting with their audience. This love for music is what inspires them to create new songs, practice their craft, perform live, and continue to grow as an artist.

It’s this pure love for music that sets successful music artists apart from those who are just trying to make a quick buck. Their passion for music is infectious and helps them build a strong connection with their listeners, leading to more loyal fans and supporters.

Desire To Succeed

While passion for music is crucial, it’s not the only factor that contributes to success. Successful music artists also have a strong desire to succeed in the industry. They set goals for themselves, whether it’s to release a new album or tour the world, and they work tirelessly to achieve those goals.

They’re not afraid to take risks or try new things, and they’re constantly looking for ways to improve and evolve as an artist. This desire to succeed keeps them motivated and focused, even when they face setbacks or challenges.

Unwavering Determination

Finally, successful music artists have an unwavering determination to make it in the industry. They know that there will be obstacles and roadblocks along the way, but they’re committed to overcoming them and reaching their goals.

They’re willing to put in the hard work and dedication required to succeed, whether it’s spending hours in the studio, rehearsing for a live performance, or promoting their music on social media. This determination is what helps them stay the course and ultimately achieve success as a music artist.

Overall, passion and drive are essential components of a successful music artist. An unwavering love for music, a desire to succeed, and a determination to overcome challenges are all key factors that set successful music artists apart from the rest.


Frequently Asked Questions Of What Makes A Successful Music Artist


What Does It Take To Be A Successful Music Artist?


To become a successful music artist, you need to have raw talent, work hard, be persistent, network with people in the music industry, and have a unique identity that sets you apart from the rest. It also helps to have a good team, such as a manager and a PR team to help promote your music.


What Defines A Successful Musician?


A successful musician is defined by their ability to connect with fans through their music, perform captivating live shows, maintain a loyal and expanding fan base, and achieve commercial success through record sales, streaming revenue, and merchandise sales. Additionally, a successful musician is able to evolve their sound and remain relevant in the ever-changing music industry.


What Makes A Successful Singer?


A successful singer has a combination of vocal talent, stage presence, hard work, dedication, and a unique personality. They also understand their audience, are passionate about their music, and are constantly evolving and improving. Additionally, having a good team, networking skills, and social media presence can also contribute to success in the industry.


What Makes A Good Artist Music?


A good artist’s music captivates listeners with its unique sound and memorable lyrics that convey emotion and connect with the audience. The artist’s vocals, instrumentation, and production must align seamlessly while showcasing their originality and creativity. Additionally, their music needs to resonate with their target audience, making them stand out among their peers.


Conclusion


Successful music artists possess a mix of talent, hard work, and determination. They put in the time to craft their skills, and they know how to market themselves, build a loyal fan base, and stay true to their unique artistic vision.


Setting goals, staying focused, and adapting to changing audiences and genres also help many music artists remain relevant in the industry. Ultimately, success is measured by the artist’s ability to connect emotionally with fans, and to stay true to their musical passion while navigating a constantly-evolving musical landscape.


Categories
Archive

Essential Workflow Tips For Ableton Live

Essential Workflow Tips for Ableton Live: Organize your session view, master the keyboard shortcuts, use the MIDI editors and consolidate your tracks. Ableton Live is one of the most commonly used digital audio workstations (DAW) on the market.


From its intuitive Session View to its powerful sequencing and arrangement capabilities, there’s no doubt that Ableton is an excellent choice for music producers of all levels. However, mastering the immense functionality that Ableton provides can be a daunting task, even for experienced music producers.


That is why, in today’s article, we will be sharing some essential workflow tips for Ableton Live that will help you make the most of this powerful program. By using our tips, you will be able to organize your session view, master the keyboard shortcuts, use the MIDI editors, and consolidate your tracks. Therefore, let’s dive right into our workflow tips for Ableton Live.

Essential Workflow Tips For Ableton Live


Credit: www.levelsmusicproduction.com


1. Optimize Your Workspace


Optimizing your workspace is key to efficient workflow in Ableton Live. Organize your plugins, samples, and tracks in a way that makes sense to you. Keep only the essentials on your screen to reduce clutter and distractions.

When it comes to using Ableton Live efficiently, one of the most crucial things is to optimize your workspace. In simple terms, this means creating an environment that allows you to work efficiently and without any distractions.

Create Custom Layouts

One way to optimize your workspace is by creating custom layouts that cater to your specific workflow requirements. You can do this by using Ableton Live’s various customization options, such as hiding certain elements, reorganizing the interface, and saving custom templates.

Reduce Clutter & Distractions

Another essential workflow tip is to reduce clutter and distractions. This can be achieved by hiding unnecessary elements such as tracks and devices that are not currently in use. You can also utilize Ableton Live’s full-screen mode to get rid of any distractions and focus solely on your work.

Customize The Appearance

In addition to reducing clutter, you can also customize the appearance of Ableton Live to suit your preferences. This can make the interface more pleasant to work with, leading to a more enjoyable production experience. By optimizing your workspace in Ableton Live with custom layouts, reducing clutter and distractions, and customizing the appearance, you can streamline your workflows and increase your productivity.

2. Understand Session Vs Arrangement Views


To optimize your workflow in Ableton Live, it’s important to understand the difference between session and arrangement views. In session view, you can trigger clips and loops on the fly, while arrangement view is better suited for linear composition and editing.


By mastering both views, you can seamlessly move between them and create dynamic arrangements.

As an Ableton Live user, understanding the differences between Session and Arrangement views is crucial in optimizing your workflow.

Know When To Use Each View

Session view is ideal for live performances and creating musical ideas on-the-fly. It allows you to trigger clips and loops in real-time, encouraging spontaneity and experimentation. On the other hand, Arrangement view is perfect for composing and arranging a complete track. It allows for linear, timeline-based editing, making it easy to tweak individual MIDI and audio clips, adjust volume levels, and add effects to create a polished final product.

Navigate Efficiently Within Each View

Within Session view, organizing your clips into scenes and color-coding them can make it easy to quickly locate specific clips. You can also utilize the search function to locate clips by name or keyword. In Arrangement view, keyboard shortcuts such as “Tab” to switch between the track and clip view and “Shift + Space” to play from the current position can help you navigate more efficiently. Additionally, utilizing markers can make it easier to locate specific sections of your arrangement. In conclusion, understanding the differences between Session and Arrangement views in Ableton Live can help optimize your workflow and increase your productivity. With these tips, you can efficiently navigate within each view and determine when to use each, ensuring a seamless and enjoyable music-making experience.


3. Utilize Browser & Browser Collections


One essential workflow tip for Ableton Live is to utilize browser and browser collections effectively. This allows quick access to your sound library, effects, and samples. You can organize your collections by genre, mood, or any other categorization that works for you and easily search for specific items.

Organize Your Sound Library

The Browser Collections feature in Ableton Live allows users to organize their sound library systematically. This feature enables the use of color-coding, renaming, and grouping of sounds, making it easier to locate them when needed. You can also use tags to categorize sounds by type, genre, or any relevant attribute, making it possible to find them by searching for specific tags.

Save Commonly Used Effects And Instruments

You can save the effects and instruments that you use frequently in the Browser Collections. This feature simplifies the process of finding and adding frequently used items to your projects. You can also create custom folders within the Collections browser to group these sounds and effects according to your preferred workflow. Saving these effects and instruments in a single directory also enables you to find and add them quickly when needed, speeding up your workflow.

Use The Browser Collections Efficiently

The Browser Collections allow for a high level of customization with regards to organizing your sound library. You can create custom folders, color-coding structures, tags and more. Take advantage of these features to ensure that you have an efficient and user-friendly workflow in Ableton Live. Additionally, you can add your favorite effects, plugins, and virtual instruments to the Collections, readily making them available for your projects.

Conclusion

Browser Collections in Ableton Live is a critical feature in improving your workflow. With a well-organized sound library, you can quickly find and add the sounds you need and save frequently used effects and instruments, thus boosting your productivity. Use this feature to elevate your Ableton Live experience.

Essential Workflow Tips For Ableton Live


Credit: m.youtube.com


4. Maximize Midi Editing


Maximizing MIDI editing can significantly improve your workflow in Ableton Live. Utilizing features like note editing, quantization, and velocity controls can help you fine-tune the smallest details of your tracks, ensuring they sound polished and professional.

Maximize Midi Editing

MIDI editing might seem like a tedious task, but it is crucial to making your music sound professional. Fortunately, Ableton Live offers a variety of tools that make MIDI editing a breeze. Here are some essential workflow tips you can use to maximize MIDI editing.

Use Shortcuts For Quick Editing

Shortcuts are essential when it comes to MIDI editing in Ableton Live. They can help you save a lot of time and increase your productivity. For example, you can use the “Ctrl + D” shortcut to quickly duplicate a selected MIDI clip. The “Ctrl + Shift + M” shortcut is also handy for inserting a new MIDI clip in the currently selected track. Another useful shortcut is “Ctrl + E” which allows you to edit the contents of a MIDI clip in a new window.

Employ Groove Templates For Tighter Rhythms

Groove templates can help you add a natural feel to your MIDI clips. Ableton Live comes with several built-in groove templates that can be applied to your MIDI clips. To access groove templates, select a clip and click the “Groove” button in the Clip View. You can also create your own groove templates by selecting a MIDI clip with the groove you want, and then right-clicking on the clip and selecting “Extract Groove”. This will create a new groove template that you can apply to other clips.

Split, Crop, And Reverse Midi Notes

Another essential workflow tip for MIDI editing in Ableton Live is to split, crop, and reverse MIDI notes. You can split a MIDI note by selecting it and pressing “Ctrl + E”. This will create two separate notes that you can edit individually. To crop a note, select it and press “Ctrl + Shift + L”. This will remove everything outside of the selected note. To reverse a note, select it and press “Ctrl + R”. This can add a unique and creative touch to your MIDI clips. By following these tips, you can make the most out of MIDI editing in Ableton Live. With practice, you can become an expert in no time and create music that sounds polished and professional.

5. Master Audio Effects


Learn how to master audio effects with these essential workflow tips for Ableton Live. From basic EQ adjustments to advanced modulation techniques, this guide will help you take your productions to the next level.

Create Custom Effect Chains

Custom effect chains in Ableton Live can be a game-changer for any producer. Instead of using generic presets, you can create your own FX chains that are tailored to your mix. This way, you can produce something unique and more polished. One way to do this is to create a new Audio Effect Rack where you can add multiple effects to a single chain, including reverb, delay, compressor, and EQs. You can manipulate these effects individually to achieve the desired result. This customization of the chain will help you produce something unique without investing too much time.

Use Automation For Dynamic Changes

Automation is a powerful tool that can save you time while producing music. The ability to automate parameters like volume, pan, and effects can help you create dynamic changes in your track. This tool can be used to tell a story by adding suspense, drama, or excitement in different sections of your track. To use this feature in Ableton Live, you can pick one of the effects and click on the ‘show automation’ button. After this, an automation lane will appear, enabling you to draw in different changes for that effect. This feature helps you automate the whole effect chain to make it ready for the final mix.

Save Your Audio Fx Presets

Saving your custom audio effects settings in Ableton Live can save you a lot of time when you’re producing music. This is because you can reuse them across different tracks, projects and sessions and ensure consistent sound quality. Once you’ve found an effect chain that you like, all you need to do is right-click on it and choose “Save As.” Here you can save your preset as a user-created effect preset. This feature can make things easier for anyone working on many projects at once.

Group Tracks To Save Time On Effects

Grouping tracks in Ableton Live is an excellent way of processing the audio for multiple tracks at once. By grouping a set of tracks, you can apply common effects to all of them simultaneously, saving time and keeping your mix cohesive. To create a group, select the tracks you want to add, right-click, and choose “Group Tracks.” Now all of the audio present in these grouped tracks is processed together. You can add your custom audio effects chain this way for all the tracks at once.

Preview Effects In Real-time

The last but not the least, Ableton Live provides a useful tool for previewing audio effects before committing them to your mix. In the Audio Effect Rack view, you can enable the Sidechain feature that allows you to preview any effect in real-time. By doing this, you can test the effect before dropping it into the mix. By following these tips, you can become an expert in using the Audio Effects in Ableton Live. The main takeaway is to create your customizable effect chain, use automation judiciously, and make the most out of the grouping and previewing features.

6. Embrace Collaboration Tools


Collaboration tools can greatly enhance your workflow when producing music in Ableton Live. Utilizing programs like Splice or Dropbox can streamline the process of sharing project files with collaborators, while communication platforms such as Slack can allow for efficient feedback and idea exchange.

Collaboration is the key to success in the music industry, and Ableton Live makes it easy for its users to connect and collaborate with other users. By embracing collaboration tools, you can uncover new techniques, learn new skills, and even get feedback on your projects.

Connect with other Ableton users

One of the most significant benefits of collaborating with other Ableton users is being able to learn from one another. Ableton’s online community is vast, and there are plenty of forums, Facebook groups, and other online communities you can join. By joining these groups, you can ask questions, get advice, and connect with other users who share your passion for music production.

Share and receive feedback on projects

Another great thing about collaborating with other Ableton users is that you can share and receive feedback on your projects. This is a great way to get an outside perspective on your work and can help you identify areas where you can improve. You can also learn a lot from other users by giving feedback on their projects and seeing how they approach production.

Conclusion

By embracing collaboration tools, you can take your music production to the next level. Ableton Live makes it easy for its users to connect and collaborate with other users. You can learn new skills, get feedback on your projects, and even make new friends in the music production community. So why not start collaborating today and see where it takes you?

7. Simplify Navigation With Key Commands


To simplify navigation in Ableton Live, use key commands. By assigning personalized keys, you can quickly access essential functions and increase your workflow efficiency.

Memorize Essential Shortcuts

When it comes to working with Ableton Live, it can be easy to spend a lot of time navigating through menus and searching for the right tools. But by memorizing essential shortcuts, you can work much more efficiently, saving time and effort. Some of the most important shortcuts to learn include:

  • Ctrl/Cmd + S – Save
  • Ctrl/Cmd + Z – Undo
  • Ctrl/Cmd + X – Cut
  • Ctrl/Cmd + C – Copy
  • Ctrl/Cmd + V – Paste
  • Tab – Switch between Session and Arrangement views
  • Spacebar – Start and stop playback

Create Your Own Custom Key Commands

In addition to memorizing essential shortcuts, you can also create your own custom key commands to streamline your workflow even further. This can be especially useful for tasks that you perform frequently, such as creating new tracks or adjusting volume levels. To create a custom key command, simply navigate to the Preferences menu, select the MIDI Tab, and click on the Key Map button. From there, you can choose which function you want to map to a specific key, and then record the key press. It’s that simple! By taking the time to learn and customize key commands in Ableton Live, you can significantly simplify your workflow, enabling you to work faster and more efficiently. With these essential tips, you’ll be well on your way to mastering this powerful music production software!

Essential Workflow Tips For Ableton Live


Credit: m.youtube.com


8. Optimize Performance


Optimizing performance is crucial in Ableton Live to ensure smooth and uninterrupted creation. A few tips include simplifying your workflow, organizing your clips and samples, and adjusting buffer settings to reduce latency.

When producing music in Ableton Live, it’s crucial to optimize performance to ensure smooth playback and avoid any potential hiccups during live performances. Here are two essential workflow tips to assist you in optimizing performance.

Freeze Tracks To Reduce Cpu Usage

During the music production process, the CPU usage can increase significantly, which may lead to a lag in the software and affect your workflow. To avoid this, you can freeze particular tracks that are taking up most of the CPU usage. Freezing a track is an easy process. Right-click on the track you’d like to freeze and select ‘Freeze Track.’ By doing this, Ableton creates an audio file of the track. This consequently renders the track static and reduces CPU usage. When you’ve frozen a track, you can still edit the effects and volume of the track, but the audio file can no longer be modified. If there are any changes to the track that you’d like to make, you can unfreeze the track, make the modifications and refreeze it once again.

Maximize Use Of Ableton’s Built-in Effects

Ableton Live comes with a vast array of built-in effects such as EQs, compressors, and reverbs. Using these effects can enhance your workflow and conserve CPU usage. Rather than using third-party plugins that may take up more CPU usage, opting to use the built-in effects can help reduce the strain that your computer endures. To use Ableton’s built-in effects, you can simply drag and drop them onto your tracks. Additionally, you can combine various effects to create unique sounds. This will also assist you in minimizing the number of third-party plugins you’ll need to use in your project, leading to more optimization.

Frequently Asked Questions On Essential Workflow Tips For Ableton Live


How Do I Get The Most Out Of Ableton?


To get the most out of Ableton, focus on learning the software thoroughly through tutorials and hands-on experimentation. Utilize Ableton’s unique features, such as Live’s Session View and MIDI mapping capabilities. Take advantage of third-party plugins and collaborate with others in the Ableton community.


Practice regularly and don’t be afraid to experiment and try new things.


Is Ableton Hard For Beginners?


Ableton can be challenging for beginners due to its unique interface and workflow. However, there are various resources available such as tutorials and online courses that can make learning easier. With practice and dedication, anyone can master Ableton.


What Makes Ableton Live So Good?


Ableton Live excels with its innovative Session View, which allows for easy loop-based performance and experimentation. It also offers a user-friendly interface, extensive MIDI mapping capabilities, a vast library of instruments and effects, and seamless live performance integration. Its versatility makes it an excellent choice for musicians, producers, and DJs.


Which Ableton Is Best For Beginners?


Ableton Live Intro is ideal for beginners. It has all the essential features needed to produce quality music, and it is user-friendly. With its straightforward interface, users can easily navigate and experiment with different sounds and effects. Plus, it is affordable, making it an excellent option for those on a budget.


Conclusion


Implementing these essential workflow tips for Ableton Live can significantly enhance your production process. Whether you’re a beginner or an experienced producer, incorporating these strategies can amplify your creativity, streamline your workflow and harness the full potential of this powerful DAW.


Utilize the features and tools effectively, organize your sessions meticulously, and optimize your workflow to generate high-quality tracks. With these practices in place, you can produce music efficiently and effectively. Happy producing!

Categories
Archive

How To Make Money From Music Production

To make money from music production, you can sell beats online or work as a freelancer producing music for clients. As a freelance music producer, you can make money from sync licensing, scoring for films, television shows, and video games, or producing music for other artists.


Music production has become a lucrative business for individuals who are passionate about music. With the growing demand for music in various industries, including television, radio, movies, and video games, there is a huge market for freelance music producers. If you want to make money from music production, you can choose to sell beats online or work as a freelancer producing music for clients.


Being a freelance music producer gives you the opportunity to diversify your income stream, and you can make money from sync licensing, scoring for films, television shows, and video games, or producing music for other artists. We will discuss the top ways to make money from music production.


Discover The Music Production Industry


Discover the music production industry and learn how to make money from your skills and passion. With the rise of digital platforms, it has never been easier to monetize your music production talents and turn your creative pursuits into a profitable business.

The Rise Of The Music Industry

The music industry has undergone a massive shift in recent years. With the rise of technology, the industry has moved away from traditional record labels and towards independent artists. This has created a great opportunity for music producers, who play a crucial role in taking an artist’s music to the next level. As a music producer, you have the chance to find and work with new and upcoming talent in a rapidly growing industry.

Importance Of Music Production In The Industry

Music production is an essential component of the music industry. It involves taking an artist’s raw recording and transforming it into a finished product. This includes everything from editing and mixing to adding instrumentation and effects. Music production is what gives a song its unique sound and quality. It is responsible for the heart and soul of the final product. As a music producer, you have the chance to bring your creative expertise to the table and leave an indelible mark on the industry. Whether you are a seasoned producer or just starting, the music production industry is full of opportunity. With the right skills and mindset, you can turn your passion for music into a successful career. So, take the time to learn and grow as a producer and keep abreast of the latest trends to stay ahead in this dynamic and constantly evolving industry.

Skills Needed For Music Production


To make money from music production, you need to have a handful of skills, including technical knowledge of music software/hardware, music theory, arrangement, songwriting, and mixing/mastering skills. Being creative, passionate, and having great time management skills is also essential to succeed in the industry.

If you are looking to make money from music production, you need to have a set of skills that make you stand out from the crowd. Music production requires creativity, technical skills, and knowledge of the music industry. In this blog post, we will discuss the essential skills needed for music production, including Music Theory and Composition, Digital Audio Workstations and Software, and Editing and Mastering Techniques.

Music Theory And Composition

Music Theory and Composition is an important skill for any music producer. It involves understanding the basics of music, including scales, chords, and melody. A good grasp of music theory helps producers to create better melodies and harmonies, resulting in better-produced tracks. If you are new to music theory, you can take online courses or read books to learn the basics. Music composition also involves understanding the various musical instruments and how to use them creatively to produce great music.

Digital Audio Workstations And Software

Digital Audio Workstations (DAWs) are used by music producers to record, mix, and master music tracks. DAWs are software programs that mimic the functionality of traditional recording studios. They enable producers to create music digitally by using different types of virtual instruments and effects. A good music producer should be familiar with different DAWs and software programs. Some popular DAWs include Ableton Live, Pro Tools, and Logic Pro X.

Editing And Mastering Techniques

Editing and Mastering Techniques are essential skills that make a significant impact on the quality of the final track. Editing involves cleaning up the audio, removing unwanted noise, and correcting errors. Mastering is the post-production process of preparing and transferring recorded audio from a source to a data storage device. It involves making the final mix sound more polished and professional. Additionally, music producers must also have great listening skills to identify and improve minor issues in the final mix. This skill is critical to ensure that the finished track sounds the best it can. Conclusion In conclusion, learning the skills of music theory and composition, digital audio workstations and software, and editing and mastering techniques are essential for any music producer. With these skills, you can easily make money from music production by creating high-quality, unique music tracks that resonate with your audience.

Starting A Music Production Business

If you are a music producer, you already have an ear for great music and know what it takes to make a hit. However, starting a music production business requires more than just talent and skills. You need to create a legitimate business structure, build a stable client base, and invest in top-notch equipment and software to make your business successful. In this article, we will take a look at these important aspects and help you get started in the world of music production business.

Creating A Legitimate Business Structure

The music production business is no different from other businesses and requires you to register your business with the state. This step will help you create a professional image and protect your personal assets from any liabilities that may arise. You can choose to register as a sole proprietor, a partnership, or a corporation. It’s important to do your research and choose the structure that best suits your business needs.

Building A Client Base

Building a client base is a critical step in the music production business. You can start by reaching out to local artists, bands, or record labels. Create a portfolio of your work to showcase your skills and experience. You can also network with other professionals, attend music conferences, and offer competitive prices to attract new clients. It’s essential to maintain a good relationship with your clients and deliver high-quality work to ensure repeat business.

Investing In Equipment And Software

Investing in top-notch equipment and software is crucial for producing high-quality music. You need to have a powerful computer, studio monitors, a microphone, a mixer, and a recording software to get started. The cost of equipment and software can be high, but if you want to succeed in this business, you need to make the investment.

Important Equipment and Software for Music Production Business Cost
Powerful computer $1000-$3000
Studio monitors $300-$1000
Microphone $50-$1000
Mixer $100-$2000
Recording software $100-$1000

In conclusion, starting a music production business can be challenging, but with hard work and determination, it can be a rewarding career. By creating a legitimate business structure, building a stable client base, and investing in top-notch equipment and software, you can not only make money but also create some amazing music.

How To Make Money From Music Production


Credit: www.youtube.com


Monetizing Your Music Production Skills


As a music producer, there are several ways to monetize your skills and make money. You could sell your beats online, offer production services, license your music for commercial use, or teach music production. With determination and hard work, you can turn your passion for music into a profitable career.

If you’re passionate about creating music and you have the skills to produce high-quality tracks and beats, you can turn your passion into profit by monetizing your music production skills. There are several ways to make money from music production, and in this post, we’ll explore some of the most popular methods, including selling beats online, producing for independent artists, scoring music for film and television, and selling sample packs and sound kits.

Sell Beats Online

One of the easiest ways to make money from music production is by selling your beats online. Many websites, such as Beatstars, Airbit, and Traktrain, allow producers to sell their beats directly to artists and other customers. When you sell your beats online, you keep all the rights to your music, and you can earn a passive income by licensing your tracks to multiple buyers.

Producing For Independent Artists

If you enjoy collaborating with other artists, you can monetize your music production skills by producing for independent artists. Many independent musicians are looking for producers who can help them create high-quality tracks that match their style and vision. You can offer your services as a freelance producer, or you can join platforms such as SoundBetter or Fiverr to find clients.

Scoring Music For Film And Television

Another lucrative way to monetize your music production skills is by scoring music for film and television. This involves creating original music or soundtracks for movies, TV shows, commercials, and other visual media. Scoring music for film and television requires a different set of skills than producing beats, but it can be a rewarding career path for those who are passionate about music and storytelling.

Selling Sample Packs And Sound Kits

Finally, you can make money from music production by selling sample packs and sound kits. These are collections of sounds, loops, and samples that other producers and musicians can use in their own tracks. You can create and sell your own sample packs, or you can collaborate with other producers and sell their packs on your website or through marketplaces such as Splice. In summary, there are several ways to monetize your music production skills, including selling beats online, producing for independent artists, scoring music for film and television, and selling sample packs and sound kits. By exploring these different methods and finding the ones that work best for you, you can turn your passion for music into a profitable career.

Creating Passive Income Streams


Learn how to make money from music production by creating passive income streams. With the right strategy, you can turn your passion for music into a lucrative business model that will generate revenue around the clock.

Creating Passive Income Streams: Passive income is the holy grail of music production. It’s the revenue earned without actively working for it. As a music producer, creating passive income streams can help you make money long after you’ve stopped working. There are various ways to create passive income streams from music production. These include publishing and royalties, licensing your music for commercials and ads, and building a music catalog and residual income. H3: Publishing and Royalties When you create original music, you own the copyright. Publishing your music involves registering your songs with a performing rights organization (PRO) such as ASCAP or BMI. Once registered, your PRO collects royalties from radio play, live performances, and music streaming platforms, and pays you for your share. You can also make money by licensing your songs for TV, film, or games. This way, you can earn royalties when your music is used in these productions. H3: Licensing Your Music for Commercials and Ads Licensing your music for commercials and ads is another way to create passive income streams. Ad agencies look for music that fits with the tone and message of their client’s brand. When your music gets picked, you can earn a significant amount of money. You can work with a music library, sync licensing agency, or directly with an ad agency to get your music licensed for commercials. H3: Building a Music Catalogue and Residual Income Building a music catalog is the foundation of creating residual income. You can sell your music on popular platforms like iTunes, Spotify, and Amazon Music. Every time someone streams or downloads your music, you earn a percentage of the sale. You can also sell your music on your own website. Creating a catalog of music that appeals to your fans can help you earn money for years. In conclusion, creating passive income streams is an essential part of making money from music production. Publishers and royalties, licensing your music for ads, and building a music catalog are among the best ways to create passive income streams. By focusing on these areas and consistently producing quality music, you can earn money long after you’ve stopped working.


Building Your Brand As A Music Producer

As a music producer, you may have a lot of competition in the industry. Building your brand is essential to stand out from the crowd and make a name for yourself. Your brand acts as your unique identity that communicates what you stand for and what makes you different from others. Building a strong brand requires a combination of networking and collaboration with other artists, having a strong social media and online presence, and branding your image and sound.

Social Media And Online Presence

Social media is a powerful tool to promote your music and build your brand as a music producer. Utilize different social media platforms such as Instagram, Facebook, Twitter, TikTok, and YouTube to showcase your music production skills and interact with your fans. Share your new releases, behind-the-scenes footage, and collaborate with other artists to increase your reach and engagement. Having a website or a blog is also an effective way to create an online presence, showcase your portfolio, and keep your audience updated.

Networking And Collaborating With Other Artists

Collaborating with other artists is a great way to expand your network and build your brand. Attend music industry events, join forums, and connect with artists in your genre to create meaningful relationships and partnerships. Collaborations help you learn new techniques, reach a wider audience, and provide new opportunities for growth. Remember to credit your collaborators and maintain a healthy working relationship that can lead to future collaborations.

Branding Your Image And Sound

As a music producer, your image and sound play a crucial role in building your brand. Define your niche and identity as a music producer. Have a unique logo, color palette, and create a consistent visual style that represents your brand. Experiment with different sounds and genres to create a signature sound that people can associate with your brand. Be innovative and let your creativity shine through in your music productions.

Maximizing Your Earnings Potential

If you’re a talented music producer and looking to maximize your earnings potential, then the good news is there are several ways to do so. Here are some effective tips on how to diversify your income streams, sell merchandise and merch bundles, or teach music production to earn more money.

Diversifying Your Income Streams

One of the most significant ways to maximize your earnings potential is diversifying your income streams. Instead of putting all your eggs in one basket, try exploring various opportunities to earn money from your music production skills.

You can expand your income streams by offering your services to different clients, such as music libraries, indie filmmakers, or TV shows. You can also consider creating and licensing your own music, which mainly involves uploading your music to several platforms like Spotify, Apple Music and getting royalties for the plays. Always try to collaborate, network, and seek out new opportunities to diversify your income streams.

Selling Merchandise And Merch Bundles

Selling merchandise and merch bundles is an excellent way of making money from music production. Everyone loves merchandise! You can design and sell different merchandise items such as t-shirts, hats, mugs, stickers, or phone cases that showcase your brand, philosophy, or style.

Making merch bundles too can boost up your sales. For instance, You can include CDs, Vinyl or Cassette tapes with your merchandise items. It will help your fan to buy the whole bundle at once instead of buying one item at a time.

Teaching Music Production And Offering Private Lessons

Besides creating and licensing music and selling merchandise, teaching music production and offering private lessons is a fantastic way to supplement your music production income. Many aspiring music producers are interested in learning music production, and there are different ways you can teach them.

You can create online music production courses and sell them to different learning platforms. You can also do one-on-one online private lessons or host various music production workshops or seminars. This way, you’ll be sharing your knowledge and getting paid in return.

By diversifying your income streams, selling merchandise and merch bundles, and teaching music production and offering private lessons, you can maximize your earnings potential as a music producer. Remember to be professional, unique, and creative in all your ventures, and the sky’s your limit.

How To Make Money From Music Production


Credit: mackie.com


Frequently Asked Questions On How To Make Money From Music Production


Can Music Producers Make Good Money?


Yes, music producers can make good money through various income streams such as royalties, fees for producing, and touring. The amount they earn depends on their experience, reputation, and success in the music industry. The top music producers in the world can earn millions of dollars annually.


Can You Make Money Making Music?


Yes, it is possible to make money making music. There are various ways you can monetize your music, such as through live performances, selling merchandise, licensing your music, or streaming royalties. However, it takes a lot of hard work, dedication, and talent to make a sustainable income as a musician.


How Do Music Producers Make Passive Income?


Music producers make passive income through streaming services, royalties from the songs they’ve produced, and by selling beats online. They can also earn income through music placements in films, TV, and commercials, as well as by collaborating with other artists and producers.


Additionally, they can make money by selling their own merchandise and touring.


How Much Do Beginner Music Producers Make?


As a beginner music producer, you can earn anywhere from $0 to $500 per track. The amount depends on your experience, skills, and reputation. Some producers work for free to gain exposure, while others charge a flat fee or a percentage of royalties.


The key is to keep improving your craft and building your brand.


Conclusion


To conclude, music production can be a lucrative career path for those willing to put in the effort and hone their skills. With the advent of new technologies and the growing demand for unique sounds, there’s never been a better time to enter the industry.


Remember to network, stay up-to-date with industry trends, and never stop learning. By following these tips and taking advantage of available resources, you can turn your passion for music production into a profitable career.


Categories
Archive

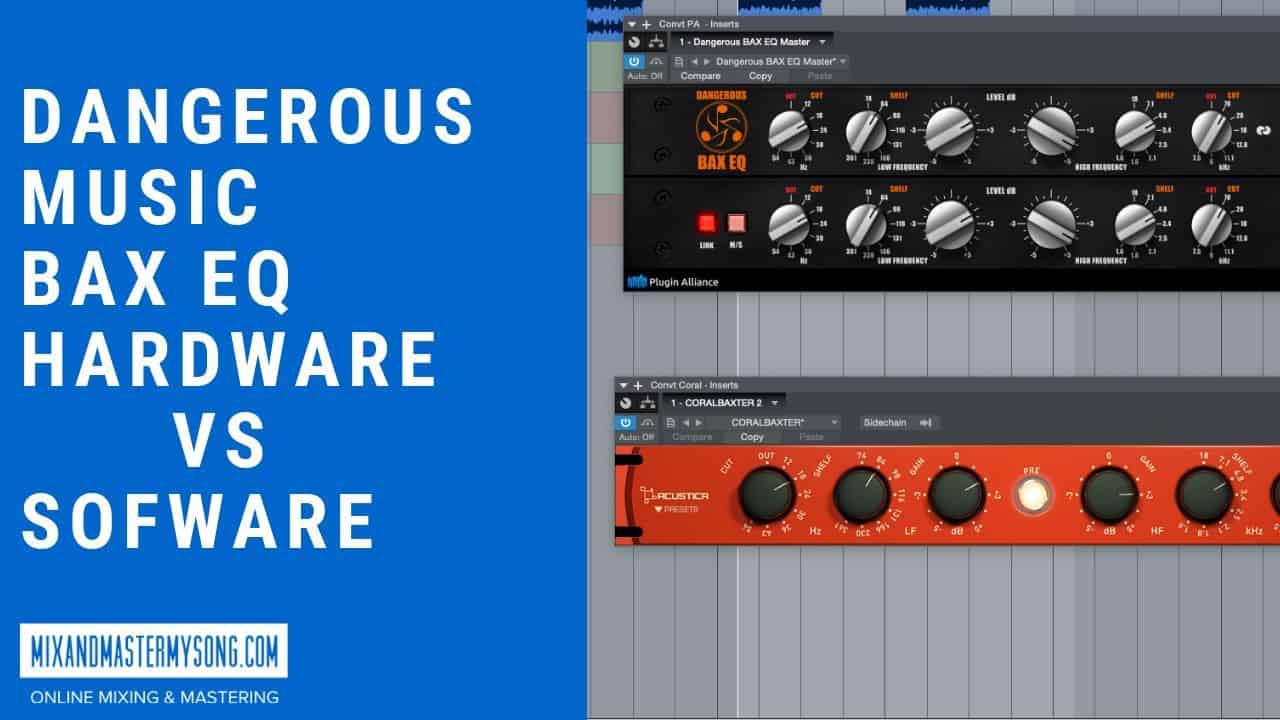
Dangerous Music Bax Eq Hardware Vs Sofware

Bax Eq hardware and software are different in terms of features and user experience. The hardware version provides a more tactile experience and unique sound quality, while the software offers convenience and accessibility.


Also, the Bax is a popular equalizer used in the music industry to enhance the audio quality of recordings. It comes in two versions: hardware and software. This EQ hardware uses analog circuitry to provide a more tactile and hands-on experience for users.

Related reading: EQ: The Complete Guide Hub and Piano Eq. For background, see the Wikipedia article on Equalization.


It also produces a unique sound that many producers and engineers love. On the other hand, the Bax Eq software offers more convenience and accessibility for users who prefer to work within their digital audio workstations. While the software may lack the character and warmth of the hardware, it provides features that allow for more precise control over the audio spectrum. Moreover, ultimately, the choice between Bax Eq hardware or software comes down to personal preference and workflow.

Dangerous Music Bax Eq Hardware Vs Sofware


Credit: mixandmastermysong.com


Hardware Vs Software


In addition, the debate between hardware and software for music production continues with Dangerous Music’s Bax EQ as a hot topic. While hardware offers a tactile experience and unique sound, software provides convenience and versatility. It ultimately comes down to personal preference and the desired outcome for the project.

Furthermore, the debate over using hardware vs software has been a long-standing one in the music industry. Both options have their benefits and drawbacks, and it ultimately comes down to personal preference and what works best for the individual. In this post, we’ll dive into the differences between hardware and software Bax EQs and the advantages of each.

Defining Hardware And Software

Hardware Bax EQs are physical units that you plug into a mixer or other audio equipment. They can be a standalone EQ or incorporated into a larger unit. Software Bax EQs, on the other hand, are digital versions that can be run on a computer and used within a DAW (Digital Audio Workstation) or plugin format.

Benefits Of Hardware Bax Eqs

Hardware Bax EQs have been used in the music industry for many years and are still preferred by some producers over software versions. Here are some of their benefits:

  • Physical interface – Many producers prefer hardware EQs as they provide a tactile experience that is not available with software versions. You turn real knobs and buttons to shape the sound, which feels more hands-on.
  • Sound quality – Hardware Bax EQs have a warm, analog sound. They can add character and depth to a sound that is difficult to replicate with software.
  • No latency – Hardware processing is real-time, without any delay or latency that can occur with software EQs.

Benefits Of Software Bax Eqs

Software Bax EQs have become increasingly popular in recent years due to their ease of use and versatility. Here are some of their benefits:

  • Cost-effectiveness – Software Bax EQs are more cost-effective compared to hardware versions, making them accessible to a wider range of producers.
  • Flexibility – You can run software Bax EQs inside a DAW or other music software. You can also run several instances at once, which boosts efficiency and creativity.
  • Updates – Software Bax EQs often receive regular updates with new features and bug fixes, something that is not available with hardware versions.

In conclusion, both hardware and software Bax EQs have their benefits and drawbacks. Producers should consider their personal preferences, budget, and desired sound when choosing between the two.


The Debate Between Bax Eq Hardware Vs Software

When it comes to music production, one of the most debated topics is the use of Bax EQ hardware vs software. Both have their advantages and disadvantages, and it can be challenging to decide which option is best for your needs. In this article, we’ll explore some of the key factors to consider when choosing between Bax EQ hardware and software.

Pros And Cons Of Hardware Bax Eqs

Hardware Bax EQs have been a staple in recording studios for decades. These devices use analog circuitry to modify the frequency response of an audio signal. Some of the pros and cons of using hardware Bax EQs include:

Pros Cons
  • Warm, rich analog sound
  • High-quality components
  • Instant, hands-on control
  • Expensive
  • Requires regular maintenance
  • Fixed number of bands

Pros And Cons Of Software Bax Eqs

Software Bax EQs offer a more flexible and cost-effective alternative to hardware units. These plugins run inside a digital audio workstation (DAW) and often provide many features and options. Here are some pros and cons of using software Bax EQs:

Pros Cons
  • Lower cost
  • Expansive range of options
  • Easy recall of settings
  • Digital sound may lack warmth
  • May require significant processing power
  • No physical control

Factors To Consider When Choosing Bax Eqs

When weighing the pros and cons of Bax EQ hardware vs software, there are several key factors to consider:

  • Budget: Hardware Bax EQs can cost thousands of dollars, while software plugins often cost far less.
  • Workflow: Some producers prefer the hands-on control of hardware units, while others prefer the flexibility and convenience of software plugins.
  • Sound Quality: While both hardware and software units can provide high-quality sound, some argue that analog circuitry offers a warmth that cannot be replicated digitally.
  • Compatibility: Software plugins may not be compatible with all DAWs, so it’s essential to research compatibility before purchasing.

In conclusion, the choice between Bax EQ hardware and software ultimately comes down to personal preference and budget. While hardware units offer a warm, analog sound and hands-on control, software plugins provide flexibility and cost-effectivity. Before making a decision, it’s essential to consider your workflow, sound quality needs, budget, and compatibility with your DAW.


Testing And Comparison

When it comes to audio processing, the choice of hardware versus software is often a point of debate among music producers and audio engineers. The Dangerous Music Bax EQ is a classic equalizer that engineers have trusted for years. Until recently, this equalizer was only available as hardware, but now there is a software version available. In this article, we will discuss the testing and comparison of Dangerous Music Bax EQ hardware versus software.

Testing Process For Hardware And Software Bax Eqs

Before we dive into the comparison, let’s discuss the testing process for both hardware and software Bax EQs. We tested the hardware Bax EQ by connecting it to an audio interface and processing different tracks. Additionally, we tested the software Bax EQ by installing the plugin in a DAW and processing the same set of tracks. We tested both hardware and software Bax EQs with the same settings and parameters.

Comparison Of Results

The test results showed no significant differences between the hardware and software Bax EQs. In terms of sound quality and performance, both versions produced excellent results. There was no audible difference between the hardware and software versions of the Bax EQ. This means that users can choose based on their preferences and convenience without having to worry about sacrificing sound quality.

Expert Opinions On The Use Of Hardware And Software Bax Eqs

Audio engineers and music producers have their own opinions on the use of hardware versus software. Some feel that hardware provides a more “authentic” sound, while others prefer the convenience and flexibility of software. When it comes to the Dangerous Music Bax EQ, experts agree that there is little difference in sound quality between the hardware and software versions. Most experts recommend that users choose based on their preferences and needs, rather than on sound quality differences.

Pros of Hardware Bax EQ Pros of Software Bax EQ
– Classic sound
– Authentic feel
– No latency
– Convenience
– Flexibility
– Affordable price

In conclusion, the Dangerous Music Bax EQ hardware and software versions have been tested and compared, and both provide excellent sound quality and performance. The choice between hardware and software versions should be based on personal preferences and needs rather than on sound quality differences. Audio engineers and music producers can use whichever version they prefer and still produce excellent results.


Frequently Asked Questions For Dangerous Music Bax Eq Hardware Vs Sofware


What Is The Bax Eq Hardware?


The Bax Eq hardware is a high-end audio equalizer known for its exceptional sound quality and versatility. It’s a studio favorite for mastering engineers around the world.


What Are The Benefits Of Using Bax Eq Hardware?


The Bax Eq hardware provides a powerful and precise method for shaping the tonal quality of audio recordings. Its sound quality stands out, and it offers hands-on controls that software can’t fully match.


What Is Bax Eq Software?


The Bax Eq software is a digital equalizer that closely emulates the sound of the hardware version. It offers the same sonic quality and controls as the original hardware but with added flexibility and convenience.


What Are The Advantages Of Using Bax Eq Software?


The Bax Eq software provides all the benefits of the hardware version while offering more flexibility and convenience. It’s perfect for home recording enthusiasts who want access to professional-level audio processing.


Conclusion


When deciding between hardware and software for Bax Eq, it is important to consider their pros and cons. While hardware may provide a more authentic sound, it comes at a higher cost and requires additional space. On the other hand, software may sacrifice some sound quality, but offers more convenience and affordability.


Ultimately, the choice depends on individual needs and preferences. Regardless of the option chosen, it is essential to prioritize safety and use caution when operating audio equipment.

Categories
Archive

The Ultimate Guide To Melodic House Production

The Ultimate Guide To Melodic House Production covers everything you need to know to create melodic house tracks. From sound design to song structure, this guide teaches you the essential elements of the genre in concise, easy-to-understand terms.


Melodic house is a subgenre of house music that emphasizes melody and musicality over pure rhythm. It has gained popularity in recent years thanks to artists like Lane8, Yotto, and Kaskade. If you’re interested in producing melodic house tracks, this guide is the perfect place to start.


It covers everything from choosing the right sounds to arranging your ideas into a cohesive song. With the tips and techniques outlined in this guide, you’ll be able to create melodic house tracks that stand out from the crowd. So let’s dive in!


Melodic House Fundamentals

Melodic house is a subgenre of electronic dance music (EDM) that is characterized by its euphonious melodies, soothing harmonies, and groovy beats. It’s a genre that has evolved significantly over the years and has gained popularity among music enthusiasts worldwide. However, creating and producing a track in this genre requires a thorough understanding of its fundamentals. This guide will highlight the essential elements of melodic house production that every beginner must know.

Understanding The Basic Elements Of Melodic House

Before delving into the details of creating a melodic house track, it is vital to understand the basic elements that define the genre. These are:

Elements of Melodic House Description
Chords and Melodies The chord progression and melody are the foundation of the track.
Bassline It provides the groove and adds depth to the track.
Drums The kick, snare, and percussion elements create the rhythm and energy of the track.
Atmosphere/Soundscapes They add a sense of space and ambiance to the track, giving it an ethereal feel.

The Importance Of Rhythm In Melodic House

Rhythm is the backbone of any music genre, and it is essential in melodic house. The rhythm elements, including the kick, snare, and percussion, create the groove and energy of the track. The rhythm must be consistent and catchy, making it easy for the listener to dance along. It’s crucial to experiment with different drum sounds and patterns to create a unique rhythm that sets your track apart from others.

Melodic Structure And Progression

In melodic house, creating a memorable melody is crucial. A good melody often follows a specific structure and progression that creates a sense of tension and release. Typically, a track is divided into different sections such as the intro, verse, chorus, and breakdown. Each section must have its unique melody and chord progression to keep the listener engaged. It’s essential to understand the music theory behind creating melodies and chord progressions and experiment with different variations until you find the perfect fit.

The Ultimate Guide To Melodic House Production


Credit: www.productionmusiclive.com


Creating Melodic House Sounds


Learn how to create catchy and soulful Melodic house sounds with the Ultimate Guide to Melodic House Production. From layering synths to arranging tracks, this comprehensive guide provides the tips and tricks you need to make your productions stand out and captivate listeners.

Creating Melodic House Sounds is a fundamental aspect of melodic house production. To create a track that is unique, engaging and stands out, producers must learn how to create compelling melodic sounds. In this section, we will delve into the essential components of melodic house sounds and various techniques used to create them.

The Anatomy Of Melodic House Sounds

To create melodic house sounds, producers have to understand the basic anatomy of melodic sounds. A typical melodic sound consists of three components: attack, sustain, and release. The attack is the initial sound of the note, the sustain is the duration of the note, and the release is the sound after the note has been played. These basic components form the building blocks of melodic sounds, which producers can use to create their signature sounds.

Synthesizer And Sampler Techniques

Synthesizer and sampler techniques are paramount in creating unique melodic house sounds. One of the most common techniques is to use the additive synthesis method. With this technique, producers use multiple waveforms, such as sine waves and square waves, to create a more complex waveform. This technique allows producers to create unique sounds that are not found in traditional instruments. Also, Sampler techniques, such as time stretching and pitch shifting, are useful in creating melodic sounds.

Layering Sounds For Depth And Texture

Layering sounds is another technique that producers use to create depth and texture in their tracks. The art of layering involves blending different sounds to create one complex sound. Producers can use a mix of organic and electronic sounds to create a blended sound that is unique. The use of layering makes melodic sounds more powerful, full, and engaging. Additionally, producers can use effects such as reverb and delay to create a sense of space and openness in their sounds. Producing melodic house sounds requires a combination of creativity, patience, and technique. By incorporating the concepts mentioned above, producers can create sounds that resonate with their audience, establish their brand, and stand out in the crowded music industry.

Arranging A Melodic House Track


Discover the secrets to creating an unforgettable melodic house experience with our ultimate production guide. From crafting infectious melodies to arranging your track, our expert tips and techniques will help you elevate your skills as a melodic house producer.

Arranging a Melodic House Track requires skill and creativity. It is where a producer brings together all the elements to create a cohesive and captivating piece of music. In this section, we will explore various techniques to help make your arrangement stand out and keep your listeners engaged.

Building The Intro And Outro

The intro and outro of your track are crucial to capturing your audience’s attention and making a lasting impression. The intro should be simple but effective and set the tone of the track. It’s an opportunity to introduce your melody and slowly build anticipation for what’s to come. The outro, on the other hand, should bring the track to a satisfying close and leave the listener wanting more.

Creating Dynamic Build-ups And Drops

Build-ups and drops are staple elements in Melodic House and can make or break a track. A well-crafted build-up can create excitement and anticipation for the drop, while a powerful drop can leave your listeners mesmerized. Creating dynamic build-ups can be achieved by gradually increasing the volume, tempo, and adding new elements to create tension. On the other hand, drops should be epic, energetic, and leave a lasting impact on your audience.

Transition Techniques

Smooth transitions can enhance the overall flow of your track and help keep your listeners engaged. To achieve this, use creative transition effects such as filters, risers, and noise sweeps. You can also use breakdowns to create contrast and build anticipation for the next section of the track. Lastly, it’s important to ensure your transitions are well-timed and flow naturally. In conclusion, arranging a Melodic House track requires careful planning and creativity. By implementing the techniques in this guide, you can take your production skills to the next level and create captivating pieces of music that leave a lasting impression on your audience.

Mixing And Mastering Melodic House


Learn the art of mixing and mastering melodic house music with the ultimate guide to melodic house production. Discover everything you need to create and develop your own unique sound, from layering melodies to achieving the perfect balance.

Melodic House music is known for its captivating sound that creates an uplifting and dynamic atmosphere for the listener. However, this effect can only be fully realized through proper mixing and mastering. In this section of The Ultimate Guide To Melodic House Production, we will discuss the essential mixing and mastering techniques for creating a well-balanced, polished, and professional-sounding track. Understanding Equalization and Compression Equalization and compression are two of the most crucial tools in mixing. Equalization helps to shape the sound of each element in the mix by adjusting the frequency balance. Compression, on the other hand, helps to even out the dynamic range of each sound, enabling the track to sound consistent and cohesive. Both of these tools must be used carefully to avoid over-processing the mix, resulting in a muddy or unbalanced sound. Consider using automation to help make manual adjustments to the EQ and compression settings at different points in the track. Creating Depth with Reverb and Delay Reverb and delay are two essential effects that can help add depth and spatialization to your mix. By adjusting the wet/dry levels of each effect, you can create a sense of space and distance between each element in the mix. For example, you can use a longer reverb on the synth and a shorter one on the percussion to create a sense of separation between the two. Note that too much reverb can result in a washed-out sound, so use it sparingly. Mastering for Loudness and Clarity Once your mix is complete, mastering is the final step before distribution. The goal of mastering is to prepare the track for different playback systems and ensure that it sounds as consistent, loud, and clear as possible. Mastering involves adjusting the levels, EQ, compression, and limiting of the entire mix. However, it is important not to overdo it, as this can result in a loss of dynamics and an unpleasant listening experience. If you lack the required skills, consider hiring a professional mastering engineer to help you polish your mix and give it a professional touch. In conclusion, mixing and mastering are the essential stages in getting a well-balanced, polished and professional-sounding track. Equalization, compression, reverb, and delay, when used correctly, can help add depth and clarity to your mix, Mastering, on the other hand, ensures your track is ready to be heard on different playback systems. Don’t let poor mixing and mastering hold your Melodic House music production back!


Promoting And Releasing Your Melodic House Tracks


Your ultimate guide to producing melodic house tracks should include an emphasis on promoting and releasing your music. Focus on building your brand through social media and networking, while also ensuring proper distribution and marketing strategies. Maximize your potential as an artist with these tips for success.

Choosing The Right Platforms For Releases

When it comes to promoting and releasing your melodic house tracks, the selection of the right platforms for your releases is crucial. There are several music distribution platforms available, including Spotify, Beatport, iTunes, and SoundCloud. You must choose the one that is most suitable for your music genre and target audience.

Distribution Platforms Features
Spotify Playlist pitching, Discover Weekly, Release Radar, and more.
Beatport Catering to electronic music producers and DJs and offering high-quality downloads.
iTunes A leading music distribution platform covering various genres, including melodic house.
SoundCloud Catering mostly to independent music producers and offering personalized upload and distribution services.

Marketing Strategies For Maximum Exposure

Marketing your melodic house tracks require strategic planning to achieve maximum exposure. As a content writer, you can use marketing strategies like social media promotions, email marketing, digital advertising, press releases, and more. These will help you to reach your target audience and promote your music to more people.

  • Make use of social media platforms like Facebook, Instagram, Twitter, and YouTube to promote your music. Utilize their algorithm to get better reach.
  • Create an email marketing campaign to reach your subscribers’ inbox with your latest releases.
  • Run digital advertising such as Pay Per Click to target your audience more effectively.
  • Reach out to music bloggers, radio and podcast hosts to feature your music on their platforms.

Collaborating With Industry Professionals

Collaborating with industry professionals can be beneficial for your melodic house production. Working with established artists, DJs, and producers can offer opportunities like exposure to their fan base, gaining experience working with the industry’s top players, and networking opportunities. Seek for occasions like remix competitions hosted by authoritative music labels.
To find and work with industry experts, you can:

  • Search for established artists in your melodic house genre and reach out to them through social media or music websites.
  • Join producer communities, music forums and participate in remix competitions hosted by large music labels to network and build relationships.
  • Get in touch with music professionals such as audio engineers, graphic designers, and distributors to help you with the production, branding and distribution of your music.

By carefully selecting the right platforms, promoting with strategic marketing, and collaborating with industry experts, your melodic house production can achieve the ultimate exposure and success.


Frequently Asked Questions On The Ultimate Guide To Melodic House Production


How Do You Make A Melodic House?


To make a melodic house, you need to focus on creating a catchy melody that can be repeated throughout the track. Use instruments like piano, strings and synths to create interesting harmonies. Combine kick and bass together, and use percussion to add groove and excitement to your music.


Layer different elements together, and use effects to add depth and excitement. Finally, make sure to arrange your track properly to give your audience an enjoyable listening experience.


What Are The Elements Of Melodic House?


Elements of melodic house include catchy melodies, arpeggios, and chord progressions, often accompanied by atmospheric pads, percussion, and vocals. The style often incorporates elements of deep house, techno, and electronica, with a focus on emotional and uplifting tracks.


How Do You Mix And Master A House Song?


To mix and master a house song, you need to use the right software, adjust volumes, EQ and panning, add effects, and finalize with compression and limiting. It’s important to have a clean and cohesive mix without any harsh frequencies and enough headroom.


A professional mix and mastering can take your song to the next level.


What Is Melodic House Music?


Melodic house music is a subgenre of electronic dance music that emphasizes melodies, chords, and harmonic structure. It features elements of house music with atmospheric soundscapes, arpeggiated melodies, and lush synths.


Conclusion


Producing melodic house music is no easy feat, but with the help of this guide, you have everything you need to create your own electrifying tracks. From understanding the genres’ roots in disco and house music to choosing the right software and plugins, it’s all covered here.


Remember, the key to success here is practice and experimentation. So, get started today and let your creative juices flow! With time and effort, you’ll be crafting unforgettable melodies that will inspire and delight listeners for years to come. Happy producing!

Categories
Archive

Critical Elements Your Techno Track Needs

To create a top-notch techno track, one must incorporate critical elements such as a strong beat, catchy melodies, engaging transitions, and unique sound design within the first few seconds of the track. These elements, when combined with creative songwriting, groove, and attention to detail, can make the difference between a track that goes unnoticed and one that becomes a hit.


The techno genre has evolved over the years, but the fundamental elements remain the same, and staying true to these elements while adding your spin to them can lead to a successful track. So, whether you’re a seasoned producer or just getting started, incorporating these critical elements into your techno tracks is key to composing memorable, attention-grabbing music.


Effective Techno Production


To produce an effective techno track, it must contain critical elements such as a strong bassline, driving beats, atmospheric effects, and unique sound design. These elements work together to create an intense and engaging listening experience for techno enthusiasts.

Effective Techno Production is what grabs the attention of techno enthusiasts and keeps them hooked. If you want to create a techno track that captures the essence of this music genre, there are several critical elements that you must include in the track. These elements include a pulse-pounding rhythm, impactful bassline, intricate synths, and well-crafted percussion. Let’s dive deeper into each of these elements in this post, which is specifically designed for anyone interested in producing techno music.

Pulse-pounding Rhythm

The rhythm is the backbone of techno music. It is what drives the energy and keeps the listener engaged. A pulse-pounding rhythm comprises of a steady, repeating beat that is hard to resist. The repetition creates a hypnotic effect that takes the listener on a journey. To create a technos track with this critical element, you must choose drum samples carefully. Experimenting with various drum samples can lead to fantastic results. You can also add percussion layers on top of the beat to add texture and keep the listeners interested.

Impactful Bassline

The bassline is another critical element of techno music that helps to create a groove and adds intensity to the track. It creates a foundation for the rhythm to sit on, and the impact of the bassline can make or break a track. To create an impactful bassline, you can experiment with different bass sounds and play with the rhythm and notes to find what sounds best with your track. Use compression techniques to make the bassline stand out and emphasize its impact.

Intricate Synths

Synths are a crucial element of techno music. They add a layer of complexity to the track and define the melody. It is essential to choose the right synth for your track as it can completely alter the mood and energy of the track. When creating a techno track, experiment with different synth sounds, and try layering them to get an intricate sound. Modifying parameters like LFO, filter envelopes, and pitch-bend can result in exciting and complex sounds, making your track stand out from others.

Well-crafted Percussion

It’s the percussion that adds that final touch of polish and character to your techno track. A well-constructed percussion section can infuse energy and rhythm, harmonizing with the rest of the elements in your track. To create a great percussion track, you must experiment with different percussion sounds, be it claps, hats, cymbals, or shakers. Combining unique sounds can lead to interesting results. But use them sparingly and tastefully as too much can ruin the track. In conclusion, including these critical elements in your techno track creates a dynamic and captivating experience for your listeners. A carefully crafted track with a pulse-pounding rhythm, impactful bassline, intricate synths, and well-crafted percussion can set you apart from the competition. So, start experimenting and let your creative juices flow!


Structuring And Arrangement

Structuring and arrangement are critical elements that can make or break your techno track. The way your track is structured and arranged can determine whether it will be a hit or miss. It is important to understand how to structure and arrange your track to keep your listeners engaged from start to finish and leave them wanting more.

Attention-grabbing Intro

Your techno track’s intro is the first impression you make on your listeners. It should be attention-grabbing enough to make your listeners want to keep listening. Your intro should set the tone for the entire track and should give your listeners a taste of what’s to come. An attention-grabbing intro can be achieved through the use of unique sounds, creative rhythms, and exciting effects.

Building Tension In The Breakdowns

The breakdowns in your techno track are critical moments that can make or break the track’s overall impact. Breakdowns are the moments where you can build tension and anticipation in your listeners, creating a sense of excitement that keeps them engaged. You can achieve this by using filters, drops in volume, or other effects that create a feeling of anticipation and tension. Keep your breakdowns exciting and impactful to keep your listeners hooked.

Payoff In The Drop

The drop is the moment your listeners have been waiting for. It should be an explosive moment that delivers on the promise of your techno track. The drop should be a culmination of the tension and excitement you’ve built throughout your track. Use powerful and dynamic sounds, creative rhythms, and bold effects to create a drop that your listeners won’t forget.

Dynamic Outro

Your techno track’s outro is the last impression you make on your listeners. It should be dynamic enough to leave a lasting impression. Your outro should be exciting and impactful enough to leave your listeners wanting more. Use creative sounds, unique rhythms, and exciting effects to take your listeners on one final journey before the track comes to a close.

Key Takeaways:
An attention-grabbing intro can be achieved through unique sounds, rhythms, and effects.
Use breakdowns to build tension and anticipation in your listeners.
Create a powerful and explosive drop that delivers on the promise of your track.
Leave a lasting impression with a dynamic and exciting outro.

With the right structuring and arrangement, you can create a techno track that captures your listeners’ attention and keeps them engaged from start to finish. Use these critical elements to create a track that stands out from the crowd and leaves a lasting impression.

Mixing And Mastering


Achieving the perfect mix and master for your techno track involves incorporating critical elements such as a strong kick drum, dynamic synth lines, and well-balanced levels. Attention to detail with EQ, compression, and reverb can also enhance the overall sound and impact of your production.

Mixing and mastering are essential processes in producing a professional-sounding techno track. Properly mixing and mastering your track ensures that it sounds good on all playback devices and in different environments. These two processes are often the difference between a good track and a great one. In this post, we’ll explore the critical elements that your techno track needs, with a particular focus on the subheading of mixing and mastering.

Balancing Frequencies

Balancing frequencies is the first critical element to consider when mixing and mastering. Proper balance ensures that each element in your track can be heard clearly. It’s best to start by identifying the most crucial parts of your track, such as the drums, bass, and melody. EQ can be used to adjust the balance between these elements. Using a visual representation of your track in software such as Ableton Live or Logic, you can identify the frequencies that need adjustment and use the EQ to adjust them. Compressors can also be used to control dynamic range and ensure that each element in your track has equal emphasis.

Eq And Compression Techniques For Maximum Impact

EQ and compression techniques can be used strategically to create maximum impact in different sections of your track. For instance, boosting the low end of your kick drum with EQ and then compressing it will make it sound more prominent and powerful. Compression can also be used to glue elements together, making the track sound cohesive and uniform. Proper use of compression and EQ can significantly improve the overall clarity and impact of your track.

Creating Space With Reverb And Delay

Reverb and delay are essential effects that can create space and depth in your mix. Reverb can be used to create a sense of space by adding a spatial “tail” to sounds, simulating their natural acoustic environment. Delay can be used to create movement and interest, mimicking the natural echoes heard in different environments. When using reverb and delay, it’s important to be careful not to overdo it, as too much can muddy your mix. You can use sends and returns to apply reverb and delay to specific elements in your track, allowing you to control the amount of effect on each element.

Volume Control

Lastly, volume control is crucial in ensuring that each element in your track is heard clearly. Proper use of volume can create tension, atmosphere, and impact. Using automation, you can control the volume of each element over time, creating movement and dynamics in your track. It’s important to ensure that the volume of each element in your mix is balanced, with no element overpowering the others. In conclusion, mixing and mastering are essential processes in producing a professional-sounding techno track. Balancing frequencies, using EQ and compression techniques, creating space with reverb and delay, and proper volume control are all critical elements to consider when mixing and mastering your track. Ensure that you pay attention to each of these elements, and your final track will sound excellent on all playback devices and in different environments.


Critical Elements Your Techno Track Needs


Credit: www.thefader.com


Frequently Asked Questions Of Critical Elements Your Techno Track Needs


What Are The Key Elements Of Techno Music?


The key elements of techno music include the use of electronic instruments, repetitive rhythms, mechanical sounds, and a minimalistic approach to composition. Techno music often incorporates futuristic and experimental elements, and can evoke a sense of energy and movement.


What Are The Fundamentals Of Techno Music?


The fundamentals of techno music include the use of electronic instruments and a repetitive beat with a tempo ranging from 120 to 150 BPM. The genre originated in Detroit in the mid-1980s and is known for its futuristic and experimental sound.


Techno music often incorporates various samples and uses synthesizers to create a unique and energetic sound.


How Do You Structure A Techno Track?


To structure a techno track, you should first start with a consistent beat and rhythm. Next, add layers of sound and melody gradually, building towards the climax. Use effects to enhance the overall atmosphere of the track. The arrangement should be dynamic with contrasting parts to keep the listener engaged.


Finally, mix and master the track to achieve a professional sound.


What Are The Elements Of Minimal Techno?


Minimal techno is characterized by stripped-down beats and a focus on repetitive percussion and minimal melodic elements. The genre is built on a foundation of 4/4 rhythms and features sparse arrangements with a focus on sound textures and atmospheric effects.


The elements of minimal techno are typically produced using digital instruments and software, and are often created through careful manipulation of loops and samples.


Conclusion


Based on the critical elements highlighted in this blog post, it is evident that every techno track should be treated with technical precision, creativity, and artistic expression. Your ultimate goal as a techno music artist should be to deliver an immersive and unforgettable experience that will keep your audience longing for more.


As you implement the essential elements discussed here, always remember to stay true to yourself, stay curious, and keep pushing the boundaries of techno music. Remember, your art is your voice; use it to tell your story, connect with your audience, and leave a lasting impression.


Categories
Archive

How To Create A Radio Edit Of Your Song

To create a radio edit of your song, remove any explicit language and shorten the length to fit within radio time constraints. Creating a radio edit of your song involves editing the content to fit within radio time limits, tightening the arrangement or structure, and removing any explicit language.


This allows your song to gain airplay on radio stations that might not play songs with explicit lyrics. It is also a great opportunity to make a shortened version of your song that still captures the essence and mood of the original, which can attract new listeners.


We will go through some of the key steps and considerations in creating a top-quality radio edit of your song that will help you reach a wider audience.

How To Create A Radio Edit Of Your Song


Credit: support.tracklib.com


The Importance Of A Radio Edit


Creating a radio edit of your song is crucial to ensure it gets airplay and reaches a wider audience. You need to condense the length and edit out any explicit or inappropriate content, while still maintaining the essence of the song.


Don’t underestimate the importance of a radio edit in promoting your music career.

What Is A Radio Edit?

A radio edit is a version of a song that has been edited to fit into the limited time available for radio airplay, typically between 3-4 minutes. This version of a song is usually created by removing any unnecessary intros, outros, or extended instrumental solos that may not be suitable for radio play. The focus is on creating a more concise and listener-friendly version of the original song.

Why Is A Radio Edit Important?

When a song is released, it is important to create a radio edit version to increase the chances of it being played on the radio. Radio stations have strict guidelines on how long a song can be and what content they can broadcast. A radio edit helps ensure your song meets these requirements and increases the likelihood of it being played. Creating a radio edit also allows you to showcase the essence of your song in a shorter amount of time. Since most listeners only have a limited attention span, a shorter and more engaging version of your song can help grab their attention and keep them interested. In addition, a radio edit can help you reach a wider audience by increasing the chances of your song being played in different markets and stations. This can lead to increased exposure and help you gain more fans and listeners for your music. Ultimately, creating a radio edit of your song is essential in enhancing your chances of getting airplay and increasing your exposure to potential listeners. By keeping it concise, engaging, and suitable for radio play, you can give your music the best chance of success.

Evaluate Your Song For A Radio Edit


Creating a radio edit of your song can ensure it gets airtime on popular stations. To do this, you should evaluate the length, structure, and lyrics of your piece, and make adjustments accordingly.

Creating a radio edit of your song is crucial if you want to get airplay on mainstream radio stations. The process involves assessing your track and identifying the sections that need to be trimmed to fit within the typically 3-4 minute time slot that most radio stations allow for songs. This is where evaluating your song for a radio edit comes in. In this article, we will discuss how to evaluate your song for a radio edit, identify key sections to trim, consider the length of your song and determine the best structure for a radio edit.

Identify Key Sections To Trim

The first step in evaluating your song for a radio edit is to identify the key sections to trim. These sections are typically the verses, choruses, intros, and outros of the song. Analyze your song and pay attention to the parts that are repetitive, less catchy, or have unnecessary instrumentation. These parts are the ones to trim down, so your song can come out sounding more concise and radio-friendly.

Consider The Length Of Your Song

Another factor to consider is the length of your song. Radio stations generally prefer songs that are 3 to 4 minutes long, and anything over five minutes might be too long for a radio edit. If your song is longer than 4 minutes, it would help if you shaved off some sections to fit within the standard radio time frame. Remember that your listeners are most likely busy people, and they might not have the luxury of listening to a lengthy radio edit.

Determine The Best Structure For A Radio Edit

To determine the best structure for a radio edit, you can start by removing the least impressive or essential section of your song. It could be the intro, an instrumental section or even some of the verses. Organize your song to make sense while fitting within the 3-4 minutes timeframe. Structure your song, so it has a clear beginning, middle, and end. Keep the most catchy and memorable parts of your song in the edit as it will make it more enjoyable for your listeners.

Conclusion

Evaluating your song for radio edit is essential to make your music more accessible to a broader audience. By identifying key sections to trim, considering the length of your song, and determining the best structure for a radio edit, you can make sure your music is radio-friendly while still maintaining its originality and uniqueness. Remember, even with a radio edit, your song still needs to sound great and deliver your message or story effectively.


Tips For Creating A Radio Edit


Crafting a radio edit of your song can be tricky, especially if you’re new to the process. Here are some tips to make it easier. Keep it short, stick to the main chorus and avoid using excessive instrumentation.

Tips for Creating a Radio Edit Creating a radio edit of your song can be a challenging task, but it’s a necessary one if you want your music to be played on the radio. A radio edit is a shortened version of your song that usually lasts between 3-4 minutes. It’s crucial to create a radio edit that captures the essence of your song and conveys your message in a shorter time frame. Here are some tips for creating a radio edit. Focus on the Most Memorable Parts of Your Song When creating a radio edit, it’s essential to focus on the most memorable parts of your song. This could be the chorus or the hook that people will remember. Ensure that the most memorable parts of your song feature prominently in the radio edit. Remove any unnecessary sections such as instrumental interludes, long intros, or outros that don’t add value to the song. The goal is to create a concise and memorable version of your song. Consider Using a Different Introduction When creating a radio edit, you may want to consider using a different introduction than the one in the original version of your song. A shorter and more immediate introduction can capture the listener’s attention from the start. A good radio edit intro is usually shorter and more upbeat than the original. Use Crossfades to Blend Sections Use crossfades to blend sections of your song together smoothly, and this can make your radio edit more cohesive. Crossfades allow you to merge two sections of your song seamlessly, which helps to make your radio edit sound more polished. Additionally, using a crossfade can help you to shorten particular sections of your song while ensuring that it doesn’t sound abrupt. Shorten Instrumental Breaks Shortening the instrumental breaks in your song can help you to reduce the length of your radio edit significantly. Ensure that the instrumental breaks don’t take up too much time and that they don’t detract from the memorability of your song. Edit Lyrics to Fit the Time Requirements Finally, editing your lyrics to fit the time requirements of your radio edit is essential. In most cases, the lyrics need to be shorter than those in the original version. Ensure that you keep the essential message of your song while still keeping it relevant and catchy. Be concise and to the point; ensure that every single word counts. In conclusion, creating a compelling radio edit of your song takes time and effort. However, with these tips, you’ll be on your way to creating a memorable and concise version of your song that will capture the attention of radio stations and listeners alike. Stick to them, and you’ll create a radio edit that your fans will love.

How To Create A Radio Edit Of Your Song


Credit: www.wikihow.com


Using Technology To Help Create A Radio Edit


Technology can be helpful in creating a radio edit of your song. Editing software can help you trim your music to meet time restrictions and enhance the audio quality for radio broadcast. Consider using available tools to create a perfect radio edit that draws listeners’ attention and conveys your message effectively.

Creating a radio edit of your song can significantly enhance its chances of getting airplay. However, editing a full-length song to fit in a radio-friendly runtime can be a daunting task. Thanks to technology, creating a radio edit of your song has become relatively easy. In this blog, we will explore how to use digital audio workstations, effects and plugins, and automated tools to slice your track and make it a perfect fit for radio.

Using A Digital Audio Workstation (daw) To Edit Your Song

A DAW can make the editing process much more manageable, especially if you have a large number of tracks. The software allows you to slice the track to remove the parts that you don’t want and rearrange the remaining sections to create a seamless song. You can also use the DAW to modify the tempo, pitch, and volume of the track. Most DAWs have intuitive user interfaces, making it easy for you to identify and isolate portions of the track you need to edit.

Utilizing Effects And Plugins To Modify Your Track

Applying effects and plugins can genuinely enhance your song’s overall quality and fit it more effectively into the radio format. Mixing plugins, such as equalizers and compressors, can bring out more clarity in the song and create a more polished sound. Additionally, reverbs and delays can create more depth, making the song more immersive. Careful consideration of the effects and plugins to apply is crucial as some effects can muddy the song rather than improve it.

Using Automated Tools To Create A Quick Radio Edit

If you’re looking for a quick and effortless way to create a radio edit, you can use automated tools like Avid’s Pro Tools or iZotope’s RX7. These tools can quickly give you a rough mix of your song, which you can then further edit. You can also use tools like Toontrack’s EZdrummer 2, which can create drum patterns that perfectly match the song’s tempo, saving you time that you would otherwise use to manually create a drum pattern. In conclusion, using technology can significantly simplify the task of creating the perfect radio edit. By using a DAW, effects and plugins, and automated tools, you can create a polished and precise radio edit that suits your song. With these tools at your disposal, you can also experiment with different sounds and effects, giving your song a unique touch that stands out from the crowd.

Testing Your Radio Edit

After creating a radio edit of your song, it’s important to test it. This gives you an opportunity to listen to the track multiple times, play it alongside other popular songs in the same genre, and receive feedback from others. These tests will help you identify any issues that need to be fixed before releasing your song. Here are the three ways to test your radio edit:

Listening To Your Radio Edit Multiple Times

Listening to your radio edit multiple times will help you identify parts of the song that need improvement. It will also help you identify pacing errors, tonal inconsistencies, and any other issues that need fixing. Play your song several times until you’re satisfied with the result.

Playing Your Radio Edit Next To Other Popular Songs In The Same Genre

Playing your radio edit next to other popular songs in the same genre will help you determine if your song has the same level of loudness and sound quality as other songs in the same category. It will help you identify if your song matches the genre’s standards or if it needs further editing and changes.

Getting Feedback From Others

Receiving feedback from others is an essential step in creating a perfect radio edit. Share your track with someone you trust who is knowledgeable about music and ask for their honest opinion. This feedback will help you fine-tune your song and make necessary adjustments. Keep in mind that feedback may not always be positive, but it’ll help you improve the quality of your music.

How To Create A Radio Edit Of Your Song


Credit: flypaper.soundfly.com


How To Distribute Your Radio Edit


Creating a radio edit of your song is crucial for getting airtime. To distribute it effectively, choose the right radio stations, research their submission guidelines, and personalize your pitch. With some networking and persistence, your radio edit will reach its intended audience.

Creating a radio edit of your song is only one part of the process. Once you have the perfect edit, the next step is to distribute it to radio stations and make it available online. In this post, we will take you through some steps for distributing your radio edit to make sure that it reaches your audience effectively. ###Submitting Your Radio Edit to Radio Stations Submitting your radio edit to radio stations is the first step in getting your music played on air. There are several ways you can get your music on the radio, one of them is by submitting your music directly to the station. Radio stations usually have a website where you can submit your music or a contact email for music submissions. Submitting directly to the station can be time-consuming and sometimes tedious, but it is an effective way to get noticed. ###Uploading Your Radio Edit Online In addition to submitting your radio edit to radio stations, you can also upload it on various online platforms. By doing this, you make your music easily accessible to a larger audience, regardless of where they are. One of the most popular platforms for uploading music is SoundCloud. By creating an account, you can upload your song, add descriptions and tags, and share it across social media platforms. Other platforms include YouTube, Spotify, and iTunes. ###Using a Music Distributor to Release Your Radio Edit on Streaming Platforms Using a music distributor is another option for releasing your radio edit on streaming platforms. It’s a cost-effective way of getting your music on various streaming platforms. There are several digital distribution services available, including DistroKid, TuneCore, and CD Baby. These platforms allow you to upload your music, and they handle the rest of the processes, such as distributing your music to various platforms, including Spotify, iTunes, and Amazon Music. This option is advantageous, especially if you want to reach a large audience worldwide. Conclusion Overall, these are great ways to distribute your radio edit for the world to hear. From submitting your music directly to radio stations to using music distributors, the possibilities are endless. By following these steps, you can increase your chances of getting your music played on the radio and discovered by new listeners online.

Frequently Asked Questions On How To Create A Radio Edit Of Your Song


How Do I Get My Song On The Radio?


To get your song on the radio, you need to follow these steps: 1. Find radio stations that play your genre of music. 2. Research the submission process for each station. 3. Prepare a press kit with your bio, music, and contact info.


4. Follow up with each station to ensure they received your submission. 5. Promote your music through social media and shows to increase visibility.


What Is A Radio Edit Of A Song?


A radio edit of a song refers to a shorter version of the original track that has been modified to fit the time constraints of radio stations. Generally, radio edits eliminate any explicit content, instrumental solos, or extended intros/outros present in a song, making them more accessible to a broad audience.


What Is The Difference Between Radio Edit And Clean Version?


A radio edit refers to a shortened version of a song that has been edited for time and content. A clean version, on the other hand, refers to a version of a song that has had any explicit or offensive language removed or replaced with milder options.


What Makes A Song Radio Friendly?


A radio friendly song has a catchy tune, easy to sing along lyrics, and is generally between 3 to 4 minutes in length. It must also have a clean version free from explicit language and a structure that can easily fit into commercial breaks.


Additionally, it should be relatable to a broad audience, something that people will hum or sing along for hours.


Conclusion


Creating a radio edit of your song is essential if you want it to be played on air. Follow the tips outlined in this post such as understanding the format, considering the length, and editing out any explicit content. Keep in mind that a radio edit doesn’t have to mean compromising your artistic vision.


By making a version that is radio-friendly, you increase your chances of getting your music heard by a larger audience. Happy editing!

Categories
Archive

Essential Scales For Making Melodies

The essential scales for making melodies are major and minor scales. These scales provide a strong foundation for creating beautiful and memorable melodies.


If you want to create great music, understanding scales and how they work is essential. The two most important scales for making melodies are the major and minor scales. The major scale is known for its happy and uplifting sound, while the minor scale lends a more melancholic and emotional feel to music.


Knowing how to play these scales on your instrument and using them in your compositions can help you create music that resonates with your audience. We will explore the major and minor scales in more detail and show you how to incorporate them into your melodies. Whether you’re a beginner or an experienced musician, mastering these essential scales is a key step in becoming a great composer.

Essential Scales For Making Melodies


Credit: www.productionmusiclive.com


Major Scales


Mastering major scales is crucial for composing engaging melodies. These essential scales provide the foundation for creating music in various genres and are a must-have skill for any aspiring musician.

Major scales are the foundation of Western music and are a crucial component of creating melodies. Understanding the structure and formula of major scales, as well as common major scales used in music, is essential for any aspiring musician or composer. By using major scales effectively, you can create memorable and compelling melodies that will captivate your audience. In this section, we will explore major scales in detail and provide some tips for creating melodies using major scales.

The Structure And Formula Of Major Scales

Major scales have a distinct pattern consisting of whole and half steps. Every major scale starts with a note, known as the “tonic,” and then follows a specific sequence of whole and half steps. The formula for creating a major scale is: Tone, Tone, Semitone, Tone, Tone, Tone, Semitone Translated into a musical language, this means that the major scale is created using the following sequence of notes: `Do, Re, Mi, Fa, Sol, La, Ti, Do` This formula and sequence form the foundation of major scales and are essential for understanding how to use them in melodies.

Common Major Scales Used In Music

There are twelve unique major scales in Western music, each starting on a different note. However, some major scales are more common than others. The most commonly used major scales are:

  • C major
  • G major
  • D major
  • A major
  • E major
  • B major
  • F# major

These scales are popular because they closely align with the natural harmonics of instruments like the guitar and piano. By learning these common major scales, you can create melodies that are in sync with the long musical tradition.

Tips For Creating Melodies Using Major Scales

Now that you understand the structure and formula of major scales and have some examples of commonly used scales, let’s discuss some tips for creating melodies using major scales.

  • Start with the tonic note and focus on the melody’s mood or emotion.
  • Use the notes of the major scale in a simple and repetitive pattern.
  • Use the notes of the major scale in a complex and intricate pattern to create a more sophisticated melody.
  • Use the major scale as a base, but experiment with chord progressions to add variety and interest.
  • Listen to popular melodies and analyze how the composer used major scales.

By using these tips and experimenting with major scales, you can create melodies that capture your audience’s attention and convey the emotion or mood of your piece. In conclusion, major scales are an essential tool for creating melodies in Western music. By understanding their structure and formula, learning common scales, and using some tips and tricks, you can create music that is both harmonious and captivating. Continue exploring and practicing major scales, and soon you’ll be creating your memorable melodies.


Minor Scales


One essential scale for making melodies is the minor scale. It creates a moody and emotional sound that can add depth to a melody. Incorporating the minor scale can bring complexity to a melody and invoke a range of emotions in the listener.

Minor scales are an essential tool for creating powerful and emotive melodies. The unique structure and formula of minor scales create a distinct sound that can convey a variety of moods, from melancholy to angst and everything in between. In this article, we’ll explore the structure and formula of minor scales, common minor scales used in music, and share tips for creating melodies using minor scales.

The Structure And Formula Of Minor Scales

Minor scales are created using a specific formula of whole steps (W) and half steps (H). The three types of minor scales, natural minor, harmonic minor, and melodic minor, all use different formulas to create their unique sound. The natural minor scale follows the formula: W-H-W-W-H-W-W. For example, the A natural minor scale would include the notes A-B-C-D-E-F-G. The harmonic minor scale differs from the natural minor scale by raising the seventh note one half step, following the formula: W-H-W-W-H-A2-H. Using the A harmonic minor scale, the notes would be A-B-C-D-E-F-G#. The melodic minor scale has a unique structure, using a different formula for ascending and descending notes. The ascending formula is W-H-W-W-W-W-H, while the descending formula is W-H-W-W-H-W-W. Using the A melodic minor scale, ascending notes would include A-B-C-D-E-F#-G#. Descending notes would use the natural minor formula, resulting in the notes A-B-C-D-E-F-G.

Common Minor Scales Used In Music

The natural minor scale is the most commonly used minor scale, frequently heard in classical, jazz, and pop music. The harmonic minor scale is also popular in classical and jazz music, with its unique raised seventh note creating tension and drama in melodies. The melodic minor scale is commonly used in jazz and fusion music, with its unique ascending and descending formulas making it versatile for creating complex melodies. Other minor scales, including the Dorian and Aeolian mode, are also used in a wide range of music genres.

Tips For Creating Melodies Using Minor Scales

One way to use minor scales is to start with a chord progression in a minor key and build the melody from there. Experimenting with different scales and modes can also bring unique flavor to your melodies, creating unexpected twists and turns that engage your listener. Start by identifying the root note of your scale, then work with notes that harmonize with the chord progression to create a melody that fits the overall mood. Adding rhythmic variety and dynamics to your melodies can also keep them engaging and emotionally impactful. In conclusion, minor scales are a powerful tool for creating emotive and memorable melodies. By understanding the structure and formula of common minor scales and experimenting with different modes and chord progressions, you can create melodies that resonate with your listener and leave a lasting impact.

Pentatonic Scales


Pentatonic scales are essential for making melodies, as they consist of five notes and create a distinct sound in music. Musicians often use pentatonic scales in various genres, including blues, folk, and rock. Learning how to use these scales can enhance your skills as a music creator.

Pentatonic scales have been used in music for centuries. They are extensively used in modern pop music, rock, and jazz. The word “pentatonic” comes from the Greek word “pente,” which means “five,” and “tonic,” which means “sound.” As the name suggests, the pentatonic scale consists of five notes, which make it easy to learn for beginners.

The Structure And Formula Of Pentatonic Scales

The pentatonic scale is a five-note scale that can be formed by removing the fourth and the seventh note from the diatonic scale. This results in a unique and basic sound to the scale. The formula for a major pentatonic scale is Root, 2nd, 3rd, 5th, 6th, and it can be represented in intervals as W-W-W+H-W-W+H. Similarly, the formula for the minor pentatonic scale is Root, minor 3rd, 4th, 5th, and minor 7th, and its interval representation is W+H-W-W-W+H.

Common Pentatonic Scales Used In Music

The pentatonic scale has two variations: the major and minor scales. Some commonly used pentatonic scales in music are:

  • Major Pentatonic
  • Minor Pentatonic
  • Blues Scale
  • Egyptian Scale
  • Japanese Scale

Tips For Creating Melodies Using Pentatonic Scales

One of the easiest ways to create a melody using the pentatonic scale is to start with the root note and build a simple sequence of notes. Here are some tips to create melodies using pentatonic scales:

  • Start by playing the pentatonic scale in sequences, up and down, or in patterns.
  • Use repetition to add a catchy element to the melody. This helps in creating a memorable tune.
  • Try playing the scale in different octaves to explore different sound ranges.
  • Include variations in the melody, such as rhythm changes, to maintain the listener’s interest.


Major Pentatonic Interval Notes
C Major Pentatonic Root, 2nd, 3rd, 5th, 6th C, D, E, G, A
G Major Pentatonic Root, 2nd, 3rd, 5th, 6th G, A, B, D, E
D Major Pentatonic Root, 2nd, 3rd, 5th, 6th D, E, F#, A, B


Minor Pentatonic Interval Notes
A Minor Pentatonic Root, minor 3rd, 4th, 5th, and minor 7th A, C, D, E, G
E Minor Pentatonic Root, minor 3rd, 4th, 5th, and minor 7th E, G, A, B, D
B Minor Pentatonic Root, minor 3rd, 4th, 5th, and minor 7th B, D, E, F#, A

Blues Scales


Blues scales are essential for creating melodies in blues music. These scales provide the foundation for improvisation and are commonly used in both lead and rhythm playing. By mastering the blues scales, musicians can create soulful and expressive melodies that capture the spirit of this genre.

Blues scales are essential to creating powerful and impactful melodies in certain genres of music. These scales add depth, emotion, and soulfulness to music, making them a must-know for any aspiring music producer or songwriter. In this article, we will discuss the structure and formula of blues scales, common types used in music, and tips for creating melodies using blues scales.

The Structure And Formula Of Blues Scales

Blues scales are a six-tone scale that consists of the root, flat third, fourth, augmented fourth, fifth, and flat seventh notes of a major scale. This scale produces a distinct blues sound when played, and the flattened third, fifth, and seventh notes are what gives the scale its unique and bluesy sound. The formula for constructing a blues scale is as follows: Root, flat third, fourth, augmented fourth, fifth, flat seventh, and back to the root.

Common Blues Scales Used In Music

There are several types of blues scales used in music, each with their unique characteristics. Some of the most common blues scales include:

  • Minor blues scale: Similar to the natural minor scale, this scale adds a flat fifth and flat seventh to produce a bluesy, melancholic sound.
  • Major blues scale: This is the same as the major scale, but with a flattened third and seventh, creating a bluesy feel.
  • Pentatonic blues scale: A five-tone scale that omits the fourth and seventh notes of the minor blues scale.

Tips For Creating Melodies Using Blues Scales

When creating melodies using blues scales, there are some tips you can follow to make your music more impactful:

  1. Experiment with different variations of the blues scale to create unique and interesting melodies.
  2. Use slides, bends, and vibrato to add expression and emotion to your melodies.
  3. Combine different blues scales to create chord progressions that add variety and depth to your music.
  4. Try incorporating external notes to add color and complexity to your melodies.

By following these tips, you can create soulful and emotional melodies using blues scales that will captivate your audience. In conclusion, blues scales are an essential tool for any musician looking to add depth and feeling to their music. By understanding the structure and common variations of these scales, you can create powerful melodies that evoke a range of emotions in your listeners.

Modal Scales

Modal scales have played a pivotal role in the creation of music for centuries. These scales differ from standard scales by their unique tonal centers and specific modal qualities. Unlike traditional major and minor scales, modal scales offer a more diverse, eclectic range of musical expression. Whether you’re a seasoned musician or an aspiring songwriter, understanding the structure and formula of these scales can take your melodies to new heights.

The Structure And Formula Of Modal Scales

Modal scales are based on different sets of intervals that determine their unique sound. The most common types of modal scales include Dorian, Phrygian, Lydian, and Mixolydian. Each scale has a distinctive formula and structure that sets it apart from others. Here’s a breakdown of some common modal scales used in music:

Modal Scale Formula
Dorian 1 2 b3 4 5 6 b7
Phrygian 1 b2 b3 4 5 b6 b7
Lydian 1 2 3 #4 5 6 7
Mixolydian 1 2 3 4 5 6 b7

Common Modal Scales Used In Music

Modal scales have a rich history in various styles of music. From jazz and blues to rock and classical, they are a fundamental part of creating unique melodies. Here are some examples of common modal scales used in different genres:

  • The Dorian mode is frequently used in blues music, such as the song “The Thrill is Gone” by B.B. King.
  • The Phrygian mode is often used in metal music, such as Metallica’s “Enter Sandman”.
  • The Lydian mode is used in many jazz and fusion songs, such as John Coltrane’s “Giant Steps”.
  • The Mixolydian mode is common in rock music, such as “All Along the Watchtower” by Jimi Hendrix.

Tips For Creating Melodies Using Modal Scales

When creating melodies using modal scales, there are a few tips to keep in mind to ensure your composition is cohesive and expressive:

  1. Start by identifying the tonal center of the modal scale and use it as the basis for your melody.
  2. Experiment with the different intervals of the scale to create unique chord progressions and note combinations.
  3. Try incorporating passing tones or chromatic notes to add tension and release within your melody.
  4. Pay attention to the overall feel of your composition and adjust accordingly by using different modal scales or modes.

By keeping these tips in mind, you can create dynamic and compelling melodies using modal scales that capture your desired emotions and moods.

Exotic Scales


Get creative with your melody-making by exploring exotic scales. These scales, like the Hungarian minor and the Phrygian dominant, add unique flavor and depth to your music. Incorporate them into your compositions for a truly distinct sound.

As a musician, exploring various scales and incorporating them into your melodies can add flavor and uniqueness to your music. One such category of scales that can add a touch of exoticism to your tunes is the “Exotic scales.” These scales are commonly used in traditional music from different cultures and can help create an ethnic vibe to your composition.

Examples Of Exotic Scales Used In Music

Here are some exotic scales you can experiment with in your compositions:

Scales Origin Intervals
Phrygian Dominant Middle Eastern 1, b2, 3, 4, 5, b6, b7
Hungarian Major Hungary 1, b2, 3, #4, 5, b6, 7
Mohammedan India 1, 2, b3, 4, b5, b6, 7

How To Incorporate Exotic Scales Into Your Melodies

Incorporating exotic scales into your melodies can add a unique touch to your composition. Here are a few ways to do it:

1. Experiment with the scales

Play around with the scales and get a feel for them. Try playing them up and down and improvising melodies with them. This way, you will understand the tonality and intricacies of the scales.

2. Combine scales with each other

To make your music even more exotic, try combining different exotic scales. This can lead to interesting results and can add layers to your composition. Experiment with different scales until you find the combination that you enjoy.

3. Start simple

If you’re new to incorporating exotic scales into your melodies, start with simple patterns. Begin by adding a few notes of an exotic scale to a familiar scale or melody, and then expand from there. This way, you won’t feel overwhelmed, and you’ll be able to slowly incorporate exotic scales into your compositions. Overall, exotic scales can add a unique and exotic feel to your melodies. Experiment with different scales and incorporate them into your compositions to take your music to the next level.


Essential Scales For Making Melodies


Credit: www.fender.com


Frequently Asked Questions Of Essential Scales For Making Melodies


What Scale Do Most Songs Use?


Most songs use the major or minor scale, which are both seven-note scales in Western music. The major scale produces a happy, upbeat sound, while the minor scale creates a more somber and melancholy tone. Other scales, such as the pentatonic and blues scales, are also commonly used in certain genres of music.


What Are The Melodic Major Scales?


Melodic major scales are a series of notes or tones arranged in ascending and descending order with a particular pattern of half-steps and whole-steps. This scale is also known as the jazz melodic minor scale or the altered scale. The scale is a derivative of the major scale and is used mostly in jazz music.


What Is The Most Important Musical Scale?


The major scale is considered the most important musical scale. It’s used as a foundation for many types of music and can evoke different emotions based on the variation used. The major scale consists of seven notes with a pattern of whole-steps and half-steps.


What Is The 5 Music Scale?


The 5 music scale refers to the pentatonic scale, which is a musical scale consisting of five notes per octave. It is used in various musical traditions and is popular in blues, rock, and pop music. The scale is known for its simplicity and versatility.


Conclusion


With plenty of options for scales to choose from, it can be overwhelming for a musician to select the right ones. However, after going through this post, you have gained an understanding of key scales and their usage. By using these essential scales, you can create unique and beautiful melodies that resonate with your audience.


Keep practicing and experimenting with these scales to elevate your music and bring forth your creativity to the forefront.

Categories
Archive

Audio Compression Threshold Explained

Audio compression threshold refers to the level at which a compressor begins to reduce the dynamic range of audio signals. Audio compression is an important tool for helping to control the dynamic range of audio recordings. This makes them sound clearer and more polished.


Also, the threshold is the level at which the compressor begins to activate its gain reduction process. It decides how much of the signal’s dynamic range the compressor affects. We’ll take a closer look at audio threshold, what it is, and how it works.

Related reading: Compressor Threshold Setting and Compression Meters. For background, see the Wikipedia article on Dynamic range compression.


We’ll also explore some of the common uses of audio compression, and provide some tips on how to use compression effectively in your own recordings.

Audio Compression Threshold Explained


Credit: www.iconcollective.edu


What Is Audio Compression?


Moreover, Audio Compression is a process that reduces the dynamic range of an audio signal. The threshold is the level at which the compression starts to work. Understanding the threshold control will help you control the loudness of your audio and ensure a balanced mix.

Dynamic Range Compression Threshold

In addition, Audio compression is a process that reduces the dynamic range of an audio signal. It is a crucial and widely-used technique in the field of audio engineering. This enables audio professionals to achieve a more consistent volume level throughout a recording. Compression is particularly useful in cases where the audio content has a wide dynamic range, such as with live recordings or performances where the volume can vary greatly.

Threshold

Furthermore, the threshold is one of the most important parameters of audio compression. It determines the point at which the compressor starts to act on the audio signal. Audio below the threshold stays uncompressed, while the compressor reduces anything above it by the set ratio. We express the threshold in decibels (dB), and you can adjust it to suit each recording.

Examples Of Thresholds

As a reference, engineers often start vocals at around -10 dB. Meanwhile, that for drums is around -20 dB. A higher threshold will allow more dynamic range to pass through uncompressed, resulting in a more natural and unprocessed sound. On the other hand, a lower threshold will compress more of the dynamic range. This results in a more consistent and polished sound.

Final Words for Compression Threshold

In conclusion, audio compression is a powerful tool for achieving a consistent volume level in audio recordings. The threshold parameter is a crucial aspect of dynamic range compression and can greatly affect the overall sound of a recording. By understanding how the threshold works and experimenting with different settings, audio professionals can achieve a well-balanced and polished sound that meets the requirements of their clients.

Why Is Compression Used In Audio Production?

Audio compression is an essential tool in music production. The process of compression helps to manipulate the dynamics of an audio signal, controlling the levels of both loud and soft sounds in order to achieve a desired sound. It is an integral part of the recording and mixing process, used to ensure that recordings have a balanced and polished sound.

Balance And Clarity for Compression Threshold

One of the main reasons for using compression in audio production is to achieve a balanced and clear sound. Compression helps to tame the peaks of an audio signal. This makes the difference between the louder and quieter parts of a track less extreme. This creates a more consistent sound, so no part of the recording disappears in the mix. By bringing up quieter elements, compression can help to bring out the details and nuances in a song. This leads to a more dynamic and exciting final product.

Volume Control

Compression is also often used to control volume and maintain a consistent overall level. Compressing the louder parts brings the signal down to a more manageable level, which frees up headroom. This means you can bring up softer elements without causing distortion or clipping. Compression can also help to prevent individual tracks from getting lost in the mix. This makes it easier to hear all of the different elements of a song.

Overall, compression is a powerful tool in audio production that helps to create a balanced and polished final product. By controlling the dynamics of an audio signal, compression can help to bring out the details in a recording and make sure that no parts of the mix are lost in the shuffle.

What Is Compression Threshold And How Does It Work?

Audio compression is an important tool for any music producer, sound designer, or audio engineer. This setting is a key element of understanding how audio compression works. It is an important parameter that determines when the audio signal will be compressed, limiting its dynamic range and making the audio sound more consistent.

Definition Of Compression Threshold

The threshold is the level at which the compressor begins to work. Once the audio signal reaches the threshold level, the compressor kicks in and starts reducing the volume of the signal. This helps to bring the loudest parts of the audio signal down to a more manageable level, while not affecting the quieter parts of the audio. This can help to even out the overall dynamics of the audio. This makes it sound more consistent and easier to mix.

Adjusting The Threshold

Adjusting the threshold control is an important part of using compressors effectively. With a threshold that sits too high, the compressor won’t engage until the signal is too loud. The compressor won’t reduce the dynamic range much. On the other hand, a threshold that sits too low makes the compressor work all the time. The audio may sound overly compressed or flattened.

A good starting point for setting this setting is to aim for a gain reduction of around 3-6 dB. This will help to reduce the dynamic range of the signal without overly affecting the audio quality. After setting the threshold, it’s important to monitor the audio output carefully and adjust the settings as necessary.

Conclusion

Understanding threshold is an essential part of using compression effectively. By adjusting the threshold and monitoring the output, you can achieve a more even, consistent sound that is easier to mix and master. Keep these tips in mind when working with audio compression to get the most out of your tracks.

Types Of Compression Threshold


The threshold sets the level above which the compressor acts on loud sounds. The types of compression threshold include hard, soft, and medium, with each type affecting the audio differently.

Understanding the types of compression threshold is crucial for audio engineers and producers. This setting determines the level at which the compressor starts to reduce the dynamic range of an audio signal. There are two types of compression threshold – Soft Knee and Hard Knee.

Soft Knee

A soft knee reaches full compression gradually. In this case, the amount of gain reduction increases gradually as the input signal level passes the threshold. A soft knee is ideal when you need natural, smooth dynamic control. It’s perfect for vocals, acoustic guitar, and other instruments that require a smooth transition between quiet and loud parts.

Hard Knee

Hard Knee threshold is a clear and defined threshold that kicks in abruptly. It starts being effective right from the point when the audio signal hits the threshold. It is best suited for situations that require a more transparent effect, such as drums or percussion. Hard Knee processing is most effective when working with material with a relatively consistent dynamic range.


How Does The Compression Threshold Affect Sound?


The compression threshold refers to the level at which an audio compressor starts to reduce the volume of a signal. Essentially, by setting a threshold, you’re telling the compressor to activate only when a certain volume level is exceeded, which can impact the overall sound of your audio.

The threshold control is a crucial feature in audio recording, mixing, and production. It is the point at which a compressor starts reducing the volume of an audio signal. This setting affects sound in several ways, and it is essential to understand how it impacts audio quality. In this article, we will explore the implications of the threshold and how it affects sound.

Reduction Of Dynamic Range

One of the primary ways that the threshold control affects sound is through the reduction of dynamic range. Dynamic range is the difference between the loudest and softest parts of an audio track, and it is an essential aspect of audio quality. When this setting is low, the dynamic range of the audio signal is reduced. As a result, the loudest parts of the track are quieter, and the softest parts are louder. This can lead to a dull and lifeless sound, which is undesirable in most cases.

Creating A More Consistent Sound for Compression Threshold

On the other hand, a higher compression threshold results in a more consistent sound. This means that the loudest parts of the track are not significantly louder than the softest parts, and the overall volume is more controlled. A consistent sound can be desirable in some cases, especially when recording vocals, where a consistent volume level is critical.

Impacts On Natural Dynamics

While a consistent sound may be desirable in some cases, it can have significant impacts on natural dynamics. When you push compression too far, it squashes the track’s natural dynamics and the audio can sound unnatural. This is because the compressor is reducing the differences in volume between the loudest and softest parts of the track. This compression can result in a loss of detail and nuance in the audio signal. In conclusion, the compression threshold has a significant impact on audio quality, and it is essential to understand its implications.

A low compression threshold can lead to a dull and lifeless sound, while a high compression threshold can result in a loss of detail and nuance. Ultimately, finding the right compression threshold will depend on the specific needs of the audio project, but understanding its impact is crucial to achieving the desired sound.

Tips For Using Compression Threshold

Compression threshold is an essential feature in audio compression that determines the part of a track that needs compressing. Using it effectively can help achieve a balanced and professional sound output. Below are some tips on how to use compression threshold:

Start With A Low Threshold And Ratio

Begin the compression process by setting a low threshold, bagingin at -20db. This way, the compressor only touches the louder parts of the track. Also keep the ratio low, about 2:1 or 3:1, for softer compression. A lower ratio is necessary, especially when mixing vocals, as it helps to maintain the track’s dynamic range.

Adjust The Threshold To Suit The Track

The nature of the track dictates which compression threshold to use. Use your ears to identify the loudest and quietest parts of the track, and then set the threshold at a level that balances the two. If it’s a drum-heavy track, a higher threshold would be more appropriate, but for a vocal track, a lower compression threshold is required.

Use Your Ears To Determine The Right Balance

After setting the threshold level and the ratio correctly, before hitting the compression button, listen to the track to determine if it sounds balanced. Adjust the compression threshold and ratio accordingly until you achieve the desired result. Remember that every track is unique, and there is no set formula for applying compression. Therefore, it’s essential to trust your ears and experiment to achieve the best sound output.

In conclusion, using compression threshold correctly requires patience and a good ear. Start with a low threshold and ratio, adjust the threshold to suit the track, and use your ears to determine the right balance.

Common Mistakes When Using Compression Threshold


Setting the compression threshold can be a tricky task, and some common mistakes are often made. One of the most common mistakes is setting the threshold too low, resulting in over-compression and a loss of dynamic range. It is important to carefully consider the desired effect and adjust the threshold accordingly.

When it comes to audio compression, setting the threshold is crucial. The threshold determines the level at which the compressor kicks in and starts reducing the volume of the audio signal. However, many people make some common mistakes when using compression threshold. Here are some of them:

Over-compression

One of the most common mistakes people make when using compression threshold is over-compressing the audio signal. Over-compression can result in a lack of dynamics and a loss of natural sound. It can also make the audio sound squashed and lifeless. It’s important to find the right balance when setting the compression threshold, so that the audio remains dynamic and natural-sounding while still being controlled.

Setting The Threshold Too High/low

Another mistake people make when setting compression threshold is setting it too high or too low. If the threshold is set too high, only the loudest parts of the audio will be compressed, while quieter parts will remain untouched. This can result in inconsistent volume levels and an unbalanced mix. On the other hand, if the threshold is set too low, the compressor will kick in too often, compressing almost the entire audio signal. This can result in a lack of dynamics and an unnatural sound.

To avoid these mistakes, it’s important to find the sweet spot where the compression is applied consistently across the entire audio signal, while still preserving the natural dynamics of the sound. In conclusion, setting compression threshold correctly is essential to achieving a well-balanced and controlled audio signal. By avoiding these common mistakes, you can ensure that your audio sounds natural, dynamic and professional.

Audio Compression Threshold Explained


Credit: theproaudiofiles.com


Audio Compression Threshold Explained


Credit: www.musicguymixing.com


Frequently Asked Questions Of Audio Compression Threshold Explained


What Should My Compression Threshold Be?


Set your compression threshold based on the needs of each track and source. For most sources, a moderate setting balances control and natural dynamics. It’s important to regularly analyze and adjust your compression settings to ensure optimal performance.


What Is The Threshold Of Audio Compression?


The threshold is the point where the compressor starts to change the volume of the audio. It is the level at which the compressor reacts, reducing the volume of the audio when it exceeds the threshold.


What Is A Good Compressor Setting For Audio?


The ideal compressor setting for audio depends on the type of audio you are compressing. Generally, the ratio should be set between 2:1 to 4:1, the threshold should be set just below the peak level of the audio, attack should be set between 5-30ms, and release should be set between 100-300ms.


It’s best to experiment with different settings to find what sounds best for your particular audio.


What Is A Low Threshold Compressor?


A low threshold compressor is a type of compressor that uses a lower starting pressure compared to other types of compressors. This means that the compressor will start working at a lower pressure rather than waiting for a higher pressure to build up.


This makes it useful for applications where there is a requirement for low pressure air.


Conclusion


As we have seen, audio compression thresholds play a crucial role in determining the quality and loudness of a sound. Understanding compression and how it works is essential for any audio enthusiast, musician, or sound engineer. By manipulating the audio compression threshold, you can achieve a balanced and defined sound that is pleasing to the ears.


To truly master the art of compression, it’s essential to study its different parameters and how they interact. Get creative and experiment with different settings to find your unique sound signature. With dedication and practice, you can become an expert in audio compression and take your music to the next level.

Categories
Archive

A Tip For Huge And Clean Sounding Mixes

To achieve huge and clean sounding mixes, focus on gain staging and EQ. By correctly adjusting levels and frequencies, you can prevent any signal distortion and create a clear and powerful sound.


As a music producer or audio engineer, creating a perfect mix is always the ultimate goal. However, achieving that can be quite challenging, especially when you have to balance different tracks with various instruments and vocals. One key tip to getting that huge and clean sound is through gain staging and EQ.

Related reading: How To Achieve Loud Mixes and How To Get A Cleaner Drum Mix. For background, see the Wikipedia article on Audio mixing.


This means ensuring that each track has the right volume and adjusting the frequencies to create a harmonious blend. The right balance between these two elements will help prevent any distortion and give your mix the clarity and power it needs to stand out. We’ll delve deeper into these essential techniques and provide tips on how to implement them effectively.


Start With A Good Recording for Clean Sounding Mixes

Starting with a good recording is the foundation of producing a huge and clean sounding mix. It’s easy to make a bad recording sound better, but it’s impossible to make a bad recording sound great. Here are some tips for achieving excellent recordings.

Choose The Right Microphone for Clean Sounding Mixes

Choosing the right microphone is critical to capturing the sound you’re looking for. There’s no one-size-fits-all solution when it comes to microphones, and each microphone has its own unique characteristics.

For vocals, a large diaphragm condenser microphone is usually the go-to option. It’s also essential to choose the right microphone for the instrument being recorded. For example, a dynamic microphone is often used for drums and guitar amps.

Use A Suitable Room for Clean Sounding Mixes

The recording environment plays an important role in capturing a good sound. You don’t need a fancy, expensive recording studio to produce great recordings. However, it’s crucial to select a room with good acoustics.

The room should be relatively quiet, and its size will depend on what you’re recording. A smaller room is preferable for vocals and acoustic instruments, while a larger space is best for drum recording.

Record At The Right Level for Clean Sounding Mixes

Recording at the right level is critical for getting a good sound. Too much gain, and the recording will clip, too little, and it will be too quiet. It’s essential to set the recording level correctly to ensure that the recording is neither too hot nor too quiet.

It’s also crucial to ensure that each instrument or vocal is recorded at the right level. For example, recording drums requires careful balancing of each mic to produce a cohesive sound.

By following these recording tips, you can ensure that you end up with a recording with excellent sound quality, which is essential for producing a huge and clean sounding mix.

Focus On Eq for Clean Sounding Mixes


Focus on EQ is a crucial tip for achieving huge and clean sounding mixes. By attentively balancing the different frequencies in your mix, you can enhance the overall sonic quality and achieve a professional sound.

The key to achieving a huge and clean-sounding mix is in the details, and one crucial aspect of this is equalization (EQ). EQ is the process of boosting or cutting specific frequencies of a track to enhance or reduce its tonal qualities. By manipulating the EQ, you can make certain elements of your mix stand out without getting lost in the overall sound.

Cut Before Boosting

When applying EQ, it’s essential to cut problematic frequencies before boosting desirable ones. Boosting frequencies can introduce unwanted noise and distortion, making your mix sound muddy and cluttered. On the other hand, cutting frequencies helps to remove any unwanted sounds and create clarity in your mix. Before boosting any frequency, consider whether you can achieve the desired effect by cutting undesirable frequencies instead.

Sculpt The Sound

EQ isn’t just about removing or boosting frequencies; it’s also about sculpting the sound of your mix. By using different EQ settings on different tracks, you can create a tonal balance that complements each element of your mix. For example, you can remove low frequencies on the vocal track, so it doesn’t clash with the bass or kick drum. Similarly, you can remove high frequencies on the guitar tracks, so they don’t clash with cymbals.

Make Room For All Tracks

Each element of your mix needs its space to breathe, so it’s crucial to make room for all tracks. When every track is fighting for the same frequency space, it’s easy for the mix to become muddy and cluttered. EQ can help you create space by cutting out frequencies that aren’t essential for a specific track. For example, you can cut the low end of the vocals to make room for the bass and kick drum or cut the high end of the guitar to make room for the high-end percussion.

In summary, EQ is an essential tool for achieving a huge and clean-sounding mix. By cutting before boosting, sculpting the sound, and making room for all tracks, you can create a tonal balance that complements each element of your mix. So, take the time to experiment with EQ, and you’ll be well on your way to creating a professional-sounding mix.

https://www.youtube.com/watch?v=QiBmQuz9yr4


Use Compression for Clean Sounding Mixes

The secret ingredient to a huge and clean sounding mix is the use of compression. Compression is a tool that can make a significant difference in the quality of your mixes, whether you’re a seasoned pro or just getting started.

Set The Right Threshold And Ratio for Clean Sounding Mixes

When using compression, it’s important to set the right threshold and ratio. The threshold determines the level at which the compressor will start working. The ratio determines the amount of gain reduction that will be applied to the signal. To get a smooth and even sound, set the threshold so that the compressor is only triggered by the loudest parts of the track, and adjust the ratio until you achieve the desired level of compression.

Adjust Attack And Release

The attack and release settings control how quickly the compressor responds to dynamic changes in the signal. A fast attack time will let the compressor react quickly to transients, while a slower attack time will allow the initial transient to pass through without being compressed. Similarly, a fast release time will let the compressor recover quickly, while a slower release time will allow the compressor to smoothly release the compressed signal. Adjusting these settings can help you get a more natural and transparent compression sound.

Parallel Compression

Parallel compression is a technique where a compressed signal is blended with an uncompressed signal. This can help you achieve the benefits of compression without losing the natural dynamics of the track. To apply parallel compression, duplicate the track, apply heavy compression to the duplicate, and mix the compressed and uncompressed signals together to taste.

Apply Effects Sparingly for Clean Sounding Mixes

When it comes to mixing music, applying the right amount of effects is crucial. Too little and your mix may sound flat and dull. However, too much and you risk drowning out the important elements of your track. The key is to apply effects sparingly so you can achieve high-quality, crystal-clear audio.

Less Is More

It’s a common temptation for beginners to go overboard with effects. They assume that adding reverb, delay, compression, and EQ to every channel is the key to their track’s success. However, that is far from the truth. In reality, less is more. Applying too many effects creates a jumbled and muddy mix, leading to a lack of clarity and definition. Instead, focus on adding the right effects to the right channels to achieve a more balanced and harmonious sound.

Use Sends And Returns for Clean Sounding Mixes

If you want to apply multiple effects to your track without muddying up the mix, consider using sends and returns. This technique involves creating separate channels for effects that you can send multiple channels to. By doing so, you can add the effects to several channels all at once, leading to a cleaner, more organized sound. Plus, you can adjust the amount of effect applied to each channel, giving you greater control over your mix.

Consider The Overall Mix for Clean Sounding Mixes

It’s important to remember that every element of a mix is connected. When applying effects to a specific track, think about how it will affect the overall mix. Too much reverb on one channel can bleed into another, while over-compressing can squash the dynamic range and reduce clarity. Take the time to listen to each channel in context and consider how the overall mix will be impacted. Doing so will lead to a cleaner, more polished sound.

Pay Attention To Panning for Clean Sounding Mixes


When it comes to achieving huge and clean sounding mixes, one tip to pay attention to is panning. By distributing instruments and sounds in the stereo field, you can create more depth and space in your mix, resulting in a balanced and professional sounding production.

Create A Stereo Image for Clean Sounding Mixes

One tip for achieving a huge and clean sounding mix is to pay attention to panning. Panning is the technique of distributing audio signals between the left and right channels of a stereo mix. By taking advantage of panning, you can create a stereo image that gives your mix depth and dimension. A well-panned mix can transport the listener into the song, making it more enjoyable and engaging. To create a stereo image, try experimenting with panning instruments and vocals. For instance, consider panning the drums, bass, and piano to the center to provide a solid foundation for your mix. Then, pan other instruments such as guitars and synths to the left and right channels to create a wider soundscape. Be sure to adjust the panning of each track so that they don’t overlap and clash with each other.

Experiment With Different Arrangements

Another way to optimize your panning technique is to experiment with different arrangements. Sometimes, simply swapping the panning of two tracks can make a huge difference in the mix. For example, placing a lead guitar on the right side of the mix may create a more balanced and natural sound. Try different combinations to find the most pleasing arrangement.

Mono Compatibility

It’s important to remember that not all playback systems have stereo capabilities. Therefore, mono compatibility is also crucial for achieving a huge and clean sounding mix. To ensure mono compatibility, listen to your mix in mono and check for any phase cancellations or frequency imbalances. If you notice any issues, adjust the panning until the mix sounds good in both stereo and mono. In conclusion, paying attention to panning is an essential technique for achieving a wide, clean, and professional-sounding mix. By creating a stereo image, experimenting with different arrangements, and ensuring mono compatibility, you can achieve the best possible audio experience for your listeners.

A Tip For Huge And Clean Sounding Mixes


Credit: twitter.com


Don’t Forget About Levels


To achieve a huge and clean sounding mix, don’t forget about levels. Properly adjusting the levels of each instrument and vocals can make a significant difference in the overall quality of your mix. Keep tweaking until you achieve the perfect balance between all elements for a professional-sounding result.

Mixing can make or break a track, and paying attention to levels is crucial. With proper leveling, you can achieve a clear, balanced, and professional-sounding mix. If you’re struggling to get your mix to sound clean, it’s time to revisit your levels and ensure you’re not making some common mistakes.

Avoid Clipping for Clean Sounding Mixes

Clipping occurs when the input level of a track is too high, causing distortion and harshness. It’s important to avoid clipping by keeping an eye on your levels and making adjustments where necessary. You can use a limiter or compressor to prevent clipping, but it’s best to avoid it in the first place. Remember, a clean mix is a crucial aspect of professional music production.

Maintain Balance for Clean Sounding Mixes

Another common mistake in mixing is failing to maintain a proper balance between tracks. This can result in an unbalanced mix, making it difficult for listeners to distinguish each element of the track. Balance is key, and you can achieve it by adjusting the levels of each track. Keep in mind that each element of the mix plays a role in creating a cohesive and harmonious sound.

Use Automation for Clean Sounding Mixes

Automation is a useful tool that allows you to make precise adjustments to levels over time. It’s particularly useful for achieving dynamic range and creating interest in your mix. You can use automation to adjust levels on individual tracks, automate panning, or apply effects. With automation, you can ensure that each element of your mix has its place in the spotlight. In conclusion, levels are an important element of a clean and professional-sounding mix. Avoid clipping, maintain balance between tracks, and use automation to achieve a dynamic and interesting sound. With these tips, you can take your mixing skills to the next level and create music that sounds amazing.

Take Breaks


Taking regular breaks while mixing is a crucial tip for achieving a huge and clean sound. By taking breaks, your ears will have a chance to rest and reset, allowing you to come back to the mix with a fresh perspective and prevent ear fatigue.

Prevent Ear Fatigue

As much as we love mixing music, our ears can only take so much auditory stimulation before they start to fatigue. Ear fatigue can lead to a distorted perception of sound, making it difficult to make accurate mixing decisions. Taking breaks can help prevent ear fatigue. It’s essential to rest your ears for a few minutes every hour or two to avoid straining your hearing. Your ears will thank you for it, and your mixes will sound much better as a result.

Gain Fresh Perspective

Mixing a track can be time-consuming, and it’s easy to get lost in the details. During extended mixing sessions, it’s easy to lose perspective on how the track sounds. Taking breaks can help you get a fresh perspective on the mix. When you return from a break, you’ll be able to hear the mix with a fresh set of ears. This can help you expose any problem areas and identify areas that need improvement. You’ll be amazed at how much better your mixes will sound after taking a short break.

Refresh Your Ears

Taking a break not only helps prevent ear fatigue and gain fresh perspective, but it also refreshes your ears. Listening to music for an extended period can cause our ears to become accustomed to a particular sound. By taking breaks, you’re giving your ears a chance to rest and reset. When you return, you’ll be able to hear the details much better, resulting in more precise mixing decisions. Remember, taking breaks is an essential component of creating huge and clean sounding mixes. Don’t overlook the power of giving your ears some rest. Your ears will thank you, and your mixes will sound better as a result!

A Tip For Huge And Clean Sounding Mixes


Credit: www.musicradar.com


Master Your Mix


Achieving a massive and polished sound for your mix is a must for audio production. To attain this, carefully setting levels, panning, and utilizing effects are key. It’s also important to use EQ to carve out space for each instrument and to pay attention to the arrangement in order to mix elements cohesively.

Mixing can be one of the most challenging parts of music production. It requires a keen ear, knowledge of various software and hardware tools, and an understanding of how to blend different sounds together in harmony. If you’re looking for a tip to help you achieve huge and clean sounding mixes, then mastering your mix is key.

Prepare For Mastering

Before you begin mastering your mix, there are a few things you should do to prepare. First, make sure all of your tracks are properly mixed to avoid any volume or frequency imbalances. Second, create a high-quality mixdown of your song, and make sure you save it as a lossless audio file format such as WAV or AIFF. Finally, identify any mixing errors or problem areas in your track, and make the necessary adjustments before moving on to mastering.

Check For Mono Compatibility

Mono compatibility refers to how your mix will sound when played in mono, such as on a small speaker or in a club sound system. To ensure your mix is mono-compatible, use a stereo imaging plug-in to adjust the stereo width of your mix. This will help you to identify any phasing or frequency cancellation issues that can occur when playing your mix in mono.

Final Adjustments

Finally, you’re ready to master your mix. Use a mastering software tool to apply compression, equalization, and other mastering techniques to your mix. Be sure to test your mix on a variety of playback systems to ensure it sounds great no matter where it’s played. Once you’re happy with your mix, export it as a high-quality audio file and distribute it to your listeners. In conclusion, mastering your mix is an essential step in achieving a huge and clean-sounding mix. By preparing your mix for mastering, checking for mono compatibility, and making final adjustments, you can ensure that your mix will sound great on any playback system.

Frequently Asked Questions On A Tip For Huge And Clean Sounding Mixes


How Do You Make Your Mixes Sound Good?


To make your mixes sound good, you must focus on several key areas. First, ensure proper levels and balance of each element. Second, utilize EQ to remove unwanted frequencies and boost desired ones. Third, use compression to smooth out dynamics and add punch.


Fourth, consider the use of reverb and delay for spatial depth. And finally, consistently reference your mix against professional productions.


How Do I Make My Mix Sound Bigger?


To make your mix sound bigger, focus on adding depth and width to your sound. Use reverb and delay to create a sense of space. Pan different elements to different parts of the stereo field. Use EQ and compression to help certain frequencies stand out.


Experiment with layering sounds and adding harmonies to create a fuller, richer sound.


How Do You Mix Clean Audio?


To mix clean audio, follow these steps: 1. Start with high quality audio recordings. 2. Use EQ to reduce background noise and enhance clarity. 3. Adjust levels to balance volume between tracks. 4. Apply compression to keep volume levels consistent.


5. Use reverb and/or delay effects sparingly for spatial depth.


How Do You Mix And Master Loud?


To mix and master loud, make sure to use compression, EQ, and limiters to boost the overall volume without causing distortion. However, be careful not to overdo it and avoid clipping or excessive compression. Additionally, use reference tracks to ensure your mix sounds balanced and clear at loud volumes.


Finally, consider hiring a professional mastering engineer for the best results.


Conclusion


Achieving a huge and clean sounding mix requires a combination of factors. Starting with a well-recorded track, utilizing proper gain staging, and implementing techniques such as EQ, compression, and reverb can make a significant impact. It’s also crucial to trust your ears, take breaks when needed, and experiment with different approaches.


By applying these tips consistently, musicians and producers can enjoy their music in all its glory and take their productions to a whole new level.