Categories
Archive

Mixing And Mastering: The Ultimate Guide to Audio Excellence

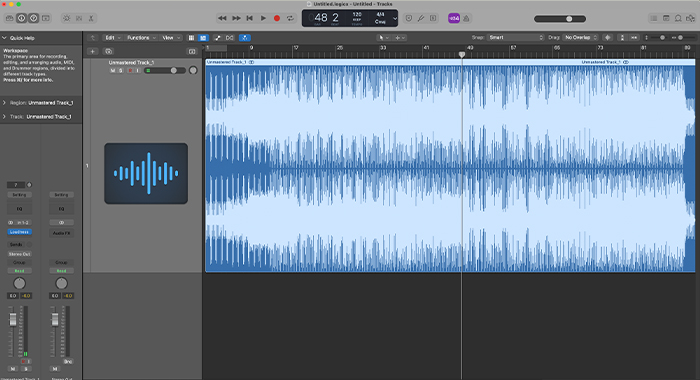
Mixing and mastering are post-production processes that enhance audio quality in music production. When producing music, mixing involves adjusting individual tracks to create a balanced sound.


Mastering refines the mixed audio to achieve a polished, professional sound. Both processes are critical in creating high-quality recordings that sound great across different playback systems. Mixing involves adjusting levels, panning, and effects to ensure every element of the track fits together seamlessly.


Mastering focuses on overall tonal balance, stereo enhancement, and loudness optimization to make the music sound cohesive and engaging. By mastering, you can ensure your music is ready for distribution and will sound its best on various platforms.
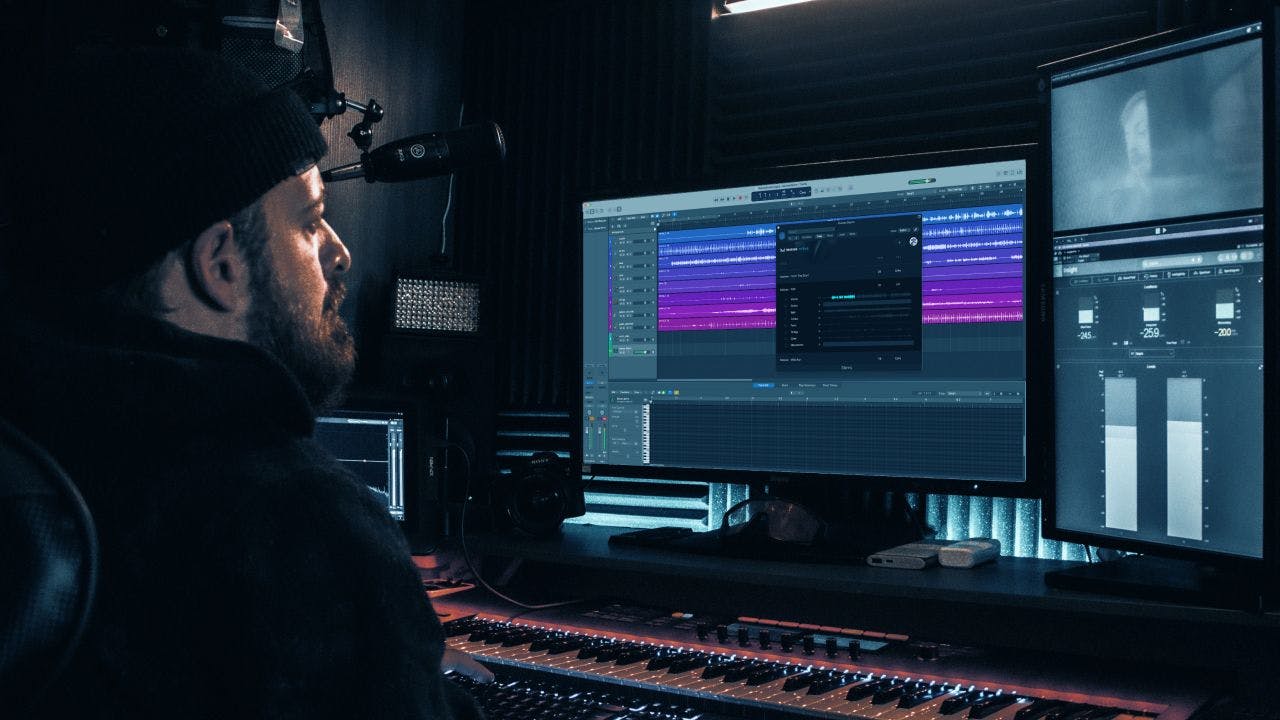
Mixing And Mastering: The Ultimate Guide to Audio Excellence


Credit: moises.ai


The Difference Between Mixing And Mastering

Mixing and mastering are crucial stages in the music production process. Understanding the difference between the two is essential for achieving professional sound quality.

Key Distinctions

Mixing involves blending and balancing individual tracks to create a cohesive sound.

Mastering focuses on enhancing the overall audio quality through adjustments in clarity, consistency, and tonal balance.

Role Of Mixing

Mixing brings together various elements like vocals, instruments, and effects to create a harmonious audio mix.

  • Adjusts levels, panning, and EQ settings
  • Adds effects like reverb and compression
  • Ensures all elements complement each other

Role Of Mastering

Mastering gives the final polish to the mixed tracks, optimizing them for distribution and playback.

  1. Enhances overall loudness and clarity
  2. Balances frequencies to achieve a cohesive sound
  3. Checks for consistency across tracks
Mixing And Mastering: The Ultimate Guide to Audio Excellence


Credit: www.amazon.com


Setting Up Your Workspace

When setting up your workspace for mixing and mastering, it’s crucial to create an environment that allows you to focus and work efficiently.

Choosing The Right Environment

Opt for a dedicated space with minimal distractions and adequate sound treatment to ensure accurate audio monitoring.

Essential Equipment And Software

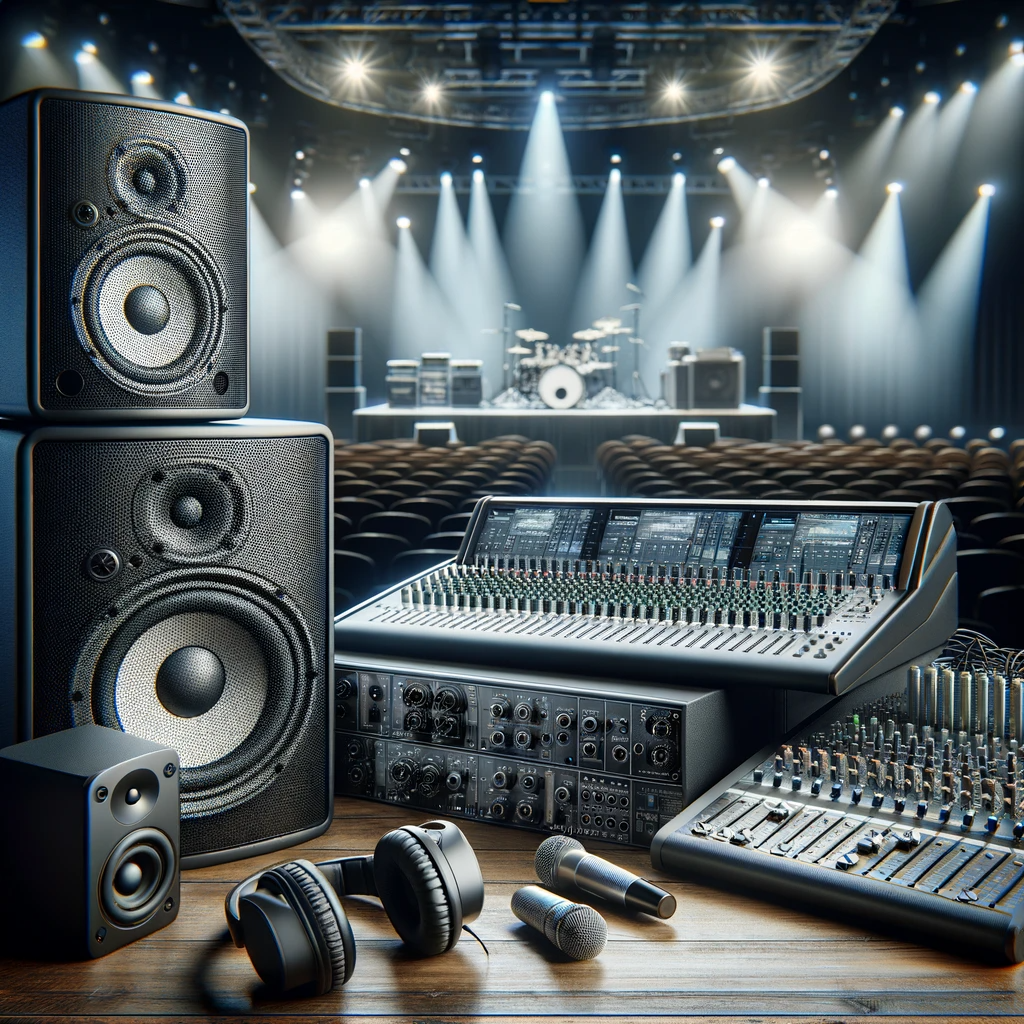
Invest in quality studio monitors, headphones, audio interfaces, and digital audio workstations like Pro Tools or Ableton Live.


The Art Of Mixing

Mixing is an essential part of the music production process and is often referred to as the art of blending different audio elements to create a cohesive and balanced sound. It involves manipulating various elements such as volume levels, stereo placement, equalization, and effects to ensure that each instrument and vocal sits well within the mix.

Balancing Levels And Panning

When creating a mix, it’s important to balance the volume levels of each track to ensure that no element overwhelms the others. This can be achieved by adjusting the faders on the mixer to create a well-balanced sound where each instrument or vocal is audible but not overpowering.

Panning plays a vital role in creating a sense of space within the mix. By placing different elements in the stereo field, such as moving a guitar to the left and a keyboard to the right, a sense of depth and dimension can be achieved.

Equalization And Frequency Shaping

Equalization, or EQ, is used to adjust the frequency content of individual tracks to create a balanced and clear overall sound. By cutting or boosting specific frequencies, the tonal characteristics of each instrument can be enhanced, allowing them to sit well within the mix without clashing with other elements.

Effects And Automation

Adding effects such as reverb, delay, and compression can further enhance the sound of the mix, adding depth, movement, and character to the individual tracks. Automation allows for dynamic changes in parameters such as volume, panning, and effect levels over time, adding a level of expressiveness and polish to the final mix.

Mastering Techniques For Professional Sound


Learn professional sound mixing and mastering techniques in this comprehensive guide. Elevate your audio production skills and achieve top-quality results for your music or podcasts. Expert tips and tricks for creating a polished, professional sound.

When it comes to achieving a professional sound in your mixes, proper mastering techniques play a crucial role. Mastering is the final step in the audio production process, where the individual tracks are optimized and combined to create a cohesive and polished final product. In this blog post, we will explore two essential mastering techniques that can enhance the overall sound of your mix: Dynamic range and loudness, Stereo enhancement and harmonic excitement, and Finalizing the mix.

Dynamic Range And Loudness:

One of the key elements to consider when mastering your mix is the dynamic range and loudness. Dynamic range refers to the difference between the quietest and loudest parts of a track, and it plays a significant role in creating a balanced and impactful sound. It is essential to strike the right balance between preserving the dynamics of the mix and ensuring a consistent loudness level across the entire track. By using compression, EQ, and limiting techniques, you can control the dynamic range and achieve optimal loudness levels. These techniques allow you to enhance the clarity and presence of individual elements while maintaining a professional sound throughout the mix.

Stereo Enhancement And Harmonic Excitement:

Another technique that can elevate the quality of your mix is stereo enhancement and harmonic excitement. Stereo enhancement involves widening the stereo image of the mix, creating a sense of depth and immersion for the listener. This can be achieved using techniques such as stereo widening, panning, and utilizing stereo imaging plugins. Harmonic excitement, on the other hand, involves adding subtle harmonics to individual tracks or the entire mix, which can bring vitality and warmth to the sound. Utilizing saturation, harmonic exciters, or tape emulation plugins can help in achieving this desired effect. By incorporating these techniques, you can create a wide and captivating soundstage that enhances the overall listening experience.

Finalizing The Mix:

Once you have optimized the dynamic range, loudness, and stereo image of your mix, it’s time to finalize it for distribution. This involves ensuring that the mix translates well across different playback systems and formats. You can achieve this by checking the mix’s mono compatibility and making any necessary adjustments. Additionally, it’s important to address any technical issues such as clicks, pops, or background noise that may have been overlooked during the production phase. By thoroughly reviewing and fine-tuning your mix, you can guarantee a professional sound that captivates the audience and stands out in a competitive music industry.

Understanding Audio Formats And Delivery

When it comes to mixing and mastering audio, understanding audio formats and delivery is a crucial part of the process. The way your audio files are formatted and delivered can have a significant impact on the quality and compatibility of the final product. In this section, we will explore two important aspects of audio formats and delivery: file types and compression, and optimizing for different platforms.

File Types And Compression

Choosing the right file type and compression method is essential for maintaining audio quality and ensuring compatibility across different devices and platforms. Here are some commonly used file types:

File Type Extension Advantages
WAV .wav – High-quality, uncompressed audio.
MP3 .mp3 – Small file size, widely supported.
FLAC .flac – Lossless compression, retains audio quality.

Compression, on the other hand, allows you to reduce the file size of your audio while maintaining an acceptable level of quality. There are various compression methods available, such as:

  • Lossless compression: Reduces file size without sacrificing quality
  • Lossy compression: Sacrifices some audio information to achieve higher compression ratios

It is essential to strike a balance between file size and audio quality based on your specific requirements and the platforms you intend to deliver your audio.

Optimizing For Different Platforms

When delivering audio content, optimizing it for different platforms is crucial to ensure a seamless experience for your listeners. Here are some key considerations:

  • Streaming platforms: Most streaming platforms have their preferred audio formats and specifications. Understanding these requirements and encoding your audio accordingly can enhance playback quality and compatibility.
  • Mobile devices: Mobile devices have varying processing power and storage capacities. Compressing your audio files appropriately can reduce buffering issues and provide a better user experience.
  • Radio and television: Broadcast media often has specific audio delivery requirements. Researching these requirements and adhering to broadcasting standards is crucial to ensure that your audio sounds its best on the airwaves.

By optimizing your audio files for different platforms, you can reach a wider audience and provide them with a seamless listening experience, regardless of the device or platform they choose.
Mixing And Mastering: The Ultimate Guide to Audio Excellence


Credit: geminisound.com


Frequently Asked Questions For Mixing And Mastering


What Is The Difference Between Mixing And Mastering?


Mixing is the process of blending individual tracks together to create a balanced and cohesive sound, while mastering is the final step that ensures the overall clarity, loudness, and consistency of the entire mix.


Why Is Mixing And Mastering Important In Music Production?


Mixing and mastering are important because they enhance the quality and impact of the music. Mixing helps to balance the various elements of a song and make it translate well on different playback systems, while mastering adds depth, polish, and loudness to the final product.


Can I Mix And Master My Own Music?


Yes, you can mix and master your own music if you have the necessary skills and the right tools. However, it is recommended to work with a professional engineer who has the experience and expertise to bring out the best in your music.


How Long Does It Take To Mix And Master A Song?


The time it takes to mix and master a song can vary depending on several factors such as the complexity of the music, the number of tracks, and the level of detail required. On average, it can take anywhere from a few hours to several days to complete the process.


Conclusion


To sum up, mastering and mixing is crucial for achieving a professional sound. These techniques can enhance the clarity, depth, and overall quality of your music. By understanding the fundamentals and applying the right tools and strategies, you can take your audio production to the next level.


Continuously improving your skills in this area will ensure that your music stands out in the competitive industry.

Categories
Archive

Mixing Kick Drum : Master the Art of Crafting Thunderous Beats

To mix a kick drum effectively, adjust EQ and compression settings to enhance its clarity and punchiness. Achieve a balanced sound by blending with other elements in the mix.


When mixing a kick drum, focus on maintaining a strong low-end presence while ensuring it cuts through the mix with defined attack and sustain. By utilizing techniques such as EQing to carve out space for the kick drum and using compression to control dynamics, you can create a powerful and well-defined kick sound that anchors the rhythm of the track.


Experiment with different processing tools and settings to find the optimal balance that complements the overall mix while enhancing the impact of the kick drum. The kick drum is a fundamental element in most music genres, making it crucial to spend time perfecting its mix to achieve a professional and cohesive sound.


The Importance Of Kick Drum In Music Production

The Importance of Kick Drum in Music Production

Conveying Power And Impact

Kick drum is crucial for adding power to a track and creating impact on listeners.

Setting The Foundation For The Track

Kick drum establishes the rhythm and sets the foundation for all other elements in the music production.

Understanding The Anatomy Of Kick Drum

Components Of A Kick Drum Sound

A kick drum is composed of various elements that contribute to its unique sound.

  • Shell: The main body of the kick drum where the sound originates.
  • Head: The drumhead that is struck to produce sound, usually made of plastic or felt.
  • Beater: The part of the pedal that hits the drumhead to create the sound.
  • Resonant Head: The bottom drumhead that enhances the tone of the kick drum.

Frequency Spectrum And Tuning

The kick drum occupies the lower end of the frequency spectrum, providing the low-end foundation in a mix.

Tuning the kick drum involves adjusting the tension of the drumheads to achieve the desired pitch and resonance.


Choosing The Right Samples For Kick Drum

When it comes to creating a powerful and impactful mix, the kick drum is an essential element that can make or break the entire sound. One crucial aspect of enhancing the kick drum’s sound is choosing the right samples. The samples you choose will lay the foundation for the kick drum’s character and help it cut through the mix with clarity and punch.

Sample Selection Criteria

Timbre: Look for samples with a timbre that complements the overall tone of your track. Whether it’s a deep, thumpy kick for a club track or a tight, punchy kick for a pop song, the timbre should align with the genre and style of your music.

Transients: Pay attention to the transient response of the samples. A well-defined transient will ensure the kick drum cuts through the mix, providing clarity and impact. Avoid samples with excessive decay that can muddy the sound.

Tuning: Ensure the sample is tuned to the key of your song. This will prevent any dissonance and ensure that the kick drum resonates harmoniously with the rest of the track.

Layering And Processing

Layering: Experiment with layering multiple kick drum samples to create a unique and complex sound. By blending samples with different characteristics, you can achieve a fuller and more dynamic kick drum sound.

Processing: Apply equalization, compression, and transient shaping to sculpt the sound of your kick drum samples. Tailor the processing to enhance the desired attributes of each sample and ensure they work cohesively in the mix.

“` It’s crucial to select kick drum samples with suitable timbre, well-defined transients, and proper tuning. Additionally, layering and processing techniques can further enhance the kick drum’s sound, contributing to a more impactful and cohesive mix.

Mixing Kick Drum  : Master the Art of Crafting Thunderous Beats


Credit: www.levelsmusicproduction.com


Techniques For Mixing Kick Drum


To achieve a well-balanced kick drum mix, employ techniques such as EQ to enhance the low-end frequencies, compression for control and sustain, and sidechain compression with the bass to ensure they complement each other. Experiment with layering multiple kick drum samples for a fuller sound, and utilize transient shapers for clarity and punch.

Balancing With Other Drum Elements

When it comes to mixing kick drum, finding the right balance with other drum elements is crucial. The kick drum provides the foundation of your rhythm section, and it needs to sit well within the overall drum mix. To achieve this balance, follow these simple techniques:

  • Avoid boosting conflicting frequencies between the kick drum and other elements. For example, if the snare drum has a prominent hit around 200Hz, consider cutting the same frequency range from the kick drum to prevent muddiness.
  • Experiment with panning to give each drum element its own space within the stereo field. By panning the kick drum slightly off-center, you can create a more natural and immersive listening experience.
  • Use volume automation to adjust the kick drum’s level during different sections of the song. This can enhance the dynamics and impact of your drum mix, ensuring the kick drum doesn’t overpower or get lost in the mix.

Applying Compression And Eq

To shape the sound of your kick drum and make it stand out in the mix, compression and EQ are essential tools. Follow these tips to effectively apply compression and EQ to your kick drum:

  1. Start by using a high-pass filter to remove any unnecessary low-end rumble from the kick drum. This will help clean up the low frequencies and make room for other instruments in the mix.
  2. Apply gentle compression to control the dynamic range of the kick drum. This can help even out the levels and add sustain and impact to the sound. Experiment with different attack and release settings to find the right balance.
  3. Consider using a dedicated EQ to shape the tone of the kick drum. Boosting around 60-80Hz can enhance the low-end punch, while cutting around 200-300Hz can reduce muddiness. Additionally, a slight boost around 2-4kHz can bring out the attack and presence of the kick drum.
  4. Don’t be afraid to experiment with different compression and EQ settings to find what works best for your specific mix. Trust your ears and make adjustments that enhance the overall sound and impact of your kick drum.

Advanced Tips For Crafting Thunderous Beats

When it comes to crafting thunderous beats, one of the most important elements to master is the kick drum. The kick drum provides the foundation and power in a track, driving the energy and impact of the overall mix. In this section, we will explore advanced tips for mixing kick drums to help you achieve that thunderous sound you’re after.

Creative Sound Design Approaches

One of the key ways to craft a thunderous kick drum is through creative sound design. Experiment with different synthesis techniques and effects to shape the sound to your liking. Try these creative sound design approaches:

  1. Add saturation or distortion to add warmth and harmonics to the kick drum.
  2. Layer multiple kick drum samples to create a fuller and more complex sound.
  3. Apply envelope shaping to control the attack and decay of the kick drum.
  4. Experiment with pitch modulation to create interesting variations in tone.
  5. Use parallel processing to blend the original kick drum with heavily processed versions for added character.

Blending With Low-end Synthesis

In addition to creative sound design, blending the kick drum with low-end synthesis can greatly enhance the overall impact of the beat. Here are some tips for blending the kick drum with low-end synthesis:

  • Use a sub-bass synthesizer to generate a separate low-frequency layer that complements the kick drum.
  • Ensure that the sub-bass layer is in sync with the kick drum by adjusting the pitch and timing.
  • Apply sidechain compression to the sub-bass layer to create a pumping effect that accentuates the kick drum hits.
  • EQ both the kick drum and sub-bass layer to ensure they occupy distinct but complementary frequency ranges.

By utilizing these advanced tips for mixing kick drums, you can take your beats to the next level and create tracks that make a powerful impact. Experiment with different sound design approaches and blending techniques to find the perfect balance and unleash thunderous beats that will grab the attention of your listeners.

Mixing Kick Drum  : Master the Art of Crafting Thunderous Beats


Credit: www.ikmultimedia.com


Mixing Kick Drum  : Master the Art of Crafting Thunderous Beats


Credit: www.avid.com


Frequently Asked Questions On Mixing Kick Drum


Can I Mix The Kick Drum With Only One Microphone?


Yes, you can mix the kick drum with just one microphone. However, using multiple microphones allows for better control and a more defined sound. By placing one microphone inside the kick drum and another outside, you can capture both the low-end thump and the attack of the kick drum, resulting in a fuller and more balanced sound.


How Should I Eq The Kick Drum To Make It Punchier?


To make the kick drum punchier, focus on enhancing the low frequencies and reducing any muddiness. Use a low shelving EQ to boost the frequencies around 60-80Hz for added depth and power. Additionally, apply a slight boost around 2-4kHz to accentuate the attack and presence of the kick drum.


Finally, cut any excessive low-end rumble below 40Hz to keep the kick drum tight and focused.


What Are Some Techniques To Make The Kick Drum Stand Out In The Mix?


There are several techniques to make the kick drum stand out in the mix. Firstly, consider sidechaining the bass guitar or other low-frequency instruments to the kick drum, which creates space for the kick to punch through. Secondly, parallel compression can be used to bring out the sustain and body of the kick drum.


Lastly, subtle saturation or distortion can add harmonics and make the kick drum more prominent in the mix.


Conclusion


Mixing kick drums is a crucial aspect of producing high-quality music. By following the tips and techniques outlined in this blog post, you can achieve a powerful and balanced kick drum sound in your mixes. Experiment with different approaches, keep practicing, and trust your ears to hone your skills in kick drum mixing.


Elevate your music to the next level by mastering this essential element of production.

Categories
Archive

Prevent Vocal Recording Distortion : Mastering the Perfect Audio Clarity

Prevent vocal recording distortion by properly adjusting microphone levels and avoiding overloading. Clear vocals enhance overall audio quality.


To achieve professional-sounding recordings, it is essential to understand key techniques for minimizing distortion during vocal recordings. Addressing microphone sensitivity, distance, and input levels can significantly impact the clarity and quality of the recorded vocals. By implementing these strategies, content creators can elevate their recordings and produce clean, distortion-free vocals that captivate audiences.


Vocal recording distortion is a common issue in the industry, but with the right knowledge and techniques, it can be effectively managed to deliver exceptional results. Mastering these fundamental aspects of vocal recording is crucial for achieving professional-grade audio quality and engaging content.


Understanding Vocal Recording Distortion

What Is Vocal Recording Distortion?

Vocal recording distortion occurs when the audio signal is overloaded, resulting in a distorted sound.

Causes Of Vocal Recording Distortion

  • Improper microphone placement
  • High input levels
  • Poor quality equipment
  • Room acoustics
Prevent Vocal Recording Distortion : Mastering the Perfect Audio Clarity


Credit: www.amazon.com


Preparing For Distortion-free Vocal Recording

When preparing for distortion-free vocal recording, it is crucial to consider several key factors. By selecting the right microphone, optimizing room acoustics, and implementing best practices, you can ensure high-quality recordings without any unwanted distortions.

Selecting The Right Microphone

Choosing the correct microphone is essential for preventing distortion in vocal recordings. Ensure to pick a microphone that complements the tones of the vocalist’s voice and has a low noise floor.

Optimizing Room Acoustics

Proper room acoustics play a significant role in reducing distortions in vocal recordings. Consider using soundproofing materials and acoustic panels to minimize echoes and reverberations in the room.


Techniques For Achieving Perfect Audio Clarity

Vocal recording distortion can be a headache for audio engineers and musicians alike. Achieving perfect audio clarity in vocal recordings requires a combination of proper mic technique and effective use of audio compression. By mastering these techniques, you can ensure that your recordings are free from unwanted distortion and maintain their natural, pristine quality.

Proper Mic Technique

Using the right mic technique is crucial for preventing vocal recording distortion. Here are some essential tips to keep in mind:

  • Position the microphone at a suitable distance from the vocalist to avoid overloading the mic with excessive sound pressure.
  • Encourage the vocalist to sing consistently and maintain a consistent distance from the mic to ensure a balanced recording level.
  • Consider using a pop filter to minimize plosive sounds and maintain a smooth recording.

Using Audio Compression Effectively

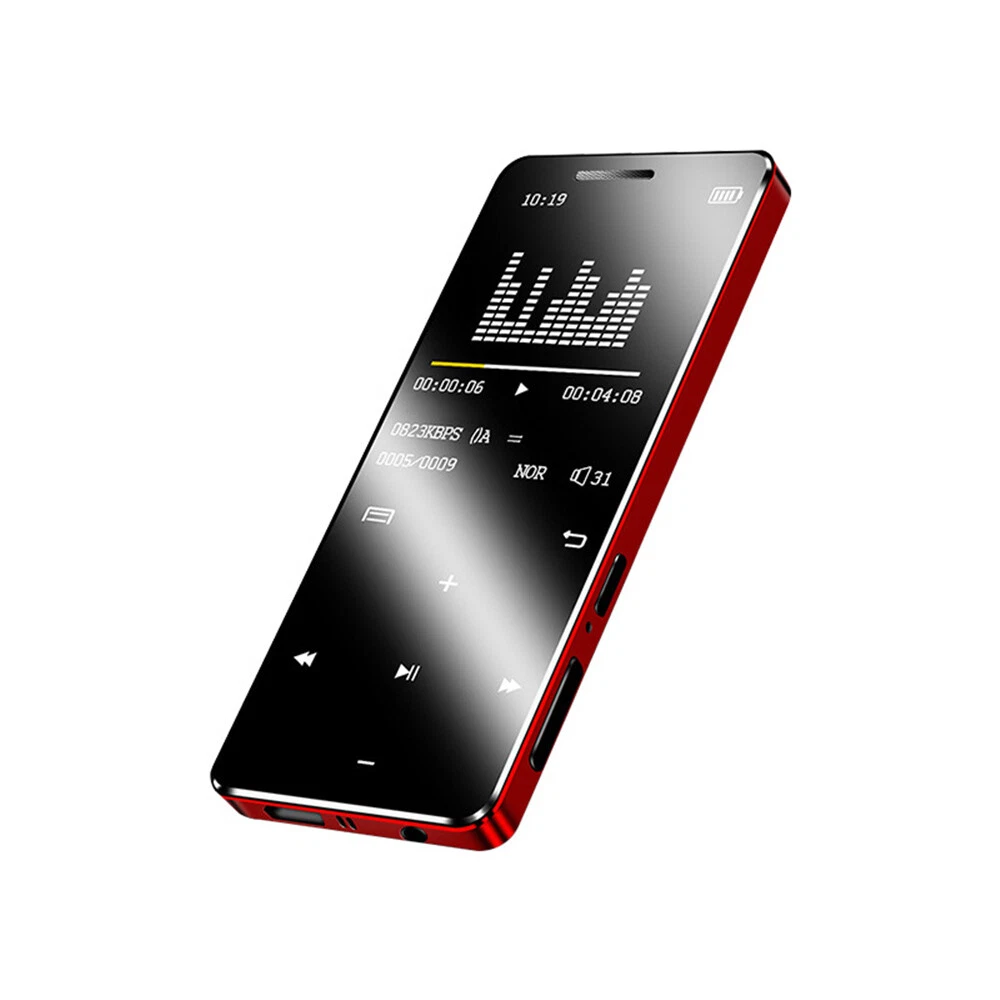
Audio compression is a powerful tool for controlling the dynamic range of vocal recordings and preventing distortion. When using audio compression, it’s crucial to:

  1. Set the attack and release parameters appropriately to handle transient peaks without distorting the vocal signal.
  2. Utilize a gentle compression ratio to smooth out volume fluctuations while preserving the natural dynamics of the vocals.
  3. Monitor the gain reduction and make adjustments to ensure a consistent and distortion-free recording.
Prevent Vocal Recording Distortion : Mastering the Perfect Audio Clarity


Credit: www.practical-music-production.com


Mastering The Recording Process

Mastering the recording process is crucial to producing high-quality vocal recordings. One of the key aspects of this process is preventing vocal recording distortion. By maintaining a consistent input level and monitoring and adjusting in real-time, you can ensure that your vocal recordings sound clear and professional.

Maintaining A Consistent Input Level

When it comes to preventing vocal recording distortion, maintaining a consistent input level is essential. This means keeping the volume of the input signal steady throughout the recording process. By doing so, you can avoid sudden spikes or drops in volume that can lead to distortion.

There are a few ways to maintain a consistent input level:

  • Start by setting an appropriate input gain level on your audio interface or mixer. This will ensure that the signal coming into your recording system is neither too loud nor too soft.
  • Use a pop filter to minimize plosive sounds and maintain a steady input level. Plosive sounds, such as “p” and “b” sounds, can cause sudden spikes in volume if not properly controlled.
  • Encourage the vocalist to maintain a consistent distance from the microphone throughout the recording. Moving too close or too far from the microphone can cause variations in volume and affect the quality of the recording.
  • Consider using a compressor or limiter plugin during the recording process. These tools can help control the dynamic range of the vocals and prevent sudden spikes in volume.

Monitoring And Adjusting In Real-time

In addition to maintaining a consistent input level, monitoring and adjusting in real-time is crucial for preventing vocal recording distortion. This ensures that you catch any issues as they arise and make necessary adjustments before it’s too late.

Here are some tips for monitoring and adjusting in real-time:

  • Wear headphones while recording to accurately monitor the vocals. This allows you to hear any distortion or other issues immediately.
  • Pay close attention to the input levels displayed on your recording software or audio interface. If you notice any clipping or distortion, lower the input gain or adjust the vocalist’s distance from the microphone.
  • Listen for any unwanted background noise or interference that may affect the quality of the recording. If necessary, make adjustments to the recording setup or environment to minimize these issues.
  • Make use of the solo or mute functions in your recording software to isolate and listen to the vocals more closely. This can help you identify any distortion or other issues that may be present.

Post-production Strategies For Clarity Enhancement


Enhancing vocal clarity during post-production is crucial in preventing recording distortion. Implementing strategic techniques like noise reduction, equalization, and compression can effectively refine vocal recordings for a more polished and professional sound. These methods help to minimize unwanted background noise and accentuate the natural nuances of the vocals, resulting in a pristine audio output.

Noise Reduction

One of the key post-production strategies for clarity enhancement in vocal recordings is noise reduction. Noise, such as background hiss or room ambiance, can greatly affect the clarity and intelligibility of vocals. By implementing effective noise reduction techniques, the unwanted noise can be minimized, allowing the vocals to shine through with greater clarity.

There are various noise reduction plugins available that can be used during the post-production process. These plugins analyze the audio signal and identify the noise components, which can then be attenuated or removed entirely. By reducing the noise, the vocals become more prominent and easier to understand for the listeners.

Equalization

Another post-production strategy for clarity enhancement is equalization. Equalization, commonly known as EQ, involves the adjustment of frequency levels in an audio signal. By carefully applying EQ to vocal recordings, you can enhance certain frequencies that are important for vocal clarity, while reducing or cutting frequencies that may cause muddiness or harshness.

When equalizing vocals, it’s crucial to pay attention to the frequency range that affects clarity the most. Typically, boosting the presence frequencies around 3-5 kHz can help vocals cut through the mix and improve intelligibility. Additionally, reducing any low-end rumble or excessive high-frequency sibilance can further enhance the clarity of the vocals.

Professional Mixing And Mastering

While noise reduction and equalization are important post-production strategies, enlisting the help of professional mixing and mastering engineers can take your vocal recordings to the next level of clarity. These skilled professionals possess the technical expertise and experience to fine-tune the vocal tracks, ensuring every element is balanced and optimized for the best listening experience.

During the mixing process, the engineer will adjust the levels of all the individual tracks, creating a balanced blend where the vocals sit in the forefront. They will also apply additional techniques such as panning, compression, and reverb to enhance the spatial placement and overall presence of the vocals in the mix.

Once the mixing is complete, the mastering engineer steps in to fine-tune the final mixdown. They focus on optimizing the overall tonal balance, dynamics, and loudness of the track, ensuring the vocals retain their clarity and shine through in any listening environment.

By employing these post-production strategies, including noise reduction, equalization, and professional mixing and mastering, you can prevent vocal recording distortion and elevate the clarity of your vocal recordings to a professional level.

Prevent Vocal Recording Distortion : Mastering the Perfect Audio Clarity


Credit: www.amazon.com


Frequently Asked Questions Of Prevent Vocal Recording Distortion


How Can I Prevent Vocal Recording Distortion?


Distortion in vocal recordings can be prevented by ensuring proper microphone placement, using a pop filter to reduce plosive sounds, using a high-quality, balanced XLR cable, avoiding overloading the microphone preamp, and utilizing a good room acoustics treatment. Experimenting with different mic preamp gain settings can also help minimize distortion.


Why Does Vocal Recording Distortion Occur?


Vocal recording distortion can occur due to factors such as improper microphone placement, mismatched impedance between the microphone and preamp, excessive gain or volume levels, too close proximity to the microphone, poor room acoustics, or using a low-quality microphone. Identifying and addressing these issues can help prevent or reduce distortion.


Can Using A Pop Filter Prevent Vocal Recording Distortion?


Yes, using a pop filter can help prevent vocal recording distortion. A pop filter acts as a shield between the vocalist and the microphone, reducing plosive sounds that can cause distortion. It effectively prevents bursts of air from hitting the microphone diaphragm, resulting in cleaner and clearer recordings.


How Can I Improve Microphone Placement To Prevent Distortion?


To improve microphone placement and prevent distortion, ensure that the mic is positioned at the correct distance and angle from the vocalist’s mouth. Experiment with different placements to find the sweet spot, avoiding placing the mic too close or too far.


Generally, a good starting point is positioning the microphone around 6-8 inches away from the vocalist’s mouth, slightly off-axis.


Conclusion


To prevent vocal recording distortion, follow these practical tips in your recording process. With proper microphone placement, managing input levels, and utilizing pop filters, maintaining clear and crisp vocal recordings becomes achievable. By being mindful of room acoustics and investing in quality equipment, you can ensure professional and distortion-free vocal recordings for your projects.

Categories
Archive

Audio Formats What The Flac : Unlocking the Power of Lossless Sound

FLAC (Free Lossless Audio Codec) is a popular audio format known for its high-quality sound and lossless compression capabilities. Designed to provide audio files that retain all original audio data.


When it comes to audio formats, FLAC stands out as a top choice for music enthusiasts and professionals alike. Its ability to maintain high audio quality while reducing file size makes it ideal for storing and listening to music. With no loss of audio data during compression, FLAC ensures a true representation of sound without compromising quality.


As digital audio technology continues to evolve, FLAC remains a trusted format for preserving audio integrity and delivering a premium listening experience.

Audio Formats What The Flac  : Unlocking the Power of Lossless Sound


Credit: www.amazon.com


The Evolution Of Audio Formats

Audio formats have undergone significant changes over the years, adapting to advancements in technology and user preferences.

Early Audio Formats

Dive into the history of audio formats, starting from the earliest versions like vinyl records and cassette tapes.

These physical formats gradually shifted to digital with the rise of CDs and MP3 files.

Lossy Vs. Lossless Formats

Understand the difference between lossy and lossless formats for audio compression.

  • Lossy formats sacrifice some quality for smaller file sizes, popularized by formats like MP3.
  • Lossless formats maintain original audio quality without compression, exemplified by formats like FLAC.

Understanding Flac

Understanding FLAC: FLAC, which stands for Free Lossless Audio Codec, is a popular audio format known for preserving the original sound quality. Let’s delve into the essentials of FLAC.

What Is Flac?

FLAC is a lossless audio format that compresses audio files without sacrificing quality. It retains the true sound data, making it a favorite among audiophiles.

Benefits Of Flac

  • Retains original audio quality
  • Significantly reduces file size
  • Perfect for archiving and storing high-quality audio
  • Compatible with a wide range of media players

Unlocking The Power Of Lossless Sound

High Fidelity Listening Experience

When it comes to experiencing music in its purest form, few formats can match the quality of FLAC. Free Lossless Audio Codec (FLAC) offers a high fidelity listening experience, preserving the original audio source without any loss in quality. With FLAC, music enthusiasts can enjoy the full range of sound, including subtle nuances and dynamic range, delivering a truly immersive listening experience.

Compatibility And Usage

FLAC files are widely compatible across various platforms and devices. Many music players, both software and hardware-based, support FLAC, allowing users to seamlessly integrate this powerful audio format into their listening experience. Moreover, FLAC files can be easily converted to other formats if needed, providing flexibility for different usage scenarios.

Flac Vs. Other Formats


FLAC offers superior audio quality compared to other formats, making it a popular choice among audiophiles. Its lossless compression preserves the original sound without sacrificing fidelity. With smaller file sizes and high resolution, FLAC stands out as a top choice for music enthusiasts and professionals.

When it comes to audio formats, there are a wide variety of options available to music enthusiasts. Among them, FLAC stands out for its superior quality and flexibility. In this section, we will explore the key differences between FLAC and two popular formats: MP3 and WAV.

Flac Vs. Mp3

While MP3 is the most widely used audio format due to its small file size, it does come at a cost. MP3 files are compressed, which means that some audio data is lost in the process. This compression allows for efficient storage and transmission, making MP3s ideal for portable devices and online streaming platforms. However, discerning listeners may notice a loss of audio quality, especially when compared to lossless formats like FLAC. FLAC, on the other hand, preserves all the original audio data, providing a more detailed and accurate sound reproduction. Although FLAC files are larger in size, they offer a truly immersive listening experience that captures the nuances and subtleties of the music.

Flac Vs. Wav

WAV is another lossless audio format that is often compared to FLAC. These formats share similarities, such as preserving the original audio data and offering high-quality sound reproduction. However, there are a few key differences between them. FLAC files are typically compressed and can achieve similar sound quality as WAV files with smaller file sizes. This compression allows FLAC to be more space-efficient, making it a preferred choice for archiving and storing music libraries. On the other hand, WAV files are uncompressed, which makes them larger in size but ensures bit-for-bit accuracy. This format is commonly used in professional audio production and mastering, where every detail must be preserved. Ultimately, the choice between FLAC and WAV depends on your specific needs and priorities, whether it’s file size, storage space, or uncompromised audio quality.


Tips For Using Flac


Discover valuable tips for maximizing the benefits of using FLAC audio format. Learn how to enhance sound quality and compatibility seamlessly. Boost your audio experience with these expert suggestions.

FLAC (Free Lossless Audio Codec) is a popular audio format that allows you to enjoy high-quality music without sacrificing storage space. Whether you’re a music enthusiast or an audiophile, FLAC can greatly enhance your listening experience. To help you make the most of this audio format, here are some important tips to keep in mind:

Converting To And From Flac

Converting audio files to and from FLAC is a common task for many users. Whether you want to convert your existing music library to FLAC or you have FLAC files you need to convert to another format, these tips will come in handy:

  1. Use reliable software: When converting audio files, it’s crucial to use reliable software that supports FLAC. There are various programs available, both free and paid, that can handle FLAC conversions without compromising the audio quality.
  2. Preserve metadata: When converting audio files, it’s important to preserve the metadata, such as album artwork, titles, and artist information. This will ensure that you can easily organize and identify your music files.
  3. Batch conversion: If you have a large number of audio files to convert, look for software that supports batch conversion. This will save you time and effort by allowing you to convert multiple files simultaneously.

Best Practices For Storing And Playing Flac Files

Storing and playing FLAC files properly is essential to ensure optimal audio quality. Here are some best practices to consider:

  • Use lossless storage: Since FLAC is a lossless audio format, it’s important to store your FLAC files in a lossless storage format, such as a hard drive or solid-state drive. This will preserve the audio quality and prevent any degradation.
  • Keep backups: It’s always a good idea to keep backup copies of your FLAC files. This will protect your music library from accidental data loss or hardware failures.
  • Use a FLAC-compatible player: To play FLAC files, you need a player that supports this format. Fortunately, there are many options available, ranging from standalone audio players to software-based media players.
  • Consider using a dedicated audio player: If you’re a true audiophile, consider investing in a dedicated audio player that supports FLAC. These devices often have superior audio quality and features specifically designed for high-quality audio playback.
Audio Formats What The Flac  : Unlocking the Power of Lossless Sound


Credit: www.ebay.com


Audio Formats What The Flac  : Unlocking the Power of Lossless Sound


Credit: s.click.aliexpress.com


Frequently Asked Questions For Audio Formats What The Flac


What Is The Flac Audio Format?


FLAC, short for Free Lossless Audio Codec, is a high-quality audio format that compresses audio files without losing any audio quality. It offers lossless compression, which means it reduces file size without sacrificing audio fidelity, making it ideal for music enthusiasts and audiophiles.


How Does Flac Audio Format Compare To Mp3?


Unlike MP3, which is a lossy format, FLAC is a lossless audio format. This means that FLAC files retain the original audio quality, while MP3 files sacrifice some audio quality to reduce file size. Therefore, if you want the best audio experience with no audio quality loss, FLAC is the way to go.


Can Flac Files Be Played On Any Device?


Most modern devices and media players support FLAC files, including smartphones, tablets, computers, and dedicated audio players. However, it’s essential to check your device’s specifications and ensure it is compatible with FLAC playback. Additionally, some older devices or entry-level models may not support FLAC, so it’s recommended to verify beforehand.


Is Flac Audio Format Widely Used In The Music Industry?


While FLAC is not as widely used as MP3 due to its larger file size, it is highly popular among music enthusiasts, audiophiles, and professionals in the music industry. Many music platforms and online stores offer FLAC downloads, particularly for high-resolution audio, providing the best audio experience for listeners who prioritize audio quality.


Conclusion


To sum up, understanding audio formats is crucial for high-quality music listening. By exploring the benefits of FLAC and its compatibility with various devices, users can make informed decisions for their audio needs. With its lossless compression, FLAC is a versatile option that ensures top-notch sound while conserving storage space.


Embracing FLAC can elevate the music experience for enthusiasts and audiophiles alike.

Categories
Archive

Reasons Audacity Isnt Playing : Troubleshooting Tips

Audacity may not play due to corrupted installation files or incompatible settings. Before troubleshooting, ensure a stable Internet connection and update the program to the latest version.


Audacity users may encounter issues when attempting to play audio files. This guide will explore common reasons why Audacity may not be playing, as well as provide practical solutions to resolve playback problems effectively. By following these steps, you can troubleshoot Audacity playback issues and get back to enjoying your audio editing experience without interruptions.


Let’s delve into the potential reasons behind Audacity’s playback problems and how to address them successfully.


Credit: www.reddit.com


Common Issues With Audacity

One common issue users face with Audacity is encountering unsupported audio formats.

Make sure to convert the audio file to a compatible format like MP3 or WAV.

If Audacity isn’t playing, check your audio device configuration.

Ensure correct input and output devices are selected in the software.

Reasons Audacity Isnt Playing  : Troubleshooting Tips


Credit: multimedia.easeus.com


Unsupported Audio Format

If Audacity isn’t playing your audio file, one common reason could be an Unsupported Audio Format. This occurs when the file type or sample rate is not supported by Audacity.

Incompatible File Type

Audacity may not recognize audio files if they are in an incompatible file format such as WMA or protected AAC. Convert files to WAV or MP3 for compatibility.

Sample Rate Mismatch

A sample rate mismatch occurs when the audio file’s sample rate doesn’t match Audacity’s project rate. Ensure they align for successful playback.


Audio Device Configuration

When troubleshooting audio playback issues in Audacity, it’s crucial to review the audio device configuration. Depending on the specific issue, the root cause may be related to driver compatibility or hardware connectivity. By examining these aspects, you can identify and resolve the problem effectively.

Driver Compatibility

Checking the driver compatibility is fundamental in ensuring that Audacity operates seamlessly with the audio device. It’s essential to verify if the installed drivers are up to date and compatible with Audacity’s requirements. Outdated or incompatible drivers can lead to playback issues, including audio errors and distorted sound quality.

Hardware Connectivity

Hardware connectivity plays a significant role in Audacity’s ability to play audio. Verify the physical connection of the audio device to the computer. Ensure that all cables are securely connected and that the audio device is recognized by the system. A loose connection or a faulty cable can impede audio playback and cause interruptions.

Software And Plugin Compatibility

One of the common reasons why Audacity may not be playing as expected is due to software and plugin compatibility issues. When using Audacity, it is crucial to ensure that you have the right version of the software and compatible plugins installed. This will help to prevent any playback problems and ensure a smooth recording and editing experience.

Outdated Audacity Version

If you are experiencing issues with Audacity not playing, one of the possible reasons could be an outdated version of the software. Audacity regularly releases updates to fix bugs and improve performance. By using an older version, you may encounter compatibility problems with certain plugins or encounter playback issues. To remedy this, always make sure to keep your Audacity software up to date by installing the latest version from their official website.

Incompatible Plugins

Another cause for Audacity not playing properly could be incompatible plugins. Audacity supports a wide range of plugins that enhance its features and capabilities. However, it’s essential to check if the plugins you have installed are compatible with your Audacity version. Using outdated or incompatible plugins can lead to playback problems, including audio distortion or the inability to play audio files altogether. To avoid these issues, verify that the plugins you are using are compatible with your Audacity software version.

Troubleshooting Methods

Having trouble playing Audacity? Don’t worry, we’ve got you covered. In this section, we will discuss some troubleshooting methods that can help you get your Audacity up and running smoothly. Whether it’s updating your software or adjusting your device settings, these simple steps can often solve common playback issues. Let’s dive in and troubleshoot those problems:

Updating Software

Keeping your software up to date is essential for optimal performance. Outdated software can sometimes cause compatibility issues and prevent Audacity from playing. To ensure that you have the latest updates, follow these steps:

  1. Check for updates: Open your Audacity application and navigate to the ‘Help’ or ‘Preferences’ tab. Look for the option to ‘Check for Updates’ and click on it.
  2. Install updates: If an update is available, follow the prompts to download and install it. Make sure you have a stable internet connection during this process.
  3. Restart Audacity: After installing the updates, close Audacity and reopen it. Check if the playback problem has been resolved.

Adjusting Device Settings

Device settings can sometimes interfere with Audacity’s playback capabilities. Here’s how you can tweak your settings to ensure seamless performance:

  1. Open Sound Settings: Go to your computer’s System Preferences or Control Panel and search for ‘Sound’ or ‘Audio Settings’.
  2. Select Playback Devices: Once you’re in the Sound settings, find the ‘Playback’ tab and click on it.
  3. Choose the correct device: Make sure the correct playback device is selected. If you are unsure which device is your primary playback device, refer to your computer’s user manual or contact the manufacturer for assistance.
  4. Adjust volume levels: Check that the volume levels are not set too low or muted. Drag the volume slider to increase it if necessary.
  5. Test Audacity playback: Open Audacity and try playing your audio files again. If the problem persists, move on to the next troubleshooting method.

By updating your software and adjusting your device settings, you can often overcome Audacity playback issues. Give these troubleshooting methods a try and get back to recording and editing your audio projects with ease. Remember, if one method doesn’t solve the problem, don’t worry—there are always more solutions to explore. Happy troubleshooting!

Reasons Audacity Isnt Playing  : Troubleshooting Tips


Credit: forum.audacityteam.org


Frequently Asked Questions On Reasons Audacity Isnt Playing


Why Is Audacity Not Playing Audio?


There could be several reasons why Audacity is not playing audio. It could be due to incorrect audio device settings, outdated audio drivers, or incompatible audio file formats. Make sure to check your audio settings, update your drivers, and ensure your audio files are in a compatible format.


How Can I Fix Audacity Playback Issues?


To fix Audacity playback issues, try these solutions: 1) Check your computer’s audio settings, 2) Update Audacity to the latest version, 3) Verify that your audio drivers are up-to-date, 4) Ensure Audacity supports your audio file format, 5) Close other programs that might interfere with playback, and 6) Restart your computer and Audacity.


Why Is There No Sound In My Audacity Project?


If you’re experiencing no sound in your Audacity project, check these possible causes: 1) Audio tracks may be muted or disabled, 2) Ensure your speakers or headphones are properly connected and working, 3) Adjust the volume levels in Audacity, and 4) Verify that your audio device is selected correctly in Audacity’s preferences.


Conclusion


To sum up, Audacity issues may stem from outdated software or incompatible formats. Checking for updates and using supported file types can resolve these problems. Regular maintenance and troubleshooting can keep Audacity running smoothly, ensuring an uninterrupted audio editing experience.


Additionally, exploring alternative software can provide a backup solution for continued productivity.

Categories
Archive

Best Synths For Beginners: Master the Music with Ease

As an Amazon Associate I earn from qualifying purchases.

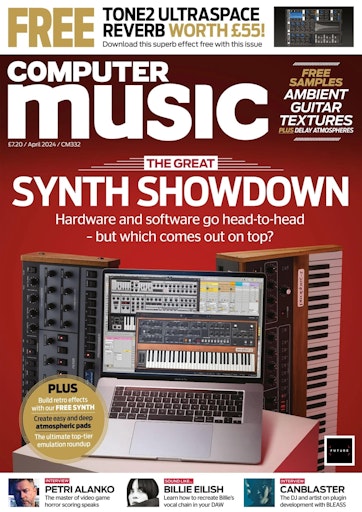
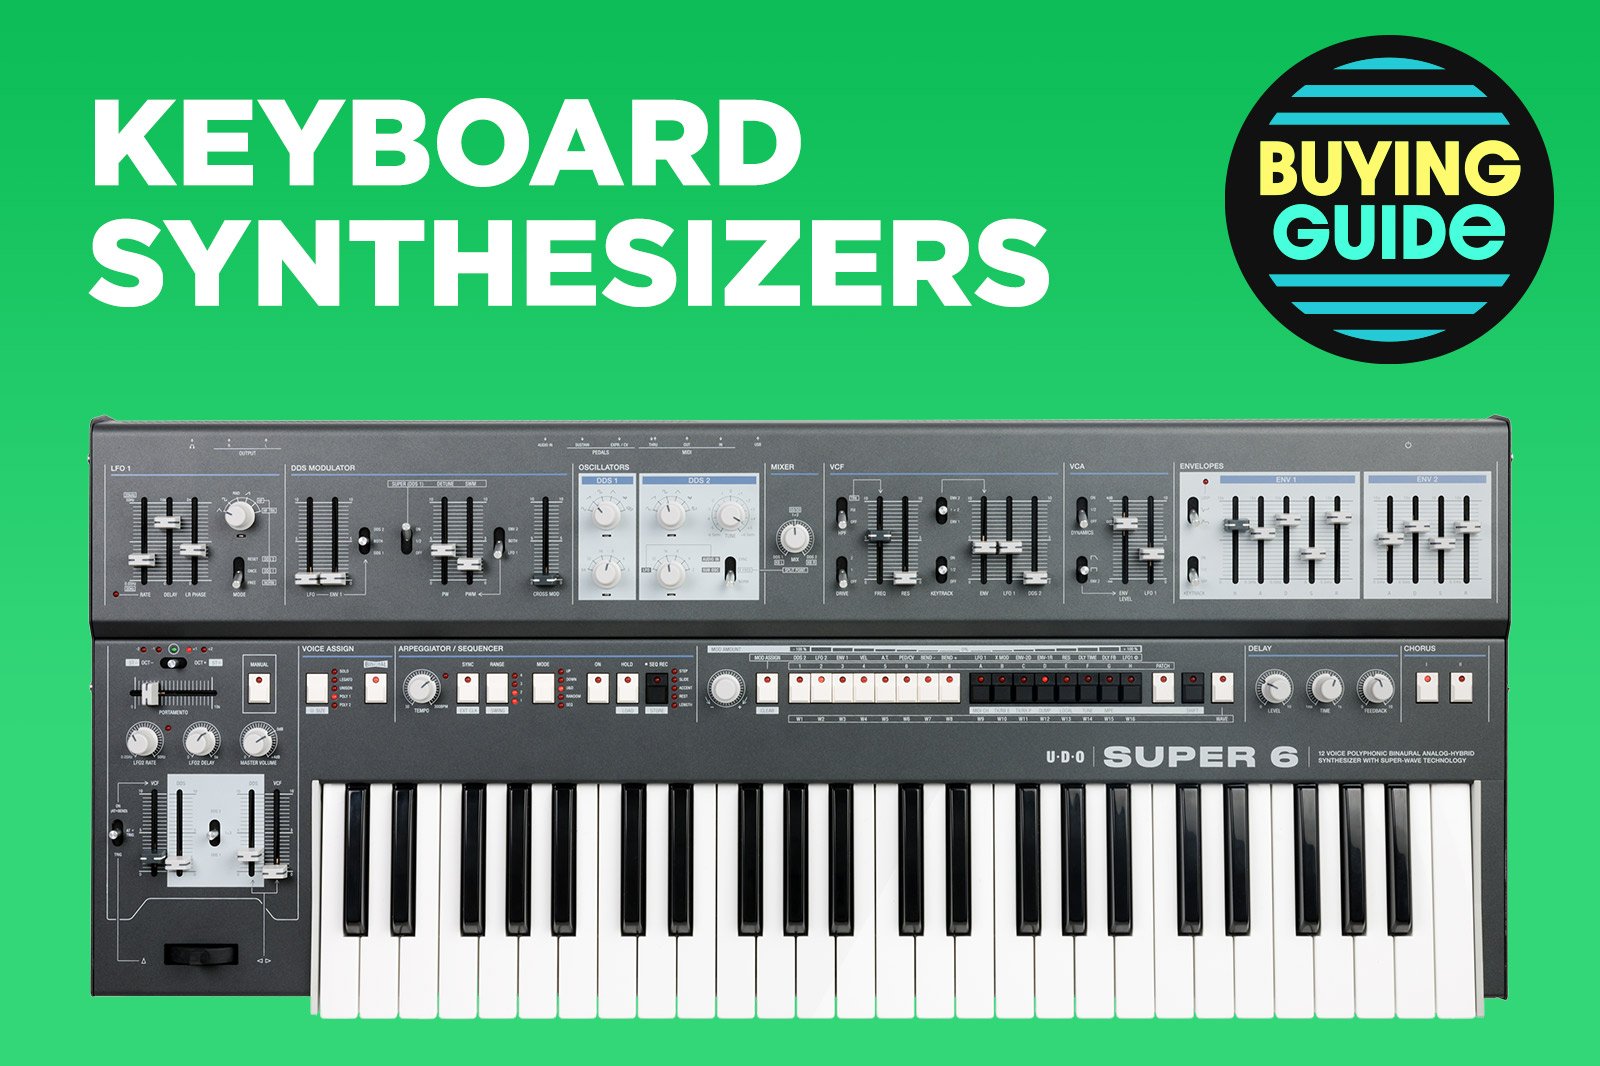
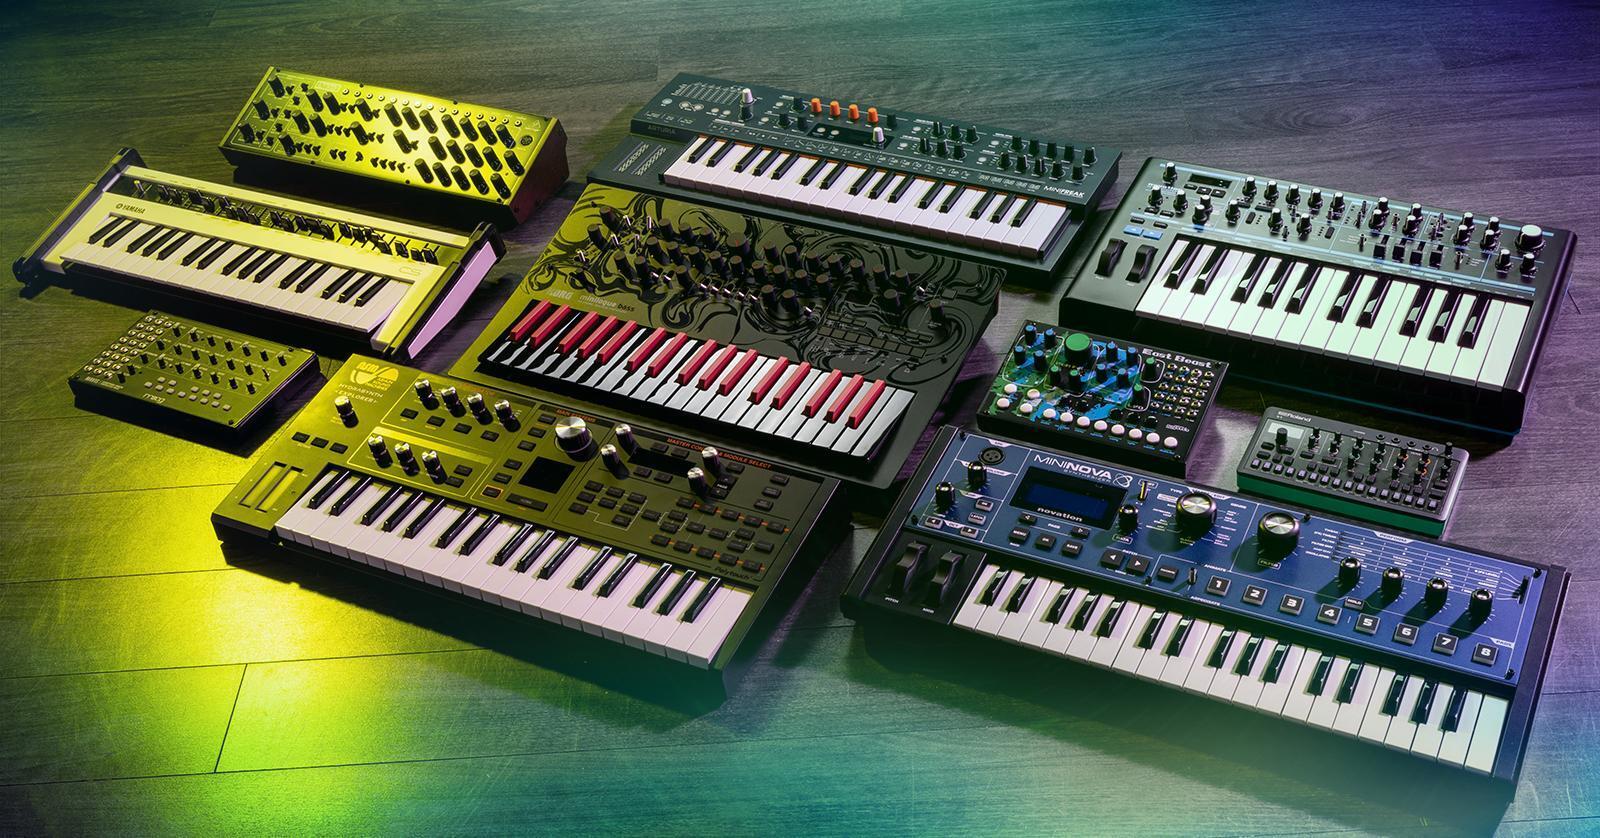
The best synths for beginners are the Korg Minilogue and Arturia Microbrute, offering affordability and versatility. For aspiring musicians venturing into the world of synthesizers, choosing the right instrument can be a daunting task.


The Korg Minilogue stands out for its user-friendly interface and rich sound capabilities, making it an ideal choice for newcomers seeking a versatile and budget-friendly option. On the other hand, the Arturia Microbrute‘s compact design and hands-on controls provide an intuitive playing experience, perfect for beginners looking to dive into analog synthesis.


Both synths offer a wide range of creative possibilities, making them excellent introductory instruments for those exploring the exciting realm of electronic music production.

Best Synths For Beginners: Master the Music with Ease


Credit: pocketmags.com


The Basics Of Synthesizers

The Basics of Synthesizers: Synthesizers are electronic musical instruments that generate and manipulate audio signals to produce sound. For beginners, understanding the basics of synthesizers is essential to kickstart their music production journey.

Types Of Synthesizers

  • Analog Synthesizers
  • Virtual Analog Synthesizers
  • FM Synthesizers
  • Granular Synthesizers
  • Sample-Based Synthesizers

Components Of A Synthesizer

  1. Oscillators: Generate sound waves
  2. Filters: Shape the tone of the sound
  3. Amplifiers: Control the volume of the sound
  4. Modulators: Add movement and dynamics to the sound
  5. Envelopes: Control how sounds change over time
  6. LFOs: Create rhythmic modulation effects

Key Features To Look For


Looking for the best synths for beginners? Key features to consider include ease of use, portability, versatile sound options, and affordable pricing. Choose a synth that offers user-friendly controls, intuitive interface, and built-in tutorials for an ideal learning experience.

User-friendly Interface

Key Features to Look For: Synths with intuitive controls and clear labeling facilitate easier learning for beginners.

Built-in Tutorials And Guides

Synths that offer tutorials and guides within the interface can help new users grasp concepts quickly. A beginner-friendly interface is essential for those starting out in the world of synthesis. Look for synths that have clearly labeled controls and a user-friendly design. Built-in tutorials and guides can be beneficial for beginners to learn the basics of synthesis. Choosing a synth with interactive tutorials can enhance the learning experience for newcomers. Having access to educational resources directly on the synth can expedite the learning process. Ensure the synth you select offers a user-friendly interface and helpful guidance for beginners.

Top Synthesizers For Beginners

Start of the blog post section about Top Synthesizers for Beginners

Searching for the perfect synthesizer to kick start your music production journey? Look no further! We have compiled a list of top-notch synthesizers that are ideal for beginners. Whether you are an aspiring musician or a hobbyist, these synthesizers will provide you with an impressive range of features without breaking the bank. Let’s dive into the world of synthesizers for beginners and discover the affordable options and best value for money choices.

Affordable Options

Affordable Options

If you are on a tight budget, there are synthesizers that offer remarkable features at budget-friendly prices. Take a look at these standout options:

  • Korg Volca Keys Analog Synthesizer: Compact and versatile, this synthesizer packs a punch with its affordable price tag.
  • Arturia MicroBrute Analog Synthesizer: Don’t let its size fool you; this synthesizer is a powerhouse of sonic possibilities, perfect for beginners.

Best Value for Money

Best Value For Money

When it comes to getting the best value for your money, these synthesizers deliver exceptional quality without breaking the bank:

  1. Behringer DeepMind 12: With its impressive array of features and affordable price point, this synthesizer offers exceptional value for beginners.
  2. Yamaha Reface CS Synthesizer: Compact, portable, and packed with outstanding sound quality, this synthesizer provides an unmatched price-to-performance ratio.
Best Synths For Beginners: Master the Music with Ease


Credit: www.perfectcircuit.com


Learning Resources

If you’re a beginner looking to learn how to use synths, having access to the right learning resources is essential. These resources can help you understand the fundamentals of synthesis, discover new techniques, and connect with a community of like-minded individuals. Below, we’ve compiled a list of some of the best learning resources for beginners.

Online Tutorials

Online tutorials offer a great way to learn how to use synths from the comfort of your own home. From basic tutorials that cover the essentials to more advanced lessons that dive into specific topics, there’s something for every level of skill and interest. Some popular websites that offer a wide range of synth tutorials include:

  • Synthtopia: Offers a vast collection of tutorials, covering everything from basic synthesis concepts to advanced sound design techniques.
  • YouTube: A treasure trove of synth tutorials, YouTube channels like “SynthHacker” and “Loopop” provide detailed walkthroughs and tips.
  • Sound on Sound: Features an extensive library of tutorials, articles, and step-by-step guides for synth enthusiasts of all levels.

Community Forums And Groups

Being a part of a community of synth enthusiasts can greatly enhance your learning experience. Community forums and groups offer a platform to ask questions, seek advice, and share your own experiences. Here are some notable online communities for synth beginners:

  • Reddit: The subreddit r/synthesizers is a lively community where beginners and experts alike come together to discuss everything synth-related.
  • Gearslutz: This popular forum not only features discussions on synths but covers a wide range of music gear topics, making it a valuable resource.
  • Facebook Groups: Groups like “Synth Students” and “Synth Explorers” provide a friendly and supportive environment for beginners to learn and grow.


Tips For Mastering Synthesizers


Discover the top synthesizers suited for beginners to hone their skills. Dive into the world of music production with user-friendly synths that offer a seamless learning experience. Elevate your sound and unlock your creativity with these beginner-friendly instruments.

Practice Regularly

Your journey to mastering synthesizers begins with regular practice. Just like any musical instrument, the more time you spend playing and experimenting, the better you’ll become. Dedicate a consistent schedule each day to sit down and practice your synth skills. This will help you develop muscle memory and improve your understanding of different sound combinations.

Start with simple exercises to build your foundation. Begin by playing scales, chords, and arpeggios to get comfortable with the keyboard. As you progress, challenge yourself with more complex melodies and harmonies. Remember, practice makes perfect!

Experiment With Sound Design

One of the most exciting aspects of synthesizers is the ability to design unique and unconventional sounds. Don’t be afraid to step outside traditional boundaries and experiment with sound design. By exploring different waveforms, filters, envelopes, and modulation options, you can create your signature sound.

Start by experimenting with basic parameters like oscillators, filters, and envelopes. Adjust the cutoff frequency, resonance, and attack/release times to shape your sound. Take it a step further by exploring modulation options such as LFOs and modulation envelopes. These tools allow you to add movement and depth to your sound.

Remember to take notes of the settings and changes you make. This will help you recreate sounds in the future and expand your sonic palette.

Best Synths For Beginners: Master the Music with Ease


Credit: www.sweetwater.com


Frequently Asked Questions On Best Synths For Beginners


What Are The Best Synths For Beginners?


When starting out, it’s important to choose synths that are user-friendly and offer a wide range of sounds. Some top options for beginners include the Korg Volca series, Novation MiniNova, and Arturia MicroBrute. These synths provide great sound quality and are perfect for learning the basics of synthesis.


Are Analog Or Digital Synths Better For Beginners?


Both analog and digital synths have their advantages, but for beginners, digital synths are often recommended. They are easier to use, have a wide range of sounds, and are more budget-friendly. Analog synths offer a unique warmth, but they can be more complex to operate and maintain.


How Much Should I Spend On A Beginner Synth?


The cost of a beginner synth can vary depending on your budget. It’s possible to find decent options for under $300, such as the Behringer Neutron or the Roland Boutique series. However, if you’re serious about learning synthesis and have a larger budget, investing in a higher-end synth like the Korg Minilogue XD or the Moog Subsequent 25 is worth considering.


Conclusion


Choosing the best synth as a beginner can be a daunting task. However, with the right guidance and knowledge, you can find the perfect one to kickstart your musical journey. Whether it’s affordability, versatility, or ease of use, the synths mentioned in this guide are excellent choices for beginners.


Start your musical exploration now!

Categories
Archive

Edm Mixing And Mastering : The Ultimate Guide for Perfecting Your Tracks

For top-notch EDM mixing and mastering, hire a professional to enhance your tracks’ quality and ensure they sound polished and professional. Professional mixing and mastering can elevate your EDM tracks to stand out in a competitive market, giving you a distinct sound that captivates your audience and keeps them coming back for more.


With the right expertise and tools, your EDM music can reach its full potential and make a lasting impact on listeners. By entrusting your tracks to a skilled mixing and mastering engineer, you can achieve a professional sound that sets you apart in the world of EDM.


Trusting the experts in this field is crucial to achieving the best results for your music career.

Edm Mixing And Mastering  : The Ultimate Guide for Perfecting Your Tracks


Credit: cymatics.fm


The Basics Of Edm Mixing


Learn the essentials of EDM mixing for a top-notch sound. Understand the intricacies of EDM mixing and mastering, from balancing tracks to using effects. Achieve a polished and professional sound for your EDM tracks with these fundamental mixing techniques.

Understanding Levels And Panning

Maintain consistent volume levels across tracks to avoid distortion and ensure clarity.

Panning places sounds within the stereo field for a spacious and balanced mix.

Balancing Eq And Frequency Spectrum

Use EQ to adjust the tonal balance of each element within the track.

Focus on cutting frequencies that clash rather than boosting excessively.

Balance low, mid, and high frequencies to ensure a full and well-rounded sound.

Edm Mixing And Mastering  : The Ultimate Guide for Perfecting Your Tracks


Credit: www.udemy.com


Advanced Techniques For Edm Mixing

When it comes to advanced techniques for EDM mixing, mastering compression and dynamic processing is crucial.

Utilizing Compression And Dynamic Processing

Utilize compression to even out dynamics and make sounds more cohesive.

Adjust attack and release settings for optimal control over the sound.

  • Set the threshold carefully to avoid over-compression.
  • Experiment with different compression ratios for desired effects.
  • Use sidechain compression creatively to make elements stand out.

Creating Spatial Effects With Reverb And Delay

Enhance depth and dimension using reverb and delay for spatial effects.

  • Adjust reverb decay time to create a sense of space.
  • Experiment with pre-delay settings for unique textures.
  • Combine reverb and delay to create an immersive environment.


Mastering Your Edm Tracks

The process of mastering your EDM tracks is a crucial final step in ensuring your music reaches its full potential. This phase involves enhancing the overall sound quality, optimizing the audio for different playback systems, and bringing out the energy and impact of your tracks. Here, we’ll explore the essential components of mastering your EDM tracks, delving into the role of mastering and techniques such as limiting and multiband compression.

Understanding The Role Of Mastering

Mastering is the stage where the individual tracks of your EDM production are combined and processed to achieve a cohesive and polished sound. It involves adjusting the overall tonal balance, ensuring optimal playback levels, and adding the final touches to your music. The goal of mastering is to make your tracks sound consistent and professional across various listening environments and platforms.

Using Limiting And Multiband Compression

Limiting is a crucial tool in mastering EDM tracks as it helps control the peak levels, allowing the tracks to sound “loud” without sacrificing dynamics. By carefully setting the threshold and release parameters, you can prevent clipping and maintain a balanced sound. Multiband compression allows precise control over different frequency ranges, enabling you to sculpt the tonal balance and dynamics of your tracks in a targeted manner. When utilized skillfully, these techniques can elevate the impact and cohesiveness of your EDM productions.

Edm Mixing And Mastering  : The Ultimate Guide for Perfecting Your Tracks


Credit: www.masteringthemix.com


Common Pitfalls And How To Avoid Them

When it comes to EDM mixing and mastering, there are several common pitfalls that many producers and engineers fall into. These pitfalls can lead to over-processed tracks, a loss of dynamics, and a sacrifice in quality. However, by understanding these pitfalls and how to avoid them, you can ensure that your EDM tracks have the punch and clarity they need to stand out in the crowded electronic music landscape.

Over-processing And Loss Of Dynamics

Over-processing is a common mistake that can lead to a loss of dynamics in your mix. When you apply too much compression, EQ, or other effects, it can result in a lifeless, squashed sound that lacks energy and excitement. To avoid this pitfall, it’s important to use processing techniques sparingly and with intention.

Instead of slapping a compressor on every track, take the time to carefully consider which elements really need compression and how much. Similarly, be mindful of the amount of EQ you apply, making sure that you’re enhancing the frequencies that need it without reducing the natural dynamics of the sound.

One way to avoid over-processing is to take breaks during your mixing process. When you’ve been working on a track for a long time, it’s easy to get caught up in the details and lose sight of the bigger picture. By taking breaks and coming back with fresh ears, you can better gauge if you’ve gone too far with your processing.

Balancing Loudness Without Sacrificing Quality

In the world of EDM, loudness is often equated with quality. However, simply pushing your tracks to be as loud as possible can lead to a sacrifice in overall sound quality. This is because extreme loudness often comes at the expense of dynamics, clarity, and depth.

To avoid this pitfall, it’s essential to find the right balance between loudness and quality. One technique to achieve this is to use a technique called “loudness matching.” This involves comparing your mix to commercially released tracks that you admire and adjusting the level of your tracks until they match in perceived loudness.

Another important consideration is the use of dynamic range. While it may be tempting to squash your mix with heavy compression and limiting to achieve maximum loudness, it’s important to preserve some dynamic range to allow the elements of your track to breathe and retain their impact.

By carefully managing the loudness of your tracks and maintaining a balance between volume and quality, you can create impactful, professional-sounding EDM mixes that stand out from the crowd.

The Art Of Collaboration And Feedback


Discover the power of collaboration and feedback in EDM mixing and mastering. By working together with professionals, artists can enhance their sound quality and achieve a polished final product that resonates with their audience. Embrace the iterative process of giving and receiving feedback to continuously improve your music production skills.

Collaboration and feedback are key components of creating a successful EDM mix. In this fast-paced industry, EDM professionals understand the importance of working together and accepting constructive criticism to refine their craft. Seeking input from industry experts and utilizing reference tracks for comparison are two valuable techniques that can elevate your EDM mixing and mastering skills.

Seeking Professional Input

Collaborating with experienced professionals in the field can greatly enhance your EDM mixing and mastering journey. By seeking their input, you gain insights and knowledge that may not have occurred to you otherwise. Professionals can provide valuable feedback on various aspects of your mix, such as the balance of instruments, frequency levels, or overall tone. Their expertise can help you identify areas that need improvement and guide you towards achieving a more polished sound. Additionally, this collaboration can open doors to networking opportunities and future collaborations.

Utilizing Reference Tracks For Comparison

Reference tracks are an essential tool for every EDM mixer and mastering engineer. These are tracks from successful artists that serve as benchmarks for sound quality, dynamics, and overall mix balance. By comparing your mix to a well-produced reference track, you can identify any discrepancies or areas of improvement. This technique helps maintain a standard of excellence and ensures that your mix is competitive in the industry. Analyzing reference tracks allows you to fine-tune your mix and make adjustments to achieve a more professional and cohesive sound. To summarize, collaboration and feedback are integral to the art of EDM mixing and mastering. Seeking professional input expands your knowledge and improves your skills, while utilizing reference tracks allows for accurate comparison and helps you achieve a high standard of excellence. Embrace the power of collaboration, seek input from industry experts, and make reference tracks a vital part of your mixing and mastering process to continuously refine your craft and create exceptional EDM mixes.

Frequently Asked Questions Of Edm Mixing And Mastering


What Is The Importance Of Mixing And Mastering In Edm?


Mixing and mastering are crucial steps in the production process that enhance the overall sound quality of an EDM track. Mixing combines different elements, such as vocals and instruments, to create a balanced and cohesive sound. Mastering ensures the final mix sounds polished and professional, ready for distribution.


How Does Mixing And Mastering Improve The Clarity Of Edm Tracks?


Through the process of mixing, all the individual elements of an EDM track are carefully balanced and equalized to prevent any frequency clashes and improve the overall clarity. Mastering adds the final touch by optimizing the track’s dynamics and frequencies to make it sound clear and vibrant on any sound system.


Can Mixing And Mastering Fix Issues Like Muddiness Or Harshness In Edm Tracks?


Absolutely! Mixing and mastering can address common issues like muddiness or harshness in EDM tracks. By applying techniques like EQ, compression, and multiband processing, the mix engineer can eliminate any unwanted frequency buildup or harshness, resulting in a more balanced and pleasing sound.


How Long Does The Mixing And Mastering Process Typically Take For An Edm Track?


The duration of the mixing and mastering process for an EDM track depends on various factors, such as the complexity of the arrangement and the quality of the initial recording. On average, it can take anywhere from a few hours to several days to complete these processes and achieve the desired result.


Conclusion


EDM mixing and mastering are crucial elements in creating a professional and polished sound for your music. By understanding the technical aspects and employing the right techniques, you can elevate your music to the next level. With the right approach and the help of a skilled engineer, your EDM tracks can stand out in a competitive industry.

Categories
Archive

What is the Difference between a Dj And a Music Producer: Unveiling the Secrets

A DJ focuses on live mixing and playing music, while a music producer creates and produces music in a studio setting. DJs typically perform music for live audiences, blending tracks seamlessly to keep the energy flowing.


On the other hand, music producers work behind the scenes, crafting sounds, arranging compositions, and overseeing the technical aspects of music creation. Both roles are crucial in the music industry, but they involve different skill sets and focus areas. DJs excel in performance and crowd interaction, while music producers excel in composition, sound design, and music arrangement.


Although some individuals may take on both roles, the distinction between a DJ and a music producer lies in their primary focus and expertise.


Credit: www.facebook.com


Key Roles In The Music Industry

Dj Vs. Music Producer

A DJ focuses on mixing and playing music to entertain an audience.

A Music Producer crafts and creates original music tracks.

Here’s a breakdown of their key differences:

Role DJ Music Producer
Primary Focus Performance and mixing live music Creating and producing music tracks
Skills Beatmatching, crowd interaction Music composition, sound design
Objective Entertain and engage audience Create original music for various purposes
Tools DJ controller, mixer DAW software, instruments

Key Responsibilities

  • DJ: Performance, track selection, mixing
  • Music Producer: Composition, arrangement, production

Both roles play crucial roles in the music industry, each offering a unique set of skills and contributions to the world of music.

What is the Difference between a Dj And a Music Producer: Unveiling the Secrets


Credit: iamghostproducer.com


Skills And Responsibilities

Understanding the distinction between a DJ and a music producer involves recognizing the divergent skill sets and roles each profession entails.

Dj’s Skill Set

A DJ excels in live performance, mixing tracks, and engaging with the crowd to ensure a seamless music experience.

  • Proficient in beatmatching.
  • Skilled in reading and responding to a crowd’s energy.
  • Ability to seamlessly transition between tracks.

Music Producer’s Skill Set

A music producer focuses on creating and manipulating music, working behind the scenes to craft unique sounds and compositions.

  1. Expertise in music theory and composition.
  2. Proficient in using digital audio workstations (DAWs).
  3. Knowledge of sound design and audio engineering.

Artistic Expression And Performance

Artistic expression and performance play a crucial role in distinguishing the roles of a DJ and a music producer. Each brings a unique set of skills and talents to the table, contributing to the vibrancy and diversity of the music industry. Let’s delve into the distinctions between the two, focusing on their approaches to artistic expression and performance.

Dj’s Performance Style

A DJ’s performance style revolves around mixing and blending pre-recorded tracks to create a seamless, high-energy auditory experience for the audience. They utilize equipment such as turntables, mixers, and controllers to manipulate the tempo, rhythm, and dynamics of the music, keeping the crowd engaged and energized.

Music Producer’s Creative Process

Music production encompasses the intricate process of crafting, arranging, and sculpting musical compositions. Producers harness their creativity and technical expertise to capture the essence of a song, employing various tools and software to fine-tune each element of the track, from melody and harmony to rhythm and sound design.

What is the Difference between a Dj And a Music Producer: Unveiling the Secrets


Credit: www.facebook.com


Impact On The Music Industry

Both DJs and music producers have a significant impact on the music industry. These two roles play distinct yet interconnected roles in shaping the music we hear today. Let’s dive deeper into the influence of DJs and music producers on the music industry.

Dj’s Influence

DJs are the life of the party. Their ability to mix and blend tracks seamlessly keeps the dance floor packed and the energy high. DJs are skilled in reading the crowd, understanding what songs will get people moving, and creating an unforgettable experience through their live performances. They have the power to introduce different genres, remixes, and obscure tracks to a wider audience, ultimately shaping trends and setting the tone for the music scene.

By selecting and playing the right songs at the right time, DJs have the ability to make or break a track’s popularity. They can breathe new life into existing songs through remixes, mashups, and live edits, making them more appealing to a wider audience. DJs act as tastemakers, constantly searching for new tracks and hidden gems to include in their sets, allowing lesser-known artists to gain exposure and recognition.

Music Producer’s Influence

While DJs excel at performing and selecting tracks, music producers are responsible for creating them. They are the architects behind the scenes, shaping the sound and direction of a song or an album. Music producers have the technical expertise and creative vision to take an idea and turn it into a fully realized piece of music.

These talented individuals have the ability to bring out the best in an artist, shaping their sound and helping them find their unique voice. They work closely with the artists to develop the musical elements, such as the instrumentation, melodies, and arrangements, while also taking care of the technical aspects, such as mixing and mastering.

Music producers often collaborate with artists, songwriters, and other producers to create innovative and cutting-edge music. They push boundaries, experiment with different sounds, and introduce new techniques, ultimately shaping the evolution of music genres. Their influence extends beyond a single artist or song, as they contribute to the entire album or body of work, ensuring a cohesive and well-produced final product.

In conclusion, both DJs and music producers play crucial roles in the music industry. DJs shape the live experience, curate tracks, and drive trends, while music producers create, shape, and refine the music itself. Together, these two forces greatly impact the music industry, constantly pushing the boundaries and elevating the art of music.


Career Paths And Opportunities

When it comes to pursuing a career in music, there are various paths one can take. Among the most popular choices are becoming a DJ or a music producer. While both roles involve creating and playing music, they have distinct differences in terms of career trajectory and opportunities. In this blog post, we will delve deeper into the career paths of DJs and music producers, highlighting their unique journeys and the opportunities that lie ahead.

Dj Career Trajectory

For individuals passionate about performing and connecting with a live audience, a career as a DJ can be an appealing choice. DJs primarily specialize in mixing and blending recorded music to create seamless transitions and energetic sets. Their main focus is on live performance, and DJs often build their reputation and fanbase through their ability to entertain and engage crowds at clubs, festivals, and events.

DJs often start their careers by performing at small venues such as local bars or student parties. As they gain experience and develop their skills, they can gradually progress to bigger and more prestigious venues. Established DJs may even have the opportunity to play at international gigs, collaborating with renowned artists and traveling around the world to share their music.

Moreover, with the increasing popularity of online streaming platforms and social media, DJs can extend their reach and build a global following. By regularly sharing mixes, podcasts, and live streams, DJs can attract listeners from all corners of the globe, leading to increased exposure and potential opportunities.

Music Producer Career Trajectory

If you are more drawn to the creative process of music production and enjoy working behind the scenes, a career as a music producer might be a perfect fit for you. Music producers are responsible for creating, arranging, and refining the sound of a song or album. They often collaborate with artists, songwriters, and sound engineers to achieve desired artistic visions.

Aspiring music producers usually start by honing their skills in home studios or small recording spaces. They experiment with different genres, sound effects, and recording techniques to develop their unique style. Once their talent is recognized, music producers can progress to working with local artists, aspiring musicians, and independent labels.

A successful music producer can go on to work with well-established artists, major record labels, or film and television production companies. They have the opportunity to participate in the creation of chart-topping hits, industry-defining albums, and even iconic soundtracks. Additionally, music producers can diversify their career by venturing into songwriting, remixing, or sound design for various media.

With the advent of digital platforms, music producers also have the freedom to release their own original music independently. This allows them to showcase their unique vision and artistic capabilities to a global audience, reinforcing their reputation and potentially attracting collaborations with talented musicians and industry professionals.

In Conclusion

Whether you choose to follow the DJ or music producer career path, each offers its own set of opportunities and rewards. DJs thrive on the thrill of live performances and connecting with enthusiastic audiences, while music producers can find fulfillment in the creative process and impact they have on the final product. Whichever path you choose, both roles require dedication, skill development, and a passion for music.

Frequently Asked Questions For What Is The Difference Between A Dj And A Music Producer


What Does A Dj Do?


A DJ is responsible for playing and mixing music tracks at events, clubs, or radio stations. They create a seamless flow of music, ensure a lively and engaging atmosphere, and often interact with the audience to gauge their preferences.


What Are The Key Responsibilities Of A Music Producer?


A music producer oversees the creation and development of music tracks or albums. They work closely with artists, engineers, and songwriters to shape the overall sound and vision of a project, providing guidance on arrangement, instrumentation, and production techniques.


How Does A Dj Differ From A Music Producer?


While both DJs and music producers work with music, DJs primarily focus on playing and mixing existing tracks to entertain a live audience. On the other hand, music producers are involved in the creation and production of original music, collaborating with artists to bring their ideas to life.


Is Being A Dj Different From Being A Music Producer?


Yes, being a DJ and being a music producer are different roles. A DJ’s main job is to entertain a live audience by playing and mixing music, while a music producer primarily works behind the scenes, shaping the sound and production of music tracks or albums.


Conclusion


The difference between a DJ and a music producer lies in their roles. While a DJ focuses on live performance and mixing music, a music producer concentrates on creating and producing original music. Understanding these distinctions is key in appreciating the unique skills and contributions of both artists in the music industry.

Categories
Archive

Boost Your Recordings at Home with the Benefits of Good Headphones

Good headphones enhance sound quality, eliminate background noise, and provide accurate monitoring, crucial for professional home recording sessions. When recording at home, investing in high-quality headphones can significantly improve the overall recording experience and the quality of the finished audio productions.


Whether you are a musician, podcaster, or content creator, using good headphones can make a difference in achieving clear, detailed, and balanced audio recordings. By choosing the right headphones designed for recording purposes, you can ensure that your home studio setup is optimized for capturing the best sound possible.


With the right set of headphones, you can focus on delivering top-notch content without distractions or technical challenges.


Credit: vistatec.com


Choosing The Right Headphones


When recording at home, the benefits of good headphones cannot be overstated. Quality headphones help in capturing accurate sound and identifying any imperfections in recordings. It is important to choose the right headphones to ensure professional-quality results.

Consider Your Recording Needs

When choosing headphones for home recording, consider your specific needs such as vocal clarity or instrumental nuances.

Select headphones that provide accurate sound representation to enhance your recording quality.

Understanding Different Types Of Headphones

Know the differences between closed-back and open-back headphones for diverse recording purposes.

Closed-back headphones offer isolation, whereas open-back headphones provide a more natural sound.

Boost Your Recordings at Home with the Benefits of Good Headphones


Credit: www.amazon.com


Benefits Of Good Headphones For Home Recordings


Experience crystal-clear audio quality and enhanced sound dynamics with high-quality headphones for home recordings. Achieve precise monitoring for better mix decisions and accurate recording levels, ensuring professional-grade results from the comfort of your own space.

Enhanced Sound Quality

Good headphones provide clear sound reproduction without distortion, ensuring accurate monitoring of your recordings.

Isolation From External Noise

Quality headphones reduce outside distractions, allowing you to focus on the finer details of your recordings.


Factors To Consider When Selecting Headphones

Choosing the right headphones for recording at home is crucial for achieving professional-quality sound. There are several important factors to consider to ensure that the headphones you select meet your specific recording needs. From frequency response to comfort and durability, each aspect plays a significant role in the recording process.

Frequency Response And Impedance

The frequency response of headphones determines the range of audio frequencies they can reproduce. Look for headphones with a wide frequency response, typically ranging from 20 Hz to 20 kHz, to capture the full spectrum of sound when recording. Additionally, consider the impedance of the headphones, as it affects the ability to use them with different recording equipment. Lower impedance headphones are suitable for portable devices, while higher impedance headphones are ideal for professional studio setups.

Comfort And Durability

Comfort is crucial during long recording sessions. Adjustable headbands, cushioned ear cups, and lightweight designs can significantly enhance comfort, allowing you to focus on your recording without distractions. When considering durability, opt for headphones with sturdy materials and reliable construction to withstand frequent use without compromising on performance.

Tips For Using Headphones Effectively


Maximize your home recording experience with these effective headphone tips. Good headphones enhance sound quality, providing a professional touch to your audio projects. Get the most out of your recordings by investing in quality headphones for a seamless production process.

Optimizing Volume Levels

When using headphones for recording at home, it is crucial to optimize the volume levels to achieve the best results. Paying attention to the volume settings not only enhances the recording quality but also prevents potential hearing damage. Here are a few tips for optimizing volume levels:

  1. Avoid excessive volume: Listening to audio at excessively high volume levels can lead to long-term hearing damage. Ensure that the volume is set at a comfortable level.
  2. Balance between audio sources: When using headphones, it’s important to maintain a proper balance between the audio sources. Adjust the volume levels of individual tracks or instruments to create a harmonious mix.
  3. Consider room acoustics: Take into account the characteristics of your recording space. If the room has poor acoustics, increasing the volume may be necessary to compensate for sound reflections.
  4. Use an audio interface: Invest in a good quality audio interface to control volume levels more precisely. This external device allows you to adjust the gain in a way that suits your recording needs.

Taking Breaks To Prevent Ear Fatigue

Recording sessions often require extensive use of headphones, which can lead to ear fatigue. To maintain optimal focus and prevent any discomfort, it’s important to take breaks. These breaks are not only beneficial for your ears but also for your overall productivity. Consider the following:

  • Schedule regular breaks: Plan short breaks throughout your recording sessions to give your ears some time to rest. This will help prevent fatigue and improve your ability to accurately assess the quality of your recordings.
  • Engage in relaxation exercises: During these breaks, engage in relaxation exercises to relieve any tension or stress that may have built up in your head and neck area. This will help refresh your senses and enhance your focus.
  • Stay hydrated: Drinking water during your breaks helps maintain proper hydration, which is vital for your overall well-being. Proper hydration can also help minimize ear fatigue.
  • Switch to speakers: Whenever possible, switch from using headphones to speakers during non-critical recording or mixing tasks. This allows your ears to experience a different audio environment and reduces the strain caused by prolonged headphone use.

Maintaining Your Headphones

Your headphones are essential tools for recording at home. To ensure they continue to perform at their best, it is important to take proper care of them. Here are some maintenance tips to help you extend the life of your headphones:

Cleaning And Storage Tips

Cleaning your headphones regularly is vital to maintain their sound quality and hygiene. Use a soft, lint-free cloth to wipe the ear pads and headband. Avoid using harsh chemicals or abrasive cleaners that could damage the materials. It’s also recommended to remove any accumulated debris from the headphone ports using a clean, dry toothbrush.

When it comes to storage, it’s best to keep your headphones in a protective case or pouch when not in use. This helps prevent dust accumulation and protects them from accidental damage. Additionally, make sure to store them in a cool and dry place to avoid any potential moisture issues.

Avoiding Overuse

While it’s tempting to use your headphones for extended periods, it’s important to avoid overusing them. Excessive usage can lead to fatigue and discomfort. Take regular breaks to give your ears and headphones a rest. This not only enhances your listening experience but also helps to prevent any potential audio processing issues due to prolonged use.

Furthermore, using your headphones at high volumes for an extended period can be damaging to both your ears and the headphone drivers. It is advised to keep the volume at a reasonable level that allows you to enjoy the music without straining your ears or damaging the headphones.

Boost Your Recordings at Home with the Benefits of Good Headphones


Credit: www.amazon.com


Frequently Asked Questions On Benefits Of Good Headphones When Recording At Home


Why Are Good Headphones Important For Recording At Home?


Good headphones are important for recording at home because they allow you to accurately hear the details of your recording, including subtle nuances and errors. This ensures that your recordings sound professional and polished, and you can mix and edit them with precision.


How Do Good Headphones Enhance The Recording Quality?


Good headphones enhance recording quality by providing clear and accurate sound reproduction. They have a wider frequency response, allowing you to hear a broader range of frequencies, resulting in more balanced and detailed recordings. This helps you make better decisions during the recording process and produce high-quality tracks.


Can’t I Just Use Any Headphones For Recording At Home?


While you can use any headphones for recording at home, good headphones are specifically designed for accurate sound reproduction. Ordinary consumer headphones may exaggerate or mask certain frequencies, leading to inaccurate mixes. Good headphones offer a flat frequency response, enabling you to make precise adjustments and produce professional-sounding recordings.


Conclusion


Investing in good headphones for home recording can greatly enhance the quality of your work. The ability to capture subtle nuances and ensure precise audio monitoring is invaluable for any recording artist. With the right set of headphones, you can elevate your music production experience and produce professional-grade recordings from the comfort of your home studio.

Categories
Archive

Boost Your Sound Quality: Audio Mastering Tips For Streaming Platforms

Achieving optimal audio mastering for streaming platforms involves balancing loudness and dynamic range. Ensuring consistency across all devices is key to maximizing sound quality.


Mastering your audio for streaming services is crucial in today’s digital music landscape. With users consuming content across various platforms, delivering a consistent and balanced sound is essential for maximizing listener experience. By understanding the nuances of audio mastering and implementing key strategies, you can enhance the quality of your music and make it stand out in the competitive streaming market.


We will explore valuable tips and techniques to help you achieve professional-grade results when mastering audio for streaming platforms.

Boost Your Sound Quality: Audio Mastering Tips For Streaming Platforms


Credit: www.masteringthemix.com


What Is Audio Mastering?

Audio mastering is the final step in the production process that ensures your music sounds polished and professional across various playback systems. Let’s dive into the importance of audio mastering and the key steps involved.

Importance Of Audio Mastering

Audio mastering enhances the overall sound quality, balances the mix, and optimizes the audio for streaming platforms. It ensures consistency and maximizes the impact of your music.

Key Steps In Audio Mastering

1. Preparing the Mix: Assess the mix for any flaws or inconsistencies that need to be addressed before mastering.

2. Equalization (EQ): Adjust the frequency balance to enhance clarity and tonal balance in the music.

3. Compression: Control dynamics and ensure a balanced sound by applying compression to the mix.

4. Stereo Enhancement: Enhance the stereo image to create a wider, more immersive listening experience.

5. Limiting: Apply limiting to ensure the audio reaches the desired loudness level without distortion.

6. Quality Control: Listen to the mastered audio across different playback systems to ensure it sounds consistent and professional.

Understanding Streaming Platform Requirements

Understanding Streaming Platform Requirements is crucial for ensuring your audio content meets the standards set by popular streaming platforms. To deliver high-quality sound to listeners, it’s important to have a good grasp of Audio Mastering Tips tailored specifically for streaming services.

Audio Format And Compression

Streaming platforms often have specific requirements for audio format and compression to optimize playback quality. Understanding these specifications helps in preparing your audio files for streaming without any loss in sound fidelity.

Loudness Standards

Adhering to loudness standards is crucial for ensuring consistency in volume levels across different tracks. By mastering your audio to meet these standards, you provide a seamless listening experience for your audience on various streaming platforms.

Optimizing Your Mix For Streaming

When it comes to optimizing your mix for streaming, there are specific techniques and considerations that can make a significant impact on the final sound quality of your music. Streaming platforms have their own unique audio compression standards, and understanding how to prepare your tracks accordingly is essential. By paying attention to details such as balancing EQ and dynamics, and avoiding clipping and distortion, you can ensure that your music sounds its best when streamed by your audience. Let’s delve into some vital mastering tips to optimize your mix for streaming.

Balancing Eq And Dynamics

Balancing EQ and dynamics is crucial for creating a mix that translates well across various streaming platforms. Pay attention to the frequency balance of your tracks, making sure that no single range overpowers the others. Using a multiband compressor can help you control the dynamics of different frequency bands, ensuring a balanced and cohesive sound. Utilize EQ adjustments to address any frequency imbalances, making subtle tweaks to enhance the overall mix without sacrificing the integrity of the original recording. Striking the right balance of EQ and dynamics can make a significant difference in how your music is perceived by listeners on streaming platforms.

Avoiding Clipping And Distortion

Avoiding clipping and distortion is paramount when preparing your mix for streaming. Streaming services apply their own compression algorithms to standardize audio playback, and excessively loud or clipped sections can result in audible distortion when played back. Carefully monitor your levels during the mastering process, ensuring that peaks are kept in check without sacrificing the overall impact of the music. By maintaining appropriate headroom and utilizing dynamic range processing tools, you can prevent your tracks from being negatively affected by compression on streaming platforms.

Tools And Techniques For Audio Mastering

When it comes to audio mastering for streaming platforms, having the right tools and techniques in place is crucial to achieving professional-quality sound. In this section, we will explore some key tools and techniques that are commonly used in audio mastering, including the use of limiters and compressors, as well as how to apply multiband compression effectively.

Maximizing Impact On Different Streaming Platforms

When it comes to distributing your music on streaming platforms, mastering is a crucial step to ensure that your tracks sound their best. However, each platform has its unique parameters and requirements, so it’s essential to customize your audio specifically for each platform. In this article, we will explore some audio mastering tips to maximize the impact of your music on popular streaming platforms like Spotify and Apple Music.

Customizing For Spotify

Spotify is one of the leading streaming platforms globally, with millions of users tuning in every day. To get the most out of this platform, there are a few key considerations to keep in mind when mastering your tracks for Spotify:

  1. Normalize your loudness levels: Spotify uses loudness normalization, ensuring that tracks play at a consistent volume. Aim for an integrated loudness level of -14 LUFS (Loudness Units Full Scale) to maintain the dynamic range of your music.
  2. Pay attention to the first few seconds: Spotify’s algorithm heavily relies on user engagement, so it’s important to capture listeners’ attention right from the start. Ensure that your track’s intro is compelling and engaging, grabbing the listener’s interest within the first few seconds.
  3. Optimize for mobile: With a significant portion of Spotify’s users listening on mobile devices, it’s crucial to consider this when mastering your tracks. Test your music on different mobile devices and make adjustments to ensure it sounds great even on smaller speakers or headphones.

Adapting For Apple Music

Apple Music is another major player in the streaming industry, boasting a large and dedicated user base. To maximize the impact of your music on Apple Music, here are a few tips to keep in mind:

  1. Follow Apple’s Mastered for iTunes guidelines: Apple provides a set of guidelines known as Mastered for iTunes, which details the best practices for optimizing your audio for their platform. Follow these guidelines to ensure that your music sounds its best on Apple Music.
  2. Emphasize on the mid-range frequencies: Apple devices are known for having well-balanced mid-range frequencies. Make sure your tracks have a strong presence in this frequency range to ensure they translate well across Apple Music’s ecosystem of devices.
  3. Provide high-quality artwork and metadata: Apple Music places a significant emphasis on visual aesthetics and proper metadata. Ensure that your album artwork is high-resolution and eye-catching, and that your metadata is accurate and has the necessary information to give your tracks maximum visibility.

By customizing your audio specifically for each streaming platform, you can ensure that your music retains its impact and quality, regardless of where it is played. Consider the unique requirements of platforms like Spotify and Apple Music, and make the necessary adjustments to achieve the optimal listening experience for your audience.

Boost Your Sound Quality: Audio Mastering Tips For Streaming Platforms


Credit: crumplepop.com


Boost Your Sound Quality: Audio Mastering Tips For Streaming Platforms


Credit: www.izotope.com


Frequently Asked Questions Of Audio Mastering Tips For Streaming Platforms


How Can I Prepare My Audio Tracks For Streaming Platforms?


To prepare your audio tracks for streaming platforms, ensure they are well-mastered with balanced levels, proper EQ, and dynamic range. Convert them to the appropriate format (e. g. , WAV, FLAC) and check for any distortion or clipping. Also, consider using online mastering services for professional results.


What Are The Best Audio Mastering Techniques For Streaming?


The best audio mastering techniques for streaming include optimizing the overall loudness to fit within the platform’s guidelines, using multi-band compression and EQ to enhance the frequency balance, and adding subtle stereo widening effects for depth. It’s also crucial to listen on different devices and adjust as necessary.


Why Is Audio Mastering Important For Streaming Platforms?


Audio mastering is vital for streaming platforms because it ensures consistent playback quality across different devices and platforms. It helps to optimize the sound for a particular platform’s requirements, resulting in a more professional and enjoyable listening experience for the audience.


Good mastering can make your music stand out and compete with other tracks on the streaming platform.


Conclusion


To sum up, mastering your audio for streaming platforms requires attention to detail and understanding of the specific requirements for each platform. By following these tips, you can ensure that your music sounds its best across a variety of devices and streaming services.


Remember to keep experimenting and refining your mastering process to achieve the best results for your music on streaming platforms.