To use Distrokid as a producer, sign up, upload tracks, add metadata, distribute, and receive royalties. Distrokid simplifies music distribution for producers looking to get their music on major streaming platforms.
As a producer, utilizing Distrokid allows for seamless worldwide distribution of your music, ensuring it reaches a broader audience and generates revenue. With Distrokid’s user-friendly platform, producers can easily manage their music library, track performance, and receive timely royalty payments.
By leveraging Distrokid’s tools and services, producers can focus on creating music while leaving the distribution and administrative tasks to the platform. This streamlined process makes it easier for producers to showcase their work and grow their fan base in the competitive music industry.
Getting Started With Distrokid
As a producer looking to use Distrokid, the first step is to create an account and upload your music. Then, complete the release form and select your release date. Next, finalize the payment process and your music will be distributed to major platforms, making your tracks accessible to a larger audience.
Creating An Account
Create an account on Distrokid by providing basic information and payment details.
Go to the Distrokid website.
Click on the “Sign Up” button.
Fill in your email, password, and artist name.
Add payment information.
Uploading Your Music
Follow these steps to upload your music on Distrokid and start sharing your tracks.
Login to your Distrokid account.
Click on the “Upload” button.
Fill in the relevant song details.
Upload your music file.
Choose your release date and distribution options.
Understanding Distrokid’s Distribution Process
Digital Stores And Streaming Platforms
Distrokid’s distribution process ensures your music reaches popular digital stores and streaming platforms.
Some of these platforms include Spotify, Apple Music, Amazon Music, and more, giving your music wide exposure.
Revenue Collection And Distribution
Your revenue from music streams and sales is collected by Distrokid efficiently.
The process involves aggregating earnings from various platforms and distributing them to you directly.
Utilizing Distrokid’s Marketing Tools
When it comes to distributing your music as a producer, Distrokid offers a range of powerful marketing tools to help you promote and customize your releases. Whether you’re looking to maximize your exposure or connect with your audience in a meaningful way, Distrokid has the features and functionality you need to truly make an impact.
Customizing Your Release
With Distrokid, you can customize your release in a way that resonates with your audience. Customizing your release can include updating album art, adding metadata, and specifying the release date.
Promotional Features
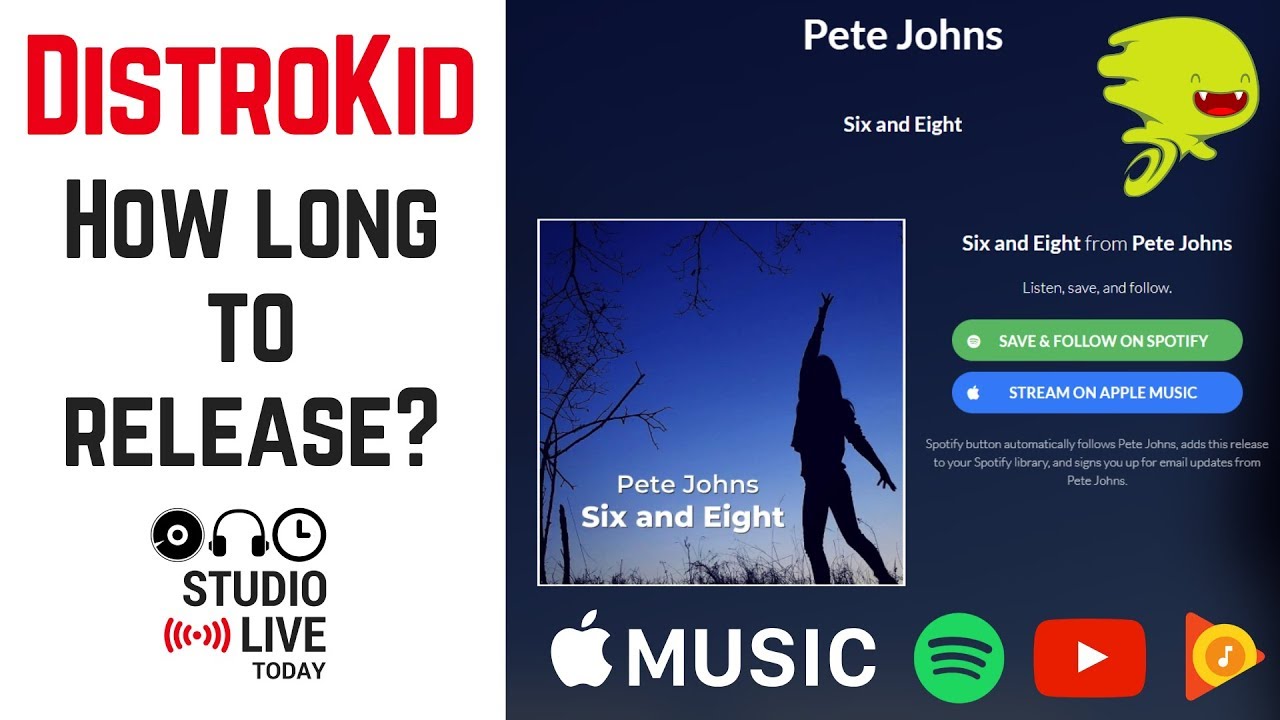
Distrokid provides a host of promotional features to help you reach a wider audience, including the ability to create personalized hyperfollow pages, customize your Spotify profile, and utilize smart links to direct your fans to the streaming platform of their choice.
Customize your release with album art and metadata.
Create personalized hyperfollow pages to engage your audience.
Utilize smart links to direct fans to their preferred streaming platform.
Maximizing Your Music’s Reach
Learn how to amplify your music’s reach by leveraging DistroKid as a producer. Maximize exposure and distribution effortlessly.
Playlist Placement Strategies
One of the most effective ways to maximize the reach of your music is by securing playlist placements. Playlists are curated collections of songs that can introduce your music to thousands or even millions of potential fans. By getting your tracks featured on popular playlists, you can significantly increase your exposure and attract new listeners. Here are some strategies to help you secure those valuable playlist placements:
Research relevant playlists: Take the time to search for playlists that align with your music genre and style. Look for playlists that have a large number of followers and active listeners.
Build relationships: Once you’ve identified relevant playlists, reach out to the curators or playlist owners. Introduce yourself, explain why your music would be a good fit for their playlist, and provide them with a link to your best tracks.
Create your own playlists: In addition to reaching out for placements, you can also create your own playlists on streaming platforms. Curating playlists can help you build a loyal fanbase and attract the attention of other playlist curators.
Promote your placements: If your music gets featured on a playlist, make sure to promote it on your social media, website, and newsletter. This will help you leverage the exposure and encourage your existing fans to listen and share the playlist.
Social Media Integration
In today’s digital age, social media plays a crucial role in promoting music and connecting with your audience. Integrating your DistroKid releases with your social media channels can significantly boost your music’s reach. Here are some effective strategies to maximize your music’s exposure through social media integration:
Share teasers: Before releasing your music, share teasers, snippets, or behind-the-scenes footage on platforms like Instagram, Facebook, and Twitter. This will build anticipation and generate buzz among your followers.
Create engaging content: Regularly post engaging content related to your music, such as photos, videos, or blog posts. This will keep your audience engaged and increase the chances of them sharing your content with their own followers.
Collaborate with influencers: Partnering with social media influencers or bloggers who have an audience that aligns with your target demographic can expose your music to a whole new group of potential fans.
Run social media ads: Consider running targeted ads on platforms like Facebook Ads or Instagram Ads to reach a wider audience. You can choose specific demographics, interests, and locations to ensure your ads are seen by the right people.
By implementing these strategies and utilizing the powerful distribution services provided by DistroKid, you can maximize the reach of your music and increase your chances of finding success in the highly competitive music industry. Remember to stay active, engage with your audience, and constantly seek new opportunities to promote your music.
Optimizing Distrokid For Producer Success
Collaboration Features
With Distrokid, producers have access to a range of collaboration features that can greatly enhance their success in the industry. One such feature is the ability to easily invite artists, songwriters, and other producers to work on a project together. This can lead to creative breakthroughs and the opportunity to collaborate with talented individuals from around the world.
Additionally, Distrokid allows producers to seamlessly share their music with others, making it easy to gather feedback and make necessary changes. This real-time collaboration process ensures that every aspect of a song is perfected through the collective efforts of all those involved.
Performance Tracking And Analytics
In order to achieve success as a producer, it’s crucial to have a clear understanding of the performance of your music. Distrokid provides comprehensive tracking and analytics tools that enable producers to keep track of their streaming numbers, downloads, and royalties in real-time.
Producers can access detailed reports and insights that help them identify trends, understand their audience, and make informed decisions to propel their career forward. This allows producers to focus their efforts on creating music that resonates with their listeners, leading to increased popularity and recognition in the industry.
Benefits of Distrokid’s Performance Tracking and Analytics:
– Real-time streaming numbers and downloads tracking
– Detailed reports and insights for informed decision-making
– Understanding audience preferences and trends
In conclusion, by optimizing Distrokid’s collaboration features and leveraging the power of performance tracking and analytics, producers can elevate their success in the industry. The ability to collaborate easily and receive feedback in real-time, combined with the insights gained from tracking and analyzing their music’s performance, gives producers the competitive edge needed to thrive in the music business.
Frequently Asked Questions For How To Use Distrokid As A Producer
Do Producers Use Distrokid?
Producers commonly use DistroKid for distributing their music to online platforms quickly and easily.
Where Do You Put The Producer On Distrokid?
You can add the producer’s information in the credits section while uploading your music on DistroKid.
How Does Distrokid Pay Producers?
DistroKid pays producers by distributing their earnings directly into their chosen payment method.
How Much Does Distrokid Pay For 1,000 Streams?
DistroKid pays $0. 003 for 1,000 streams.
Conclusion
Using DistroKid as a producer is a game-changer. With its user-friendly interface and cost-effective plans, you can effortlessly distribute your music to various platforms. The reliable customer support and efficient royalty collection make it a go-to choice for producers. Embrace DistroKid and take your music career to new heights.
This guide covers music production headphones in plain terms. As an Amazon Associate I earn from qualifying purchases.
The best music production headphones are the Sennheiser HD 650 and the Audio-Technica ATH-M50x. Also, both offer superior sound quality and comfort for extended studio sessions.
Moreover, choosing the right headphones for music production is crucial for accurate audio editing and mixing. In addition, Sound engineers and producers require headphones that provide clear, flat response and reveal the finest details in a track. The Sennheiser HD 650 impresses with its open-back design and natural soundstage, making it a favorite among audiophiles.
Meanwhile, the Audio-Technica ATH-M50x stands out with its closed-back design, offering excellent sound isolation, which is perfect for recording and mixing in noisy environments. For example, these models top numerous lists thanks to their consistent performance, durability, and comfort, making them ideal choices for professional studio work. In addition, their clarity across all frequencies ensures producers can trust the reproduction of their mixes for a polished final product.
Introduction To Music Production Headphones
Furthermore, choosing the right headphones is key for any music producer. As a result, Quality headphones give you a clear sound. They help you make the best music. In this post, we explore top headphones for music production.
Essential Features For Studio Headphones
Additionally, the best studio headphones must have certain features.
Also, Comfort: They should feel good even after hours.
Durability: They must last and handle everyday use.
Moreover, Sound Quality: Clear, accurate audio is crucial.
In addition, Frequency Response: They need to catch all the sounds.
Furthermore, isolation: Good isolation keeps external noise out.
The Role Of Headphones In Music Production
Additionally, Headphones play a massive part in how music is made. However, they let you hear details. You can mix and master with precision. It’s important to choose carefully for the best results.
Closed-back Vs. Open-back Headphones
Also, choosing the right headphones is crucial for music production. Then, closed-back and open-back headphones offer unique experiences. Let’s look at each to find the best option for a music producer.
Pros And Cons Of Closed-back Designs for Music Production Headphones
Moreover, closed-back headphones are all about isolation. In short, they’re great in studios and for recording. But what are the exact benefits and downsides?
Pros:
Excellent noise isolation
Minimal sound leakage
Deep, pronounced bass
Ideal for tracking and mixing
Cons:
Can cause ear fatigue
Sometimes less natural soundstage
Heat buildup around ears
Why Open-back Headphones May Be The Better Choice
Additionally, Open-back headphones give a feel of spacious sound . Similarly, they mimic listening to studio monitors. Perfect for critical listening.
Advantages
Disadvantages
Natural soundstage
Breathable ear cups
Reduced ear fatigue
Subtle nuances in music
Poor isolation
Sound leakage
Not ideal in noisy environments
Less impactful bass
Also, each choice has its place in a music producer’s toolkit. Consider the environment and usage when choosing between closed-back and open-back headphones.
Frequency Response And Sound Quality for Music Production Headphones
Moreover, the heart of music production lies in the subtlety of sound. Also, Frequency Response and Sound Quality play crucial roles. They determine how well headphones capture the essence of music. Let’s explore the importance of these features in choosing the best music production headphones.
Balanced Sound for Accurate Monitoring
Balanced Sound For Accurate Monitoring for Music Production Headphones
In addition, achieving a clean mix starts with headphones that offer a balanced sound . In addition, high-quality headphones do not exaggerate bass, mids, or treble. This ensures that what you hear is as close to the original recording as possible. Such precision allows producers to make sound decisions that translate well across various listening devices.
Furthermore, flat frequency response for unbiased listening
Additionally, clear differentiation between instruments and vocals
Also, no coloration to avoid mix errors
The Importance of Frequency Range
The Importance Of Frequency Range for Music Production Headphones
Moreover, a broader frequency range equips producers to hear every detail, from the deepest bass to the highest treble. For example, Headphones with a wide frequency range reproduce sound more accurately. This makes them a critical tool for fine-tuning tracks to perfection.
Frequency Range
Benefit
Low-End
Decipher subtle bass frequencies
Mid-Range
Capture the warmth of vocals and instruments
High-End
Notice fine details and audio textures
In addition, grasping the nuances of frequency response and sound quality is pivotal. As a result, it ensures that producers select headphones that reveal the truth in music. With the right headphones, mastering the art of sound becomes an intuitive and precise process.
Comfort And Build Quality for Music Production Headphones
Furthermore, Music production requires high-quality headphones with excellent comfort and build quality. However, Producers often wear headphones for extended periods , making these two factors critical. These aspects not only enhance the overall experience but also preserve your focus and productivity during those long mixing and editing sessions.
The Search For Long-session Comfort for Music Production Headphones
Additionally, finding headphones that remain comfortable over several hours is essential for musicians and producers . Then, the best music production headphones need to strike a perfect balance between a snug fit and a featherlight touch to avoid any discomfort. Look for features such as:
Also, memory foam earpads : They adapt to your head and ears.
Moreover, adjustable headbands : They ensure a perfect fit for all head sizes.
In addition, Breathable materials : They prevent overheating and sweating.
Furthermore, over-ear design : This offers added comfort and noise isolation.
Durability And Longevity In Studio Headphones
Additionally, Studio headphones are an investment for your music production . You want them to last. In short, key indicators of durable headphones include:
Feature
Description
Metal components
Stronger and last longer than plastic.
Replaceable parts
Ear pads and cables can be replaced if needed.
Thick cables
Less prone to tangling and wear.
Warranty
Longer warranty periods offer peace of mind.
Also, Brands known for their robust build , like Sennheiser and Audio-Technica, often provide such features. Similarly, investing in headphones that stand the test of time makes both practical and financial sense.
Top Picks For Professional Producers for Music Production Headphones
Moreover, the right headphones are essential for music production. The market boasts a myriad of options, so choosing the perfect pair can be daunting. Also, Professional producers need headphones that offer precision, clarity, and a flat frequency response. Below, find the top picks that cater to both seasoned and budding producers.
Premium Headphones: Worth the Investment?
Premium Headphones: Worth The Investment?
In addition, premium headphones represent a significant investment. But for a pro, they’re critical tools. In addition, these headphones don’t just sound good; they reveal every detail in the mix. This precision helps producers make informed decisions during music production.
Furthermore, Open-back design for natural sound reproduction
High-resolution drivers ensure detailed sound across frequencies
Comfortable build for long studio sessions
Consider these top-tier models known for stellar audio performance:
Model
Type
Price Range
Sennheiser HD 800
Open-back
Above $1000
Beyerdynamic DT 1990 Pro
Open-back
Around $600
Audeze LCD-X
Planar Magnetic
Above $1000
Affordable Options For Up-and-coming Producers for Music Production Headphones
Not all quality headphones break the bank. Up-and-coming producers can find affordable options that still offer professional-grade sound. For example, these models provide a balanced mix, durable construction, and the comfort needed for extended wear.
Audio-Technica ATH-M50x: Versatile and durable, under $200
Sony MDR-7506: A proven choice with a flat response, around $100
AKG K240 Studio: Semi-open for natural sound, under $70
These headphone options deliver top performance without a large investment, ideal for producers still honing their craft.
Wireless Vs. Wired: The Great Debate
Choosing the best music production headphones often leads to a crossroads: wireless or wired? As a result, each type boasts features appealing to different needs. Producers and audiophiles weigh in, tipping the scales with sound quality, convenience, and precision. It’s a face-off where only your personal studio habits can declare the winner.
The Convenience Of Wireless Headphones
Wireless headphones symbolize freedom. However, nobody enjoys untangling cables or being tethered to their desk. Visualize the ease of moving around your studio space, no strings attached.
Portability: Move freely without cables snagging gear.
Multi-tasking: Step away to grab a coffee without missing a beat.
Clutter-free: A clean workspace fosters creativity.
Despite some concerns over audio fidelity and battery life, the tech advancements have narrowed the quality gap significantly. Then, charging cases and Bluetooth codec improvements make wireless a contender.
Why Wired Headphones Dominate In Studios
In most professional settings, wired headphones reign supreme. In short, ask any seasoned audio engineer and they’ll tell you: precision is key .
Advantages of Wired Headphones
Consistent Sound Quality:
No compression means true audio reproduction.
No Batteries Required:
Endless power supply from your device.
Minimal Latency:
Synchronous audio for meticulous editing.
Purists argue that the physical connection provides an uninterrupted signal flow. This ensures crystal-clear sound — essential when crafting a mix. Additionally, with no risk of interference, wired headphones are a staple in the arsenal of professionals.
Brand Reputation And User Reviews
The quest for the best music production headphones leads us down a path marked by brand reputation and real-world experiences. Similarly, recognized brands carry a promise of quality. But what do the users say? Let’s dive in.
Trusted Brands In Music Production
Trusted brands offer headphones that transform sounds into clear, balanced outputs. Look for these names:
Sennheiser: Legendary for their precision.
Audio-Technica: Known for durability.
Beyerdynamic: Delivers comfort and clarity.
AKG: A favorite for their flat-response.
Sony: Combines affordability with quality.
Learning From User Experiences And Reviews for Music Production Headphones
User reviews are gold mines of honest feedback. Also, they reveal strengths and weaknesses.
Headphone Model
User Rating
Sennheiser HD 650
4.7/5
Audio-Technica ATH-M50x
4.6/5
Beyerdynamic DT 770 PRO
4.5/5
AKG K702
4.3/5
Sony MDR7506
4.4/5
Skim through reviews to gauge consistent patterns in user experiences. In addition, look out for mentions of sound quality, comfort, and build.
Credit: www.pcworld.com
Additional Considerations
Choosing the right cans isn’t just about sound. For example, other features play big roles in your listening experience. Let’s dive into the finer details that can make or break your headphone selection.
The Impact Of Impedance On Sound Quality
Higher impedance means clearer sound, especially in professional studios. As a result, it’s all about getting every detail in the music. Here’s what you need to know:
Low impedance (under 50 ohms): Good for smartphones and standard devices.
Medium impedance (50-100 ohms): Versatility for various equipment.
High impedance (over 100 ohms): Best with specialized gear for top quality.
Think about where you’ll use your headphones. However, Studio work often demands high-impedance headphones for the best sound.
Cables And Accessories: Small Details That Matter
Don’t overlook cables and accessories. Then, they enhance sound and comfort. Look for these:
Feature
Why It’s Important
Detachable Cables
They extend headphone life and make storage easy.
Coiled versus Straight
Coiled offers more stretch; straight provides length.
Extra Padding
Increases comfort for long sessions.
Consider a pair with a carrying case for protection. Don’t forget about adapter needs for different gear. Quality accessories can transform your audio experience.
Conclusion: Making The Final Choice
Selecting the right headphones for music production is crucial. Similarly, your decision impacts how you hear and mix sounds. It shapes the music you create. It’s time to make a final choice.
Summing Up The Essentials For The Best Pick
Remember what matters most:
Sound quality should be crystal clear.
Comfort is key for long sessions.
Durability means longer-lasting headphones.
Look for flat frequency response for true sound.
Noise isolation helps focus on details.
The Personal Nature Of Selecting Music Production Headphones
Choosing headphones is personal. Everyone’s ears are different. Also, what feels good to you matters. A pair that fits well, sounds great, and suits your budget is the best choice. Trust your ears and your needs.
Test different headphones if you can. In addition, think about what you want. Do sounds feel real? Are the headphones comfy for hours? Your perfect pair is out there. Take your time. Pick wisely. Happy mixing!
Credit: www.nytimes.com
Frequently Asked Questions Of What Are The Best Music Production Headphones
What Defines The Best Studio Headphones?
Studio headphones should offer flat, neutral sound reproduction. For example, they’re designed for accuracy in music production, allowing producers to hear every detail.
How Do Over-ear Headphones Benefit Producers?
Over-ear headphones provide superior comfort for long sessions. They isolate sound better, which helps in identifying nuances in music during production.
Are Wireless Headphones Good For Music Production?
Wireless headphones can be used, but wired headphones are preferred. They ensure no latency or compression affects the sound quality during production.
What’s The Importance Of Headphone Frequency Response?
Frequency response affects how headphones reproduce bass, mids, and treble. As a result, a wide frequency range allows for detailed sound analysis, crucial for producers.
Conclusion
Selecting the ideal headphones for music production hinges on your personal preferences and requirements. However, prioritize comfort, sound clarity, and durability. As trends evolve, stay informed on the latest models. Explore the headphones highlighted to enrich your production experience. Your perfect match awaits; happy mixing!
Reverb is an effect that simulates the sound reflections from surfaces in a space, creating an ambiance. Distortion alters the sound wave shape, adding grittiness or “crunch” to the tone.
Understanding the difference between reverb and distortion is crucial for musicians and audio engineers aiming to sculpt their desired sound. Reverb imitates the natural echo you would hear if a sound bounces off walls and other surfaces, contributing to the depth and space of a recording or live performance.
Distortion, on the other hand, is a form of audio signal processing that adds harmonic overtones and can substantially change the character of the sound, often producing a heavier, more aggressive tone. Both effects are instrumental in various music genres, helping to create atmosphere and texture. Choosing the correct application and balance of reverb and distortion can significantly impact the feel and quality of a piece of music.
The Essence Of Audio Effects
The Essence of Audio Effects lies in their ability to transform sound. They shape how we experience music. Audio effects like reverb and distortion are not just tools used by musicians and producers. They are essential elements that define a song’s character and emotion. Each effect has a specific role and creates a unique impact on the final sound output.
Crucial Audio Enhancements
Reverb and distortion stand out as audio enhancements. They bring depth and personality to music.
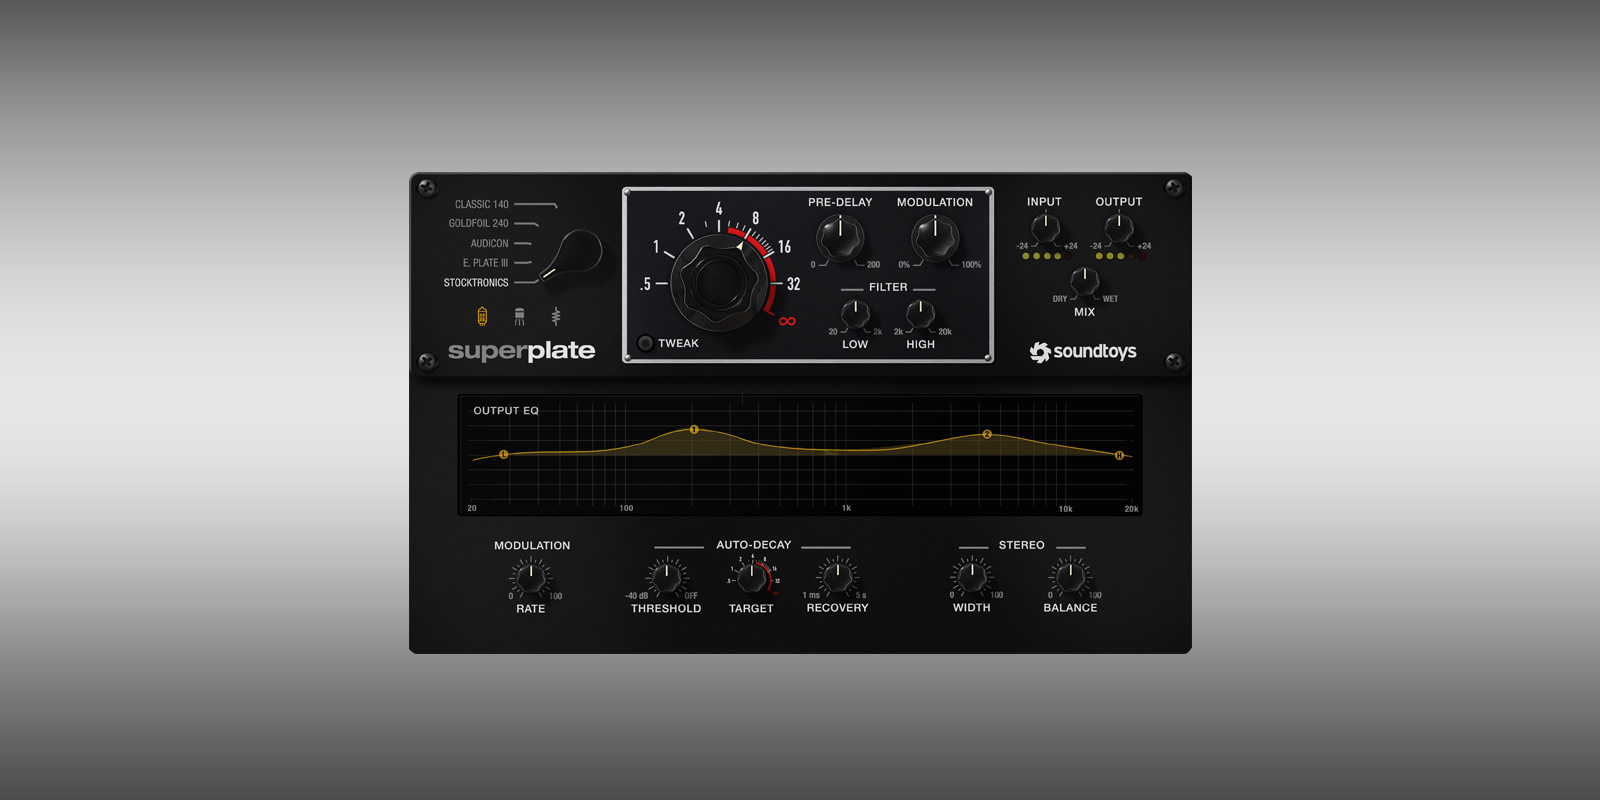
Reverb or reverberation, adds space and atmosphere. Picture a sound echoing in a hall.
Distortion intensifies and changes a sound’s texture. It creates a gritty or aggressive edge. Think of an electric guitar’s raw growl.
Each effect has its own parameters allowing for fine-tuning. This gives artists creative control over their sound.
Impact On Music Production
In music production, these effects are powerhouses:
Reverb can make a dry vocal sound like it’s in a cathedral or a small room.
Distortion can turn a smooth guitar into one that screams with emotion.
Artists use them to match a song’s mood to its message. Producers use them to create signature sounds. In essence, reverb and distortion can make or break a track.
Diving Into Reverb
Welcome to the sound-altering world where ‘Reverb’ plays a mystical role in music production! Imagine entering an ancient cathedral and whispering sweet nothings, only to hear them dance around the room, trailing off into a symphony of echoes. That’s reverb for you – the natural spread of sound after it hits your ears, creating a sense of space and depth. Now, let’s take a deeper dive into what makes reverb such an essential effect for audio enthusiasts.
Natural Echoes And Reverberation
We experience reverb daily without even realizing it. It’s all about the reflection of sounds bouncing off various surfaces. In music, reverb adds richness and makes everything feel more alive. It can transform a dry, stale note into a warm embrace enveloping the listener. Here’s how it works in different environments:
Small Rooms: Quick, tight echoes blend into a subtle reverb.
Large Halls: Longer, grander echoes create a cathedral-like effect.
Open Areas: Sparse echoes offer a sense of vastness and infinity.
Common Reverb Tools And Technologies
Music producers wield numerous tools to infuse reverb into tracks. Each tool shapes sound in a unique way. High-quality reverb can turn a bedroom recording into an arena performance. Some of these tools include:
Tool
Type
Use
Spring Reverb
Hardware
Creates a twangy, vintage effect popular in guitar amps.
Room Emulators
Software
Simulate specific spaces like studios or concert halls.
Convolution Reverb
Software
Uses real sound samples (impulse responses) for authentic echoes.
Digital Reverb Pedals
Hardware
Offers portable and diverse reverb effects for live performance.
Understanding reverb’s rich dynamics unlocks a whole new dimension in sound design. Whether mixing a track in the studio or setting up for a live gig, knowing how to harness natural echoes and reverberation shapes the listener’s experience.
Understanding Distortion
Distortion twists sound in unique ways. It adds grit and intensity to music. Distortion alters the harmonic structure of musical notes. This creates a thick, powerful sound.
Distortion’s Role In Music
Distortion shapes a song’s emotional impact. Guitar riffs become edgier. Vocals gain raw power. It boosts the energy in rock, metal, and blues genres.
Electric Guitars: With distortion, guitars sound louder and more aggressive.
Other Instruments: Keyboards and bass can also use distortion for effect.
Vocals: Adding distortion can give a raspy, more expressive sound.
Varieties Of Distortion Effects
Several distortion effects are available. They offer different sound characteristics. They fit various musical styles.
Effect Type
Sound Characteristic
Common Usage
Overdrive
Warm, smooth clipping
Blues and rock
Fuzz
Extreme, buzzy texture
Classic rock, psychedelic
High-gain
Intense, heavy clipping
Metal and hard rock
Differences In Acoustic Properties
Understanding how reverb and distortion shape sound is crucial. They alter audio in unique ways. Let’s explore these changes.
Timbral Alterations: Distortion
Distortion, widely used in electric guitar music, adds grit and intensity. It significantly alters the pure tone of an instrument by creating harmonic overtones. These changes to the sound’s timbre produce a thicker, more aggressive tone. Distortion effects come in different flavors:
Overdrive: Simulates pushing an amp beyond its limit subtly.
Fuzz: Offers a warm, vintage sound that’s highly modified.
Metal: Generates a sharp, cutting tone for heavier genres.
Spatial Enhancements: Reverb
Reverb gives a sense of space to sounds, simulating various environments. It reflects sound waves, creating an echo. Unlike distortion, reverb does not change the original sound’s harmonic content. Instead, it adds depth and atmosphere. Different types of reverb create unique spatial effects:
Room: Imitates the acoustics of small spaces.
Hall: Replicates larger, more expansive areas.
Plate: Uses a metal plate to produce a vintage vibe.
Both reverb and distortion are essential tools for musicians. They give character to music, setting the mood and style of a track.
Application In Genres: Diverse Uses
The Application in Genres: Diverse Uses captures how different musical styles use reverb and distortion. These effects shape the vibe and emotion of the music we love. Rock guitars roar through distortion, while reverb gives a concert hall feel to orchestras and electronic anthems. Let’s explore these sounds and their habitats.
Rock And Distortion’s Symbiotic Relationship
Rock music thrives on distortion. This marriage began in the 1960s, birthing an iconic sound. Guitar riffs get their gritty, aggressive punch from distortion. It makes rock songs jump from radios and stages. Here are key points of this relationship:
Electric Guitars: Distortion is their voice.
Power Chords: They cut through mix with a fuzzy edge.
Solo Sections: They lift with a distinct, driving force.
Bands like Led Zeppelin, AC/DC, and Nirvana defined their genres through this effect.
Reverb In Orchestral And Electronic Music
Reverb adds depth and space to music, crucial for orchestral and electronic genres. These styles need a sense of grandeur and atmosphere. Reverb creates this by simulating sound reflecting off surfaces. Let’s see how it’s applied:
Orchestral Music: Reverb simulates concert halls, bringing warmth and richness.
Electronic Music: It builds synthetic landscapes, making beats vast and immersive.
Tracks by Enya or Moby transport listeners using reverb’s expansive qualities.
Technical Aspects: Parameters And Settings
Understanding the technical aspects of sound effects is crucial for shaping audio to fit any production. Specific parameters and settings help craft the unique character of reverb and distortion. By manipulating these controls, sounds transform in texture and spatial quality. Let’s explore these adjustments.
Adjusting Reverb For Desired Ambiance
Reverb simulates the way sound reflects in space, creating a sense of environment around the audio. Key parameters to adjust include:
Decay Time: How long the reverb lasts.
Pre-Delay: Time before the reverb effect begins.
Wet/Dry Mix: The balance between the original sound and the reverb effect.
By altering these settings, one can achieve the perfect ambience for any track, from a small room to a large hall.
Modulating Distortion For Aggressive Tones
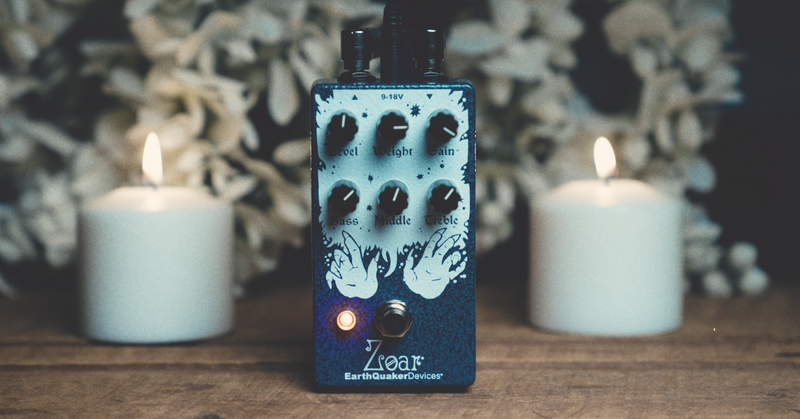
Distortion adds grit and intensity to sounds, making them more aggressive. To control the character of distortion, adjust these settings:
Parameter
Description
Gain
Increases the input signal, driving the distortion.
Tone
Shapes the color of the distorted sound.
Level
Sets the output volume of the effect.
Tweaking these controls ensures distortion fits seamlessly into the mix, enhancing the energy of the music.
Crafting The Tone: Artists’ Perspective
Reverb and distortion shape music. Artists use these effects to create atmosphere and energy. Reverb adds space, making it feel like you’re in a big hall. Distortion turns up the grit, giving guitars a growl. Both effects play a big role in a song’s vibe.
Famous Uses Of Reverb In Songs
Reverb has been the secret sauce behind many memorable songs. It takes listeners on a sonic journey.
“When the Levee Breaks” by Led Zeppelin features dramatic reverb.
Adele’s “Rolling in the Deep” uses reverb to lift her powerful voice.
The xx’s “Intro” creates an ethereal mood with its reverb-laden guitar.
Iconic Distortion-driven Tracks
Distortion fuels rock’s fire. It defines some of the genre’s most explosive tracks.
“Smells Like Teen Spirit” by Nirvana captures the raw edge of grunge.
The White Stripes’ “Seven Nation Army” boasts a gritty riff that’s unforgettable.
“Whole Lotta Love” by Led Zeppelin showcases distortion’s power.
Reverb And Distortion In Live Performances
Reverb and distortion shape the sound in live performances. Reverb adds echoes. Distortion changes the sound. Both create mood and depth. They make music feel alive. Let’s dive into their onstage use.
Challenges And Techniques On Stage
Volume Control: Taming loudness prevents a muddy mix.
Balanced Mix: Mixers adjust levels for a clear sound.
Sound Checks: Sound checks fine-tune effects before the show.
Automation: Pre-programmed settings help during performances.
Sound engineers often face the challenge of acoustics. Different venues need unique settings. They adjust reverb and distortion to fit. This ensures the effects enhance, not disrupt, the live sound.
Table showing typical settings
Effect
Venue Type
Typical Setting
Reverb
Large Hall
Long Decay
Distortion
Rock Club
High Gain
Audience Perception Of Effects
The audience feels the music’s energy. Effects like reverb and distortion play key roles. They turn sound into an experience. They transport the audience to different worlds.
Emotional Impact: Reverb can make sounds haunting. Distortion can fuel excitement.
Genre Authenticity: Jazz uses light reverb. Metal relies on heavy distortion.
Listeners might not know these terms. Still, they sense their power. They pick up the energy. They follow the rhythms. These effects shape the whole show.
Future Of Audio Effects
The future of audio effects sparkles with innovation and technological advancements. Reverb and distortion, fundamental to music production, are undergoing exciting transformations. These changes impact how artists create and manipulate sound. Let’s dive into the fascinating developments reshaping the audio effects landscape.
Innovations In Sound Engineering
Audio effects technologies have always played a key role in evolving music and sound design. Pioneers in the field are constantly pushing boundaries, leading to groundbreaking sound engineering innovations. Cutting-edge reverb and distortion tools offer greater control and higher fidelity. Innovations include:
Enhanced spatial algorithms for realistic reverb textures
Dynamic distortion effects that adapt to playing style
Integration of machine learning for personalized effect customization
These advancements result in richer and more nuanced audio experiences.
The Evolving Role Of Software And Hardware
In the realm of audio effects, software and hardware have unique functions. Their evolution influences how artists sculpt their sound. Modern developments include:
Software plugins providing extensive libraries of reverb and distortion types
Hardware units incorporating digital technology for versatile processing
Hybrid systems that combine the best of digital and analog worlds
Mobile and tablet applications that bring studio-quality effects to portable devices
These trends suggest a future where flexibility and accessibility dominate the audio effects industry.
Credit: www.recordingmag.com
Credit: www.russomusic.com
Frequently Asked Questions For What’s The Difference Between Reverb And Distortion
What Are Reverb And Distortion Effects?
Reverb and distortion are both sound effects. Reverb simulates acoustic spaces by creating echoes. Distortion alters the sound wave to create a ‘gritty’ or ‘fuzzy’ tone.
How Do Reverb And Distortion Differ?
Reverb is about space and echoes, giving a sense of environment. Distortion modifies the actual sound wave, creating a heavier, aggressive tone.
Can Reverb And Distortion Be Used Together?
Yes, reverb and distortion can be combined. The reverb adds depth after the signal is distorted, often used in music for a richer sound.
What Settings Control Reverb And Distortion?
Reverb is controlled by settings like decay, size, and mix; distortion by gain, level, and tone. Each set shapes the character of the effect.
Conclusion
Understanding the nuanced sonic qualities of reverb and distortion can elevate your music production. While reverb adds spatial depth and ambiance, distortion introduces a gritty, intense character to the sound. Mastering their use will unlock new creative avenues, ensuring your tracks make a powerful, emotive impact.
Ready to experiment with your audio? Embrace the difference and watch your music evolve.
For mixing music, a minimum of 8GB of RAM is recommended; professionals often prefer 16GB or more. Adequate RAM is crucial for smooth workflow and handling large projects in music production.
Mixing music is an intricate process that demands not just creativity but also computer resources, where RAM plays a significant role. Musicians and sound engineers use advanced software that can be resource-intensive, especially with multiple tracks and effects. Ensuring your system has enough RAM to handle these tasks can prevent disruptions and system slowdowns, thereby streamlining the creative process.
Seasoned professionals might even use 32GB or more to guarantee efficiency when working with extremely large and complex projects. Investing in sufficient RAM is investing in the seamless execution of music production tasks, as it facilitates the simultaneous use of various plugins and virtual instruments without hindrance.
Introduction To Digital Audio Workstations And Ram
Digital Audio Workstations (DAWs) are the heart of music production. These powerful software programs allow artists to record, edit, mix, and master their tracks. To perform smoothly, they rely heavily on your computer’s Random Access Memory (RAM). The right amount of RAM ensures that DAWs function without hiccups, even with multiple tracks and plugins. This is crucial for a seamless music mixing experience.
The Role Of Ram In Music Production
RAM is a critical component for music creators. It acts like a digital workbench, holding your project’s active data. More RAM means more space for your tracks and samples. This allows for multitasking without slowing down your workflow. During live recording sessions, sufficient RAM prevents glitches that can ruin a take. Hence, picking the right amount of RAM is essential for a smooth production process.
Digital Audio Workstations (daws) And System Demands
DAWs, like Ableton Live, Pro Tools, or FL Studio, come with specific system requirements. These requirements vary depending on the software. Modern DAWs typically suggest at least 8GB of RAM for basic functions. But for mixing music with multiple plugins, 16GB or more is advisable. This ensures your system handles the demands of today’s music production. Below is a comparison of popular DAWs and their minimum RAM requirements:
DAW
Minimum RAM
Recommended RAM
Ableton Live
4GB
8GB
Pro Tools
8GB
16GB
FL Studio
4GB
8GB+
Logic Pro X
4GB
8GB+
Keeping an eye on future updates and growing project sizes is smart. This way, you future-proof your music production setup.
Credit: aaftonline.com
Determining Your Ram Needs
Creating the perfect mix in the digital world hinges on having the right tools. Random Access Memory (RAM) is crucial for music production and mixing. Too little, and your workflow stutters. Just right, and creativity flows uninterrupted. Let’s explore how to assess your unique RAM needs for mixing music.
Assessing Your Project Size And Complexity
Project size and complexity are the first metrics to consider:
Track count: More tracks require more RAM.
Plugin use: High-end plugins can be RAM-hungry.
Bit depth and sample rate: Higher values increase RAM usage.
Estimate your usual project scope. Standard projects often work well with 8GB to 16GB of RAM. Complex arrangements and professional studios might need 32GB or more.
How Sample Libraries Influence Ram Requirements
Sample libraries can be vast and detailed. They are integral to modern music production. Large sample libraries demand substantial RAM resources. To ensure smooth playback and editing:
Check the specifications recommended by your sample library provider.
Consider investing in more RAM if you frequently use large libraries.
Library Size
Recommended RAM
Small to Medium
16GB
Large
32GB+
Remember: More RAM means smoother workflow with larger libraries.
Minimum Ram Recommendations
Choosing the right amount of RAM is crucial for music production. More RAM allows for smoother performance when working with multiple tracks and effects. The RAM needed varies based on complexity and software requirements. Let’s break down the minimum RAM needed.
Starting Point For Amateur Producers
If you’re starting in music production, 8GB of RAM is a practical base. This amount can handle basic mixing tasks. It allows you to learn and create without many technical limits. For simple projects, 8GB works well.
Ram Capacity For Entry-level Mixing Projects
For entry-level mixing, consider upgrading to 16GB of RAM. This upgrade aids in running larger projects effortlessly. It’s a sweet spot for many hobbyist producers. With 16GB, you can explore more plugins and tracks without strain.
Basic Projects: 8GB is sufficient.
Hobbyist Tasks: Aim for 16GB.
Complex Mixes: Consider 32GB or more.
Project Type
Minimum RAM
Basic Mixing
8GB
Moderate Projects
16GB
Professional Work
32GB+
Optimal Ram For Professional Use
Professional music producers understand that a seamless mixing experience requires powerful computer specs. For handling complex projects with numerous tracks and effects, optimal RAM is crucial. This section will dive into how much RAM is necessary for professional music mixing and why.
Why More Ram Translates To Better Performance
RAM (Random Access Memory) is a critical component for music production software. It stores the data that your computer uses actively, allowing for quick access and smooth operations. More RAM enables your system to handle:
Multiple tracks: Load and play more simultaneously.
Higher sample rates: Work with superior audio quality.
Plugins: Use more effects and virtual instruments.
Large sample libraries: Access extensive sound collections without slowdowns.
With insufficient RAM, you’ll face lags and crashes, disrupting the creative process. Professional mixing demands the ability to handle these elements effortlessly.
Industry Standard Ram Specs For Pro-level Mixing
The industry standard for professional music mixing starts at 16GB of RAM. Let’s break down the recommended specs for various use cases:
Use Case
Recommended RAM
Basic Project
8GB
Standard Professional Use
16GB
Complex Professional Use
32GB or More
For basic mixing with fewer tracks and plugins, 8GB may suffice. However, for standard professional tasks, 16GB is the baseline. Heavy-duty mixing with extensive plugins, virtual instruments, and large sample libraries often requires 32GB or more. Top-tier producers might invest in 64GB to future-proof their setups.
The Effects Of Insufficient Ram
Understanding the role of RAM in music production is crucial. Insufficient RAM hinders the mixing process. This leads to a less efficient and more frustrating music creation experience.
Common Symptoms Of Ram Deficiency
Too little RAM in a music mixing setup can reveal itself in various ways. Below are signs to watch for:
Sluggish performance: Your music production software takes longer to respond.
Program crashes: Frequent freezing or sudden closures of your mixing software.
Unable to run multiple plugins: Limitations hit when using various effects simultaneously.
Error messages: Pop-ups about memory problems while executing tasks.
Long-term Impacts On Mixing Workflows
Inadequate RAM does not only cause immediate issues. It has long-term effects on your music mixing workflow:
Capacity: Aim for a minimum of 16GB. More complex projects may need 32GB or more.
Select RAM that meets your system’s requirements and your music mixing needs. Match modules for best results.
Installation Tips For Maximum Efficiency
Proper installation ensures your new RAM runs efficiently. Use these tips:
Power off: Shut down your computer. Unplug it for safety.
Ground yourself: Prevent static damage. Touch a metal part of the case before handling RAM.
Open the case: Unscrew and remove the side panel to access the motherboard.
RAM slots: Locate the RAM slots. They are long and usually near the CPU.
Insert RAM: Align the notch on the RAM stick with the slot. Push down firmly until it clicks into place.
Ensure all RAM sticks are fully seated. Turn on your computer. Check if the system recognizes the new memory.
Balancing Ram With Other Components
Choosing the right amount of RAM for music mixing is a task that requires careful consideration. It’s not just about having the most RAM, but how it works with the CPU and storage to create a seamless music production experience. Let’s explore how these components come together to support your creative process.
The Interplay Between Ram, Cpu, And Storage
CPU (Central Processing Unit): This is the brain of your computer. It handles tasks and processing of your music mixing software.
RAM (Random Access Memory): This is the short-term memory of your computer. It keeps your current tasks and audio samples you are working on for quick access.
Storage: This holds all your files. Solid State Drives (SSDs) are faster, make loading samples quicker.
Music mixing needs RAM and CPU to work together. High RAM allows more samples and plugins in real-time. A powerful CPU calculates audio processing faster. Good storage speeds up loading times. It’s like a band; each member must play in sync for a perfect tune.
Harmonizing Hardware For A Seamless Mixing Experience
Music mixing is complex. Each part of your PC needs to match your music project’s size. More tracks and effects mean you need more RAM. A faster CPU means less waiting for processing. Faster storage means quicker access to your sounds. Let’s create the perfect blend:
Component
Role
Recommended Specs
RAM
Holds current mixing data
16GB+
CPU
Processes audio data
Quad-core or higher
Storage
Stores sound libraries
500GB SSD
For a small project, 8GB of RAM might work. Big projects need 16GB or more for comfort. Pair this with a decent CPU and fast SSD for the best experience. Strike the right balance and your music production will sing!
Future-proofing Your Music Production Setup
As a music producer, staying current with technology is essential. Ensuring your setup can handle future demands means considering not just how much RAM you need now, but what you’ll need in years to come. In this guide, we’re diving into the importance of investing in scalable RAM options and staying informed about the latest in software and tech trends.
Investing In Scalable Ram Options
To stay ahead, look for upgradable RAM modules. This lets you start with what you need and expand as necessary. Think about these points:
Minimum vs Optimal: 16GB of RAM is a good start, but 32GB or more is better for comfort.
Motherboard limits: Check how much RAM your board supports before buying.
Future upgrades: Plan for higher spec requirements in coming years.
Consider this table showing current standards versus future-proofing:
Task
Current Standard RAM
Future-Proof RAM
Basic Mixing
8GB-16GB
32GB+
Professional Projects
16GB-32GB
64GB+
Staying Ahead Of Software Updates And Tech Trends
New updates often mean new power needs. Keep these tips in mind to stay prepared:
Follow music production forums and news sites for the latest updates.
Test new software versions to assess RAM usage.
Watch for emerging technologies that could shift RAM needs.
Staying educated helps you adapt quickly. Don’t get caught off guard by a major software release needing more RAM than you have. Always aim to be one step ahead.
Expert Opinions And Case Studies
Embarking on the journey of music production requires the right gear. One crucial piece is RAM. Let’s dive into what the pros say and real-world cases to guide your RAM choices.
Industry Professionals Weigh In
Music production gurus stress the importance of sufficient RAM. They agree on one thing – more RAM equals better performance. Let’s explore their insights.
Efficiency is key – More RAM means faster processing and handling multiple plugins.
Industry veterans suggest a minimum of 16GB for serious work.
Producers using heavy virtual instruments recommend 32GB or above.
Grammy-winning mix engineers use often at least 32GB. This ensures smooth workflow and creativity without limits.
Real-world Examples Of Ram In Music Production
Here are studio setups from real producers. Notice how RAM plays a role in their everyday projects.
Producer
Genre
RAM
Jane Doe
Electronic
16GB
John Smith
Hip-Hop
32GB
Emily Stone
Pop
64GB
From bedroom to professional studios, RAM sizes vary. Jane Doe manages with 16GB, focusing on synth layers. John Smith swears by 32GB for his sample-rich tracks. Pop producer Emily Stone goes big with 64GB, never compromising on her complex sessions.
Conclusion: Tailoring Ram To Your Musical Journey
Choosing the right amount of RAM for music production is essential. As your skills grow, so should your computer’s capabilities. The journey doesn’t end with a single purchase. It evolves as your musical needs do.
Striking The Right Balance For Your Needs
Musicians must find the perfect balance of RAM for their projects. Not enough RAM can slow down your workflow. Too much is not cost-effective.
8GB: Good for beginners
16GB: Ideal for hobbyists
32GB+: Best for professionals
RAM Size
Use Case
8GB
Light mixing, small projects
16GB
Medium projects, multiple plugins
32GB+
Large projects, professional studio work
The Path Forward: Continuous Learning And Upgrading
Music production is a path of never-ending improvement. Keep learning and be willing to upgrade. A boost in RAM can mean faster processing and more complex projects handled with ease.
Your setup should grow with you — from a beginner’s home studio to a full-scale professional environment. Let your RAM needs reflect your current stage and future goals.
Frequently Asked Questions On How Much Ram For Mixing Music
How Much Ram Do I Need For Music Production?
For most music production tasks, 8GB of RAM is a suitable starting point. However, for more complex projects with multiple tracks and high-quality plugins, 16GB is recommended. Professionals may benefit from 32GB or more for optimal performance.
Is Extra Ram Crucial For Mixing Tunes?
Extra RAM can significantly enhance mixing large sessions. It reduces the risk of crashes and allows more plugins to run simultaneously. This results in smoother workflow and more creative freedom without technical limitations.
Can Ram Affect Sound Quality In Mixing?
RAM itself doesn’t directly affect sound quality, but insufficient RAM can lead to performance issues that disrupt the mixing process. Adequate RAM ensures the audio engine runs smoothly, allowing for better precision and sound quality during mixing.
What’s The Minimum Ram For A Beginner In Music Mixing?
A beginner in music mixing should aim for at least 8GB of RAM. This amount allows for a comfortable learning experience and the ability to handle basic projects without frequent system limitations.
Conclusion
To sum it up, striking the right balance in RAM for music mixing is key. Opt for at least 8GB for basic projects. Professional setups benefit from 16GB or more. Remember, upgrading can enhance workflow and sound quality. Choose wisely for a smooth music production experience.
Spotify pays artists between $0.003 and $0.005 per stream, depending on various factors. Artists receive royalties from Spotify based on the number of streams their songs generate.
Understanding how Spotify streaming royalties work is crucial for musicians to maximize their earnings. Many factors influence the amount artists receive for each stream, including their record label deals, distribution agreements, and the popularity of their music. By gaining insight into these factors, artists can make informed decisions to boost their streaming revenues and grow their music careers.
We will delve deeper into the complexities of Spotify streaming royalties and provide tips for artists to increase their earnings on the platform.
The Spotify Model
Spotify’s innovative streaming platform allows users to access millions of songs by paying a monthly subscription fee or listening to ads. This unique model has revolutionized the music industry.
How Spotify Pays Artists
Spotify pays artists based on the number of streams their songs garner. The total revenue generated is divided among rights holders, including record labels, publishers, and distributors.
Calculating Royalties
Spotify uses a complex formula to calculate royalties, taking into account factors such as the country of the listener, the type of subscription, and the artist’s share of plays.
Artists typically earn between $0.003 and $0.005 per stream, with popular artists commanding higher rates.
Direct deals between Spotify and artists or record labels can result in a higher payout per stream.
Royalty Rates
Understanding Different Rates
Spotify royalty rates vary based on the type of subscription and country.
Free tier streams yield lower rates compared to premium subscriptions.
Free tier: around $0.003 – $0.005 per stream
Premium: approximately $0.006 – $0.0084 per stream
Impact On Artists And Labels
Higher royalties from premium subscriptions benefit artists and labels.
However, lower rates for free tier streams may impact earnings significantly.
Challenges And Controversies
Spotify, the leading music streaming platform, has faced a slew of challenges and controversies regarding its streaming royalties. These issues have sparked debates and concerns within the music industry, raising questions about transparency, fairness, and the impact on artists.
Transparency Issues
One of the major challenges surrounding Spotify’s streaming royalties is the lack of transparency in the payment system. Despite the immense volume of streams, artists often find it difficult to understand how their royalties are calculated and distributed. This opacity has led to frustration and distrust among musicians, who are seeking more clarity and fairness in the payment process.
Artist Advocacy
Amidst the controversies, artist advocacy has emerged as a crucial issue, with many musicians pushing for better compensation and representation. There is a growing demand for platforms like Spotify to prioritize the welfare of artists and ensure that they receive a fair share of the streaming revenue. This advocacy has prompted discussions about the need for improved regulations and industry standards to protect the rights and livelihoods of musicians.
Emerging Solutions
As Spotify continues to dominate the streaming market, emerging solutions for fair distribution of royalties are gaining attention. Artists and rights holders are seeking equitable compensation amidst concerns over the platform’s payment model. With ongoing debates and efforts to revamp royalty structures, the industry is navigating towards innovative solutions to address these challenges.
Blockchain Technology
One of the most promising emerging solutions for fairer streaming royalties is blockchain technology. This decentralized system records transactions in a transparent and immutable manner, ensuring accuracy and accountability. By implementing blockchain, the music industry can create a more direct and efficient payment process, reducing the need for intermediaries and ensuring artists receive their rightful compensation.
It works like this: each song is treated as a smart contract on the blockchain, ensuring that every time it is played, a transaction is recorded. This allows for real-time tracking of streams and eliminates the possibility of manipulation or inaccurate reporting. Moreover, blockchain technology can enable instant and direct payments from listeners to artists, bypassing the convoluted royalty distribution process.
Direct Licensing
Another crucial solution to the Spotify streaming royalties dilemma is direct licensing. Rather than relying solely on the complex network of collecting societies and intermediaries, direct licensing allows artists and rightsholders to negotiate deals directly with streaming platforms. By cutting out the middlemen, artists can secure more favorable royalty rates and maintain greater control over their music.
Direct licensing also offers a way for artists to license their music to multiple platforms simultaneously, maximizing their income potential. This approach eliminates the exclusivity agreements often required by traditional record labels, giving artists the freedom to distribute their music widely and reach a larger audience.
The rise of direct licensing has been facilitated by digital distribution platforms, which empower artists to independently release their music without the need for a traditional label. This allows artists to retain ownership of their work and have a more direct relationship with their audience, while also ensuring they receive a fair share of the streaming revenues.
The Future Of Streaming Royalties
Streaming royalties have transformed the music industry in the digital age, offering both opportunities and challenges for artists and streaming platforms alike. As the streaming landscape continues to evolve, it is crucial to understand the shifting dynamics and potential reforms that may shape the future of streaming royalties.
Shifting Dynamics
The dynamics surrounding streaming royalties are constantly evolving, driven by various factors. One significant aspect is the increasing popularity and dominance of streaming platforms such as Spotify. With millions of users worldwide, these platforms have become the go-to destination for music consumption. However, this popularity brings into focus the inherent challenges of fair compensation for artists.
One challenge arises from the current pricing model used by streaming platforms, which pays artists on a per-stream basis. While this allows for easy access and affordability for consumers, it often leads to minimal earnings for artists, especially those with smaller audiences.
Additionally, the rise of independent artists and self-released music has further complicated the streaming royalty landscape. As independent artists bypass traditional record labels, they have more control over their music but face challenges in securing equitable compensation for their work.
Moreover, the impact of algorithmic playlists and curated content cannot be ignored. These features heavily influence what users listen to, impacting stream counts and subsequent royalties. This brings into question the notion of a level playing field for all artists, as popular playlists tend to favor more established acts.
Potential Reforms
To address the concerns associated with streaming royalties, there have been calls for potential reforms in the industry. These reforms aim to ensure fair compensation for artists while preserving the accessibility and convenience of streaming services.
One potential reform is the revision of the per-stream payment model. Critics argue that this model may not accurately reflect an artist’s true value and suggest alternative payment structures, such as a user-centric system. This system would allocate royalties based on the specific artists and songs that users listen to, rather than the overall stream count.
Another potential reform centers around greater transparency in royalty reporting. Artists have voiced concerns about the lack of clarity in streaming platforms’ reporting practices. Implementing standardized reporting frameworks would offer artists greater insight into their earnings and ensure accountability in the distribution of royalties.
Additionally, collective bargaining and fair trade practices within the music industry could play a significant role in securing fairer streaming royalties. By empowering artists to negotiate better deals with streaming platforms, collective bargaining can help address the power imbalance between artists and platforms.
Potential Reforms for Streaming Royalties
Reform
Description
User-Centric Payment Model
An alternative to the per-stream payment model, this system allocates royalties based on the specific artists and songs that users listen to.
Standardized Reporting Frameworks
Implementing standardized reporting practices to provide artists with better insights into their earnings and ensure transparency.
Collective Bargaining
Empowering artists to negotiate better deals with streaming platforms, addressing the power imbalance and ensuring fairer compensation.
As the streaming industry continues to evolve, it is crucial for all stakeholders to actively engage in discussions surrounding streaming royalties. The future of streaming royalties will depend on finding a balance between fair compensation for artists and the sustainability of streaming platforms, ultimately benefiting both creators and listeners alike.
Credit: www.grizzlybeatz.com
Frequently Asked Questions Of Spotify Streaming Royalties
How Much Royalties From $1 Million Spotify Streams?
Royalties from $1 million Spotify streams vary, typically around $4,000 to $6,000. It depends on artist’s agreement and region.
How Much Does Spotify Pay For 1,000 Streams?
Spotify pays roughly $4 to $6 for 1,000 streams, depending on various factors.
How Much Does 1 Billion Spotify Streams Pay?
1 billion Spotify streams typically pay around $4-7 million to the rights holders. Factors such as country, subscription type, and royalty rates can influence the actual payment.
What Percentage Of Royalties Does Spotify Take?
Spotify takes a 30% cut from the royalties paid to artists and content creators.
Conclusion
The discussion around Spotify streaming royalties is complex but essential for both artists and music streaming platforms. Understanding the various factors that affect royalty payouts is crucial for all parties involved. As the music industry continues to evolve, finding a fair and sustainable approach to streaming royalties remains a key challenge.
As an Amazon Associate I earn from qualifying purchases.
The Sony WH-1000XM4 and the Audio-Technica ATH-M50x are among the best headphones for music production. Professionals widely regard these models for their sound fidelity and comfort.
Creating music often requires headphones that deliver clarity, wide frequency range, and accurate sound reproduction, making the search for the perfect pair a critical task. Sony WH-1000XM4 stands out with its industry-leading noise cancellation technology and exceptional sound quality, which is essential for both music production and casual listening.
Audio-Technica’s ATH-M50x, renowned for its professional studio monitor headphones, offers an accurate and immersive listening experience. Both options provide long-wearing comfort, crucial for extensive studio sessions. Determining the best headphones can play a significant role not only in music production but also in the critical listening every producer and audiophile values greatly. The key lies in finding headphones that resonate with your personal needs and the technical demands of music creation.
Credit: www.pcworld.com
The Essential Role Of Headphones In Music Production
Headphones in music production are not just accessories; they are vital tools. They allow musicians to hear every note and beat with clarity. This helps to create and refine a perfect track. Without them, it’s almost impossible to achieve the best sound quality.
Critical Listening And Sound Isolation
Critical listening requires concentration on sound’s intricate details. Quality headphones aid in this process. They block out outside noise, so producers focus solely on music.
Headphones with excellent sound isolation let creators hear true audio. They ensure other sounds do not interfere. This is essential for making music that sounds great everywhere.
Flat Frequency Response For True Sounds
Headphones with a flat frequency response are crucial. They reproduce audio without altering it. This means that the bass, mids, and highs are all balanced.
Producers get to hear sounds as they are. This helps when mixing and mastering tracks. It ensures music sounds natural and true to the original recording.
Music production needs great headphones.
They help block out unwanted sounds.
Enables hearing the true quality of music.
Flat frequency response maintains sound integrity.
Traits Of High-quality Studio Headphones
Traits of High-Quality Studio Headphones guide music makers. The right headphones are a tool. They bring ideas to life. In the sea of options, certain traits stand tall. They define the best headphones for creating music.
Comfort And Durability For Long Sessions
Comfort matters in long studio sessions. A pair of headphones should feel good. It should not distract the artist.
Ear padding: Soft materials make a difference.
Weight: Lighter headphones reduce strain.
Headband: An adjustable headband is key for fitting different head sizes.
Durability means quality materials. It means headphones that last. Look for:
Metal components: They offer more strength than plastic.
Replaceable parts: Ear pads and cables that can be replaced extend the life of headphones.
Closed-back Vs. Open-back Designs
Closed-back and open-back designs serve different purposes.
Closed-Back
Open-Back
Isolate sound.
Spacious soundstage.
Good for recording.
Good for mixing.
Prevent audio leakage.
Allow natural audio bleed.
Choose based on need. Closed-back works well for recording. Open-back is best for mixing. Both should have:
Flat frequency response: This ensures natural sound.
Quality sound drivers: They provide clear audio.
Dynamic Vs. Planar Magnetic Drivers
Choosing the best headphones for making music starts with understanding what’s inside. Dynamic and Planar Magnetic drivers are the heart of your listening experience. They can change the game in music production. Let’s dive into what makes them different.
Understanding Driver Technology
Dynamic drivers are common and work like mini speakers. A coil moves in a magnetic field, making air vibrate to create sound. Planar Magnetic drivers, on the other hand, use a thin, electrically charged diaphragm. This sits between magnets. It creates a highly detailed sound.
Comparing Performance And Price
Aspect
Dynamic Drivers
Planar Magnetic Drivers
Bass Response
Good punch
Controlled and even
Price Range
Wide variety
Usually higher
Detail
Sufficient for most
Extremely detailed
Weight
Lighter, comfortable
Heavier due to magnets
Dynamic headphones excel in cost and comfort. They fit most budgets. Planar magnetic options serve up superior detail. They are often more expensive. They could weigh more too. Your music making needs decide the right pick.
Top Studio Headphones For Professional Audio Work
When creating music, the right headphones are as important as any instrument. For professionals in audio work, studio headphones deliver accurate sounds. This helps make precise adjustments ensuring high-quality production. Let’s explore some of the best options available.
Budget-friendly Yet Reliable Choices
Quality doesn’t always have to break the bank. Here is a list of headphones that offer professional sound on a budget:
Audio-Technica ATH-M20x: Great clarity and comfort.
Sennheiser HD 202 II: Balanced sound with durable design.
AKG K240 Studio: Semi-open design for natural sound.
These options prove that affordability and performance can go hand in hand.
Premium Picks For Unmatched Quality
For the ultimate sound experience, these premium headphones are worth the investment:
Model
Features
Type
Beyerdynamic DT 1990 Pro
Open-back for spatial sound, detailed resolution.
High-End
Shure SRH1540
Spacious soundstage with rich bass.
Luxury
Audio-Technica ATH-R70x
Neutral sound profile, open-back design.
Professional
By investing in these premium choices, you ensure an exceptionally accurate audio experience.
Wireless Headphones: A Viable Option For Producers?
Music producers need the best tools for their craft. Choosing the right headphones is key. Many wonder if wireless headphones fit the bill. Let’s dive in and explore if they are up to the task.
Analyzing Latency And Connectivity Issues
Latency can disrupt the music-making process. It’s the delay from source to ears. Wireless headphones may introduce latency. This can affect producers who need real-time audio feedback.
Bluetooth technology: Earlier versions had noticeable lag.
Advancements: Modern wireless headphones have improved. They offer lower latency.
Codecs: They affect audio transmission. Look for aptX or AAC for better performance.
Wireless Headphone Feature
Importance for Producers
Low Latency Codecs
Ensures minimal delay
Reliable Connectivity
Prevents signal drops
When Mobility Outweighs Wired Constraints
Mobility is vital in some music-making scenarios. Studios can be hectic. Wires can limit movement or cause accidents. A wireless set might be what you need.
Consider these points:
Battery life: Long sessions need headphones that won’t die mid-take.
Range: Move freely without losing connection.
Comfort: Wireless often means less bulk.
Wireless headphones offer unique benefits for music producers. They free you from physical ties. They allow creativity to flow in dynamic environments.
Credit: www.mellostudio.com
Iconic Studio Headphones And Their Legacy
Creating music often means listening for the finest details. Over years, certain headphones have become studio icons, treasured for their audio quality and durability. These fabled cans have helped artists and sound engineers to mold the soundscapes of countless legendary tracks.
Models That Shaped The Music Industry
Stalwarts in the industry have set the bar for what studio headphones should be. Notable models include:
Sennheiser HD 25 – These on-ear headphones offer crisp highs and booming lows.
Audio-Technica ATH-M50x – Known for their comfort and excellent sound isolation, ideal for long sessions.
Sony MDR-7506 – They deliver consistent audio. Many studios maintain these trusted companions for daily use.
Beyerdynamic DT 770 PRO – These closed-back headphones are praised for their spacious soundstage and detailed resolution.
These models have become synonymous with professional audio work, shaping the industry standard.
Classic Versus Contemporary Designs
Classic Designs
Contemporary Designs
Pioneering sound quality
Durable build for heavy use
Time-tested by professionals
Advanced technology integration
Wireless capabilities for ease
Enhanced sound customization options
Classic headphones have established a legacy that stands strong even today. Their designs focus on simplicity and functionality.Contemporary designs merge these core values with modern features, such as Bluetooth connectivity and noise-cancellation. The essence of pure sound though, remains timeless in the quest for the perfect mix.
User Reviews And Testimonials
Choosing the best headphones for making music is crucial. Real user reviews and testimonials provide insights that specs alone can’t. They reflect actual experiences with sound quality, comfort, and durability.
Trusted Opinions From Industry Professionals
Experts in the music arena often share their top picks for headphones. Their seasoned ears catch nuances many miss. Professionals from recording studios to stage performers give us an honest take on which headphones stand out.
Clarity in sound: High-fidelity headphones like the Beyerdynamic DT 770 Pro get nods for studio mixing.
Comfort for long sessions: The Audio-Technica ATH-M50x ranks high for its plush ear cups.
Durability: Sennheiser HD 650’s robust build wins long-term fans.
Common Praise And Criticisms
User feedback often points to specific qualities. Musicians and producers alike weigh in. Below, a summary of their collective wisdom:
Headphone Model
Praise
Criticisms
Sony WH-1000XM4
Noise cancellation, Battery life
Price, Weight
Akg K371
Balanced sound, Comfort
Bass response, Non-removable cable
Shure SRH1540
Soundstage, Build quality
Price, Bulky form factor
Countless reviews emphasize the need for comfort and quality over extended use. Balance in sound plays a pivotal role in production work. Light, cozy over-ear designs win for long studio hours. Yet, every user has unique needs. Some prefer the subtle details that open-back headphones provide. Others prioritize noise isolation for distraction-free sessions. Thus, personal trial becomes essential.
Integrating Headphones Into Your Studio Setup
Integrating headphones into your studio setup is a game-changer for music makers. High-quality headphones provide a personal sonic space. You can hear every detail. This is vital for making professional-grade music. Follow these steps to get the most out of your headphones.
Calibration And Matching With Monitors
Calibration ensures headphone output matches studio monitors. Here’s how to get the balance right:
Use reference tracks to compare sound across devices.
Adjust your headphone output to match your monitor levels.
Keep notes of volume settings for consistency.
With calibrated headphones, what you hear is what you get. This is crucial for mixing tracks.
Care And Maintenance For Longevity
Good headphones can last years with proper care. Here are tips to extend their life:
Clean ear pads and headband regularly.
Store in a dry place away from direct sunlight.
Coil the cable without kinks to prevent damage.
Remember, well-maintained headphones mean better sound for longer. Treat them well, and they’ll serve your music creation needs throughout many sessions.
Frequently Asked Questions For What Are The Best Headphones For Making Music
What Are The Top Headphones For Studio Recording?
Studio recording demands headphones with flat frequency response. The Audio-Technica ATH-M50x and Beyerdynamic DT 770 Pro are top choices. They offer clear, accurate sound for precise monitoring during recording sessions.
How Do Noise-cancelling Headphones Benefit Producers?
Noise-cancelling headphones are essential for music producers. They block out external noise, allowing producers to focus on the mixing. Models like Sony WH-1000XM4 provide excellent noise cancellation for a distraction-free production environment.
Are Wireless Headphones Suitable For Music Production?
For music production, wired headphones are generally preferred due to lower latency. However, some wireless models like Sennheiser HD 450BT now offer low-latency codecs, making them suitable for casual music-making sessions.
What Headphones Do Djs Commonly Use?
DJs prefer headphones with robust build, swivel ear cups, and enhanced bass. The Pioneer HDJ-X10 is a popular choice, offering high durability and excellent sound isolation, ideal for loud club environments.
Conclusion
Selecting the right headphones is crucial for any music creator. Quality, comfort, and durability matter. Consult reviews, test different models, and consider your specific needs. Your ideal audio experience awaits—find headphones that elevate your music-making journey. Remember, the perfect pair can transform how you produce and enjoy sound.
**Distrokid typically takes 1-2 days to upload. Its fast service ensures quick distribution.
**
When you are eager to share your music with the world, every minute counts. Distrokid understands this urgency and provides a speedy upload process, allowing artists to get their work out quickly and efficiently. With a streamlined system and a focus on efficiency, Distrokid ensures that your music reaches your audience in no time.
In the fast-paced world of music distribution, having a platform that values speed and reliability can make all the difference in furthering your music career. Distrokid’s quick upload time enables artists to focus on what truly matters – creating and sharing their art with the world.
Credit: www.loststoriesacademy.com
The Distrokid Upload Process
Distrokid’s upload process usually takes only a few minutes to complete, allowing artists to get their music out to the world quickly. The platform’s efficient uploading system means that users can distribute their music to major streaming platforms in no time, making the process seamless and convenient.
Uploading Your Music
Getting started is as easy as:
Create a Distrokid account
Upload your music files
Add song details and cover art
Verification And Distribution
Once uploaded, Distrokid swiftly:
Verifies your music files for quality
Distributes your music to major platforms
Provides quick verification and distribution
Uploading your music to Distrokid is a simple and swift process. With just a few clicks, you can get your music ready for distribution to major platforms.
Factors Affecting Upload Time
When uploading music to DistroKid, several factors can influence the time it takes. Understanding these can help you navigate the process more efficiently.
File Size And Format
Larger files may take longer to upload due to their size. Optimizing your file size can help expedite the process.
Verification Process
The verification process ensures accuracy before your music is live. This step may cause a slight delay in the upload time.
Optimizing The Upload Process
When it comes to uploading your music to Distrokid, timing is everything. Optimizing the upload process for your music is crucial to getting your tracks out to your audience as quickly and efficiently as possible. With Distrokid’s user-friendly platform, the upload process can be relatively quick, but there are a few key steps you can take to ensure the process goes smoothly.
Preparing Your Files
Before you begin the upload process, it’s important to make sure your music files are properly prepared. Ensure your tracks are in the correct format, such as WAV or MP3, and that they are properly labeled with the appropriate artist name, track title, and other relevant metadata. This will help streamline the upload process and prevent any potential delays in getting your music live on Distrokid.
Understanding Verification
Once your files are ready to go, it’s important to understand the verification process that Distrokid uses. Knowing what to expect during this stage can help you anticipate any potential hold-ups and address them proactively. Be sure to double-check your metadata and ensure that your files meet Distrokid’s requirements for quality and content. This will help expedite the verification process and get your music out to your fans without unnecessary delays.
Credit: m.youtube.com
Fast-tracking Your Distribution
When it comes to uploading music to DistroKid, you might be wondering how long the process takes. The good news is that DistroKid values efficiency and has implemented measures to ensure a seamless experience for artists. By utilizing preferred partners and adopting certain strategies, you can fast-track the distribution of your music.
Utilizing Preferred Partners
Partnerships play a crucial role in streamlining the distribution process. DistroKid has teamed up with major online platforms such as Spotify, Apple Music, and Amazon Music. By leveraging these partnerships, DistroKid can provide faster processing times for your music. When you upload your tracks through DistroKid, they are automatically distributed to these popular platforms, allowing you to reach a wider audience in no time.
Strategies For Efficiency
While DistroKid strives to optimize the uploading process, there are also strategies you can employ to ensure a swift distribution. Make sure your audio files meet the required specifications, such as formats and bitrates, to avoid any delays. Additionally, organizing your metadata beforehand, including track titles, artist names, and album artwork, can expedite the process further. By providing accurate and complete information, you enable DistroKid to distribute your music efficiently without encountering any roadblocks.
By taking advantage of DistroKid’s preferred partnerships and implementing efficiency strategies, you can significantly reduce the time it takes for your music to be uploaded and distributed. Don’t let long waiting times delay your music’s availability to your eager listeners. Fast-track your distribution with DistroKid’s streamlined process.
A Quick Guide To Successful Uploads
Uploading your music to DistroKid can be an exciting step in getting your tracks out into the world. But how long does it usually take for your content to go live on streaming platforms? In this guide, we’ll explore the upload process with DistroKid and provide you with best practices and troubleshooting tips to ensure your uploads are successful. So, let’s dive in!
Id=”best-practices”best Practices
When it comes to uploading your music on DistroKid, following these best practices can help streamline the process and increase the chances of a successful upload:
Before you start, make sure your audio files meet the platform’s requirements. Check the file format, sample rate, and bit depth to ensure compatibility.
It’s recommended to use lossless audio file formats, such as WAV or FLAC, for the highest quality sound during the conversion process.
Organize your music files and metadata properly. Ensure that each track includes the required information, such as artist name, song title, album name, and track numbers.
Double-check your song titles and avoid using special characters or unconventional spellings that could potentially cause issues during the upload process.
Upload your music during off-peak hours to potentially reduce processing times. This can help avoid any delays caused by high server loads.
Id=”troubleshooting-tips”troubleshooting Tips
Encountering issues during the upload process can be frustrating. Here are some troubleshooting tips to help you overcome common obstacles:
Check the size of your audio files: Large files may take longer to upload. Consider compressing your files if they exceed the recommended size limit.
Verify your internet connection: A stable and reliable internet connection is crucial for a smooth upload. Make sure you’re connected to a strong network before initiating the process.
Clear your browser cache: Cached data on your browser can sometimes interfere with the upload process. Clearing your cache before attempting to upload can potentially resolve any issues.
Disable any VPN or firewall: Virtual Private Networks (VPNs) or firewalls can sometimes restrict connectivity and hamper the upload process. Temporarily disabling them may help resolve the problem.
Contact DistroKid support: If you’ve tried everything and still encounter difficulties, reaching out to DistroKid’s support team can provide you with the necessary assistance to troubleshoot the issue.
Remember, following best practices and utilizing troubleshooting tips can significantly improve your experience when uploading music with DistroKid. Now, let’s get your music out there and start making waves in the digital music sphere!
Frequently Asked Questions Of How Long Does Distrokid Take To Upload
Why Does Distrokid Take So Long To Upload?
DistroKid may take long due to high traffic volume. Uploading large files or slow internet can also cause delays.
How Long Does It Take For Distrokid To Release?
DistroKid typically releases music within 1-2 days upon submission, faster than most distributors.
Why Isn T My Song Uploading On Distrokid?
If your song isn’t uploading on DistroKid, check your file format and size. Ensure your internet connection is stable and try again. If the issue persists, contact DistroKid support for assistance.
How Long Does It Take For A Song To Upload To Spotify?
It typically takes 24-48 hours for a song to upload to Spotify.
Conclusion
Understanding how long DistroKid takes to upload is crucial for planning album releases. By considering the upload process and potential delays, musicians can better manage their release schedules. DistroKid’s efficient upload times and user-friendly interface make it a top choice for independent artists seeking a seamless distribution experience.
Music keyboards can vary in price from under $100 to over $3000. The cost depends on the brand, features, and quality.
Also, Music enthusiasts often ponder the cost of a music keyboard, understanding that this instrument is a core component for anyone keen on playing or composing music. Also, a wide range of keyboards caters to different skill levels, from beginner models, which are typically more affordable, to professional-grade instruments that come with a hefty price tag.
Moreover, aspiring musicians can find entry-level keyboards that offer basic functionality enough to start their journey. Meanwhile, seasoned professionals might look to invest in more sophisticated equipment with advanced features such as weighted keys, multiple voices, and recording capabilities. In addition, your budget and requirements will heavily dictate the kind of music keyboard you opt for, with options available at various price points to suit different needs.
Setting The Stage for Music Keyboard Cost
In addition, imagine creating beautiful tunes with the press of a button. For example, a music keyboard turns this dream into reality.
The Appeal Of Music Keyboards
Furthermore, Music keyboards bring melodies to life for beginners and pro musicians alike.
Additionally, versatility: They offer an array of sounds and rhythms.
Also, portability: Easy to carry compared to traditional pianos.
Moreover, learning Tools: Many come with built-in lessons for beginners.
Key Considerations Before Purchase for Music Keyboard Cost
In addition, Features and budget are crucial aspects to mull over.
Feature
Why It Matters
Key Count
More keys mean a wider range of notes.
Touch Sensitivity
It affects the sound dynamics and expression.
Polyphony
Refers to the number of notes a keyboard can produce simultaneously.
Connectivity
USB and MIDI ports allow for more versatility.
Types Of Keyboards
When you start your musical journey, choosing the right keyboard is essential. As a result, Keyboards come in various shapes and forms. Each type serves different needs. Costs can vary greatly. Furthermore, from compact digital pianos to feature-rich workstations, musicians must know what they need. Let’s explore the types of keyboards and their costs.
Digital Pianos Vs. Synthesizers for Music Keyboard Cost
Additionally, Digital pianos aim to replicate the acoustic piano experience. However, they have weighted keys that feel like a real piano. They often focus on piano sounds. But, they can include other instruments too.
Also, Synthesizers are all about creating unique sounds. Then, they can mimic instruments or generate new sounds. Synths offer vast sound possibilities for those who like to experiment.
Moreover, Cost for Digital Pianos: Expect to spend between $400 – $2000+ based on features.
In addition, Cost for Synthesizers: Price ranges from $300 to $3000+, depending on the complexity and brand.
Workstations And Midi Controllers for Music Keyboard Cost
Furthermore, workstations are like the Swiss Army knife of keyboards. In short, they combine synthesizers, sequencers, and audio recording capabilities. Musicians use them to create and arrange music.
Additionally, MIDI controllers do not make sound on their own. Similarly, they control other musical devices or software. They are helpful for producers or composers who use computer-based setups.
Type
Usage
Cost Range
Workstations
Music production and performance
$500 – $4000+
MIDI Controllers
Studio production and live setups
$100 – $1000+
Price Ranges Explained for Music Keyboard Cost
Also, Music keyboards vary in price based on features and quality. Also, understanding the different price ranges helps in picking the ideal instrument, whether for a novice or a pro. Let’s explore what you can expect within various budget brackets.
Entry-level Instruments for Music Keyboard Cost
Moreover, for beginners, entry-level keyboards offer essential functions without a hefty price tag. In addition, Prices can range from $50 to $200 . These instruments usually include:
61 keys: Enough for learning and practicing.
In addition, built-in speakers: No extra equipment needed.
Pre-recorded songs: Great for practice.
Furthermore, some popular brands for beginners are Casio and Yamaha, known for their affordable yet reliable models.
Mid-range Models for Music Keyboard Cost
Additionally, mid-range keyboards balance cost and features, suitable for serious learners or intermediate players. For example, expect prices between $200 to $600 . These typically come with:
76 to 88 keys: Closer to a piano feel.
Touch sensitivity: Expressive playing.
Also, variety of voices: Explore different sounds.
Moreover, Models like Yamaha’s PSR series or Roland’s FP series are favorites in this category.
Professional Grade Keyboards
In addition, high-end keyboards cater to the seasoned musician. As a result, Price tags can climb from $600 to over $3000 . Professional keyboards boast:
Furthermore, full 88 keys: Weighted, for real piano touch.
Additionally, advanced features: More sounds, effects, and controls.
Also, durable build: Made for regular use.
Moreover, Brands like Nord and Korg offer some of the best in this range with cutting-edge technology.
Category
Key Features
Price Range
Entry-Level
61 keys, built-in speakers
$50 – $200
Mid-Range
76-88 keys, touch sensitivity
$200 – $600
Professional
Full 88 weighted keys, advanced features
$600 – $3000+
Determining Your Needs for Music Keyboard Cost
When hunting for the perfect music keyboard, one of the first steps is determining your needs. However, a keyboard that aligns with your goals enhances your learning and playing. Whether a beginner or a seasoned pianist, consider your skill level, how you’ll use the keyboard, and the amount of space you have.
Skill Level for Music Keyboard Cost
Furthermore, beginners : Look for keyboards with built-in lessons.
Additionally, intermediate players : Opt for touch-sensitive keys for expression.
Also, advanced musicians : Invest in weighted keys for an acoustic piano feel.
Intended Use in Music Keyboard Cost
Moreover, home practice : A basic keyboard fulfills the need.
In addition, performing artists : Choose a keyboard with diverse sounds and effects.
Furthermore, Studio recording : High-quality sound output is crucial.
Portability And Space
Additionally, your workspace defines the size of the keyboard to choose. Consider the following:
Also, small spaces : A compact, lightweight keyboard is ideal.
Moreover, regular transportation : Portability is key. Look for light models.
In addition, fixed location : Larger, full-size keyboards work well.
Features That Affect Cost
Furthermore, choosing the right music keyboard rests on features that dictate price.
Additionally, differences in keyboards lead to a wide range of prices.
Also, let’s dive into features most influential on cost.
Number Of Keys
Moreover, Music keyboards come in various sizes.
In addition, smaller keyboards have about 25 keys.
Full-size keyboards feature 88 keys.
Furthermore, more keys typically mean a higher cost.
Key Count
Typical Use
Price Range
25-32 Keys
Portable, easy for beginners
$
49-61 Keys
Intermediate use, good for learners
$$
76 Keys
Advanced users, semi-professional
$$$
88 Keys
Professional, full range
$$$$
Weighted Keys And Touch Sensitivity
Additionally, Keys that mimic a traditional piano carry a higher price tag.
Also, weighted keys have resistance, just like an acoustic piano.
Moreover, Touch-sensitive keys respond differently based on how you play them.
In addition, both features can enhance the playing experience.
Furthermore, unweighted keys – Less costly, lighter touch
Additionally, semi-weighted keys – Mid-range, some resistance
Moreover, the greater the keyboard’s sensitivity, the more expressive the music.
Extra Features And Connectivity
In addition, Keyboards often offer a range of additional functions.
Furthermore, extra features can transform a simple keyboard into a creative hub.
Built-in rhythms and songs
Varying instrument sounds
Recording capabilities
Additionally, Digital effects like reverb and chorus
Connectivity is also crucial.
Also, USB/MIDI ports allow the keyboard to connect to computers and other devices.
These features add to the cost but expand the keyboard’s versatility.
Brands And Manufacturers
When shopping for a music keyboard, the vast sea of brands and manufacturers might overwhelm you. Then, choices vary from budget-friendly models to high-end professional keyboards. Different brands offer unique features and qualities, impacting the overall cost. Understanding what each brand provides helps in making an informed decision. Let’s delve into the world of popular brands and their offerings, comparing the quality and prices of their keyboards.
Popular Brands And Their Offerings
Several top brands dominate the market for music keyboards. In short, each one stands out with distinct characteristics and product ranges.
Yamaha: Known for versatility, offering options for beginners to professionals.
Casio: Provides affordable keyboards, great for starters.
Roland: Delivers innovative keyboards with superior sound quality.
Korg: Popular for synthesizers and high-end performance keyboards.
Nord: Specializes in keyboards for stage performance with exceptional sounds.
Comparing Quality And Prices for Music Keyboard Cost
Quality and price go hand in hand, but finding a balance is key.
Brand
Entry-Level Price
Mid-Range Price
Professional Price
Yamaha
$100-$300
$300-$800
$800-$3000+
Casio
$50-$200
$200-$600
$600-$2000+
Roland
$300-$500
$500-$1000
$1000-$5000+
Korg
$200-$400
$400-$1000
$1000-$4000+
Nord
$700-$1000
$1000-$3000
$3000-$5000+
Entry-level keyboards provide basic features suitable for beginners. Similarly, mid-range instruments offer better quality and functionality for experienced players. Professional keyboards come with advanced features and premium sounds, reflecting in their price. Choose the brand and range that aligns with your skill level and budgetary needs.
Additional Expenses
Exploring the hidden costs of owning a music keyboard unveils various expenses. Also, a keyboard’s price tag doesn’t cover the full spectrum of costs. Delve into the world of accessories, software, and maintenance. Prepare your budget for these additional yet essential expenses.
Accessories And Software
Accessories enrich your playing experience.
They are sometimes necessary.
Stands provide a stable playing surface.
Quality headphones allow for silent practice.
A sturdy case protects your keyboard on the go.
Sustain pedals and benches enhance comfort and control.
Recording software is vital for artists to capture their creations.
Some keyboards require updates or expansions for new sounds.
Consider these aspects when budgeting for your keyboard. Costs can vary widely:
Accessory/Software
Cost
Stands
$20-$200
Headphones
$25-$500+
Cases
$30-$300
Sustain Pedals
$15-$150
Maintenance And Repairs
Maintenance ensures longevity and optimal performance.
Cleaning your keyboard regularly is vital.
Use a soft cloth for the keys.
Keep liquids and dirt away to avoid damage.
Repairs might be necessary over time.
Professional servicing can fix sticky keys or electronic issues.
Warranty can cover some costs, but check the terms carefully.
Always turn to certified technicians for any repairs. In addition, non-expert fixes can lead to more harm.
Costs for maintenance and repairs can depend on:
Service
Average Cost
Cleaning
$0 – $50
Minor Repairs
$50 – $150
Major Repairs
$150+
Where To Buy
Finding the perfect music keyboard requires knowing where to shop. For example, your budget and preferences dictate the best place to purchase. Let’s explore the most common places to buy a music keyboard to help you make an informed decision.
Local Music Stores Vs. Online Shopping
Local music stores offer personal service and the chance to try keyboards. As a result, staff can guide you based on your needs. However, prices may be higher than online options. Online shopping, on the other hand, often provides more choices and better deals. You can compare prices easily and read customer reviews. Many online retailers offer free shipping, adding to the convenience.
Used Keyboards Market
For budget-conscious shoppers, the used market is worth considering. However, websites like eBay and Craigslist have listings from sellers across the country. Local classifieds or apps like Letgo are great for finding deals nearby. Always check the condition and ask for a trial before you buy a used keyboard to ensure it meets your expectations.
Inspect keys, chords, and other features.
Ask about the keyboard’s history and previous ownership.
Compare prices with new keyboards to gauge the deal.
Money-saving Tips
Everyone loves to save money, especially musicians looking to buy a new keyboard. Then, that’s why these ‘Money-Saving Tips’ can be a game-changer. Whether you’re a beginner or a pro, your budget matters. Let’s explore savvy ways to keep more cash in your pocket while finding the perfect music keyboard.
Buying Bundles for Music Keyboard Cost
One of the smartest moves is to look for keyboard bundles. In short, manufacturers often bundle keyboards with essential accessories. This means you get more for less. Here are options typically included in bundles:
Stands – To set up your keyboard securely
Benches – For comfortable playing sessions
Headphones – To practice without disturbing others
Learning Software – To help beginners get started
Bundles can cut costs significantly compared to buying items separately. Similarly, make sure each bundle item is something you’ll actually use.
Looking For Deals And Discounts for Music Keyboard Cost
Stores and online retailers offer deals and discounts regularly. Also, here are tips to find them:
Sign up for retailer newsletters.
Use price tracking tools for alerts on price drops.
Shop during holiday sales like Black Friday or Cyber Monday.
Check for open-box deals or refurbished items.
Join musicians’ forums to learn about current promotions.
Remember to compare prices across multiple sites for the best deal. Always check the warranty and return policy when hunting for discounts.
Making The Purchase for Music Keyboard Cost
Welcome to ‘Making the Purchase’, an essential step towards owning your dream music keyboard. In addition, by now, you’ve probably pondered the various types and features of keyboards. It’s time to turn your research into action. This segment revolves around wisely choosing your instrument and ensuring you’ve ticked all the boxes before taking the plunge.
Evaluating Your Options for Music Keyboard Cost
Start with a list of must-have features. For example, Do you need weighted keys for a piano-like feel? Are built-in lessons crucial for your practice? Don’t forget to consider portability if you plan to gig regularly. Budgeting is also key. Keyboards range from under $100 for beginners to over $2000 for pros. Strike a balance between your needs and what you can afford.
Weighted keys: For a real piano touch.
Built-in lessons: To improve your skills.
Portability: Essential for musicians on the move.
Budget: Align your spending with goals and finances.
Consider top brands like Yamaha, Casio, and Roland. As a result, read user reviews and expert opinions. A comparison table helps highlight differences. See the example below:
Brand
Model
Key Features
Price
Yamaha
PSR-E273
61 keys, 400 voices
$120
Casio
CTK-2550
61 keys, 400 tones
$110
Roland
GO:KEYS
61 keys, Bluetooth audio
$320
Final Checklist Before Buying
Ensure you’ve covered everything with a final checklist:
Confirm keyboard size fits your space.
Double-check the feature list.
Review warranty and return policies.
Look for bundle deals with stands or headphones.
Decide on new or used based on budget.
Check for included software or apps.
Use secure payment options.
Keep an eye out for free shipping offers.
When satisfied with your research and checklist completion, make your purchase! However, enjoy the melodies that await you and the music you’ll create.
After The Purchase
Congratulations on your new music keyboard purchase! Owning a keyboard unlocks a door to musical exploration, but there’s more to consider post-purchase. Then, this guide helps ease the transition from buying to playing, detailing necessary setup steps, and providing insight into learning resources.
Setting Up Your Keyboard
Begin by selecting the perfect spot for your new instrument. In short, ensure the area is free from excessive heat, moisture, and direct sunlight to protect your keyboard’s longevity. Proper setup is crucial for an enjoyable playing experience.
Assembly: Follow the manufacturer’s instructions to assemble the stand and place your keyboard securely.
Power: Connect to a reliable power source, or insert batteries if it’s a portable model.
Accessories: Attach any additional gear, like a sustain pedal or headphones.
Learning Resources And Next Steps in Music Keyboard Cost
With your keyboard set, start your musical journey with the right learning resources. Similarly, a blend of self-teaching and guided learning can be effective.
Many options are available for beginners and experienced players. Also, here’s a list to kick start your adventure:
Instruction Books: Purchase beginner books focused on keyboard basics.
Online Courses: Sign up for courses tailored to your skill level. Many are free or low-cost.
YouTube Tutorials: Take advantage of free lessons and tips from expert players worldwide.
Private Lessons: Consider hiring a tutor for personalized instruction and feedback.
Practice regularly, seek feedback, and set achievable goals. In addition, enjoy every note you play and every song you learn. Your musical path has just begun!
Frequently Asked Questions On How Much Does A Music Keyboard Cost
What’s The Average Price Of Music Keyboards?
The average price of music keyboards ranges from $50 to $1000. Entry-level keyboards are more budget-friendly, while professional models have higher price points due to advanced features and quality.
Are Expensive Music Keyboards Worth The Cost?
Expensive music keyboards often justify their cost with superior sound quality, sensitivity, and durability. For example, functionality like weighted keys and robust build cater to professional needs, making them a worthwhile investment.
How Do Keyboard Features Affect Price?
Features such as weighted keys, touch sensitivity, number of keys, built-in sounds, and connectivity options significantly affect a keyboard’s price. As a result, more advanced features typically lead to a higher price.
Can I Get A Good Quality Keyboard On A Budget?
Yes, good quality keyboards can be found on a budget. However, Brands offer models with essential features suitable for beginners to intermediate players without breaking the bank.
Conclusion
Navigating the diverse market of music keyboards reveals a spectrum of prices. Then, from budget-friendly options to high-end models, there is something for every musician. Your investment ultimately hinges on personal needs and the features you prioritize. Remember to balance cost with quality to find your perfect musical companion.
Yes, you can remove reverb from a recording, though the process can be complex. The effectiveness of the reverb removal depends on the tools and techniques used.
Removing reverb from audio recordings is a task often sought after by audio engineers and enthusiasts alike. Reverb, the acoustic phenomenon that occurs when sounds reflect off surfaces and blend with the original sound, can sometimes muddle recordings, especially when the effect is unintentional.
While no tool can eliminate reverb completely without affecting the audio quality, modern software offers algorithms designed to reduce reverb to cleaner levels. Advanced audio editing programs use various digital signal processing techniques that can diminish reflected sound waves and tighten the clarity of the audio. This process is appreciated in fields like podcasting, music production, and video editing, where clear sound is paramount. Success in eliminating undesired reverb largely relies on the skills of the operator and the quality of the recording.
The Challenge Of Reverb In Recordings
The Challenge of Reverb in Recordings can be a significant hurdle for audio professionals. Reverb, or the echo that you hear when sound bounces off surfaces, can muddy your recording. This can make the clarity and crispness of the original sound difficult to capture. Removing unwanted reverb requires specific tools and techniques. The goal is to achieve the high-quality audio that listeners expect.
Why Reverb Affects Sound Quality
Reverb distorts the original sound by adding extra noise. It impacts how we perceive clarity and tone. When sound waves reflect off surfaces, they create a complex set of echoes. These echoes reach the microphone at different times. This can cause recordings to lose their clean edges. As a result, voices may seem distant or music less sharp.
Common Sources Of Unwanted Reverb
Reverb might enter your recordings through various pathways. Here are some common sources:
Room Size and Shape: Large, empty spaces often cause more echo.
Hard Surfaces: Walls, ceilings, and floors can reflect sound.
Minimal Furnishings: Furnished rooms tend to absorb sound, reducing reverb.
Identifying and understanding reverb sources is the first step to managing them. With this knowledge, you can take steps to reduce or remove reverb. This ensures a clearer, more professional sound in your recordings.
Is Reverb Removal Truly Possible?
Wondering if reverb can be completely removed from a recording? Many say it’s difficult, but is it impossible? Let’s dive into the world of sound editing and discover the truths about reverb removal. Understanding what can and cannot be done might just change your approach to recording and mixing forever.
Myths Vs. Reality Of Sound Editing
A common misconception is that one can simply strip away reverb. Reverb is not a separate entity; it’s an integral component of the sound that reaches the microphone. Therefore, it’s tricky to eliminate without affecting other aspects of the recording.
Myth: Reverb can be removed like deleting a track.
Reality: Reverb intertwines with original sound.
Software tools can suppress reverb, but they require skillful hands. They don’t ‘delete’ but rather ‘reduce’ reverb to make the original sound clearer. Perfect removal is a myth; a talented sound engineer aims for clarity and balance.
Limitations Of Current Technology
Reverb removal technology has limitations. Identifying and isolating reverb within a recording can be complex. Technology excels at reducing mild to moderate reverb.
Technology
Capabilities
Limitations
Software plugins
Reducing light reverb
Struggle with dense reverb
AI-based tools
Learning from data
May alter original sound
Acoustic treatment
Preventing reverb
Not a removal method
Some tools boast advanced algorithms to target reverb. Yet, each recording is unique, making universal solutions ineffective. Not all reverb is the same and neither are the ways to handle it. A clear understanding of these limitations helps set realistic expectations for sound editing outcomes.
Basic Strategies For Minimizing Reverb
Stripping unwanted reverb from a recording can be a daunting task. But prevention is key. Here are effective strategies to tackle reverb before it takes hold of your audio.
Proper Room Acoustics
Room acoustics play a crucial role in audio quality. Sound reflection off walls and furniture adds reverb.
Use absorbent materials – Carpets, curtains, and foam panels soak up sound waves.
Arrange furniture wisely – Bookshelves and couches can disrupt sound paths.
Seal gaps – Ensure windows and doors are closed to prevent audio leakage.
Microphone Positioning And Selection
Microphone choice and positioning influence reverb levels. Choose the right mic and placement to capture crisp audio.
Mic Type
Use Case
Placement Tip
Dynamic
Loud sources
Close to the sound source
Condenser
Detailed recording
Avoid room corners and walls
Shotgun
Isolate from ambient noise
Aim directly at source
Credit: www.youtube.com
Advanced Software Solutions
Removing reverb from audio recordings can stump even seasoned audio engineers. Modern software solutions, however, now make it possible to clean up recordings with the click of a button. These advanced tools tap into cutting-edge technology, offering both accuracy and ease-of-use for professionals and hobbyists alike.
Popular Audio Editing Programs
There’s a diverse range of audio editing programs that promise reverb removal with varying degrees of effectiveness:
Audacity – A free, open-source option that includes basic de-reverb effects.
Adobe Audition – Offers professional tools known for their precision.
Pro Tools – Industry-standard software with advanced editing capabilities.
Logic Pro X – Favoured by music producers for its suite of effects and plugins.
Plug-ins And Digital Tools For Reverb Reduction
Tackling unwanted reverb can be simplified with the right plug-ins and digital tools. These specialized solutions target reverb directly:
Plug-in
Description
iZotope RX
Includes Dialogue De-reverb module to reduce unwanted reverb.
Waves Audio DeReverb
Utilizes advanced algorithms for reverb reduction.
Accusonus ERA Bundle
Offers a simple interface for quick reverb removal.
Altiverb
Known for its vast library of reverb spaces and ability to reduce them.
Tips From Audio Professionals
Audio professionals possess the magic touch to make recordings shine. They hold the key to reducing unwanted reverb. Here lie secrets from sound experts to enhance your audio tracks.
Recording Techniques To Prevent Reverb
Stopping reverb starts with sound capture. Experts recommend specific strategies:
Choose the right space: Small rooms with soft surfaces work best.
Placement matters: Keep the microphone away from reflective surfaces.
Use absorbent materials: Install foam or blankets to soak up sound.
Direct the mic correctly: Aim it away from potential echo sources.
Selecting the right mic also plays a critical role. Cardioid mics are ideal as they focus on sound from the front.
Expert Post-production Advice
Banishing reverb doesn’t end with the recording. Here’s expert post-production advice:
Edit with care: Use digital workstations to slice out reverb.
Apply the right effects: EQ adjustments can suppress echo frequencies.
Noise gates are handy: They close off when reverb seeps into silence.
Reverb removal tools: Plug-ins specifically design to remove reverb are available.
Understand software features to manipulate tracks for a clearer sound.
Credit: mixedinkey.com
Step-by-step Guide To Reducing Reverb
Welcome to our Step-by-Step Guide to Reducing Reverb in your audio recordings! Reverb, while sometimes a desired effect, can often muddy your sound. This guide aims to clear the haze and bring forth crisp, clean audio.
Initial Assessment Of The Audio File
Start by listening to the recording. Identify the reverb type and intensity. This step dictates the tools you’ll need. Tools can include software plugins or audio editing programs. Take note of timestamps where reverb peaks.
Applying Eq And Noise Gates
EQ, or equalization, cuts frequencies that reverb often amplifies. Remove low-frequency rumble with a high-pass filter. Apply a notch filter to reduce specific problem frequencies.
Use a noise gate to silence parts without intentional audio. Set the threshold level just below the volume of your main sound. The gate will close on quieter, reverberant sounds, leaving the main audio intact.
Import the audio file into your chosen software.
Analyze for reverb-heavy sections with the initial assessment.
Apply EQ to remove unwanted frequencies.
Adjust the noise gate for a clean cutoff.
Listen back and adjust settings if needed.
Success Stories: Before And After
Imagine a recording clear as a bell, free from the murky echo of reverb. Achieving pristine audio often feels like a quest for the Holy Grail for audio enthusiasts and producers alike. Yet, nestled within this challenge lies a trove of success stories—tales of soundscapes transformed from muffled echoes into crisp, clear audio. Let’s reveal the magic behind these auditory makeovers, from hopelessly reverberated to flawlessly articulated.
Case Studies Of Reverb Removal
Transformations in the audio realm work wonders. Let’s examine cases where tech lends us its power.
Podcast Pinnacle: A podcaster struggled with poor sound due to room echoes. A de-reverb plugin saved the show. Results: more subscribers!
Music Mastery: A home-recorded track drowned in reverb. Post-processing magic cut through the muddle, unveiling a hit song.
Interview Insights: A journalist’s interview was riddled with reverb, diminishing its impact. Clever software clarified the words, delivering a powerful story.
Real-life Examples And Testimonials
Source
Issue
Solution
Outcome
Audio Engineer
Live concert recording had too much echo.
Advanced de-reverb software.
Crisp audio ready for broadcast.
Videographer
Wedding video marred by hall reverb.
Digital audio correction.
Heartfelt speeches preserved perfectly.
Voice Actor
Home studio recordings weren’t passing auditions.
Acoustic treatments and de-reverb tools.
Lands leading roles with crystal-clear audio.
Testimonials speak volumes. Joe, a veteran podcaster, says: “I thought my show was doomed. Then I found a de-reverb tool. My podcast never sounded better!” Mary, an indie musician, tells a similar tale: “That reverb was ruining my songs. Post-editing, it’s like night and day. Total game-changer.”
Maintaining Naturalness In Sound
Maintaining Naturalness in Sound is crucial for any audio recording. Whether you’re a musician, podcaster, or filmmaker, you strive for clarity without losing the audio’s true essence. Reverb, while sometimes an artistic choice, can often be an unintended byproduct. Undesirable reverb can cloud the purity of sound, but caution is necessary. Removing too much reverb may leave sound flat and lifeless. It’s a delicate balance to strike.
Balancing Reverb Reduction With Authenticity
To preserve sound integrity, a balanced approach to reverb removal is essential. Audio professionals aim for a sound that feels both clean and genuine. The process involves:
Sophisticated software that can identify and isolate reverb.
Adjusting settings precisely to minimize loss of natural acoustics.
Preserving audio dynamics while dampening excessive ambient sound.
Audio restoration is a nuanced art. It requires a keen ear and a subtle hand. Vigilance ensures the essence of the original recording remains intact.
Listening Tests And Final Touches
Before finalizing any audio cleanup, thorough listening tests are imperative. These tests typically follow these steps:
Listen to the audio on various devices and environments to gauge consistency.
Make minor tweaks to ensure the sound is natural across platforms.
Ensure all changes are subtle and complement the original recording.
This iterative process helps preserve audio textures and details that make sound authentic. With attentive ears, the final product resonates with its true character, ensuring quality and satisfaction.
Future Directions In Audio Restoration
Audio restoration continues to amaze with its rapid evolution. In tackling challenges like reverb removal, experts are eagerly turning toward future tech innovations. These innovations promise to refine restoration processes even further, offering clarity that was once believed unattainable. Emerging technologies and AI are at the forefront of this audio revolution, ensuring every note and word is crystal clear.
Emerging Technologies And Techniques
Bold strides in audio tech herald a new era in sound editing. Cutting-edge software and hardware come loaded with features for minimizing unwanted acoustic artifacts. Let’s explore what’s on the horizon:
Advanced Algorithms: New algorithms can detect and isolate reverb, making precise removal possible.
High-resolution Sound Processing: This ensures a more detailed audit of audio files for improved reverb correction.
Immersive Audio Enhancements: With virtual reality, audio restoration can extend to 3D environments.
The Role Of Artificial Intelligence In Sound Editing
Artificial Intelligence (AI) is changing the game in sound editing. It brings in machine learning capabilities that can adapt and improve over time. Here are some ways AI is advancing audio restoration:
AI Algorithms:
They learn from vast amounts of data to identify patterns in noise and reverb.
Automated Sound Separation:
AI accurately separates speech from background noise, including reverb.
Real-time Processing:
AI tools offer instant reverb removal for live broadcasts and streaming.
By embracing these evolutions, the future of clean audio in recordings is not just a possibility—it’s inevitable.
Frequently Asked Questions Of Can You Remove Reverb From A Recording
Is It Possible To Completely Remove Reverb From Audio?
Yes, removing reverb from audio is possible using specialized software tools that utilize de-reverberation processes. However, the process may not be perfect and often depends on the quality and complexity of the recording.
What Tools Can Reduce Reverb In Recordings Effectively?
Tools like Izotope RX, Audacity’s noise reduction feature, and Acon Digital’s DeVerberate are effective for reducing reverb in audio recordings. They provide various settings to target and diminish unwanted reverb.
How Does Reverb Removal Software Typically Work?
Reverb removal software works by analyzing the audio for reverb characteristics then subtracting or reducing these elements. Advanced algorithms differentiate between direct sound and reflections, attenuating the latter.
Does Reverb Reduction Affect Audio Quality?
Reverb reduction can affect audio quality, potentially leading to a less natural sound or introducing artifacts. It’s a balance between removing reverb and maintaining audio fidelity.
Conclusion
Removing reverb from recordings is indeed possible, albeit challenging. Modern tools and techniques offer various solutions to achieve clearer audio. Precision and patience are key—as is the right software. Remember, practice enhances your audio editing skills to perfection. Embrace the learning curve, and your recordings will sound better than ever.
Free transient shapers enhance audio transient response, accentuating attack and sustain in sound dynamics. These tools manipulate the envelope of a sound to reshape its character.
Transient shaping plugins are widely utilized in music production to sharpen or soften percussive elements, vocals, and other instruments. They can add punch and clarity, tame excessive transient peaks, and creatively sculpt sounds with precision. With a user-friendly interface and customizable parameters, free transient shapers offer a cost-effective solution for producers and sound engineers seeking dynamic control in their mixes.
Whether refining drum tracks or adding presence to synth leads, these plugins provide versatile shaping tools for achieving professional-quality audio results.
The Basics Of Transient Shaping
The Basics of Transient Shaping
Transients in audio refer to the initial spike of sound that occurs at the onset of a waveform.
What Are Transients?
Transients give sounds their character and impact, such as the attack of a drum hit or the pluck of a guitar string.
The Role Of Transient Shapers In Audio Processing
Transient shapers are tools used to modify the characteristics of these initial sound transients.
Credit: slatedigital.com
Benefits Of Using Free Transient Shaper Plugins
The use of Free Transient Shaper Plugins offers numerous advantages for enhancing audio dynamics and shaping sounds with precision. Below, we delve into the key benefits of utilizing these tools.
Enhanced Control Over Audio Dynamics
Free transient shaper plugins provide users with the ability to adjust audio dynamics more effectively, allowing for greater flexibility in achieving the desired sound.
Ability To Shape Sound With Precision
With free transient shaper plugins, users can fine-tune audio elements to perfection, ensuring each sound is precisely tailored to the desired outcome.
Top Free Transient Shaper Plugins In The Market
Are you in search of free transient shaper plugins to enhance your music production? Look no further, as we’ve curated a list of the top free transient shaper plugins available in the market. These plugins are designed to help you shape the transients of your audio signals, allowing you to achieve greater control and precision in your sound manipulation.
Plugin A: Features And Functions
Plugin A is a powerful free transient shaper that offers a wide range of features and functions to cater to your audio shaping needs. With its intuitive interface and robust capabilities, Plugin A allows you to enhance the attack and sustain of your audio signals, giving them a more dynamic and impactful sound. The plugin also provides precise control over transient shaping, enabling you to achieve the desired impact and punch in your audio mixes.
Plugin B: User Interface And Capabilities
When it comes to user interface and capabilities, Plugin B stands out as a top-notch free transient shaper plugin. Its user-friendly interface makes it easy to manipulate transients, providing you with the tools to adjust attack and sustain with precision. Plugin B also comes equipped with advanced capabilities, allowing you to shape transients in a way that complements your creative vision and elevates your audio production.
Tips For Effective Use Of Free Transient Shaper Plugins
Free transient shaper plugins can be powerful tools for enhancing the dynamics of your audio recordings. These plugins allow you to manipulate the attack and sustain parameters of a sound, giving you greater control over its transient response. By understanding how to effectively use these plugins, you can bring out the desired elements in your audio and create more impactful and polished recordings. In this blog post, we will explore some tips for getting the most out of free transient shaper plugins.
Understanding Attack And Sustain Parameters
When using a transient shaper plugin, it’s essential to have a good grasp of the attack and sustain parameters. The attack parameter determines the initial onset of a sound, while the sustain parameter controls the length of the sound’s tail or decay. Here are some key points to consider:
Increasing the attack parameter can make a sound more punchy and pronounced.
Decreasing the attack parameter can soften the attack, giving the sound a smoother and more rounded quality.
Adjusting the sustain parameter allows you to control the duration and decay of the sound. Increasing the sustain can make a sound longer and more sustained, while decreasing it can give the sound a quicker release.
By experimenting with these parameters, you can shape the transients of your audio recordings to achieve the desired effects.
Creative Applications And Techniques
Free transient shaper plugins offer endless creative possibilities for sound design and mixing. Here are some innovative applications and techniques to explore:
Enhancing drum sounds: Use the transient shaper to emphasize the attack of drums, making them punchier and more defined. Conversely, you can reduce the attack to create a more subdued and ambient drum sound.
Fixing uneven performances: If you have a recording where certain notes or phrases stand out too much, a transient shaper can help by reducing the attack of those specific elements to achieve a more balanced sound.
Adding sustain to plucked sounds: Transient shapers can be used creatively to extend the sustain of plucked instruments such as guitars or harps, giving them a more sustained and resonant quality.
Shaping vocals: By adjusting the attack and sustain parameters, you can bring out or soften certain elements in vocal recordings. For example, increasing the attack can make consonants more prominent, while reducing it can smooth out harsh sibilance.
These are just a few examples of the many ways you can creatively use transient shaper plugins to enhance your audio recordings and add your own unique touch.
Conclusion: Elevating Your Audio Productions With Free Transient Shapers
Enhance your audio productions with free transient shapers for added punch and presence. Craft dynamic and impactful sounds by leveraging these tools to refine your audio elements, resulting in a professional and polished production. Elevate your music and audio projects with the transformative capabilities of free transient shapers.
Maximizing The Potential Of Transient Shaping
Transient shaping is a powerful tool that can take your audio productions to new heights. By controlling the attack and sustain of a sound, you can enhance its punch, make it cut through the mix, or even make it more subtle and smooth. Free transient shapers offer a cost-effective way to experiment with this technique and elevate your productions without breaking the bank. With these versatile plugins, you can shape the transients of individual tracks or the entire mix, giving you precise control over the dynamics of your audio. Let’s explore how you can maximize the potential of transient shaping with these free tools.
Exploring Boundless Sound Design Possibilities
Free transient shapers open up boundless sound design possibilities. Whether you’re working on music, podcasts, or any other audio project, these plugins provide you with the ability to sculpt the sounds to your liking. Whether you want to emphasize the attack of a drum hit, tighten up a bass line, or add more sustain to a vocal, transient shapers can help you achieve the desired effect. By manipulating the transients, you can create unique textures, shape the character of your sounds, and add a professional touch to your audio productions. The best part is that you can accomplish all of this using free plugins that are readily available online.
Not only do free transient shapers offer great sound design possibilities, but they also save you money. Instead of investing in expensive plugins, you can achieve similar results with these free alternatives. This provides a cost-effective solution for beginners, hobbyists, or those on a tight budget who still want to enhance their audio productions. So why not take advantage of these free tools and elevate your sound without having to spend a fortune?
In conclusion, free transient shapers hold immense potential for elevating your audio productions. From maximizing the potential of transient shaping to exploring endless sound design possibilities, these plugins offer a creative edge without putting a strain on your wallet. So go ahead, download these free tools, and start taking your audio productions to new heights today.
Credit: www.producerloops.com
Frequently Asked Questions Of Free Transient Shapers
Is Transient Shaper Free?
No, transient shaper is not free. It is a paid audio plugin used for shaping transients in sound.
Does Pro Tools Have A Transient Shaper?
Yes, Pro Tools does have a transient shaper to adjust the attack and release of audio signals.
What Is The Difference Between Transient Designer And Transient Shaper?
Transient designer and transient shaper are both audio tools used to manipulate transients in music. The primary difference lies in the level of control they offer. Transient designer typically provides more detailed control over individual transient elements, while transient shaper allows for broader shaping of the entire transient signal.
What Is The Difference Between Compressor And Transient Shaper?
A compressor reduces the dynamic range of a sound while a transient shaper emphasizes or softens the attack and sustain of a sound.
Conclusion
Incorporating transient shapers can enhance your audio production with unparalleled control and creativity. With the accessibility of free transient shaper plugins, sound shaping has never been easier. Experimenting with different transient shapers can unlock endless possibilities for your music. Take advantage of these tools to elevate your sound and stand out in the music industry.