Categories
Archive

Are Gaming Headphones Ideal for Music Production?

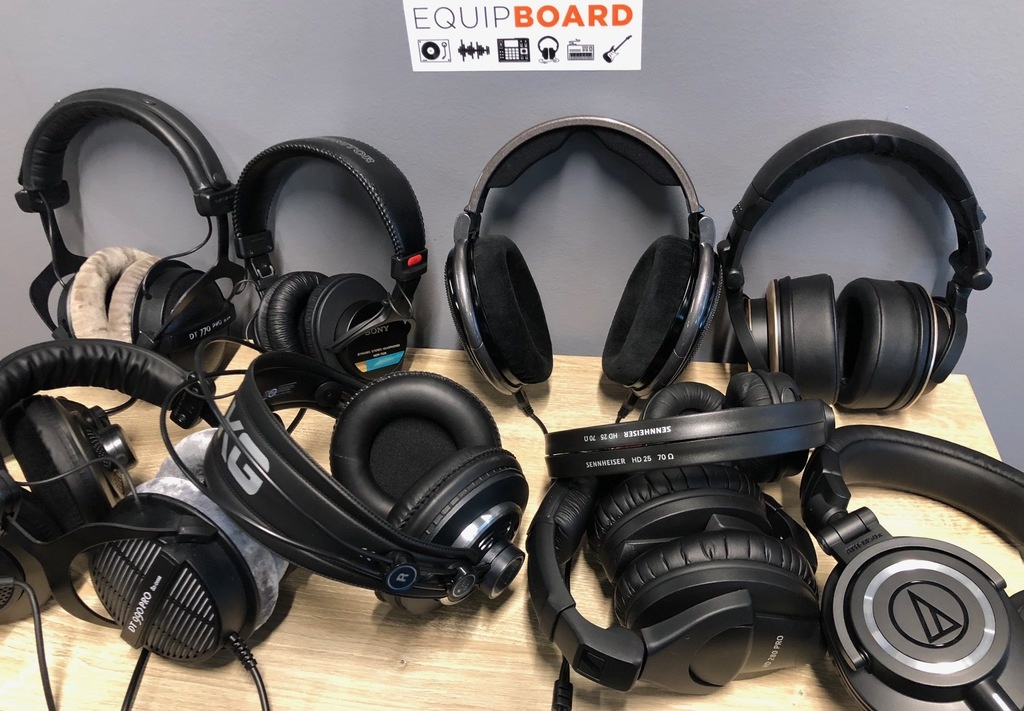
Gaming headphones are not ideal for music production. They often boost certain frequencies, which compromises the accurate sound needed for creating music.


Gaming headphones are specifically designed with an emphasis on certain sound frequencies to enhance in-game audio experiences. These modifications, which often embellish bass and treble for a more exciting gaming atmosphere, can obscure the pure sound production intended for music.


Music producers rely on a flat frequency response for a precise and neutral sound stage, essential for making accurate mixing decisions. Gaming headphones also tend to focus on aesthetic and comfort features that may not translate to the needs of sound work. Hence, headphones crafted for professional audio work are better suited for music production, providing uncolored and faithful sound reproduction critical for achieving the desired mix in any audio project.


The Quest For Superior Sound

The Quest for Superior Sound drives audio enthusiasts in their search for the perfect audio experience. Whether you are a gamer or a music producer, sound quality is vital. Different headphones cater to different needs. Let’s explore how gaming headphones and music production headphones match up in the pursuit of superior sound.

Gaming Headphones: Built For Gamers

Gaming headphones offer unique features for an immersive experience:

  • Surround sound for positional audio.
  • Enhanced bass to feel in-game effects.
  • Microphones for clear communication.
  • Comfort for long gaming sessions.

While they are excellent for gaming, they might not always be the best choice for editing music. Audio accuracy is not the main focus in designing gaming headphones.

Music Production Headphones: Crafted For Musicians

Music production headphones offer features needed for creating music:

Feature Benefit
Flat frequency response Accurate audio production.
Open-back design Natural sound, avoids echo.
Comfort Long studio sessions with no pain.

Music headphones prioritize clarity and accuracy. This is essential in producing high-quality music. Some gaming headphones might work for casual music listening, but may not cut it for music production.

Technical Specifications Compared

When diving into the world of audio fidelity, technical specs play a big role. They tell you how well headphones can handle different sounds. For music production, precise sounds are critical. Gaming headphones and studio headphones differ in specs. Let’s compare their features.

Frequency Response: Gaming Vs Studio

Frequency response is a key factor in headphone performance. It shows the range of sounds headphones can reproduce. A broad frequency range is better for detailed sound work.

Gaming Headphones Studio Headphones
Strong bass, from 20 to 20,000 Hz Wider range, often 10 to 30,000 Hz
Enhanced low-end for booming explosions Flat response for accurate sound production

Gaming sets might enhance certain frequencies. This makes games feel more immersive. Studio headphones aim for a flat response. This allows creators to hear sounds as they are

Soundstage And Imaging: Two Worlds Collide

Soundstage and imaging represent how headphones simulate sound space. They create a sense of where sounds come from. This illusion is crucial for both gaming and music production.

  • Gaming headphones focus on a wide soundstage. They help gamers identify sound directions.
  • Studio headphones strive for precise imaging. This accuracy is critical for mixing tracks.

While gaming cans offer immersive experiences, they may not match the precision needed in studios. Professional studio headphones deliver detailed imaging. They help producers fine-tune each sound for a perfect mix.

Design Philosophy: Comfort And Durability

When diving into the world of audio creation, comfort and durability stand at the forefront of design. Individuals in the music production sphere spend hours perfecting tracks. The need for headphones that can withstand the rigors of daily use becomes essential. Simultaneously, prolonged sessions beckon for a design catering to comfort. This is where gaming headphones enter the scene. Their design philosophy often marries the need for extended wearability with robust construction.

Ergonomics: Marathon Sessions Vs Long Mixes

Ergonomic design is crucial for any headphone set intended for long periods of use. Gaming headphones are crafted with marathon gaming sessions in mind. They offer features like padded headbands, cushioned ear cups, and adjustable fits. Music producers can benefit from these features as they entail similar long-session use cases.

  • Thick, soft padding reduces ear fatigue
  • Adjustable headbands ensure a snug fit
  • Swivel ear cups accommodate various head shapes and sizes

Build Quality: Sturdy For Battles Or Sessions

Gaming headphones are expected to survive through epic battles and rage quits. This demand has given rise to headphones with superior build quality. Music producers find value in this sturdy construction. It equates to durability that can handle the wear and tear of daily music manipulation. High-quality materials and solid manufacturing mean fewer replacements and more reliability.

Feature Gaming Headphones Music Production Headphones
Material Reinforced plastics, metals Often high-grade plastics, sometimes metals
Design focus Impact resistance Sound quality and comfort
Lifespan Constructed for longevity Varies, professional sets are durable

Connectivity And Compatibility

When selecting headphones for music production, connectivity and compatibility are critical. These factors influence how well your headphones will work with your production setup. Let’s explore these important aspects.

Wired Vs Wireless: Latency Issues

Latency refers to the delay between audio input and output. In music production, low latency is key. Wired headphones usually offer minimal latency, which is crucial when timing is everything. Wireless headphones, while convenient, often introduce a slight delay. This delay can disrupt the production process. Professionals often opt for wired headphones to ensure real-time audio feedback.

Compatibility With Audio Interfaces And Equipment

Headphones must integrate with a range of devices. These include audio interfaces, mixers, and computers. Most gaming headphones use a standard 3.5mm jack or USB connector. It’s essential to check for compatibility. Audio interfaces might require adapters for optimal connection with gaming headphones. Always review the technical specifications of your equipment before making a decision. This approach guarantees seamless integration with your music production gear.

Headphone Type Connectivity Compatibility Latency
Wired 3.5mm or 6.35mm Jack, XLR, USB High with most devices Low
Wireless Bluetooth, RF Varies with devices Higher than wired
  • Check headphone connector type.
  • Ensure low latency for precise audio work.
  • Identify if adapters are necessary.


The Price Factor

When deciding on headphones for music production, cost plays a big role. Not all headphones are equal in quality and price. Some may wonder if gaming headphones fit the bill. Let’s dive into the cost analysis and compare what hobbyists and professionals might consider investing.

Cost Analysis

Gaming headphones vary in price, just like studio ones do. Affordable options exist, but are they good for music making? Prices can range from under $50 to several hundreds of dollars. Features like surround sound and extra bass are standard in gaming headphones. Yet, are they necessary for producing music? The table below breaks down the pricing tiers:

Price Range Typical Features Intended Use
Under $50 Basic sound quality, Wired connection Casual listening
$50 – $150 Improved soundstage, Comfort features Entry-level gaming and music
Over $150 High-fidelity sound, Advanced features Immersion in gaming, potential music production

Investment For Hobbyists Vs Professionals

Hobbyists may not want to spend a lot. A reasonable quality gaming headset can be enough for learning and experiments. Professionals, on the other hand, need the best tools. They might find gaming headsets lacking for critical listening. Here’s a quick contrast:

  • Hobbyists: Less frequent use, budget-friendly is key.
  • Professionals: Daily use, high-quality sound is a must.

Professionals invest in gear that lasts and performs. Durable construction and crystal-clear audio become priorities. The comparison reveals the key differences in needs and budget between the two groups.

The Sound Isolation Variable

When producers mix music, they need to hear every detail. Good sound isolation helps them focus. Let’s see how gaming headphones fit into this.

Noise Cancellation In Gaming

Gaming headphones often boast active noise cancellation (ANC). ANC uses technology to block outside noise. This feature creates an immersive gaming experience.

  • Gaming benefits: Keeps gamers focused.
  • Listening advantages: Helps hear music clearly.

Isolation Needs In Studio Environments

Music production demands quiet. Here, passive sound isolation from headphones is key. It stops sound from leaking in or out.

Environment Isolation Level
Home Studio Medium
Professional Studio High
Gaming Low to Medium

High isolation stops distractions. This is a must for music creators. Gaming headphones can vary in isolation quality.

User Experiences And Anecdotes

Gaming headphones and music production – can the two really mesh together? People often wonder if the immersive audio experience delivered by gaming headsets can cross over into the realm of creating music. Here, we delve into real-world stories to see what users have to say.

Producer Testimonials

Music producers require headphones that catch every detail in a mix. From deep bass to crystal-clear highs, accurate sound representation is key. Let’s see what some producers say about using gaming headphones for music production:

  • “The bass is punchy” – a producer values how gaming headphones handle low-end frequencies.
  • “Surprisingly clear mids and highs” – a remark on the often underestimated fidelity in gaming headsets.
  • “Comfort for long sessions” – an essential factor for producers spending hours in the studio.

Gamer Insights On Audio Production

Gamers, known for their love of immersive and directional sound, also step into music production domains. Hear what they’ve found:

  1. Gaming headphones offer incredible 3D spatial awareness, beneficial for sound staging in music.
  2. Some users note the value for money with gaming headsets when starting out in audio production.
  3. Others point out that while good for casual use, when compared to studio headphones, gaming headphones can color the sound, which might not be ideal for critical listening.
Are Gaming Headphones Ideal for Music Production Mastery?


Credit: equipboard.com


Making The Choice

When diving into the realms of music and gaming, the importance of sound can’t be overstated. Selecting the right headphones becomes a pivotal decision. Whether you’re mixing a fresh track or immersed in an epic game, the quality of your headphones can make or break the experience. But can gaming headphones really meet the rigorous demands of music production? Let’s explore and make an informed choice.

Situational Recommendations

  • Music Production: Look for flat-frequency response for true sound.
  • Gaming: Enhanced bass and 3D soundstage matter.
  • Portability: Wireless options for on-the-go use.
  • Comfort: Extended wear demands plush ear cups.
  • Budget: High-end for pros, cost-effective for starters.

Can One Pair Serve Both Worlds?

Striking a balance is key. A pair of headphones that serves both music production and gaming is a treasure. Must-haves include high-quality sound, comfort, and durability. Yet, unique features specific to each use-case often lead to the inevitable need for compromise. Consider the following:

Feature Music Production Gaming
Sound Quality Critical for clarity Immersive for experience
Frequency Response Flat for accuracy Varied for impact
Comfort Essential for long sessions Same importance
Connectivity Wired for zero latency Wireless for freedom

A careful assessment of one’s primary needs versus occasional uses guides the optimal choice in this soundscape journey. While a singular pair may suffice for both, expectations must be managed to embrace the strengths and limitations of such a multifaceted tool.

Additional Gear To Enhance Sound

Exploring the realm of sound beyond standard gaming headsets leads us to an array of gear designed to uplift our auditory experiences. While gaming headphones might serve well for casual listening, diving into music production demands more refined tools.

Dac/amps: Boosting Audio Fidelity

True sound clarity often hides in the details. To uncover these details, Digital-to-Analog Converters (DACs) and Amplifiers (Amps) come into play.

  • DACs take digital audio and turn it into a line-level analog signal.
  • Amps then boost this signal to drive high-quality headphones.

Together, these tools deliver a listening experience that’s closer to the artist’s original intent. They transcend the limitations of gaming headphones by offering more nuanced and accurate sound reproduction.

Software Solutions For Audio Enhancement

Software has a significant role in fine-tuning audio. Various Equalization (EQ) tools and Audio Processing Plugins can:

  • Broaden the soundstage
  • Enhance certain frequencies
  • Reduce unwanted noise

These digital solutions can be powerful partners in achieving professional-grade sound. They allow producers to tweak and tailor their output, bringing every nuance to the forefront.


Looking To The Future

Looking to the Future stirs imagination about the evolving world of audio. Aural landscapes change fast, and so do the tools we use to create and experience them. Exciting developments are unfolding at the intersection of gaming and music production tech. Let’s discover these innovations and their impact on creators and consumers alike.

Emerging Trends In Audio Technology

The audio sphere consistently dazzles us with breakthroughs. Cutting-edge features once tethered to high-end studios now trickle into consumer products. Notably:

  • 3D Audio: Creates immersive sound environments.
  • AI-Driven Sound: Tailors audio experiences to individual listeners.
  • High-Resolution Audio: Offers studio-quality sound for detailed listening.

Such advances redefine expectations for listening devices, including gaming headphones.

Potential Crossovers In Gaming And Music Tech

The line between gaming headphones and music production tools continues to blur. Upcoming crossovers suggest:

Gaming Headphones Music Production
Better sound isolation Crisp, clean audio capture
Enhanced frequency response Richer, more nuanced playback
Customizable sound profiles Personalized mixing options

Gaming gear offering studio-like quality makes music production more accessible.

Frequently Asked Questions Of Are Gaming Headphones Good For Music Production


Can Gaming Headphones Be Used For Music Production?


Gaming headphones can be used for music production in a pinch. However, they may lack the flat frequency response that studio headphones provide. This can affect the accuracy of sound monitoring during the production process.


What Makes Gaming Headphones Different From Studio Headphones?


Gaming headphones often emphasize bass and surround sound for an immersive experience. Studio headphones, on the other hand, aim for a flat frequency response to ensure accurate sound reproduction for professional audio work.


Are There Benefits To Using Gaming Headphones For Producing Music?


Gaming headphones can offer a comfortable fit for long sessions and may include a built-in microphone. They can be beneficial for basic music production but may not provide the precision needed for professional quality sound.


Is It Cost-effective To Use Gaming Headphones For Music Production?


Using gaming headphones for music production is cost-effective for beginners. It eliminates the immediate need for specialized studio headphones. But as production skills improve, investment in studio-grade headphones is advisable.


Conclusion


Gaming headphones can indeed double up for music production, albeit with caveats. Their rich bass and crisp highs often align with production needs. Nonetheless, for fine-tuning and precision, studio headphones remain unmatched. It’s all about the right tool for the right job – a balance between casual listening pleasure and professional audio work.


Choose wisely based on your production priorities and budget constraints.

Categories
Archive

How to Use Reverb in FL Studio: Sound Mastery Tips

To use reverb in FL Studio, add a reverb effect to your track or send it to a dedicated reverb bus. Navigating the realms of digital audio production can be daunting, yet FL Studio streamlines the process with an intuitive interface.


Reverb, one of the essential tools in a producer’s arsenal, imbues your track with space and depth. FL Studio, a powerhouse in music production software, offers a variety of reverb plugins such as Fruity Reeverb and Fruity Convolver, which serve to simulate acoustic spaces.


Whether you’re going for a subtle room effect or an expansive hall, mastering the use of reverb is key to crafting a professional-sounding mix. This functionality is crucial for giving individual instruments a sense of place or creating a cohesive atmosphere throughout your arrangement. By manipulating parameters like decay time, wet/dry mix, and pre-delay, you can tailor the reverb to fit the mood of your music.


Introduction To Reverb In Fl Studio

Reverb is like magic in music production. It adds depth and life to any track. In FL Studio, reverb can take your sounds to new spaces. Understanding reverb’s role and the tools available is key to mastering this effect.

The Role Of Reverb In Music Production

Reverb makes music fuller and more immersive. It’s used to create the illusion of space. Think of reverb as the sound reflection. When you clap in a hall, the echo is reverb in action.

  • Depth: Reverb adds layers to your mix, putting sounds at different distances.
  • Atmosphere: Different reverb settings can mimic environments, from small rooms to vast arenas.
  • Emotion: It can intensify feelings in music, making the sound warm or cold.

Fl Studio’s Reverb Plugins

FL Studio offers a range of reverb plugins. Each one brings unique features to your audio production.

Plugin Name Description
Reverb 2 Flexible and popular, great for any sound.
Convolver Uses real space samples for authentic reverb.
Fruity Reeverb Simple to use, perfect for beginners.

Choose the right plugin to match your sound vision. Will it be the versatile Reverb 2 or the realistic Convolver? Perhaps start with the easy-to-use Fruity Reeverb.

How to Use Reverb in FL Studio: Sound Mastery Tips


Credit: www.masteringthemix.com


Getting Started With Reverb

Getting Started with Reverb is like adding magic to your tracks in FL Studio. It can turn flat sounds into rich, atmospheric landscapes. First steps in reverb make a huge difference. The right type of reverb can breathe life into your music. Let’s dive in and see how you can master reverb in FL Studio.

Selecting A Reverb Plugin

FL Studio comes with a variety of reverb plugins. Some popular ones include Fruity Reverb 2 and Convolver. Each plugin has unique features. Check out these steps:

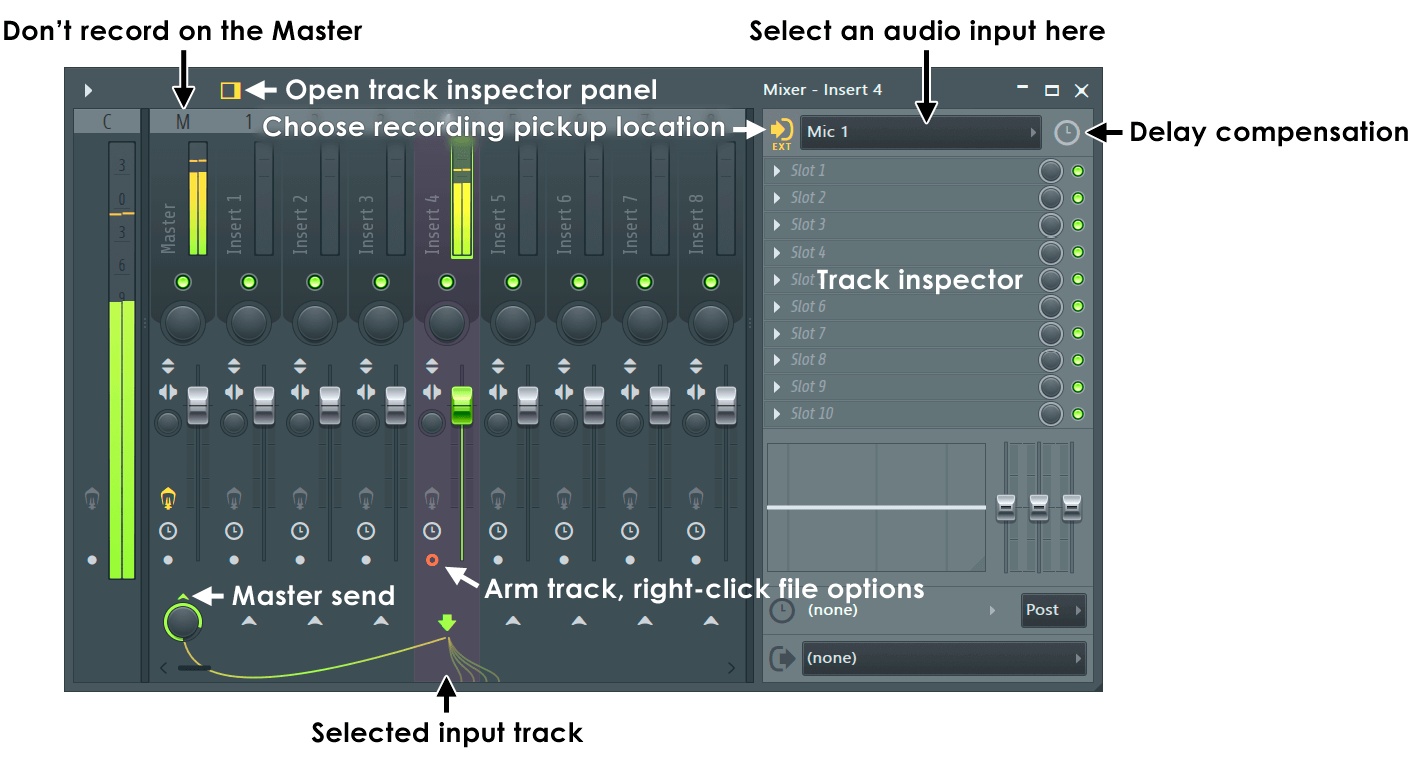
  • Open the Mixer: Press F9 or click on the mixer icon.
  • Choose a Slot: Click on an empty slot to see a list of effects.
  • Select a Reverb: Pick ‘Fruity Reverb 2’ for most needs or ‘Convolver’ for realistic spaces.

Basic Parameter Adjustments

With your reverb plugin loaded, tweak these core settings first:

Parameter Function
Wet/Dry Balances reverb with original sound.
Decay Sets how long reverb lasts.
Size Adjusts the space size of the reverb.
Low Cut Removes low-end rumble.
High Cut Softens high frequencies.

Start by setting the Wet/Dry to 50% for a clear effect. Reduce if the sound gets too washed out. Increase Decay for long trails, or decrease for tight spaces. Adjust Size to match the virtual space you want. Use Low Cut and High Cut to shape the reverb’s tone.

Crafting The Right Space

Let’s explore the magic of adding depth and atmosphere to your tracks in FL Studio. Crafting the Right Space with reverb can take your music from sounding flat to professional. It’s all about finding that sweet spot to make your mix stand out.

Understanding Room Sizes And Decay

Reverb can mimic a variety of spaces. Small rooms sound intimate while large halls give a grand echo. Here’s how to dial in the right size:

  • Room Size: Adjust to simulate different physical spaces.
  • Decay Time: Longer decay simulates bigger rooms.

Find a balance that complements the track. Don’t overdo it. Too much reverb can drown your mix.

Utilizing Pre-delay Effectively

Pre-delay sets the stage for your reverb. It’s the time before the reverb kicks in after the original sound. Use pre-delay to:

  1. Separate the sound from the reverb, adding clarity.
  2. Give a sense of distance from the sound source.

Match pre-delay with the tempo of your track for a natural feel. Adjust pre-delay with precision for desired spacing.

Remember: The goal is to create a space that feels right for the music. Experiment with room sizes and pre-delay. Listen closely to find that perfect reverb setting.

Creating Depth And Dimension

When you make music, sounds can seem flat. Adding reverb creates depth and dimension, making your tracks feel alive. In FL Studio, using reverb lifts your music from the screen to the stage. Let’s unlock the secrets of using reverb to make your soundscape breathtaking.

Layering Sounds With Reverb

Start by opening FL Studio and load a sound into the mixer. Layering sounds with reverb is like painting where you want echoes. Imagine each layer as a stroke of sound color.

  • Select a mixer track for your sound.
  • Click on the ‘Reverb’ effect slot.
  • Choose a reverb type that fits your sound.

Playing with the size and decay knobs changes how your sound travels. Big rooms make big echoes. Small rooms make quick, tight echoes. Find the right size to fit your musical picture.

Add layers of reverb to different sounds. Make some close and others far. This contrast gives a feeling of space.

Balancing Dry And Wet Signals

Balancing dry and wet signals is key in FL Studio. Dry is your original sound. Wet is your sound swimming in reverb. Like a seesaw, you need balance for fun.

Dry Signal Wet Signal
Your sound with no echoes. Your sound with reverb.

Use the ‘dry’ and ‘wet’ knobs to find the perfect mix. Start with the wet low, then slowly raise it. Stop when your sound feels full but not crowded.

Too much wet makes mud. Too much dry keeps your sound alone. Aim for a place in the middle that sounds just right.


Advanced Reverb Techniques

Welcome to the world of ‘Advanced Reverb Techniques’ in FL Studio. Dive deeper into your mixes.

Making Use Of Modulation

Modulation in reverb adds depth to your sound. To start:

  • Select a reverb plugin in FL Studio.
  • Look for modulation settings within the plugin.
  • Adjust the rate and depth to taste.

Experiment with slow rates for lush soundscapes. Use faster rates for a vibrant shimmer.

Be subtle. Modulation should enhance, not overwhelm.

Employing Side-chaining With Reverb

Side-chaining reverb ensures clarity and punch. Let’s apply it:

  1. Insert a reverb on your send track.
  2. Route the element you want through this send.
  3. Add a compressor after the reverb.
  4. Side-chain your lead element to this compressor.

Your lead cuts through, the reverb ducks. It makes the mix clean and dynamic.

Remember, side-chain settings depend on your track’s tempo and rhythm.

Common Reverb Mistakes To Avoid

As you dive into the world of music production with FL Studio, reverb becomes an essential tool. It adds depth and space to your sounds. Yet, misuse can ruin the perfect track. Let’s tackle the most common reverb mistakes so your mix sounds professional and crisp.

Muddiness And Overuse

Too much reverb muddies your mix. It’s tempting to add reverb to every track; resist that urge. Minimal reverb often does the trick, maintaining clarity. Imagine reverb as salt in cooking: a sprinkle enhances, but too much spoils the dish. A clear mix has each sound in its own space, free from an overpowering reverb haze.

Always start with less reverb, and increase gradually as needed. Test your track on different systems to ensure balance. Cut the lows on reverb sends to prevent muddiness. Remember, subtlety is key to an effective reverb application.

Neglecting Eq In Reverb

Reverb without EQ can cause clashes in your mix. Frequencies pile up, stepping on each other’s toes. Pay attention to the EQ of your reverb send. Cut low frequencies to avoid a cluttered bottom end. Carve out room for vocals and key instruments by cutting competing frequencies from the reverb. A well-EQ’d reverb complements your mix, helping each element shine.

Use an EQ plugin on your reverb send. Make precise cuts where necessary. This clears up space and ensures your reverb is felt, not just heard. Fine-tuning reverb with EQ helps create a polished and distinct sound.

Mixing With Reverb For Different Genres

Reverb is the secret spice of music production. It adds depth and space to your tracks. Every genre has its unique reverb needs. Let’s dive into how to tweak reverb in FL Studio for different music styles.

Tailoring Reverb For Edm

EDM tracks thrive on energetic vibes. To keep the energy high:

  • Use shorter reverb times for punchy drums.
  • Side-chain reverb to kick drums for a pumping effect.
  • Focus on pre-delay to separate synth stabs from the reverb tail.

Remember to adjust the wet/dry mix for balance.

Adjusting Reverb In Acoustic Recordings

Acoustic music values authenticity. The reverb should enhance but not overpower:

  • Choose natural-sounding spaces that match the recording environment.
  • Longer reverb tails can add depth to vocals and guitars.
  • Keep it subtle to retain an intimate feel.

When mixing, carve out low frequencies from the reverb to avoid muddiness.

How to Use Reverb in FL Studio: Sound Mastery Tips


Credit: www.image-line.com


Exploring Creative Reverb Usage

Reverb can breathe life into your FL Studio tracks. Don’t just stick to the basics. Explore and get playful with your soundscapes. Creative reverb applications can transform your mix. They can make sounds appear distant or as if playing in vast spaces. They can also add unique atmospheric layers. This section dives deep into unconventional ways to use reverb.

Non-traditional Reverb Applications

Inventive reverb techniques can enhance storytelling in your music. It’s not just for creating space; it’s an instrument on its own. Think of reverb as a painter thinks of color. It adds mood and texture.

  • Side-chain Reverb: Link reverb to a kick drum for a pulsating effect.
  • Drones: Stretch a reverb tail to create a seamless drone.
  • Glitchy Echoes: Short, choppy reverb can add a glitchy rhythm.

Experimenting With Reverse Reverb

Reverse reverb works magic. It builds anticipation and adds a mystical feel. To create it, follow these steps:

  1. Record a dry signal of your sound.
  2. Reverse the sound in FL Studio’s playlist.
  3. Add reverb to this reversed sound.
  4. Bounce the wet, reversed sound to an audio file.
  5. Reverse the audio file back, so the reverb comes before the dry sound.

Done right, reverse reverb can lead your listeners through a sonic wonderland. Combine it with other effects for even crazier sounds.

Optimizing Cpu Usage In Fl Studio

Optimizing CPU usage in FL Studio can be crucial for music producers. Large projects with multiple effects can strain your CPU. Reverb, a common effect, can be particularly demanding. Let’s explore how to manage CPU load while using reverb.

Reverb And Plugin Efficiency

Understanding how reverb affects CPU usage is important. Plugins vary in efficiency. Use native FL Studio reverb plugins for better optimization. Third-party plugins might use more CPU. Below are a few tips to keep your sessions running smoothly:

  • Choose lightweight plugins when possible. Some reverbs are more CPU-intensive.
  • Reduce quality settings inside the plugin during mixing, then increase for the final render.
  • Use send tracks for reverb. This way, multiple channels share one reverb unit.
  • Freeze or bounce tracks that don’t require further edits to audio clips. It saves CPU resources.

Workflow Tips For Smooth Production

A smooth workflow in FL Studio saves time and prevents CPU overload. Use these tips to enhance your production process:

  1. Organize your projects by routing similar instruments to the same mixer track.
  2. Render patterns to audio to decrease real-time processing.
  3. Disable unused plugins to recover CPU capacity.
  4. Adjust buffer length in audio settings for a balance between latency and CPU usage.

Frequently Asked Questions For How To Use Reverb In Fl Studio


What Is Reverb In Fl Studio?


Reverb, or reverberation, in FL Studio replicates the echo effect you hear when sound bounces off various surfaces. It’s an essential tool for adding depth and space to your mixes, effectively creating an atmosphere for individual tracks or the entire composition within the digital audio workstation.


How Do You Add Reverb To Tracks In Fl Studio?


To add reverb in FL Studio, load the mixer, select the channel for your track, and click on an empty slot in the ‘FX’ section. Choose Reverb from the list of effects. You can then tweak the settings like size, decay, and wet/dry levels to suit your desired sound.


Can You Customize Reverb Settings In Fl Studio?


Yes, the Reverb effect in FL Studio offers customizable settings such as room size, dampening, and decay time. By adjusting these parameters, you can shape the reverb to match the creative needs of your project, from subtle ambiance to expansive echoes.


What’s The Best Reverb Setting For Vocals In Fl Studio?


The best Reverb setting for vocals often includes a shorter decay time with moderate wetness to avoid muddiness. Aim for clarity and a sense of space that complements the vocalist’s timbre without overwhelming it. Tailoring to the mix’s context and preferred genre is crucial.


Conclusion


Mastering reverb in FL Studio can transform your mixes. By experimenting with various settings, you’ll achieve the perfect ambiance for your tracks. Remember: subtle tweaks can lead to major improvements. Keep practicing and your mixes will soon resonate with depth and dimension.


Keep mixing and refining — your signature sound awaits!

Categories
Archive

What Headphones Do Professional Producers Use?: Studio Secrets Revealed

Professional producers often use high-end headphones such as the Sennheiser HD 800 S, Beyerdynamic DT 1770 Pro, or the Sony MDR-7506 for their excellent sound quality and reliability. Audio-Technica’s ATH-M50x also garners widespread use for its balance between quality and affordability.

As an Amazon Associate I earn from qualifying purchases.


Selecting the right headphones is crucial for producers who depend on accurate sound reproduction to mix and master music. The market offers a wide range of options tailored to suit various production needs—from closed-back designs that isolate sound, preventing leakage into microphones, to open-back models that provide a more natural listening experience.


Producers consider factors such as frequency response, comfort during long sessions, durability, and the reputation of the brand. These tools become extensions of their auditory senses, ensuring that what they create in the studio translates well across different listening platforms. Choosing professional-grade headphones is an investment in their craft, enabling precise adjustments and a polished final product.

What Headphones Do Professional Producers Use?: Studio Secrets Revealed


Credit: www.productionmusiclive.com

The Quest For Perfect Sound

Music producers embark on a quest for perfect sound. Their journey is pivotal to creating chart-topping hits. Every element, from subtle sound layers to bold beats, needs precision. The gear they choose can elevate their work to a new level. However, the right headphones play an especially critical role.

Why Headphone Choice Matters To Producers

Headphone choice is crucial for producers. It impacts the accuracy of sound editing and mixing. Producers rely on headphones for various reasons:

  • Detailed Sound: They reveal nuanced audio details.
  • Isolation: They block external noise for focus.
  • Portability: They allow for mobility in different workspaces.
  • Frequency Range: They capture a wide spectrum of sounds.

Top producers seek headphones delivering clear, balanced audio. True-to-life sound reproduction is the goal. High-quality closed-back headphones are popular for their sound isolation abilities.

Sound Quality Versus Practicality

Producers weigh sound quality against practical needs. High-fidelity headphones offer premium sound but may be less suited for everyday use. Meanwhile, more rugged and versatile options cater to on-the-go scenarios.

The right choice balances the following elements:

Aspect Why It’s Important
Sound Quality For accurate sound reproduction and mixing decisions.
Comfort For lengthy studio sessions without fatigue.
Durability To withstand regular use and travel.
Portability For flexibility in different producing environments.

Studio headphones often come with a flat frequency response for accurate monitoring. They must offer clarity across bass, mids, and treble. Durability is key for users who move around.

Through The Producer’s Ears

Through the Producer’s Ears, it’s about precision and nuance. Masters of music production rely on headphones that deliver sound as it’s meant to be heard. They need to catch every beat, bassline, and intricate layer. The right headphones can elevate their craft to new heights. Let’s dive into what makes a pair of headphones worthy of the pros.

Acoustic Signature Preferences

Producers often have a unique acoustic signature they trust. This means the sound reproduction must be flawless. Here are key elements they look for:

  • Frequency Response: Flat for accurate monitoring.
  • Soundstage: Wide for precise positioning of instruments.
  • Detail Retrieval: High for uncovering hidden nuances.

Comfort And Durability

Sessions can last hours. Thus, comfort gets top priority. Here’s what professionals consider:

Feature Benefits
Padded Headband Reduces pressure on the head.
Memory Foam Ear Cups Contours to the ear for comfort.
Adjustable Fit Ensures a secure, tailored feel.
Lightweight Design Minimizes fatigue during long sessions.

Durability is also critical. Top-notch materials, replaceable parts, and robust construction define pro-level headphones. This ensures they withstand the rigors of daily use and remain reliable for years.

Industry Standard Headgear

Within the walls of professional studios, an unwritten rule echoes: the right headphones can make or break a mix. Known as industry-standard headgear, these headphones are more than just tools; they are the trusted confidants of producers who weave auditory magic. Quality, clarity, and durability stand as pillars for these pieces of technology. Producers across the globe rely on specific brands and models that have proven their worth through years of rigorous use and iconic performances.

Common Brands Among Professionals

In the realm of sound production, certain brands stand tall, trusted for their unmatched sound fidelity. Beyerdynamic, Audio-Technica, and Sennheiser lead the pack, favored for their precision. AKG and Sony also grace many studios, offering a blend of comfort and quality that professionals demand. With a wide range of options, these brands exemplify excellence in audio reproduction.

  • Beyerdynamic: Precision and durability
  • Audio-Technica: Clear sound, wide range
  • Sennheiser: Comfortable, high-quality audio
  • AKG: Trusted by industry veterans
  • Sony: Robust build, reliable performance

Iconic Models And Their Legacy

Among the ocean of headphones, a few models have achieved legendary status. The Sennheiser HD 800 S, known for its detailed soundstage, remains a heavyweight champion. The Audio-Technica ATH-M50x, praised for its versatile use, continues to be a staple in studios. Beyerdynamic’s DT series, particularly the DT770, DT880, and DT990, are revered for their robust construction and exceptional sound clarity. AKG’s K702 impresses with accurate sound representation, essential for mixing and mastering.

Model Brand Features
HD 800 S Sennheiser Wide soundstage, detailed audio
ATH-M50x Audio-Technica Comfortable, versatile use
DT770 Beyerdynamic Robust build, clear sound
DT880 Beyerdynamic Semi-open design, neutral sound
DT990 Beyerdynamic Open design, spacious sound
K702 AKG Accurate sound, open-back design

Each model carries a story, a signature feel, and a trusted place in the audio production lineage. The choice of headphones remains a deeply personal one for producers, yet these models continue to uphold their legacy in the ever-evolving music industry.

What Headphones Do Professional Producers Use?: Studio Secrets Revealed


Credit: m.facebook.com

Beyond Brand Loyalty

Professional producers often look past brand names. They seek tools that deliver top performance and sound. This pursuit goes beyond brand loyalty. They focus on crucial features that their work demands.

Features That Matter Most

  • Sound Quality: Pristine audio reproduction stands out.
  • Comfort: Hours in the studio need comfortable wear.
  • Durability: Builds must withstand daily use.
  • Frequency Response: Wide range brings out nuances.
  • Noise Isolation: A must for accurate monitoring.

Pros use headphones that excel in these areas. They choose based on their needs, not just the logo on the side.

When Innovation Trumps Tradition

At times, new tech offers better solutions than well-known brands. Open-back designs or planar magnetic drivers are such innovations. They improve sound stages and offer clearer sounds. Top producers adapt and embrace these advancements. They always hunt for the best tools for their craft.

Let’s examine these innovators:

Headphone Type Noteworthy Feature
XYZ Acoustics A1 Open-back Wide soundstage
AB Sound Masters Planar Magnetic Exceptional clarity

These headphones are examples where innovation leads to better production results. Brands are secondary to the quality and functionality they provide.

Balancing Budget And Brilliance

Every music producer knows the right headphones can make or break a mix. Professionals need headphones that deliver precision and clarity. But, not every producer can splurge on top-tier gear. A sweet spot exists between cost and quality.

High-end Headphones Versus Affordable Quality

High-end headphones promise unparalleled sound. They boast features like vast frequency ranges and superior noise isolation. Yet, affordable quality headphones also offer great sound. They can provide comfort and durability without breaking the bank.

High-End Headphones Affordable Quality Headphones
Wide frequency range Good frequency response
Advanced noise cancellation Decent sound isolation
Premium materials Durable build
Pricey Cost-effective

Making The Case For Investment Pieces

Investment pieces resonate with professionals for good reason. They offer stellar performance that can seriously impact work quality. Carefully selecting an investment headphone can mean fewer upgrades and better longevity. Not all investments must strain the wallet.

  • Top sound fidelity for precise mixing
  • Long-term reliability reduces replacement costs
  • Enhanced comfort for prolonged use

The Analog And Digital Divide

When it comes to music production, professionals often pick their gear with great care. A key choice is between analog and digital headphones. Both types have unique qualities that attract different users. Let’s explore why some producers opt for one over the other and what makes them stick to their preference.

Preference For Wired Over Wireless

Pro producers choose wired headphones for a reason. Wired connections provide steady sound quality. There’s no battery life to worry about. They ensure that a producer’s session remains uninterrupted. Here are some reasons why wired headphones are a staple in professional studios:

  • No latency: Instant sound transfer without delay keeps the music tight.
  • Consistent audio: Wired headphones deliver reliable sound across sessions.
  • High-quality components: These headphones focus on sound excellence over convenience.

The Ongoing Debate About Audio Fidelity

Audio fidelity is a hot topic among producers. While digital technology advances, some argue that analog headphones provide a warmth and richness to sound that digital can’t match. Here’s what has them divided:

Analog Headphones Digital Headphones
Natural sound with depth Clean and precise audio
No need for digital-to-analog conversion Convenient features like noise-cancellation
Often preferred for mixing and mastering Portable with wireless options

Ultimately, the choice lies with the producer’s personal taste and the requirements of their project. Both analog and digital headphones have their place in music production. The debate continues as technology progresses and personal preferences evolve.

Personalization And Custom Gear

Personalization and Custom Gear play a pivotal role in the world of professional music production. High-tier producers require not just standard equipment, but personalized tools tailored to their unique sound and preferences. This customization enables producers to monitor and mix tracks with a level of precision that suits exactly their auditory standards.

Tailor-made Headphones For A-list Producers

Top music professionals often opt for tailor-made headphones. These customized pieces offer unmatched comfort and sound. Each pair is crafted to the specific needs of the individual, from the ear cup design to the type of padding used. Such bespoke headphones provide an unparalleled listening experience and are integral to the producer’s toolkit.

  • Custom-molded earpieces for perfect fit
  • High-quality materials for durability
  • Unique sound profiles to suit user preference

Modifications That Impact Sound

Professional producers not only seek comfort but also desire modifications enhancing sound quality. It ranges from specialized drivers designed to deliver a flatter frequency response, to noise-canceling capabilities enabling focus in any environment.

Modification Benefit
Custom Drivers Enhanced precision & clarity
Noise Cancellation Isolation from external noise
Detachable Cables Convenience & repairability


Catching Up With The Future

Remember the time music was all about cassette tapes? Fast forward to today, and we witness a revolution in music technology. Professional producers now have high-tech headphones that are true game-changers. It’s exciting to dive into the world where creativity meets the cutting edge!

Technological Advancements In Headphone Design

Headphone technology keeps evolving, giving producers tools to make even better music. Here are some incredible advancements:

  • Active Noise Cancellation (ANC) – Block outside noise, focus on the mix.
  • High-Resolution Audio Support – Hear every detail in the music.
  • Wireless Technology – Cut the cord for good.
  • Comfort and Durability – Wear them for hours, keep them for years.

Famous brands known for quality, such as Sennheiser, Audio-Technica, and Beyerdynamic, lead the race. Professionals look for headphones that offer crystal-clear sound and ease of use. It’s all about staying ahead and embracing innovation.

What’s Next For Studio Headphones?

What can professionals expect in the near future? Better sound, more comfort, and smart features that might just blow your mind:

Trend Impact on Music Production
AI Integration Custom sound profiles based on listening habits.
Immersive Audio 3D audio for a live recording feel.
Biometric Monitoring Adjust music based on heart rate and mood.
Environmental Sound Control Tune into surroundings with a touch.

These innovations ensure headphones not only help in creating music but also in experiencing it in new ways. Producers can expect to plunge into soundscapes that were once a mere dream.

Frequently Asked Questions Of What Headphones Do Professional Producers Use

What Headphones Are Best For Music Production?

Most professional music producers opt for high-quality, over-ear studio headphones with a flat frequency response for accurate monitoring. Brands like Audio-Technica, Sennheiser, and Beyerdynamic are commonly used due to their sound fidelity and comfort for long sessions.

Do Producers Prefer Wired Or Wireless Headphones?

Producers typically prefer wired headphones to ensure the highest audio quality and to avoid potential latency or interference. A stable connection is crucial during the precise work of producing and mixing music.

Are Noise-cancelling Headphones Good For Studio Work?

Noise-cancelling headphones are beneficial for studio work as they minimize external noise, allowing producers to focus on the sound details. However, not all noise-cancelling headphones provide the flat frequency response needed for accurate sound reproduction.

How Much Should I Spend On Production Headphones?

Professional production headphones can range from $100 to over $500. It’s not necessary to spend a fortune, but investing in mid-range or higher-end headphones can lead to better sound accuracy and comfort during extended use.

Conclusion

Selecting the right headphones is essential for professional producers. It dictates the quality of their audio work. Renowned brands like Sennheiser, Beyerdynamic, and Sony frequently top their lists. Always consider personal preference and specific needs when investing. Your perfect pair could be their trusted choice.

Categories
Archive

How to Use Reverb and Delay on Vocals: Sound Mastery!

To use reverb and delay on vocals, adjust the effects to complement the song’s tempo and mood. Choose the type and amount that enhance the vocal performance without overshadowing it.


Vocal tracks can truly shine with the proper application of reverb and delay, which are essential tools in the audio production arsenal. These effects help vocals sit well in the mix, giving them depth and presence. Reverb creates a sense of space around the voice, simulating various acoustic environments, from tight club ambiances to vast concert halls.


Delay, on the other hand, repeats the vocal at varying intervals and volumes to add texture or musicality. The key lies in the balance—too little might not make an impact, while too much can muddy the mix. Crafting the perfect vocal sound involves tweaking the effects parameters such as decay time, feedback, and wet/dry mix until they complement both the singer’s voice and the track’s overall vibe.


The Magic Of Reverb And Delay

Imagine your voice soaring through a grand cathedral or echoing down a mountain valley. This isn’t just fantasy. It’s what happens when you mix the right amounts of reverb and delay with vocals. Both effects can turn flat recordings into rich, atmospheric experiences. Let’s dive into the world of reverb and delay and learn to use these tools to transform vocal tracks.

The Role Of Reverb In Vocal Recording

Reverb, short for reverberation, adds depth and space to your voice. It simulates how sound waves bounce off walls and objects in a physical space. This effect helps vocals to sit well in a mix, preventing them from sounding too dry or upfront. Here’s why it’s magical:

  • Creates an atmosphere: Depending on the setting, reverb can make vocals sound as if they’re in a small room, a hall, or an open space.
  • Adds warmth: Reverb can give vocals a fuller, richer sound, which feels more natural to the ear.
  • Enhances sustain: It gently extends the natural decay of the voice, which can be especially powerful for legato singing.

It’s vital to adjust the reverb settings to match the mood of the song and the desired effect. This ensures vocals don’t get lost or overwhelming.

Delay Effects: The Echo Enhancer

Delay is another essential tool for vocal tracks. It repeats sound after a short pause, much like an echo. Used wisely, it adds rhythm and can make simple melodies more complex. Consider these benefits:

  • Builds depth: It gives the illusion of multiple voices or a choir when set correctly.
  • Increases impact: Strategic delays can highlight certain lyrics or musical phrases.
  • Improves clarity: Instead of muddying the mix, well-set delay can actually make lyrics easier to understand.

Timing and feedback are important when setting delay effects. They help ensure the repeated sounds enhance the track without overpowering it.

Choosing The Right Reverb

Understanding how to use reverb on vocals transforms a good mix into a great one. It breathes life into your vocal tracks, embedding them seamlessly into the mix. The challenge lies in choosing the right reverb.

Types Of Reverb Effects

Reverb comes in various flavors, each bringing its own character to the vocals:

  • Room Reverb: Creates a sense of recording in a small space.
  • Hall Reverb: Suggests a larger, more expansive environment.
  • Plate Reverb: Mimics the sound of vibrating metal, providing a smooth decay.
  • Spring Reverb: Offers a distinctive twang, suited for vintage vibes.

Tailoring Reverb To Vocal Characteristics

Match the reverb type to the vocal’s unique properties:

  • Consider the vocal’s timbre. A brighter timbre may shine with plate reverb.
  • Note the song’s tempo. Faster tempos might need shorter, subtler reverb tails.
  • Reflect on the vocal’s dynamic range. More dynamic vocals can handle larger reverb spaces.
  • Do not forget the genre. It usually dictates the amount and type of reverb used.

Test different settings with these tips and find the perfect reverb for any vocal performance.

Delay: Timing Is Everything

Delay: Timing is Everything when it comes to enriching vocal tracks. The tight synchronization of delay effects can transform a good song into a timeless hit. Knowing how to manipulate delay times allows for a deeper connection with the listener and brings a professionalism to your mix that’s hard to achieve otherwise.

Setting Delay Times For Vocal Tracks

The magic lies in dialing in the perfect delay times to complement the vocal melody and rhythm. Begin with the song’s tempo to establish a baseline. A delay calculator or your digital audio workstation’s (DAW’s) tap tempo function can help. Here’s a simple method to set delay times:

  • Identify the BPM: Note the beats-per-minute of your track.
  • Choose a note duration: Do you want a quarter note, eighth note, or dotted eighth note delay?
  • Calculate the delay time: Use the formula (60,000 ms / BPM) divided by the note value.

For example, if your song is at 120 BPM and you want a quarter note delay:

(60,000 ms / 120 BPM) = 500 ms

This setting ensures your delayed vocals will sync flawlessly with your track.

Creative Use Of Feedback And Filtering

Manipulating feedback and filtering can turn a simple delay into an atmospheric soundscape. Experiment with these techniques:

Feedback Filtering
For subtle repeats, set feedback low. For more pronounced echoes, increase it carefully. A high-pass filter cuts low frequencies, making delays crisp and clear.
Too much feedback can clutter the mix. Strive for balance. Using a low-pass filter can soften and warm-up delays for depth.

Combine feedback with a dynamic filter sweep for an evolving vocal effect that keeps listeners captivated. This can be achieved by automating filter cutoff frequencies over time within your DAW.

Mixing With Reverb And Delay

Mixing with Reverb and Delay breathes life into vocals, painting them into the sonic space of your track. These effects, when used with precision, can transform a flat vocal take into a dynamic element of your mix. Discover how to dial in these popular effects for a professional sound.

Balancing Wet And Dry Signals

Finding the perfect blend of your original vocal (the ‘dry’ signal) and the effect-laden ‘wet’ signal ensures clarity and presence. Consider these points:

  • Start with the dry signal. Add reverb and delay incrementally.
  • Use sends. This keeps your original vocal track intact.
  • Adjust to taste. The genre dictates the blend. More reverb suits ambient music, less for pop or rock.

Listen in context. Soloing the vocal leads to overestimating the needed effects. Always adjust while playing the full mix.

Avoiding Muddy Mixes

A clear mix ensures each element stands out. To keep reverb and delay from overwhelming your mix:

  1. Cut low frequencies from your reverbs and delays. Use a high-pass filter.
  2. Time the delay. Sync it with your track’s tempo.
  3. Less is more. Heavy effects drown your vocals. Start small.

Carve space with EQ. Smart equalization prevents vocal frequencies from clashing with other instruments.

Advanced Techniques

Unleashing the advanced techniques for applying reverb and delay on vocals can dramatically enhance the depth and professionalism of your mixes. It’s time to explore some sophisticated methods that will take your vocal tracks to the next level.

Pre-delay For Clarity

Pre-delay is a powerful tool that separates the vocal from its reverberated tail. This delay allows the initial words to stand out before the reverb effect kicks in.

  • It creates a sense of space without muddying the vocal.
  • Setting pre-delay depends on the tempo and rhythm of your song.
  • A shorter pre-delay makes the space feel smaller, whereas a longer pre-delay gives a greater sense of a large room or hall.

Employing pre-delay enhances clarity and ensures vocals remain intelligible and impactful.

Using Side-chain Compression With Reverb

Side-chain compression, paired with reverb, helps maintain vocal presence while utilizing lush reverberation. The idea is simple:

  1. Apply reverb to the vocal track.
  2. Set up a compressor on the reverb effect.
  3. Link this compressor to the dry vocal signal.

This means when the vocal is singing, the reverb level ducks down, cleaning up the mix. Once the vocal stops, the reverb swells back up, adding a tail to the end of phrases. It’s dynamic use of space that keeps your lead vocals clear and present.

How to Use Reverb and Delay on Vocals: Sound Mastery!


Credit: reverb.com

Reverb And Delay In Different Genres

Transforming vocals with reverb and delay can be an art form that varies by genre. Each musical style has well-established traditions. Knowing these can help craft a sound that resonates with listeners. Here are insights suited to different genres.

Genre-specific Application Tips

Every genre has its unique flavor when applying effects to vocals. Let’s dive into the specifics:

  • Pop: Keep reverb light and delay crisp to maintain vocal clarity.
  • Rock: Moderate reverb with darker tones and slapback delay fit well.
  • Hip-hop: Sparse reverb and tight delay enhance rhythm.
  • Country: Slightly larger reverb spaces with warm delays match the storytelling aspect.
  • Electronic: Heavy and experimental reverb/delay usage shapes the futuristic sound.

Case Studies: Hit Songs Examined

Analyzing hit songs gives practical examples of these effects in action.

Genre Song Effect Details
Pop “Shallow” by Lady Gaga & Bradley Cooper Light hall reverb brings out the vocals with subtle tape delay for depth.
Rock “Sweet Child O’ Mine” by Guns N’ Roses Blend of room reverb and multi-tap delays creates an anthemic vocal.
Hip-hop “Sicko Mode” by Travis Scott Short plate reverb and ping-pong delay for a modern, edgy sound.
Country “Tennessee Whiskey” by Chris Stapleton Ample spring reverb with echo adds to the soulful vocals.
Electronic “Levitating” by Dua Lipa Large, modulated reverb with rhythmic delay creates a spacey vibe.

Select the right tools and tweak settings to suit the vocal style of your tracks.

Automation And Creative Effects

Diving into the world of vocal effects, mastery in reverb and delay automation becomes vital. These techniques are not just for polish—they bring vocals to life. Threading automation and creative effects throughout your mix can transform a flat performance into a dynamic soundscape. Let’s explore how to layer these tools and sculpt vocal tracks that pulse with energy and innovation.

Automating Parameters For Dynamic Mixes

Automation grants you the power to tailor effects over time. This leads to a mix that breathes with the music.

  • Start by mapping the reverb size or delay feedback to automation lanes.
  • Adjust these parameters to swell in choruses or pull back in verses. This creates movement.
  • Automate the wet/dry mix to control the effect intensity without changing the core settings.
  • Time your automation with lyrical pauses for a dramatic effect that demands attention.

Automation isn’t just about volume—it’s about shaping the emotional arc of the song.

Experimental Uses For Artistic Flair

Reverb and delay aren’t just tools for ambiance—they’re paintbrushes for your sonic palette.

  • Try reversing the reverb on a vocal line to create a haunting lead-in. This acts as an aural magnet.
  • Employ a ping-pong delay to bounce vocals from left to right, crafting a sense of space.
  • Use granular delay effects to deconstruct vocals, piecing them back together for a futuristic twist.
  • Dive into a pitch-shifted delay for a voice that morphs and melds with the harmony in unexpected ways.

By experimenting, you’ll find unique textures that can define your sound, making your vocals stand out.

How to Use Reverb and Delay on Vocals: Sound Mastery!


Credit: reverb.com

Common Pitfalls To Avoid

Common Pitfalls to Avoid when applying reverb and delay on vocals are crucial for any mix. From muddy soundscapes to overpowering or nonexistent effects, it’s key to sidestep common errors to achieve that professional sound.

Overuse And Underuse: Finding The Balance

Striking the right balance between too much and too little when it comes to reverb and delay ensures vocals sit perfectly in a mix. Here’s what you need to know:

  • Overuse drowns vocals, causing them to lose clarity and distinction.
  • Underuse makes vocals dry and detached from the rest of the track.
  • Listen in different environments to gauge the right amount.
  • Use automation to adjust levels during different song sections.

Phase Issues And Muddy Tails

Phase problems and muddy tails can quickly degrade your vocal tracks:

  1. Align the dry signal with the wet to avoid phase cancellation.
  2. Opt for high-quality plugins that minimize phase issues.
  3. Trim excess reverb tail for clarity.
  4. Apply high-pass filters to clean up low-end mud.

In-depth Tool Reviews

In-Depth Tool Reviews: Crafting the perfect vocal track often relies on the strategic use of effects like reverb and delay. But with the myriad of options out there, finding the right tools for the job can be daunting. This section provides meticulous reviews of popular plugins and hardware units that can add depth and space to your vocal tracks.

Popular Reverb And Delay Plugins

Digital magic transforms vocals into resonating masterpieces. Consider these top picks:

  • ValhallaDSP VintageVerb: Offers lush, retro-inspired spaces.
  • Waves H-Delay: Delivers analog warmth and versatile echo effects.
  • Soundtoys EchoBoy: Known for its depth and character. Great for vocals.

Hardware Units Worth The Investment

True connoisseurs value hardware units for their unique sound qualities. Some standout options:

Unit Name Key Feature Why It Stands Out
Lexicon PCM92 Rich, dimensional reverb Legendary sound, studio staple
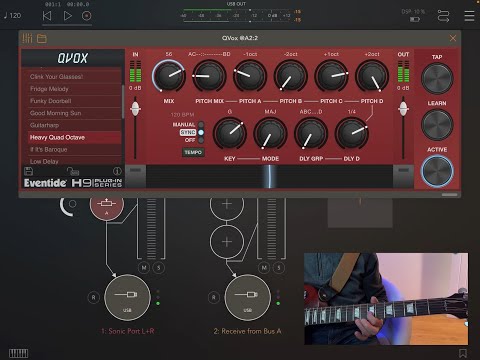
Eventide H9 Harmonizer Multi-effect processor Versatile, with mobile app control

Frequently Asked Questions Of How To Use Reverb And Delay On Vocals

What Is Reverb Used For On Vocals?

Reverb adds spatial effects to vocal tracks, simulating various environments. It creates a sense of space, making vocals resonate as if performed in a room, hall, or other physical space. This enhances the depth and presence of the voice in a mix.

How Can Delay Improve Vocal Recordings?

Delay is a time-based effect that repeats vocals back at varying intervals. When used subtly, it can thicken vocals and add richness to the mix. It’s also employed creatively to produce echoes that interact musically with the track.

What’s The Difference Between Reverb And Delay?

Reverb simulates acoustic spaces, blending with the original sound for a sense of environment. Delay, however, echoes the original signal at set intervals, adding rhythmic complexity. They’re both used to add depth but operate on different principles of sound reflection and repetition.

How To Set Reverb And Delay Levels For Vocals?

Setting levels involves balancing wet/dry mix to not overwhelm the vocals. Start with a low mix and gradually increase until achieving the desired effect. Use your ears and the context of the mix to guide the level adjustments for natural-sounding results.

Conclusion

Experimenting with reverb and delay can transform your vocal tracks into polished, professional recordings. Embrace these effects to add dimension and character to your mix. Keep practicing and fine-tuning to find the perfect sound that complements your music. Remember, subtlety is key to achieving a clear and impactful vocal presence.


Happy mixing!

Categories
Archive

Should You Put Reverb on a Kick? Unveil the Beat!

Using reverb on a kick drum is not typically standard practice. It can often muddy the mix rather than enhance it.


When mixing music, achieving the perfect drum sound is crucial for setting the foundation of a track. The kick drum, known for providing the heartbeat of a song, usually requires clarity and punch to cut through the mix effectively. Producers often debate the use of reverb on kick drums, as its application is quite genre-dependent and can vary greatly depending on the desired end result.


Traditional wisdom suggests a cautious approach to reverb on lows, especially kicks, as it can blur the distinctiveness necessary for a solid groove. Instead, focus is placed on EQ, compression, and possibly subtle enhancement effects to ensure the kick remains crisp and driving. Understanding the sonic landscape of your project will guide you in deciding whether to experiment with reverb on your kick drum or to keep it dry for that tight, impactful sound.


The Role Of Reverb In Music Production

Reverb is an essential effect in music production. It simulates the natural echoes we hear in different spaces. When applied well, reverb adds depth and life to sound, making it fuller and richer. It helps instruments sit well in the mix. In music, every instrument can benefit from reverb. Yet, we must use reverb with care, especially on elements like the kick drum.

Demystifying Reverb

Reverb is the persistence of sound after it is produced. It’s created when a sound reflects off surfaces and returns to the listener at different times. These reflections add a sense of space to an audio track. And while reverb can be magical, it’s crucial to understand when and how to use it.

  • Controls dry/wet balance: Too much reverb can make a sound muddy.
  • Adjust predelay for clarity: This avoids smearing the original sound.
  • Choose the right type: Hall, plate, and room reverbs offer different vibes.
  • Tailor to fit the space: The reverb should match the intended virtual environment.

Historical Use Of Reverb On Percussion

Epoch Usage Effect on Percussion
1950s-60s Plate reverb introduction Added warmth to snares and toms
1970s Experimental use of reverb Kicks had subtle reverb for lush soundscapes
1980s Gateway to electronic effects Reverb used on kicks in moderation for depth
Present Advanced digital technology Controlled use for defined space representation

Over time, reverb on percussion has evolved. It has moved from being just an effect to being a dynamic production tool. In the context of the kick drum, reverb must be subtle. It should support, not overwhelm. The kick drum is the backbone of rhythm. Thus, clarity and punch are crucial.

Consider the genre, tempo, and mix’s overall feel before adding reverb to a kick. A tight room reverb might work wonders in a jazz piece. Yet, it might cloud a fast-paced techno beat. Selecting the right reverb setting is as crucial as the decision to use it.

Kick Drums In The Mix

The kick drum forms the heartbeat of a track. It’s essential for rhythm. Skilled producers often debate: Should you add reverb to a kick? This powerful instrument can drive a song forward. But it also needs careful mixing to fit perfectly in your music. Let’s explore kicking up your mix with the right kick drum treatment.

Anatomy Of A Powerful Kick

A kick drum’s power lies in its sonic attributes. The right balance gives it that much-needed oomph. A kick drum consists of:

  • Low-end frequency – the ‘thump’ you feel
  • Mids – where the ‘body’ of the sound sits
  • Attack – the ‘click’ or initial hit

To craft a powerful kick, focus on clarity and punch. Adjust the equalization (EQ) and compression. Pay attention to the tuning too. This ensures it cuts through the mix without overpowering other elements.

Understanding Kick Drum Placement

Where does your kick drum sit in the mix? It’s not just about volume. It’s about its spatial relationship with other instruments. Consider the following:

  1. Is the kick drum supposed to be at the forefront or blend in?
  2. Will added reverb make it lose its impact, or enhance the vibe of the track?
  3. Does the genre of your track favor a dry and tight kick, or a more ambient one?

Effective placement ensures the kick drum complements the groove. Use pan settings and reverb sparingly. These fulfill the desired effect without muddying the mix. Test different levels. See what works best for your track!

Common Myths About Reverb And Kick Drums

Dispelling myths around reverb and kick drums is crucial in the world of music production.

Kick drums are the backbone of rhythm, yet there’s debate on the use of reverb with them.

Clearing Up Misconceptions

Several myths cloud the judgment of producers. Let’s debunk them.

  • Myth: Reverb muddies the kick. This isn’t always true.
  • Myth: A kick should always be dry. Not necessarily; effects can enhance it.
  • Myth: Reverb is only for melodic instruments. Kicks can benefit too.

Why Some Producers Avoid Reverb On Kicks

There are reasons behind the caution. Here they are:

  1. Reverb can cause unwanted frequencies.
  2. It might clash with other elements.
  3. Control of the low-end could be lost.
  4. A mix can lose its crispness and power.

These reasons make sense, but it’s about balance.

Tuning your reverb can give the kick a new dimension.


Reasons To Consider Reverb On Kicks

When producing music, the kick drum holds down the beat.

But can reverb take it to the next level? Let’s explore.

Enhancing Depth And Dimension

Adding reverb to a kick drum can immensely alter its presence.

  • Influence of subtle reverb: Creates a sense of space.
  • Larger-than-life kicks emerge with longer tails.
  • Gives the illusion of depth in your mix.

The kick can go from flat to full-bodied, just with reverb.

Creating A Unique Sound Signature

Distinctiveness in music is priceless.

Reverb on kicks can set a track apart.

  • Crafts individual character: No two reverbs sound alike.
  • Enables genre bending: A twist to traditional electronic genres.
  • Unexpected textures emerge, enhancing listener engagement.

Potential Pitfalls Of Reverb On Kick Drums

Having a kick drum cut through the mix is vital for the rhythm of any track. Yet, adding reverb to it can be a risky choice. It’s essential to understand the potential pitfalls before adjusting the reverb settings on your kick drum.

Muddying The Low End

Clarity in the lower frequencies is a pillar of well-balanced productions. Adding reverb to the kick drum can threaten this crispness. Reverb tails produce extra sounds within low frequencies that can blur the punch you desire from the kick drum. Carefully assess the tail length and the decay of your reverb to ensure your kick remains sharp and defined.

Clashing With Other Elements

The kick should stand alone in its space and time. The wrong reverb settings can lead to clashing with bass lines and other percussive elements. This conflict results in a crowded mix where the distinct rhythm of the kick is lost. Always test reverb settings in the context of the full mix to maintain a harmonious balance of all elements.

  • Avoid excessive reverb that extends into other instruments’ space.
  • Tweak the EQ settings after reverb application to alleviate frequency clashes.

Techniques For Applying Reverb To Kick Drums

Kick drums set the foundation for a song’s rhythm. Producers often debate the use of reverb on these percussive elements. Applying reverb to kicks can either add dimension or muddy the mix. Here are effective techniques to ensure your kick cuts through with the right amount of space.

Choosing The Right Reverb Type

Selecting an appropriate reverb type is crucial. Different reverbs create unique soundscapes. Room reverbs offer a natural feel. Plate reverbs give a classic, controlled sound. Hall reverbs evoke a larger space, which may overwhelm a kick drum. Consider the genre and the role of the kick within your track.

  • Room Reverb: For a subtle effect. Good for most genres.
  • Plate Reverb: When you need a vintage vibe.
  • Hall Reverb: Use sparingly, usually too big for kick drums.

Dialing In The Perfect Settings

Fine-tuning reverb settings ensures your kick remains punchy. Aim for a short decay time to avoid a washed-out kick. The pre-delay parameter helps in separating the kick from the reverb tail, keeping clarity intact.

Parameter Setting Guideline Tips
Decay Time Short Prevents muddiness, maintains punch.
Pre-Delay 20-30ms Creates a gap between kick and reverb tail.
Wet/Dry Mix Low Wet Percentage Keeps the reverb subtle.

Before adding reverb, ensure your kick drum is well EQ’ed. Use reverb as a touch-up, not a fix. Test your settings in the mix, not in isolation. Your ears are your best guide. Trust them and create a kicking foundation for your tracks.

Examples Of Reverb On Kick In Different Genres

Reverb on a kick drum can transform the feel of a track. It’s like adding a new dimension to the beat. It can make the sound seem bigger or give it character. But every music genre treats reverb on the kick differently. Below we explore some examples. We examine how reverb shapes the kick in Electronic Dance Music (EDM) and Rock and Acoustic Genres.

Electronic Dance Music (edm)

In EDM, beats are critical. They get people moving. A touch of reverb on the kick can make a huge difference. It can create a sense of space in a club track. Let’s see how it works in different EDM sub-genres:

  • House: A slight reverb tail adds depth without muddying the mix.
  • Trance: Here, reverb can be more pronounced, enhancing the atmospheric feel of the music.
  • Dubstep: The kick might have a tight reverb to keep the rhythm clean but spatial.

Rock And Acoustic Genres

In rock or acoustic music, the kick drum often stays more natural. Still, producers use reverb to blend the kick with other instruments. Here are the ways reverb finds its place in these genres:

Genre Reverb on Kick
Classic Rock Subtle reverb for a live feel
Indie Varies, but often it’s minimal to keep it authentic
Folk Minimal to none, retaining a raw sound

A kick with the right reverb can tie a track together. In contrast, too much can ruin it. Knowing how much to use comes with understanding the genre and practice.


Hybrid Approaches And Creative Uses

Exploring the sonic landscape of music production involves innovative techniques. Hybrid approaches and creative uses of reverb on kick drums can elevate a track from ordinary to extraordinary. Let’s delve into methods to blend reverberation artfully with the depth of kick drums.

Sidechain Reverb Techniques

Sidechain reverb adds rhythm and space to the mix without overpowering the kick. This technique allows the reverb to pump and breathe with the music.

  • Insert a reverb send on the kick track.
  • Apply a compressor post-reverb.
  • Sidechain the compressor to the kick.
  • Adjust the threshold for desired pumping effect.

The kick strikes firmly while the tail of the reverb ducks and weaves, crafting a dynamic soundscape.

Layering Samples With And Without Reverb

Combining dry and wet kick samples can yield interesting textures. Layering is all about balance and finding the perfect blend.

  1. Select a dry kick sample that provides the core punch.
  2. Choose a reverb-treated sample for character.
  3. Adjust the levels to ensure the dry kick dominates.
  4. EQ the reverb-laden sample to avoid low-frequency mud.

This hybrid approach results in a kick that cuts through the mix with added depth and dimension.

Mixing Tips For Balanced Drum Sounds

Achieving a balanced drum sound is key to a polished mix. Drums often provide the backbone of a track. The kick drum, especially, sets the groove. Yet, it can get lost or overpower other elements without the right mixing techniques. Let’s explore how EQ, compression, and reverb can enhance your kick drum.

Eq And Compression Strategies

Using EQ and compression is crucial for sculpting a kick drum that sits well in a mix. Start with EQ: cut the frequencies that clash with the bass and boost the sweet spots for punch and clarity.

  • Cut below 30Hz to remove rumble.
  • Find the thump around 50-60Hz and boost slightly.
  • Carve out the mud between 300-600Hz.
  • Add a gentle boost around 2-4kHz for attack.

Compression helps control dynamics and sustain. Choose a slow attack to maintain punch. Adjust the release to sync with your song’s tempo. Use them well to make the kick potent and consistent.

Integrating Reverb With The Overall Mix

Reverb on a kick drum is a delicate affair. Too much can blur the beat, too little might sound unnatural. Aim for subtlety. The goal is to give the kick a sense of space, not to drown it in effects.

  1. Select a short decay time to avoid washiness.
  2. Use a low-pass filter on the reverb to maintain punchiness.
  3. Blend it in gently until it just fills the gaps.

Link the reverb type to your track’s style. A room reverb might work well for rock. Electronica may benefit from a plate or digital reverb. Always check in context of the full mix. It’s about complementing, not competing.

Should You Put Reverb on a Kick? Unveil the Beat!


Credit: m.facebook.com

When To Break The Rules

In the realm of music production, innovation often comes from defying norms. The decision to apply reverb to a kick drum is one such norm that stirs debate. While traditional guidance might deter producers from this route, there are moments for rule-breaking that could lead to extraordinary outcomes.

Innovative Producers And Their Approaches

The music industry brims with stories of producers who achieved fame by shattering conventions. Here are a few daring approaches:

  • Layered Textures: Some producers add subtle reverb to kicks to create a sense of space or layering.
  • Genre-blending: In electronic genres like house or trance, a touch of reverb can enhance the kick, giving it a unique character.
  • Controlling Dynamics: Reverb tails can be side-chained to other elements, bringing life to the rhythm section without muddying the mix.

Trusting Your Ears Over Conventional Wisdom

Conventional wisdom provides a starting point, but trusting your ears is crucial. Experimenting with reverb on a kick drum can unveil new possibilities:

  1. Begin with minimal reverb and gradually increase it while listening to the impact on the mix.
  2. Pay attention to the kick’s clarity, punchiness, and its blend with the bassline.
  3. If the kick enhances the track’s vibe, you’ve made the right choice.

Listen intently, make bold decisions, and you may just craft the next breakthrough sound.

Frequently Asked Questions On Should You Put Reverb On A Kick

Is Reverb On Kick Drums Common In Mixing?

Applying reverb to kick drums is not a common practice. Producers often aim for a tight and punchy sound that reverb can muddy. However, in genres like ambient or certain electronic music styles, a touch of reverb might sometimes be used creatively.

What Impact Does Reverb Have On A Kick Drum?

Reverb can add space and depth to kick drums, but it often leads to a less defined low end. Heavy reverb may cause the kick to lose impact and clarity in a mix, potentially clashing with baseline frequencies and other elements.

How Can I Apply Reverb To A Kick Without Losing Punch?

To maintain punch while applying reverb to a kick, use a short decay time and a high-pass filter on the reverb effect. This retains the transient attack of the kick while providing a sense of space. Always blend carefully and adjust to taste.

Can Reverb On Kick Drums Work In Live Settings?

In live settings, natural acoustics provide reverb, often making additional reverb on kick drums unnecessary. In some venues, a slight reverb can enhance the sound, but it should be used sparingly to avoid muddiness.

Conclusion

Determining the use of reverb on a kick drum is a nuanced decision. Each mix presents unique demands, making no one-size-fits-all answer. Your musical genre, desired soundstage, and the distinctive qualities of the kick itself play pivotal roles. Trust your ears, and don’t shy away from experimentation to achieve that perfect beat.

Categories
Archive

How Do You Add Reverb in Garageband: Sonic Bliss!

To add reverb in GarageBand, select your track, then click on the “Smart Controls” button, and adjust the “Reverb” slider. Open the “Track” header from Smart Controls to fine-tune using different reverb presets.


GarageBand, Apple’s fully equipped music creation studio, offers a suite of audio effects including reverb, which can add depth and atmosphere to your recordings. Mastering the application of reverb can transform your tracks from flat recordings to professional-sounding mixes. Whether you’re working on a podcast, song, or any audio project, understanding how to manipulate reverb within GarageBand can be essential for achieving the desired sound ambience.


The interface provides both ease-of-use for beginners and advanced options for seasoned users. Dive into the world of audio editing and give your creations the richness they deserve by skillfully applying reverb in your next GarageBand project.


Introduction To Reverb And Garageband

An enthralling sonic adventure begins with understanding reverb and how Garageband can transform your audio.

Essence Of Reverb In Music

Reverb, or reverberation, is the echo you hear when sound bounces off surfaces.

  • Creates depth in music.
  • Mimics various environments, from halls to caves.
  • Can make sounds warmer and more lively.

Garageband: A Gateway To Audio Editing

Garageband is Apple’s user-friendly platform for music creation.

  1. Simple tools for beginners and pros.
  2. Edit and polish tracks with ease.
  3. Includes a range of effects, including reverb.
How Do You Add Reverb in Garageband: Sonic Bliss!


Credit: forum.audiob.us


Setting Up Your Project

Setting up your project in GarageBand is the first step towards crafting that perfect sound. Whether you’re looking to add depth, space, or just a touch of echo, reverb is a vital effect. It can transform your audio, giving it the richness and atmosphere it deserves. This section will guide you through starting a new track and importing audio files before you add that magical reverb. With these simple steps, you’ll be on your way to creating an audio masterpiece.

Starting A New Track

The journey to great audio begins with a new track in GarageBand. Once you open the application, start fresh by:

  • Selecting ‘File’ from the top menu.
  • Choosing ‘New’ to create a new project.
  • Deciding on the type of track (Software Instrument, Audio, or Drummer).
  • Clicking the ‘Create’ button to establish your new workspace.

Importing Audio Files

With your new track ready, it’s time to bring in your audio files. Here’s how to import them smoothly:

  • Click ‘File’ in the top menu and look for ‘Import’.
  • Navigate to and select the audio file you wish to use.
  • Drag and drop the file right into your project timeline.
  • Ensure the file is correctly positioned on the track for editing.

You’re now all set with a track that’s primed for the addition of reverb, adding layers and dimensions to bring your audio to life.

Understanding Reverb Types

Understanding reverb types is key to creating rich, atmospheric soundscapes in GarageBand. Reverb imitates how sound bounces off surfaces, giving depth and space to your tracks. Mastering reverb use enhances your music, making it more immersive.

Room And Hall Reverbs

Room and hall reverbs replicate the echo you hear in small rooms or large halls. The size of the virtual space affects how the reverb sounds:

  • Small rooms create intimate, tight reverbs.
  • Large halls produce expansive, grandiose echoes.

GarageBand provides presets for both, allowing for tailored sound design based on the setting you aim to simulate.

Plate And Spring Varieties

Plate and spring reverbs offer distinct sonic textures:

  • Plate reverbs emulate the sound of vibrations through a large metal plate. They provide a smooth, classic reverb effect favored in studio recordings.
  • Spring reverbs mimic the sound moving through a metal spring, resulting in a characteristic “twang” often heard in guitar amps.

With varying settings for decay and warmth, GarageBand lets you explore these flavors to enrich your music’s character.

How Do You Add Reverb in Garageband: Sonic Bliss!


Credit: www.waves.com


Applying Reverb: Step By Step

Reverb adds depth to your audio tracks in GarageBand. Follow these steps to apply it.

Navigating The Effects Menu

To start, open your project. Then, select the track you want to edit.

  1. Click on the track to activate it.
  2. Find the ‘Smart Controls’ button. It looks like a knob and is at the top left.
  3. Press this button to open the Effects menu.

In the opened pane, click on the ‘Reverb’ dropdown.

Adjusting Reverb Parameters

Inside the Reverb menu, you will see different options. Let’s adjust them.

  • Reverb Type: Choose from various reverb styles.
  • Wet/Dry: Balance the reverb against the original sound.
  • Pre-Delay: Set the time before the reverb kicks in.
  • Decay Time: Control how long the reverb lingers.
  • Size: Adjust the size of the virtual room.
Paramater What It Does
Reverb Type Changes the reverb style
Size Alters the room size effect
Decay Time Sets how long the reverb lasts
Pre-Delay Adjusts the start of reverb effect
Wet/Dry Balances reverb with original sound

Slide each control to achieve your desired sound.

Play your track to hear the reverb in action.

Adjust until you’re pleased with the sound.

Reverb can turn a flat recording into a professional-sounding piece. With these steps, mastering it in GarageBand is easy.

Tweaking Reverb Settings

Perfecting the art of reverb in Garageband enhances your audio tracks’ depth and vibe. Reverb isn’t just an effect; it’s an essential tool that brings your music to life. Learn to master reverb settings, and you transform sounds from flat to three-dimensional. Let’s dive into how you can adjust reverb for the ideal sound landscape in Garageband.

Wet/dry Mix For Balance

Finding the right balance between original sound and reverb is key. The wet/dry mix allows you to blend the unprocessed ‘dry’ sound with the ‘wet’ reverb-laden sound.

  • A higher wet value means more reverb.
  • A higher dry value keeps more original sound.

Use the slider in Garageband’s reverb settings to find the perfect mix that suits your track. Toggle it left or right and listen as the sound ambiance shifts.

Tailoring Decay Time For Space

Decay time shapes the reverb’s length and, by extension, the perceived size of the space being emulated. Longer decay times can make it sound like you’re in a grand cathedral, while shorter decays evoke a cozy studio vibe.

Adjust decay time in Garageband by finding the reverb settings and tweaking the decay parameter. Here’s a simple guide:

Space Size Decay Time Setting
Small Room Short Decay
Medium Hall Medium Decay
Large Cathedral Long Decay

By tailoring the reverb decay time, the dimension and depth of your music can resonate perfectly with your artistic intention.

Advanced Techniques

Exploring advanced techniques takes your Garageband projects to new levels of professionalism. Tweaking reverb settings allows for a richer, more detailed sound. Let’s delve into ways to add dynamic soundscapes and create auditory depth in your tracks.

Using Automation For Dynamic Effects

Automation in Garageband lets you change effects over time. This feature can make your reverb grow or shrink with your music. It adds real-time excitement to your tracks. Here’s how to make it happen:

  1. Open the track editor and select the automation button.
  2. Choose the smart controls related to reverb.
  3. Draw automation points to sculpt the reverb intensity.

Tip: Use gentler slopes for subtle changes and steep lines for dramatic effect changes.

Creating Depth With Pre-delay

Pre-Delay can set your sound in a virtual space. Larger rooms have longer delays, and smaller rooms have shorter ones. To adjust Pre-Delay in Garageband:

  • Click on your track’s reverb settings.
  • Find the Pre-Delay slider and move it.
  • Remember, small adjustments can have a big impact.
Room Size Pre-Delay (milliseconds)
Small Room 0-30 ms
Medium Room 30-50 ms
Large Room 50-100 ms

Playing with the right Pre-Delay setting can place your instrument at the perfect spot in the mix.

Mixing With Other Effects

Mixing effects in Garageband can transform your music. Reverb is a tool that can add depth and space to your tracks. Yet, combining it with other effects like EQ and compression takes your mixing to the next level. Let’s explore how you can integrate these powerful tools to elevate your music production.

Combining Eq And Reverb

Adding reverb to your track is more than just flipping a switch. It interacts with other elements. This is where Equalization (EQ) becomes vital. EQ helps shape the sound before it enters the reverb effect. Here are steps to combine EQ and reverb effectively:

  • Select the track you want to apply reverb to.
  • Open the EQ settings and adjust to taste.
  • Apply reverb from the effects menu.
  • Use EQ to fine-tune how the reverb responds to different frequencies.

By cutting the lows before applying reverb, you avoid a muddy mix. Boosting the highs can give a sense of airiness.

The Role Of Compression

Compression is another tool that can work wonders with reverb. It helps maintain consistency in volume and brings out the reverb effect without overpowering. To use compression and reverb together:

  1. Add a compressor to your track.
  2. Adjust the threshold and ratio to control dynamics.
  3. Insert the reverb effect after the compressor.

Compression should be subtle. The goal is to keep the track’s dynamics while making reverb noticeable. This combination reduces the chance of reverb washing out your track.

Remember to listen carefully as you mix. Use these effects to support your track, not overwhelm it. Happy mixing!

Saving And Sharing Your Work

Saving and Sharing Your Work takes your music from personal to global. With reverb added in GarageBand, your tracks now have depth and atmosphere. Let’s secure your masterpiece and share it with fans and collaborators.

Exporting The Final Mix

Once your reverb settings are perfect, you’ll want to export your song. Here’s a simple process:

  1. Click on ‘Share’ at the top menu bar.
  2. Select ‘Export Song to Disk’.
  3. Choose your preferred audio format.
  4. Name your file and set the location.
  5. Click ‘Export’ to save the mix.

Your track saves as a neat audio file, ready for the world to hear.

Sharing Tracks And Sessions

Sharing your music or collaborating on projects is exciting. Try these steps to share:

  • Use ‘Project Sharing’ for GarageBand sessions.
  • Send individual tracks or entire sessions via email.
  • Blend ideas effortlessly by sharing through iCloud Drive.

With these methods, friends and producers access your reverb-laden tracks easily.

Common Pitfalls And How To Avoid Them

When adding reverb in GarageBand, it’s easy to slip into common mistakes that can muddy your mix or overpower your music. Knowing these pitfalls and how to dodge them ensures your tracks sound professional and polished. Let’s explore how to steer clear of the most common mixing missteps.

Avoiding Muddy Mixes

Clarity is key in your music production. Reverb adds depth, but too much can blur your sound. Follow these tips:

  • Use reverb sparingly. Apply just enough to enhance, not overwhelm.
  • Adjust the wet/dry ratio. More ‘dry’ keeps your original sound clear.
  • Equalize. Cut low frequencies on your reverb to reduce muddiness.
  • Less is more. Start minimal and gradually increase if needed.

Reverb On Drums: Dos And Don’ts

Drums can make or break a track. The right reverb treatment is crucial:

  1. Do: Tailor reverb to each drum piece. Snare and toms can handle more.
  2. Don’t: Drown high-hats and cymbals in reverb; it can create a washy sound.
  3. Do: Use pre-delay to distance the reverb effect from the initial drum hit.
  4. Don’t: Forget to listen to the drums with the full mix to check balance.

Keep these guidelines in mind, and you’ll avoid common reverb pitfalls in GarageBand.

Inspirational Ideas For Using Reverb

Spice up your tracks with the magic of reverb in Garageband. Reverb can transform the mood and feel of your music. Let’s explore some creative ways to use reverb.

Emulating Iconic Soundscapes

Picture the sun setting over a vast desert. That’s the power of a good reverb. You can recreate classic vibes from famous songs with just a few tweaks.

  • 60’s Surf Rock: Use a spring reverb for that splashy texture.
  • Stadium Rock: A large hall reverb will make your guitar solos soar.
  • Gothic Cathedrals: A cathedral reverb gives your vocals an ethereal quality.

Experimenting With Creative Reverb

Don’t just stick to the basics. Mixing different reverb types can lead to new sonic territories. Consider the following ideas:

  1. Reverse Reverb: Adds a ghostly trail to your notes.
  2. Gated Reverb: Gives drums that punchy, 80’s vibe.
  3. Soft Reverb: Creates a gentle atmosphere for intimate vocals.


How Do You Add Reverb in Garageband: Sonic Bliss!


Credit: www.waves.com


Frequently Asked Questions Of How Do You Add Reverb In Garageband


How To Apply Reverb To Tracks In Garageband?


Applying reverb in Garageband is straightforward. First, select the track where you want to add reverb. Then, click on the “Smart Controls” button, which looks like a knob. In the Smart Controls area, click on the “Reverb” slider and adjust it to your desired level.


Can You Customize Reverb Settings In Garageband?


Yes, you can customize reverb settings in Garageband. After selecting your track and opening the Smart Controls, click on the “Edit” button in the Reverb section. This allows you to choose different reverb types and adjust various parameters such as decay, predelay, size, and dry/wet mix for a personalized sound.


What Is The Best Reverb Setting For Vocals?


The best reverb setting for vocals depends on the desired effect. For a natural sound, a small amount of ‘Room’ or ‘Plate’ reverb with a short decay time is typically recommended. Adjust the wetness to blend smoothly with the dry vocal to maintain clarity while adding space.


Is There A Way To Preview Reverb Effects?


Yes, you can preview reverb effects in Garageband. As you adjust the reverb settings, you can immediately hear the changes through the playback feature. Simply play the track while modifying the reverb to hear the effect in real-time, ensuring you get the exact sound you’re looking for.


Conclusion


Embracing the power of reverb in Garageband can transform your music production. With the simple steps outlined, you’ll add depth and ambiance effortlessly. Remember, experimenting is key to finding that perfect sound. Dive in, tweak settings, and let your creativity soar with Garageband’s reverb effects!

Categories
Archive

Best Way to Learn the Musical Keyboard: Master Keys Unlocked

The best way to learn the musical keyboard is through consistent practice and structured lessons. Start with fundamental concepts before advancing to complex pieces.


Embarking on a journey to master the musical keyboard opens up a world of creativity and expression. With the right approach, it’s an incredibly rewarding skill that enhances coordination, memory, and emotional well-being. Beginners should prioritize finding a quality keyboard that suits their needs and consider seeking guidance from a skilled instructor or established online course.


It’s essential to set realistic goals, allowing for gradual progress through scales, chords, and eventually, full songs. Incorporating regular practice into one’s routine ensures steady growth in skill level. Embrace the digital age by using apps and online resources to supplement learning, but remember nothing replaces the value of hands-on experience. Stay motivated by celebrating small accomplishments and remaining patient with the learning curve; before long, the language of music will feel like second nature on the keyboard.


The Allure Of The Keyboard

The musical keyboard captivates with its sleek design and rows of gleaming keys. From the graceful melodies it produces to the potent chords and rich sounds it commands, the keyboard stands as a symbol of musical possibility. It offers a world of harmony at your fingertips and reflects versatility across genres. Both easy to start and challenging to master, the keyboard appeals to all who wish to express themselves through music.

Harmony And Versatility

One of the keyboard’s most fascinating features is its harmonious capabilities. With the simple press of multiple keys, musicians can weave complex chords and layered textures into their performances. This adaptability is unrivaled. The keyboard can emulate an entire orchestra or serve as a solo instrument. Here are some key points of its versatility:

  • Chords and Melodies: Play both simultaneously.
  • Multiple Voices: Mimic a range of instruments.
  • Range: Expansive note spectrum caters to most musical pieces.

From Classics To Pop

The keyboard’s appeal spans across genres. It’s as comfortable with Bach’s fugues as it is with today’s chart-toppers. This versatility makes it a favorite for learners. Here’s how the keyboard fits into different genres:

Genre Role of Keyboard
Classical Central to composition and performance
Jazz Essential for rhythm and improvisation
Pop Drives melody and often underpins the beat
Rock Adds layers and depth to the music

Each genre showcases the keyboard’s flexibility in creating distinct sounds. Mastery of the keyboard enables musicians to traverse musical landscapes with ease. In learning the keyboard, one unlocks the potential to play not just one style, but the canon of global music.


First Touch: Choosing Your Instrument

Embarking on your musical journey starts with a vital step: selecting the right keyboard. This decision shapes your learning experience. Your choice depends on various factors. Understand the differences between acoustic and digital keyboards. Consider your skill level. Each factor plays a key role in your musical growth.

Acoustic Vs. Digital Keyboards

Choosing between an acoustic and a digital keyboard is crucial. Acoustic keyboards have real hammers and strings. They produce rich sounds. Their keys offer weighted resistance, similar to a traditional piano. They require regular tuning and maintenance. Acoustic keyboards are ideal for a classic feel and sound.

Digital keyboards, on the other hand, are versatile. They need no tuning. Some offer various sounds and features. You can use headphones for silent practice. They are perfect for beginners and musicians who value portability and variety.

Keyboards For Different Skill Levels

Skill Level Recommended Keyboard Type Key Features
Beginner Lightweight Digital Keyboard 61 keys, built-in lessons, affordable
Intermediate Advanced Digital Keyboard 76 keys, touch sensitivity, recording functions
Expert Full-size Digital Piano or Acoustic Keyboard 88 keys, fully weighted keys, high-quality sound

Beginners often benefit from a smaller, lightweight keyboard. Look for one with built-in lessons. Intermediate players might prefer a keyboard with more keys and touch sensitivity. Experts should aim for a full-size keyboard. Look for features such as fully weighted keys and superior sound quality. These enhance playing experience and performance.

Building The Foundation: Music Theory Basics

Welcome to the essential first steps in your musical journey: Building the Foundation: Music Theory Basics. Before you can master the keyboard, understanding the core elements of music is crucial. Let’s dive into the worlds of sheet music, chords, and scales to set the stage for your success.

Reading Sheet Music

Decoding sheet music is like learning a new language. It’s the gateway to playing the keyboard with confidence. Start with these basics:

  • Note Names: Learn every note on the staff.
  • Rhythms: Understand whole, half, quarter, and eighth notes.
  • Time Signatures: Identify beats per measure.
  • Clefs: Explore treble and bass clefs for keyboard range.

Use flashcards for quick learning. Practice daily for best results.

Understanding Chords And Scales

Chords and scales form the backbone of music on the keyboard. They create melodies and harmonies. Follow these steps to grasp them:

  1. Scale Knowledge: Memorize major and minor scales.
  2. Chord Structures: Know your triads, sevenths, and extended chords.
  3. Finger Placement: Practice correct fingering for fluency.
  4. Progressions: Learn common chord progressions.

Scales train your ear and fingers. Chords let you play songs. Together, they unlock the music world.

Scale Type Main Chords Uses
Major Major, Minor, Diminished Pop, Classical
Minor Minor, Augmented Jazz, Blues

Remember, regular practice and patience are key to learning the keyboard. Start with these music theory basics to build a strong foundation. Enjoy every note along the way!

Practice Makes Perfect: Setting A Routine

Practice Makes Perfect: Setting a Routine can be the game changer in mastering the musical keyboard. Consistent practice not only polishes your skills but anchors your fingers to dance confidently across the keys. Let’s unlock the effective ways to set a routine that aligns with progression and satisfaction in your musical journey.

Daily Practice Tips

  • Carve Out Practice Time: Choose a time slot each day solely for practice and stick to it. Consistency trumps quantity.
  • Warm-Up Exercises: Begin with scales and arpeggios to warm up your fingers, encouraging dexterity and speed.
  • Focus On New Pieces: Allocate time to learn new songs, enhancing your repertoire and keeping the practice exciting.
  • Repeat Challenging Sections: Isolate tough parts of a piece and drill them. Repetition fosters improvement.
  • Record Your Practice: Listen to recordings of your sessions to spot areas for improvement.
  • Stay Motivated: Celebrate small wins to maintain motivation. Set mini-goals for every session.

Long-term Advancement Goals

Goal Strategy Expected Outcome
Technique Mastery Regularly practice hand positioning and finger movements. Smooth, precise keyboard play.
Music Theory Knowledge Dedicate time weekly to understand scales, chords, and progressions. Comprehend the language of music.
Ear Training Engage in listening exercises and try to play by ear. Enhanced ability to recognize notes and chords.
Repertoire Expansion Learn and perfect new pieces regularly. A broad and varied selection of music to play.
Performance Skills Practice in front of friends or record yourself. Confidence and poise during public performances.

Technique Development: Getting The Fingers To Dance

Mastery of the musical keyboard requires more than just love for music. It demands technique development. Think of your fingers as dancers. They need to move with grace and precision across the keyboard. To achieve that, it’s important to focus on two key aspects: Proper Finger Placement and Exercises for Agility and Strength. Striking the right keys effortlessly is an art. With the right exercises, your fingers will soon dance to the rhythm of your tunes, creating beautiful music.

Proper Finger Placement

Correct finger positioning forms the foundation for effortless playing. It minimizes strain and maximizes efficiency. Remember to keep your fingers curved, using the tips to press the keys. Thumbs should remain resting, ready to play. Imagine holding a small ball in each hand. This natural position helps avoid fatigue. A consistent finger-to-key matchup ensures quick learning and better coordination. Each finger has a home base:

  • Thumb on C and F,
  • Index on D and G,
  • Middle on E and A,
  • Ring on F and B,
  • Pinky on G and C.

Start slowly, focusing on remaining relaxed. Accuracy matters more than speed in the beginning.

Exercises For Agility And Strength

Like any dancer, fingers too require strength and agility to perform well. Simple exercises practiced daily can work wonders. Start with five-finger drills. Then, progress to scales and arpeggios. Use a metronome to pace yourself. Increase speed as you gain confidence.

Exercise Description Benefit
Five-Finger Drills Play consecutive notes with each finger. Basic dexterity
Scales Ascend and descend the keyboard in key signatures. Finger independence
Arpeggios Play broken chords, one note at a time. Stretching fingers

An effective practice routine includes a variety of exercises. Aim to challenge yourself, but also include familiar pieces. This ensures you build technique while also enjoying your practice sessions.

Learning Through Songs: Applying Knowledge

Mastering the musical keyboard unfolds thrillingly through songs.

Songs bridge the gap between theory and real-world playing.

They transform notes into musical stories.

Simple Tunes For Beginners

Start with melodies that make you smile and feel confident.

  • “Twinkle Twinkle Little Star” – grasp simple note patterns.
  • “Happy Birthday” – practice timing and rhythm.
  • “Jingle Bells” – fun tune, good for hand coordination.

These songs are stepping stones to a broader musical world.

Challenging Pieces To Aspire To

Once you conquer the basics, challenge yourself.

Gain skill and confidence by playing more complex pieces.

  1. “Fur Elise” by Beethoven – develop finger independence.
  2. “Canon in D” by Pachelbel – learn chord progressions.
  3. “Clair de Lune” by Debussy – enhance expressiveness.

These classics provide robust exercises for dedicated learners.

The Creative Expedition: Composition And Improvisation

The Creative Expedition: Composition and Improvisation unlocks a world where musical keyboards are not just instruments. They become tools for crafting stories, expressing emotions, and exploring new sonic landscapes. Think of the keyboard as a paintbrush and music as your canvas. With every stroke—or key press—create vibrant melodies that resonate with your inner artistry.

Songwriting Basics

Embarking on songwriting begins with mastering the basics. Understand concepts like melody, harmony, and rhythm. These are like building blocks for creating your own music. Focus on:

  • Chord progressions: Series of chords that create a harmonic backdrop.
  • Melody construction: Crafting tunes that listeners can hum along to.
  • Lyrical content: Conveying a story or message through words.

Experiment with different combinations of these elements. Use your keyboard to play around with ideas. When a particular sound pleases your ear, note it down.

Jamming With Others

Improvising with fellow musicians can greatly enhance your playing skills. It teaches you adaptability and sharpens your listening abilities. Here’s how to get started:

  1. Find peers: Connect with other keyboard players or instrumentalists.
  2. Select a key: Decide on a key that suits everyone for a smooth session.
  3. Create a groove: Start with a simple rhythm and build it up collaboratively.

Let each session be a fun, engaging learning experience. It’s all about playing, listening, and reacting in the moment. Embrace the spontaneous nature of jamming!

Best Way to Learn the Musical Keyboard: Master Keys Unlocked


Credit: www.bestbuy.com

Digital Enhancement: Utilizing Music Software

The journey of learning the musical keyboard enters an exciting phase with digital tools. Today, music software brings a revolution in how we practice, record, and refine our keyboard playing. They are user-friendly. They speed up learning. They are fun too. Such software allows keyboard learners to unlock a world of possibilities right from their personal computers or tablets.

Recording And Editing

The magic of music software starts with its recording and editing abilities. As you dive into learning the keyboard, seeing your progress is thrilling. Recording yourself provides invaluable feedback. Editing lets you make magic.

  • Hit record, play, and listen back.
  • Edit your music; cut, copy, paste, or tweak.
  • Experiment with multiple takes.

Virtual Instruments And Effects

Broaden your musical palette with virtual instruments and effects. These tools offer various sounds. You can mix and match styles. You can be a one-person band. The options are endless.

Transform your keyboard into an orchestra:

  1. Select from pianos, strings, or synths.
  2. Apply reverb, delay, or distortion.
  3. Create unique soundscapes.

Joining The Community: Engaging With Other Musicians

Mastery in musical keyboard does not happen in isolation. Connecting with other musicians can leap your skills forward. Whether online or in person, communities provide valuable support, inspiration, and knowledge. Let’s dive into how you can join these vibrant musical arenas.

Online Forums And Groups

Online forums and groups are treasure troves of information. They are places to share your progress, ask questions, and get feedback. You can learn from the experiences of others. Here are top ways to engage:

  • Sign up for popular music forums like Reddit’s r/Piano or Piano World.
  • Join Facebook groups like Adult Beginners Piano or Digital Piano.
  • Check out dedicated keyboard communities on platforms like Discord.
  • Participate in discussions, challenges, and share your own tips.

Local Workshops And Meetups

Face-to-face interaction has its own charm. Local workshops and meetups provide a hands-on approach to learning. Here’s how you can immerse yourself in the local scene:

  1. Look for flyers at music stores or community boards announcing workshops.
  2. Use apps like Meetup to find local music events.
  3. Attend local concerts and festivals, often keyboardists run workshops.
  4. Connect with music schools; they might host special events for all skill levels.

Remember, every interaction is a step toward becoming a better musician. So start engaging and watch your keyboard skills flourish!

Performing And Sharing: Taking Your Music Public

Playing the musical keyboard is a joy, but sharing your music adds excitement. Sharing tunes with an audience is a giant step. This journey involves stages, platforms, and learning to face a crowd. From charming a local café with melodies to lighting up the internet with your sounds, sharing amplifies your skills.

Overcoming Stage Fright

Stage fright is natural, but you can move past it. Practice is key. The more you play, the more confidence grows. Start small; perhaps a supportive family gathering. Deep breaths help calm nerves before stepping up. Smiling relaxes you and the crowd. Visualizing success boosts morale. Believe in your music, and others will too.

Platforms For Sharing Your Music

Different platforms are ready for your tunes. Live venues, like coffee houses and open mics, welcome musicians. Create a YouTube channel for a global audience. SoundCloud and Bandcamp are great for audio tracks. Social media, like Instagram and Facebook, bring your circles closer to your music. Share clips, get feedback, and grow.

  • Live Venues: Intimate gatherings, open mic nights, street performances.
  • Online Video: YouTube and Vimeo let you post videos, live streams, and more.
  • Audio Platforms: Share on SoundCloud, Spotify, and Bandcamp.
  • Social Media: Use Instagram, TikTok, and Facebook to post clips and engage fans.

Evolution Of A Keyboardist: Continuous Learning

The journey into mastering the musical keyboard is an endless quest for growth and excellence. As keyboardists evolve, they discover that the learning never stops. Continuous improvement and experimentation become the hallmarks of their musical journey. The development of musicianship is about embracing new challenges to continually hone one’s craft.

Advanced Skills And Techniques

Mastery of the keyboard goes beyond basic chords and melodies. To excel, a player must delve into advanced skills and techniques. This includes leveraging dynamic articulation, understanding the nuances of touch sensitivity, and mastering the use of modulation wheels and pedals.

  • Perfecting finger positioning and speed
  • Learning complex chord progressions
  • Exploring improvisation and spontaneous creation
  • Integrating syncopation and rhythmic patterns

Keyboards with diverse functionalities, such as synthesizers or workstations, further expand the skill set. Musicians must familiarize themselves with programming sounds or creating layers for intricate compositions.

Exploring Different Genres And Styles

Music spans a variety of genres and styles, each presenting unique challenges and techniques. Keyboardists often find that tapping into different musical traditions can enrich their repertoire and expressiveness.

Genre Styles to Master
Classical Sight-reading, historical interpretations
Jazz Swing rhythms, complex harmonies
Rock Riffing, use of synthesizer leads
Pop Catchy hooks, melodic phrasing

Diving into different styles fosters adaptability and inventive playing. Methods such as listening to genre-specific masters or practicing signature pieces embody the style’s essence.

Gear And Accessories: Enhancing Your Play

Delving into the world of musical keyboards opens up a symphony of possibilities. Choosing the right gear and accessories is a vital step. A well-equipped setup can transform your practice sessions and accelerate your learning curve. It’s not just about having a keyboard; it’s about creating an environment that inspires and supports your musical journey.

Must-have Accessories

To get the most out of your keyboard, here is a list of must-have accessories:

  • Adjustable Stand: Keeps your keyboard stable and at the right height.
  • Quality Bench: Ensures comfortable seating for long sessions.
  • Headphones: Allows for private practice without distractions.
  • Sustain Pedal: Adds expressiveness to your playing.
  • Sheet Music Stand: Holds your music sheets or digital device.

Investment In Quality

Your choice in keyboard gear should reflect an investment in quality. High-quality accessories not only last longer but also provide the best support for your growth as a musician.

Benefits of Quality Keyboard Gear
Accessory Benefit
Sturdy Keyboard Stand Prevents slipping and wobbling during play.
Comfortable Bench Reduces back strain and improves posture.
Noise-cancelling Headphones Enhances sound clarity and detail.
Well-built Sustain Pedal Mimics the feel and response of an actual piano pedal.

Best Way to Learn the Musical Keyboard: Master Keys Unlocked


Credit: m.youtube.com

Frequently Asked Questions On Best Way To Learn The Musical Keyboard

What Are The Basics Of Learning Keyboard?

Understanding keyboard basics involves learning the notes, chords, scales, and hand positioning. Start with familiarizing yourself with the piano layout: white keys for natural notes and black keys for sharps and flats. Practice with simple scales, and advance to chords.

Can Keyboard Self-learning Be Effective?

Yes, self-learning can be effective with disciplined practice and proper resources. Utilize online tutorials, apps, and practice exercises to improve your skills. However, feedback from a teacher or experienced player can greatly enhance progress and technique.

How Much Practice For Keyboard Proficiency?

Consistent daily practice is key for proficiency. Aim for at least 30 minutes to an hour each day. Focus on technique, sight-reading, and repertoire. Over time, practice sessions can be adjusted to refine more complex pieces and techniques.

What Are The Best Keyboard Learning Tools?

The best tools include instructional books, online courses, and piano learning apps. Seek tools that offer interactive feedback and comprehensive lessons covering theory, technique, and practice pieces. Look for ones that suit your learning style.

Conclusion

Embarking on the keyboard learning journey enriches both mind and soul. Select the method that resonates with you and practice diligently. Remember, consistency trumps intensity, making daily practice vital. Embrace the joy of music-making, and watch your skills flourish. Let the rhythm guide you to mastery.

Categories
Archive

How to Put Music Notes on Keyboard: Master Keys!

To put music notes on a keyboard, you can use key combinations with the “Alt” key or Character Map. Music enthusiasts and professionals often seek ways to incorporate musical notation into digital documents.


Crafting content related to music can enhance reader engagement, particularly when discussing musical composition, music theory, or digital notation. Including music notes using a computer keyboard has become an essential skill for composers, educators, and students in the digital age.


Whether it’s for creating lesson plans, sharing melodies on social media, or typing up scores, knowing the right shortcuts and tools are crucial. This guide provides a brief yet comprehensive approach to achieving just that, ensuring your documents resonate with the sound of music – figuratively speaking. With these tips, your keyboard transforms into an extension of your musical toolkit, enabling easy sharing of the universal language of music.


Unlocking The Musical Map: Keyboard Layout

Imagine a map that leads to treasure. The keyboard is just that for music. Keys represent different notes. When they come together, music is born. This guide will teach how to find notes and understand their places on the keyboard.

Identifying Octaves

An octave is a set of eight white keys. It starts from C and ends at the next C. Think of them as steps on a ladder. Each rung takes you higher or lower in pitch. Spotting these octaves is key to mastering the keyboard layout.

  • Count every white key from one C to the next
  • There are seven other notes between each C
  • Each C begins a new octave

Locating Middle C

Middle C is the home base of the piano. It’s the note right in the middle. Finding it is like finding the center of town. From there, you can go anywhere.

To find Middle C:

  1. Look at the keyboard
  2. Find the set of two black keys near the middle
  3. Middle C is the white key just to the left of this pair

Remember, once you find Middle C, you have found your way. Every note has a place, and knowing where they are is your musical map.

Music Theory Essentials: Reading Sheet Music

Before you can interpret music notes on a keyboard, you need to understand sheet music basics. Reading sheet music is like a map guiding your fingers to the right keys. Let’s dive into the fundamentals that will transform your musical journey.

Clefs And Staffs

Music is written on a set of five horizontal lines called a staff. The clef, at the beginning of the staff, tells you the pitch of the notes. Two main clefs are used:

  • Treble Clef: Represents higher notes, where melodies often are.
  • Bass Clef: Indicates lower notes, used for the left hand in keyboard music.

Note Values

Now let’s understand note values. Each note symbol shows how long to play it. Here’s a quick guide:

Note Type Symbol Beat Value
Whole Note O Four beats
Half Note U Two beats
Quarter Note ♩ One beat
Eighth Note ♪ Half beat

Note values form the rhythm of the music. Learn these, and you’ll master the timing of any song.


The Fundamentals: Piano Notes And Keys

Welcome to the world of piano music! Before you can start creating melodies, it’s crucial to understand the fundamentals of piano notes and keys. Knowing the layout of the keyboard is the first step in mastering the instrument.

White Keys And Natural Notes

The white keys on a piano are the foundation of music theory. Each white key corresponds to a natural note. These notes are A, B, C, D, E, F, and G. After the note G, the sequence repeats starting again at A. Here’s a quick guide to the white keys:

  • C: Located directly to the left of a group of two black keys.
  • D: Between the first and second black keys in a group of two.
  • E: To the right of the second black key in a group of two.
  • F: To the left of a group of three black keys.
  • G, A, B: Found between the black keys in a group of three.

By identifying these keys, you can start to learn simple songs and build up your piano skills.

Black Keys And Accidentals

Black keys represent sharps and flats, known as accidentals. These keys add depth and dimension to music. Sharps raise the pitch by a half step, while flats lower it by the same amount. Each black key serves as a sharp for the white key immediately to its left and as a flat for the white key to its right.

Black Key Position As a Sharp (#) As a Flat (♭)
Left of 3 black keys group C# Db
Middle of 3 black keys group D# Eb
Right of 3 black keys group F# Gb
Left of 2 black keys group G# Ab
Right of 2 black keys group A# Bb

Understanding these keys and their relationship with natural notes is a major milestone for any budding pianist. Practice frequently and soon, reading and playing from these keys will become second nature!


Enhancing Muscle Memory: Practical Exercises

Mastering the placement of music notes on a keyboard requires practice. It boosts precision as your fingers learn their way. This guide offers exercises to strengthen muscle memory. You will play with ease and confidence.

Scales And Arpeggios

Regularly practicing scales and arpeggios is a time-tested method for training your fingers. These exercises get your hands familiar with common patterns found in music. They also improve your agility and hand coordination.

  • Start with C Major: The simplest key with no sharps or flats.
  • Go Slow: Focus on precision over speed for effective learning.
  • Use a Metronome: It keeps your tempo steady and your rhythm sharp.
Keys Fingers
C, D, E, F, G, A, B, C 1, 2, 3, 1, 2, 3, 4, 5

Repeat the scale until you can do it without looking. Then, try different keys, adding sharps and flats. This will prepare your hands for more complex pieces.

Simple Melodies

Playing melodies trains your fingers to move between notes smoothly. Start with songs you know well to keep lessons fun.

  1. Choose Easy Songs: “Twinkle Twinkle Little Star” is great for beginners.
  2. Break It Down: Practice each section before playing the full melody.
  3. Repeat Often: Repetition is key for building strong muscle memory.

Remember to use the correct finger for each note. This will make it easier to tackle challenging songs in the future. Your hands will learn to hit the right keys without hesitation.

Visual Aids: Using Stickers And Guides

Turning your keyboard into a musical guide can be fun and educational. Visual aids like stickers and guides help you master the notes quickly.

Choosing The Right Stickers

Begin by selecting stickers that are durable and easy to read. Look for:

  • Clear lettering that won’t smudge or fade.
  • Adhesive quality that won’t damage your keyboard.
  • Variety in colors and shapes for fast recognition.

Placement Tips For Effectiveness

Effective sticker placement transforms your keyboard into a learning tool.

  1. Identify each key’s note.
  2. Place stickers on the lower half of the keys.
  3. Ensure the stickers are straight.
  4. Use different colors for sharps and flats.
Note Sticker Color Position
C Red Left of 2 black keys
E Blue Right of 2 black keys
G Green Left of 3 black keys
How to Put Music Notes on Keyboard: Master Keys!


Credit: www.wikihow.com


Technological Tools: Apps And Software

Embracing the rhythm of music composition on a keyboard can be a breeze with the right technological tools. Various apps and software have made it possible for music enthusiasts and professionals to jot down their musical ideas. These tools offer a virtual platform for learning and creating music notes with ease. Whether you are a beginner or an expert, technology brings music notation right at your fingertips.

Interactive Learning Apps

Interactive learning apps transform music theory into a fun activity. They guide you through the process of reading and writing music notes. Here are some top choices for interactive learning applications:

  • Music Tutor – Enhances sight-reading skills.
  • Yousician – Offers real-time feedback for improvement.
  • Simply Piano – Teaches piano through fun games.

Each app features progress tracking and a variety of songs to practice. Kids find these apps easy to use and entertaining.

Virtual Keyboard Software

Virtual keyboard software sets a stage for composing and arranging music. These programs mimic a physical keyboard, allowing you to visualize notes and chords. Examples of virtual keyboard software include:

  1. Synthesia – It works like a game and teaches piano through falling notes.
  2. MuseScore – Known for comprehensive music notation.
  3. GarageBand – Turns your device into a collection of virtual instruments.

These tools often feature extensive sound libraries and recording capabilities. They bring creativity right to your screen.

Mastering Key Positions: Ergonomics And Posture

Mastering the art of placing music notes on a keyboard starts with the basics. Understanding ergonomics and posture is essential. Good habits lead to better performance. Let’s delve into the key strategies to ensure accurate note placement, starting with correct finger positioning.

Correct Finger Placement

Fingers are the tools to hit the right notes. Know where each finger goes. Here’s a simple guide:

  • Thumb (1) on middle C
  • Index (2) on D
  • Middle (3) on E
  • Ring (4) on F
  • Pinky (5) on G

Repeat for each octave. Practice until finger placement becomes second nature.

Maintaining Good Posture

Posture affects how you play. Always sit up straight. Elbows should make a natural angle. Wrists remain relaxed, not bent. Here is a checklist for posture:

Body Part Posture
Back Straight and supported
Shoulders Relaxed, not raised
Arms Slightly curved, comfortable
Wrists Neutral, avoiding strain
Feet Flat on the floor

Keep these points in mind to prevent discomfort. Thus, you ensure longevity in playing and smooth music creation.

How to Put Music Notes on Keyboard: Master Keys!


Credit: m.youtube.com


From Practice To Performance: Building Confidence

From Practice to Performance: Building Confidence is a journey every musician travels. It takes dedication to move from playing notes to delivering memorable performances. Let’s explore strategies to build that onstage assurance.

Progressing From Simple To Complex Pieces

To build confidence, start with simple melodies. Mastery of these tunes lays a solid foundation. As skills improve, gradually tackle more challenging compositions. Break complex pieces into sections, and practice each meticulously. Celebrate small victories; they lead to major achievements.

  • Start with basic songs to gain familiarity with musical notation.
  • Practice daily, focusing on trouble spots to iron out kinks.
  • Increase complexity slowly to avoid overwhelming yourself.

Managing Performance Anxiety

Performance jitters are common. Begin by playing in front of a mirror, then to family or friends. Record practice sessions; hearing your progress boosts morale. Deep breathing exercises help ease tension before taking the stage. Remember, a mistake is not failure, but a chance to improve.

  1. Perform to small, supportive audiences to build comfort.
  2. Analyze recordings of your playing to identify strengths and areas for improvement.
  3. Practice mindful breathing to calm nerves before performances.

Frequently Asked Questions On How To Put Music Notes On Keyboard


Can You Type Musical Notes On A Keyboard?


Yes, you can type musical notes on a computer keyboard by using special characters shortcuts or by accessing a dedicated musical font. For example, in Windows, you can typically use the Alt key plus a number code to generate musical notes.


What Are The Keyboard Shortcuts For Music Notes?


For many systems, the Alt key followed by a numeric code can create music notes. For example, Alt+13 for ♪ (eighth note) and Alt+14 for ♫ (beamed eighth notes) on the numeric keypad. However, shortcuts may vary based on your operating system and software.


How To Insert Musical Notes In Word Documents?


In Microsoft Word, you can insert musical notes by going to Insert > Symbol, then choosing a music note from the special characters list. Alternatively, you could use the Character Map on Windows or similar tools on other operating systems.


Are There Font Options For Musical Notes Keyboard Typing?


Yes, there are several fonts available that are specifically designed to display musical notes when typing, such as Maestro, Opus, and MusiSync. You can install these fonts and then select them in your word processing or design software to type music notes.


Conclusion


Mastering the art of incorporating music notes into your keyboard typing can enhance your musical expressions digitally. As you embark on this learning journey, remember practice makes perfect. Keep the tips shared in mind, and soon, crafting musical messages will be second nature.


Embrace the rhythm of learning, and let your creativity flow!

Categories
Archive

Why Do Studio Musicians Wear Headphones? Unveiling Audio Secrets

Studio musicians wear headphones to hear a click track or pre-recorded music clearly. They eliminate ambient noise, enabling better concentration and synchronization with the music.


Headphones are an essential tool for studio musicians. They create a controlled auditory environment, crucial for precision and timing during recording sessions. By using headphones, artists can isolate specific parts of the music, stay in time with a click track, or monitor real-time recording.


This practice ensures that each musician can focus on their own performance while still blending seamlessly with the entire ensemble. High-quality headphone usage directly contributes to the polished sound of professionally recorded music. The use of this equipment also allows for adjustments without disrupting the overall studio workflow, making it easier for producers and sound engineers to achieve the perfect take.


The Studio Environment

The studio environment shapes the sound of music. Musicians and engineers work in a space designed for optimal sound quality. This special environment is why studio musicians always wear headphones.

Sound Isolation In Recording

Sound isolation is crucial during recording sessions. Why? It keeps sounds from bleeding into each other’s microphones. Headphones allow musicians to hear the mix without external noise.

  • Cleaner tracks: Each instrument records without noise from others.
  • Better focus: Musicians can concentrate on their own part.
  • Control: Engineers adjust what each musician hears for best performance.

The Role Of Acoustics

In studios, acoustics matter a lot. Good acoustics means better sound. Headphones are part of this. They give a true representation of what’s being recorded. This is how they help:

  1. True sound: Musicians hear the actual sound with no room effects.
  2. Feedback prevention: No sound from loudspeakers means no microphone feedback.
  3. Communication: Talkback systems in headphones let artists talk to each other and the control room easily.

Fundamentals Of Studio Recording

The world of studio recording is fascinating, filled with intricacies that transform raw talent into polished tracks. At the heart of this process is a seemingly simple practice: studio musicians wearing headphones. Beyond keeping the beat or backing track close, headphones are a critical tool for precision and coordination during the recording process. Let’s dive into the fundamentals that make this standard practice an essential element of studio recording.

Microphone Techniques

In studio recording, achieving the perfect sound relies on the art of microphone placement. Headphones serve as an invaluable guide for musicians to hear themselves and adjust their performance to capture the ideal take. Here are key techniques:

  • Minimizing bleed: Headphones allow for clear monitoring, helping to prevent sound from other instruments leaking into the mic.
  • Understanding mic patterns: Musicians can hear how different microphone pickup patterns affect their sound.
  • Distance and angle: Wearing headphones, artists can fine-tune their distance and angle relative to the microphone for the best audio quality.

Signal Path Essentials

The signal path is the journey audio takes from source to recording device. Every component in this path plays a crucial role. Key elements include:

  1. Direct input: Ensures the cleanest sound from the instrument to the console.
  2. Preamps: Boost the raw signal without adding unwanted noise.
  3. Converters: Change analog waves into digital format with clarity.
  4. DAW: Digital Audio Workstation where the mixing magic happens.

Headphones allow musicians to hear exactly what the microphones pick up, ensuring they and the sound engineers can make real-time adjustments for a flawless final product.

Purpose Of Headphones In The Studio

Imagine a world where every note hits the right chord, every beat aligns perfectly, and every song feels just right. In the recording studio, studio musicians wear headphones to catch every detail; from pitch-perfect vocals to the precision strum of a guitar. Headphones are the magic behind the flawless tracks we love.

Preventing Sound Bleed

Headphones act as barriers keeping each sound in its own space. During recording, microphones pick up sounds with high sensitivity. Without headphones, other instruments and voices could bleed into the microphone. This bleed can muddy the final mix, making it tough to edit individual parts.

Here’s why preventing sound bleed matters:

  • Clarity of sound: Isolates each instrument for a clear, crisp track.
  • Cleaner mixes: Makes mixing and mastering more efficient.
  • Pure feedback: Musicians hear only the sounds meant for them.

Real-time Monitoring For Precision

Musicians rely on headphones for real-time audio monitoring. This helps them adjust their performance on the fly for the perfect take. Whether it’s a singer tuning their voice or a guitarist syncing with the drumbeat, headphones enable precision.

In real-time monitoring, headphones provide:

  1. Instant feedback: Hear exactly what’s being recorded.
  2. Synchronized timing: Stay on beat with other tracks.
  3. Balance and blend: Adjust performance for harmony with other sounds.


Types Of Headphones Used By Professionals

Studio musicians need precise audio details to create the best sound. The right headphones make this possible. Professionals have specific types for different tasks. Let’s delve into the world of studio headphones and the types used by the pros.

Closed-back Headphones For Isolation

Closed-back headphones are essential for recording. They are designed to prevent sound from leaking. This helps musicians stay focused. These headphones block out external noise. Recording artists need this isolation. It ensures microphone recording is clean. Most studios choose reputable brands for quality.

  • Excellent Sound Isolation: Perfect for vocalists and instrumentalists.
  • Durable Build: They’re built to last long studio sessions.
  • Versatile: Useful for both beginners and top-tier professionals.

Open-back Headphones For Mixing

Open-back headphones shine during mixing sessions. They offer natural sound. This lets engineers hear the mix as it would sound in open space. Critical listening is key in music production. These headphones provide that experience. Musicians use them to fine-tune final tracks. They’re not ideal for recording. Sound leaks could cause feedback.

  • Natural Acoustic Sound: Mimicks listening to monitors.
  • Comfortable for Long Periods: They cause less ear fatigue.
  • Used for Final Adjustments: Ensures the mix translates well across different listening environments.

Studio headphones are a crucial tool. They help musicians and sound engineers create magic. Both closed-back and open-back types serve distinct purposes. They are vital for producing great music.

The Click Track

The Click Track is a crucial tool for studio musicians. It guides their performance, ensuring each note is in time.

Maintaining Rhythm And Timing

In the studio, the click track acts as an invisible metronome. Musicians listen through their headphones and match the tempo. This keeps the rhythm consistent and precise. Think of it as an auditory guide.

  • Perfect Pace: No slowing down or speeding up unexpectedly.
  • Consistent Cues: Each tick is a cue to stay on track.

Without a click track, even the best musicians might slightly drift in timing. This affects the overall sound.

Synchronization Across Tracks

Recording a song usually involves multiple layers. Each instrument may record separately. The click track keeps everyone synchronized.

Imagine each musician playing at a different beat. It would be chaos! But with headphones and a click track, they perfectly align.

Instrument Role in Synchronization
Drums Foundation of timing for all tracks
Bass Aligns rhythmically with drums
Guitar Harmonizes with the established beat

Every strum, beat, and note fits together like pieces of a puzzle. The click track ensures the final mix is tight and cohesive.

Wearing headphones, musicians share a common time reference. This leads to a seamless blend across all recorded tracks.

Communication And Cues

Studio musicians often find themselves in a world surrounded by sound. Yet, despite the swirling melodies and beats, one crucial element remains paramount: communication. Headphones become an essential tool, facilitating crystal-clear conversations and precise musical execution. Let’s delve into why they’re integral to producer-directed sessions and inter-musician coordination.

Producer-directed Sessions

In the studio, the producer’s role is to shape the sound and direct the session. Wearing headphones allows musicians to hear the producer’s instructions amidst the cacophony. They can receive real-time feedback and act upon it immediately. Here’s how these sessions benefit:

  • Instant adjustments: Musicians adapt to changes on-the-fly.
  • Clarity in communication: Important cues are not missed.
  • Focus on details: Specific parts of the music get the attention they need.

Inter-musician Coordination

Headphones are the lifeline for musicians, syncing their sounds to a harmonious unit. They ensure everyone is on the same sonic page, aligning beats and keys with precision. Consider these advantages of headphones for coordination:

  1. Enabling clear musical cues between band members.
  2. Allowing for tight synchronization of complex rhythms.
  3. Reducing auditory distractions so musicians can focus on their performance.

Protection Against Long-term Hearing Loss

Protection Against Long-Term Hearing Loss is essential for studio musicians. The consistent exposure to loud music poses a significant risk. Thus, wearing headphones is not just about getting the right mix. It’s also about keeping their hearing sharp for years of sound making. Let’s delve into how studio headphones can safeguard a musician’s most precious asset—their hearing.

Regulating Sound Exposure

Studio headphones play a pivotal role in regulating sound exposure. The controlled environment within the earpieces allows musicians to:

  • Monitor audio without cranking up external speakers.
  • Keep track of volume levels precisely.
  • Prevent sudden spikes in sound that can injure the ear.
Sound Source Decibel Level
Studio Monitors 85-90 dB
Headphones 70-85 dB

Limiting decibel levels within headphones is crucial for ear health. The table showcases the safe ranges recommended for studio use.

Custom Ear Protection

Custom ear protection takes headphone use to the next level. Specialty studio headphones can:

  1. Fit the unique shape of a musician’s ears.
  2. Minimize environmental noise intrusion.
  3. Individualize settings for optimal hearing safety.

Professional studio headphones often come with these options. The tailored fit and additional settings ensure consistent protection every session.


Psychological Aspect Of Headphone Use

The psychological aspect of headphone use among studio musicians delves into the mental and emotional states that these essential tools foster. Headphones are more than just equipment; they’re a gateway to a musician’s optimal performance psyche.

Creating An Intimate Performance Space

Imagine stepping into a zone where only the music exists. This is the reality for studio musicians wearing headphones. Headphones carve out a personal performance haven, free from outside distractions. This cocoon of sound allows artists to:

  • Connect deeply with the music
  • Experience a heightened sense of privacy
  • Deliver emotions and subtleties in their performance

Focus And Concentration Enhancement

The art of creating music demands intense concentration. Headphones serve as a tool to enhance this crucial aspect. They enable musicians to:

  1. Focus solely on the sonic elements
  2. Minimize auditory distractions from the studio environment
  3. Achieve a high level of precision in their instrumentals and vocals

This targeted focus is essential in capturing the perfect take. With headphones, artists embrace the pure essence of the music, leading to performances that resonate and endure.

Technological Advances In Studio Headphones

Technological Advances in Studio Headphones have redefined the recording experience for studio musicians. These advancements enable clearer sound, better focus, and convenient features that enhance the music-making process.

Wireless And Bluetooth Capabilities

Wireless technology has transformed studio work for musicians. No longer tethered by cables, artists enjoy freedom of movement. This mobility allows for more dynamic performances and comfort during long sessions.

  • Long-range connectivity
  • High-fidelity audio transmission
  • Seamless integration with various devices

A table of popular wireless studio headphones:

Headphone Model Key Feature Operating Range
AudioTech Pro 24-hour battery life 30 meters
Beats Studio3 Fast charge 10 meters

Noise-cancellation Innovations

Noise-cancellation technology ensures pristine audio capture. Ambient noise gets minimized, allowing musicians to focus on their performance.

  • Active noise cancellation (ANC)
  • Passive noise isolation
  • Enhanced concentration and audio precision

Bullet points of benefits:

  1. Reduced ear fatigue from lower volume requirements
  2. Better sound quality for accurate monitoring
  3. Isolation from external distractions to stay in the zone

Why Do Studio Musicians Wear Headphones? Unveiling Audio Secrets


Credit: www.facebook.com

In The Headphone Mix: Crafting The Ideal Sound

In the Headphone Mix: Crafting the Ideal Sound is a crucial part of the recording process. Musicians rely on headphones to hear sounds clearly. This helps them perform better. It also lets them control what they hear. Musicians get the right mix to create perfect music.

Personalized Monitoring Mixes

Studio musicians often play different parts of a song. They need to hear specific tracks louder. Headphones give a personalized mix to each musician. This means drummers can hear more drums. Singers can focus on their vocals. This personalized monitoring is vital for tight performances.

Effects And Processing Before The Final Cut

Mixing music is like cooking. Chefs taste dishes before serving. Musicians listen to effects before finalizing. Headphones allow early processing and effects. This helps musicians understand the final sound. It lets them adjust their performance as needed.

  • Reverb makes vocals sound rich.
  • Delay can make guitar parts groove.
  • Compression keeps levels even.

By wearing headphones, musicians can fine-tune their sound. The final recording comes out just as planned. The right headphone mix makes all the difference.

Frequently Asked Questions For Why Do Studio Musicians Wear Headphones

Why Do Studio Musicians Use Headphones?

Studio musicians wear headphones to hear a mix of the music they are playing to. This allows them to listen to a click track for timing, previously recorded tracks for synchronicity, and personal mix adjustments, all without causing microphone bleed or disrupting the recording.

What’s The Purpose Of Headphones In Recording Sessions?

Headphones in recording sessions allow musicians to hear a clear, isolated mix. This is essential for staying in time with the click track and integrating their part with others accurately. It results in a cleaner, more cohesive recording.

How Do Headphones Prevent Audio Leakage?

Headphones prevent audio leakage by creating a closed listening environment for the musician. They deliver sound directly to the ear, minimizing what microphones can pick up. This is crucial to avoid the spill of unwanted sound into the recorded track.

Can Studio Musicians Perform Without Headphones?

While possible, performing without headphones can compromise the recording quality. Without headphones, musicians would struggle to hear the necessary audio cues, potentially leading to a lack of synchronicity and a higher chance of errors in the recorded performance.

Conclusion

Studio musicians require headphones for precision and coordination. This essential gear ensures high-quality production. From maintaining tempo to achieving perfect pitch, headphones are crucial. They bridge the gap between silent isolation and complete auditory immersion. So next time you listen to a track, remember the vital role headphones play in crafting those melodies.

Categories
Archive

How Much Does It Cost to Record With Rick Rubin

The cost to record with Rick Rubin varies widely based on project scope. Exact figures are not publicly disclosed and depend on negotiation.


Renowned producer Rick Rubin has worked with a diverse spectrum of artists, shaping the sound of iconic albums across various genres. His production expertise comes with a premium, reflecting his status and track record in the music industry. Recording costs with Rubin are not one-size-fits-all, as they can fluctuate based on factors such as studio time, album complexity, and artist requirements.


Musicians and record labels seeking Rubin’s legendary touch must prepare for substantial but potentially variable expenses. His involvement typically signals a serious investment in a project’s potential, aiming to elevate the music to commercial and critical acclaim. The lack of concrete pricing information online means interested parties should contact Rubin’s representation directly to discuss specific project needs and associated costs.


Rubin’s Legacy In Music Production

The music world resonates with Rick Rubin’s groundbreaking influence. A master of sound, Rubin bridges genres, shaping music history. Cost is a question for many. Yet, Rubin’s impact is invaluable. His studio is a beacon where creativity meets legacy.

Accolades And Reputation

Rick Rubin’s accolades sparkle with industry prestige. The Grammy Awards have recognized his genius repeatedly. Rubin’s touch transforms music, earning him a reputation as a sonic wizard. Artists across the globe seek his guidance for chart-topping success.

  • Grammy Awards for Producer of the Year
  • Critical acclaim from music enthusiasts
  • Renowned mentorship attracting top-tier talent

Key Albums And Artists

Behind every great album, there’s often a visionary producer. Rick Rubin is that force behind many masterpieces.

Artist Album
Red Hot Chili Peppers Californication
Adele 21
Johnny Cash American Recordings

Rubin has forged iconic sounds with diverse artists. From rock to hip hop, his discography reads like a “who’s who” of music legends.

  1. Red Hot Chili Peppers – A transformative change in sound
  2. Beastie Boys – Igniting a rap-rock revolution
  3. Johnny Cash – Revitalizing a legend’s career


Price Factors Of Recording With Rubin

The price factors of recording with Rick Rubin can be as varied as the soundscapes he creates. Working with an iconic producer like Rubin means considering various elements that influence the total cost. Whether you’re an indie artist or a mainstream act, knowing these factors is crucial for budgeting your dream project.

Artist Status And Project Scope

The music industry recognizes different tiers of artists, and one’s status highly dictates the fee structure. An established artist with commercial success typically commands a higher investment, as they bring a proven track record to the studio. In contrast, an emerging talent might not require as substantial a budget but is often charged keeping their potential in mind.

  • Record label backing can help with funding.
  • Expect customized pricing for each artist’s needs.

The project scope also plays a significant role in the cost. Albums require more time and resources than single tracks. Consider these details when planning your budget.

Studio Selection And Equipment

The chosen recording venue directly impacts the project’s cost. Rubin’s preferred studio, Shangri-La, stands amongst the most prestigious but also carries a higher price tag due to its equipment and history.

Studio Selection Equipment Quality
Shangri-La or alternative Standard to high-end

Top-tier gear and instruments also elevate costs. The studio’s reputation, coupled with high-quality equipment, ensures an unparalleled recording experience but factors heavily into the overall expense.

  • Rental fees vary by studio.
  • State-of-the-art equipment brings premium costs.

Estimating The Rubin Experience

An artist’s dream often includes working with iconic producers who shape the signature sound of many hit records. One such legend in the music industry is Rick Rubin. Estimating the Rubin experience involves understanding not just the financial aspect, but the value brought to a project. Rubin’s portfolio features a diverse array of artists, and his production can substantially elevate an album’s quality and potential success.

Standard Rates For Producers

The music industry houses a vast range of producer rates. Experience, fame, and the project’s scope all play roles. As a general pattern (rates are rarely published, so treat any figure you see as an estimate):

  • Beginner producers: typically the most affordable, often charging per song
  • Intermediate producers: higher rates that reflect a track record of releases
  • Top-tier producers: rates negotiated privately, often with points (a share of royalties) on top of a fee

Rick Rubin’s position far exceeds the top-tier bracket, with this status often bringing a premium fee.

Rubin’s Premium

When it comes to estimating the cost for recording with Rick Rubin, the word “premium” undoubtedly becomes relevant. Rubin’s unparalleled track record comes with a price proportionate to what he offers: mastery in production.

Experience Level Rates
Rick Rubin Vary significantly

Rubin’s rates don’t circulate publicly but are tailored to each unique project. This flexibility ensures artists get a personalized experience. Rubin doesn’t publish his rates; deals are private, often with points, so any figure is an estimate.

Aspiring artists must consider Rubin’s premium as an investment in their art. A session with Rubin promises not just a high-quality product but also a valuable transformation in the artist’s musical journey.

Additional Costs To Consider

Entering the studio with a legendary producer like Rick Rubin opens a door to greatness. Yet, recording an album encompasses more than just studio time fees. It’s crucial to budget wisely for extra expenses to ensure a smooth creative journey. Let’s journey through the additional costs you should consider.

Musician Fees And Royalties

Collaborating with top musicians can elevate your sound. High-caliber session musicians often charge premium rates.

  • Session players might charge per hour or track.
  • Negotiate rates beforehand to manage your budget effectively.
  • Factor in potential royalties for contributors, if applicable.

Remember, these professionals bring valuable expertise. Their fees often reflect their experience and demand.

Post-production Expenses

After recording wraps up, the journey is not over. Post-production is where the magic happens.

Expense Description
Mixing Integrates separate tracks to create a cohesive sound.
Mastering Polishes your final mix for distribution.
Artwork Visually represents your music for marketing.

A seasoned engineer to mix and master your tracks can be quite costly. Don’t forget to budget for cover art or any additional visual materials needed.

Famous Studios Rubin Uses

When you record with Rick Rubin, you’re not just paying for his expertise. You’re stepping into some of the music industry’s most revered spaces. Rubin utilizes iconic studios that are as much about the vibe as they are about cutting-edge technology. Let’s dive into the storied walls where magic happens.

Shangri La

Nestled in Malibu, Shangri La is not just a studio—it’s a retreat. This legendary space oozes creativity and has seen the likes of Bob Dylan and Eric Clapton. The cost of recording here can reflect its elite status.

  • State-of-the-art equipment
  • Historic Neve console
  • Private recording areas

Sound City

Sound City in Los Angeles is another Rubin favorite. Its reputation was built on albums like Nirvana’s “Nevermind”. The studio’s analog sound draws artists seeking warmth and depth.

  1. Legendary analog recording console
  2. Vintage microphones and outboard gear
  3. Ambiance that’s hard to replicate

Cost Implications Of Iconic Studios

Recording at Rubin’s go-to studios can be a significant investment. But remember: it’s not just about the session. It’s about the experience and the potential to create something timeless.

Studio Attributes Estimated Cost
Shangri La Luxurious, historic Price on request
Sound City Analog, legendary Price on request

No exact price is publicly available. Rates change based on time, project needs, and Rubin’s involvement. Plan a budget that accommodates the studio’s fame and amenities.


The Hidden Value

Discussing the cost of recording with a legendary producer like Rick Rubin, we unearth ‘The Hidden Value’. Beyond the invoice, lies a treasure trove of benefits that cater to an artist’s brand and career longevity. These factors might not come with a price tag yet hold immeasurable worth.

Branding And Exposure

Collaborating with Rick Rubin often acts as a seal of approval in the music industry. It’s a statement of quality and potential. Artists gain:

  • Instant recognition: Affiliation with a high-profile name draws attention.
  • Expanded reach: Rubin’s reputation can propel an artist to new audiences.
  • Marketing buzz: Projects associated with Rubin typically receive extensive media coverage.

These elements elevate an artist’s brand, opening doors to lucrative opportunities.

Long-term Career Impact

Working with Rubin can be transformative for artists, setting the path for a durable career. The benefits include:

  1. Artistic growth: Exposure to Rubin’s creative process can significantly hone an artist’s craft.
  2. Sustained success: Rubin’s guidance often leads to critically acclaimed work, aiding long-term recognition.
  3. Professional network: Connections made through Rubin can foster future collaborations.

These influences often result in a legacy that outlives the initial investment of recording with Rubin.

Negotiating With Music Icons

Ever dreamed of recording with a legend like Rick Rubin? His golden touch has led to Grammy-winning albums. Your journey to collaborate with a music icon involves careful negotiations. Learn how to approach and seal a deal that benefits both parties. We will uncover what it might cost to work with Rubin.

Approaching Rubin’s Management

Start by getting in touch with Rubin’s team. Make your pitch stand out. Impress them with your music’s uniqueness. Use a concise, engaging email that highlights your commitment to artistry. Remember, communication is key in this stage to spark an interest. Below are basics to include:

  • Your music style and influences
  • A brief bio to share your story
  • Quality recordings or links to your work
  • Express desire to evolve under Rubin’s guidance

Possible Deal Structures

There’s no one-size-fits-all deal. Flexibility is crucial. Anticipate various payment and royalty agreements. Here are common structures to consider:

Deal Type Description Benefits
Flat Fee A one-time payment for Rubin’s services. Simple, no future obligations.
Percentage Deal Payment is a share of album’s profits. Upfront costs are lower.
Hybrid Deal Combines flat fee with profit share. Balances risk and reward for both sides.

Prepare a budget that aligns with your goals. Be upfront about it. Know that working with Rubin is an investment in your music’s future. The exact figures depend on many factors. Seek a professional music attorney to guide negotiations.

Insider Tips

It’s no secret that working with a legendary producer like Rick Rubin is a dream for many artists. With his golden touch, your music could soar to new heights. Let’s dive into what you need to know about budgeting and preparing for a session with Rick Rubin. Bold strategy and foresight are key.

Budgeting For The Big League

Costs vary wildly when you’re aiming to collaborate with top-tier producers like Rubin. Understanding the financial commitment is crucial before stepping into the studio. A few cost factors include:

  • Studio time
  • Production fees
  • Additional personnel
  • Miscellaneous expenses

Remember: Rubin’s calibre = a significant price tag. Rubin doesn’t publish his rates; deals are private, often with points, so any figure is an estimate. Negotiation is key.

Include cushioning in your budget for unexpected costs. Rubin’s expertise is a hefty investment but can catapult your success.

Preparing For The Process

Working with Rubin is more than just showing up and recording—it’s a creative journey. Start with clear vision and goals for your project. Rubin values artists who bring dedication and passion. To prepare, consider:

  1. Defining your sound
  2. Honing your songs
  3. Being open to feedback

Expect intense collaboration and evolution.

Organize your materials and thoughts beforehand.

Avoid rushed decisions or last-minute changes. Valuable studio time should not be wasted.

Prepare mentally and emotionally for a transformative experience.

Remember, this is not just recording—it’s crafting a musical legacy with one of the industry’s best.

Funding Your Dream Project

Have you ever dreamed of recording with the legendary Rick Rubin? Turning that dream into reality can come with a significant price tag. Don’t worry though; there are ways to fund your dream project. Let’s explore some creative and practical options to bring your music to life alongside a true industry icon.

Crowdfunding

Crowdfunding platforms offer artists a way to raise funds directly from their fans and supporters. By generating a compelling campaign, you can connect with a loyal audience willing to back your recording endeavors. Popular crowdfunding sites include:

  • Kickstarter – Best for exclusive rewards to backers.
  • Indiegogo – Allows for flexible funding goals.
  • GoFundMe – Ideal for more personal funding needs.

Create a captivating pitch, set a clear goal, and share your passion. Keep supporters updated to maintain excitement and encourage more pledges. Success in crowdfunding hinges on your ability to market your project.

Sponsorships

Seeking out sponsorship from brands and companies is another viable path. Sponsors can help cover costs in exchange for brand exposure. To attract a sponsor, consider these steps:

  1. Identify potential sponsors aligned with your music and values.
  2. Prepare a compelling sponsorship proposal.
  3. Clearly outline the mutual benefits.

Be prepared to showcase your fanbase and social media presence, proving your project is worth investing in.

Recording Deals And Advances

Signing a recording deal can provide the necessary funds through an advance. Record labels finance the recording in anticipation of future sales. Keep in mind:

Pros Cons
Financial support for production May come with creative restrictions
Access to professional networks Repayment from future royalties
Marketing and distribution included Potential for long-term financial obligations

When considering a recording deal, review contract terms carefully. Ensure the agreement will ultimately benefit your career and artistic vision.

Alternatives To Rubin

Recording with a legend like Rick Rubin comes at a top-tier price. But don’t worry if that’s beyond the budget. Many worthy alternatives to Rubin offer incredible production value without the hefty price tag. Let’s explore options that won’t break the bank.

Up-and-coming Producers

Discovering a talented, yet less established producer might be the golden ticket. These music maestros often charge significantly less as they’re building their reputations. Look for buzz in online music forums or seek recommendations from industry insiders. Advantages of teaming up with fresh producers include innovative sounds and a shared hunger for success, which can lead to genuinely collaborative magic.

Collaborating With Music Schools

Music schools are breeding grounds for emerging talent. Connecting with these institutions can lead to productive partnerships with up-and-comers who often participate in projects for a fraction of the cost or for the experience alone.

Costs vary widely by school and program; check each school’s current tuition.

Engaging with these options presents phenomenal opportunities to cut costs while uncovering and nurturing young talent. With such collaboration, artists achieve professionally produced music, and students gain real-world experience—a win-win scenario.


Rick Rubin in 2026: What Has Changed?

Rick Rubin still does not publish a rate card, so there is no official answer to how much he charges to produce an album. Any number you see online is an estimate rather than a quoted fee.

What has changed is how much of his thinking you can access for little or nothing. His podcast Tetragrammaton is free, and in 2025 he released The Way of Code, a free interactive project made with Anthropic that pairs 81 short meditations on the creative mindset with editable code artwork. He also produced Tyler Childers’ 2025 album Snipe Hunter, so he is still actively making records.

Frequently Asked Questions On How Much Does It Cost To Record With Rick Rubin

What’s The Price Range For Rick Rubin’s Recording Sessions?

Rubin doesn’t publish his rates; deals are private, often with points, so any figure is an estimate. Project scope, session length and artist stature all shape the final deal.

Can Aspiring Artists Afford Rick Rubin’s Production?

Aspiring artists often find Rick Rubin’s fees challenging, but options like shared sessions or seeking funding can make it attainable. It’s best for rising talents to consider budget-friendly alternatives initially.

How To Book A Recording Session With Rick Rubin?

Booking a session with Rick Rubin requires contacting his management team. You’ll need a serious inquiry and potentially some industry connections. Start with a well-crafted pitch of your music project.

Does Rick Rubin Offer Any Discounts For Recording?

Rubin doesn’t publish his rates; deals are private, often with points, so any figure is an estimate. Because deals are negotiated privately, there is no public information about discounts.

How much does Rick Rubin charge to produce an album?

There is no public price. Rubin doesn’t publish his rates; deals are private, often with points, so any figure is an estimate.

Is Rick Rubin still producing music in 2026?

Yes. Beyond his podcast Tetragrammaton and the 2025 project The Way of Code, he produced Tyler Childers’ 2025 album Snipe Hunter.

Conclusion


Recording with Rick Rubin is a significant investment in your music career. While exact costs vary, expect a premium for this legendary producer’s touch. Weighing your budget and potential return is key. Secure funding or save diligently before booking a session.


Make every second count with Rubin’s expertise to elevate your sound.