Categories
Archive

Music Royalties Uncovered: Your Guide to Earning More

Music royalties are payments artists receive for the use of their work. These include earnings from streams, sales, and broadcasts.


Understanding music royalties is essential for musicians, producers, and anyone involved in the music industry. Royalties serve as the financial backbone for creators, incentivizing them to continue producing new content. They exist to ensure that artists get compensated whenever their music is played publicly, reproduced, or distributed.


There are several types of music royalties, such as mechanical, performance, synchronization, and print music royalties. Each type corresponds to different usages of music, from streaming on digital platforms to live performances. To navigate this complex field, artists often partner with collection societies or publishers who help track usage and collect royalties on their behalf. As the music landscape evolves with technology, the systems for managing and distributing royalties also adapt, making it crucial for rights holders to stay informed and protect their intellectual property.


The Basics Of Music Royalties

Understanding music royalties is crucial for artists, producers, and labels. It’s the way music creators get paid. Think of royalties like a pie. Every time a song plays, that pie gets sliced. The more the song plays, the more slices the creators earn. But the pie has different kinds of slices, known as types of royalties. Let’s dive into these slices and see how they reward the music makers.

Different Types Of Royalties

Making music pays in more ways than one. Every note and lyric can turn into cash. Here are the main slices of the royalty pie:

  • Mechanical Royalties: Earned when music is sold on CDs, vinyl, or as digital downloads.
  • Performance Royalties: Collected when a song is played in public, like radio or live venues.
  • Synchronization Royalties: Generated when music is used in TV, movies, or ads.
  • Print Royalties: Paid when music is written down and sold, like sheet music.

Roles Of Performing Rights Organizations

Performing Rights Organizations (PROs) do a big job. They make sure creators get paid. Think of them as the pie servers. They track where the music plays. Then, they collect the money and send it to the right people. In the US, big PROs include ASCAP, BMI, and SESAC.

Organization Role
ASCAP Licenses and collects performance royalties.
BMI Tracks public performances and pays artists.
SESAC Handles licensing and royalties for composers.

Composing And Copyrights

For musicians and composers, understanding how to protect your creations is key. Copyright laws give power to music creators. They help make sure you get paid when others use your songs. Knowing about composing and copyrights is critical for any musician’s success.

Registering Your Work

To keep your music safe, the first step is to register it. This process gives you legal proof of your work. Think of it as your musical fingerprint.

  1. Choose the right copyright office.
  2. Fill out the registration form for your song or album.
  3. Pay the filing fee, which can vary based on your needs.
  4. Send in a copy of your music, either online or by mail.

The registration number and certificate are your shields. Keep them secure and updated.

Maintaining Copyright Control

Once your music is registered, your focus should shift to control. You hold the keys to your work’s use. Control is power in the music world.

  • Keep copies of all legal documents and registrations.
  • Use contracts when others want to use your work.
  • Watch out for any unauthorized use of your music.
Control Aspect Action
Licensing Choose who can use your music.
Monitoring Track where your music gets played.
Enforcing Act on illegal uses of your songs.

Managing your copyrights well ensures you earn what you deserve. Tight control supports your artistic and financial future.


Mechanical Royalties Explained

Mechanical royalties are vital for songwriters and publishers. They earn money each time a song reproduces. This happens with CDs, vinyl, tapes, and digital formats.

Earning From Physical Sales

Physical sales like CDs still generate income, despite digital dominance. Songwriters earn mechanical royalties on every sold copy. This applies worldwide.

Product Type Royalty Per Unit
CDs 9.1 cents (standard)
Vinyl Varies by country
Tapes 9.1 cents (standard)

Streaming Services Impact

Streaming platforms changed the game. Every stream counts as a mechanical reproduction. Artists earn from these too.

  • Services pay a royalty for each play.
  • Digital sales can outperform physical.
  • Online consumption keeps growing.

Collecting these royalties can be complex. Artists often need a publishing administrator or a collection society.

Music Royalties Uncovered: Your Guide to Earning More


Credit: www.billboard.com


Performance Royalties And Licensing

Understanding performance royalties and licensing is key for musicians. When a song plays in public, money is due to its creators. Let’s dive into how artists earn from live gigs and broadcasts.

Live Performances Vs. Broadcasts

Live performances and broadcasts both generate royalties. However, they work differently. When artists perform live, venues pay out to performing rights organizations (PROs). These PROs then distribute the money to the rights holders.

Live Performances Broadcasts
Venues pay PROs directly. TV and radio stations pay for licenses.
PROs pay artists and publishers. PROs distribute royalties similarly.

Broadcasts include radio, TV, and online streaming. Stations and networks secure licenses from PROs. These licenses cover all the music they play. Royalties from broadcasts add up quickly, especially with popular tracks.

Licensing Your Music For Use

Licensing music is a big revenue source for artists. Musicians grant permission to use their music. In return, they receive payments. These come from different channels:

  • TV shows and movies – They need background tracks.
  • Commercials – Ads use catchy tunes.
  • Video games – They use music for immersive experiences.

To license music, artists often work with publishers or licensing agencies. These groups help broker deals. They also ensure artists get fair pay for their music use.

Licensing agreements detail how and where the music can be used. They state the duration and type of usage. Details include whether a song is for a TV show’s theme or a one-time ad. Music creators should understand these agreements well.

Synchronization Licenses

Making money from music goes beyond album sales and streaming revenue. In fact, synchronization licenses represent a lucrative opportunity for artists and songwriters. This type of license occurs when music gets paired with visual media such as TV shows, movies, advertisements, or video games.

Tapping Into Tv And Film

Television and film can turn a song into a household tune overnight. Artists eager to expand their audience should consider the following steps for getting their music in front of production companies:

  • Build a diverse catalogue of tracks ready for synchronization.
  • Work with a skilled music supervisor who understands your style.
  • Create high-quality recordings to stand out.
  • Research shows that resonate with your musical genre.

Negotiating Synch Deals

Navigating the world of sync deals can be tricky. To ensure both exposure and fair compensation, here are key points to remember:

Aspect Action
Understand the Value Know the worth of your music in the marketplace.
Read the Fine Print Review contract details thoroughly before signing.
Hire a Lawyer Consult a music attorney to navigate legalities.
Negotiation Be prepared to discuss terms like exclusivity and duration.

Remember, you have a right to negotiate terms that benefit your career. Sometimes, the exposure gained from a synch license can be worth more than the upfront fee.

Digital Royalties

Artists and record labels are diving into digital waters where music royalties evolve with technology. Digital Royalties represent the frontier of income for music creators in the online realm. They emerge from downloads and streams of songs, videos, and performances. Let’s uncover how these modern earnings work.

Online Streaming And Downloads

Digital platforms have changed how we enjoy music. Each click on a play button or each digital download sends pennies to an artist’s pocket. These micro-payments are digital royalties, a vital income source for artists.

  • Subscription Services: Sites like Spotify and Apple Music pay royalties per stream.
  • Ad-Supported Streams: Free services with ads still generate royalties, albeit lower amounts per play.
  • Digital Downloads: Purchases from platforms like iTunes ensure a larger one-time royalty.

Navigating Digital Platforms

To ensure rightful earnings, artists must understand digital landscapes. Various platforms have different rules and payout methods. Here’s a guide to navigating this digital maze:

Platform Royalty Type Collection Method
Spotify Per stream Through PROs/Distributors
Apple Music Per stream Direct or through aggregators
YouTube Ad-revenue sharing Content ID system

Artists should register with Performance Rights Organizations (PROs) to track royalties. Digital distributors can also help artists collect earnings from various online platforms.

Master Rights And Record Labels

Understanding the complex world of music royalties is crucial for artists and labels alike. A key part of this puzzle is understanding Master Rights and Record Labels. These rights are golden tickets in the music industry. They control the original recordings of songs, known as masters. Record labels often own these rights, but artists can retain them too. Knowing how they work is vital for successful music business ventures.

Ownership And Earning Potential

Ownership of master rights is a powerful position in the music industry. The owner controls the recording usage. This includes selling, licensing, and distribution. Artists or labels can earn significant income from these rights. It hinges on contractual agreements. Artists may own their masters, or labels might have them. The details can vary widely.

Here’s a breakdown of the income sources from master rights:

  • Digital Sales: Songs bought online contribute to earnings.
  • Streaming Royalties: Each play on streaming platforms generates income.
  • Licensing Deals: Using songs in media like ads, films, or TV shows pays well.
  • Physical Sales: Income from CDs or vinyl records also matters.

Leveraging Master Rights

Leveraging master rights can boost an artist’s or label’s revenue considerably. Record labels usually do this for their signed artists. They secure deals and opportunities. Independent artists, though, can still maximize their master rights. They can self-release music or use distribution services.

Effective ways to leverage master rights include:

  1. Exploring synchronization opportunities for TV, movies, and commercials.
  2. Partnering with influencers for social media promotion can reach a wide audience.
  3. Releasing high-quality content consistently to sustain listener interest.

Both routes require strategic planning and a good understanding of the industry.

Maximizing Royalty Income

Artists and songwriters know: royalties are key to long-term financial success. Let’s explore ways to maximize royalty income. With strategic moves, artists can bump up their earnings.

Collaborations And Partnerships

Joining forces with other artists can lead to new sounds and more listeners. More ears can mean more royalty checks.

  • Feature on tracks: Work with diverse musicians to expand reach.
  • Create remixes: Remixes can introduce your music to new audiences.
  • Brand partnerships: Align with brands for sponsored content and new revenue.

Think co-writing songs with others. Co-written songs often receive more radio play and streaming.

Advanced Royalty Strategies

Understanding music rights is essential. Keep close tabs on earnings and use technology to your advantage.

  1. Register with PROs: Ensure all songs are registered with Performance Rights Organizations.
  2. Digital Distribution: Use digital platforms to distribute music worldwide instantly.
  3. Data Analysis Tools: Use these tools to track royalties and optimize the catalog.

Consider sync licensing opportunities for TV, movies, and commercials. These can lead to significant payouts.

Make sure to audit royalty statements regularly to avoid missing out on income. Seek legal advice if numbers do not add up.

Royalty Collection Societies

Royalty Collection Societies play a pivotal role in the music industry. They ensure that artists, songwriters, and music publishers receive their fair share of earnings whenever their work is used commercially. These organizations track the usage of music across various platforms and collect royalties on behalf of the creators.

Choosing A Collection Society

With a myriad of collection societies across the globe, selecting the right one can be crucial for your royalties. Key factors to consider include:

  • The society’s reputation and track record.
  • Distribution frequency and policies.
  • Types of royalties collected.
  • Geographical coverage.

It’s vital to assess each society’s strengths and align them with your needs as a creator.

Global Royalty Collections

Collection societies operate on a global scale to ensure royalties flow back to the rightful owners. They have agreements with international counterparts to make worldwide collection possible. This global network is essential to cover all avenues where music is played, from radio stations to live concert venues, and even online streaming platforms.

Key aspects of global royalty collections include:

Royalty Type Source
Performance Royalties Radio, TV, live performances
Mechanical Royalties CDs, downloads, streaming
Synchronization Royalties Films, commercials, games

The international cooperation of collection societies ensures creators can enjoy the fruits of their labor, no matter where in the world their music resonates.

Legalities And Royalty Disputes

Understanding music royalties is crucial for artists and producers. Legalities can be complex. Disputes often arise. Royalties ensure creators get paid for their work. Sometimes agreements break down. When this happens, legal steps may become necessary.

When Legal Action Is Necessary

Legal action is a last resort. It becomes necessary when parties can’t agree on royalty payments. This happens for several reasons:

  • Contract breaches
  • Unauthorized use of music
  • Disputes over songwriting credits

Protecting rights is critical. Artists sometimes must fight for their share.

Resolving Royalty Conflicts

Resolution can happen outside the courtroom. Mediation or arbitration are common paths. These methods save time and money.

  1. Review contracts
  2. Negotiate settlements
  3. Engage a mediator or arbitrator

Agreeing on terms can prevent future issues. Always seek expert legal advice. A clear understanding of rights and responsibilities is key.

Future Of Music Royalties

The music industry is at a crossroads, with ever-evolving technologies drastically altering how artists, songwriters, and producers receive compensation for their work. This change is shaping the future of music royalties, offering exciting prospects and challenges in equal measure.

Technological Advances

New technology influences how royalties track and pay out. Blockchain, for instance, promises transparency and speed in royalty distribution

  • Direct-to-Artist Platforms: Allow for real-time royalty payments.
  • Smart Contracts: Automate payments, reducing errors and delays.
  • Streaming Services Analytics: Offer detailed reports for accurate royalty calculations.

Artists are hopeful that these technologies will guarantee fair compensation and more control over their earnings.

Predicting Royalty Trends

Forecasting the trajectory of music royalties involves analyzing current trends and patterns. Royalty rates may fluctuate due to various factors:

Trend Impact on Royalties
User-Generated Content New royalty streams
Global Expansion Increased overseas collections
Subscription Models Shifted payout structures

The task is to stay ahead, with artists and industry professionals needing to understand these trends to optimize their royalty earnings.

Music Royalties Uncovered: Your Guide to Earning More


Credit: virpp.com


Frequently Asked Questions Of Music Royalties


What Are Music Royalties?


Music royalties are payments made to rights holders (songwriters, composers, recording artists, and their representatives) for the authorized use of their musical works. Payments vary depending on the usage type, like radio play, streaming, or CD sales.


How Do You Earn Music Royalties?


You earn music royalties by having your music played on platforms that pay for such use. This includes radio, streaming services, live venues, and TV. Joining a performing rights organization can help manage and collect these royalties.


What Types Of Music Royalties Exist?


Several types of music royalties exist, including mechanical, performance, synchronization, and print music royalties. They each relate to different uses of music, from physical sales and downloads to live performances and use in videos.


Who Collects Music Royalties?


Performing Rights Organizations (PROs) such as ASCAP, BMI, and SESAC in the US, collect performance royalties. Mechanical royalties are collected by Mechanical Rights Organizations (MROs) like The Harry Fox Agency. Artists directly receive some types, like sync fees.


Conclusion


Navigating the landscape of music royalties can be complex, yet it’s essential for artists and rights holders to understand. This ensures fair compensation for their created works. By staying informed and proactive, musicians can safeguard their earnings and continue fueling their passion for creativity.


Protect your tunes, secure your due, and let the music play on.

Categories
Archive

Sad Chord Progressions: Unlock Emotion

Sad chord progressions often involve minor keys and descending patterns. They evoke emotional responses and melancholy feelings.


Exploring the power of music, the impact of sad chord progressions cannot be overstated. These sequences of chords are the backbone of many emotive ballads, cinematic scores, and soulful songs. They tap into our deepest sentiments, triggering a sense of sorrow or longing through their harmonious melancholy.


The use of minor chords, particularly when played in a certain order, can create a poignant and introspective atmosphere. Traditional combinations, like the natural minor or the Dorian mode played in succession, offer a rich tapestry of sound, perfect for composers and songwriters aiming to convey a somber or reflective mood. Mastery of these progressions allows musicians to paint with sound, utilizing the language of music to express the inexpressible.

Sad Chord Progressions: Unveil Emotive Musical Power


Credit: audiosorcerer.com


The Elements Of Sadness In Music

Music has a unique power to touch our hearts and evoke a wide range of emotions. Sad music, in particular, creates a deep connection with listeners through specialized chord progressions. Certain musical elements work together to unlock the feelings of sorrow and melancholy entwined in songs.

Melody, harmony, tempo, and rhythm are tools musicians use to paint an atmosphere of sadness. Let’s delve into two critical components that make music feel sad.

Harmonic Minor: The Heart Of Melancholy

The harmonic minor scale is vital in composing sad music. It combines the sounds of Eastern music with Western harmony, creating a wistful mood.

  • Differing from the natural minor scale, it features a raised seventh note.
  • This slight alteration adds a sense of tension and longing to the music.
  • Many sad chord progressions utilize this scale to stir deep emotions.

Songs written in this scale bring out haunting melodies that can make us feel as though we are part of a sorrowful story.

Tempo And Rhythm: Crafting A Sorrowful Pace

Slow tempos and gentle rhythms set the stage for sad music. They create a pace that allows listeners to reflect and embrace the emotions conveyed.

  • Slow beats tend to simulate the heartbeats or breathing patterns of someone who is sad or reflective.
  • Different rhythm patterns can also affect the mood, with certain beats suggesting the heaviness of a sorrowful moment.
  • Musicians often choose rhythms that mimic the natural cadence of a sorrowful sigh or a tearful moment.

Composers carefully select tempo and rhythm combinations to ensure the listener feels the weight of every note.

History Of Sad Chord Progressions

The story of sad chord progressions stretches back through time. These progressions tap deep into our emotions. They have been stirring hearts for centuries. Let’s explore how they’ve evolved and touched listeners across eras.

Classical Mourners: From Bach To Chopin

Baroque beginnings shaped the emotional landscape in music. Johann Sebastian Bach was a master of melancholy. His ‘Chaconne’ in D minor stands as a profound example. It weaves a tapestry of grief and sorrow through its chords.

Moving forward, Wolfgang Amadeus Mozart’s ‘Requiem’ also speaks to the soul. Its minor keys convey a weighty sense of loss. The classical period cherished the sad chord progression. It made it a foundation for expression.

In the Romantic era, a surge in emotional music rose. Frédéric Chopin’s ‘Funeral March’ is iconic. Its heavy chords spell out deep sadness. It echoes the pain of loss. Many compositions from this time are rich with sad progressions.

Contemporary Tears: Pop And Rock’s Somber Sounds

Fast-forward to modern times. Sad chord progressions fill pop and rock music. The Beatles’ ‘Yesterday’ paints a picture of longing with its tender chords. The melody captures a universal feeling of nostalgia.

Singer-songwriters like Adele use these progressions to tell stories. Her hit ‘Someone Like You’ revolves around mournful piano chords. It resonates with audiences worldwide.

Alternative rock bands like Radiohead have also mastered the art of sadness in music. Their song ‘Fake Plastic Trees’ is a journey through introspective and somber sounds. Its chord progressions reflect life’s complex emotions.

Anatomy Of A Sad Chord Progression

A sad chord progression tugs at the heartstrings, creating a canvas for emotional storytelling in music. To dissect the anatomy of such a progression, it’s key to understand how certain chords stir deep emotions. Here’s a closer look:

Key Minor Chords: The Foundation

The foundation of a sad chord progression often lies within minor chords. Minor chords possess a brooding quality that major chords lack. This quality is essential for evoking sadness. The minor key serves as the base for building a melancholic atmosphere.

  • A Minor (Am): Often used as a starting point for a sad progression
  • E Minor (Em): Brings a deeper sense of sorrow
  • D Minor (Dm): Known as the “saddest of all keys”

Adding The Sevenths: Depth In Despair

For additional emotional depth, sevenths are often introduced to the foundational minor chords. These complex tones add layers to the melancholy narrative. The sevenths resonate with listeners, enhancing feelings of despair.

Chord Seventh Added Resulting Emotion
Am A Minor 7 (Am7) Subtle sadness
Em E Minor 7 (Em7) Deeper sorrow
Dm D Minor 7 (Dm7) Profound melancholy

Including minor seventh chords in a progression can brighten the darkest corners of a melody while maintaining its gloomy essence.


Iconic Sad Progressions And Songs

Music has a language all its own, one that stirs emotions and tells stories without uttering a single word. Within this language, certain chord progressions stand as pillars of sorrow, painting shades of melancholy with every note. Let’s take a journey through Iconic Sad Progressions and Songs that have etched their mark in music history.

Hits That Hurt: Analyzing Pop Music

The charts are often lit up with upbeat tunes, yet it’s the songs that tug at the heartstrings that leave a timeless impact. These sad chord progressions speak directly to the soul.

  • “Someone Like You” by Adele uses a poignant ADEFG pattern.
  • The Beatles’ “Yesterday” combines minor and major chords to evoke a sense of loss.
  • “Apologize” by OneRepublic features a minor progression that resonates with listeners worldwide.

Songs like these create waves of emotion, often relying on a blend of minor chords to deliver their message.

Legends Of Gloom: Unforgettable Melancholic Melodies

Certain melodies linger long after the music stops. Enduring tracks embody feelings of grief, hopelessness, or introspection.

Song Artist Chord Progression
“Hallelujah” Leonard Cohen CBAmG
“Nothing Compares 2 U” Sinéad O’Connor FGAmC
“Creep” Radiohead GBC

Elements like a slow tempo, use of minor keys, and descending bass lines often accompany these sad progressions, deepening the effect on the listener.


The Science Behind Musical Sadness

Music speaks directly to our hearts. It has the power to soothe, energize, and even bring us to tears. Sad chord progressions pull on the strings of our emotions in unique ways. But what’s the science behind the feelings they evoke? Unraveling this mystery requires exploring how our brains interpret these melodies and why our bodies react the way they do to melancholic harmonies.

Cognitive Echoes Of Emotion

Musical sadness isn’t just a cultural construction; it’s a cognitive experience deeply rooted in our brains.

  • Minor chords often sound ‘sad’ to us.
  • They can mimic the intonation of a sad speech.
  • Our brain links these sounds to emotional memories and experiences.

This can create a sense of familiarity or nostalgia, amplifying the emotional impact of a song.

Physiological Response To Melancholic Harmonies

Our bodies can have physical reactions to sad music. Let’s explore:

Harmony Type Physiological Response
Minor Key Slower heartbeat, reflective mood
Dissonance Tension, unease
Resolution Release of tension, often still somber

These responses can make us feel a deep sense of emotional release or connection to the music.

Composition Tips For Evoking Emotions

Music carries the power to stir deep emotions. Composing with sad chord progressions can touch souls. Let’s examine key tips for crafting melodies that evoke the emotions you aim to convey.

Building Tension And Release

To captivate listeners, a balance of tension and release in music is vital. Tension grips their attention. Release brings satisfaction. This dynamic is the heartbeat of emotional music.

  • Minor chords often set a somber tone.
  • Dissonance creates a sense of unease.
  • Delayed resolution keeps listeners yearning for completion.

Compose with intent. Use silences and dynamics boldly. Silence can be as powerful as sound. A sudden pianissimo after fortissimo leaves a memorable impact.

Colorful Additions: Using Extensions And Suspensions

Extensions and suspensions enrich chord progressions. They add complexity and depth. This can elevate the emotional weight of your piece.

Extension Effect
Seventh A sense of longing or melancholy
Ninth An airy, wistful feel
Eleventh A complex, unresolved tension

For suspensions:

  1. Add a note a step above or below the main chord.
  2. Hold the tension.
  3. Resolve back to the original chord.

These tools shape the emotional landscape. They make simple chord progressions speak volumes. Don’t be afraid to experiment!

Sadness In Film Scores And Soundtracks

The sounds that weave the narratives in movies often go unnoticed, but they hold immense power in shaping emotions. Sad chord progressions stand as silent narrators in many iconic film scores and soundtracks, guiding the audience through the depths of the characters’ emotions. This interplay of music and story transcends mere background noise, becoming essential to the cinematic experience.

Scoring The Scene: Music As A Storyteller

Music sets the tone for every scene. It whispers secrets about the character’s inner world without a single spoken word. Sad chord progressions evoke a sense of loss or longing. They gently nudge viewers to feel the characters’ pain. Composers carefully craft these melodies to align with the narrative, ensuring that the music speaks just as loudly as the vibrant imagery on screen.

Common elements in these progressions might include:

  • Minor chords for a deep, resonating sadness,
  • Slow tempos that mimic the heavy heartbeats of sorrow,
  • Dynamic shifts that reflect the ebb and flow of intense feelings.

Epic Emotions: When Cinema Meets Symphony

The marriage between cinematic storytelling and orchestral music can be profoundly moving. When the two meet, magic happens. Filmmakers entrust composers with the task of translating the emotional spectrum of a film into a score. The result? A soundtrack that does not just support a scene but elevates it to new emotional heights.

An example of such an orchestration might include:

Musical Feature Emotional Weight
String section swells Heighten a sense of tragedy
Piano keys plinking like raindrops Stimulate a sense of isolation
Dissonant chords Intensify feelings of tension

In summary, every note in a film score is intentional; it’s designed to pull on heartstrings and evoke emotion. Sad chord progressions in film scores and soundtracks act as a universal language of feeling, one that delicately yet powerfully conveys the essence of sadness.


Therapeutic Applications Of Sad Music

The allure of sad music often lies in its power to touch the innermost corners of our emotions. Sad chord progressions serve as a gateway to the soul, ushering listeners into a state of deep reflection and emotional release. These melodies draw us into a space where we find solace and understanding, nurturing therapeutic applications that may seem counterintuitive. The magic of these melancholic notes provides comfort, stimulates healing, and explores the paradoxical relationship between sorrowful sounds and mental well-being.

Catharsis Through Chords

Music with sad chords can act as a form of catharsis. The experience of listening to music that mirrors our sorrow can be incredibly cleansing. Let’s explore how these chords help:

  • Emotional release: Listening allows feelings to surface and be expressed.
  • Reflection: Lyrics and melodies inspire introspection and understanding.
  • Connection: Shared experiences in songs create a sense of not being alone.

It’s as if each chord progression plucks a string in our hearts and weaves a narrative that validates our feelings, offering a way to let them go.

Sad Songs For Mental Health: A Paradox?

The idea that sad music can be good for mental health seems like a paradox. Yet, it is backed by science:

Effect on Mood Reason
Mood Enhancement Engages the brain’s pleasure centers while processing music.
Stress Reduction Slower tempos can calm the mind and relax the body.
Improved Cognition Lyrics and melodies foster concentration and memory.

Sad songs often provide a backdrop for contemplation and emotional equilibrium. They help us reconcile our feelings, leading to a more balanced mindset.

Reimagining Joyful Tunes As Melancholic Ballads

Reimagining joyful tunes as melancholic ballads unlocks a treasure chest of emotions. Doing so allows listeners to experience familiar melodies anew. A twist on the chirpy rhythms of upbeat songs can often reveal a hauntingly beautiful and delicate side few have heard. With just a few chord changes, a song known for bringing smiles can tug at the heartstrings, turning into something poignantly beautiful.

Twist On The Happy Hits: A Sombre Interpretation

Transforming upbeat anthems into sombre songs involves more than altering tempo. It’s about examining the harmony and finding ways to introduce minor chords where major ones once dominated. These subtleties reframe the narrative and engage listeners with an entirely different emotional palette.

  • Modulating major to minor keys breathes new life into a tune.
  • Slowing down the rhythm can emphasize the newly found depth of the composition.
  • Strategic pauses add an element of anticipation and reflection.

Popular songs often get this treatment to showcase the versatility of music and how it adapts to diverse emotional landscapes.

Cross-genre Alchemy: Blending Moods In Music

Genres in music act as melting pots for emotion. Combining elements from different styles creates something truly unique. This alchemy brings new meaning to tracks that might otherwise fly under the radar.

Original Genre New Mood
Pop Acoustic Lament
Dance Electronic Elegy
Rock Pensive Power Ballad

Merging upbeat and downbeat elements breeds a new spectrum of sound. Artists dabbling in this practice often discover hidden layers in their work. It is a creative process that rewards both the musician and the audience.

Frequently Asked Questions On Sad Chord Progressions


What Are Sad Chord Progressions?


Sad chord progressions often use minor keys and dissonant intervals to evoke emotional responses. Commonly, the progression moves from a minor key to another minor or diminished chord, such as Am – Dm – Em – F. This sequence creates a melancholic or wistful atmosphere in music.


How Do Chord Progressions Affect Music Mood?


Chord progressions play a vital role in setting a song’s mood. Progressions with minor chords or diminished sevenths typically convey sadness or tension. In contrast, major chords often produce a happier, uplifting effect. The choice of chords can evoke a wide array of emotions.


Can You Give Examples Of Sad Songs With Sad Progressions?


Many popular songs use sad chord progressions to set a somber tone. Examples include “Someone Like You” by Adele with its poignant A – C#m – F#m – D progression, and Radiohead’s “Fake Plastic Trees” which employs an Am – E – D – G sequence.


What Makes Minor Chords Sound Sad?


Minor chords have a sound that is often perceived as melancholic or somber due to their structure. They include a minor third interval that creates a less harmonious, more unsettling sound compared to the major third in major chords. This subtle dissonance intensifies emotional responses.


Conclusion


Exploring sad chord progressions opens a gateway to deep emotional expression in music. As we’ve seen, they evoke feelings that resonate universally, transcending genres and periods. Remember, harnessing the power of these progressions can add profound depth to your compositions.


Keep experimenting, and let your creativity flow through the melancholic beauty of music.

Categories
Archive

Diatonic Vs Chromatic Harmonicas: The Ultimate Duel

Diatonic refers to music that uses a seven-note scale, while chromatic encompasses all twelve notes in an octave. Diatonic scales form the basis of Western music, and chromatic scales include all possible half-step increments.


Exploring the realm of music theory reveals a rich tapestry of scales and notes that are fundamental to creating melodies and harmonies. The diatonic scale is pivotal in various musical genres, providing a familiar structure through its seven distinct notes that correspond to the white keys of a piano.


Contrastingly, the chromatic scale offers a more complex array of sounds with its twelve pitches, each a half step apart, akin to playing every white and black key in sequence. This distinction between diatonic and chromatic is more than theoretical; it’s audible in the color and tension of the music produced. This comparison not only shapes the way instruments are played and songs are composed but also influences how music is taught and understood.

Diatonic Vs Chromatic Harmonicas: The Ultimate Duel


Credit: www.amazon.com


The Harmonica Duel

Imagine two harmonica players stepping onto a stage, each with a glint in their eyes and a harmonica in their hands. One wields a diatonic harmonica, the other, a chromatic. The crowd holds its breath, ready to witness a classic musical showdown. This duel isn’t just about skill; it’s a clash of styles, sounds, and harmonica history. Let’s explore the unique characteristics that define the melodic battle between diatonic and chromatic harmonicas.

Melodic Duel: Diatonic Vs Chromatic

The diatonic harmonica, known for its soulful blues, is the weapon of choice for simplicity and raw expression. The chromatic harmonica, with its sharp mechanism, allows for a full scale of notes, creating diverse melodies. This melodic duel starts with the diatonic harmonica’s natural ease in bending notes, giving it a wailing quality beloved in blues and rock. Conversely, the chromatic harmonica stands out with its button-activated sharps and flats, perfect for jazz and classical tunes.

A Tale Of Reeds And Airflows

Both harmonicas tell their story through reeds and airflows. The difference lies in how those reeds make music. Diatonic harmonicas use a single reed per note, with techniques like bending to reach additional sounds. Chromatic harmonicas, however, have a separate reed for each sharp and flat, accessed using a slide button. It’s a fascinating contrast:

  • Diatonic: Simpler structure, fewer reeds, and rich bending capabilities.
  • Chromatic: More complex, more reeds, and a wide array of tones.

In this duel, players reveal their mastery through breath control, dexterity, and personal style. The diatonic may dance through quick, soulful melodies, while the chromatic harmonica could craft intricate musical passages with precision.


Diatonic Harmonica Chromatic Harmonica
Blues, folk, rock Jazz, classical
Bending for expression Slide button for full scale
Simpler, fewer reeds Complex, many reeds

Unveiling The Diatonic Harmonica

The diatonic harmonica, often known as the “blues harp”, offers a rich tapestry of sound in a small package. Its simplicity lets beginners learn quickly. Its expression draws professionals. It has shaped genres with its unique voice.

The Birth Of Blues And Folk

The diatonic harmonica’s raw, soulful sound became a staple in blues and folk music. Legends like Sonny Boy Williamson breathed life into it. These small instruments held powerful stories of life, loss, and joy. They became the voice of a musical revolution.

Layout And Key Flexibility

Offering a 10-hole interface, diatonic harmonicas limit players to a single key. Mastery comes in leveraging this constraint. Players bend notes and use techniques like overblowing to explore melodies.

Seasoned musicians often collect harmonicas in various keys. This allows them to match the harmonica key with the song’s key. It preserves the diatonic’s integrity while offering versatility in performances.

Features Diatonic Harmonica
Number of Holes 10
Suitable For Blues, Country, Folk
Note Bending Possible
Key Variety Single Key per Instrument
  • Single Key: Each harmonica plays in one key.
  • Techniques: Note bending, overblows for expression.
  • Genres: Perfect for blues, folk, and rock.


The Chromatic Contender

The Chromatic Contender steps into the musical ring with its complete set of notes. This mighty instrument plays every half-step, offering versatility unknown to its diatonic counterpart. The chromatic scale includes all twelve pitches of the octave. Such capability allows for a full expression in music, where every note is available at your fingertips.

Classical And Jazz Stylings

The chromatic harmonica suits the intricate melodies of classical music. It also thrives in the improvisational realm of jazz. Classical milestones and jazz tunes reach new heights with this instrument. Here’s how:

  • Melodic adaptability: It can mimic a violin’s vibrato or a saxophone’s sass.
  • Full range: It covers several octaves, ideal for complex compositions.

Complexity Meets Versatility

The chromatic instrument isn’t just about range; it’s about exploiting musical complexity. Players optimize the available notes to transition between scales. The result is a rich harmonic texture, perfect for different genres:

Genre Use of Chromatics
Blues Bends and microtones for soulful expressions.
Classical Accuracy in complex pieces with swift modulations.
Jazz Improvisation with intricate chord progressions.

Learning the chromatic scale opens doors to infinite musical paths. Its versatility makes it a favored choice for composers and arrangers.

Design And Build

Exploring the wonders of harmonicas starts with their design and build. The harmonica, a staple in music genres like blues and folk, comes in two main types: Diatonic and Chromatic. Differences in design help these instruments produce their unique sounds. Let’s dive into their reed structure and body variations.

Reed Structure

At the heart of any harmonica lies its reeds, crucial for sound production. Diatonic harmonicas typically have a single reed per note. They’re often loved for their rich tone. Chromatic harmonicas, however, sport a double reed system. This setup, featuring a slide button, unlocks all 12 musical notes for playing a full scale.

Body And Shape Variations

Aside from reeds, the physical form of a harmonica affects its sound. Diatonic harmonicas are smaller, perfect for portability and ease of play. Their rectangular shape is familiar to many. In contrast, chromatic harmonicas are slightly larger. This size accommodates their slide mechanism. A rounded mouthpiece on chromatics offers a comfortable playing experience.

Here’s a quick comparison:

Feature Diatonic Harmonica Chromatic Harmonica
Reed Quantity Single Reed Double Reed
Shape Compact, Rectangular Larger, Rounded
Notes Accessibility Limited Scale Full 12-Note Scale

To understand their unique characteristics, consider their purpose. Beginners often start with a diatonic due to its simplicity. Professional players may prefer the versatility of a chromatic harmonica. Whether it’s the bluesy riffs or the complex melodies, each harmonica’s design and build play a pivotal role in bringing melodies to life.

Playing Techniques Compared

Two different worlds of melody come alive in diatonic and chromatic instruments. Each boasts unique playing techniques, unlocking a spectrum of musical expression. From harmonicas to accordions, the way musicians coerce notes from these instruments is fascinating. Let’s delve into these techniques and see how they shape the character of each instrument.

Bending And Overblowing

Diatonic players master the art of bending. This technique involves changing a note’s pitch. By adjusting the airflow and embouchure, they can hit notes not explicitly available on the instrument. An amazing bend gives blues and rock music their soulful sounds.

In contrast, chromatic musicians often use overblowing. Overblowing produces higher pitches by forcing more air into the instrument. It requires skill and precision, especially to keep the tone pure and steady. Both techniques allow for richer musical expression, but they take time to perfect.

Button-pressing Brilliance

Chromatic instruments usually feature buttons or keys. These elements make playing sharps and flats straightforward. Here’s how:

  • Press a button to change the note’s pitch.
  • Smooth transitions between notes are possible.
  • Versatility is enhanced with easy access to a full scale.

In diatonic instruments, buttons can add extra notes or chords. This doesn’t match the chromatic scale’s range. However, diatonic players enjoy a simplified setup. It lets them focus on rhythm and melody within a specific key.

Quick fingers work magic on both types of instruments. Yet, the playing techniques call for distinct approaches. Diatonic players draw soulful tones through bends and breath control. Chromatic players exercise precision in button pressing for a more extensive scale. Each technique opens a gateway to express music in its unique splendor.

The Soundscapes They Create

Understanding the difference between diatonic and chromatic instruments shapes our grasp of music. Each type forms unique soundscapes that stir our emotions and connect us to the composition.

Tonal Qualities

Diatonic instruments stick to a specific scale or key, producing a harmonious and fluid sound. They resonate with familiarity, like hearing a song and knowing the next note intuitively.

Chromatic instruments, on the other hand, include all twelve pitches within an octave. This allows for vibrant and versatile soundscapes. They paint with a broader sonic palette, often surprising the ear with unexpected turns.

The distinct tonalities give each type its character:

  • Diatonic: Conveys a sense of order and unity.
  • Chromatic: Offers richer color and complexity.

Expression And Dynamics

Musicians use these instruments to express emotions. Diatonic instruments often highlight melody, making them ideal for songs that tell stories or convey clear moods.

Chromatics bring out shades of feeling with their varied pitch range. They introduce subtle or dramatic dynamic changes that can reflect the full spectrum of human emotion.

Instrument Type Expression Dynamics
Diatonic Melodic and engaging Gentle transitions
Chromatic Colorful and intense Wide-ranging intensities

In essence, the soundscape depends on whether a musical piece leverages the stability of diatonics or the flexibility of chromatics. Both create distinct and memorable musical journeys.

Choosing The Right Harmonica

Embracing the world of harmonica music starts with a pivotal decision: selecting the ideal instrument. Harmonicas come in various tunings, but the focus often narrows down to diatonic versus chromatic. Understanding these types invites musicians to discover harmonicas that align seamlessly with their musical journeys.

Music Genre Consideration

Harmonica choice closely ties with musical style preferences.

  • Blues, Folk, and Rock artists usually prefer diatonic harmonicas.
  • Jazz and Classical musicians often gravitate towards chromatic harmonicas for their versatility.

Diatonic harmonicas, tuned to a specific key, bring authenticity to music genres rooted in tradition. For a diverse pitch range essential in jazz or classical pieces, the chromatic harmonica is a natural fit. Its button-activated slide mechanism allows access to a full chromatic scale.

Skill Level And Learning Curves

Selecting a harmonica also depends on personal expertise and learning ambitions.

Harmonica Type Skill Level Learning Curve
Diatonic Beginner to advanced Gentler, more intuitive
Chromatic Intermediate to professional Steeper, technical mastery required

The diatonic harmonica is often recommended for beginners. It’s straightforward and aligns with simple melodies quickly. In contrast, the chromatic harmonica demands a deeper understanding of music theory. It suits those ready to invest time into learning its complex structure and capabilities.


Cultural Impact And Iconic Players

The harmonica, a humble instrument, divides into two main types: diatonic and chromatic. Each holds a unique place in music history. Diatonic harmonicas, tuned to a specific scale, dominate blues, rock, and folk. Chromatic harmonicas, with a button-activated slide, enable playing in all keys. This duality shapes the instrument’s role across genres. Let’s explore the cultural significance and celebrate the virtuosos who mastered these instruments.

Legends Of Diatonic

The diatonic harmonica, often called the blues harp, stands central to American roots music. Players squeeze out emotion from every bend and vibrato.

  • Little Walter: Revolutionized blues harmonica with his amplification and innovative playing.
  • Bob Dylan: Turned the harmonica into a voice of folk and protest songs.
  • Sonny Boy Williamson II: Combined mastery and raw emotion in his performances.

Their soulful melodies still echo in the music world, influencing countless artists.

Chromatic Masters

The chromatic harmonica expands possibilities with its versatility. It’s a favorite in jazz, classical, and pop. The legends behind this instrument have elevated it to new artistic heights.

Artist Contribution
Stevie Wonder Wove the chromatic harmonica into soul and pop, showcasing its expressive range.
Larry Adler Brought the harmonica to the classical stage, collaborating with composers like Vaughan Williams.
Toots Thielemans Jazz harmonica icon, known for his emotional phrasing and compositions.

They’ve challenged the boundaries of music, making the chromatic harmonica a celebrated solo instrument.

Maintenance And Lifespan

Maintenance is key to a harmonica’s lifespan. Both diatonic and chromatic harmonicas need regular care. This ensures they sound great for years. Let’s explore some essential maintenance tips.

Cleaning And Tuning

Keeping your harmonica clean is crucial. Regular cleaning prevents build-up that can affect sound quality.

  • For diatonic harmonicas, tap out saliva after playing.
  • Chromatic harmonicas require occasional disassembly for thorough cleaning.
  • Use soft cloths and alcohol-free cleaners.

Tuning might seem daunting, but with practice, it’s straightforward. A small tuning tool can adjust reeds. Always tune in a quiet environment.

Replacing Reeds And Parts

Over time, reeds may degrade. Replacing them is part of harmonica upkeep.

Part Diatonic Chromatic
Reeds Often replaceable individually May require specialized tools
Valves N/A Need replacing to prevent air loss
Slides N/A Lubricate regularly for smooth operation

Always buy quality parts for longevity. Some models allow easy reed replacement. Others might need a professional touch.

Diatonic Vs Chromatic Harmonicas: The Ultimate Duel


Credit: www.youtube.com


The Future Of Harmonica Music

The future of harmonica music looks brighter than ever with the continuous evolution of diatonic and chromatic harmonicas. These instruments, central to a variety of music genres, are set for an innovative leap. This will enable artists to explore new horizons and create even more diverse soundscapes. Let’s delve into the advancements that will shape the next generation of harmonica music.

Innovations In Design

Heralding a new era for harmonica design, recent years have seen groundbreaking developments that promise to enhance the player’s experience. These include:

  • New materials for better sound and durability.
  • Improved reeds for more accurate pitch control.
  • Modular construction, enabling customized setups.
Feature Benefit
Adjustable mouthpieces Easier playability for various techniques
Synthetic combs Resistance to moisture and temperature changes

These innovations promise to make playing more intuitive, allowing musicians to push the boundaries of what’s possible on a harmonica.

The Evolving Music Scene

As the music scene changes, harmonica players adapt by incorporating both diatonic and chromatic styles. The following trends are reshaping the landscape:

  1. Crossover genres blend harmonica sounds in new ways.
  2. Electronic music integrates harmonica via digital effects.
  3. Global collaborations fuse traditional and modern harmonica techniques.

The harmonica is becoming a versatile player across various music styles. This versatility ensures it remains a beloved instrument for years to come.

Frequently Asked Questions For Diatonic Vs Chromatic


What Is A Diatonic Scale?


A diatonic scale is a sequence of seven distinct pitch classes. It includes five whole steps and two half steps in each octave. This scale is integral to Western music, forming the basis of major and minor keys.


How Does Chromatic Differ From Diatonic?


Chromatic scales differ from diatonic by including all twelve pitches within an octave. Unlike the seven-note diatonic scale, chromatic encompasses half-step increments between each note, allowing for more complex melodies and harmonies.


Can Diatonic Harmonicas Play Chromatic Notes?


Diatonic harmonicas are primarily designed for specific key scales. However, advanced techniques like bending or overblowing can produce chromatic notes, albeit with limitations compared to a chromatic harmonica.


Why Choose A Diatonic Instrument?


Musicians choose diatonic instruments for their simplicity and strong association with specific genres like blues, folk, and rock. They offer a straightforward approach to playing in the native key of the instrument.


Conclusion


Exploring diatonic and chromatic structures reveals the depth and diversity of music. Each system has its charm and purpose, shaping melodies and harmonies uniquely. Whether you gravitate towards the straightforward diatonic or embrace the chromatic’s complexity, understanding both enriches your musical journey.


Dive into these scales; let them guide your creative expression.

Categories
Archive

Best Guitar Amp Mics: Capture Your Sound Perfectly!

As an Amazon Associate I earn from qualifying purchases.

The Shure SM57 and the Sennheiser e609 remain top choices for guitar amp mics. These industry standards deliver quality sound and durability.


Selecting the best guitar amp microphone ensures every riff and chord is captured with clarity and definition, which is crucial for both live performances and studio recordings. The Shure SM57 excels with its reliable performance, versatile application, and ability to handle high pressure sound levels.


Perfect for guitar amps, it’s a go-to mic for many sound engineers. The Sennheiser e609, with its supercardioid pattern, offers precise sound capture, reducing bleed from other instruments. It’s specially designed for miking guitar cabs and is highly praised for its ease of use and exceptional sound pickup. Both these mics have earned their place in the music industry, consistently providing the punch and detail that artists and technicians look for when amplifying or recording guitar.

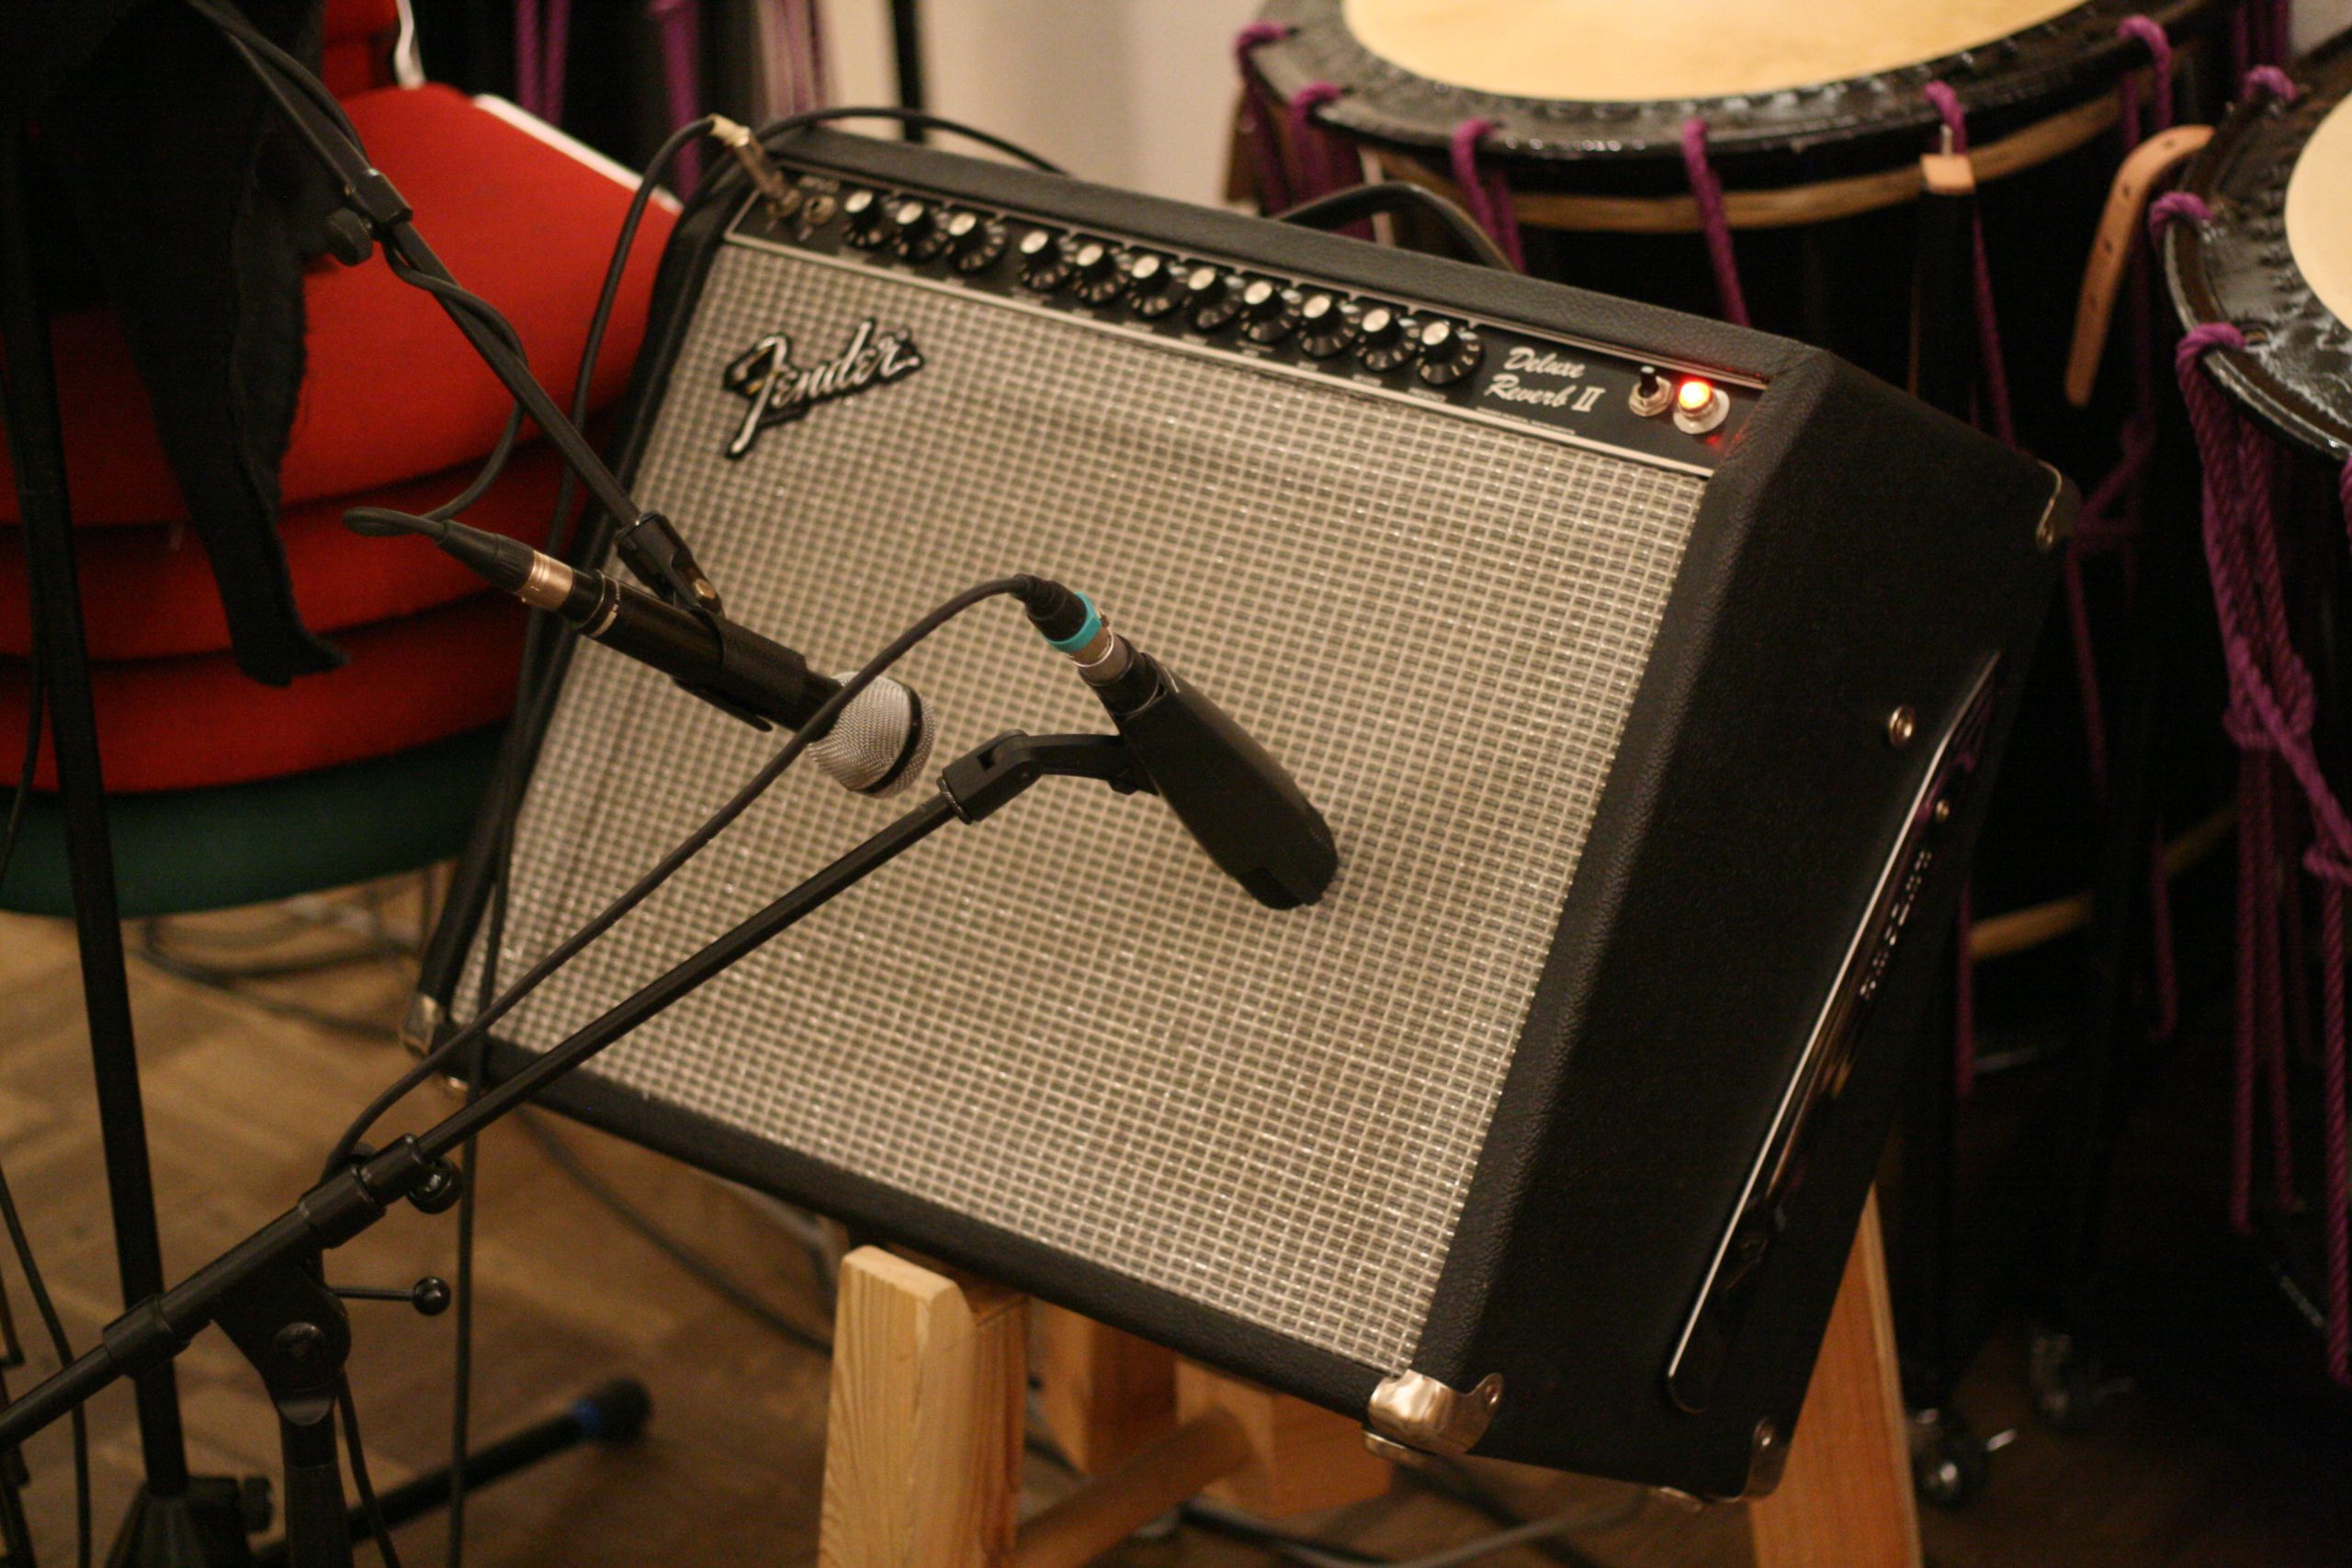
Best Guitar Amp Mics: Capture Your Sound Perfectly!


Credit: www.guitarworld.com


The Quest For Perfect Guitar Tone

The journey to capture the essence of a guitar’s soul has always been arduous. Great guitar tone is the Holy Grail for guitarists and audio engineers alike. It’s more than just plugging in and playing. It’s about harnessing the raw, vibrant energy that resonates from the strings, through the amp, and out into the world.

Elements Of Great Amp Micing

Creating the ultimate guitar sound involves meticulous attention to detail. Choosing the right microphone, positioning it accurately, and fine-tuning the amp settings all play crucial roles.

  • Microphone type: Dynamics and condensers are go-tos.
  • Position: Angle and distance affect the sound character.
  • Environment: Room acoustics significantly influence tone.

It’s a balance between science and art.

The Role Of Microphones In Guitar Recording

Microphones are the ears of the recording world. They capture every subtlety and nuance of a guitar’s tone. The right mic can mean the difference between a good take and a great one.

Mic Type Characteristics Best For
Dynamic Robust, handles high volume Live settings
Condenser Detailed, sensitive Studio recordings
Ribbon Warm, vintage vibe Mellow tones

Experiment to find the perfect match for your sound.

Dynamic Mics: Workhorses Of The Studio

Every guitarist knows the power of the right amp set-up. But, capturing that perfect sound isn’t just about the amp. It’s about the mic too. Enter dynamic microphones. These mics aren’t just studio staples; they’re durable, reliable, and perfect for capturing the raw energy of a guitar amp.

Pros Of Dynamic Mics

  • Withstands High Volume: They handle loud sounds without distortion.
  • Built Tough: Dynamic mics can endure drops and knocks.
  • Less Sensitive to Hum: These mics pick up less background noise.
  • Cost-Effective: They offer great sound at an affordable price.
  • Versatile: Suitable for stage and studio use.

Popular Dynamic Mic Models For Guitars

Model Features Used By
Shure SM57 Cardioid pattern, handles high pressure Professionals worldwide
Sennheiser MD 421 Five position bass roll-off, clear sound Studio engineers
Electro-Voice RE20 Variable-D for minimal proximity effect Radio stations and recording artists

Dynamic mics stand as an excellent choice for capturing guitar amps. Their durability and quality make them go-to choices for musicians and sound engineers alike.

Condenser Mics: Clarity And Detail

When recording or amplifying a guitar, the details in the sound matter. Condenser microphones capture the nuances with crystal clear accuracy. Their sensitivity to sound makes them ideal for picking up the intricacies of a guitar amp.

What Sets Condenser Mics Apart

Condenser mics have a unique build that allows them to pick up sound with high fidelity. This results in a detailed audio capture, perfect for the clear and articulate reproduction of your guitar’s tone.

  • Wide Frequency Response: Captures high and low tones clearly.
  • Excellent Transient Response: Swiftly responds to the ‘attack’ in your playing.
  • High Sensitivity: Ideal for quiet or intricate sounds.

Top Condenser Mic Picks For Amplifiers

Mic Model Key Feature Suitable For
Audio-Technica AT4050 Multi-pattern design Versatile recording
AKG C414 Low noise and high dynamic range Professional studios
Rode NT1-A Warm sound with high clarity Home studios

Each condenser mic offers a blend of characteristics to suit different needs. Audio-Technica AT4050’s versatility stands out for varied styles. AKG C414 shines in professional settings, and Rode NT1-A is a favorite in home studios for its warmth and detail.

Ribbon Mics: Vintage Warmth

The allure of ribbon microphones lies in their iconic sound, reminiscent of classic records from the golden era of music. They envelop guitar amps in a blanket of smooth, mellow tones, providing that sought-after vintage warmth. Let’s unravel the mystery of ribbon mics and discover why they are a favorite for capturing the soul-stirring sounds of guitar amplifiers.

Ribbon Mic Characteristics

Ribbon microphones, known for their rich and natural sound, are a staple in recording studios. Their design includes a thin, lightweight ribbon that moves within a magnetic field. This unique construction translates into a warmth and roundness of tone that solid-state mics struggle to replicate. The following are key traits:

  • Figure-8 polar pattern: Captures sound from the front and back, ideal for amp recording.
  • Smooth high frequencies: Softens harshness for a pleasant listening experience.
  • Fast transient response: Offers a natural capture of intricate guitar sounds.

Ribbon mics do require careful handling and sometimes need preamps with high gain but low noise. They are less ideal for high SPL environments unless specifically designed for it.

Best Ribbon Mics For Amp Capture

When it comes to recording guitar amps, certain ribbon mics outshine their peers. Here are a handful that promise exemplary performance:

Mic Model Key Features Suitable For
Royer R-121 High SPL handling, warm and natural sound Guitar cabs, brass instruments
AEA R84 Versatile, classic vibe Studio and live sound
Beyerdynamic M 160 Hypercardioid pattern, detailed sound Strings, pianos, and cymbals

These ribbon mics offer the warmth that tubes and transistors often miss, especially for guitar amplifiers. Recording enthusiasts cherish them for their ability to produce music that feels as good as it sounds.

Microphone Placement Techniques

Microphone Placement Techniques: Capturing the true essence of a guitar amp’s sound hinges on masterful mic placement. The dance between microphone and speaker can unveil a world of difference in tonal quality. Use creative mic techniques to sculpt the perfect guitar sound for any recording session.

On-axis Vs. Off-axis Positioning

Discovering the right angle:

  • On-Axis: Point the mic directly at the speaker center for a bright, defined sound.
  • Off-Axis: Angle the mic slightly for a more rounded, warmer tone.

Experiment with these positions to find your ideal amp character.

Distance Micing For Different Sounds

Exploring space measures:

Distance Sound Character
Close (1-2 inches) Bass boost, direct sound
Medium (1-3 feet) Balanced, room ambiance
Far (4+ feet) Echo, environment

Change the distance to fine-tune your sound output.

Mic Combinations For Fullness And Depth

Capturing the true essence of a guitar’s sound often requires more than a single mic. Mic combinations for fullness and depth can transform a flat recording into a dynamic masterpiece. Let’s explore the art of blending different mic types and aligning their phases for the perfect guitar amp sound.

Blending Mic Types

Mixing different microphones can capture the complexity of a guitar amp’s sound. Here’s a guide to some popular pairings:

  • Dynamic + Condenser: A dynamic mic provides punchy lows, while a condenser captures crisp highs.
  • Ribbon + Condenser: Ribbons offer warm mids, paired with the detail of a condenser.
  • Dynamic + Ribbon: This combo allows for a blend of warmth and clear low-end definition.

Phase Alignment Considerations

Proper phase alignment is crucial for a robust sound. Incorrect phase can cause weak or hollow recordings. Follow these steps:

  1. Position mics at similar distances from the amp.
  2. Use phase buttons to test and adjust the sound.
  3. Listen for fullness to confirm correct phase alignment.

By combining mics thoughtfully and managing phase, you can achieve a rich, multi-dimensional guitar sound.

Dialing In The Perfect Mic Settings

Dialing in the perfect mic settings is essential for capturing the essence of any guitar amp. It turns raw power into a polished audio masterpiece. Whether you’re recording in the studio or amplifying live sound, the setup can make or break your guitar’s tone.

Gaining Staging Basics

Gaining the right stage for your mic means starting with the basics. Correct gain staging ensures your signal is strong. It avoids unwanted distortion. Follow these steps:

  • Set your amp volume. Aim for the sweet spot where your amp sounds best.
  • Set your mic preamp. Gradually increase the gain until the signal is clear yet free from clipping.
  • Check the levels. Your mixer or audio interface should show a strong, clean signal.

Adjusting Eq And Filters

EQ and filters shape your sound. They can brighten or mellow the tone. Use them wisely:

  • High-pass filters remove low-end rumble. Start around 80 Hz.
  • Midrange brings out the guitar’s character. Boost or cut depending on the mix.
  • Treble adds sparkle. Adjust until the sound is clear but not harsh.

Remember, every room and guitar amp is different. Take time to test different settings. Trust your ears. With practice, you’ll capture the perfect guitar tone.

Best Guitar Amp Mics: Capture Your Sound Perfectly!


Credit: upayasound.com


Case Studies: Famous Guitar Amp Micing Setups

Guitar tones shape music’s emotion and message. Legendary recordings often feature distinct amp micing setups. This section dives into the micing secrets behind iconic guitar sounds. Gain insights from classic rock textures to modern mix triumphs. Let’s explore how pros place mics to capture magical guitar tones.

Classic Rock Sounds

The golden era of rock relied on simple yet effective micing. Artists preferred dynamic microphones for their robust and warm sound.

  • Shure SM57: The staple for many rock legends.
  • Placed close to the speaker, capturing the grit and punch of guitar riffs.


Jimmy Page of Led Zeppelin used a mixture of distance and close micing. It created a massive presence and dimension. A distance mic captured the room tone.

Artist Microphone Micing Technique
Jimmy Page Shure SM57 Combo of close and room mics

Contemporary Production Techniques

Modern technology brings new micing strategies. Producers experiment with multiple mics for a fuller sound spectrum.

  • Royaltone Studios: Favored the blend of a dynamic and condenser mic.
  • Using a Royer R-121 with a Shure SM57 captures clarity and warmth.
  • The condenser mic adds airiness and detail.


John Mayer’s tone combines mics for a smooth yet articulate sound. His technique favors clarity and fullness.

Artist Microphone Setup Production Note
John Mayer Royer R-121 & Shure SM57 Blending mics for tonal balance

Maintaining Your Mics For Longevity

To capture the true essence of your guitar amp, a reliable mic is essential. Care for your mics and they’ll last for years. This includes regular maintenance and troubleshooting. Let’s keep your mics performing at their best with these simple steps.

Regular Maintenance Tips

Caring for your guitar amp mics is the key to their longevity. Follow these straightforward maintenance tips:

  • Keep Mics Dry: Avoid moisture as it can damage the mic internals.
  • Use Protective Cases: Always store in cases when not in use.
  • Clean Regularly: Gently wipe your mics to remove dust and spit.
  • Handle with Care: Don’t drop mics and detach cables gently.
  • Check Connections: Inspect cables and plugs for wear and tear.

Troubleshooting Common Mic Issues

Encounter a problem with your mic? Here’s how to resolve common issues:

Problem Solution
No Sound Check cable connections and ensure the mic is on.
Distorted Sound Lower the mic’s input level or move it further from the amp.
Interference Reposition the mic or check for nearby electronic devices.
Static Noise Inspect the cable for damage or try a different cable.

By keeping these tips in mind, you help your guitar amp mics deliver clear and robust sound in each performance.

Accessorize Your Micing Setup

Accessorizing your micing setup is like adding the perfect condiments to a gourmet burger; it elevates the experience. Guitar amp micing isn’t just about the microphone itself. The accessories you choose breathe life into the sound you capture. This section will guide you through essential add-ons and innovative tools to enhance your guitar amp micing setup.

Essential Mic Accessories

Think of these accessories as the unsung heroes of sound recording. They make the job easier and the result sound sweeter.

  • Mic Stands: They must be sturdy and adjustable.
  • Shock Mounts: These isolate the mic from vibrations.
  • Cables: High-quality cables ensure clear signal transmission.
  • Pop Filters: Not typically used for amps, but useful for reducing plosive sounds when recording a guide track.

Innovative Tools For Amp Micing

Here’s where the real magic happens. Innovative tools can take your recording from good to great.

Tool Type Purpose Benefits
Reflection Filters Control room sound Creates dry vocal or instrument sounds
Isolation Pads Prevent mic stand transfer Reduces rumble and interference
Adjustable Mic Bars Mount multiple mics Enables stereo micing techniques


Capturing Live Guitar: Mics On Stage

Every live performance hinges on the bridge between electrifying riffs and the roaring audience. The right mic turns strings into legends. Let’s explore guitar amp mics that bring out the best on stage.

Challenges Of Live Micing

Live micing is a high-wire act. Feedback, noise, and equipment durability test every sound engineer. The perfect mic must capture the guitar’s soul, reject off-axis noise and need to last. Here are common hurdles:

  • Feedback Suppression: Crucial for clarity.
  • Sound Bleed: Minimize intrusion from other instruments.
  • Consistent Output: Ensure reliability during long sets.

Mics To Withstand The Rigors Of Touring

Durability and performance are non-negotiables on tour. Only mics built for the road make the cut. Below are top choices for touring guitarists:

Mic Model Features Why It Rocks
Shure SM57 Rugged, Dynamic Legendary durability, industry standard
Sennheiser e906 Super-cardioid, Flat Shape Easy positioning, handles high SPLs
Audix i5 VLM Capsule, Dynamic Clear sound, resilient build

Future Of Amp Micing Technology

The Future of Amp Micing Technology sparks excitement among guitar enthusiasts and sound engineers alike. Cutting-edge innovations promise to transform the art of capturing guitar sounds, leading to richer, more dynamic audio experiences. Let’s explore these thrilling developments set to redefine amp micing.

Advancements In Mic Design

New microphone designs are emerging that challenge long-standing traditions in amp micing. Manufacturers now focus on crafting mics that enhance frequency response, reduce interference, and provide better isolation. Features like built-in pop filters and shock mounts are becoming standard.

  • Multi-pattern Capability: Allows for greater flexibility and experimentation.
  • Compact Size: Easier placement without compromising sound quality.
  • Durable Materials: Ensures longevity and consistent performance on the road.

Virtual Micing And Modelling

The realm of virtual micing and amp modelling is set for a revolutionary leap forward. Software plugins now emulate classic mic sounds, providing limitless possibilities with minimal gear. Users can switch between legendary mic models with a click.

  1. Impulse Responses: Capture the essence of physical mics and spaces digitally.
  2. Customizable Settings: Tailor the sound to the precise needs of each session.
  3. Real-time Adjustment: Alter mic settings on-the-fly during live performances or recording.
Best Guitar Amp Mics: Capture Your Sound Perfectly!


Credit: reverb.com


Frequently Asked Questions For Best Guitar Amp Mics


What Are The Top Guitar Amp Mics?


The best guitar amp mics typically include the Shure SM57, Sennheiser e609, and Royer R-121. These mics are favored for their durability, sound quality, and ability to handle high sound pressure levels, making them industry standards for guitar amp recording and live performances.


How To Choose A Mic For Guitar Amps?


When choosing a mic for guitar amps, consider the mic’s frequency response, polar pattern, and maximum SPL. Dynamic mics are often preferred for their ruggedness and ability to capture loud sounds, while ribbon mics offer a smooth, natural response for more nuanced recordings.


Are Condenser Mics Good For Guitar Amps?


Condenser mics can be excellent for guitar amps, especially in studio settings. They offer a wider frequency response and higher sensitivity, which can be advantageous for capturing the amp’s full tonal range. However, they may require more careful handling and positioning due to their sensitivity.


Can I Use A Vocal Mic For Guitar Amps?


Yes, you can use a vocal mic for guitar amps, particularly if it’s a dynamic model like the Shure SM58. While not tailored specifically for guitar amps, these mics can still produce a decent sound and may offer versatility if you’re working with a limited mic collection.


Conclusion


Selecting the perfect guitar amp mic can elevate your sound to new heights. With the options we’ve explored, finding your match is simpler than ever. Remember, the right choice blends seamlessly with your style and setup. Dive in, test out our top picks, and let the music speak for itself.


Time to amplify your talent!

Categories
Archive

Waves Online Mastering Review: Unveiling Audio Prowess

Waves Online Mastering provides professional audio mastering services through a web-based platform. Users appreciate its convenience and quality output.


Waves Audio, a longstanding powerhouse in the field of audio production, now offers musicians and producers a seamless mastering solution with its Online Mastering service. This digital service combines cutting-edge technology with expert mastering techniques to polish and enhance music tracks.


The interface is user-friendly, enabling artists to upload tracks, choose their preferred mastering styles, and receive a mastered track within a short turnaround time. The service aims to deliver studio-quality sound, ensuring that the final product is ready for commercial release. Trusted by industry professionals, Waves Online Mastering stands as a formidable option for those looking to finalize their audio to a professional standard without the need for physical studio presence.


Introduction To Waves Online Mastering

Introduction to Waves Online Mastering throws open the doors to a studio-quality sound. This service lets musicians and producers polish tracks effortlessly.

Rise Of Online Mastering Services

The music landscape is evolving. Artists everywhere are discovering that online mastering services offer a fast, affordable path to pro-sounding music.

  • Accessibility to top-tier audio tools
  • Quick turnaround times
  • Cost-effective solutions for independent artists

Waves: A Trusted Name In Audio

Waves stands out in the audio realm. High-quality plugins and a sterling reputation back Waves Mastering. Its online mastering platform extends this excellence to your browser.

Features Benefits
User-Friendly Interface Smooth workflow for users of any skill level
Precision Tools Refined sound across genres
Industry-Standard Quality Radio-ready tracks

Key Features Of Waves Online Mastering

Waves Online Mastering brings polished sound to music with ease. It offers a quick and accessible mastering solution packed with features. For musicians and producers looking for professional-grade results, understanding these key features is vital.

The User Interface Experience

Efficiency and simplicity define the user interface of Waves Online Mastering. This tool streamlines the mastering process with a clean layout and intuitive design. It allows users to upload tracks and receive mastered versions with minimal effort.

  • Drag-and-drop functionality for quick uploads.
  • Crisp visuals and clear feedback on processing stages.
  • Accessible preset options for genre-specific mastering.

Proprietary Processing Algorithms

At the core of Waves Online Mastering is its advanced processing technology. Unique algorithms tailored to enhance audio tracks give users a competitive edge. These algorithms analyze and optimize sound for a consistent, radio-ready finish.

Algorithm Feature Description
Loudness Optimization Adjusts volume for streaming standards.
EQ Balancing Tweaks frequencies for a balanced mix.
Stereo Enhancement Widens the soundstage for an immersive experience.

The platform’s algorithms also ensure a consistent sound across various devices and playback systems. This gives your music the ability to shine everywhere, from earbuds to club speakers. With Waves Online Mastering, exceptional sonic quality is just a few clicks away.


How Waves Stands Out From The Competition

In a sea of online mastering services, Waves rises as a top-notch choice for producers and audio engineers. With features that blend effortlessly with its product ecosystem and a steadfast dedication to sound quality, Waves Online Mastering isn’t just an alternative—it’s a standout. Let’s dive into how this service eclipses its rivals.

Seamless Integration With Other Waves Products

Efficiency in workflow is essential for music professionals. Waves Online Mastering offers that by integrating with other Waves products. This integration creates a smooth process from mixing to mastering. Users find it easy to work within the Waves ecosystem. Here are key benefits:

  • Compatibility with Waves plugins
  • Unified user interface
  • Familiarity for Waves users

This synergy allows for a cohesive production experience. Users can expect a seamless transition between stages of their audio project.

Commitment To Sound Quality

Waves doesn’t compromise on sound quality. It ensures crystal-clear audio for every track mastered. Here’s what sets their commitment apart:

  1. Advanced algorithms for sound enhancement
  2. Continuous updates for optimal performance
  3. Rigorous quality control tests

Entrusting your music to Waves means receiving a polished product. The result is not just loud, but sonically superior. With Waves, your tracks are mastered to compete with industry standards.


The Technical Edge: What Makes Waves Unique

When you’re seeking that extra sparkle for your track, Waves Online Mastering offers a unique edge. This service combines cutting-edge technology with industry-standard precision. This is your inside look at why Waves stands out in the world of audio mastering. Let’s dive into what gives Waves its technical superiority.

Behind The Scenes Of Waves’ Mastering Technology

Waves’ mastering technology is the brainchild of world-class audio engineers. Their years of experience have culminated in a mastering suite that’s both user-friendly and technically advanced. Here’s what sets it apart:

  • Custom Algorithms: Unique processing methods ensure your mix translates well across all sound systems.
  • Intelligent Signal Analysis: Your music undergoes detailed scrutiny, adjusting levels and clarity automatically.
  • Optimized Loudness Control: Attain the perfect balance for streaming platforms without losing dynamic range.

Professional Endorsements And Reviews

Waves doesn’t just claim to be the best — professionals agree. Here’s what they say:

Reviewer Profession Testimonial
Mike Smith Producer “Waves gave my track the punch it needed.”
Sarah Jones Sound Engineer “Clean, consistent results every time.”
Raj Patel Artist “My music has never sounded so alive.”

Trust from the pros tells you that Waves Online Mastering isn’t just another tool — it’s a game-changer for your music.

Price Point And Subscription Plans

Understanding the ‘Price Point and Subscription Plans’ of Waves Online Mastering is crucial for artists. It’s all about finding top-notch mastering services that fit the budget. This section dives into the costs and subscription options Waves offers, breaking down what you get for your money.

Cost-benefit Analysis For Musicians

As a musician, the value for money is key. Waves Online Mastering provides various pricing tiers. This ensures different needs and budgets are catered to. Artists should assess the cost concerning quality and features.

  • Basic Plan: Suitable for a one-off single with no future commitment.
  • Pro Plan: Ideal for EPs or albums, offering bulk processing at a discount.
  • Unlimited Plan: Best for continuous creators needing multiple masters monthly.

By choosing the right plan, artists can optimize their investment. This means high-quality mastering without overspending.

Comparing With Other Mastering Services

Waves competes with a variety of mastering services. Each service comes with its own price tag and feature set. To make an informed decision, artists should compare these aspects.

Service Single Master EP/Album Deal Subscription
Waves Affordable rate Discounted bulk rate Favorable monthly fee
Service X Comparable rate No bulk deal Higher monthly fee
Service Y Higher rate Comparable bulk deal No subscription service

Waves Online Mastering often emerges as a cost-effective alternative. Artists get professional mastering without draining their funds. Making a side-by-side comparison reveals Waves’ competitive edge in the market.

Real-world User Experiences

Exploring the real-world user experiences with Waves Online Mastering reveals a journey of musicians and producers as they refine their sound. This section delves into how Waves transforms raw audio into polished, release-ready gems, through the eyes of its users.

Success Stories From Indie Artists

Indie artists have found true companions in Waves Mastering, turning their bedroom productions into sonic masterpieces. Below, a few success stories highlight the platform’s impact:

  • Alex & The Band: Tripled their Spotify streams within months post-mastering.
  • Sara’s Acoustic Set: Captured the essence of her live sound, gaining local radio play.
  • The Synth Lords: Achieved a warmer, vinyl-ready sound that boosted their vinyl sales.

Critiques And Constructive Feedback

While many celebrate the shine Waves adds, others offer constructive feedback. Some common points include:

User Positive Experience Room for Improvement
Electronic Producer Clarity in high frequencies Desired more low-end punch
Folk Songwriter Loved the warm, analog feel Wanted more control over the mastering process
Hip-Hop Artist Impressed by the vocal presence Suggested improvement in turnaround time

The Future Of Online Mastering With Waves

The music industry is constantly evolving, and Waves Audio stands at the forefront of this transformation, especially in the realm of online mastering. Offering innovative tools that bring professional audio processing into the digital era, Waves enables musicians and producers to achieve studio-level sound from anywhere in the world.

Upcoming Features And Updates

Waves Online Mastering is gearing up for an exciting future with a slew of anticipated updates and features. Users can look forward to:

  • New algorithm enhancements for richer sound quality
  • Integration with cloud storage services for seamless workflow
  • Customizable presets tailored by genre and style
  • Real-time collaboration tools enabling teams to work together

Industry Trends And Waves’ Role

In a competitive landscape, staying ahead means understanding and shaping industry trends. Waves Online Mastering not only follows but also sets trends, driving the industry by:

Trend Waves’ Influence
AI Integration Advancing automation for more consistent results
Mobile Access Providing platform flexibility for users on-the-go
High-Resolution Audio Pushing the boundaries of audio fidelity
Eco-friendly Solutions Reducing carbon footprint with online services

These developments underline Waves’ commitment to excellence and innovation in the fast-paced world of music production.

Final Verdict On Waves Online Mastering

After diving deep into Waves Online Mastering, a clear picture has emerged. This platform stands out for its blend of technical innovation and user-friendly tools. It’s critical to weigh every aspect of the service before deciding if it’s the right choice for perfecting your music tracks.

Pros And Cons Recap

Like any service, Waves Online Mastering has its highlights and drawbacks. An honest review is incomplete without acknowledging both. Let’s break down the key points:

  • Cutting-edge technology: Waves harnesses advanced algorithms for a refined sound.
  • User accessibility: Its simple interface ensures a smooth experience.
  • Quick turnaround: Fast processing delivers masters without delay.
  • Cost-effective: It offers competitive pricing for budget-conscious artists.

However, some downsides include:

  1. Limited customization can challenge those seeking deep control over their sound.
  2. A reliance on presets may not satisfy all professional audio requirements.

Is Waves Right For Your Mastering Needs?

Deciding on the right mastering service hinges on your unique needs. For independent musicians or producers with tight budgets, Waves Online Mastering is a gem. Its ease of use and quick results offer immense value. Artists yearning for more hands-on customization might need to look elsewhere. But for those embracing streamlined, technology-driven mastering, Waves stands as a solid ally in music production.


Frequently Asked Questions On Waves Online Mastering Review


What Is Waves Online Mastering?


Waves Online Mastering is a professional audio mastering service provided by Waves. It allows musicians and producers to master their tracks using expert-grade algorithms and Waves’ renowned audio-enhancing tools, all through a simple web interface.


How Does Waves Mastering Improve Sound Quality?


Waves Mastering enhances sound quality by applying equalization, compression, stereo imaging, and volume maximization. These processes refine tracks for a polished, radio-ready sound that’s consistent across different playback systems.


Is Waves Online Mastering User-friendly?


Yes, Waves Online Mastering is designed for ease of use. Artists can upload tracks and receive a mastered version quickly. The interface is straightforward, making professional mastering accessible to users with different skill levels.


Can I Preview My Track With Waves Mastering?


Waves Online Mastering typically offers a preview feature. This allows users to listen to a sample of the mastered track before committing to the full-service, ensuring satisfaction with the end result.


Conclusion


To sum up, Waves Online Mastering stands as a noteworthy tool for both novice and veterans in music production. Offering quality, convenience, and speed, it merits consideration by anyone seeking professional audio enhancement. Explore its capabilities to elevate your sound to the next level.

Categories
Archive

What Is Resonant Frequency

Resonant frequency is the natural vibration frequency of an object or system. It occurs when the frequency of an external force matches the system’s natural frequency.


Understanding resonant frequency is crucial in various fields, from engineering to music. It plays a significant role in the design of structures, electronic circuits, and musical instruments. Engineers must account for resonant frequencies to ensure stability and prevent structural failures due to resonance.


In electronics, resonant circuits filter specific frequencies which is essential for radio transmission and reception. Additionally, musicians leverage resonant frequencies to tune their instruments for desired sound qualities. Recognizing and managing resonant frequency helps avoid potential disasters and optimizes performance across multiple applications.

What Is Resonant Frequency: Unveil the Sonic Secrets


Credit: m.youtube.com


The Magic Of Resonant Frequency

The world around us vibrates with energy, from the strings of a guitar to the girders of a bridge. Each object sings at its own tune, known as its resonant frequency. This hidden melody holds a kind of magic, binding the laws of physics to the everyday objects we see and use.

The Fundamental Concept

Think of resonant frequency as the special vibration rate at which an object naturally wants to oscillate. It’s like how a child swings higher when pushed at just the right moment. When energy meets an object at its resonant frequency, the object responds by vibrating more intensely.

Real-world Examples

  • Music Instruments: When a guitar string is strummed, it vibrates at its resonant frequency, creating music.
  • Bridges: The infamous Tacoma Narrows Bridge collapsed due to wind’s vibrations matching the bridge’s resonant frequency.
  • Microwave Ovens: They cook food by using the resonant frequency of water molecules to heat them up.


Vibrations And Frequencies

Every object around us vibrates. A sound from a bell, a string on a guitar, or even buildings during an earthquake, they all have one thing in common – vibrations. These vibrations occur at different rates, known as frequencies. Picture them as invisible waves moving through the air.

The Basics

Resonant frequency is a special kind of vibration. Imagine a child on a swing; when pushed at just the right moment, the swing goes higher. That right moment is like the resonant frequency for objects. At this frequency, even small, regular pushes can lead to big swings, or in science talk, large amplitude vibrations.

  • Objects have a natural state where they vibrate the easiest.
  • This state is the object’s resonant frequency.
  • Energy is most efficiently transferred at this frequency.

Comparison To Non-resonant Frequencies

Resonant Frequency Non-resonant Frequency
Maximized vibration Reduced vibration
Energy transfer is efficient Energy transfer is less efficient
Persistent and stable Variable and less stable

Resonant frequencies create strong vibrations while non-resonant frequencies do not. Objects at non-resonant frequencies need more energy to keep vibrating. They do not ‘sing’ as resonant objects do. It is like pushing the swing randomly; it does not go as high.

Unlocking The Physics

Unlocking the Physics of resonant frequency is like discovering the natural rhythm of an object. It’s the specific frequency at which an object vibrates with the least amount of effort. Imagine a playground swing moving back and forth; there’s one push that makes it swing the highest – that’s similar to resonant frequency in physics.

Mathematical Representation

The math behind resonant frequency tells us how to find this natural rhythm. It’s described by a simple formula:

fâ‚€ = 1 / (2π√(LC))

Here, fâ‚€ is the resonant frequency. L stands for inductance and C for capacitance. The π in the formula is Pi, an important number in circles’ math.

Role Of Damping

Every swinging system loses energy, and this is where damping comes into play. Damping slows down the vibration and it’s due to things like air resistance or internal frictions. Without damping, things would swing or vibrate forever.

In simple terms, higher damping means the object stops vibrating quickly. Lower damping lets the object vibrate longer. Finding the balance is key for systems like bridges or buildings to be safe and last long.


Resonant Frequency In Daily Life

Imagine a swing moving back and forth with the lightest push. This magic happens when the push matches the swing’s rhythm, or its resonant frequency. Everything around us, from bridges to wine glasses, has its own secret dance. Find out how these hidden rhythms shape our world.

Structural Resonance

Buildings and bridges dance to the earth’s rhythm. Structural resonance occurs when their swaying matches seismic waves. Engineers test models on shaking tables to ensure safety. They make buildings dance safely through earthquakes. This is life-saving science in action.

  • Bridges endure wind without crumbling.
  • Skyscrapers sway safely during quakes.
  • Playgrounds need strong swings for endless fun.

Acoustic Resonance

Ever hear a note break a glass? That’s acoustic resonance. Sound waves can make objects vibrate if they hit the right note! Musicians tune instruments to resonate with every melody. Speakers use this to fill rooms with music. It’s like whispering to the universe in its own language.

Instrument Resonant Use
Guitar Strings vibrate at specific pitches.
Drums Skins resonate to create deep sounds.
Flute Air column vibrates to play notes.

Next time the world seems quiet, listen closely. You might hear its secret rhythms.

Technological Applications

The realm of resonant frequency harbors a treasury of benefits across multiple technological applications. Resonant frequency, the natural vibration frequency at which an object can oscillate with the greatest energy, is a fundamental concept with profound implications in today’s technology. This section illuminates the riveting applications of resonant frequency in enhancing our daily lives.

Resonance In Wireless Communications

Wireless communications form the backbone of our interconnected world. Resonant frequency plays a crucial role in optimizing signal transmission and reception. Devices like mobile phones, radios, and television sets employ antennas that use resonance to efficiently convert electrical energy into radio waves and vice versa.

Improved signal clarity and increased range mark the benefits of using resonant frequencies in communication devices. As such, manufacturers meticulously design antennas to align with specific resonant frequencies, ensuring seamless connectivity and high-quality communications.

Medical Imaging Breakthroughs

In healthcare, resonant frequency aids in cutting-edge diagnostic methods. Magnetic resonance imaging (MRI) machines exploit the phenomenon of resonance to peer inside the human body with astonishing clarity.

  • MRI uses radio waves at resonant frequencies to excite atomic nuclei in the body’s tissues.
  • This resonant effect helps in producing detailed images for precise medical assessments.
  • Resonant frequency also propels advancements in ultrasound technology, enhancing image resolution.

Thanks to resonant frequency, medical professionals gain a non-invasive window into the body, leading to better diagnosis and treatment.

Risks And Challenges

The concept of resonant frequency bears critical significance in both nature and industry. Despite its utility, it poses various risks and challenges. Inappropriate management of resonance can lead to catastrophic outcomes. Recognizing these hazards is pivotal for maintaining safety and functionality.

Engineering Disasters

Resonance led to some of the most infamous engineering failures. The Tacoma Narrows Bridge collapse stands out as a stark example. On November 7, 1940, the bridge twisted and ultimately fell into Puget Sound. Wind-induced vibrations synced with the bridge’s natural frequency, causing a disastrous resonance. Such events underscore the need to consider resonance during design and testing phases.

Controlling Unwanted Resonance

Unchecked resonance can damage structures and devices. Engineers use various strategies to mitigate these risks. Damping devices absorb energy, preventing resonant frequencies from reaching destructive levels. Altering the mass or stiffness of a system shifts its natural frequency away from external forcing frequencies. These techniques form a vital part of design considerations across various industries.

Strategy Method Application
Damping Add absorptive elements Building structures
Tuning Adjust natural frequency Instrument strings
Isolation Use isolative mounts Machinery bases

Controlled use of resonant frequency enhances performance, but unbridled resonance presents perils that necessitate diligent oversight. Engineers and designers remain vigilant to harness the benefits while avoiding the potential dangers of resonance.


A Deep Dive Into Sonic Secrets

Resonant frequency is like a hidden charm in everyday sounds. It’s a natural wonder that stays mostly unseen. It turns out, sounds around us are not random. Some are like the secret whispers of the world, tuning in at just the right note. Let’s uncover these sonic secrets together.

Musical Instruments

Imagine a guitar string that hums when you pluck it. That is resonant frequency at work. Every musical instrument has one. It is the special pitch each one sings best at. Instruments are designed to make this pitch just right. This pitch is bold and strong. It gives music its richness. Let’s see how:

  • Strings vibrate at a set rate when strummed.
  • Pipes in organs and flutes have one when air whistles through.
  • Drums echo with it when struck.

The Phenomenon Of Sympathetic Resonance

Sympathetic resonance is like a secret dance between sounds. One object vibrating at resonant frequency can make another start vibrating. Think of it as an invisible high-five between different musical notes. It’s why a piano string might start humming along when a singer hits just the right note.

Here are some quick facts about sympathetic resonance:

Fact Detail
Origin From Latin, means “feeling together”
Occurs When one object’s vibrations match another’s natural frequency
Common In musical instruments and everyday objects

Pianos and violins are prime examples. Metal bridges and buildings display this too. It helps engineers make safe structures. It’s a force sculpting the very world of sound all around us.

The Future Of Frequency

The Future of Frequency holds exciting potential across various fields.

Resonant frequency shapes our world in hidden ways.
From bridges that sway to the quartz in watches.

Technological advancements promise to harness this concept anew.

Let’s explore what lies ahead.

Emerging Technologies

Emerging tech redefines resonant frequency use.

  • Wireless power transfer relies on it for efficiency.
  • Structural health monitoring ensures bridge safety.
  • Sonic levitation uses sound waves to elevate objects.

These technologies enable smarter, safer living.

Innovative Research Directions

Research unlocks resonant frequency’s future potential.

Field Focus
Healthcare Healing with vibration therapy
Material Science Developing resonant frequency materials
Environmental Science Harnessing energy from ambient vibrations

Each stride guides us towards a resonant future.

Frequently Asked Questions Of What Is Resonant Frequency


What Is The Definition Of Resonant Frequency?


Resonant frequency is the natural frequency at which a system oscillates with the greatest amplitude. It occurs when the system’s inertia and its restoring force are in perfect balance, causing it to vibrate at a specific frequency.


How Is Resonant Frequency Calculated?


Resonant frequency is calculated using the formula f0 = 1/(2π√(LC)) for LC circuits, where ‘L’ is the inductance and ‘C’ is the capacitance. For mechanical systems, it depends on mass and stiffness.


Why Is Resonant Frequency Important?


Resonant frequency is important because it identifies the point where systems, like bridges or electronic circuits, can experience maximum vibration. Engineers use it to ensure structural integrity and optimize performance.


Can Resonant Frequency Be Changed?


Yes, resonant frequency can be changed by altering the system’s physical properties. For electronic circuits, changing inductance or capacitance will adjust the resonant frequency. Similarly, changing mass or stiffness affects mechanical systems.


Conclusion


Resonant frequency shapes modern technology, from bridges to circuits. Grasping it leads to safer designs and better communication. Remember, this natural phenomenon is key to efficiency in various systems. Keep exploring its principles for advancements across engineering and physics fields.


Your curiosity could resonate with innovation.

Categories
Archive

How to Make Music with a MIDI Keyboard: Master Tunes!

To make music with a MIDI keyboard, connect it to a computer and use music production software. Select your virtual instruments and start recording your performance.


Creating harmonious melodies with a MIDI keyboard is a captivating venture for aspiring musicians and seasoned composers alike. This dynamic tool serves as a bridge between your musical ideas and the digital audio workstation (DAW) of your choice, translating your keystrokes into a panorama of sound.


By utilizing an array of software instruments and effects, artists can produce complete arrangements, all from the tactile familiarity of piano keys. With technological advancements, the process has become more intuitive, enabling even beginners to navigate the realm of music production with ease. Dive into the artistry of sound as you master the realm of MIDI keyboard music-making, sculpting your unique audio landscapes with each note you play.


Introduction To Midi Keyboards

An exciting journey into music creation starts with a MIDI keyboard. This tool is the bridge between your musical ideas and the digital audio workstation (DAW). MIDI keyboards don’t make sound on their own. They send information to a computer or synth. This information turns into sound.

Origins Of Midi Technology

The story of MIDI begins in the early 1980s. Musicians needed a way to connect different electronic instruments. In 1983, the MIDI standard was born. MIDI stands for Musical Instrument Digital Interface. It forever changed how music is made. Big machine racks turned into small files on a computer.

The Versatility Of Midi Keyboards In Music Production

MIDI keyboards are powerful tools in modern music making. Their keys can control notes. Their knobs, sliders, and pads can control sound effects and more. This lets artists shape music in new ways. A single MIDI keyboard can mimic an orchestra, a drum kit, or any other instrument.

How to Make Music with a MIDI Keyboard: Master Tunes!


Credit: www.wired.com

Essential Equipment And Setup

Making music with a MIDI keyboard requires more than just talent. It requires the right tools. The journey into music production begins with setting up the essential equipment. It’s like assembling a superhero’s gadget belt—each piece brings you closer to unleashing your full musical potential. Let’s explore what’s needed to get started.

Choosing The Right Midi Keyboard

The heart of any digital music setup is the MIDI keyboard. Think of it as your instrument’s voice. Choose a size that fits your space and playing style. Here’s what to consider:

  • Keys: Full-sized or mini? Weighted action like a piano or synth-action?
  • Features: Need knobs, pads, and faders for control?
  • Portability: Will you travel with it or keep it in the studio?
  • Compatibility: Check it works with your software.

Connecting Your Midi Keyboard To A Computer

A good connection between your keyboard and computer is crucial. For this, you’ll need:

Component Function
MIDI to USB cable/Interface Links keyboard to computer
Driver Software Ensures efficient communication
DAW (Digital Audio Workstation) Software where you compose and record

First, plug the cable into your keyboard. Then connect it to your computer. Some devices are plug-and-play, while others need drivers. Install them if necessary. Finally, open your DAW, and set up the new instrument. Now, your setup is complete. Ready to make music!

Navigating The Interface

Stepping into the world of MIDI keyboards opens a universe of musical possibilities. To harness its full potential, understanding and customizing the interface is key. Whether you’re laying down a fresh track or tweaking the perfect sound, a well-set interface makes all the difference. Let’s dive in and master the controls of your MIDI keyboard.

Understanding The Layout And Controls

At first glance, a MIDI keyboard may seem daunting. Do not worry! With a bit of guidance, the layout becomes clear.

  • Keys: These are similar to a traditional piano and are your primary tool for creating melodies.
  • Pads: These can trigger samples or be used for finger drumming.
  • Knobs and Faders: They adjust volume, effects, and other parameters in real-time.
  • Buttons and Switches: Use these for changing settings or navigating through sounds.

Become familiar with each part. Recognize their feel and response.

Customizing Settings For Optimal Use

Different styles of music require unique settings. Customize your MIDI keyboard to match your needs.

  1. Select your DAW: Ensure your Digital Audio Workstation recognizes the MIDI keyboard.
  2. Map the controls: Assign functions to knobs and faders based on your workflow.
  3. Adjust sensitivity: Set key and pad sensitivity to respond to your touch.
  4. Save presets: Store your settings for easy recall during sessions.

Experiment with the settings to find what works best. This setup can elevate your musical creativity.


Creating Your First Melody

Welcome to the exciting journey of making music with your MIDI keyboard. The thrill begins when you compose your first melody. Let’s dive into the simple steps you can take to bring your musical ideas to life.

Exploring Scales And Chords

Understanding the building blocks of music is key. Scales and chords form the foundation of melodies.

  • Select a scale that resonates with your musical taste.
  • Practice playing the scale to familiarize your fingers.
  • Experiment with combining notes to form chords.

Try these steps:

  1. Choose a major or minor scale.
  2. Play each note to hear how it sounds.
  3. Build chords by skipping every other note in the scale.

Use these chords to outline your melody’s structure.

Recording And Editing Midi Notes

With chords and scales in hand, let’s record.

  • Set up your software to record MIDI.
  • Play your melody, using the chosen scale and chords.
  • Press record and capture your creation.

Editing is where you perfect your melody.

Double-click the recorded MIDI clip to edit.

Action Result
Move notes up or down Change pitch
Stretch or shrink notes Alter note duration
Copy or delete notes Variety in melody
  • Editing fixes any small mistakes.
  • Change velocity for dynamics.

Practice these steps to create and polish your first melody.

Exploring Sound Libraries

The heart of modern music production lies in the vast universe of sounds that a MIDI keyboard unlocks. Under the umbrella of ‘Exploring Sound Libraries’, uncovering the perfect sound is akin to finding treasure. Let’s embark on this sonic adventure, transforming your MIDI keyboard into an orchestra at your fingertips.

Selecting Instruments And Sounds

Begin by diving into the plethora of sound libraries available. Think of each library as a genre-specific palette. You might find grand pianos under ‘Classical’, beefy basses in ‘Electronic’, or world instruments in ‘Ethnic’ collections. Your task? Jest to select sounds that resonate with your musical vision.

  • Explore bundled sound libraries often included with software.
  • Dig through online sound databases for unique finds.
  • Use tags and filters to narrow down to the desired sound.

Layering Different Sounds For Fuller Tracks

After picking your sounds, it’s time to give your tracks depth and richness. This technique is called layering. Imagine stacking different sounds together to create a new, fuller one. For instance, combine a piano with a synthy pad to add warmth.

  1. Select complementary sounds that blend well together.
  2. Adjust the volume and effects of each layer for balance.
  3. Experiment with panning to fill the stereo field.

Remember, there is no one-size-fits-all approach. Trust your ears and let creativity lead your path in shaping your music’s character with MIDI keyboards and sound libraries.

Composition Techniques

Creating music with a MIDI keyboard unlocks a world of creativity and expression. From beginners to seasoned musicians, understanding composition techniques ensures your melodies resonate with listeners. Let’s dive into the process of structuring your song and adding dynamic effects to bring your music to life.

Song Structure And Arrangement Tips

To create a memorable tune, the blueprint of your song must be clear and intentional. Think of song structure as a roadmap. This roadmap guides your listeners through the audio journey you’ve crafted. Here are ways to shape your song:

  • Start with a Framework: Establish a verse, chorus, bridge pattern.
  • Verses Tell the Story: Build your narrative with melody progression.
  • Chorus for Impact: Use a catchy, repeatable tune for the chorus.
  • Bridge as a Break: Offer a musical contrast with a bridge section.
Section Function
Intro Sets the tone
Verse Builds the story
Chorus Highlights the theme
Bridge Provides contrast
Outro Concludes the piece

Incorporating Dynamic And Expressive Techniques

Dynamic expression breathes life into your composition. Here’s how to make your music dance and sing:

  • Velocity for Emotion: Play with key pressure to control intensity.
  • Modulation for Interest: Use the mod wheel for vibrato or filters.
  • Sustain for Connection: Hold notes together with a sustain pedal.
  • Automation for Variation: Program changes in volume or pan during playback.

Employ these techniques to add depth to your composition and make the keyboard sing. Remember, subtlety makes a significant impact. By incorporating changes in velocity and modulation, your tune can express a range of emotions, keeping listeners engaged.

Mixing And Effects

Before you share your music with the world, mixing and effects can transform a good track into a great one. Your MIDI keyboard is the start. Now learn to shape and spice up your sound.

Using Eq And Compression To Shape Your Sound

Equalization (EQ) and compression are power tools in music production. EQ balances the frequencies. Compression controls the dynamics of your track.

  • EQ cuts remove unwanted noise and boost key frequencies.
  • Compression evens out volume. It ensures no sound overpowers others.

Combine both for a clean and consistent sound. Start with presets but customize for your needs.

Creative Use Of Reverb, Delay, And Other Effects

Reverb and delay add depth and space to your music. They make sounds feel alive.

Experiment with settings:

  1. Short reverb for small rooms.
  2. Long reverb for big halls.
  3. Delay for echo effects.
Effect Use For
Flanger Twisting sounds
Chorus Thicker textures

Play with other effects like distortion for grit or phaser for movement. Effects take your sound from raw to refined.

Finishing Your Music Project

Finishing Your Music Project takes precision and care. After laying down your tracks with a MIDI keyboard, the final steps are critical to polish your creation. From MIDI editing to export, these stages bring your musical vision to life with professional flair. Let’s dive into these final touches to transform your MIDI compositions into finished pieces ready for the world to hear.

The Art Of Midi Editing And Quantization

Tweaking your MIDI notes perfects the timing and expression. This essential editing process is where magic happens. Begin with quantization — aligning notes for rhythm accuracy. Follow these simple steps:

  1. Select the MIDI notes you wish to edit.
  2. Choose the quantize value (1/4, 1/8, etc.) that fits your musical piece.
  3. Apply quantization to snap notes to the nearest grid line.

Next, adjust velocities for dynamic expression. Make it sound natural by varying the intensity of each note. You can manually edit notes or use a MIDI controller for real-time adjustments.

Preparing Your Track For Export And Distribution

The final export captures your hard work into a shareable format. Ensure high-quality sound by checking the following before export:

  • Consolidate your tracks.
  • Double-check the mix.
  • Apply any final mastering touches.

Choose your export format carefully. WAV or AIFF files offer the best quality for distribution. MP3s work well for online sharing due to their smaller size. Follow these steps to export:

  1. Navigate to your software’s export option.
  2. Select the file type and quality settings.
  3. Name your track and choose a storage location.
  4. Click ‘Export’ and your music is ready to share!

Advanced Midi Techniques

Unlock the full potential of MIDI keyboards with advanced techniques. This guide dives into ways to enhance your music production setup. Explore the integration with external gear and advanced MIDI controls.

Integration With Hardware Synthesizers And Drum Machines

A MIDI keyboard is a powerful tool when combined with hardware synthesizers and drum machines. This setup can massively expand sound possibilities.

  • Connect the MIDI out from your keyboard to the MIDI in on the synth/drum machine.
  • Use different MIDI channels to control multiple devices.
  • Assign knobs and sliders to tweak sounds in real-time.

Remember to sync the devices’ MIDI clock for tight rhythm sections.

Exploring Advanced Midi Mapping And Automation

MIDI mapping and automation bring dynamic elements to your music. Master these to create evolving soundscapes.

  1. Use MIDI learn to assign controls to software parameters.
  2. Draw automation curves for volume, panning, and filters.
  3. Assign aftertouch, pitch bend, and mod wheel for expressiveness.

Advanced MIDI mapping allows for personalized control setups, making each performance unique.

Learning Resources And Communities

Playing music on a MIDI keyboard is like unlocking a world full of sounds. To get started, you need the right learning resources and creative communities. These tools will help you learn, create, and share music. They are great for beginners and pro musicians. Let’s explore where you can find MIDI knowledge and meet music friends.

Online Courses And Tutorials

Online courses and tutorials are great for learning MIDI keyboards. They are easy to follow. You can learn at your own pace. Here are some useful ways to learn:

  • Video Lessons: Websites like YouTube have free tutorials.
  • Music Production Platforms: Paid platforms offer structured courses.

These resources cover everything. From setting up your MIDI keyboard to making complete songs.

Forums And Networks For Midi Musicians

Online forums and networks help you connect with other MIDI musicians. They are perfect for getting tips, feedback, and inspiration. Here are some places musicians hang out:

  • Social Media Groups: Find groups on Facebook and Reddit.
  • Music Forums: Websites like SoundOnSound have active communities.
  • Local Music Meetups: These can be found through sites like Meetup.com.

You can ask questions, share your music, and learn from others in these communities.

Frequently Asked Questions For How To Make Music With Midi Keyboard

What Is A Midi Keyboard?

A MIDI keyboard is a piano-style device that controls virtual instruments. It sends note information to music software, enabling musicians to create digital music compositions without traditional instruments.

How Does A Midi Keyboard Work?

A MIDI keyboard translates key presses into digital signals. These signals indicate note, velocity, and duration. Music software interprets these signals to produce sound through virtual instruments.

What Equipment Do I Need To Start Using A Midi Keyboard?

To use a MIDI keyboard, you’ll need the keyboard itself, a computer or device to run music production software, and a USB or MIDI interface to connect the two. Optionally, headphones or speakers are needed to hear your music.

Can You Learn Piano On A Midi Keyboard?

Yes, you can learn piano on a MIDI keyboard. Many MIDI keyboards have weighted keys to mimic an acoustic piano’s feel, aiding in learning proper finger techniques and dynamics.

Conclusion

Creating music with a MIDI keyboard opens a realm of possibilities, allowing your musical ideas to flourish. By applying the techniques discussed, you can transform keystrokes into stunning compositions. Don’t let hesitations hold you back; dive in, experiment, and let your creativity lead the way.


Happy composing!

Categories
Archive

XLR vs USB Mics: Unveiling the Best for Your Audio

XLR mics offer superior sound quality and require an audio interface, while USB mics provide convenience and direct computer connectivity. Understanding the difference between XLR and USB microphones is crucial for selecting the right tool for your recording needs.


Diving into the world of digital recording, one must navigate the choice between XLR and USB microphones, each serving distinct purposes for artists, podcasters, and broadcasters. XLR microphones are the industry standard in professional audio environments, prized for their high-quality sound and versatility.


They typically need an external power source and audio interface to connect to your computer, which can lead to additional costs but allows for greater control over the sound. On the other hand, USB microphones are the go-to for easy setup and portability. They are ideal for home studios, voice-over work, and situations where simplicity and convenience are paramount. This guide aims to provide clarity, helping you make an informed decision tailored to your audio projects.


Introduction To Xlr And Usb Microphones

Choosing the right microphone shapes the quality of audio recordings. The battle often narrows down to XLR versus USB microphones. XLR mics are known for their professional audio quality and versatility. USB mics have gained popularity for their convenience and ease of use. This section will shine a light on these two diverse microphone technologies.

The Rise Of Digital Recording

The leap from analog to digital recording marked a pivotal moment in audio production. Digital recording offers crisp sound quality and easy file management. This advancement made it simpler for creators to produce and share content from anywhere.

  • Seamless integration with computers and mobile devices.
  • High-quality recording with minimal setup.
  • Access to editing software, enhancing post-production quality.

Diverse Microphone Technologies

XLR and USB mics serve different needs, fitting various recording environments.

Feature XLR Microphones USB Microphones
Quality High, suitable for studios Good, ideal for home use
Connection Requires audio interface Direct to computer
Power Often requires external Powered via USB
Flexibility High, with various models Fixed, often all-in-one
Usability Professional use Beginners and hobbyists

Technical Backbone Of Xlr Microphones

XLR microphones stand tall in the professional audio world. Their technical design ensures high-quality sound. They are durable and provide reliable performance. This robustness comes from their unique way of handling signals. Let’s delve into what makes XLR mics the preferred choice for pros.

Analog Signal Transmission

XLR microphones work with an analog signal pathway. This means they capture sound waves and transform them into electrical signals. The process keeps the audio pure and unprocessed.

  • XLR connectors usually have three pins: two for the audio signal and one for ground.
  • The three-pin design helps in reducing noise interference.
  • Signal strength and quality remain consistent over long cable runs.

The Essence Of Balanced Audio

XLR cables carry a balanced audio signal. This is crucial for noise reduction. It sends one original and one inverted signal along the cables. At the destination, the inverted signal flips back. This cancels out any noise picked up along the way.

Benefit Explanation
Less Noise Noise picked up on the cable cancels itself out.
Longer Cables Signals can travel far without quality loss.
High Fidelity True to the original sound for studio recordings.

Understanding Usb Microphone Simplicity

Choosing the right microphone can transform your recording experience. USB mics offer a blend of quality and convenience. Let’s dive into what makes USB microphones a go-to choice for many users.

Integration Of Digital Interface

USB microphones come with built-in digital interfaces. This means they have the necessary analog-to-digital converters inside. Traditional XLR mics need an external sound card or audio interface to make this conversion. With USB mics, your computer becomes the recording studio.

  • No extra gear is required
  • Internal preamps boost signal quality
  • Features like headphone jacks for monitoring are common

Plug-and-play Convenience

USB microphones simplify the recording process. Connecting a USB mic is easy. Plug the mic into your computer’s USB port. Most operating systems will recognize the device immediately. Setup times with USB mics are almost non-existent.

Step Action
1 Connect the USB cable to your mic
2 Plug the other end into your computer
3 Wait for your device to install automatically
4 Start recording or streaming

Perfect for podcasters, gamers, and content creators, USB mics offer effortless integration. Your workspace stays tidy, and you can capture high-quality audio with ease.

Sound Quality And Performance Comparison

If you’re in the market for a new microphone, sound quality and performance are key. Whether you’re a musician, podcaster, or streamer, you want clear audio. Let’s compare XLR and USB mics.

Sampling Rates And Bit Depth

XLR microphones often pair with external audio interfaces. This setup provides higher sampling rates and bit depth, resulting in finer audio detail.

In contrast, USB microphones have built-in sound cards. They offer various sampling rates and bit depths, but are typically lower than XLR setups.

Mic Type Sampling Rate Bit Depth
XLR Mics Up to 192kHz 24-bit
USB Mics Up to 48kHz 16-bit

Frequency Response And Noise Floor

Frequency response measures a mic’s capacity to capture various pitches. XLR mics excel with broader frequency responses. Your highs and lows sound crisp and distinct.

  • USB mics might have a narrower frequency response
  • Good for spoken word, limited for high fidelity music

Noise floor indicates background noise level. A lower noise floor means a cleaner sound. XLR mics paired with quality hardware deliver a hushed noise floor.

  • USB mics often have a higher noise floor
  • Prone to hiss or hum in silent moments

Selecting between XLR and USB mics hinges on your sound quality needs. High-quality recordings favor XLR, while USB shines in convenience and simplicity. Understand their differences, and choose the mic that fits your audio goals.

Versatility And Usage Scenarios

Choosing between XLR and USB mics involves considering where and how you’ll use them. Both bring unique advantages to various recording environments. Let’s explore their strengths across different settings.

Studio Recording Vs. Home Setups

XLR microphones are the gold standard in professional studios. Their balanced audio signal minimizes noise, delivering clarity and quality. XLR mics require an audio interface or mixer, which offers greater control over sound.

  • Perfect for musicians and podcasters seeking professional results.
  • They thrive in acoustically treated spaces.

USB microphones, on the other hand, are ideal for home setups. They connect directly to a computer, no extra gear needed. Their ease of use makes them a favorite for beginners or casual recorders.

  • Great for quick recordings, video calls, and online meetings.
  • Best suited for creators on a budget.

Portability Considerations

USB mics win when it comes to portability. They are lightweight and easy to carry. These mics fit right into mobile rigs or small home studios. Just plug into a laptop and start recording.

  • Fantastic for podcasters and YouTubers on the move.
  • No bulky equipment needed.

XLR microphones are less portable. They generally need more equipment like stands, cables, and interfaces. Yet, for on-location recordings that require top-notch sound, they are unbeatable.

  • Ideal for live performances and professional engagements.
  • Capture studio-quality audio anywhere.

Cost Implications And Budgeting

Choosing between an XLR and USB microphone involves budget considerations. Whether a podcaster, musician, or streamer, understanding the financial side is key to making an informed decision. Let’s dive into the costs tied to XLR and USB mics.

Initial Investment And Hidden Costs

USB microphones appeal for their affordability and ease of use. An all-inclusive setup, they let you plug in and record without extra gear. On the other hand, XLR microphones often require additional investment in audio interfaces, cables, and potentially preamps. This table outlines the basic costs:

Microphone Type Initial Cost Additional Required Gear Total Initial Investment
USB Low None Low
XLR Medium Audio Interface, Cables Higher

While USB mics mean lower upfront costs, an XLR setup’s initial price tag doesn’t tell the whole story. Potential hidden costs like stands and shock mounts can add up for either choice.

Long-term Value And Durability

Investing in XLR microphones could offer better long-term value. Known for their robust build and consistent performance, they stand the test of time. USB microphones might not match up in durability, potentially leading to replacement expenses. Here’s a quick glance at long-term aspects:

  • XLR mics generally offer professional-grade sound that lasts.
  • USB options may see faster tech wear-out, leading to additional costs.
  • Considering repairs and upgrades, an XLR setup can be more cost-effective over time.

It’s important to note that higher priced gear does not automatically equal longevity, but quality XLR mics have a history of enduring long-term use.

The Impact Of Preamps And Audio Interfaces

Understanding XLR vs USB microphones starts with a key component: preamps and audio interfaces. These elements can greatly influence sound quality. Preamps amplify mic signals. Audio interfaces convert them for your computer. Let’s dive into their roles.

The Role Of External Preamps

External preamps boost XLR mic signals before they reach the audio interface. This step is crucial for capturing clear and rich sounds. A good preamp offers:

  • Low noise at high gains
  • Warmth and coloration, enhancing tone
  • More control over the audio signal

For pro recordings, external preamps are vital. They pair with XLR mics for optimal audio quality.

Usb Mics – Internal Preamps And A/d Conversion

USB mics have built-in preamps and converters. They streamline the recording process by combining:

  • An internal preamp to amplify the signal
  • Analog to Digital (A/D conversion), translating sound to digital

This integration means you can record directly to a computer with ease. USB mics are great for beginners or quick setup needs.

Who Should Choose Which Microphone?

Deciding between an XLR microphone and a USB mic involves understanding different needs. Let’s explore which creators will benefit from each type of microphone.

Assessing Needs For Content Creators

Content creators such as podcasters, streamers, and videographers require microphones that blend quality with convenience. Consider these points:

  • USB microphones are plug-and-play devices, ideal for quick setup.
  • XLR microphones offer advanced sound quality and flexibility but need additional gear.
  • For solo podcasts or simple recording tasks, a USB mic often suffices.
  • Creators keen on producing high-quality audio recordings may opt for an XLR setup.

Those frequently on the go might prioritize the portability of USB mics.

Professional Recording Studios’ Preferences

Professional studios require the best audio fidelity and versatility. Here’s what to consider:

  • XLR microphones are the gold standard in these settings.
  • They connect to professional audio interfaces or mixers for optimal sound control.
  • Studios often use multiple microphones, requiring XLR’s expandability.

For robustness and a higher ceiling in audio quality, professionals predominantly choose XLR mics.

Type of Microphone Best Use
USB Mic Easy setup, portable, solo work
XLR Mic Professional quality, studio work


Future Outlook And Technological Advances

As audio technology evolves, the debate between XLR and USB microphones continues. Each has its place in the world of sound recording. Advancements in technology are shaping the future. This ensures both types of mics will remain relevant. Let’s delve into what the future holds in the realm of microphone innovation.

Advancements In Usb Mic Technology

USB microphones are becoming more sophisticated. They offer convenience and quality. The latest models come with improved digital signal processing. This creates clearer audio. Features such as on-mic gain control, headphone jacks, and latency-free monitoring are now standard.

  • Higher sampling rates and bit depths ensure studio-quality recordings.
  • Multi-pattern USB mics enable different recording setups.
  • Enhanced software compatibility extends the mic’s versatility.
  • Portable designs appeal to creators on the go.

Manufacturers are integrating AI technology. This can help to reduce background noise. This makes USB mics more effective for home studios.

The Enduring Place Of Xlr In Professional Audio

Despite USB advancements, XLR microphones hold strong in professional settings. Their superior audio quality is unmatched. XLR mics offer durability and flexibility for various setups.

Feature Advantage in Professional Use
Analog Signal Path Minimal latency and high-fidelity capture.
Phantom Power Consistent power supply for condenser mics.
Interchangeable Components Customizable setups for specific audio needs.

The future shows XLR connections being incorporated into digital interfaces. This gives users the best of both worlds. They enjoy the robustness of XLR mics and the simplicity of digital recording. Developments like wireless XLR transmitters enhance stage and film production. This confirms XLR’s place in the professional sphere.

XLR vs USB Mics: Unveiling the Best for Your Audio


Credit: acousticnature.com


Making The Decision: Key Takeaways

Making the Decision: Key Takeaways
Choosing between an XLR and USB microphone can feel like a balancing act. You need the best audio quality for your project but also value simplicity in your setup. These key points will help you pinpoint the right choice for your recordings.

Summarizing Performance And Convenience

XLR microphones offer professional sound quality. They are the choice for studios and live performances.

  • Require an audio interface or mixer.
  • Offer more control over sound.
  • Can be more costly due to extra gear.

USB microphones promise an easier start.

  • Plug directly into your computer.
  • Great for podcasting and home use.
  • Generally more budget-friendly.

Let’s put this in a table for a clearer view:

Feature XLR Mic USB Mic
Sound Quality Professional Good
Setup Complexity More complex Plug & Play
Equipment Needs audio interface No extra gear
Price Higher with gear More affordable

Final Thoughts On Choosing The Right Mic

The right microphone fits your needs and goals. Consider these:

  1. Type of use: Is it for music, podcasting, or streaming?
  2. Environment: Are you in a studio or a home office?
  3. Budget: What can you spend on audio equipment?

Determine your priorities: sound quality or ease of use? Your choice shapes the future of your audio work.

XLR vs USB Mics: Unveiling the Best for Your Audio


Credit: www.pcworld.com


Frequently Asked Questions Of Xlr Vs Usb Mics


What Distinguishes Xlr From Usb Microphones?


XLR microphones utilize an analog signal path that requires external power and audio interfaces. USB mics have a built-in preamp and analog-to-digital converter, allowing for direct connection to computers with a simple USB cable.


Can Xlr Mics Connect To Computers?


XLR microphones can connect to computers using an audio interface or a mixer. This device converts the analog signal from the mic to digital, allowing for computer compatibility and recording.


Are Usb Microphones Good For Podcasting?


USB microphones are ideal for podcasting due to their convenience and ease of use. They plug directly into a computer, minimizing setup and are generally more affordable than XLR setups.


Do Xlr Mics Offer Better Quality Than Usb?


XLR microphones often provide superior audio quality due to their high-grade components and the use of professional audio interfaces. However, high-quality USB mics can also deliver excellent sound for most applications.


Conclusion


Choosing between XLR and USB microphones hinges on your specific needs. For professional studio quality, XLR mics reign supreme. Meanwhile, USB mics offer unparalleled convenience for casual use. Assess your priorities, be it audio fidelity or ease of use, to make the right pick.


Embrace the mic that aligns with your audio aspirations.

Categories
Archive

Recording Studio Racks: Essential Gear for Pro Sound

Recording studio racks are essential for organizing and protecting audio equipment. These structures provide easy access and thermal management for devices.


Recording studio environments thrive on organization and equipment safety, making racks a staple for any sound engineer or music producer. Studio racks, often constructed from heavy-duty materials, come in various sizes, from small tabletop models that hold a few units to large free-standing structures capable of housing an entire studio’s worth of gear.


They’re designed to conform to standard equipment dimensions, typically described in “rack units” (U), a unit of measure where one rack unit equals 1. 75 inches in height. The organization benefits are significant as they help prevent cable clutter, which can be both unsightly and hazardous. Proper rack mounting also ensures optimal airflow, keeping gear cool and preventing overheating, which can extend the lifespan of expensive studio components and maintain sound quality. Whether for a home studio or a professional recording suite, incorporating studio racks is crucial for a streamlined workflow and equipment longevity.


The Heart Of The Studio: Rack Essentials

The core of any recording studio is its rack. This unsung hero holds the gear that shapes sounds. Proper rack organization ensures efficiency and ease of use for sound engineers.

Components Of A Recording Studio Rack

Understanding what goes into a studio rack is key:

  • Power Conditioners: Keep your equipment safe from power surges.
  • Audio Interfaces: Convert analog signals to digital for recording.
  • Preamps: Boost microphone levels to line level.
  • Equalizers: Shape the audio frequency.
  • Compressors: Control the dynamics of your audio.
  • Effects processors: Add reverb, delay, and other effects.
  • Patchbays: Simplify cable management and signal routing.

Why Quality Racks Are A Sound Investment

Investing in high-quality racks ensures:

  1. Protection for your valuable equipment.
  2. Organization that streamlines workflow.
  3. Accessibility, granting easy reach to all gear.
  4. Enhanced cooling to keep gear at optimal temperatures.

A robust rack supports future upgrades and expansion. Choose wisely for long-term benefits.

Recording Studio Racks: Essential Gear for Pro Sound


Credit: www.adorama.com


Types Of Studio Racks

Studio racks are vital for a tidy and efficient workspace. These come in various forms, each serving unique needs. Whether it’s a sizable floor model or a compact desktop version, studio racks keep gear organized. Choices range from fixed designs to fully customizable ones. Let’s explore the types available for an ideal setup.

Floor Standing Vs. Desktop Models

Floor standing racks suit larger studios well. They have more space for equipment. Many have wheels and stable bases. This makes moving them easy.

Desktop models fit smaller studios. They save space and sit within arm’s reach. Perfect for those with limited gear or confined work areas.

Floor Standing Racks Features Desktop Models Features
Greater equipment capacity Space-efficient
Often come with wheels Easy access to controls
Stable base for heavy gear Compact size for smaller setups

Customizable Rack Options

Some racks offer customization. This means you can adjust shelf height or add modules. If your gear changes, your rack can too. It’s all about flexibility and scalability.

  • Adjustable shelves: Change heights as needed.
  • Modular designs: Add or remove parts easily.
  • Expandable structures: Start small and add on later.

Crucial Rack-mounted Gear

Crucial Rack-Mounted Gear sits at the heart of every recording studio setup. These devices are building blocks for professional sound quality. From boosting signals to managing loudness, the right gear makes all the difference. Let’s explore the must-haves for your studio rack.

Preamps for Pristine Audio Quality

Preamps For Pristine Audio Quality

A preamp boosts microphone signals before they hit your audio interface. This ensures your recordings capture every detail with clarity. It’s key for both vocals and instruments. A good preamp provides warmth and character that software can’t replicate.

  • Tube Preamps: Rich, warm sounds for vocals
  • Solid-State Preamps: Clean, transparent audio for accurate representation
  • Hybrid Preamps: Best of both worlds, offering versatility

Compressors and Limiters for Audio Control

Compressors And Limiters For Audio Control

Compressors and limiters handle dynamics. They ensure your audio is punchy and balanced. Compressors ‘squeeze’ the audio, making soft sounds louder and loud sounds softer. Limiters prevent peaking and distortion. Both ensure polished, professional results every time.

  1. Optical Compressors: Smooth and musical compression
  2. VCAs: Precise control for dynamic range
  3. FETs: Add aggression to drums and bass
Recording Studio Racks: Essential Gear for Pro Sound


Credit: gatorco.com


Choosing The Right Rack Size

When setting up your recording studio, choosing the right rack size for your gear is crucial. It’s a balance of current needs and future expansions. The right rack should fit perfectly, keeping your space organized and your gear accessible.

Assessing Gear Needs

Your journey begins by figuring out what you need. List all your audio gear, including dimensions. Think about these factors:

  • Size of each unit: Measured in rack units (U), e.g., a compressor might be 2U.
  • Depth of gear: Ensure the rack can accommodate the longest piece of equipment.
  • Weight capacity: Racks must support the total weight of your devices.
  • Ventilation: Heat-sensitive gear needs racks with good airflow.

Expansion Considerations For Future Proofing

Buying a rack isn’t just about today’s needs. Anticipate growth. A flexible approach saves money and hassle down the road.

  • Extra space: Aim for 10-20% more space than your current gear requires.
  • Modularity: Racks with adjustable shelving or expandable frames adapt to new gear.
  • Quality: Invest in sturdy racks. They protect expensive equipment and resist wear and tear.

Power Distribution And Management

A robust power distribution and management system is vital for any recording studio. It ensures that all your audio equipment gets the correct amount of power. Not only does it protect against electrical damage, but it also contributes to the overall sound quality. Let’s dive into how to keep your gear safe and sound pristine.

Safeguarding Equipment Against Power Surges

Power surges can strike without warning, potentially damaging your valuable studio equipment. To prevent this, surge protection is crucial. Use surge protectors designed for audio gear. They will absorb electrical spikes keeping your equipment safe. Look for protectors with high joule ratings for the best defense.

  • High joule ratings: A higher number means better protection.
  • Response time: Fast response limits equipment exposure to surges.
  • Warranty: Choose products with a warranty that covers connected gear.

Clean Power For Clear Sound

Clean power isn’t only about safety. It’s about sound quality. Power line noise and interference can creep into your records. Devices called power conditioners clean your studio’s electricity. They ensure your gear performs at its best. Expect crisper highs, defined lows, and an overall cleaner mix.

Look for power conditioners with:

Feature Advantage
Voltage regulation Keeps power steady, improving performance
Isolation Reduces noise for a clear audio signal
Multiple outlets Connect all your gear in one place

Equip your studio rack with quality power distribution tools. Your recordings will thank you. Ensure your studio’s dynamic sound and long-term equipment health through proper power management.

Cooling And Ventilation Solutions

Keeping a recording studio’s gear in prime condition is essential. Cooling systems prevent damage and maintain performance. Let’s explore how to keep your studio’s racks cool and quiet!

Preventing Overheating In Racks

Steady air circulation is key. Without it, equipment overheats, potentially causing malfunctions or shortened lifespans.

  • Use fan-based cooling units tailored for studio racks.
  • Thermal management solutions should fit your specific setup needs.
  • Regular maintenance like dust cleaning ensures optimal airflow.

Implementing rack-mounted fans pulls warm air away from equipment. Space gear with enough clearance, allowing air to flow freely.

Noiseless Cooling Technologies

Studio environments demand quiet cooling solutions. Excessive noise contaminates recordings.

  • Silent fans designed for studios reduce noise.
  • Invest in noise-reducing enclosures – they muffle equipment sounds.
  • Solid-state cooling – no moving parts to reduce sound.

Silent cooling systems make a world of difference for audio clarity. Locate cooling units at a distance from microphones to minimize interference. Sealed rack doors with ventilation panels support quiet operation.


Cable Organization And Management

Recording studio racks act as the spine of your studio set-up. Proper cable organization and management is key to ensuring a clean, efficient, and safe working environment.

Avoiding The Tangle: Best Practices

A labyrinth of cables turns any studio into a danger zone. Tangled cables are not only a trip hazard but can also degrade signal quality and make trouble-shooting a nightmare.

  • Label every cable – Know each cable’s purpose at a glance.
  • Use cable ties – Maintain neat and organized cable paths.
  • Color-code – Assign colors to different types of cables.
  • Run cables along walls – Keep walkways clear.

Patch Bays For Flexibility And Accessibility

Patch bays serve as control panels for your studio’s inputs and outputs.

They allow quick re-routing without the behind-the-rack cable swap nightmare.

Patch Bay Benefits Description
Flexibility Change signal flow instantly.
Efficiency Save time on set-up changes.
Organization Reduce cable clutter.

Standardize the types of cables used in your studio for better patch bay management.

The Aesthetic Appeal Of Studio Racks

Let’s face it, the look of your studio matters as much as the sound. Studio racks are more than just functional; they bring that sleek, professional vibe to your creative space. A well-designed rack can be a centerpiece, showcasing your gear with style while keeping everything tidy and accessible.

Customizing The Look Of Your Rack Setup

Customization turns a standard rack into a personal statement. Here’s how:

  • Choose racks with a finish that complements your studio’s color scheme.
  • Install faceplates or skins to add a pop of color or interesting textures.
  • Add rack drawers or shelves for a clean, organized appearance.

Consider the material of your racks. Wood brings warmth, while metal exudes a modern touch.

Led Lighting And Visibility Enhancements

LED lighting doesn’t just light up your setup; it transforms it:

Feature Benefits
Color customization Match the mood or theme of your music.
Enhanced visibility Spot your gear quickly, even in low light.
Dynamic effects Create movement with color changes and pulsing lights.

For those late-night sessions, LED lights provide crucial visibility while also protecting your eyes from strain.

Acoustic Considerations And Placement

Creating music requires not just talent but the right environment. Recording studio racks play a crucial role. They hold important gear. But placing them correctly is key. They can affect sound quality. Let’s explore acoustic considerations and placement strategies for recording studio racks.

Room Acoustics And Rack Positioning

Good sound starts with room acoustics. Racks should not interfere with sound waves. Place them away from microphones. Near walls can cause sound bounce. This bounce creates echoes. The goal is clear sound recording.

  • Avoid corners: Traps bass and muddies sound.
  • Space out equipment: Prevents heat buildup and noise.
  • Consider symmetry: For balanced sound reflection.
  • Use absorptive material: On walls behind racks.

Isolation Solutions For Rack Equipment

Isolation is key. It protects gear from external vibrations. Racks need to stand solid. They should not shake. Vibrations can travel. They ruin recordings. Use isolation devices under racks.

  • Isolation pads: Reduce vibration transfer.
  • Rack stands with spikes: Minimize contact with floor.
  • Floating shelves: Dampen equipment vibration.

Recording Studio Racks: Essential Gear for Pro Sound


Credit: www.guitarcenter.com


Advanced Add-ons And Accessories

Setting up a professional recording studio involves more than just the basics. Advanced add-ons and accessories can transform your space. These tools add efficiency and quality to every recording session. They are the secret to smooth operation and dynamic sound. Let’s dive into some of the advanced gear that can enhance your studio setup.

Enhancing Functionality With Additional Gear

Extra gear can take your studio’s functionality to new heights. Think of add-ons as your personal studio assistants. They manage cables, extend connectivity, and add overall flexibility to your workspace. For instance:

  • Power Conditioners – They keep your equipment safe from electrical surges.
  • Patch Bays – Simplify cable management and signal routing.
  • Rackmount USB Hubs – Provide easy access to multiple USB connections.

Gadget-specific Rack Enhancements

The right accessories can unlock the full potential of each rack-mounted gadget. Rack enhancements ensure each device functions at its best.

Gadget Enhancement Benefits
Audio Interfaces Rack Ears Secure mounting and easy access
Preamps Vent Panels Better airflow, less overheating
Compressors Half-rack Adapters Combine two units in a single rack space

These gadget-specific accessories ensure best performance and organization. Such details may seem small but they make a big difference. Studios equipped with these extras enjoy smoother operations and better sound control.

Frequently Asked Questions For Recording Studio Racks


What Are Recording Studio Racks Used For?


Recording studio racks are essential for organizing and housing audio equipment. They provide a centralized location to mount, protect, and access devices such as amplifiers, effects units, and other gear necessary for audio production workflows.


How Do I Choose The Right Studio Rack?


Choosing the right studio rack involves considering the size of your gear, the available space, and desired accessibility. Look for sturdy construction, proper ventilation, and compatibility with standard rack-mountable equipment.


What Size Studio Rack Should I Buy?


The size of the studio rack you need depends on the amount of equipment you have. Standard sizes range from 2U to 48U—each “U” represents 1. 75 inches of vertical space. Assess your current and future gear requirements to decide.


Can Studio Racks Reduce Noise?


Yes, certain studio racks are designed with noise-reducing materials and features. They help minimize equipment hum and vibration, contributing to a quieter studio environment which is vital for quality recordings.


Conclusion


Selecting the right studio racks is key to an organized and efficient recording environment. They protect your investment and enhance workflow. To wrap up, remember that durability, size, and accessibility are pivotal. Your gear deserves the best support. Make the right choice, and let creativity thrive in a space where every piece is in its perfect place.

Categories
Archive

Email Marketing for Musicians: Amplify Your Reach

Email marketing allows musicians to engage with fans and promote their work directly. It’s an effective tool to build and maintain fan relationships.


Email marketing stands out as a strategic channel for musicians keen on establishing a direct line of communication with their audience. Tailoring this approach to their unique artistry helps artists share news, announce tour dates, release music, and sell merchandise.


By using personalized, content-rich emails, musicians can captivate their fans’ interest and encourage ongoing interaction. Over time, this builds a community of loyal listeners primed for up-to-date information and exclusive offers. For artists in the digital age, developing a sophisticated email marketing strategy can lead to increased fan retention, more efficient audience targeting, and a profound impact on their overall career growth and sustainability.


The Rhythm Of The Inbox: Email Marketing For Musicians

Welcome to “The Rhythm of the Inbox: Email Marketing for Musicians”. This digital stage gives you the spotlight right in your fans’ inboxes. Let’s explore how you, as a musician, can create a symphony of clicks and engagement through powerful, personalized communication.

The Power Of Direct Communication

Imagine sharing your latest track directly with listeners. That’s the power of email marketing.

  • No algorithms to battle
  • Your message, your rules
  • Immediate connection with your fans

Emails allow you to share tour dates, new releases, and exclusive content. This keeps fans tuned in and eager for more.

Comparison With Social Media Platforms

Email marketing and social media are different instruments in your marketing mix.

Email Marketing Social Media
Direct line to fans Competes with other content
Control over content Platform determines reach
Higher engagement rates Variable engagement

Email lets you cut through the noise of social feeds. It’s your personal backstage pass to your audience’s attention.

Email Marketing for Musicians: Amplify Your Reach


Credit: blog.harmonicreach.com


Crafting Your First Email: Essentials For Artists

Every artist’s journey into email marketing begins with the first email. This launchpiece sets the tone for your relationships with fans. Here, discover fundamental steps for musicians ready to compose engaging emails that resonate with their audience.

Gathering Subscribers Ethically

Building your subscriber list is step one. It’s crucial to collect emails in a legal and respectful manner. Here’s how you can get started:

  • Website Sign-Up Forms: Embed a simple form on your site.
  • Social Media Calls-to-Action: Encourage followers to join your list.
  • Gigs and Events: Offer a sign-up sheet or digital option.

Remember to always ask for permission and explain benefits, like exclusive content or early access to music and tickets.

Structuring Your Newsletter

A well-structured newsletter keeps fans reading. Here are the key elements to include:

  1. Welcome Message: A warm hello and thank you for subscribing.
  2. Personal Story: A brief update about your music journey.
  3. News and Updates: Latest releases, upcoming gigs, and behind-the-scenes glimpses.
  4. Exclusive Offering: Special discounts or previews just for subscribers.
  5. Call-to-Action: Engage fans by prompting them to reply, follow, or share.

Keep your email visually appealing with photos, videos, and a clean layout. Test different designs to see what works best.

Harmonizing Content With Music Releases

As a musician, your email marketing can play a symphony of success for your music releases. The right notes, struck through well-crafted emails, ensure your fans hit play as soon as your album drops. Let’s orchestrate the perfect harmony between your email content and music releases.

Timing Newsletters With Album Drops

Sending newsletters at the perfect moment can make your music a hit. Sync your emails with your album release dates. This builds anticipation and keeps fans tuned in. Here’s a checklist for that perfect email tempo:

  • Announce the release date early.
  • Share a sneak-peek a week before.
  • Countdown daily in the last three days.
  • Hit send on release day with links to your tunes.

Exclusive Content For Subscribers

Exclusive content keeps your subscribers wanting more. Offer subscriber-only perks to make them feel special. Examples of exclusive treats can include:

Type of Content Details
Behind-the-scenes footage Show your music-making process.
Early access Give a first listen to new tracks.
Discounts on merchandise Offer deals on your latest merch.
Personal messages Write to your fans directly.

Engage fans deeper by making them part of your musical journey. Use these strategies to create a fanbase that listens, purchases, and champions your music.

Engaging The Audience: Beyond The Music

Email marketing lets musicians connect with fans outside of just tunes.

A song can say a lot, but stories bond us for life. Musicians, it’s time to wield the power of your experiences and the internet!

Storytelling And Personal Anecdotes

Everyone loves a good story, and your fans are no exception. Share tales from your tours, the inspiration behind your latest hit, or your journey in music.

  • Get real with struggles and success.
  • Describe behind-the-scenes moments.

Not only do these stories enrich your emails, they make fans feel like insiders.

Use photos, videos, and clear text to make your stories feel alive.

Incorporating Multimedia Elements

Music is just one way you express yourself. Expand how you connect with your audience.

Use visuals like concert photos or artwork for your singles.

Add clips of new tracks or sneak peeks of music videos.

Type of Multimedia Ideas
Images Art covers, live show pictures.
Videos Acoustic sessions, greetings.
Audio clips Teasers of upcoming works.

Engage fans with different senses.

Remember: Each email is a stage where your artistry shines. Wow your audience beyond the music.

Metrics In Melody: Analyzing Email Performance

Imagine throwing a rock into a pond and not watching the ripples. That’s email marketing without tracking metrics. As a musician, it’s essential to see the waves your emails make. Your songs tell a story, and so should your email metrics. Let’s dive into the art of analyzing email performance to craft chart-topping email campaigns.

Key Performance Indicators To Watch

Every note in a song matters, just like every metric in an email campaign. Key Performance Indicators (KPIs) are the notes that create harmony in your email marketing strategy.

  • Open Rate: How many fans are excited to read your emails?
  • Click-Through Rate (CTR): Are fans clicking on your content?
  • Conversion Rate: Do fans take action, like buying tickets?
  • Bounce Rate: How many emails missed the inbox stage?
  • List Growth Rate: Are more fans joining your email crowd?

Improving Open Rates And Click-throughs

To get more eyes on your emails, craft catchy subject lines. They’re like your song’s hook. Make them irresistible.

Use these tips to boost opens and clicks:

Tip Description Impact
Personalize Use fan names in emails. Builds connection.
Segment Target specific fan groups. Increases relevance.
Time It Right Send when fans check emails. Boosts open rates.
A/B Test Try different email versions. Finds the best performer.

Remember, good communication is key to success. Your emails are your tour bus to fan engagement. Drive wisely, analyzing every route and every stop along the journey.


Growing Your Subscriber Base On Tour

Imagine hitting the road, armed not just with instruments but a powerful tool—your email list. Touring offers unique opportunities to connect with fans and grow your subscriber base significantly. This section highlights practical strategies for musicians to capture email addresses and expand their reach while engaging with fans face-to-face.

Live Show Sign-up Strategies

Live Show Sign-up Strategies

Transform every concert into a chance to win loyal subscribers. Here’s how:

  • Set up a Sign-up Booth: Position a table at your shows where fans can easily join your mailing list.
  • Train Your Crew: Teach team members to encourage sign-ups actively.
  • Offer Incentives: Give away stickers or digital downloads for new sign-ups.

Leveraging Merchandise and QR Codes

Leveraging Merchandise And Qr Codes

Products can do more than just generate revenue—they can also be a gateway to subscriber growth.

Merchandise Action Impact
T-Shirts Print QR codes linking to your sign-up form. Wearable sign-up reminders
CDs/Vinyl Include leaflets with QR codes. Direct link with purchase
Posters Add a sign-up QR code corner. Visually appealing call-to-action

With QR codes on merchandise, fans can subscribe on their phones in seconds. This seamless method boosts your list at every gig. Don’t miss out!


Automation And Rhythm: Setting Up Email Sequences

Email marketing is crucial for musicians in building a fanbase. Auto-pilot your fan engagement with smart email sequences. These sequences work for you around the clock. They nurture fan relationships without constant manual effort. Let’s dive into creating a rhythm with email automation that resonates with your audience.

Welcome Series For New Fans

When a new fan subscribes to your list, first impressions count. Set up a welcome email series to greet and engage them right from the start. This series can include:

  • A thank-you message
  • Introduction to your music and story
  • Links to your music and videos
  • Exclusive content as a welcome gift

Keep the tone warm and inviting. Use a mix of personal stories and multimedia to connect. Your goal is to make fans feel part of your musical journey.

Drip Campaigns For Continued Engagement

Keep your fans involved with regular updates through drip campaigns. These emails are set to send at intervals, ensuring a constant connection. Include:

  1. News about upcoming shows
  2. Behind-the-scenes content
  3. Early access to new songs
  4. Merchandise discounts

Consistency is key. Engage your subscribers regularly but don’t overwhelm them. Balance is essential to maintain interest and excitement about your content.


Avoiding The Spam Folder: Best Practices

Email marketing can be a powerful tool for musicians to connect with fans. Keeping emails out of spam folders is vital for success. Follow these best practices to ensure your messages are seen and read.

Maintaining Email List Health

A healthy email list helps in reaching the right audience effectively.

  • Regularly clean your list to remove inactive subscribers.
  • Use a double opt-in system to confirm interest.
  • Segment your lists based on fan interests or engagement levels.
  • Send engagement-driven content to keep subscribers active.
  • Respect unsubscribe requests promptly to maintain list integrity.

Crafting Effective Subject Lines

Craft subject lines that grab attention and reflect the email’s content.

Tip Example
Personalize with names “Hey [Name], here’s your backstage pass!”
Use action words “Grab your exclusive track now!”
Create urgency “Last chance to see us live!”
Keep it short and sweet “New Album Out Now!”
Avoid spam triggers “Your special invitation” instead of “Free offer!”

Testing different subject lines helps in understanding what resonates with your audience.

Collaborations And Cross-promotions

Email marketing opens up new stages for musicians. It gathers fans into a digital concert hall. “Collaborations and Cross-Promotions” is your virtual jam session. Here, different tunes blend. They create a unique symphony that resonates with a wider audience. Let’s dive into how partnering with fellow artists and brands can amplify your sound.

Partnering With Other Artists And Brands

Networks expand when musicians unite. Email campaigns gain a fresh vibe. They attract fans from various corners. Here’s how to sync with others:

  • Feature tracks – Swap songs for newsletters.
  • Co-create merchandise – Sell it via joint emails.
  • E-newsletters – Share each other’s stories.

Exclusive collaborations get fans excited. They often can’t resist a good backstage story or a limited edition item. Harness this enthusiasm in your email marketing sequences.

Joint Concert Announcements And Offers

Shows are the heart of music. Announce them together and make the heart beat louder. Think of cross-promotion as your spotlight:

  • Early bird tickets – Offer pre-sales to your collab partner’s fans.
  • Bundle deals – Pair tickets with merch discounts.
  • VIP experiences – Craft joint meet-and-greet packages.

Email-exclusive offers create a buzz. Fans love feeling like insiders. They enjoy early access and special prices. Capitalize on this by crafting enticing joint concert offers that are too good to pass up.

Legal Tune-up: Complying With Email Regulations

Email marketing can be a powerful tool for musicians to connect with fans and promote music. Yet, it’s crucial to play by the rules. Non-compliance with email regulations can result in hefty fines and tarnished reputations. This section explores the key legal frameworks governing email communication and offers practical tips for compliance.

Understanding Can-spam And Gdpr

Two major laws regulate email marketing: the CAN-SPAM Act in the United States and the General Data Protection Regulation (GDPR) in the European Union. Both laws have strict guidelines for commercial emails, including how you collect email addresses and the information you must provide to recipients.

  • CAN-SPAM requires a clear way to opt-out of emails.
  • GDPR demands explicit consent from subscribers before sending them emails.

To comply, musicians must always give fans a straightforward way to stop receiving emails and should only send campaigns to those who have expressly agreed to receive them.

Getting Consent And Respecting Privacy

Getting explicit consent isn’t just a legal must-do, it’s about respecting fans’ privacy. Musicians should put in place a transparent opt-in process. This includes:

  1. Using clear sign-up forms on websites.
  2. Explaining what subscribers are signing up for.
  3. Providing a simple way to unsubscribe in every email.
Requirement Explanation
Clear Sign-up Forms Direct and identifiable method for users to subscribe to your emails.
Subscription Details Transparent information on what content will be received.
Easy Opt-Out Unsubscribe option must be simple and accessible.

By adhering to these regulations, you create a trustful relationship with fans and ensure your email marketing is legally sound and effective.

Frequently Asked Questions For Email Marketing For Musicians


What Is Email Marketing For Musicians?


Email marketing for musicians is a strategy that involves sending targeted emails to a fanbase. These messages promote music releases, events, and merchandise, aiming to increase engagement and sales.


How Can Musicians Grow Their Email List?


Musicians can grow their email list by offering exclusive content, such as free downloads or early access to tickets. They should also have sign-up forms at shows and on their website and social media.


What Are The Best Practices In Email Content Creation?


The best practices include personalizing emails, keeping content relevant, and using a clear call-to-action. Visuals and an engaging subject line are also crucial to stand out in inboxes.


Can Email Marketing Boost Ticket Sales?


Yes, email marketing can effectively boost ticket sales by informing fans about upcoming gigs and offering special discounts or package deals exclusively to subscribers.


Conclusion


As musicians navigate the digital landscape, email marketing remains a vital tool. It builds loyal fanbases and fosters direct engagement. Remember, a solid subscriber list turns casual listeners into lifelong supporters. Start crafting those engaging emails, and watch your music career flourish! With strategy and creativity, your tunes will hit the right inboxes.