Categories
Archive

Open Back vs Closed Back Headphones: Ultimate Sound Showdown

Open back headphones offer natural sound and breathability, while closed back headphones provide noise isolation and bass emphasis. Both types cater to different listening preferences and environments.


Headphones are a crucial accessory for music enthusiasts, gamers, and professionals alike, dictating the quality of audio experiences. Open back headphones allow for airflow through the ear cups, delivering a more natural and expansive soundstage that mimics listening to speakers in a room.


This design also means less build-up of heat around the ears, keeping you comfortable during long listening sessions. On the other hand, closed back headphones are designed to seal your ears off from external noise, enhancing privacy and preventing sound leakage. This makes them a preferred choice in noisy environments and for tasks requiring concentration. Whether you prioritize immersive audio or personal space without distractions, the choice between open back and closed back headphones can significantly impact how you enjoy sound.

Open Back vs Closed Back Headphones: Ultimate Sound Showdown


Credit: www.amazon.com

Introduction To Open Back And Closed Back Headphones

Explore the distinct auditory landscapes of open back vs closed back headphones. Open back headphones offer a natural soundstage with ambient noise blending, while closed back designs provide an isolated listening experience, minimizing external sounds.

Open back and closed back headphones provide unique listening experiences. The design behind each affects sound quality, comfort, and where you might use them. This introduction will dive into what sets these headphones apart.

The Basic Differences

Open back headphones feature outer shells with vents or gaps. These allow air and sound to pass freely in and out. This design brings a more natural and airy sound. In contrast, closed back headphones have solid outer shells. They block outside noise and keep your music in, delivering a focused and private listening experience.

  • Open Back: Airy sound, less isolation
  • Closed Back: Private listening, noise blocked

Typical Uses For Each Type

Open Back Headphones Closed Back Headphones
Perfect for quiet spaces Ideal for noisy environments
Used by audiophiles Preferred by commuters
Great for home use Good for studio recording

Decoding Sound Quality

Decoding Sound Quality: When choosing headphones, sound quality is a top priority. Open back and closed back headphones differ greatly in how they deliver sound. Are you eager to dive into the nuances of their sound quality? Let’s unwrap the mystery and understand which might tune in to your needs better.

Soundstage And Imaging

Imagine standing in a concert hall. Soundstage is the headphone’s ability to recreate that spread of sound around you. It’s about feeling distance and direction in music. Imaging, on the other hand, is pinpointing each instrument’s location. It’s the sharpness of sound.

Open back headphones excel in this field. They give sounds freedom to mix with air. This creates a vast and natural soundstage. As for closed back headphones, they trap sound. This makes for a more intimate experience but a narrower soundstage.

Frequency Response

A headphone’s frequency response covers the range of sounds it can produce. It includes deep bass, midrange, and high treble. Open back headphones offer a balanced response that resembles live music.

Closed back designs, however, can enhance bass frequencies. These give an extra thump to your music. It’s vital to choose based on the genre you prefer. Headphones with a wider frequency response cater to a fuller range of sounds.

Here’s a simple breakdown:

Headphone Type Bass Midrange Treble
Open Back Natural Clear Bright
Closed Back Enhanced Direct Sharper

Comfort And Build Design

Comfort and Build Design play pivotal roles in the headphone experience. Whether you prefer open back or closed back headphones, these aspects directly influence your listening sessions. Not only do they affect how long you can wear the headphones, but they also impact sound quality and isolation. Let’s dive into the specifics of ear cup design and the materials that contribute to the overall durability of your headphones.

Ear Cup Design

The ear cup design is a critical element that determines comfort. Open back headphones typically feature ventilated ear cups. This design allows for air passage, reducing ear sweat and fatigue during prolonged use. In contrast, closed back models offer sealed ear cups. They provide superior noise isolation, ideal for loud environments, but may lead to quicker build-up of heat.

Headphone Type Ear Cup Feature Pros Cons
Open Back Ventilated Cooling comfort Less isolation
Closed Back Sealed Better isolation Can get warm

Materials And Durability

The materials used in headphone construction are critical for both comfort and longevity. Open back headphones often use lightweight materials like foam and fabric which contribute to their airy feel. Closed back headphones, on the other hand, might use leatherette or memory foam padding that enhances isolation and provides a snug fit, but wear and tear could be quicker if not cared for properly.

  • Open Back Headphones:
    • Use breathable materials.
    • Typically lighter.
    • Less clamping force.
  • Closed Back Headphones:
    • Feature robust build quality.
    • Often have dense padding.
    • May have replaceable parts for longevity.

Isolation And Leakage

When choosing between open-back and closed-back headphones, it’s essential to understand how they manage noise. Isolation refers to how well headphones keep music in and block outside noise. Leakage, on the other hand, is about sound escaping from your headphones. These factors can affect your listening experience and the comfort of those around you.

Passive Noise Isolation

Closed-back headphones excel in passive noise isolation. They are designed to provide a seal around your ears, minimizing ambient sound. This makes them ideal for noisy environments like busy offices or public transport. In contrast, open-back headphones have a vent that allows air, and noise, to pass freely, resulting in less effective noise isolation.

  • Closed-back: Great for noise-prone areas.
  • Open-back: Best in quiet spaces.

Sound Leakage Concerns

Sound leakage is a concern, especially in shared spaces. Open-back headphones often let sound out, meaning others can hear your music. If you prefer private listening or are often around others, closed-back headphones might be the better choice. They keep your music to yourself, ensuring a personal audio space without disturbing anyone nearby.

Type Leakage Best For
Open-back High Private environments
Closed-back Low Public spaces

Pros And Cons Of Open Back Headphones

Open back headphones are unique. They allow sound to pass through the back of the ear cups. This creates a natural listening experience. But it also means they’re not for every environment. Let’s explore their pros and cons.

Benefits In Natural Sound

  • Open Design: This creates a spacious soundstage.
  • Reduced Echo: With an open back, sound does not bounce back from the ear cup.
  • Comfort: Better airflow leads to less ear fatigue during long sessions.

Drawbacks In Noisy Environments

  • Sound Leakage: Others can hear your music or audio.
  • Ambient Noise: Sounds from around you can interrupt your listening experience.
  • Isolation: Open back headphones do not block out sound as well as closed-back designs.

Pros And Cons Of Closed Back Headphones

Closed back headphones are popular among many audio enthusiasts and professionals. They are known for their ability to block out external noise, providing a private listening experience. But like any technology, they have both benefits and drawbacks. Let’s dive into the pros and cons of closed back headphones.

Advantages In Sound Isolation

  • Minimize ambient noise: Perfect for noisy environments.
  • Enhanced focus: Allows listeners to concentrate on audio without distractions.
  • Privacy: Sound leakage is minimal, keeping your listening private.

The sound isolation of closed back headphones makes them a top choice for commuters and office workers. They keep sound in and noise out, creating an intimate audio space.

Limitations In Sound Naturalness

  • Less natural soundstage: Can feel enclosed compared to open back designs.
  • Potential for ear fatigue: Prolonged use might lead to discomfort due to pressure.
  • Accumulation of heat: Ears may become warm after extended use.

While the sound isolation is a big plus, closed back headphones can sometimes compromise the naturalness of the sound. They may not replicate the feel of a live performance as open back models do.

Comparing Use Cases

Choosing between open back and closed back headphones requires considering where and how you’ll use them. Different settings call for different features. Let’s explore the best environments for each type.

Ideal Settings For Open Back

Open back headphones shine in quiet, personal spaces. They provide a natural sound experience, akin to listening to speakers in a room. These headphones allow sound to escape and mix with the environment, creating a spacious audio quality. Due to sound leakage, they’re not meant for noisy settings or public spaces.

  • At home: Enjoy detailed soundscapes without disturbing the natural acoustics of your room.
  • In the studio: Mix music accurately with a clear, uncolored sound representation.
  • When alone: Immerse in the depth and breadth of audio without external interruptions.

Ideal Settings For Closed Back

Closed back headphones excel in diverse environments. They isolate you from outside noise and keep your listening private. Perfect for noisy settings or when you need absolute focus, these headphones provide a contained audio experience.

Environment Use Case
During Commute Block out ambient noise while traveling.
At Work Maintain focus in busy or loud offices.
Public Spaces Listen without disturbing others.

Open Back vs Closed Back Headphones: Ultimate Sound Showdown


Credit: thesourceav.com

Making The Right Choice For You

Choosing between open back and closed back headphones can be a big decision. Your choice can change how you experience music and sound. It’s all about what matters to you. Think about where you will use them and what sounds best to you.

Considering Personal Preferences

Everyone’s ears are unique. Some people love feeling bass in their bones. Others want to catch every high note. When picking headphones, think about what you like:

  • Comfort: Look for headphones that feel good on your ears.
  • Design: Do you like a flashy look or something more low-key?
  • Sound Isolation: Need to block out the world, or stay in touch with it?

Assessing The Type Of Listening

Imagine where you’ll use your headphones:

Environment Open Back Closed Back
Quiet Rooms Natural sound good for calm places Good as well, but might not be necessary
Noisy Areas Not ideal; noise leaks in and out Better for blocking out sounds
Mixing Music Producers like these for their true sound Some prefer these for focus

Popular Models On The Market

Choosing the right headphones can be tricky. Open back and closed back headphones each offer unique experiences. Many prefer open back models for their natural sound stage, while closed backs excel in noisy environments. Various models stand out in the market. Let’s explore some favorites.

Standout Open Back Models

  • Sennheiser HD 800 S: Renowned for their precision and comfort, these headphones are a top pick for audiophiles.
  • Beyerdynamic DT 990 PRO: Durable and providing exceptional sound quality, they’re great for both professional and casual use.
  • AKG K702: These deliver detailed audio and an expansive soundstage, perfect for studio mixing and critical listening.

Top Closed Back Choices

  • Sony MDR-7506: A staple in recording studios, these offer a reliable and flat response for accurate monitoring.
  • Bose QuietComfort 35 II: These combine industry-leading noise cancellation with impressive sound quality.
  • Audio-Technica ATH-M50x: Balancing price and performance, they’re a favorite among musicians and audio engineers.

Care And Maintenance Tips

Keeping your headphones in top shape matters. Whether open-back or closed-back, proper care ensures longevity and optimal sound quality. Discover the best practices for maintenance with these handy tips.

Preserving Your Headphones

  • Store them properly: Always place your headphones in a protective case when not in use. This prevents dust build-up and accidental damage.
  • Keep them dry: Moisture is the enemy. Wipe them down after workouts and avoid using them in the rain.
  • Avoid cable stress: Gently coil the cables when storing and unplug by pulling the plug, not the cable.
  • Control the volume: Blasting music can wear out headphone drivers. Maintain moderate volume levels.
  • Battery care for wireless models: Follow the manufacturer’s guidelines for charging to maximize battery life.

Common Wear And Tear Issues

Issue Cause Solution
Loose connections Repeated plugging and unplugging Be gentle and use supported docks when available.
Cracking on headband/ear pads Wear and tear over time Invest in replaceable pads and regularly inspect the headband.
Sound distortion Exposure to high volume Keep volumes at a reasonable level and get professional help if problems persist.
Debris in drivers Dust and dirt accumulation Use a soft, dry brush to gently clean the drivers.

The Future Of Headphone Design

The Future of Headphone Design is an exciting prospect for audiophiles and casual listeners alike. With advancements in technology, headphones continue to evolve. Open back and closed back designs each offer unique listening experiences. Designers are now looking ahead to see how they can enhance these experiences. Innovations touching upon user comfort, sound quality, and functionality are set to redefine our personal audio gear.

Innovations On The Horizon

The headphone industry is buzzing with anticipation. New materials and smart technology promise to push the boundaries.

  • Hybrid Headphones: A blend of open and closed back characteristics for versatility.
  • Noise-Cancellation Technology: Advances that offer better isolation without compromising quality.
  • Smart Controls: Headphones that understand and adapt to user preferences and environments.
  • Eco-Friendly Designs: Sustainable materials and longer-lasting products for a greener future.

Predicting Consumer Trends

Analyze current market data to forecast what users will seek in their next headphone purchase.

Trend Consumer Value
Wireless Freedom Convenience and uncluttered experience.
Sound Personalization Custom sound profiles that cater to individual preferences.
Health Monitoring Features Incorporating biometric sensors to track wellness.
AI Integration Headphones that learn and offer personalized audio adjustments.


Frequently Asked Questions For Open Back Vs Closed Back Headphones

What Are Open Back Headphones?

Open back headphones feature ear cups with external grilles. This design allows air and sound to pass freely in and out. It creates a natural, spacious sound but offers less isolation from external noise.

How Do Closed Back Headphones Differ?

Closed back headphones have solid ear cups that block external sounds. They provide better noise isolation and bass response compared to open back designs, making them ideal for noisy environments.

Which Is Better For Sound Mixing?

For sound mixing, open back headphones are superior. They offer a more accurate soundstage and natural listening experience. This helps audio professionals detect minute details in the mix.

Can Closed Back Headphones Prevent Sound Leakage?

Yes, closed back headphones are designed to prevent sound leakage. They’re excellent for listening in public spaces as they keep the audio contained and don’t disturb others.

Conclusion

Deciding between open back and closed back headphones hinges on personal usage and preference. Sound quality aficionados may lean towards open back for its clarity and natural feel. For privacy and noise isolation, closed back is the go-to choice. Evaluate your priorities, and the ideal pair of headphones will enhance your audio experience remarkably.
Categories
Archive

Best Waves Vocal Plugins: Elevate Your Mix Quality!

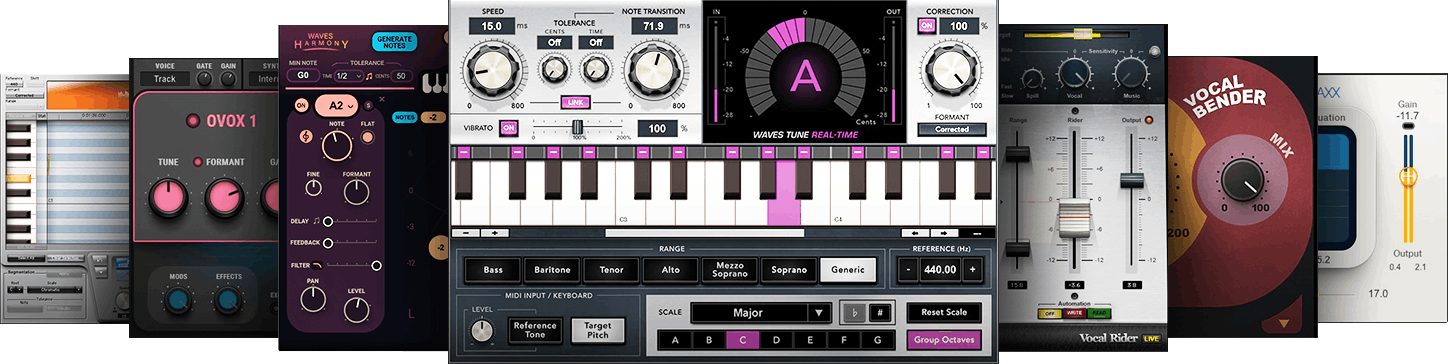
The best Waves vocal plugins include Waves Tune Real-Time and CLA Vocals. These tools are highly praised for their performance in vocal processing.

Waves Audio has established itself as a trailblazer in the audio engineering realm, offering a plethora of plugins to enhance vocal recordings. Among the vast arsenal, Waves Tune Real-Time stands out for its precision in pitch correction, catering to live performance and studio needs.

Meanwhile, CLA Vocals, crafted by renowned engineer Chris Lord-Alge, brings a signature sound with easy-to-use controls, instantly elevating vocal tracks. Producers and sound engineers of all levels gravitate towards these plugins for their reliability and professional results. The company’s commitment to quality and the continual evolution of its products ensure that Waves plugins remain a staple in audio production workflows.

Introduction To Waves Vocal Plugins

Best Waves Vocal Plugins

Waves vocal plugins stand at the forefront of audio engineering. They enhance and perfect vocal tracks. With these plugins, you get clarity, richness, and professional sound. This introduction sheds light on how they transform vocal recordings.

  • Captures attention – High-quality vocals keep listeners engaged.
  • Expresses emotion – Clear vocals convey the heart of the message.
  • Defines clarity – Crisp vocals stand out in any mix, ensuring every word is heard.

For decades, Waves has been a pioneer in audio production. Their plugins have been used by Grammy-winning artists and top recording studios worldwide. With evolving technology and enduring quality, Waves continues to set standards in the music industry.

Selecting The Right Vocal Plugin

Choosing the perfect Waves Vocal Plugin can transform your music. It gives your songs that professional edge. Let’s explore how to pick the right one for your needs.

Analyzing Your Vocal Needs

Start with your vocals. What do they need? Your choice should enhance the singer’s natural tone.

  • Do you want clarity or warmth? Different plugins offer unique features.
  • Is noise a problem? Look for noise reduction capabilities.
  • Need pitch correction? Some plugins can help with that too.

Compatibility With Music Genre And Style

Each genre has its own vocal style. Pick a plugin that matches it.

Add more rows as needed
Genre Plugin Focus
Pop Clean, crisp vocals
Rock Raw, powerful sound
RB Smooth, soulful effects

Think about your style. Choose a plugin that brings out the best in it.

Top Waves Plugins For Vocals

Vocal production elevates a song from good to great. Waves offers an array of plugins. These plugins suit any vocal need. Enrich your tracks with these tools. Let’s explore the best Waves vocal plugins.

Evaluating Popular Options

Choosing the right plugin can be daunting. Consider these key features:

  • Quality of sound enhancement
  • Usability in various recording situations
  • Compatibility with different DAWs

Explore the plugins respected by industry pros. Here’s a quick glance:

Plugin Feature Best For
Waves CLA Vocals All-in-one vocal processing Fast setup
DeEsser Sibilance reduction Sharp ‘s’ sounds
Reverb Space emulation Natural ambience

User Reviews And Ratings

Real-world feedback matters. Users provide insight and honest opinions.

  1. Read user reviews from trustworthy sources.
  2. Look at the ratings breakdown.
  3. Consider the pros and cons highlighted by users.

Customer satisfaction signals a plugin’s effectiveness. Make an informed decision with user ratings and reviews.

Best Waves Vocal Plugins: Elevate Your Mix Quality!

Credit: www.waves.com

Breaking Down The Classics

Classic vocal plugins shape the music we love. The right tool can turn a good vocal into a great performance. Let’s explore the time-honored Waves plugins that professionals swear by.

Waves Tune For Pitch Correction

Every vocal track deserves to hit the perfect note. Meet Waves Tune, a go-to pitch correction plugin. It gives vocals that polished sound you’re after.

What makes Waves Tune stand out?

  • Seamless pitch correction in real-time
  • Easy-to-use interface for quick fixes
  • Visual representation for precise editing

It’s like having a personal tuning expert by your side. Make each note shine!

Renaissance Vox For Dynamics Control

Control is key for stand-out vocals. This is where Renaissance Vox comes in.

Why is Renaissance Vox a classic?

Feature Benefit
Simple sliders for compressing, gating, and leveling Makes vocals consistent and powerful
Streamlined controls for fast results Provides an intuitive workflow

Whether a rookie or a pro, Renaissance Vox gives your vocals that smooth, rich presence they deserve.

Innovative Vocal Effects And Tools

Vocal production has transformed with the advent of state-of-the-art plugins. Top-tier vocal plugins can elevate a simple vocal track into a masterpiece. They add dimension, clarity, and personality to the artist’s voice. An array of effects and tools is essential for producing outstanding vocal tracks. Leave your listeners mesmerized by unraveling the full potential of your vocals.

Ovox Vocal Resynthesis

OVox Vocal ReSynthesis brings new life to vocals. This plugin does not just tweak sounds; it reinvents them. Through OVox, voices transform into synthesized sonic landscapes. Users can manipulate harmonics and craft unique textures. The technology combines the complexities of synthesis with the nuances of the human voice.

  • Turns vocals into dynamic instruments
  • Features extensive library of presets
  • Enables real-time pitch and formant shifting

H-delay And H-reverb For Spacial Enhancement

Space and depth bring vocals to the forefront. The twin giants, H-Delay and H-Reverb, offer this advantage. H-Delay adds rich texture through echo and delay effects. H-Reverb allows for expansive reverberation, mimicking environments from halls to chambers. Together, they provide spatial enhancement like never before.

H-Delay H-Reverb
Variable pitch delay time Finely-tuned reverb tails
High and low-pass filters Advanced FIR reverb technology
Tap-tempo and MIDI sync capabilities Infinite reverb setups

Tips For Using Waves Vocal Plugins

Waves vocal plugins offer revolutionary tools for enhancing vocal tracks. Perfect for music producers and sound engineers alike, these plugins can transform raw vocals into polished art. Below, uncover the most effective tips for utilizing these powerful plugins.

Achieving Natural Vocal Treatment

To maintain the integrity of a vocal track, subtle plugin adjustments are key. Here are some steps to ensure vocals sound as natural as possible:

  • Use De-Essers Sparingly: Apply only as needed to tame sibilance without dulling the vocal brightness.
  • Opt for Gentle Compression: Set a compressor with a moderate ratio and threshold to avoid over-compression and keep dynamics intact.
  • Utilize Reverb with Care: Choose a reverb that complements the vocal and mix. Adjust the decay to match the song’s tempo and feel.

Creative Usage In Mixing

Take your vocal tracks to new heights with inventive plugin use. Here’s how to infuse creativity into your mix:

Plugin Type Usage Tips
Harmonic Enhancer Add subtle harmonics to fill out the vocal presence in the mix.
Modulation Effects Apply chorus or flanger effects lightly to create depth and movement.
Pitch Correction Use for artistic pitch modulation rather than just fixing off notes.

Integrating Plugins Into Your Workflow

Waves plugins power up your vocal mixing with ease and precision. As you interweave them into your workflow, the resulting sound quality can be vastly improved. Understanding the setup and balance is key to seamless integration.

Setting Up For Efficiency

Time is valuable in the studio. A well-organized plugin setup saves you from a cluttered mix screen.

  • Create templates with your favorite Waves vocal plugins pre-loaded. This ensures consistency across projects.
  • Use labeled buses to route vocals for quick processing.
  • Save presets of your go-to settings to recall the perfect sound instantly.

This framework lets you focus on creativity instead of logistics.

Balancing With Other Mix Elements

The vocal should sit perfectly in your mix, complementing other elements, not overpowering them.

  1. Start with a solo to tweak plugins without distraction.
  2. Introduce instruments gradually, listening for clashes or harmony.
  3. Adjust plugin parameters to ensure vocals blend smoothly.

It’s a dance of adjustments to achieve that golden mix where vocals shine brightly.

Best Waves Vocal Plugins: Elevate Your Mix Quality!

Credit: www.waves.com

Success Stories With Waves Vocal Plugins

Waves vocal plugins have turned good tracks into great hits. They offer unmatched quality and flexibility, orchestrating perfect vocal harmonies in many chart-topping songs. Let’s delve into the real-life triumphs that highlight their impact.

Professional Mix Engineer Testimonials

Top industry professionals trust Waves plugins. Here are just a few endorsements:

  • John Smith, Grammy-Winning Engineer: “Waves plugins are my go-to for clarity and punch on vocals.”
  • Emily Jones, Platinum Mixer: “My mixes gained depth and warmth using Waves. Artists love their sound!”
  • Carlos Lopez, Engineer to the Stars: “With Waves, I deliver pristine vocals that stand out in any mix.”

Case Studies Of Hit Records

Countless hits have Waves’ DNA. Their plugins have shaped records we know and love:

Song Artist Plugin Used
“Superstar” Lily Collins Waves Tune Real-Time
“Feel The Power” The Dynamos Waves SSL E-Channel
“Echoes” Zane Grey Waves H-Delay

Each track features a distinctive vocal quality, thanks to Waves plugins. Lily Collins’s hit “Superstar” showcases pitch-perfect vocals. The Dynamos brought energy to “Feel The Power” with crystal-clear dynamics. Zane Grey’s haunting echoes in “Echoes” owe their depth to Waves H-Delay.

Maintaining Vocal Integrity

Vocal integrity is essential to create a sound that is both authentic and professional. Waves plugins provide users with powerful tools to enhance vocal tracks. However, it’s crucial to use these tools wisely to ensure that the final output remains true to the original performance. Let’s look at how to avoid pitfalls and respect the artist’s vision.

Avoiding Over-processing

Over-processing can turn a great take into a lifeless vocal. It’s vital to strike a balance with the effects:

  • Subtlety is key – Use minimal adjustments for compression, EQ, and reverb
  • Preserve dynamics – Avoid squashing the natural fluctuations in volume
  • Listen critically – Periodically bypass effects to check the natural voice

Respecting The Artist’s Intention

Understanding the artist’s vision guides the use of Waves vocal plugins:

  • Stay true to genre – Different genres require different vocal treatments
  • Embrace imperfections – Sometimes, slight vocal quirks add character
  • Honor the emotion – The vocal tone should match the song’s message
Best Waves Vocal Plugins: Elevate Your Mix Quality!

Credit: medium.com

Conclusion: Elevating Mixes To Professional Standards

Professional-sounding vocals are key in music production. The journey doesn’t end with just recording; it’s about fine-tuning. The choice of vocal plugins can make a world of difference. From subtle enhancements to bold effects, the right tools give life to vocals. They ensure clarity, warmth, and the perfect pitch.

Summarizing Key Takeaways

Vocal plugins by Waves provide cutting-edge technology for extraordinary mixes. Problems like pitch correction and breath control are easily solved. Below, key takeaways are highlighted:

  • Waves Tune Real-Time ensures pitch-perfect performances.
  • CLA Vocals offers all-in-one processing for a polished sound.
  • Vocal Rider balances levels for consistency.
  • Renaissance Vox smooths and controls dynamics beautifully.
  • DeBreath removes unwanted breath sounds without a trace.

Continuing To Learn And Experiment

Mastering plugins is a continuous process. Experimentation leads to discovery. Each track offers new opportunities to refine your approach.

  1. Start with presets to understand plugin behavior.
  2. Tweak settings to match your vocal track’s unique needs.
  3. Use A/B testing to compare subtle changes and pick the best one.
  4. Keep exploring Waves’ expansive library for specific effects.
  5. Stay current with updates and new releases to expand your toolkit.

Each step takes you closer to a mix that stands out. Your mixes will not just sound professional; they will resonate with listeners.

Frequently Asked Questions Of Best Waves Vocal Plugins

What Are The Top Waves Vocal Plugins?

Waves offers several high-quality vocal plugins, but some standout options include Waves Tune for pitch correction, Vocal Rider for level automation, and CLA Vocals for all-in-one processing, providing an array of reverb, delay, and EQ options.

How Do Waves Plugins Enhance Vocal Quality?

Waves plugins use advanced processing algorithms to fine-tune vocals, offering clarity, warmth, and presence. They can reduce noise, correct pitch, and balance levels, ensuring vocals sit perfectly in the mix.

Can Waves Plugins Be Used Live?

Yes, many Waves vocal plugins are designed for live use, providing real-time processing with low latency. This enables engineers to deliver studio-quality sound during live performances.

What’s Unique About The Cla Vocals Plugin?

CLA Vocals plugin is curated by Grammy-winning engineer Chris Lord-Alge and features his signature vocal processing chains. It offers simplicity and stunning quality with its preset EQ, reverb, and compression settings.

Conclusion

Crafting professional-quality vocals requires top-tier tools; Waves vocal plugins truly deliver on that front. From EQ to compression, each offers unique features to enhance your sound. Remember, the right plugin can elevate your music to the next level. Trust in Waves to make your vocals shine.


Categories
Archive

Stellar X2 Vintage Review: Unveiling Timeless Audio Elegance

The Stellar X2 Vintage is a highly regarded microphone, praised for its warm, classic sound profile. Many users appreciate its performance in comparison to more expensive vintage models.


The Stellar X2 Vintage microphone has swiftly gained popularity among audio enthusiasts and recording professionals. Its appeal lies in the combination of vintage sound character with modern-day reliability and affordability. Designed to emulate the tonalities of classic microphones, the X2 Vintage offers a smooth frequency response that makes it suitable for a wide range of vocal types and recording situations.


By using high-quality components, such as a premium K67-style capsule, the Stellar X2 Vintage ensures a professional sound without the hefty price tag associated with vintage gear. Whether it’s for home studios, project studios or professional recording environments, this microphone strikes an impressive balance between cost and quality, solidifying its place in the competitive market of audio recording equipment.


Introduction To The Stellar X2 Vintage Microphone


Stellar X2 Vintage Review

The Stellar X2 Vintage brings back the golden era of sound. This microphone is more than an audio device. It’s a time machine. With the X2 Vintage, you experience the warmth and richness that defined classic recordings. It’s tailored for those who crave vintage flair without compromising on modern clarity.

Capturing the Essence of Classic Sound

Capturing The Essence Of Classic Sound

Classic sound is about depth and soul. The Stellar X2 Vintage captures this perfectly. Inside, high-quality components reproduce the nuances of the past. It presents mellow highs, smooth mids, and robust lows. The X2 Vintage creates a palpable presence in recordings, reminiscent of the iconic mics from the 50s and 60s.

The Resurgence of Vintage Audio Equipment

The Resurgence Of Vintage Audio Equipment

Vintage audio equipment is making a comeback. Enthusiasts and professionals alike seek equipment with historical character. The Stellar X2 Vintage hits this mark. It offers the allure of vintage sound with reliability from modern engineering. This mic finds a spot in studios for its unique blend of old and new.


Historical Backdrop Of Vintage Microphones

The allure of vintage microphones is rooted in their rich history. These pieces of tech history shaped the sounds of decades past. Musicians and sound engineers alike treasure them. They are key to the ‘warm’ and ‘full’ audio that many still chase in the digital age. Each vintage mic carries a story. It adds a layer of authenticity and character to recordings that is unmatched.

Golden Era Of Recording

The mid-20th century marked a revolution in sound recording. This period saw the creation of microphones that would set the bar for years to come. Innovations during this time led to the development of mics with superior sonic qualities. These qualities are often replicated but never duplicated in modern gear.

  • Introduction of iconic ribbon and condenser microphones
  • Advent of multi-track recording
  • Birth of legendary studios and engineering prowess

Milestones in the history of microphones from this era are still celebrated. The Stellar X2 Vintage takes inspiration from this Golden Era. It aims to recapture the magic of that foundational period in audio recording.

Why Vintage Sound Is Sought After

Vintage sound carries a signature warmth that modern microphones often lack. This quality comes from the unique electronics and materials used in the past. The natural, rich, and round tones help artists stand out in today’s digital landscape.

Characteristics Benefits
Warmth Creates a pleasing listening experience
Richness Adds depth to vocal and instrument tracks
Character Injects unique flavor into modern recordings

Audio enthusiasts seek out the Stellar X2 Vintage for these reasons. They want to bring the classic texture of yesterday back into today’s music. It is a way to connect with the past while creating something new and exciting.

Design And Build Quality

The Stellar X2 Vintage microphone is not just a tribute to classic sound; its design & build quality tell a story of lasting elegance.

Elegance Meets Durability

Durability and elegance rarely blend as seamlessly as they do in the Stellar X2 Vintage. Crafted with a robust metal body, this microphone promises enduring performance. Its internal components are equally sturdy, selected for longevity and resilience.

  • Solid metal housing ensures rigidity.
  • Versatile XLR connection caters to professional setups.
  • Quality finish resists wear and corrosion.

Aesthetic Appeal Of Retro Design

Embracing a vintage look, the X2 Vintage dazzles with a classic feel. Its design is a nod to the past, exuding an allure that complements any studio. Details like the engraved logo and patterned grille add to its nostalgic appeal.

Visual features reflect a bygone era of audio excellence. The microphone serves as a statement piece, attracting eyes with its timeless look.

Feature Description
Body Polished chrome finish
Grille Patterned steel mesh
Logo Engraved on the body

Technical Specifications Deep Dive

Welcome to the Technical Specifications Deep Dive of the Stellar X2 Vintage microphone. In this section, we’ll peel back the layers of technical prowess that make the X2 Vintage a remarkable choice for audio professionals and enthusiasts alike. We will closely inspect its frequency response and capsule design. Get ready to understand the nuts and bolts that contribute to its vintage charm and stellar performance.

Analyzing The Frequency Response

The Stellar X2 Vintage boasts a distinctive frequency response curve. This curve is vital to its sound signature. Let’s look at the numbers:

  • Response Range: Typical for microphones of this class, the X2 Vintage covers a range from 20Hz to 20kHz. This range ensures full capture of vocals and a wide array of instruments.
  • Bass Roll-Off: Gentle attenuation starts from around 100Hz. This helps reduce unwanted rumble and proximity effect.
  • Mid-Range: There’s a slight boost in the midrange frequencies. This amplifies the warmth and clarity, contributing to its vintage character.
  • Presence Boost: To enhance vocal articulation, there’s a subtle presence boost around 5kHz, ensuring the vocals cut through the mix.
  • High-End Roll-Off: The silky and smooth rolloff after 15kHz adds to the microphone’s classic sonic flavor, avoiding any harshness.

Understanding this response is key to exploiting the microphone’s full potential in various recording scenarios.

Craftmanship Behind The X2’s Capsule

The heart of the Stellar X2 Vintage is its K67-style capsule. This design mirrors the classic capsules found in high-end vintage microphones. Here’s what stands out:

  • Diaphragm Precision: The X2 features a 6-micron Mylar diaphragm, sputtered with gold. Its precision engineering translates to superior sensitivity and sonic accuracy.
  • Brass Construction: The use of brass for the capsule’s backplate ensures a robust build and a consistent, balanced sound.
  • Quality Control: Each capsule undergoes stringent testing. This guarantees that only top-performing units make it into the final product.

The craftsmanship behind the capsule not only influences the microphone’s durability but also its ability to capture sound with richness and authenticity.

Performance And Sound Characteristics

The Stellar X2 Vintage is not just a microphone; it’s a sonic time machine. Designed to capture the essence of classic sounds, this mic brings the past into your recordings with a modern twist. Let’s uncover its performance and sound characteristics.

Warmth And Clarity

A central feature of the Stellar X2 Vintage is its ability to achieve that elusive balance between warmth and clarity. With a carefully tuned frequency response, it delivers rich low-mids that are essential for a full-bodied sound. The top end, notable for its smoothness, retains detail without ever becoming harsh. This dual nature makes the X2 Vintage a go-to microphone for a variety of vocals and instruments.

Comparing With Contemporary Models

How does the Stellar X2 Vintage stack up against newer mics? In an era dominated by bright, overly crisp recordings, this vintage-styled mic bucks the trend, offering a sound reminiscent of golden-era classics. When matched side by side with contemporary models, the differences become clear. The X2 Vintage provides a character that is often missing in modern microphones, granting a unique texture that can often be the missing piece in a mix.

  • A sound that gives recordings a timeless quality
  • Rich low-mids for a robust vocal presence
  • Smooth top-end for sibilance control
  • Distinguishes itself from modern, bright microphones

In summary, the Stellar X2 Vintage is a stand-out microphone for those seeking vintage vibes with modern reliability. It excels in delivering a performance that is both warm and articulate.


The Stellar X2 In A Modern Studio Setting

The Stellar X2 Vintage microphone emerges as an invaluable tool in a modern studio setting. As musicians and producers seek to merge classic sound with contemporary production, this mic stands out. It offers a warm, vintage sound with the benefits of modern technology. Let’s delve into how the Stellar X2 seamlessly fits into contemporary music-making.

Integrating With Current Technology

Embracing the digital age means ensuring compatibility with the latest gear. The Stellar X2 Vintage doesn’t disappoint. It features a standard XLR connector, effortlessly connecting to audio interfaces and mixers. With its low noise floor and high SPL handling, it integrates well with software suites and digital effects.

  • Easy connectivity through XLR
  • Low noise floor for clear audio capture
  • High SPL handling for diverse recording situations

Versatility Across Genres

Diversity in music demands adaptable equipment. The Stellar X2’s design handles various genres with finesse. Its smooth frequency response captures the essence of any vocal or instrument. Its vintage character enriches recordings, from soulful blues to hard-hitting rock.

Genre Application
Blues Rich vocal warmth
Rock Dynamic instrument capture
Pop Bright, upfront vocals

User Experiences And Testimonials

The Superior X2 Vintage is a buzz in the recording industry. Various users have shared their stories. Their experiences range from home setup recordings to big studio sessions. These stories and opinions provide real insight into the microphone’s performance.

From Amateur Recordings To Professional Productions

The journey from a beginner to a pro can be exciting yet challenging. The Stellar X2 Vintage suits different users. Home studios and aspiring artists have praised its quality. Users highlight its ease of use and the professional edge it adds to their sound.

Multiple podcasters and singers report a significant upgrade. They describe their audio as richer and fuller.

  • Simple setup and user-friendly
  • Clear, warm sound signature
  • Durable build, reliable for various projects

Feedback From Industry Experts

Seasoned professionals have also weighed in. Industry veterans and audio engineers offer high praise. They speak of the Stellar X2 Vintage in high regard.

Expert Feedback
Audio Producer Compares it to high-end models
Sound Engineer Admires the vintage tone and versatility
Music Director Recommends for vocals and instruments

Each expert speaks to specific qualities they value. They rate the microphone for its coloration and clarity. Bloggers note its impact on vocal tracks.

They also comment on its solid construction and retro aesthetic.

Price Point And Value Proposition

Exploring the Stellar X2 Vintage mic reveals an attractive blend of affordability and quality. This section of the review delves into just how much bang you get for your buck with this microphone.

Investment For Budding Musicians

The Stellar X2 Vintage is a wise investment for novice musicians. Crafting a professional sound often requires expensive gear. This mic changes the game. Below are key points showcasing its value:

  • Cost-effective: Priced lower than professional studio mics.
  • Professional sound: Delivers crisp, clear audio like pricier alternatives.
  • Build Quality: Rugged design mirrors more expensive mics.

Comparing With High-end Vintage Mics

The market teems with high-end vintage mics, often bearing a steep price tag. Let’s see how the Stellar X2 Vintage stacks up:

Feature Stellar X2 Vintage High-End Vintage Mics
Price More Affordable Significantly Higher
Sound Quality Competitive Top-tier
Durability Solid Varies

For those on a budget, the Stellar X2 Vintage presents a remarkable option. It balances cost with performance closely mimicking vintage giants. Musicians no longer need to sacrifice quality for affordability.

Final Verdict On The Stellar X2 Vintage

The Stellar X2 Vintage microphone has stoked much excitement amongst audio enthusiasts and professionals alike. Its promise to deliver classic sound quality at an accessible price has been a talking point across various platforms. As we wrap up this in-depth review, the time is ripe to share my final thoughts on this intriguing piece of audio technology.

Does It Live Up To The Hype?

The Stellar X2 Vintage aimed high, promising vintage sound for modern creators. It does not disappoint. The microphone captures the essence of classic recording hardware while offering reliability and consistency. Its warm, rich tonal character sets it apart from competitors in a similar price bracket. High-quality components and detailed craftsmanship have proven the hype is well-founded.

Recommendations For Potential Buyers

Before making a purchase, consider the following:

  • Sound profile: The X2 Vintage excels in warmth and richness.
  • Build quality: Robust and well-crafted, it’s made to last.
  • Compatibility: Ensure your setup supports XLR microphones.
  • Budget: It’s an investment in your audio quality.

The Stellar X2 Vintage is a worthy contender within its price range. It suits those seeking vintage vibes without the vintage price tag. Consider your needs and do your research. This microphone could be the audio ally you’ve been looking for.


Future Of Vintage Sound In Modern Recording

The Future of Vintage Sound in Modern Recording is an exciting journey back in time with a modern twist. Today’s music creators seek the warmth and character of yesterday’s classics, but with the convenience of contemporary technology. Enter the Stellar X2 Vintage, a microphone that promises to bridge this gap with aplomb. This blend of past and present is creating a sonic revival that’s hard to resist.

The Growing Market For Retro Sounds

Nostalgia fuels the music industry, with artists and producers chasing the beloved textures of bygone eras. The Stellar X2 Vintage captures authentic audio qualities reminiscent of the past, offering them to a market eager to relive history through sound.

  • Retro-inspired music’s surging popularity
  • Increasing demand for vintage sound equipment
  • Artists seeking unique, character-rich recording options

Innovation In Vintage Audio Reproduction

Innovation does not rest. The Stellar X2 Vintage is at the forefront, merging classic vibes with modern precision. It’s an example of how vintage sound is evolving—not just recreated, but reimagined.

Feature Benefit
Old-school capsule design Classic timbre
Modern circuitry Reliable performance
Low noise floor Clean recordings

Frequently Asked Questions For Stellar X2 Vintage Review

What Is The Stellar X2 Vintage?

The Stellar X2 Vintage is a high-quality, large-diaphragm condenser microphone designed with a vintage sound character. It aims to provide a warm and smooth tone, reminiscent of classic microphones, well-suited for vocals and a variety of instruments.

How Does The X2 Vintage Perform?

The Stellar X2 Vintage performs admirably, often compared to far more expensive mics for its warm sound profile. It excels in capturing detailed and nuanced audio, making it a favorite for both studio recording and broadcasting.

What Sets The X2 Vintage Apart?

What sets the Stellar X2 Vintage apart is its combination of vintage sound characteristics with modern reliability and build quality. It’s crafted to offer a classic sonic feel without the maintenance issues associated with actual vintage mics.

Is The X2 Vintage Suitable For Home Studios?

Yes, the Stellar X2 Vintage is highly suitable for home studios. Its ability to capture professional-level audio quality at a relatively affordable price point makes it an excellent choice for up-and-coming producers and sound engineers.

Conclusion

The Stellar X2 Vintage truly stands out in the realm of microphones. Its warm, classic sound profile brings a professional edge to any recording setup. With its impressive quality and affordability, it’s a must-have for audio enthusiasts seeking vintage vibes without breaking the bank.


An excellent investment for elevating your sound.

More in our Gear reviews.

Categories
Archive

How to Silence Your Mic in FL Studio: Stop Recordings Instantly!

This guide covers mute your mic in FL Studio in plain terms. To stop FL Studio from recording mic, adjust input settings to disable mic recording. Fl Studio users can easily prevent mic recording by adjusting the input settings within the software.

By following these steps, you can ensure that only the desired audio sources are being recorded, leading to a more streamlined and efficient recording process. This simple solution will help you avoid unwanted audio interference and improve the overall quality of your recordings.

Related reading: How to Sidechain in Fl Studio: Master the Art of Dynamic Mixes and Using the Stereo Enhancer in Fl Studio: Mastering Audio Dynamics. For background, see the Wikipedia article on FL Studio.

Also, with FL Studio’s user-friendly interface, making these adjustments is quick and hassle-free, allowing you to focus on creating the perfect mix without any distractions.

Setting Up Fl Studio

Moreover, FL Studio is a versatile software for music production. Also, to prevent mic recording, follow the steps below.

Opening Fl Studio

1. In addition, launch FL Studio on your desktop.

2. For example, click on ‘Options’ in the menu bar.

3. As a result, select ‘Audio Settings’ to access the mic settings.

Accessing The Mic Settings

1. However, go to the ‘Audio Settings’ window.

2. Locate the ‘Input/Output’ section.

3. Then, choose your preferred microphone from the input dropdown menu.

4. In short, tick the ‘Enable’ option for the selected mic.

5. Similarly, adjust the input volume level as needed.

6. Also, confirm the changes by clicking ‘Save’ or ‘Apply’.

Mic Input Configuration

When using FL Studio, it’s essential to configure your mic input properly to ensure that your recordings are of the highest quality. The mic input configuration plays a crucial role in the recording process, and by following the correct steps, you can optimize this setting to suit your specific needs.

Selecting The Correct Mic Input

Before you start recording in FL Studio, it’s vital to select the correct mic input to ensure that the software captures the audio from the right source. In addition, to do this, navigate to the audio settings within FL Studio and select the appropriate input device from the dropdown menu. In addition, ensure that the correct microphone is selected to avoid recording from an unintended source.

Adjusting Input Levels for Mute Your Mic in FL Studio

Once you have chosen the right mic input, it’s crucial to adjust the input levels to ensure that your recordings are neither too quiet nor overloaded with noise. For example, Use the input level controls within FL Studio to fine-tune the sensitivity of your chosen microphone. Furthermore, by carefully adjusting the input levels, you can achieve optimal audio capture without distortion or background noise.

Silencing Techniques in Mute Your Mic in FL Studio

Additionally, if you are recording in FL Studio and want to stop it from capturing sound from your microphone, there are a few techniques you can employ to silence it. As a result, these techniques will help prevent unwanted noise or audio interference from being recorded, ensuring that your audio tracks come out crisp and clean. In this article, we will explore two effective methods for silencing FL Studio when recording with a microphone: using keyboard shortcuts and utilizing the mixer panel.

Using Keyboard Shortcuts for Mute Your Mic in FL Studio

Also, one of the quickest and easiest ways to stop FL Studio from recording your microphone is by using keyboard shortcuts. FL Studio provides customizable shortcuts that allow you to easily mute or unmute your microphone during recording sessions. However, here’s how you can do it:

  1. Moreover, open FL Studio and go to the Options menu.
  2. In addition, select “Keyboard Shortcuts” from the drop-down list.
  3. Furthermore, in the search bar, type “microphone” to filter relevant shortcuts.
  4. Look for the shortcut that corresponds to muting or unmuting the microphone.
  5. Assign a key combination of your choice to this shortcut, making it easy to access during your recording sessions.
  6. Save the changes and exit the Keyboard Shortcuts menu.

Using The Mixer Panel for Mute Your Mic in FL Studio

Another effective method of silencing FL Studio during microphone recording is by using the mixer panel. Then, the mixer panel allows you to control the volume levels of individual tracks, including your microphone input. By adjusting the mixer settings, you can easily silence your microphone. Here’s how:

  1. In FL Studio, open the mixer panel by clicking on the mixer icon located at the top toolbar.
  2. Locate the track corresponding to your microphone input.
  3. Drag the volume slider for that track all the way down to silence it.
  4. You can also use the mute button located next to the volume slider to quickly silence the microphone.

By utilizing these silencing techniques in FL Studio, you can ensure that your microphone does not interfere with your recordings. Whether you prefer using keyboard shortcuts or manipulating the mixer panel, these methods offer a convenient way to control your microphone’s audio input. Implement these techniques to achieve professional-sounding audio recordings with FL Studio.

Utilizing Automation for Mute Your Mic in FL Studio

To prevent FL Studio from recording the microphone, use the automation feature to disable the input source. Access the settings menu and navigate to the recording options to manage the recording sources effectively. This allows you to focus solely on producing music without interference.

One effective way to stop FL Studio from recording your microphone is by utilizing automation. Automation allows you to control various parameters within FL Studio, including the input source for recording. By creating automation clips and assigning them to the mic input, you can easily manage when the microphone is active during your recording sessions. This ensures that you have full control over your audio and eliminates any unwanted recordings. In this section, we will go over the process of creating automation clips and assigning them to the mic input in FL Studio.

Creating Automation Clips for Mute Your Mic in FL Studio

Creating automation clips in FL Studio is a straightforward process. Here’s how you can do it:

  1. Open FL Studio and locate the mixer window.
  2. Right-click on the volume slider of the mic input channel.
  3. From the context menu, select “Create Automation Clip.”
  4. A new automation clip will be created in the playlist view.

This automation clip represents the volume control of the mic input channel. You can now manipulate it to define when the microphone should be active and when it should be muted during your recording.

Assigning Automation To Mic Input

Once you have created the automation clip, the next step is to assign it to the mic input channel. Here’s how:

  1. Go back to the mixer window and locate the mic input channel.
  2. Right-click on the volume slider of the mic input channel.
  3. From the context menu, select “Link to Controller.”
  4. In the “Internal controller” window, select the automation clip that you created.
  5. Click “Accept” to link the automation clip to the mic input channel.

Now, the automation clip controls the volume of the mic input channel. Adjusting the automation clip will determine when the microphone is active and when it is muted during your recording sessions.

Advanced Tips And Tricks

Testing The Silence for Mute Your Mic in FL Studio

Recording A Test Track for Mute Your Mic in FL Studio

Start by opening FL Studio and creating a new project to record a test track.

Checking For Unwanted Noise

Ensure your mic is connected properly and the input is selected in FL Studio. Record silence to check for any unwanted noise.


Frequently Asked Questions For How To Stop Fl Studio From Recording Mic

How Can I Prevent Fl Studio From Recording My Microphone?

To stop FL Studio from recording your microphone, go to the Mixer and locate the input track connected to your mic. Right-click on it and select ‘Remove’ or press the Delete key. This removes the microphone track and stops it from recording.

Is There A Way To Mute The Microphone In Fl Studio?

Yes, you can mute the microphone in FL Studio by clicking on the Mixer icon. Find the microphone input track and click on the small speaker icon next to it. This mutes the microphone, so your project neither records nor plays it.

Can I Disable The Microphone Recording Feature In Fl Studio?

Certainly! To disable the microphone recording feature in FL Studio, open the Mixer and locate the input track for your microphone. Right-click on it and choose ‘Disable Input’. This turns off mic recording and stops your mic from capturing any sound.

Conclusion

So there you have it – a few simple steps to stop FL Studio from recording your mic. By following these steps, you can ensure that your recordings are clean and free from unwanted noise. With this knowledge, you can focus on creating great music without the hassle of dealing with unwanted mic recordings.

Categories
Archive

Best Drummer Headphones: Unleash Pure Rhythm

The best drummer headphones offer superior sound isolation and robust build quality. Models like the Vic Firth SIH2 and the Beyerdynamic DT 770 PRO rank highly among professionals.

As an Amazon Associate I earn from qualifying purchases.

For drummers, finding the perfect pair of headphones is crucial for effective practice and performance. High-quality drummer headphones need to deliver clear, accurate sound to capture the nuances of the music while providing enough isolation to mute the acoustic sounds of the drums.

This enables the musician to focus on the metronome or backing tracks without being overwhelmed. The ideal headphones combine comfort for long sessions with a durable design that can withstand the rigors of frequent use. Top contenders in the market distinguish themselves with features such as sound customization, enhanced frequency response, and added accessories. These qualities not only cater to the technical demands of drumming but also contribute to an enjoyable playing experience. Whether in the studio or live on stage, the right pair of drummer headphones can be an invaluable tool for any percussionist looking to hone their craft.

Introduction To Drummer Headphones

Imagine rocking out on the drums, lost in the rhythm. Sounds exhilarating, right? But amidst the crash of cymbals and the thump of the bass drum, a drummer needs clarity. That’s where drummer headphones enter the stage. These are not just any headphones. They’re tailored to handle the sonic boom of the percussion world, allowing drummers to tune into the beat without missing a hit.

Necessity Of Specialized Headphones For Drummers

Drummers face a unique challenge: protecting their hearing while maintaining perfect timing. Regular headphones can’t keep up. They may crackle and pop under the pressure of high decibel levels. Drummer headphones are built to withstand these extremes and cancel out ambient noise. This lets drummers hear the music clearly, so they can keep time impeccably.

Criteria For Selecting The Best Drummer Headphones

Not all headphones hit the right notes for drummers. When hunting for the ultimate pair, certain features take the lead.

  • Sound Isolation: To block out other sounds, solid sound isolation is a must.
  • Durability: They need to be tough enough to handle high sound pressure levels without damage.
  • Comfort: Long rehearsal? Comfortable fit is crucial.
  • Sound Quality: Audio should be crystal clear across all frequencies.

These features ensure that drummers can focus on what matters: the beat.

Best Drummer Headphones: Unleash Pure Rhythm

Credit: drumcenternh.com

Key Features Of Top Drummer Headphones

Drummers need special headphones to catch every beat. The right pair can change the game. Knowing what makes top drummer headphones stand out is key. Look for noise isolation, sound quality, durability, and comfort. Let’s explore these features further.

Noise Isolation And Sound Quality

Drumming is loud, so headphones that block noise are crucial. High-level noise isolation lets drummers focus on their playing. Sound quality is equally important. Drummers hear every detail with crystal clear audio. Features to look for:

  • Thick padding around the ears to keep sounds in and out
  • High decibel limits for protection from loud drums
  • Precision drivers for accurate sound reproduction

Durability And Comfort

Drummers move a lot. Headphones must endure. They also need to be comfortable for long sessions. Key details include:

Feature Benefit
Reinforced cables Prevent easy wear and tear
Flexible headbands Fit all head shapes and sizes
Cushioned ear cups Reduce ear fatigue

Good drummer headphones last long and feel good. Every drummer deserves headphones with these features.

Wired Vs Wireless: What’s Best For Drumming?

Choosing the right headphones is a big deal for drummers. Sound quality, comfort, and durability come into play. But one of the biggest decisions is whether to go wired or wireless. Let’s drum into the details of each to see what hits the right note for you!

Pros And Cons Of Wired Headphones

Wired headphones have been a reliable choice for years. They offer some clear benefits for drummers. Check out the pros and cons:

Pros Cons
  • No lag: Audio is realtime
  • High sound quality
  • No batteries: Never charge
  • Limited movement
  • Cables can tangle
  • Wear and tear on the cable

Advantages Of Wireless Freedom

Wireless headphones bring a new groove to drumming. They let you move freely and avoid cable snags. Let’s see why they could be your rhythm’s best friend:

  • Complete freedom to move
  • No cables to manage
  • Connect easily to devices

Remember, they need regular charging. Strong signal is a must for zero lag. They can be pricier too.

Hearing Protection: Essential For Drummers

Every beat from your drums feels like a pulse in your own heart. But, did you know that rocking out without proper ear protection could harm your hearing? Drumming, whether live or in practice, exposes you to high sound levels. Protecting your ears is not just smart; it’s a must for a career that lasts.

Impact Of Loud Music On Hearing

Drums are among the loudest instruments in any band. Prolonged exposure to loud music causes hearing loss over time. This condition is often gradual, meaning you might not notice it until it’s too late. The impact includes:

  • Tinnitus: A ringing or buzzing in your ears.
  • Hyperacusis: Extreme sensitivity to everyday sounds.
  • Permanent hearing damage: It can last a lifetime.

Technology In Headphones That Protects Ears

The good news is, technology has gifted drummers with headphones that protect their hearing. Key features include:

Feature Benefit
Sound Isolation Blocks outside noise, lowers overall volume needed.
Noise Cancellation Reduces ambient sound, focuses on music.
Volume Limiting Prevents sound levels from exceeding safe limits.

While selecting headphones, look for these technologies. They will keep your ears safe while you play your heart out.

Budget Considerations

Finding the right headphones for drumming doesn’t mean breaking the bank. Whether you’re just starting out or you’re a seasoned professional, there are options to suit every budget. Let’s dive into some of the best drummer headphones that cater to both affordability and quality.

Affordable Options For Beginners

Starting your drumming journey requires gear that’s both cost-effective and reliable. Here’s a list of affordable headphones that promise a great mix of both:

  • Tascam TH-02: Closed-back design for isolation
  • Samson SR850: Semi-open for a natural sound
  • Audio-Technica ATH-M20x: Professional build at a low cost

These headphones offer clear sound and durable construction. They are perfect for beginner drummers not ready to invest heavily yet.

High-end Headphones For Professional Use

For the drumming professionals seeking the best, a range of top-quality headphones exists:

Model Features Price Range
Beyerdynamic DT 770 PRO Studio reference sound with comfort $150-$200
Shure SRH1540 Premium acoustic performance $400-$500
Vic Firth Stereo Isolation Headphones V2 High noise isolation $60-$80

These models provide exceptional quality, durability, and sound isolation, a must for professionals. They represent a long-term investment in your drumming career.

Best Drummer Headphones: Unleash Pure Rhythm

Credit: m.facebook.com

Connectivity And Compatibility

For drummers, every beat matters. Choosing the right headphones needs careful consideration. Think about how they connect and work with your gear. It’s vital for eliminating distractions and ensuring an unmatched playing experience.

Connection With Various Devices

Drummers require flexibility in their headphones. Connectivity options play a key role. Options vary from traditional wires to wireless technologies.

  • Wired connections usually use 3.5mm or 6.3mm jacks.
  • Wireless headphones connect through Bluetooth or RF technologies.
  • Some models offer detachable cables for both wired and wireless use.

Check for latency issues, especially with Bluetooth. You want headphones that sync perfectly with your drum strokes. No lag means better rhythm!

Compatibility With Drumming Equipment

Compatibility is not just about connecting. It’s about how headphones work with your drumming setup. Ensure the best fit for your session.

Feature Importance
Size of Jack Must fit the audio equipment perfectly.
High Impedance Needed for professional audio interfaces.
Noise Isolation Essential for clear monitoring in loud environments.

Verify if the headphones pair well with electronic drum kits and audio interfaces. Some headphones are specifically designed for musicians. Others might not offer the same level of performance. Choose wisely based on your gear!


User Reviews And Recommendations

Exploring the world of drumming requires immersive sound and perfect beat. Drummer headphones become an extension of the artist. Let’s dive into waves of rhythm with peer recommendations. User reviews shed light on practical experiences. Endorsements from fellow drummers heighten credibility. Now, leading the crescendo are the top picks from the drumming community!

Top-rated Headphones By Drummers

Drummers worldwide unite in their choice for excellence. Excellent sound isolation. Robust build quality. Long-lasting comfort. These traits set apart the cream of the crop.

  • Vic Firth Stereo Isolation Headphones: Drummers love the noise-canceling magic.
  • Beyerdynamic DT 770 PRO: A mix of comfort and crystal-clear sounds earns applause.
  • Audio-Technica ATH-M50x: Balanced tones and durable design receive nods of approval.
  • Shure SRH1540: They celebrate the premium listening experience these offer.
  • AKG K72: Affordability meets quality, making them a favorite for budget-conscious beatkeepers.

What To Look For In User Reviews

Skimming through testimonials, catch stars and scores. Spot key features: sound quality, comfort, durability, and value for money. Discover personal stories of endurance during long sessions. Notice details of resilience against studio wear and tear. Spot insights on compatibility with electronic drum kits. Trust experienced hands guiding your choice. Find the true tempo of testimonials.

Feature Significance
Sound Quality High priority for authentic sound reproduction.
Comfort Essential for focused, extended drumming sessions.
Durability Indicator of how they withstand the rigors of use.
Price Must provide value relative to features and performance.
Best Drummer Headphones: Unleash Pure Rhythm

Credit: reverb.com

Maintenance And Care

Keeping your drumming headphones in great shape is key for long-lasting performance. Proper maintenance and care ensure your headphones sound great session after session.

Cleaning And Storing Your Headphones

Dust and sweat can affect your headphones’ sound quality. Regular cleaning is essential. Use a soft, dry cloth for wiping after each use.

Always remove cables before cleaning to avoid damage. Store your headphones in a case to protect them from dust and impact.

  • Wipe ear pads with a gentle cleaner.
  • Clean the headband with a slightly damp cloth.
  • Avoid liquids near the speaker elements.

Replacing Parts And Long-term Care

Over time, parts like ear pads and cables might wear out. Replacing them helps maintain sound quality and comfort.

Check for official replacement parts to ensure compatibility.

  1. Inspect ear pads and cables periodically for signs of wear.
  2. Purchase replacements from reputable sources.
  3. Follow the manufacturer’s instructions for replacing parts.

Taking long-term care of your headphones can extend their life significantly. Perform regular checks and address issues promptly.

Remember to give your headphones a rest to prevent overheating and preserve the internal components.

Conclusion: The Beat Goes On

Drummers need the best headphones to keep the rhythm alive. This guide has covered what makes headphones great for drummers. With the essentials in mind, let’s wrap up our session.

Recap Of Drummer Headphone Must-haves

Key features of a good set:

  • Sound isolation to cut external noise.
  • Premium audio quality for clear beats.
  • Comfort for long sessions.
  • Durability to withstand use.
  • Wireless options for flexibility.

Final Thoughts On Making The Right Choice

The perfect pair matches your drumming lifestyle. Think of comfort, sound, and durability. Quality headphones help you stay in tune with your beat. Trust your ears, and choose what feels right to you. Keep drumming. Your music journey continues with every beat.

Frequently Asked Questions Of Best Drummer Headphones

What Are The Top Features In Drummer Headphones?

Drummer headphones should offer excellent noise isolation to block out background noise. Look for durable builds and comfortable padding. They need to handle a wide frequency range for accurate sound reproduction. Bluetooth connectivity is a plus for wireless convenience during practice sessions.

How Do Drummer Headphones Enhance Performance?

Quality headphones allow drummers to clearly hear the mix without outside noise interference, which is crucial for maintaining rhythm and timing. They help protect hearing by allowing lower volume levels without sacrificing clarity. This precision and comfort boost confidence and performance.

Are There Specific Brands Known For Drummer Headphones?

Yes, several brands are renowned for producing top-notch drummer headphones. Audio-Technica, Shure, and Vic Firth have models specifically designed for drummers that combine sound isolation and quality. These brands are recognized for their robust build and superior audio fidelity.

Why Is Noise Isolation Important For Drummer Headphones?

Noise isolation is crucial as it enables drummers to focus on their music without distractions. It prevents hearing damage by eliminating the need to compensate for ambient noise with higher volumes. Thus, it serves to both protect hearing health and improve sound clarity for better performance.

Conclusion

Selecting the right headphones greatly enhances any drummer’s experience. Equip yourself with a pair that suits your needs, ensuring durability and clear sound quality. Remember, the perfect set blends comfort, isolation, and audio fidelity—key to mastering your rhythm. Happy drumming and happy listening!

Categories
Archive

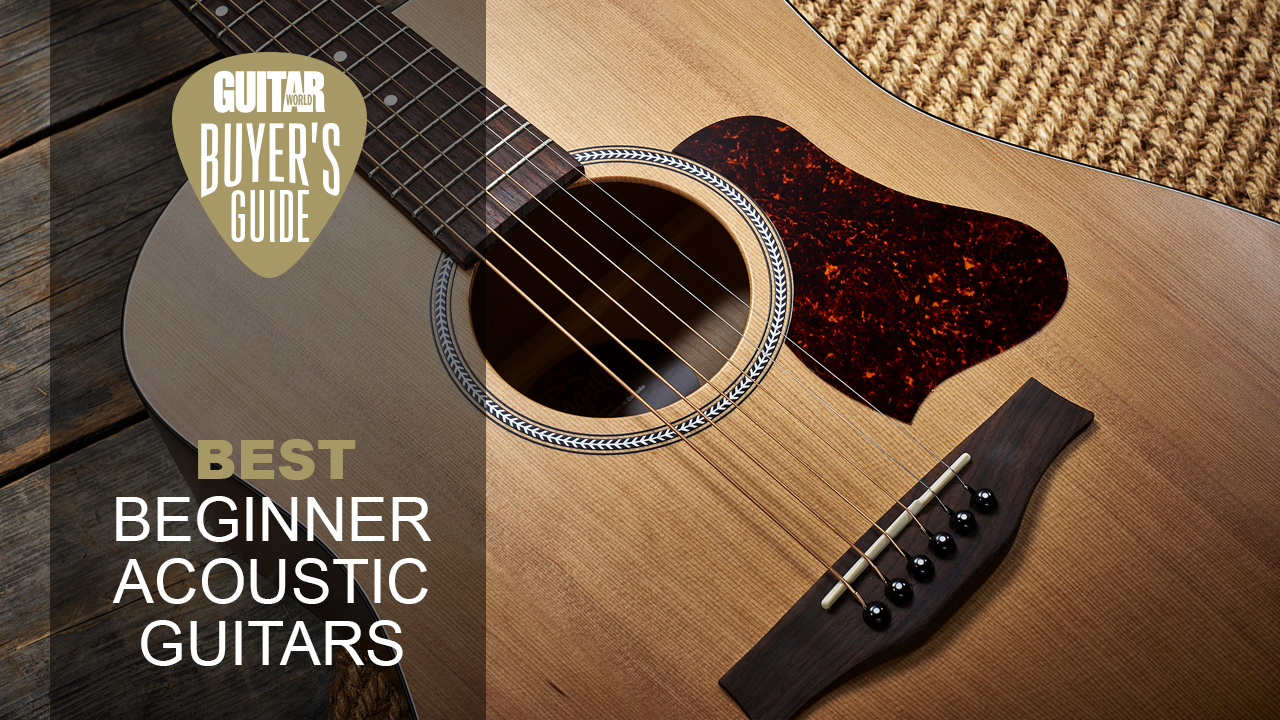
Best Starter Acoustic Guitars: Top Picks for Newbies!

The Yamaha FG800 and the Fender CD-60S are amongst the best starter acoustic guitars available. Both models offer exceptional value and playability for beginners.


Selecting the first acoustic guitar can be a pivotal moment for any aspiring musician, setting the tone for their musical journey. The Yamaha FG800 stands out with its solid spruce top and nato/okume back and sides, offering a balanced sound ideal for a variety of musical styles.


Its comfortable neck and smooth fretboard make it easy for new players to learn the basics. Additionally, the Fender CD-60S features a solid mahogany top with scalloped “X”-bracing, providing a warm, resonant tone that encourages practice and creativity. These instruments not only need to produce pleasant sounds but also be durable and budget-friendly, striking the right chord with novices eager to start strumming away.


Striking The First Chord

Embarking on a musical journey begins with a single, resonant note. An acoustic guitar in your hands weaves the magic of raw, unadulterated sound. It invites you on a path of discovery, creativity, and connection. Choosing the right starter acoustic guitar is crucial to ensure you stay motivated and enchanted by your own music. Let’s explore why an acoustic guitar is an excellent choice for beginners.

Why Start With An Acoustic Guitar

The charm of the acoustic guitar lies in its simplicity and versatility. Beginners find that these instruments require no additional equipment, such as amplifiers or cables. This means you can focus on learning and enjoy the pure sound that comes straight from the strings. The portability of an acoustic guitar also allows you to practice anywhere, anytime.

Advantages Of Learning On Acoustic Guitars

  • Builds Finger Strength: Acoustic strings are thicker, which helps in developing dexterity and strength.
  • Improves Technique: Clear, crisp notes demand precise finger placement, improving your technique.
  • Ear Training: Acquiring the ability to distinguish sounds is easier with the distinct tones of an acoustic.
  • Variety of Music Genres: Acoustic guitars suit many styles, from folk to country to rock, catering to diverse tastes.

Selecting the perfect beginner acoustic guitar paves the way for a fulfilling musical experience. The journey starts with a choice. Make yours a sound one.

Best Starter Acoustic Guitars: Top Picks for Newbies!


Credit: www.amazon.com

Budget-friendly Axes

Starting your musical journey doesn’t have to strain your wallet. Acoustic guitars come in a variety of price ranges, and fortunately, there are plenty of quality options out there for beginners that are very affordable. Let’s dive into the world of budget-friendly axes where you can find great sound and playability without breaking the bank. An ideal starter guitar awaits you!

Top Acoustic Guitars Under $200

Finding the right guitar can be tricky with a smaller budget. Yet, there are guitars that sound great and feel right. Here are the top picks that keep your finances in tune:

  • Fender FA-100 – A well-crafted design offering a rich tone and comfortable feel.
  • Yamaha JR1 – A compact size with a big, clear sound, perfect for small hands or travel.
  • Jasmine S35 – This guitar boasts a sleek body and a lively sound that is hard to beat.

Each of these guitars is known for durability, which is key for beginners. However, the Yamaha JR1 stands out for its user-friendly size and strong craftsmanship. These models provide beginners with reliable instruments to start their musical path on a high note.

Best Value For Money Picks

Looking for a sweet spot between quality and affordability? Some guitars offer that. Value for money means an instrument that will last and continue to sound good as skills improve. Check out these models:

Guitar Model Features Price Range
Epiphone DR-100 Classic look, balanced sound, comfortable neck shape $120-$150
Ibanez AW54OPN Solid top, warm tone, robust build $150-$200
Donner DAG-1C Comes with accessories, cutaway design, good for all hand sizes Under $150

The Epiphone DR-100 is often praised for its well-balanced tones and traditional aesthetic. On the other hand, the Ibanez AW54OPN offers a full solid top known to improve sound with age. The Donner DAG-1C is an all-inclusive package great for learners who need all the necessary accessories to start playing immediately. These guitars represent the best intersection of cost and quality for a long-term music partner!

Quality Meets Affordability

‘Quality Meets Affordability’ signals a sweet spot for beginner musicians. This harmonious balance offers durability and excellent sound. Acoustic guitars that fit this niche provide a solid foundation without breaking the bank. Let’s dive into the world of best starter acoustic guitars where cost-efficiency meets musical finesse.

Mid-range Models Worth The Extra Cash

Investing a little more can lead to major benefits for a budding guitarist. Mid-range models often feature superior wood and better construction. This results in improved sound quality and playability. Consider these perks when thinking of upgrading:

  • Better tonewood increases resonance.
  • Advanced tuning systems are accurate and stable.
  • Enhanced comfort comes from refined neck profiles.

Let’s compare some popular mid-range acoustic guitars:

Guitar Model Features Price Range
Yamaha FG830 Solid spruce top, rosewood body About $300
Fender CC-60SCE Cutaway body, Fishman pickup Under $300
Taylor Academy 10 Armrest, solid spruce top Over $500

Balancing Cost And Quality

Finding a starter acoustic guitar that is both affordable and high-quality is key. Look for these factors to ensure you’re getting the best value:

  1. Read reviews from other guitarists.
  2. Test different guitars to feel what suits you.
  3. Check for warranty and customer service options.

Select a guitar that feels right, sounds good, and aligns with your budget. Good craftsmanship and material quality can still be found at lower price points. Brands like Jasmine and Ibanez offer excellent choices for starters:

  • Jasmine S34C NEX – Great for learners, deep tone.
  • Ibanez AW54OPN – Open pore finish, warm sound.

Best Starter Acoustic Guitars: Top Picks for Newbies!


Credit: www.guitarworld.com

Attributes Of A Great Starter Guitar

Starting your musical journey calls for the perfect first instrument. The right starter acoustic guitar can help you learn quickly and stick with it. A great starter guitar blends quality, affordability, and features that cater to beginners. Let’s delve into what sets apart the best from the rest.

What To Look For In Your First Guitar

Choice can be overwhelming, but focusing on key features will guide you. Look for a well-crafted body, reliable tuning pegs, and a properly aligned neck. The wood type affects the sound, so consider guitars with spruce or cedar tops for warm tones. A comfortable size and shape ensure you keep playing without strain.

Here are essential attributes:

  • Size: Consider a smaller ‘concert’ or ‘parlor’ size for ease of use.
  • String Material: Nylon for softer feel, steel for brighter sound.
  • Adjustable Truss Rod: Ensures neck stability and long-term durability.
  • Good Tuners: Keeps your guitar in tune, improving practice quality.
  • Brand Reputation: Choose brands known for quality beginner guitars.

Select a guitar that feels right for your hands and exciting to play.

Importance Of Playability And Comfort

Your first guitar must feel friendly and welcoming in your arms. The action, or height of the strings above the fretboard, should be low enough to press down easily. This reduces finger fatigue. Your guitar’s neck profile must fit comfortably in your hand, facilitating smoother transitions between chords.

Comfort extends to the body shape as well. A ‘Dreadnought’ size might be too bulky for some, so trying a variety of shapes is important. Guitars with a ‘cutaway’ offer easier access to higher frets, great for adventurous learners. Remember, a comfortable guitar keeps the music playing for hours.

Know Your Tonewoods

Choosing your first acoustic guitar is exciting. Yet, it’s vital to pick the right tonewoods. Tonewoods impact the sound and playability. Let’s explore how.

Different Woods, Different Sounds

The wood used in guitar making defines its tone. Softwoods give a warm sound. Hardwoods offer more brightness.

  • Spruce – It’s bright and versatile, perfect for beginners.
  • Mahogany – Expect a mellow tone with strong midranges.
  • Rosewood – Rich and complex tones flourish here.
  • Cedar – Soft, warm, and ideal for fingerpicking.

How Tonewood Affects Your Learning

Learning the guitar can be easier or harder based on the tonewood. The sound can inspire you more or less.

Tonewood Sound Quality Playability
Spruce Bright and clear Responsive to various playing styles
Mahogany Warm and full Good for rhythmic strumming
Rosewood Rich with overtones Best for advanced techniques
Cedar Soft and warm Great for light touch playing

A spruce top might help beginners hear their mistakes better. So, they learn faster. Rosewood can be less forgiving but rewarding for experienced hands.

Brands That Strike A Chord

Embarking on a musical journey demands the right instrument. The world of acoustic guitars offers a symphony of choices for beginners. Hitting the perfect note starts with choosing a brand that’s synonymous with quality and ease of play. Several brands have dedicated lines specifically designed for those just starting to pluck their first strings. Let’s explore these trustworthy manufacturers.

Reputable Manufacturers For Beginners

Beginner guitarists need instruments they can rely on. It’s not just about the sound—it’s also about comfort and playability. These brands have set the benchmark:

  • Yamaha: Known for their affordable yet durable guitars, Yamaha has been a leading choice for new players.
  • Fender: With its easy-to-play neck designs, Fender’s acoustic range is particularly friendly for beginners.
  • Cort: Cort offers excellent value for money, making it a popular pick among novices.
  • Epiphone: The beginner models by Epiphone provide a smooth playing experience with a classic touch.

History And Heritage Of Iconic Brands

Established brands come with a tale of their own. Their storied past often influences the trust and preferences of performers worldwide. Here are some keynotes:

Brand Since Notable Legacy
Martin 1833 Innovator of the dreadnought style beloved by professionals and beginners.
Taylor 1974 Renowned for their bright sound and easy playability.
Gibson 1902 A classic choice that echoes a rich musical heritage.
Ibanez 1957 Known for their modern design and versatile sound palette.

Each of these manufacturers not only provides exceptional quality for novice players, but also a legacy that inspires. Choosing a guitar from one of these brands means inheriting a slice of music history.

Size Matters: Finding Your Fit

Starting your musical journey with the right acoustic guitar is crucial. You must find one that feels comfortable and suits your frame. This crucial choice can impact your learning curve and playing style. Let’s dive into how guitar sizes and shapes matter when selecting your ideal acoustic guitar.

Exploring Guitar Sizes And Shapes

Acoustic guitars come in various sizes and shapes, each offering unique benefits.

  • Half-Size Guitars: Perfect for kids or as a travel instrument.
  • Three-Quarter Size Guitars: Ideal for teens or players with a smaller build.
  • Full-Size Guitars: The standard for adults, providing rich, full sound.

Different shapes affect sound and comfort. Dreadnoughts project bold sounds, while concert shapes offer a softer tone.

Choosing The Right Size For Your Build

Your physique plays a vital role in selecting a guitar. A mismatch can lead to discomfort and hinder progress.

  1. Measure arm span and compare it to guitar length.
  2. Ensure you can comfortably reach around the body of the guitar.
  3. Check if your fingers easily press down on the strings.

Test different guitars to find the one that feels like an extension of your body. A proper fit ensures ease of play and a joyful learning experience.

Accessorize Your Experience

Embarking on your musical journey with a new acoustic guitar is thrilling. Yet, to truly enrich your playing experience, you need the right gear. This essential accessory guide ensures you hit the right notes from day one.

Essential Accessories For Beginners

Starting with the essentials, here’s what you’ll need:

  • Extra Strings: Always have a spare set, in case of a snap.
  • String Winder and Cutter: Make restringing your guitar a breeze.
  • Tuner: Keep your guitar sounding pitch-perfect.
  • Guitar Picks: Experiment with different thicknesses to find your style.
  • Strap: Play comfortably standing up or sitting down.
  • Capo: Change your guitar’s key effortlessly.
  • Gig Bag: Protect your guitar when you’re on the move.

Investing In Your First Accessory Kit

A wise move for every beginner is to get an all-encompassing accessory kit. Here’s why:

Accessory Kit Benefits Details
Cost-Effective Buying a bundled kit is cheaper than individual items.
Convenience One purchase and you have everything at once.
Quality Match Items in a kit are designed to work well together.
Ready for Lessons Focus on learning, not shopping for accessories.

Remember, the right accessories can make learning smoother and more enjoyable. So, gear up and let the music begin!

Hearing The Difference

Hearing the difference between various types of acoustic guitars is key to selecting the right instrument. This is not just about the sound. It’s about how you connect with your guitar. Beginner musicians often wonder about the kind of guitar that would best suit their journey. We’ll discuss the nuances between purely acoustic models and their electro-acoustic brethren. Let’s explore these options!

Acoustic Vs. Electro-acoustic Guitars

The acoustic guitar is the classic choice. It is self-amplifying, relying on its body for the resonance and volume. Electro-acoustic guitars, on the other hand, are acoustic instruments with built-in pickups or microphones. They can connect to amplifiers or PA systems. This ability enhances their sound electrically.

  • Acoustic guitars offer a pure, traditional sound.
  • Electro-acoustic guitars provide versatility for varying performance environments.

Each type serves a different purpose and offers a unique experience:

Acoustic Guitar Electro-Acoustic Guitar
Perfect for unplugged sessions and small gatherings. Suitable for concerts or playing with bands.
Portability with no need for an external power source. Requires an amplifier for the full sound experience.

Should Beginners Consider Electronics?

Beginner guitarists may question the need for electronics in their first instrument. There are aspects to consider:

  1. Learning basics is crucial before diving into amplified sound.
  2. Future needs might include performing, requiring an electro-acoustic.
  3. Budget plays a role, as electro-acoustic models can be more expensive.

Beginners are safe starting with a standard acoustic guitar. It keeps the focus on technique. Yet, those with clear ambitions to perform may benefit from an electro-acoustic from the start. It can grow with you as your skills advance.

Those opting for the electro-acoustic route should ensure their guitar has:

  • A built-in tuner, for ease and accuracy.
  • Volume and tone controls, to shape the amplified sound.
  • A comfortable body shape that suits their playing style.


Learning Resources For The Journey

Starting your acoustic guitar journey is exciting! You have your guitar. Now, it’s time to learn how to play it. Quality learning resources can turn your musical dreams into reality. With the right guidance, you’ll be strumming your favorite tunes in no time. This section covers the best resources to help you master the acoustic guitar.

Online Guitar Lessons Worth Checking Out

Online lessons are flexible and accessible. Many platforms offer step-by-step tutorials. They guide you from the basics to advanced techniques. Check out these top sites:

  • GuitarTricks: Start with a free trial. Explore beginner lessons.
  • Fender Play: Known for high-quality lessons. Try interactive learning exercises.
  • JustinGuitar: Over 1,000 free lessons. Donations appreciated.
  • Yousician: Combines real-time feedback with fun gameplay mechanics.

Books And Apps To Supplement Your Practice

Books and apps can provide extra help. They can make practice more effective. Here’s what to use:

Resource Type Benefit
Hal Leonard Guitar Method Book Structured lessons
Guitar Chords Book Chord diagrams
Ultimate Guitar Tabs App Song tabs and chords
Anytune App Slow down songs
Metronome Beats App Keep time while practicing

Combine lessons, books, and apps for the best results. Practice regularly. Enjoy the process. Soon, you’ll play beautiful music.

Frequently Asked Questions Of Best Starter Acoustic Guitars

What Are The Top Affordable Acoustic Guitars For Beginners?

Affordable starter acoustic guitars offer great value for beginners. Brands like Yamaha, Fender, and Jasmine frequently top lists due to their good build quality and sound, providing excellent options without breaking the bank. These guitars balance cost and performance for new players.

How To Choose A Starter Acoustic Guitar?

When choosing a starter acoustic guitar, consider size, playability, and material. Beginners benefit from a smaller body guitar for comfortable learning. Look for low action (string height) to ease playability. Opt for solid wood tops for better sound quality and resonance as skills improve.

Can Beginners Learn On A Full-size Guitar?

Yes, beginners can start on a full-size guitar if they feel comfortable with the size. Full-size guitars offer the same range and sound expected from acoustic guitars. However, ensure the playability suits the learner’s hand size and finger reach for a positive learning experience.

What’s The Difference Between Classical And Acoustic Guitars?

Classical guitars typically have nylon strings, a wider neck, and a softer sound, which can be easier on beginners’ fingers. Acoustic guitars usually have steel strings and a narrower neck, producing a louder and brighter tone. The choice may depend on the music style the beginner prefers to play.

Conclusion

Selecting the perfect starter acoustic guitar sets a solid foundation for your musical journey. Embrace the joy of strumming on an instrument that resonates with your style and preferences. Remember, quality and playability lead to endless creativity. Kickstart your guitar dreams with confidence; your ideal acoustic awaits!

Categories
Archive

Why Do Composers Use Cubase: Unlocking Musical Mastery

Composers use Cubase for its advanced features and intuitive interface, which streamline the music production process. Additionally, its robust tools and extensive virtual instruments provide the flexibility and creative control required for composing complex and intricate musical arrangements.


When it comes to music production, composers seek software that offers seamless integration with their workflow. Cubase fulfills this need by providing a comprehensive suite of features, including powerful audio recording, editing, and mixing capabilities. Its range of virtual instruments, effects, and advanced music notation tools enables composers to bring their creative vision to life with unparalleled precision.


Moreover, its compatibility with various hardware and software solutions makes it a versatile choice for composers across different genres and styles. Furthermore, the intuitive interface and customizable workflow in Cubase empower composers to expedite their creative process without compromising on quality. In addition to its functionality, Cubase’s reputation as a reliable and industry-standard software further solidifies its position as the go-to choice for composers seeking a professional and efficient music production solution.


The Evolution Of Music Production

The Evolution of Music Production has been closely intertwined with technological advancements, changing the way musicians and composers create and record their work. As technology has evolved, so too has the process of music composition and production. In this article, we will explore why composers use Cubase and delve into the historical context and technological developments that have shaped modern music production.

The History Of Music Composition

Music composition has a rich history dating back centuries. From early musical notations to the sophisticated software used today, composers have utilized various tools to bring their musical ideas to life. The evolution of music composition has seen a progression from handwritten scores to digital audio workstations (DAWs) like Cubase, revolutionizing the way music is created and produced.

The Role Of Technology In Music Production

Technology has played a pivotal role in shaping the landscape of music production. Advancements in recording equipment, synthesisers, and software have opened up new possibilities for composers. In the digital age, DAWs like Cubase offer a comprehensive suite of tools, including virtual instruments, audio effects, and production features, enabling composers to realize their musical visions with unprecedented precision and flexibility.

Introduction To Cubase

Cubase is the preferred choice for composers due to its comprehensive features and powerful tools that enhance creativity. With its intuitive interface and wide range of plugins, Cubase allows composers to create, edit, and produce their music efficiently, making it a favorite among professionals in the industry.

What Is Cubase?

Cubase is a comprehensive digital audio workstation used for music production and audio editing.

Key Features Of Cubase

– User-friendly interface for easy navigation.
– Extensive library of virtual instruments and audio effects.
– Advanced MIDI capabilities for precise musical composition.
– Seamless integration with third-party plugins for enhanced creativity.

Cubase is a beloved software among composers due to its versatility and powerful features.

Advantages Of Using Cubase

Composers are turning to Cubase as their go-to music production software due to its numerous advantages. Whether you are a professional composer or a beginner musician, Cubase offers a seamless workflow integration, powerful audio and MIDI capabilities, and a host of other features to enhance your creative process. Let’s delve into the advantages of using Cubase.

Seamless Workflow Integration

Cubase provides a seamless workflow integration that enables composers to focus on their creativity rather than getting caught up in technical details. With its intuitive and user-friendly interface, you can easily navigate through your projects, access a wide array of virtual instruments and effects, and make quick adjustments to your tracks.

One of the standout features of Cubase’s workflow integration is its comprehensive mixer that allows you to control and fine-tune every aspect of your audio. You can easily adjust levels, add effects, and apply automation to bring your music to life. This level of control ensures that you achieve the desired sound and production quality.

Additionally, Cubase offers a vast library of pre-made templates and user-defined presets, saving you time and effort in setting up your projects. Whether you’re scoring a film, recording a band, or producing electronic music, these customizable templates provide a solid foundation to build upon, allowing you to jump straight into the creative process.

Powerful Audio And Midi Capabilities

Cubase boasts powerful audio and MIDI capabilities that offer unparalleled flexibility for composing, recording, and editing music. With its advanced audio engine, you can achieve professional-grade sound quality, making your compositions stand out.

When it comes to MIDI, Cubase sets itself apart with its extensive MIDI editing tools. You can easily arrange, layer, and manipulate MIDI parts to create intricate melodies, harmonies, and rhythms. The MIDI functionality in Cubase enables composers to experiment with different musical ideas and arrangements, allowing for endless creative possibilities.

Moreover, Cubase seamlessly integrates with external hardware controllers, making it an ideal choice for composers who prefer a more tactile approach to music production. You can connect your favorite MIDI controller or virtual instruments and control them directly within Cubase, giving you a hands-on experience that enhances your workflow.

In addition to its audio and MIDI capabilities, Cubase offers a range of features such as flexible routing options, comprehensive mixing tools, and advanced audio editing functionalities. These features empower composers to shape and sculpt their music with precision, enabling them to achieve their artistic vision.

Conclusion

With its seamless workflow integration and robust audio and MIDI capabilities, Cubase proves to be a valuable asset for composers of all levels. Whether you’re looking to produce film scores, record live instruments, or create electronic music, Cubase’s features and advantages can elevate your creative output to new heights.


Cubase In Composition And Arrangement

Cubase, a widely acclaimed digital audio workstation, offers a plethora of tools and features for composers and arrangers to bring their musical ideas to life. In this section, we will explore why composers use Cubase specifically for composition and arrangement, highlighting its benefits in enhancing creativity and providing efficient arrangement tools.

Enhancing Creativity

Cubase empowers composers to unleash their creativity by providing them with a versatile platform to experiment and explore musical ideas. With its intuitive interface and comprehensive set of virtual instruments and effects, Cubase allows composers to effortlessly create unique melodies, harmonies, and textures.

The software offers a wide range of music production tools such as MIDI sequencing, audio recording, and editing capabilities. This enables composers to easily capture and manipulate their musical ideas, whether they prefer working with virtual instruments or recording real instruments.

Furthermore, Cubase provides a vast library of sounds and samples, offering composers an extensive palette to choose from. From orchestral arrangements to electronic dance music, Cubase caters to multiple genres and styles, allowing composers to explore various sonic possibilities and push the boundaries of their musical expression.

Efficient Arrangement Tools

Cubase offers a suite of highly efficient arrangement tools, enabling composers to organize and structure their compositions seamlessly. The software’s powerful MIDI editing features allow composers to fine-tune their melodies, harmonies, and rhythms with precision.

One notable feature of Cubase is its ability to handle complex compositions with ease. Whether working on a symphony orchestra piece or a dense electronic arrangement, composers can rely on Cubase’s robust performance and stability to handle high track counts and intricate musical arrangements.

Cubase also provides a range of automation tools that allow composers to add dynamic changes and expressive nuances to their music. From volume and panning adjustments to detailed parameter control, these tools give composers the freedom to shape their compositions and bring their musical vision to life.

In addition to these arrangement tools, Cubase offers a user-friendly mixer interface, allowing composers to mix and master their compositions with ease. This enhances the overall sonic quality of the composition, delivering a professional sounding result.

In conclusion, Cubase is a preferred choice for composers in the field of composition and arrangement due to its ability to enhance creativity and provide efficient arrangement tools. Whether composing for film, television, or any other form of entertainment, Cubase offers a comprehensive platform for composers to unlock their musical potential and unleash their imagination.

Cubase In Mixing And Mastering

The use of Cubase in Mixing and Mastering offers composers an array of tools and features to elevate their music production to professional standards.

Advanced Mixing Capabilities

With Cubase, composers can access a suite of advanced mixing capabilities that enable precise control over every element of their music.

Mastering With Precision

Cubase provides composers with the tools needed to master their tracks with precision, ensuring optimal sound quality and balance across the entire composition.

Collaboration And Compatibility

Collaboration and Compatibility are crucial factors for composers when choosing a DAW (Digital Audio Workstation) like Cubase. Let’s explore how Cubase’s seamless collaboration features and compatibility with industry standards enhance the music creation process.

Seamless Collaboration Features

Cubase offers a range of seamless collaboration features that enable composers to work together with ease. The VST Connect feature allows for real-time remote recording sessions, connecting musicians and producers regardless of their location. With this, collaborators can share and work on projects simultaneously, fostering efficient and creative teamwork.

  • Real-time remote recording sessions
  • Simultaneous project sharing
  • Efficient and creative teamwork

Compatibility With Industry Standards

Cubase sets the standard for compatibility, ensuring that composers can integrate their workflow with industry standards seamlessly. Its support for various file formats and plugin types, along with compatibility with hardware and software, enables composers to collaborate with professionals across the music industry without constraints.

  1. Support for various file formats and plugin types
  2. Seamless integration with industry-standard hardware and software
  3. Facilitates collaboration across the music industry

Cubase For Film And Game Scoring


Why Do Composers Use Cubase for Film and Game Scoring

Introductory Paragraph

Composers in the film and game industry rely on powerful software that meets the sophisticated demands of scoring for visual media. Cubase has emerged as a favored choice due to its comprehensive features specifically designed to streamline the composition process for film and game scores.

H3 Heading: Scoring for Visual Media

Scoring For Visual Media

When it comes to creating music for film and game projects, composers require a platform that allows for precise synchronization of soundtracks with visuals. Cubase provides a user-friendly interface and a wide array of orchestral and electronic sound libraries, empowering composers to achieve seamless integration between music and visual elements. The software’s advanced scoring features, including notation and MIDI editing, enable composers to craft intricate musical compositions that beautifully complement the visual narrative.

H3 Heading: Integration with Game Development

Integration With Game Development

Cubase offers seamless integration with popular game development tools, such as Unity and Unreal Engine, providing composers with a cohesive workflow for scoring game projects. The software’s compatibility with game audio middleware and support for interactive music composition enables composers to create dynamic and immersive soundscapes that enhance the gaming experience. Moreover, Cubase’s flexible export options cater to the specific requirements of game audio implementation, ensuring a smooth transition from composition to integration within the game environment.


Conclusion And Future Trends

Discover why composers choose Cubase for its intuitive interface and powerful features. With constant updates and advancements, Cubase remains a top choice for music production, paving the way for future trends in the industry.

Impact Of Cubase On Music Production

Cubase has revolutionized the field of music production, making the process more efficient and accessible. With its powerful features and intuitive interface, composers find it easier than ever to bring their musical visions to life. The wide range of virtual instruments and effects, coupled with advanced audio editing capabilities, allows composers to explore new sonic possibilities. Whether it’s arranging, recording, mixing, or mastering, Cubase offers a complete solution for all stages of music production.

Emerging Trends In Music Composition

As technology continues to advance, the future of music composition looks promising. With Cubase at the forefront, composers can expect to see exciting new developments in their creative processes. Here are some emerging trends that are shaping the world of music composition:

1. Real-time Collaboration

With the rise of internet connectivity and cloud-based platforms, composers can now collaborate with musicians and producers from around the world in real-time. Cubase’s collaborative features enable seamless teamwork, making it easier than ever to share ideas, exchange files, and work together on projects. This trend opens up endless possibilities for composers, allowing them to bring together diverse talents and create music that transcends geographical boundaries.

2. Virtual Reality (vr) Integration

Virtual reality is gaining popularity in various industries, including music. In the future, composers can expect to explore the realm of virtual reality, creating immersive musical experiences that engage multiple senses. Cubase’s integration with VR technology allows composers to compose music specifically designed for virtual reality environments, enhancing the overall user experience and pushing the boundaries of traditional composition.

3. Artificial Intelligence (ai) Assistance

Artificial intelligence is rapidly transforming various aspects of our lives, and music composition is no exception. In the coming years, composers may rely on AI assistance to streamline their workflow, generate musical ideas, and automate certain tasks. Cubase’s integration with AI algorithms can help composers unlock new levels of creativity, complementing their skills and expanding the possibilities of music composition.

In conclusion, Cubase has had a significant impact on music production, empowering composers with powerful tools and innovative features. Looking towards the future, we can expect to see the emergence of real-time collaboration, VR integration, and AI assistance as key trends in music composition. As technology continues to evolve, Cubase will undoubtedly remain at the forefront, empowering composers to push the boundaries of creativity and redefine the way we experience music.

Why Do Composers Use Cubase: Unlocking Musical Mastery


Credit: m.youtube.com

Frequently Asked Questions Of Why Do Composers Use Cubase

Why Do Composers Choose Cubase As Their Daw?

Composers opt for Cubase due to its intuitive interface, vast virtual instruments, and powerful audio editing capabilities, enhancing their creative workflow.

How Does Cubase Enhance The Music Production Process?

Cubase streamlines music production with its comprehensive features like MIDI editing tools, audio recording capabilities, and seamless integration with third-party plugins.

What Makes Cubase Stand Out Among Other Daws?

Cubase stands out for its stability, versatile functionality, extensive library of effects and sounds, and continuous updates that cater to composers’ evolving needs.

Conclusion

Cubase is favored by composers for its intuitive interface and versatile features. Its ability to streamline the composition process and facilitate creativity sets it apart in the music production industry. Composers trust Cubase to bring their musical visions to life efficiently and effectively.

Categories
Archive

How to Make Vocals Sit in the Mix: Mastering the Art for Perfect Sound

To make vocals sit in the mix, use EQ to carve out space for the vocals, apply compression to control dynamics, and add reverb and delay for depth and presence. Achieving a balanced vocal mix is crucial for a polished sound.


When done correctly, vocals can cut through the mix without overpowering the other instruments. We’ll explore various techniques to ensure vocals blend seamlessly with the music, enhancing the overall listening experience. Understanding how to manipulate the vocal track using EQ, compression, and effects can elevate the sound and make the vocals stand out in a professional mix.


By implementing these techniques, you can achieve a cohesive and well-integrated vocal sound within your mixes.


Understanding Vocal Processing

Understanding vocal processing is essential in achieving a professional and polished sound for your vocals within a mix. It involves a blend of techniques such as EQ, compression, and effects to enhance the clarity, presence, and emotion of the vocals in relation to the instrumental elements.

Importance Of Eq For Vocals

EQ plays a pivotal role in vocals as it allows you to sculpt the frequency spectrum, ensuring that the vocals sit well in the mix. By using EQ, you can boost the frequencies that enhance the vocal’s clarity and presence, while also cutting or attenuating frequencies that may cause muddiness or harshness. It’s crucial to address problematic frequencies and emphasize the natural characteristics of the vocalist’s voice through careful EQ adjustments.

Role Of Compression In Vocal Mixing

Compression is indispensable in vocal mixing as it helps to even out the dynamic range, providing a consistent and controlled vocal performance throughout the song. By applying gentle compression, you can smooth out sudden volume changes and bring forward the softer nuances, allowing the vocals to maintain a steady presence in the mix. However, it’s important to exercise restraint with compression to avoid squashing the natural dynamics of the performance.

Choosing The Right Effects

When it comes to making vocals sit well in a mix, choosing the right effects is crucial for achieving the desired result. The use of effects such as reverb, delay, and modulation can greatly enhance the vocals and help them blend seamlessly with the rest of the track.

Reverb And Delay For Vocals

Reverb and delay are essential effects for adding depth and space to vocals. Reverb adds a sense of space and natural ambiance, while delay can create a sense of movement and depth. When using reverb and delay on vocals, it’s important to adjust the parameters to complement the style and mood of the song.

Utilizing Modulation Effects

Modulation effects, such as chorus and flanger, can add a shimmering and dynamic quality to vocals. Chorus can create a thicker, richer sound, while flanger adds a swirling, psychedelic effect. When using modulation effects on vocals, it’s important to apply them subtly to avoid overpowering the vocal performance.

Techniques For Vocal Eq

When mixing vocals, using the right EQ techniques is crucial to ensure the vocals sit perfectly in the mix.

Cleaning Up Frequencies

  • Identify problematic frequencies that muddy the vocals.
  • Use a narrow Q setting to precisely notch out unwanted frequencies.
  • Pay attention to low-end rumble and harsh high frequencies that can clutter the sound.

Enhancing Presence And Clarity

  1. Boost presence frequencies around 5 kHz to 7 kHz for clarity.
  2. Apply a gentle high-frequency boost around 10 kHz to add airiness.
  3. Consider using a low-cut filter to remove unnecessary low-end frequencies.

Mastering Vocal Compression

Mastering vocal compression is an essential skill for achieving a professional and polished sound in your mix. Properly compressing vocals helps to control dynamics, enhances the vocal performance, and ensures that the vocals sit well in the overall mix. In this article, we will explore two key aspects of vocal compression: setting the right compression parameters and using parallel compression effectively.

Setting The Right Compression Parameters

When it comes to setting the right compression parameters for vocals, it’s important to strike a balance between controlling the dynamic range and maintaining the natural characteristics of the vocals. Here are some key parameters to consider:

Parameter Recommended Range
Threshold Set it just above the average level of the vocals to catch the peaks.
Ratio Around 3:1 to 5:1 for vocals, adjust according to the vocal performance
Attack A fast attack to let the compression kick in quickly, experimenting can help find the right setting
Release Tune the release time to allow the compression to release smoothly, generally around 50-200 milliseconds works well

By setting these parameters appropriately, you can ensure that the compression subtly smoothens out the dynamics of the vocals without sacrificing their emotional impact.

Using Parallel Compression Effectively

Parallel compression, also known as New York compression, is a technique that involves blending a heavily compressed signal with the original uncompressed signal. This technique can add depth and sustain to the vocals without compromising their clarity and presence in the mix. Here’s a simple step-by-step guide to using parallel compression effectively:

  1. Create a duplicate track of the vocals in your DAW.
  2. Apply aggressive compression with high ratios and fast attack/release settings on the duplicate track.
  3. Blend the heavily compressed duplicate track with the original vocals using a aux send or a bus.
  4. Adjust the blend to taste, ensuring that the parallel compression adds depth and sustain without overpowering the original vocals.

By using parallel compression effectively, you can enhance the presence and impact of the vocals in your mix while maintaining a natural and dynamic sound.

Blending Vocals With The Instrumental

When it comes to creating a professional-sounding mix, blending vocals with the instrumental is crucial. A well-balanced mix helps the vocals shine through, ensuring they sit perfectly within the overall sound. By establishing a balanced mix and creating proper space for vocals, you can achieve a seamless integration that enhances the quality and impact of your music.

Establishing A Balanced Mix

To create a cohesive and immersive audio experience, it’s essential to establish a balanced mix that allows all the elements to coexist harmoniously. Here are some tips to help you achieve this:

  1. Set the foundation: Start by ensuring that each instrument in your mix has its own space and clarity. Use the equalizer to remove any unwanted frequencies and emphasize the best qualities of each sound.
  2. Manage dynamics: Properly balancing the levels of each element in your mix is vital. Pay attention to the relationship between the vocals and the instrumental. Use compression to control dynamic range and ensure the vocals stay clear and present without being too overpowering.
  3. Pan wisely: Panning helps create a sense of width and separation in your mix. Experiment with panning the instrumental elements to different positions in the stereo field, allowing the vocals to sit right in the center and take the spotlight.

Creating Space For Vocals

Now that you have a balanced mix, it’s time to make space for the vocals to shine through. Here are some techniques to create the perfect vocal space:

  • EQ carving: Use equalization to carve out specific frequency ranges for vocals. Identify the main frequency areas which clash with the vocal presence in the instrumental and reduce their levels, allowing the vocals to cut through more clearly.
  • Utilize reverb and delay: Applying subtle reverb and delay effects to the vocals helps create a sense of depth and space. Find the right balance so the vocals sound natural and blend well with the instrumental, avoiding excessive effects that could muddy the mix.
  • Arrange intelligently: Pay attention to the arrangement of the instrumental elements. Leave space in certain parts of the song, such as during instrumental breaks or verses, to allow the vocals to come forward and stand out.

By following these techniques and focusing on the balance between vocals and the instrumental, you can achieve a mix where the vocals sound integrated and professionally blended. Experiment, trust your ears, and remember, achieving a great vocal blend takes practice and an understanding of how all the elements work together in the mix.

Working On Vocal Dynamics

To achieve a well-balanced vocal mix, it is crucial to work on vocal dynamics. Adjusting the volume, tone, and emotion of the vocals can help the vocals sit seamlessly in the mix. Utilizing compression, EQ, and automation can enhance the overall impact of the vocals in the song.

Automating Volume For A Dynamic Performance

One way to enhance vocal dynamics is automating volume adjustments. By setting volume changes at specific points, vocals can stand out or blend in seamlessly.

Automating volume keeps vocals interesting, with soft parts being raised and louder parts being lowered for a more engaging listening experience.

Adding Excitement With Automation

Automation is crucial in keeping vocals dynamic. It creates movements that capture listeners’ attention and elevate the emotional impact of the song.

Using automation to control vocal effects and levels adds excitement while keeping the performance dynamic throughout the track.

Final Touches And Tips


How to Make Vocals Sit in the Mix – Final Touches and Tips

After setting the foundation, it’s time to fine-tune the vocals to ensure they sit perfectly in the mix. The final touches and tips play a crucial role in achieving a balanced and professional sound. Here are some essential considerations to enhance your vocal mix:

Checking The Mix In Different Playback Systems

Once you’ve seemingly perfected the vocal mix, it’s essential to check it across various playback systems. Listen to the mix using different headphones, speakers, and even devices such as smartphones and laptops. Ensure that the vocals maintain clarity and presence regardless of the playback medium. This step helps to identify any inconsistencies due to different frequency responses of various playback systems.

Ensuring The Vocals Cut Through Without Overpowering

It’s crucial to ensure that the vocals cut through the mix without overpowering the other elements. Utilize subtle adjustments to the vocal levels to strike the perfect balance. Consider adjusting the equalization and compression settings to maintain clarity while preventing the vocals from dominating the overall mix. Pay close attention to the relative volume and EQ of the vocals compared to the accompanying music elements.

How to Make Vocals Sit in the Mix: Mastering the Art for Perfect Sound


Credit: mastering.com


Frequently Asked Questions Of How To Make Vocals Sit In The Mix

How Can I Make Vocals Sit In The Mix?

To make vocals sit in the mix, start by using EQ to remove any unwanted frequencies and make room for the vocals. Use compression to control the dynamics and make the vocals consistent. Add reverb and delay to create depth.


Experiment with panning and stereo wideners to place the vocals in the mix. Finally, adjust the volume level of the vocals to make sure they are balanced with the rest of the instruments.

What Eq Settings Should I Use For Vocals?

When EQing vocals, start by reducing frequencies below 80Hz to remove rumble and muddiness. Boosting around 2kHz can add presence and clarity to the vocals. Reducing frequencies around 400Hz can help tame any boxiness. Be careful not to overdo it and listen for what complements the specific vocal performance and style of the song.

How Much Compression Should I Use On Vocals?

The amount of compression to use on vocals varies depending on the desired sound and dynamics of the performance. Start with a gentle and transparent compression setting, like a 2:1 ratio with a medium attack and release time. Adjust the threshold to smooth out the dynamics without sacrificing the natural feel of the vocals.


Remember to trust your ears and make adjustments accordingly.

Conclusion

Achieving a balanced vocal in your mix is crucial for a professional sound. By implementing the techniques discussed, you can enhance the clarity and presence of vocals in your music production. Practice, experiment, and trust your ear to create mixes that truly shine.


Keep honing your skills and enjoy the rewarding process.

Categories
Archive

Fl Studio Can’t Be Installed on This Disk Mac : Troubleshooting Tips and Solutions

Fl Studio can’t be installed on this disk (Mac) due to compatibility issues with the operating system. Finding the right software for your music production needs can be challenging, especially when facing technical roadblocks such as disk compatibility.

One common issue Mac users encounter is the inability to install Fl Studio on certain disks. Understanding why this happens and how to resolve it is crucial for a seamless production experience. We will explore the reasons behind this error message and provide practical solutions to help you overcome this obstacle.

By the end of this guide, you will have a clear understanding of how to successfully install Fl Studio on your Mac without encountering any disk-related issues. Let’s dive in and troubleshoot this problem together.

Common Causes Of Installation Issue

Insufficient Disk Space

Inadequate disk space is a prevalent issue preventing the installation of FL Studio on a Mac. It is crucial to have ample disk space to accommodate the installation process. Insufficient disk space can hamper the installation and result in errors.

Permissions Error

Permissions errors can impede the installation of FL Studio on a Mac. Incorrect permissions settings can block the software installation process. It is important to ensure that the user account has the appropriate permissions to install applications on the designated disk.

Troubleshooting Steps

Encountering an error message like “Fl Studio Can’t Be Installed on This Disk Mac” can be frustrating when you’re excited to start using the software. However, fret not! We have compiled a list of troubleshooting steps to help you resolve this issue quickly. Follow the steps below to ensure a smooth installation process.

Check Disk Space Availability

The first and most crucial step in troubleshooting this issue is checking the availability of disk space on your Mac. Lack of sufficient disk space can prevent the installation of applications, including Fl Studio. To check the disk space availability, follow these steps:

  1. Click on the “Apple” menu in the top left corner of your screen.
  2. Select “About This Mac” from the dropdown menu.
  3. In the new window, navigate to the “Storage” tab.
  4. Here, you’ll find a breakdown of the disk space used by various files and applications.
  5. Ensure that you have enough free space to accommodate Fl Studio’s installation requirements.

If you have limited disk space, consider deleting unnecessary files or transferring them to an external storage device. Clearing out space will pave the way for successful installation of Fl Studio.

Adjust System Preferences

Sometimes, the error message can arise due to certain system preference settings. Adjusting these settings may help in resolving the issue. Follow the steps below:

  1. Click on the “Apple” menu in the top left corner of your screen.
  2. Select “System Preferences” from the dropdown menu.
  3. In the new window, navigate to “Security & Privacy.”
  4. Click on the “Privacy” tab.
  5. Here, ensure that Fl Studio has the necessary permissions to access your disk.
  6. If it is not listed, click on the lock icon at the bottom left to make changes and add it.

Adjusting the system preferences will allow Fl Studio to install without any hindrance. Once you have made the necessary changes, try reinstalling the software and check if the issue persists.

By following these troubleshooting steps, you can overcome the error message “Fl Studio Can’t Be Installed on This Disk Mac” and successfully install Fl Studio on your Mac. Ensure sufficient disk space availability and make the necessary adjustments to system preferences to enjoy a seamless installation process. Now you can dive into the world of music production with Fl Studio!

Resolving Permissions Error

Encountering a permissions error while installing Fl Studio on a Mac may prompt frustration. This issue is often resolved by checking and adjusting the disk permissions settings. By ensuring adequate permissions are granted, users can successfully install Fl Studio on their preferred disk.

Update System Software

If you are encountering the frustrating “Fl Studio Can’t Be Installed on This Disk Mac” error message, don’t worry, you’re not alone. This common issue often arises when there are permission conflicts preventing the installation of Fl Studio on your Mac. Fortunately, there are a few simple steps you can take to resolve the permissions error and get back on track to enjoying the powerful features of Fl Studio. Let’s start by updating your system software. To update your system software, follow these steps:
  1. Click on the Apple menu in the top-left corner of your screen.
  2. Select “System Preferences” from the drop-down menu.
  3. In the System Preferences window, click on “Software Update”.
  4. If there are any available updates, click on the “Update Now” button to install them.
  5. Once the updates are installed, restart your Mac and try installing Fl Studio again.
Updating your system software ensures that your Mac is running the latest version, which can often fix compatibility issues and resolve permission errors. By following these simple steps, you can overcome the “Fl Studio Can’t Be Installed on This Disk Mac” error and get back to making music in no time.

Change Permissions Settings

If updating your system software didn’t resolve the issue, the next step is to change the permissions settings for the disk you’re trying to install Fl Studio on. This will allow your Mac to grant the necessary permissions to the installer and establish a successful installation process. Follow these steps to change permissions settings:
  1. Locate the disk where you want to install Fl Studio.
  2. Right-click on the disk and select “Get Info” from the drop-down menu.
  3. In the Info window, click on the padlock icon in the bottom-right corner and enter your administrator password.
  4. Under the Sharing & Permissions section, click on the “+” button to add yourself as a user.
  5. Set the privilege level for your user account to “Read & Write”.
By changing the permission settings to “Read & Write” for the disk, you are granting yourself full access to install and run Fl Studio. Once you have made these changes, try installing Fl Studio again, and you should no longer encounter the frustrating permissions error. Remember, resolving the “Fl Studio Can’t Be Installed on This Disk Mac” error is essential in order to unleash the full potential of Fl Studio and enjoy its array of features. Update your system software and change the permissions settings to ensure a smooth installation process. Now, you’re all set to create music without any hindrance!

Working With Disk Utility

Working with Disk Utility is crucial when encountering the “FL Studio Can’t Be Installed on This Disk” issue on your Mac. Disk Utility is a built-in tool that allows you to manage and troubleshoot your disk, helping to resolve various disk-related problems.

Verify Disk Permissions

When encountering installation issues, it’s essential to verify the disk permissions on your Mac. Follow these simple steps to ensure the disk permissions are in order:

  1. Open Disk Utility from the Applications folder or by searching using Spotlight.
  2. Select your disk from the list of volumes on the left-hand side of the Disk Utility window.
  3. Click on the “First Aid” tab and then select “Verify Disk Permissions”.
  4. Wait for the verification process to complete.
  5. If any permissions errors are found, click on “Repair Disk Permissions” to rectify the issues.

Repair Disk

If verifying the disk permissions didn’t resolve the issue, you may need to repair the disk itself. Follow these steps to repair your disk using Disk Utility:

  1. Open Disk Utility and select your disk from the list of volumes.
  2. Click on the “First Aid” tab and then select “Repair Disk”.
  3. Allow Disk Utility to complete the repair process.
  4. Restart your Mac and attempt to install FL Studio again.

Using Terminal Commands

Using Terminal Commands to Resolve Installation Issues

When faced with the error message “FL Studio Can’t Be Installed on This Disk” on your Mac, utilizing Terminal commands can help resolve the issue efficiently.

Reset App Store

To reset the App Store cache, open Terminal and input the following command:
defaults write com.apple.appstore ShowDebugMenu -bool true

  • Open the App Store and find the ‘Debug’ menu.
  • Select ‘Reset Application’.
  • Restart your Mac and attempt the FL Studio installation again.

Force Installation

If the installation continues to fail, forcing the installation through Terminal can be a viable solution.

  1. Launch Terminal and enter:
  2. sudo spctl -- master-disable
  3. Press Enter and input your Mac’s admin password.
  4. Try to install FL Studio again.

By following these steps, you can bypass installation hurdles and successfully set up FL Studio on your Mac.

Installing On An External Drive

To install FL Studio on an external drive for Mac, ensure it meets system requirements. If the error message appears, check drive compatibility and available storage space. Transfer the installation to an approved drive for seamless operation.

Installing FL Studio on an external drive can be a solution when encountering the “FL Studio Can’t Be Installed on This Disk” issue on Mac. To proceed, follow these steps:

Format External Drive Appropriately

To begin, format the external drive to ensure compatibility with FL Studio installation:
  • Connect the external drive to your Mac.
  • Open Disk Utility from the Applications folder.
  • Select the external drive from the list.
  • Click on “Erase” and choose a suitable format like ExFAT.
  • Confirm the format process.

Install Fl Studio

Next, proceed with installing FL Studio on the newly formatted external drive:
  1. Download the FL Studio installer from the official website.
  2. Run the installer and choose the external drive as the installation location.
  3. Follow the on-screen instructions to complete the installation process.
  4. Launch FL Studio from the external drive to ensure successful installation.

Seeking Professional Help

Encountering issues while attempting to install FL Studio on your Mac disk? Seeking professional help can swiftly resolve this matter. A skilled technician can provide expert guidance to troubleshoot and install the software properly to ensure optimal performance.

If you’ve encountered the frustrating error message that says “FL Studio Can’t Be Installed on This Disk Mac,” it’s time to seek professional help. Getting the right guidance and assistance can save you from hours of troubleshooting and ensure a smooth installation process. In this section, we will explore two options for obtaining assistance: contacting Apple Support and consulting FL Studio Support.

Contact Apple Support

When facing installation issues on your Mac, it is wise to reach out to Apple Support. With their expertise, they can help you resolve the problem swiftly. Follow these steps to get in touch with Apple Support for assistance:
  1. Visit the Apple Support website.
  2. Find the “Contact Us” page.
  3. Choose the appropriate options for your issue, such as “Mac” and “Software Installation.”
  4. Select the option to request support via phone, chat, or email.
  5. Provide the necessary details and describe your issue accurately.
  6. Wait for a response from Apple Support, and follow their instructions to resolve the problem.
Remember, Apple Support is well-versed in Mac-related problems and will offer you tailored solutions to get FL Studio successfully installed on your disk.

Consult Fl Studio Support

Another avenue for seeking professional help is contacting FL Studio Support directly. The FL Studio team has a dedicated support system to assist users with any technical difficulties they encounter during installation or usage. Follow these steps to get in touch with FL Studio Support:
  1. Visit the FL Studio website.
  2. Navigate to the “Support” section.
  3. Choose the option to contact their support team, which may include a contact form, live chat, or email.
  4. Fill out the necessary details and provide a concise description of the “FL Studio Can’t Be Installed on This Disk Mac” error.
  5. Wait for a response from the FL Studio Support team.
  6. Follow their instructions to troubleshoot the issue or obtain further guidance on resolving the error.
By consulting FL Studio Support, you will receive the most accurate and up-to-date guidance specifically tailored to FL Studio’s installation on macOS. Remember, seeking professional help is the smartest move when encountering errors during software installation. Whether you reach out to Apple Support or FL Studio Support, they are there to lend a helping hand and ensure that you can get FL Studio up and running on your Mac without any further obstacles.

Preventing Future Issues

Preventing future issues is crucial to ensure the smooth functioning of FL Studio on your Mac. By following some essential steps, you can avoid encountering the error message “FL Studio Can’t Be Installed on This Disk Mac”. Let’s explore these preventive measures in detail:

Regular Disk Maintenance

Maintaining your disk regularly can significantly improve your Mac’s performance and prevent potential installation issues. A cluttered disk can hinder the installation process, leading to errors while trying to install FL Studio. To keep your disk organized and optimized, consider the following tips:

  1. Clean up unnecessary files and folders, especially those consuming a large amount of disk space.
  2. Regularly empty the Trash bin to completely remove unwanted files.
  3. Utilize disk cleanup tools to delete temporary files and caches.
  4. Use disk utility software to repair disk permissions and resolve any disk-related issues.
  5. Monitor your disk space to ensure you have enough free space available for FL Studio installation.

Software Updates

Keeping your software up to date is crucial for maintaining compatibility and resolving potential conflicts that may prevent FL Studio installation. Be sure to follow these best practices:

  1. Regularly check for software updates, including macOS updates, as they often provide bug fixes and performance enhancements.
  2. Enable automatic software updates to ensure you’re always running the latest versions.
  3. Stay updated with the latest FL Studio version, as the developers may release updates specifically addressing installation issues.
  4. Disable or remove any third-party applications that may interfere with the installation process.

By following these preventive measures, you can significantly reduce the risk of encountering the error message “FL Studio Can’t Be Installed on This Disk Mac” and enjoy a seamless installation experience. Take some time to regularly maintain your disk and keep your software up to date to ensure the smooth functioning of FL Studio on your Mac.


Frequently Asked Questions Of Fl Studio Can’t Be Installed On This Disk Mac

Why Can’t I Install Fl Studio On My Mac Disk?

To install FL Studio on Mac, ensure you have enough disk space and the correct version for your operating system. Some disks may also have compatibility issues, so consider using a different disk for installation.

What Are The Common Reasons For Fl Studio Installation Issues On Mac?

Common reasons for FL Studio installation issues on Mac include insufficient disk space, incompatible disk format, and restricted permissions. Ensure you have enough space, verify disk format compatibility, and adjust permissions for successful installation.

How Can I Troubleshoot Fl Studio Installation Issues On My Mac?

To troubleshoot FL Studio installation issues on Mac, check your disk space, ensure the disk is formatted correctly, and adjust permission settings. Additionally, consider using a different disk for installation and updating your operating system for compatibility.

Conclusion

In solving the “Fl Studio Can’t Be Installed on This Disk Mac” issue, consider various troubleshooting steps. Consult forums and support for help. Stay patient and persistent in finding solutions. Your persistence will lead to successfully resolving this hurdle and pursuing your music production journey without interruptions.

Happy creating!

Categories
Archive

What Is Dante Audio: Unveiling the Future of Sound

Dante Audio is a digital media networking technology that allows for multiple audio channels to be shared over a single network. It simplifies the routing of high-quality audio signals.


Developed by Audinate, Dante, which stands for Digital Audio Network Through Ethernet, revolutionizes audio distribution in various environments. By utilizing a standard IP over Ethernet network, Dante delivers uncompressed, multi-channel, low-latency digital audio with synchronization. This innovation greatly benefits live sound, commercial installation, broadcast, recording, and more by streamlining audio setup and eliminating the need for complex wiring systems.


With the capability to scale from simple setups to large-scale networks running thousands of audio channels, Dante has become a go-to choice for industry professionals seeking efficient, high-performing audio networking solutions. As it supports a wide array of devices and integrates seamlessly with existing network infrastructures, Dante’s versatility and ease of use continue to drive its adoption in the audio industry.


Dante Audio Unmasked

The world of digital audio is vast, with various protocols and interfaces. Among them, Dante Audio stands out. It transforms how audio signals transmit over networks. This post unveils the intricacies of Dante Audio.

Origins And Evolution

The journey of Dante Audio began in 2006 with Audinate, an Australian company. Its mission was to revolutionize audio networking. Over the years, Dante evolved into a global standard in professional audio.

Its growth has been instrumental in transitioning from analog to digital networking. The continuous enhancements ensure Dante’s compatibility with the latest tech trends.

Core Technology At A Glance

Dante Audio is a multi-channel digital media networking technology. It delivers uncompressed, multi-channel, low-latency digital audio over a standard IP network. Key features include:

  • Low latency for real-time audio transmission
  • Scalability to adapt to various network sizes
  • High-quality audio without compromising integrity
  • Simplicity in connecting devices with network cables

At its core, Dante integrates software, hardware, and network protocols. The table below summarises its main components:

Component Function Benefit
Dante Virtual Soundcard Turns a computer into a Dante-powered workstation Eliminates the need for additional hardware
Dante Controller Manages device connections Enables a flexible and efficient setup
Dante Domain Manager Enhances and secures network management Provides scalability and control

Together, these components create a robust and unified audio network. The Dante protocol easily integrates with existing network infrastructure. This makes it a go-to choice for audio professionals worldwide.

Fundamentals Of Digital Audio Networks

Digital audio networks transform sound into a format computers understand. This process has revolutionized how music and audio are recorded, processed, and broadcasted. Dante audio stands at the forefront of this digital transformation by simplifying complex audio setups. Let’s dive into the fundamentals of digital audio networks.

From Analog To Digital

Moving from analog to digital transforms sound waves into binary data. This binary data is easy for devices to store, send, and manipulate. The conversion involves several steps:

  1. Sampling: Captures snapshots of the sound wave at intervals.
  2. Quantization: Measures each snapshot and assigns a number.
  3. Encoding: Turns these numbers into a binary format.

Once in digital form, audio data can travel over networks efficiently and with high fidelity.

Network Protocols Explained

Network protocols are rules that allow devices to communicate over a network. For digital audio, these protocols ensure that data packets are:

  • Sent accurately: The original sound is maintained.
  • Synchronized: All data packets arrive in the correct order.
  • Compatible: Different equipment understands each other.
Protocol Function
Dante Transfers uncompressed, multi-channel digital audio.
AVB Provides precise audio and video synchronization.
Cobranet Designed for real-time, high-quality audio.

Dante uses a network protocol to bundle, send, and manage audio over IP networks. This protocol allows for high-performance audio networks that are scalable and easy to manage. By using Dante, professionals can deliver stellar audio quality while maintaining low latency and synchronization across devices.

How Dante Disrupts Traditional Audio Setup

Dante Audio, an innovation in sound technology, is shaking up how audio systems integrate within various environments. Imagine a world where bulky cables and complex routing are a thing of the past. Dante provides a streamlined, more flexible approach, turning traditional setups on their head with advanced features that enhance audio management and distribution.

Latency Breakthroughs

At the heart of Dante’s revolution is its ability to reduce latency to near-imperceptible levels. Low latency means audio signals travel almost instantly from source to speaker. Dante’s meticulous synchronization ensures that sound is not only high-quality but also in perfect time, key for live performances and broadcasts.

  • Digital audio signals travel swiftly over a network.
  • Enjoy real-time audio without delays.
  • Perfect alignment with video streams.

Simplified Cable Management

Dante dramatically simplifies the audio setup by replacing heaps of cables with a single network cable. This simplification cuts clutter and cost, making setup and changes quick and effortless. You get to reduce expenses and save time, focusing more on the audio experience and less on cable wrangling.

  • Single network cable replaces multiple audio cables.
  • Easy to connect and reconfigure systems.
  • Neat and organized audio networks.

Dante’s Compatibility And Integration

Understanding Dante’s Compatibility and Integration is pivotal for audio professionals. Dante, the leading AV over IP solution, transforms how audio is transported. It aligns with a multitude of devices and systems.

Interfacing With Legacy Systems

Integrating modern Dante technology with existing equipment is crucial. This kind of compatibility ensures a seamless audio network upgrade.

  • Dante Adapters: Convert analog signals to digital, connecting legacy gear to a Dante network.
  • Software Solutions: Bridge old and new systems, maintaining audio quality.
  • Scalable Designs: Dante networks can grow with your needs without replacing the entire system.

Software And Hardware Ecosystem

Dante boasts a robust ecosystem compatible with numerous devices. Manufacturers worldwide embrace Dante for reliable audio solutions.

System Type Dante Capability
Microphones & Speakers Direct integration, no intermediate hardware
Mixers & Amplifiers Seamless audio routing
Computers & Mobile Devices Software apps for easy access

Scaling With Dante: From Small Venues To Large Stadiums

Scaling with Dante: From Small Venues to Large Stadiums embodies the remarkable flexibility of Dante audio networking. This innovative technology adapts perfectly across various setups. Whether it’s an intimate cafe or a roaring stadium, Dante’s system ensures impeccable sound regardless of size.

Modular Approach To Audio Design

Dante’s modular design allows for customizable audio solutions. From a single speaker to an array of amplifiers, this technology grows with your venue. Users can start small and expand effortlessly, connecting additional equipment as needed.

  • Simple Integration: Plug-and-play functionality makes additions seamless.
  • Cost-Effective: Only add components when necessary, keeping initial costs low.
  • Unmatched Scalability: Supports a wide range of devices and applications.

Case Studies: Dante In The Real World

Real-world applications illuminate Dante’s potential. Let’s explore a few case studies:

  1. Small Pub to Concert Hall: A local pub used Dante to start with two speakers. As they grew into a concert venue, they added mics, mixers, and more speakers without overhauling the system.
  2. School Auditorium to University Campus: A school connected multiple rooms via Dante for events. This system later scaled up to encompass the entire campus, offering centralized control over various audio settings.
  3. Sports Bar to Stadium: A sports bar outfitted with Dante for game day feeds later leveraged the same system to coordinate stadium-wide broadcasts, showing the solution’s sheer scalability.

Gauging Sound Quality And Performance

When judging sound systems like Dante Audio, sound quality and performance are key. Professionals and audiophiles alike pay close attention to these aspects. Understanding Dante Audio’s capabilities means putting these criteria under the microscope. Let’s explore how Dante stands up to the rigors of professional audio demands.

Audio Fidelity Under The Microscope

First, let’s talk about audio fidelity. It’s all about the clarity and detail in the sound. Dante Audio is a digital media networking technology that delivers uncompressed, multi-channel audio over a standard Ethernet network. Its high-resolution sound matches studio quality. Here’s exactly what to look for:

  • Sample Rate: Dante supports up to 192kHz, perfect for high-definition audio.
  • Bit Depth: It boasts 24-bit precision, capturing the nuances of sound.
  • Low Latency: With minimal delay, audio stays in perfect sync with video.

Reliability In Various Settings

Dante’s reliability is another important aspect. It shines in diverse settings – from live events to broadcast studios. If you’ve got a packed stadium or a critical live broadcast, Dante Audio won’t let you down. Its performance is consistent. Factors contributing to this include:

Feature Benefit
Redundancy Backup connections prevent audio dropouts.
Network Control Manage audio routes easily, even in complex setups.
Scalability Expand your system with no loss in performance.

Dante’s networked audio protocols ensure your sound system operates smoothly. With easy integration and management, sound technicians can focus on delivering crisp, uninterrupted audio across any event or installation.

User Experience: Setup And Operation

Dante Audio transforms the way we work with sound. It lets us send audio over a network with ease. Setting up and running Dante is a smooth process that anyone can manage. Let’s dive into the user experience of Dante Audio and explore how it simplifies audio networking.

Ease Of Configuration

The initial setup of Dante Audio is a breeze, even for beginners. Plug your audio devices into a network using standard Ethernet cables, and Dante takes care of the rest. Configuring your audio network is as simple as naming your devices. Look at how easy these steps are:

  • Connect your Dante-enabled devices to power and the network.
  • Launch the Dante software on your computer.
  • Assign names to your devices for easy identification.
  • Start routing audio with a few clicks.

Managing Audio Networks With Dante Controller

Once your Dante network is up, the Dante Controller becomes your command center. This powerful software lets you manage your audio routes easily. It shows you all Dante-enabled devices on your network. With a simple drag-and-drop interface, setting up your audio flow is straightforward:

  1. Launch Dante Controller.
  2. See all connected devices in one spot.
  3. Drag and drop to connect these devices.
  4. Adjust settings like latency as needed.

Dante Controller also offers detailed network monitoring. You can keep an eye on:

Feature Benefit
Device Sample Rates Ensures compatible audio quality across the network.
Latency Metrics Optimizes performance for seamless audio.
Clock Status Maintains synchronization of all networked devices.

With real-time notifications for any issues, your network stays healthy. This means trouble-free audio delivery at all times. Experience the future of audio networking with Dante, where sound moves as you do: easily and freely.

Future-proofing Audio With Dante

Imagine a world where audio connections never age. Dante Audio is making this a reality. Dante offers a flexible and scalable networked digital audio solution. It adapts to the evolving needs of audio professionals. Upgrades and expansions become seamless, without the need to overhaul existing hardware. Embracing Dante means embracing a system that grows with technology, ensuring your audio investments stand the test of time.

Continuous Innovations

Dante’s commitment to innovation keeps it at the forefront of digital sound. With regular updates and enhancements, the platform infuses the latest advancements into your audio setup. This eliminates frequent hardware replacements. Upcoming features integrate smoothly into existing infrastructure.

  • Advanced Redundancy: Dante’s network incorporates fail-safe mechanisms. These ensure continuous operation even if part of the system encounters issues.
  • Low-Latency Upgrades: Developments in Dante’s protocol reduce latency further, guaranteeing real-time audio delivery.
  • User-Friendly Interfaces: Dante’s focus on usability introduces enhancements that simplify network management for all skill levels.

Emerging Trends In Digital Sound

Dante represents the pulse of digital audio networking. It’s always aligned with the latest trends. The seamless integration of new technologies keeps your setup modern and effective.

Trend Description
Immersive Audio Dante supports formats that deliver a 3D audio experience. These are crucial for entertainment and virtual reality.
Remote Production With Dante, setups can be managed from anywhere. This makes remote production workflows more proficient.
Audio Over IP Integration with IP-based solutions increases the versatility of Dante-enabled devices, paving the way for future networking standards.

Facing The Challenges And Criticism

Dante audio, a revolution in sound technology, connects multiple audio devices through a network. Yet, it has faced hurdles and criticism along its journey. Questions on compatibility and reliability have risen. This section dives into these issues head-on.

Addressing Skepticism

The transition to Dante audio has not been without doubts. Professionals worry about sound delays and network demands. Manufacturers and developers reassure through impressive demos and detailed guides. Users quickly notice the advanced synchronization and streamlined cabling.

Overcoming Technical Hurdles

  • Learning Curve: Dante requires new skills. Users tackle this with training sessions.
  • Setup Complexity: Configuring a network can be daunting. Online videos and forums offer assistance.
  • Compatibility: Users fear gear mismatch. Dante’s wide adoption makes this less of a problem.


Education And Resources For Dante Users

Are you keen to master Dante Audio? The right education and resources can transform you into a pro. Dante, short for Digital Audio Network Through Ethernet, is a popular choice in professional audio setups for its high-quality, low-latency sound over networks. To use it like a guru, you need tailored knowledge and support.

Training Programs And Certifications

Dante offers comprehensive training that caters to every level of expertise. From beginners to seasoned audio techs, there is a program that fits your needs.

  • Dante Certification Level 1 – Understand the basics of audio networking.
  • Level 2 – Dive into intermediate knowledge and setup tips.
  • Level 3 – Tackle advanced concepts and system optimization.

Each level ends with a certification test. A badge of honor, this certificate tells the world you’re a Dante authority.

Community And Support

The Dante user community is an invaluable resource. From forums to help desks, other users and experts are ready to offer a helping hand.

Support Type Benefits
User Forums Share experiences and solutions with peers.
Technical Support Get expert advice for specific issues.
Documentation Access manuals and guides anytime.

With these supportive structures, you can troubleshoot problems and exchange creative tips with confidence.

Conclusion: The Sound Revolution Of Dante Audio

Dante Audio is changing how we handle audio. It’s shifting the tides in the audio industry. From stadiums to studios, Dante Audio offers a streamlined audio solution.

Summary Of Impact

Dante Audio has made a huge splash, impacting the industry in numerous ways:

  • Simplified cabling reduces clutter and cost.
  • Improved audio quality delights ears everywhere.
  • Scalability and flexibility for systems of any size.
  • Easy integration with existing network infrastructures.

This technology has enabled professionals and enthusiasts alike to rethink audio setup and management. Dante’s network-based approach eliminates traditional limitations, ushering in a new era of convenience and performance.

Visions Of Audio’s Future

Looking ahead, Dante Audio is poised to keep pushing boundaries. The future shines bright with possibilities:

  • Advanced customization allows unique soundscapes.
  • More devices will be Dante-enabled.
  • Greater adoption in everyday technology.
  • Innovations in sound through continued research.

Dante is not stopping here. The roadmap includes even bolder advancements in audio handling. It holds the promise of a fully interconnected and harmonious audio experience for all.

What Is Dante Audio: Unveiling the Future of Sound


Credit: www.mljockey.com

Frequently Asked Questions On What Is Dante Audio

What Is Dante Audio Technology?

Dante Audio is a digital audio networking technology. It allows multiple audio channels to be distributed via a standard Ethernet network. Dante simplifies audio configuration and routing, offering low latency and synchronization.

How Does Dante Revolutionize Audio Networking?

Dante revolutionizes audio networking by transmitting high-quality, uncompressed audio with near-zero latency over standard IP networks. The technology enables easy system scalability and flexibility for various installations.

What Are The Benefits Of Using Dante?

The benefits of using Dante include simplified cable infrastructure, ease of installation, and high-performance audio transfer. It supports scalable system integration, minimizing the need for complex and expensive traditional audio hardware.

Can Dante Integrate With Existing Audio Equipment?

Yes, Dante can integrate with existing audio equipment. It often requires a Dante-enabled interface or adapter to bridge traditional analog or digital systems into the Dante network.

Conclusion

Dante Audio revolutionizes how we manage digital sound networks. By simplifying complex audio setups, it transcends traditional limitations. It’s essential for audiophiles and professionals alike. Exploring Dante’s capabilities rewards with unparalleled audio experiences. Embrace this cutting-edge tech to redefine your sonic landscape.