Categories
Archive

How To Use Auto Tune: Secrets to Killer Vocals!

To use Auto-Tune, select a vocal track and apply the Auto-Tune plugin. Adjust the key, scale, and retuning speed to match the desired effect.

Also, Auto-Tune has revolutionized music production, offering an array of features to fine-tune vocal tracks. Also, this digital audio processor, created by Antares Audio Technologies, corrects pitch in vocal and instrumental performances. Its use ranges from subtle intonation adjustments to the iconic ‘T-Pain effect.

‘ Aspiring musicians and seasoned producers alike lean on Auto-Tune for polished vocals that sit flawlessly in a mix. In addition, mastering Auto-Tune requires an understanding of musical keys and scales as well as an ear for the intended level of correction. On-Pitch singing can slip through unscathed, while off-pitch notes are swiftly brought into line, ensuring a harmonious output. Moreover, embrace Auto-Tune for its ability to enhance recording quality and elevate musical performances.

The Rise Of Auto Tune In Music Production

In addition, Auto Tune has transformed music production , changing the landscape of what’s possible in the studio. For example, initially intended to discreetly correct pitch, this tool has become a staple in modern music. Producers and artists alike now embrace Auto Tune for its creative potential, often using it to define their signature sound.

From Correction To Artistic Choice

Furthermore, Auto Tune began as a means to polish vocal tracks, helping singers hit the perfect note. As a result, yet, it has evolved into an art form in its own right. Musicians discovered that by tweaking settings, they could produce distinctive vocal effects. These effects range from subtle tuning that’s barely noticeable to more dramatic, robotic sounds that are now part of the musical lexicon.

  • Additionally, Subtle pitch adjustments create the perfect take
  • Strong settings craft signature sounds
  • Also, creative uses span genres from pop to hip-hop

Iconic Auto Tune Moments In Pop Culture

Moreover, the reach of Auto Tune has extended far beyond the studio, captivating listeners and creating iconic moments in music. However, here are a few standouts that have left a lasting impression.

  1. Cher’s “Believe” – The song that introduced the striking ‘Auto Tune effect’ to the world.
  2. Furthermore, t-Pain’s use in RB – Elevated Auto Tune as a fundamental sound in R&B and hip hop
  3. Kanye West’s “808s & Heartbreak” – A full album demonstrating the emotional depth Auto Tune can convey.

Also, each of these moments showcases Auto Tune’s versatility and its profound impact on music culture.

Artist Song Impact
Cher Believe Popularized the ‘Auto Tune effect’
T-Pain Various Hits Defined a genre with signature sound
Kanye West 808s & Heartbreak Showcased emotional depth of Auto Tune

Decoding Auto Tune: What It Is And How It Works

Moreover, Auto-Tune has become a buzzword in today’s music industry. Then, it is a software tool that modifies the pitch in vocal and instrumental music recording and performances. Think of it as a fine-tuning tool for vocals, making sure every note is pitch-perfect. Whether you are a professional singer or a beginner in music production, understanding Auto-Tune can elevate your sound to new heights.

The Science Behind Pitch Correction

In addition, did you know that Auto-Tune uses sophisticated algorithms to adjust pitch? In short, the software analyzes the singer’s pitch and compares it to the nearest true semitone (the next note on a scale). If the vocal’s pitch deviates, Auto-Tune automatically nudges it toward the correct tone, hence correcting any off-pitches. This real-time pitch correction ensures your music sounds harmonious and professionally polished.

  • Furthermore, detects the pitch of the input vocal
  • Identifies the intended note
  • Additionally, corrects the pitch to the nearest true semitone

Auto Tune Vs. Natural Vocal Tuning

Also, comparing Auto-Tune with natural vocal tuning reveals distinct differences. Similarly, Auto-Tune offers consistency and perfection, typically beyond natural capability. While some argue it lacks the emotional authenticity of an untouched voice, others appreciate the technological prowess it brings. Deciding between the two depends largely on the desired effect and the genre of music.

Auto-Tune Natural Vocal Tuning
Quick and precise Relies on the singer’s ability
Can sound synthetic if overused Promotes raw, natural sound
Ideal for pop, hip-hop, and electronic music Preferred in jazz, classical, and folk music

Auto-Tune allows artists to achieve a level of pitch perfection that might be unattainable otherwise. Also, whether one prefers the crispness of Auto-Tune or the warmth of a natural vocal is a matter of personal taste and artistic direction.

Setting Up Auto Tune: Equipment And Software Essentials

Moreover, getting Auto Tune set up transforms music production. In addition, this section breaks down how to get started. From selecting software to meeting technical specs, this guide ensures a smooth setup.

Choosing The Right Auto Tune Software

In addition, the right Auto Tune software can make or break your sound. Consider these factors:

  • Furthermore, features: Look for pitch correction, formant control, and other vocal effects.
  • Additionally, compatibility: Ensure the software works with your DAW (Digital Audio Workstation).
  • Also, user Interface: A clear, user-friendly design is essential for workflow.
  • Moreover, budget: Weigh the cost against the functionality you require.

In addition, explore options like Antares Auto-Tune, Melodyne, or Waves Tune.

Technical Requirements For Optimal Use

Furthermore, technical requirements are crucial for Auto Tune performance. Ensure these essentials:

Specification Requirement
Processor Multi-core CPU
RAM Minimum 4GB
Operating System Compatible OS as per software specs
DAW Compatible version with Auto Tune
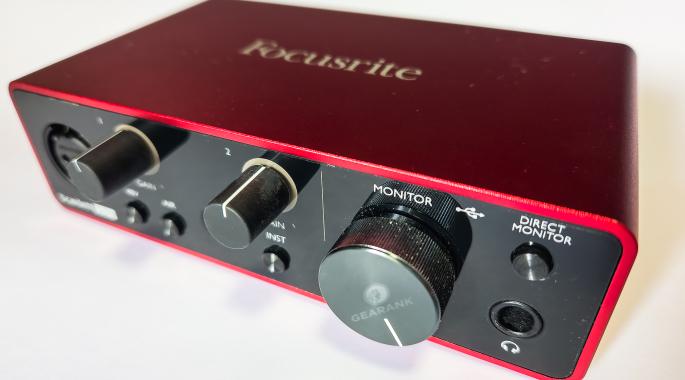
Audio Interface Low-latency capability
Hard Drive SSD recommended for speed
Internet For software activation/updates

Secure these to avoid lags and crashes during sessions.

Navigating The Auto-Tune Interface

Additionally, dive into the world of pitch perfection with Auto Tune’s sleek interface. For example, the right tools and features await your discovery to nail that ideal vocal sound. Let’s walk through the essentials for ease and mastery. Familiarize yourself with the interface, harness control over your audio, and unleash your creative potential.

Understanding Key Parameters And Controls

Also, every knob and button in Auto Tune serves a purpose. As a result, get to know these like the back of your hand:

Using an unordered list to list parameters
  • Key and Scale: Set these to match your song.
  • Input Type: Tailor Auto Tune to your voice or instrument.
  • Retune Speed: Control how fast pitch correction engages.
  • Humanize: Keep things natural, especially on sustained notes.
  • Flex-Tune: Preserve original expressiveness while correcting pitch.
  • Natural Vibrato: Adjust the depth of vibrato in your performance.
Using a table to further elaborate on some controls
Parameter Function Tip
Retune Speed Modify pitch correction speed Slower for natural, faster for T-Pain effect
Flex-Tune Keep some pitch deviations Use sparingly for a more refined touch

Saving Presets For Quick Setup

Auto Tune’s versatility comes with a smart feature: the ability to save your settings. However, this means you can prepare once and apply your setup in a single click for future projects. Here’s how:

Using an ordered list to describe steps to save a preset
  1. Adjust the parameters to your liking.
  2. Click on the ‘Presets’ menu.
  3. Choose ‘Save As’ and name your preset.
  4. Hit ‘Save’ and your preset is now ready for use.

Skip the setup hassle next time and start fine-tuning instantly! Then, with presets, your ideal sound is always at hand.

The Art Of Subtle Auto Tune: Enhancing Without Overpowering

Auto Tune often gets a bad rap for robbing music of its soul. Yet, when used with a light touch, it can polish vocals without erasing the human element that makes songs resonate. In short, mastering subtle Auto Tune is about blending technical precision with artistic expression. It’s about finding the right pitch correction that serves the song, rather than defining it. Let’s explore techniques that allow vocalists to stay true to their sound while benefiting from Auto Tune’s enhancing capabilities.

Finding The Sweet Spot: Light Correction Techniques

Discovering the perfect balance in Auto Tune is akin to an artist mixing just the right shade of color. Similarly, here are some techniques to achieve that:

  • Retune Speed: Set a slower retune speed to maintain natural fluctuations.
  • Humanize: Add variance to sustain notes for a more organic sound.
  • Flex-Tune: Preserve original intonations by only correcting notes that veer off too far.
  • Correction Amount: Use a modest correction setting to avoid over-processing.

These settings allow performers to correct pitch subtly, helping vocals blend seamlessly with the track.

Maintaining Vocal Emotion Through Minimal Tuning

Vocal emotion is paramount; it’s the singer’s fingerprint on a track. Also, minimal tuning is the key to preserving this.

  • Key and Scale: Ensure Auto Tune is set to the correct key and scale of the song.
  • Listen and Adjust: Fine-tune manually by ear for sections that need a gentle nudge.
  • Automation: Automate tuning parameters for specific phrases to maintain expressiveness.
  • Manual Correction: Sometimes manual pitch correction can address issues on individual notes without affecting the entire performance.

With attention and care, Auto Tune can enhance vocal tracks, preserving the emotion that makes music connect with listeners.
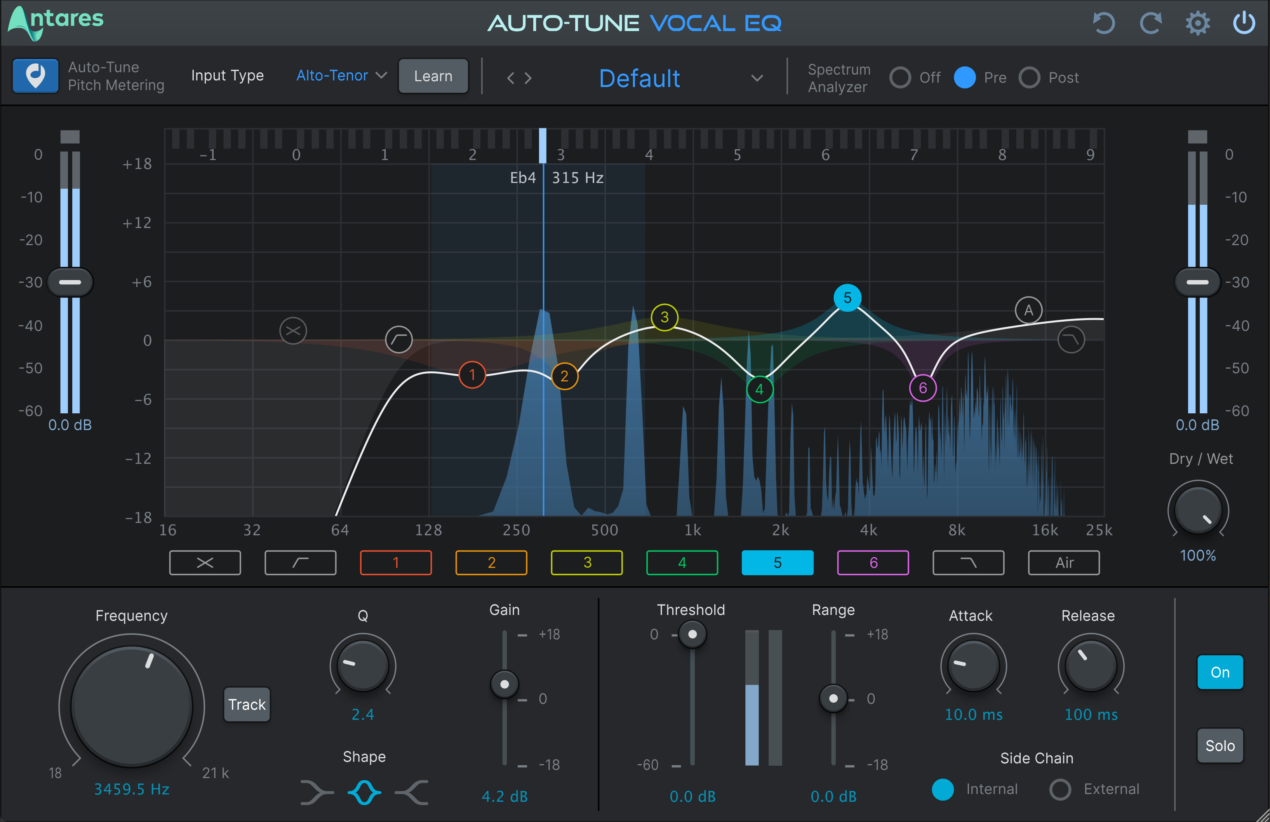
How To Use Auto Tune: Secrets to Killer Vocals!

Credit: www.musicconnection.com

Creative Use Of Auto Tune: Craft Your Signature Sound

Auto Tune isn’t just for perfecting pitch – it’s a tool for creativity. In addition, artists and producers use it to define their unique style. By tweaking and experimenting, you can uncover sounds never heard before.

Experimenting With Extreme Settings

If you want to stand out, pushing the limits is key. For example, start with the retuning speed. A fast setting gives you that well-known robotic effect. A slower speed keeps it more natural but still gives character.

  • Set Retune Speed to zero for the T-Pain effect.
  • Adjust the Humanize knob for varying note lengths.
  • Play with the Formant setting for different voice textures.

Remember, extreme doesn’t mean unusable. Keep fine-tuning until you hit the sweet spot.

Combining Auto Tune With Other Effects

Auto Tune works magic when blended with other effects. As a result, this can transform your sound into something truly original.

Effect Impact on Sound
Reverb Adds space and depth around the tuned vocals.
Delay Creates echoes that can be rhythmic or textural.
Distortion Gives edge and grit to the Auto-Tuned voice.

Pairing Auto Tune with a chorus effect can widen the sound. However, a phaser can add a swirling dimension. Try different combinations to see what clicks with your style.

Mixing And Mastering: Blending Auto Tuned Vocals With The Track

When it comes to producing music, mixing and mastering are critical steps in ensuring smooth, professional-sounding tracks. Specifically, when incorporating Auto-Tuned vocals, a producer must skillfully blend them with the track. This section of the blog will guide you through the essential techniques to make Auto-Tuned vocals work seamlessly within your mix, keeping listeners focused on the music’s overall feel rather than the tuning itself.

Balancing Vocals In The Mix

A balanced mix allows each element to shine without overpowering others. Then, follow these steps with your Auto-Tuned vocals:

  • Start by setting appropriate levels for your vocal tracks relative to the other mix elements.
  • Use EQ to sculpt the vocal tone, ensuring it complements the instruments.
  • Apply compression to even out the vocal performance and maintain consistency.
  • Consider the use of reverb or delay to create a sense of space for the vocals in the track.

Panning backing vocals or harmonies can provide additional width to your mix, making the main vocal stand out more prominently.

Final Touches For A Polished Sound

Attention to detail can elevate the quality of your song. In short, implement these final adjustments for a polished result:

  1. Listen to the mix on different sound systems to ensure consistency.
  2. Adjust the auto-tune settings if any artifacts or unnatural bends are noticeable.
  3. Perform a final check for any resonant frequencies that could be tamed with EQ.
  4. Use a limiter on the master track to achieve a full, consistent level across the song.

Remember, subtle adjustments can make significant differences. Similarly, putting in the time to fine-tune your mix and master will result in a track that stands strong alongside professional records.

Auto Tune Live: Bringing Studio Quality To The Stage

Auto Tune Live revolutionizes live performances. Also, now, artists enhance their onstage vocals with the same polished sound usually achieved in a recording studio. This powerful tool corrects pitch in real-time, ensuring singers always hit the right notes, even during the most dynamic live shows. Let’s dive into how to set up Auto Tune Live for a performance and tips to manage live vocal unpredictability.

Live Performance Setup

Organizing Auto Tune for a live setting involves careful preparation. In addition, begin by connecting Auto Tune software to your live performance rig.

  1. Choose the Right Hardware: Ensure you have a compatible audio interface and microphone.
  2. Software Configuration: Install Auto Tune Live on your device and integrate it with your digital audio workstation (DAW).
  3. Sound Check: Test the settings during a sound check to tailor the effect to the performer’s voice.

Remember to save the settings that best suit the vocalist’s range and the song’s key. This preparation will smooth out the process during the actual show.

Handling The Unpredictability Of Live Vocals

Live vocals can be unpredictable, with various factors affecting performance. For example, Auto Tune Live provides a safety net.

  • Monitor Feedback: Use in-ear monitors to help the singer stay in tune with the Auto Tune effect.
  • Tweak as You Go: Be ready to make adjustments on the fly to adapt to the singer’s dynamic range.
  • Trust the Tech: Let Auto Tune do its job. It’s designed to work under pressure and deliver consistent results.

Applying these strategies ensures that regardless of the surprises a live performance holds, the vocal quality remains intact.

Ethical Considerations And Industry Views On Auto Tune

The use of Auto Tune in music production has sparked a notable discussion. As a result, this technology corrects pitch and alters vocal performances.

Concerns center around musical integrity and artistic expression. However, voices across the industry are divided.

The Debate Over Authenticity In Music

Auto Tune’s impact on the music panorama is considerable. Then, the debate rages over its influence on what listeners perceive as authentic. Critics argue that Auto Tune masks true vocal talent. They claim it creates a homogeneous sound landscape.

Others defend its usage. In short, Auto Tune enables artistic exploration in genres like hip-hop and pop . It can create distinctive effects and sonic textures not otherwise possible.

Auto Tune As A Tool: Crafting A Fair Perspective

Evaluating Auto Tune requires a balanced viewpoint. Similarly, this tool can enhance studio recordings and live performances alike. Let’s consider the following points:

  • Auto Tune can make up for environmental factors during live shows.
  • It allows artists to achieve their desired sound efficiently.
  • Overreliance might detract from an artist’s skill set development.

Understanding these aspects helps shape a fair perspective on Auto Tune’s role.

Stepping Up Your Game: Learning From The Pros

Vocal production is an art, and mastering Auto Tune is like adding a fine brush to your toolkit. Also, artists and producers have long utilized Auto Tune to deliver stunning performances . Elevate your vocal tracks by learning from industry veterans.

Case Studies Of Successful Auto Tune Use

Examining case studies reveals the transformational power of Auto Tune in music. In addition, let’s dive into specific examples where Auto Tune played a pivotal role in chart-topping hits .

  • T-Pain’s signature sound showcases the creative use of Auto Tune as an instrument.
  • Cher’s “Believe”, a trailblazer for modern Auto Tune, led the charge into mainstream acceptance.
  • Kanye West’s “808s & Heartbreak” album stands out for its emotive, pitch-perfect vocals.

Tips And Tricks From Experienced Vocal Producers

Snippets of wisdom from veteran vocal producers can help craft your own Auto Tune approach. For example, here are some key tips:

  1. Understand the song’s emotional core. Use Auto Tune to enhance expressiveness, not stifle it.
  2. Master the tool. Know all the features and how to use them effectively.
  3. Stay subtle. Less is often more to maintain natural-sounding vocals.
Essential Auto Tune Settings For Different Genres
Genre Retune Speed Flex-Tune Humanize
Pop Fast Medium Low
RB Medium High Medium
Hip-Hop Variable Low High

These insights offer a jumping-off point for those seeking to elevate their vocal productions with Auto Tune.

Frequently Asked Questions For How To Use Auto Tune

What Is Auto Tune?

Auto Tune is a digital audio processor that corrects pitch in vocal and instrumental performances. As a result, it’s widely used to ensure perfect tuning or achieve a desired effect.

How Does Auto Tune Work?

Auto Tune analyzes the pitch of a vocal, then digitally shifts it to the nearest correct tone. It does so automatically, hence the term “auto” in Auto Tune.

What Are Auto Tune’s Common Settings?

Auto Tune’s common settings include the key of the song, scale (major or minor), retune speed, and humanize function. However, these control the tuning intensity and naturalness.

Can Auto Tune Be Used Live?

Yes, Auto Tune can be used in live performances. Then, it provides real-time pitch correction, helping artists deliver pitch-perfect live vocals.

Conclusion

Mastering Auto-Tune adds a professional touch to your tracks. In short, experiment to find your signature sound. Remember, subtlety often yields the best results. Let Auto-Tune enhance your music while keeping its heart and soul intact. Happy tuning, and unleash the hit songs inside you!


For more background, see Auto-Tune on Wikipedia. You may also like our guide: How To Use Auto Tune As A Pro.

Categories
Archive

Best XLR Cables: Unleash Crystal-Clear Audio Today!

The best XLR cables provide high-quality audio transmission and durable construction. Mogami Gold Studio XLR and Audio-Technica AT8314 are top choices.

Selecting the right XLR cable is crucial for professional audio clarity and performance. High-end options, such as the Mogami Gold Studio, are renowned for their exceptional signal integrity and ultra-low noise, making them ideal for studio recording and live sound applications.

On stage, cables like the Audio-Technica AT8314 stand out with robust construction and excellent strain relief, ensuring they hold up to frequent handling. Musicians, sound engineers, and audio enthusiasts should consider cable length, connector quality, shielding, and material durability when choosing the perfect XLR cable for their needs. Quality XLR cables can significantly enhance audio setups by providing clean, interference-free connections between microphones, mixers, preamps, and speakers.

Best XLR Cables: Unleash Crystal-Clear Audio Today!

Credit: www.amazon.com

Introduction To Xlr Cables

Imagine your sound setup as a superstar performer. Now, meet its trusty sidekick: the XLR cable. Behind every crisp audio track and every flawless concert, there’s often an XLR cable working tirelessly. It’s the unsung hero of audio, passing signals with precision. Musicians, podcasters, and sound engineers swear by their importance. Here’s why they stand a cable apart.

The Importance Of Quality Cables

Quality cables don’t just connect devices; they enhance performance. They reduce noise, avoid interference, and ensure that your sound remains pure. The difference between an average and a high-quality cable can be the difference between good and great sound. Without quality cables, even the best microphones and speakers won’t reach their potential.

  • Solid connections prevent signal loss
  • Durable materials withstand frequent use
  • Clear audio with minimal interference

What Makes Xlr Cables Stand Out

XLR cables are not your everyday audio connectors; they’re built for professional use. Their design includes a balanced three-pin setup that minimizes noise. And there’s more:

Feature Benefit
Locking Mechanism Secure connections, no accidental unplugs
Low Impedance Longer cable runs without loss
Durable Build Suits stage and studio demands

So, whether you’re setting up a home studio or gearing for a tour, picking the right XLR cables can make all the difference. Your audio setup deserves the best. Choose cables that bring out its full potential.

History Of Xlr Connectors

XLR connectors have a rich history that traces back to the early 20th century. These connectors brought revolution in audio and broadcast industries. Their durability and reliability made them ideal for professional audio applications. Here’s a glimpse into the transformation of the humble XLR connector.

From Telephony To Pro Audio

XLR connectors initially emerged in telephony and critical communication networks. With time, their use expanded. They became fundamental in professional audio setups. Engineers favored them for their balanced audio capabilities and noise-reducing design.

Evolution Of The Xlr Cable Design

The design of XLR cables has seen constant refinement. It focused on enhancing signal integrity and ease of use. The original connectors were bulky and cumbersome. Modern XLR cables are sleeker, with improved pin configurations and lock mechanisms. These features ensure an unbreakable connection during recordings or live performances.

XLR Connector Evolution Timeline
Year Design Milestone
1930s Introduction of XLR connectors in telephony.
1950s Adoption by professional audio technicians.
1960s Standardization of 3-pin design.
21st Century Development of robust locking mechanisms.
  • Three to seven pins became the norm for different audio channels.
  • Durable metal housing and rubber grips for secure handling.
  • Gold and silver-plated contacts were introduced for optimal connectivity.

Today’s XLR cables are essential tools for musicians, sound engineers, and audio professionals worldwide. The XLR connector continues to evolve with technology, ensuring it remains a staple in sound production.

Understanding Cable Specifications

Understanding Cable Specifications is crucial when choosing the best XLR cables for your audio setup. Audio professionals know that not all cables are created equal. Performance and durability largely depend on their construction. This section will delve into the essentials of balanced vs. unbalanced cables and the core materials and shielding used in XLR cables.

Balanced Vs. Unbalanced Cables

XLR cables come in two main types: balanced and unbalanced. Understanding the difference is pivotal for optimal sound.

  • Balanced cables: These feature two signal wires plus a ground wire. They help reduce noise and are ideal for long cable runs.
  • Unbalanced cables: These include one signal wire and one ground wire. They are more susceptible to noise and best for short distances.

Core Materials And Shielding

Core materials and shielding are vital to a cable’s performance and longevity. Each component serves a specific purpose. Let’s break it down:

Component Function Common Materials
Conductor Core Transmits audio signals Oxygen-Free Copper (OFC), Silver
Shielding Guards against interference Braided, Foil, Serve

High-quality cables often feature oxygen-free copper cores for clear signal path and robust shielding for interference resistance. This combination ensures pristine sound quality and reliability.

Top Xlr Cable Picks

Welcome to a comprehensive look at the top XLR cable picks available today. Whether you’re a seasoned sound engineer or a budding musician, your gear deserves the best connections. We’ve scoured the market to find XLR cables that deliver on quality and value. Dive into our top selections with confidence, knowing you’re on the right track for impeccable sound.

Professional-grade Choices

The elite of audio professionals need cables that withstand rigorous use. Our top selections promise durability and exceptional sound quality.

  • Mogami Gold Studio 25 – Precision crafted, with a lifetime warranty.
  • AudioQuest Mackenzie – Delivers clear, crisp sound for studio recordings.
  • Neumann IC 3 mt – Features top-notch connectors and a sleek design.

These cables stand up to countless gigs and sessions, ensuring your audio is always pristine.

Budget-friendly Options

Not everyone needs a bank-breaking cable. Quality sound can come at a friendly price. Here are our top budget-friendly XLR cables:

Brand Model Features
AmazonBasics XLR to XLR Copper conductors, flexible design.
LyxPro 15 Ft Multiple colors, gold-plated contacts.
Hosa Pro-20 Reinforced, offers a solid connection.

Selecting a dependable XLR cable need not empty your wallet. With these options, rest assured your sound is transmitted clearly.


Key Features To Consider

Choosing the right XLR cables can elevate your audio experience. Each feature determines how it performs in various environments. Let’s break down what to look out for.

Connector Quality And Durability

Connector Quality And Durability

Good connectors are the backbone of reliable cables. They ensure clear signals and withstand use. Look for strong metal connectors with sturdy construction. Quality connectors will have:

  • Gold or silver plating for optimal signal transmission
  • Locking mechanisms to secure the connection
  • A robust design to resist bending or breaking

High-grade connectors last longer. They save costs and hassle over time.

Cable Length And Flexibility

Cable Length And Flexibility

Length and flexibility play their parts too. Choose a length that suits your setup. Avoid excess cables as they lead to tangles and wear. Consider these factors:

Length Use Case
Short (1-3 ft) Studio patching
Medium (5-20 ft) Home theaters, live performances
Long (25 ft+) Large venues, outdoor events

Flexibility matters for easy setup and storage. A winding road of cables is a trip hazard. Flexible cables reduce this risk. They also need to maintain shape and integrity so:

  • Select cables that unravel easily and don’t kink
  • Opt for materials that endure bending and twisting
  • Check for an outer jacket that protects from damage and weathering

Cables that balance flexibility with durability offer the best value.

Brands That Lead The Market

When diving into the world of high-quality audio, XLR cables play a pivotal role. Strong and balanced connections matter. Industry leaders have cemented their reputation with consistent, reliable performance. Professionals and enthusiasts alike trust these brands.

Industry Favorites

Some brands stand out for their exceptional quality. Top-tier materials, sound fidelity, and durability define them. Top market players include:

  • Mogami – Renowned for premium sound cables.
  • Audio-Technica – Offers professional-grade cables.
  • Neutrik – Known for sturdy connectors.

Up-and-coming Manufacturers

Brand Notable Feature
Cable Matters Affordable with reliable performance.
LyxPro Crafts cables for live and studio settings.
Seismic Audio Offers a variety of customized solutions.

The newcomers bring innovation and competitive pricing. They disrupt the market with features that appeal to various users. Smart choices are made easy with quality competitively priced options.

Care And Maintenance Of Xlr Cables

Keeping XLR cables in top shape is crucial for the best sound quality. Proper care extends their life and prevents audio issues. Let’s explore how to store, clean, and handle these cables.

Proper Storage Practices

Coil cables correctly to avoid damaging the internal wires. Use the ‘over-under’ technique for kink-free storage. This method alternates the direction of each coil.

  • Avoid tight bends that strain the cable.
  • Keep cables away from heat sources.
  • Use velcro ties for secure and gentle bundling.
  • Store in a cool, dry place.

Cleaning And Handling Tips

Gentle cleaning keeps XLR cables performing their best. Wipe the cables with a dry cloth to remove dust.

Cleaning Steps Details
Dust Removal Use a soft, dry brush.
Spot Cleaning Dab with a damp cloth on spots. Do not soak.
Connector Care Use rubbing alcohol on a cotton swab.

Handling is key. When connecting or removing XLR cables, grasp the connector, not the cable. This prevents stress on the wiring.

  1. Hold the connector firmly.
  2. Push and pull without twisting to connect or disconnect.
  3. Avoid stepping on cables during use.

Integrating Xlr Cables In Audio Setups

Are you ready to take your sound to the next level? XLR cables are crucial for quality audio. Whether in a cozy home studio or rocking a live event, the right cables make all the difference. Let’s dive into how to integrate XLR cables into your audio setups for top-notch sound performance.

Optimizing Home Studios

Home studios deserve professional sound. Use these tips for the best setup:

  • Choose the right length for your space to avoid signal loss or clutter.
  • Keep cables tidy with cable organizers to prevent damage.
  • Connect interfaces and mics using balanced XLR cables for clear audio.

Select cables with durable connectors to withstand frequent use. Match cables with your gear’s specs for the best results.

Best Practices For Live Sound

Live sound environments demand reliability. Ensure flawless performances with these practices:

  • Test cables before the event to avoid surprises.
  • Label your cables for easy setup and troubleshooting.
  • Invest in high-quality XLR cables that can handle the rigors of the road.
  • Use short runs whenever possible to protect signal integrity.

Reserve a few spare cables as backups. Your live sound will impress with these steps in place.

User Experiences And Reviews

Discovering the best XLR cables means tapping into real-world usage. Folks who have put these cables to the test are the true judges of quality and performance. Let’s delve into the insights from those on the front lines, the professionals and the enthusiasts who use XLR cables daily.

Testimonials From Audio Professionals

Pro sound engineers share their takes. They highlight durability and sound clarity across various XLR cables. Reviews often cite the Neumann Silver Series for their reliability on stage.

  • Natural sound reproduction. A common thread among professionals.
  • Tough build. Vital for road use, as stated by touring techs.
  • Secure connections. Pros appreciate Neutrik connectors for their locking feature.

Recording studios prioritize noise rejection. Mogami Gold cables often receive praise for this.

Brand Feature Professional Rating
Mogami Gold Noise cancellation 5/5
Neumann Silver Durability and clarity 4.8/5

Feedback From Hobbyists

Hobbyists comment on value for money and ease of use. They often prefer LyxPro Balanced cables for home setups.

  1. Clear sound at a lower budget is a hit with bedroom producers.
  2. Flexibility makes LyxPro a go-to for small home studios.
  3. Beginners respect the solid connectors for their reliable signal.

User forums buzz about GLS Audio cables. They are celebrated for their affordability and robustness. Even non-professionals feel the quality.

“GLS cables outperform their price. Solid build!” notes an aspiring podcaster.

Best XLR Cables: Unleash Crystal-Clear Audio Today!

Credit: reverb.com

Future Of Audio Cabling

The audio cabling industry is on the brink of a transformative period. With innovations shaping the quality and efficiency of sound transmission, the future of audio cabling looks brighter than ever. As we delve into what’s on the horizon, let’s explore how these changes could redefine our experience with sound.

Technological Advancements

Advancements in material science and signal processing are leading the charge in the evolution of XLR cables. The integration of optical fibers, and developments in shielding techniques, promise cables that are not only more durable but also capable of transmitting audio with minimal loss.

  • Lighter, more flexible materials simplifying on-stage management
  • Enhanced signal integrity for clearer audio transmission
  • Smart cables with built-in diagnostic tools to predict failures before they occur

Predictions For Professional Audio

In the professional audio realm, expectations are set high for XLR cables. The industry predicts a shift towards intelligent audio systems that communicate seamlessly. XLR cables will become even more central to performance, wielding new capabilities such as:

  1. Data transfer: Beyond audio, future cables could carry control signals for advanced setups.
  2. Power over Cable: The possibility of a single cable providing both signal and power to microphones and other devices.
  3. Eco-friendly options: Eco-conscious designs emerge as a standard for newer cable manufacturing.
Feature Impact
Digital Compatibility Higher fidelity and less interference in audio signals
Improved Connectors Easier connectivity and enhanced durability

As technology propels us forward, the golden age of audio cabling is just around the corner, poised to amplify the way we hear and interact with sound.

Best XLR Cables: Unleash Crystal-Clear Audio Today!

Credit: www.amazon.com

Frequently Asked Questions For Best Xlr Cables

What Are Xlr Cables Used For?

XLR cables, primarily known for audio connectivity, are used to transmit balanced microphone and line-level signals. This ensures a high-quality audio output, making them popular in professional audio settings and live performances.

How Do I Choose The Best Xlr Cable?

Choosing the best XLR cable involves considering cable length, connector quality, shielding, and cable flexibility. For optimal sound quality, look for sturdy connectors and adequate shielding to minimize interference.

What Is The Difference Between Cheap And Expensive Xlr Cables?

Expensive XLR cables often have better build quality, durability, and shielding, which can result in a clearer audio signal and less interference. Cheap cables might be less reliable over time and more prone to noise issues.

Can Xlr Cables Affect Sound Quality?

Yes, XLR cables can affect sound quality. High-quality cables with good shielding and connectors ensure minimal signal loss and interference, preserving the integrity of the audio signal from source to output.

Conclusion

Selecting the right XLR cable can greatly impact your audio setup. Quality, durability, and sound clarity are key. Our guide aimed to simplify your choice. As you consider your options, remember to match your needs with the features of each cable.

Elevate your audio experience with the best XLR cable for you.

Categories
Archive

Recording Studio Desks Guide: Ergonomics Meets Style

Recording studio desks are essential furniture pieces, designed to optimize workspace efficiency for audio professionals. They often accommodate a range of equipment, from mixing consoles to computers and controllers.

Studio desks serve as the centerpiece in a recording studio, tailored to fit an array of audio gear while providing ease of access and organization for the user. With a multitude of designs and styles, these desks must balance functionality with ergonomics, allowing producers and engineers to work comfortably for extended periods.

A well-chosen studio desk streamlines the creative process, often integrating racks for outboard gear, adjustable monitor stands, and cable management systems. Durability, size, and aesthetic appeal are key considerations, with materials ranging from robust woods to modern metals to match the varying needs of hobbyists and professionals alike. By ensuring all essentials are within arm’s reach, these dedicated workspaces can significantly enhance productivity in any recording setup.

Introduction To The Modern Recording Studio

Imagine a place where music comes to life. That place is the modern recording studio. It’s where artists and producers spend hours crafting the next hit song. The studio’s design, especially the desk, plays a big role. A great desk can make music magic happen.

The Heart Of Music Production

The recording studio desk is crucial. It’s not just a table. It holds important gear like computers, mixers, and microphones. A great desk makes sure everything is within arm’s reach. This lets the producer focus on creating amazing tunes.

  • Space for multiple monitors
  • Rack mounts for audio gear
  • Adjustable height and angles for comfort
  • Cable management to avoid tangles

Merging Function With Aesthetics

Today’s desks combine looks with practicality. A sleek design can inspire creativity. But it also needs to be functional. Good desks offer space for everything while keeping the studio tidy. Your desk should make your studio look cool and professional.

Design Feature Function Benefit
Built-in LED lights Provides visibility in low-light sessions
Wood finish Adds warmth to the studio’s vibe
Acoustic-friendly shape Enhances sound quality

Evolution Of The Studio Workspace

Recording studios have undergone stunning transformations. From spools of tape to sleek digital interfaces, these spaces reflect innovation and design changes over time. Let’s explore the studio desk’s journey, shaping sound creation at every step.

From Analogue To Digital

The shift from analogue to digital has revolutionized recording studios. Once dominated by large mixing consoles, studios now feature compact, computer-based setups. This evolution has introduced:

  • Space efficiency: Digital desks are smaller, freeing up room.
  • Advanced capabilities: They offer vast sound manipulation options.
  • Home studios: Musicians set up quality studios even at home.

Digital technology has made recording accessible to more artists. It has changed how producers interact with their workspace.

Design Trends Through The Decades

Each decade brought fresh design trends to studio desks:

Decade Trend
1970s Wooden panels and robust frames dominated.
1980s Synth racks and larger consoles were in trend.
1990s Minimalism began to take root, with cleaner designs.
2000s Workstations became more personal and digital-focused.
2010s Ergonomics and modularity took center stage.

Currently, trends prioritize comfort, personalized setups, and adaptive design. Creators seek desks that complement rigorous workflows and support long studio sessions.

Anatomy Of A High-quality Studio Desk

The Anatomy of a High-Quality Studio Desk

A music producer’s haven is their studio. The right studio desk is at the heart of this creative space. Let’s delve into the essential parts that make a studio desk not just good, but great. Design meets functionality to set the stage for musical innovation.

Key Features To Look For

The perfect studio desk must cater to multiple needs. Here’s what to consider:

  • Ergonomic Height: Keeps you comfortable during long sessions.
  • Ample Rack Space: For essential gear, within arm’s reach.
  • Cable Management: To keep those pesky cables organized.
  • Adjustable Monitor Shelves: For the best audio experience.
  • Keyboard Tray: Slides in and out for convenience.

Materials And Construction

Sturdy and durable materials define a lasting studio desk. Here’s what they often include:

Material Benefits
Wood Aesthetic appeal, solid feel
Metal Strength, modern look
Laminate Affordable, easy to clean

Construction quality matters. Joints should be tight. Surfaces must be smooth. A well-built desk stands the test of time.

Ergonomics: Comfort In The Control Room

Imagine a workspace tailored for ease and efficiency. A recording studio desk is not just furniture. It is where the magic of music making happens. Comfort affects your work. Ergonomics make a big difference in your studio.

Proper Desk Height And Posture

The right desk height keeps your body relaxed. Your arms should rest naturally. The angle between your forearm and upper arm should be 90 degrees. Follow these points for the best posture:

  • Keep feet flat on the floor.
  • Back should be supported by the chair.
  • Wrists straight while typing or mixing.
  • Monitors at eye level to avoid strain.

Impact On Productivity And Health

Good posture means more focus. You’ll work better and for longer. Ergonomics prevent health issues too. Desk height and chair support can reduce back pain. Taking breaks boosts well-being. Here’s how comfort and health drive productivity:

  1. Less discomfort means better concentration.
  2. Good posture reduces injury risk.
  3. Work longer without pain keeps projects on track.

In short, the right desk boosts productivity and keeps you healthy.

The Style Statement: Desk Aesthetics

Within the creative oasis of a recording studio, the desk stands as a central piece. Not just a functional workspace, a studio desk makes a style statement that reflects an artist’s personality and vibe. Selecting the right desk ties together the look, feel, and operational flow of your sonic sanctuary.

Incorporating Personal Style

A recording studio desk says much about the producer or musician who uses it. It should mirror their unique style. Are bold colors your thing, or do you lean towards a minimalistic charm? The choice of materials, design, and finish can all affect the desk’s aesthetic and, in turn, inspire creativity.

  • Vinyl decals or custom paint jobs can add a personal touch.
  • LED lighting brings both functionality and ambiance.
  • Integrating artisanal elements showcases craftsmanship and luxury.

Desks That Complement Gear

A desk must not only fit your style but also your gear. The layout should enhance workflow and efficiency. It must provide ample space for monitors, mixers, and other essentials. A well-matched desk allows each piece of equipment to reside within arm’s reach, reducing clutter.

Gear Desk Feature
Monitors Raised shelves or platforms
Keyboards & Controllers Sliding trays or dedicated spaces
Rack Mount Equipment Built-in racks or side compartments

Choose a design that supports clean cable management for a tidy and attractive setup. With the right desk, form meets function in a symphony of style and practicality.

Space Management For Small Studios

Space Management for Small Studios often presents a unique set of challenges. Creating a conducive work environment in a limited space demands creativity and strategic planning. For music producers and sound engineers, having a streamlined recording studio desk plays a pivotal role. Let’s dive into how you can optimize your small studio space to foster a comfortable and efficient creative haven.

Optimizing Limited Areas

Every inch counts in a small studio. Smart layouts and compact furniture become necessary. Here are some strategies to maximize your available area:

  • Vertical Storage Solutions: Use shelves and wall-mounted racks to keep equipment off the ground.
  • Desk Placement: Position your desk to allow free movement around the room.
  • Cable Management: Maintain a tidy workspace with cable organizers and clips.
  • Collapsible Features: Consider desks with foldable parts to create space when necessary.

Multifunctional Design Solutions

Multifunctional furniture is a game-changer for small studio spaces.

Feature Benefit
Built-in Racks Save space; no need for external stands.
Adjustable Surfaces Customize the desk layout as per need.
Sliding Keyboard Trays Keep keyboard hidden when not in use.
Hidden Compartments Store cables and accessories out of sight.

Seek desks with such features to serve multiple purposes and conserve floor space. Invest in durability and flexibility for your studio setup to adapt over time.

Investing In Your Desk

A recording studio desk isn’t just furniture; it’s the central hub for your creativity and workflow. When you decide to invest in one, understanding the balance between cost and quality, as well as the desk’s longevity and upgradability, is key. A good desk can change the way you work and improve your recordings.

Cost Vs Quality

Finding the right studio desk is about striking a balance. A higher price often means better materials and sturdier construction. Don’t compromise quality to save money in the short term. An excellent desk can last for years, making it a worthy investment. Your productivity and the quality of your work matter.

  • Sturdy materials reduce wear and tear.
  • Functional designs improve workflow efficiency.
  • Professional appearance keeps clients impressed.

Longevity And Upgradability

Choose a desk that grows with you. Think long-term when selecting your studio centerpiece. Here’s why:

  1. A durable desk withstands the test of time.
  2. Modular features allow for future expansions.
  3. Adaptability to new gear is crucial.

Check for adjustable components and the ability to add racks or shelves. Your future self will thank you as your gear collection expands and evolves.

Recording Studio Desks Guide: Ergonomics Meets Style

Credit: www.wayfair.com

Setup And Maintenance

The right setup and maintenance of a recording studio desk can make a world of difference. Turn your workspace into a powerhouse of creativity with these straightforward tips on installing and caring for your desk.

Installation Tips

Setting up your studio desk is the first step to a seamless recording experience. Follow these guidelines to ensure an effective installation:

  • Read the manual – It might seem obvious, but it’s crucial. Every piece has its place.
  • Gather your tools – A simple toolkit is often enough. Keep screwdrivers and wrenches handy.
  • Organize parts – Lay out all parts and fasteners. It’s easier to see what goes where.
  • Start with the frame – The sturdiness of your desk depends on a well-assembled frame.
  • Cable management – Consider cable paths as you build. It’s simpler than rerouting cables later.

Once assembled, ensure the desk is level and stable before placing equipment on it.

Keeping Your Desk In Top Shape

Maintenance is key for a long-lasting desk. Regular care keeps your studio looking professional and functioning flawlessly. Adhere to these upkeep strategies:

Action Frequency Benefit
Dust regularly Weekly Prevents build-up
Check connections Monthly Secures equipment
Tighten bolts Semi-annually Maintains stability
Clean surfaces As needed Keeps a neat workspace

Use soft cloths and appropriate cleaners for your desk’s material. Avoid harsh chemicals that may damage the surface.


Eco-friendly And Sustainable Options

Eco-Friendly and Sustainable Options offer a fresh perspective in the recording studio desk market. These choices appeal to sound engineers and producers aiming for a greener studio.

Green Materials And Practices

Choosing a desk built with green materials reduces environmental impact. Studio desks made from recycled wood or bamboo are great examples. These materials are both sustainable and durable.

Many producers opt for desks with non-toxic finishes. A desk with a water-based stain or sealant is a healthier choice. Such practices ensure a low carbon footprint.

  • Recycled metal components
  • FSC-certified wood
  • Low VOC finishes

Supporting Eco-conscious Brands

Supporting brands that prioritize the environment is crucial. These brands invest in renewable energy and carbon offsetting. They may also use recyclable packaging.

By selecting these brands, you contribute to a greener planet. You encourage more companies to adopt sustainable practices.

Brand Sustainability Commitments
EcoDesk Co. 100% recycled materials, carbon-neutral shipping
GreenSound Studios Renewable energy use, tree-planting initiatives
Recording Studio Desks Guide: Ergonomics Meets Style

Credit: www.etsy.com

Case Studies: Desks That Made A Difference

Welcome to ‘Case Studies: Desks That Made a Difference’. A recording studio desk isn’t just furniture. It’s the command center for creativity. The right desk can inspire hits or broadcast history. Let’s explore desks that have defined the soundtracks of our lives.

Famous Studios And Their Desks

Famous studios know their desks are vital. Think Abbey Road Studios in London. Its desks shaped The Beatles’ sound. From their custom TG mixing console, magic flowed into millions of headphones.

  • Sunset Sound Studio in Los Angeles saw the Doors and Prince adjusting faders.
  • Electric Lady Studios in New York, designed for Jimi Hendrix, boasted unique console aesthetics.
  • Blackbird Studios in Nashville takes prestige in its custom API Legacy console.

Custom Desk Success Stories

Individuals often seek custom solutions tailored to their workflow. Success stories abound. For instance, Deadmau5’s custom V-Series desk became his music-making haven.

Producer Desk Type Result
Max Martin Custom Workstation Chart-topping Hits
Hans Zimmer Ergonomic Console Oscar-Winning Scores
Nile Rodgers Vintage Neve Legendary Productions

Custom desks reflect the personal style and technical needs of the artists. They create spaces that elevate music production to art.

A desk built around one’s habits encourages natural flow. It makes a tangible difference in how a producer interacts with the music. Every knob turn, every slider movement feels intuitive.

Shopping For Your Studio Desk

Embarking on the quest for the perfect studio desk is a crucial step in building a personal music production haven. This piece of furniture is the command center for your creativity and work workflow. Knowing where to begin is pivotal to achieve both functionality and comfort within your studio space.

Trusted Manufacturers And Retailers

Selecting a studio desk from reputable sources is vital to ensure quality and reliability.

  • AudioDesk – Known for ergonomic designs and solid construction.
  • Musician’s HQ – Offers a range of desks catering to various needs and budgets.
  • ProStudio – Specializes in customizable desks for professional studios.

Check user reviews and ratings before making a purchase. Try to test desks in person at local music shops. Keep an eye out for warranties and customer service.

Building Your Own Desk: Diy Considerations

For the hands-on creator, designing a DIY desk can be a rewarding project.

Consider these factors first:
  1. Material Quality: Choose durable materials like MDF or solid wood for longevity.
  2. Design: Sketch out the design based on gear placement needs.
  3. Tools: Ensure access to necessary tools or rent them if required.
  4. Skill Level: Assess your woodworking skills or find a willing helper.

Online tutorials can be invaluable resources. Measure twice, cut once, and take safety precautions.

Conclusion: Investing In Creativity And Health

Recording studio desks are more than just furniture. They cradle the tools that bring musical masterpieces to life. Selecting a desk that enhances creative flow and supports health is vital for anyone serious about music production.

The Desk As A Tool For Artistry

A great desk serves as the command center for artistic endeavors. A well-designed recording studio desk allows for seamless integration of musical equipment, empowering artists to produce their best work. Ergonomic features are vital, reducing the strain of long hours spent mixing and mastering.

  • Adjustable height for personalized comfort
  • Ample surface area to hold various devices
  • Cable management systems to keep the area tidy
  • Accessible rack mounts for essential gear

Beyond Functionality: Inspiring Designs

Investing in a desk with aesthetically pleasing design can inspire creative sparks. Streamlined shapes and ambient lighting can influence mood and productivity. The right desk becomes a reflection of one’s artistic identity.

Design Feature Inspiration Factor
Material and Finish Evokes personal style and atmosphere
Layout and Ergonomics Encourages sustained periods of creativity
Customizable Components Adapts to evolving artistic needs
Integrated Technology Keeps the creative process streamlined

Quality desks represent a sound investment in creativity and well-being. They foster an environment where inspiration flourishes and physical comfort is maintained. For any music creator, choosing the right desk is a step towards a healthier, more innovative future.

Recording Studio Desks Guide: Ergonomics Meets Style

Credit: www.amazon.com

Frequently Asked Questions On Recording Studio Desks

What Are The Best Recording Studio Desks?

A good recording studio desk combines ergonomics, sufficient space for equipment, and sturdy construction. Top picks include brands like Output, Zaor, and On-Stage, known for their sleek designs and practical features tailored to musicians and producers.

How To Choose The Perfect Studio Desk?

Choosing the perfect studio desk involves considering your space, the gear you own, and your workflow needs. Look for desks with ample rack space, adjustable height options, and cable management systems for a tidy and efficient setup.

What Size Should A Studio Desk Be?

The ideal studio desk size depends on your available room space and the amount of equipment you plan to accommodate. Typically, a desk between 48-72 inches in width offers a comfortable workspace without overcrowding a home studio.

Are Studio Desks Different From Regular Desks?

Yes, studio desks are specifically designed with music production in mind, featuring sound equipment racks, elevated monitor shelves, and cable management, unlike regular desks that lack these specialized functionalities.

Conclusion

Selecting the right recording studio desk is the cornerstone for a comfortable and efficient music production environment. With the options available, finding your perfect match enhances creativity and workflow. Remember, your desk isn’t just furniture; it’s a critical tool in your musical journey.

Choose wisely, and let the sessions begin!

Categories
Archive

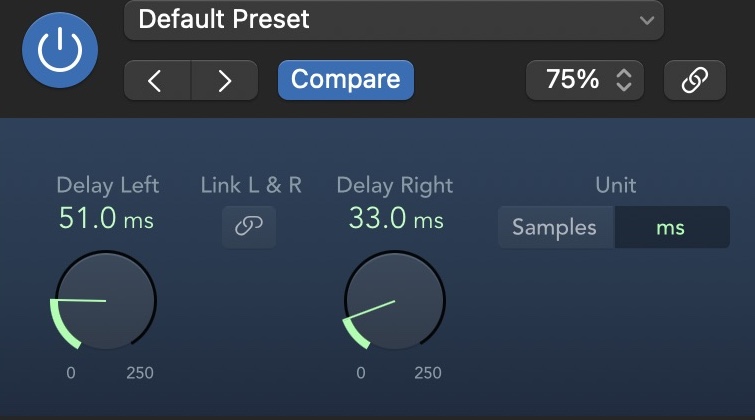
Reverb Pre Delay Explained: Enhance Your Mixes Now!

Reverb pre-delay is the time gap between the original dry sound and the onset of reverberation. It adds clarity by separating direct sound from reverb.


Understanding reverb pre-delay is essential for sound engineers and music producers aiming to sculpt depth and space in a mix. This control allows you to adjust how quickly the reverberated sound follows after the initial sound, which can greatly impact the perceived size of the space and how the original sound sits within the mix.


Applying proper reverb pre-delay settings can place vocals in front of the mix, help instruments sit well in a live-sounding space, or add a dramatic effect to specific musical elements. Mastering the use of pre-delay contributes significantly to the quality and clarity of a mix in both live and recorded audio environments.

Reverb Pre Delay Explained: Enhance Your Mixes Now!


Credit: m.youtube.com

Echoes In Time: What Is Reverb Pre Delay?

Echoes in Time: What Is Reverb Pre Delay? — this captivating phenomenon transforms sounds within various spaces. Dive with us into the realm of audio magic. Understand the essence of Reverb Pre Delay.

The Basics Of Reverberation

Imagine shouting into a canyon. The sound bounces back creating an echo. In a room, sound waves reflect off walls and surfaces, blending together. This effect is reverberation or ‘reverb.’

Why does it matter? Reverb adds depth to sounds. It helps music feel more natural. It’s essential in recordings.

  • Reflections: Sound waves bouncing off surfaces
  • Decay: These reflections gradually lose energy
  • Sound Tail: The lingering sound post-initial bang

Pre Delay In The Context Of Reverb

Now enter Pre Delay. This is the time between the original sound and the reverb’s start. It shapes the perception of space.

Pre Delay Time Perceived Space
Short Pre Delay Small Room
Long Pre Delay Large Hall

Pre Delay tweaks the distance of sound. It’s crucial for sound engineers. It creates space without crowding the mix.

  1. Set Pre Delay appropriate for your track
  2. Adjust to match the vibe and space desired
  3. Experiment with settings to find the right balance

Hearing The Difference: Pre Delay’s Effect On Sound

Hearing the difference that pre-delay makes in sound can transform your listening experience. This subtle yet impactful effect separates the direct sound from the reverberated one. It shapes the clarity and space within audio, making it a powerful tool for both creators and listeners. Let’s dive into how pre-delay affects our aural perception.

Aural Perception Of Pre Delay

Pre-delay creates a short gap before the reverberation effect kicks in. This gap allows the original sound to stand out. As a result, the listener can clearly distinguish the direct sound from its echo. This separation often makes a track feel more live and spacious. By tweaking pre-delay settings, sound engineers can simulate different acoustic environments. The feeling of being in a small room versus a large hall is often due to pre-delay settings.

Sound Examples And Comparisons

To appreciate pre-delay’s influence, consider two sound examples:

  • No pre-delay: The sound blends with the reverb instantly. It feels like singing in a bathroom.
  • With pre-delay: There’s a clear distinction between the vocal and reverb. It mimics a concert hall.

Comparing these examples reveals pre-delay’s potential to alter our sense of space and depth in recordings. It’s not just for music. In movies, sound designers use pre-delay to create realistic environments. It’s all about immersing the listener in a believable auditory space.

Dialing It In: How To Set Pre Delay

Understanding Pre Delay in reverb is essential for crafting the perfect mix. It determines when the reverb effect begins after the original sound. This tiny adjustment can make or break the clarity and placement of vocals or instruments in a mix. Discover how to set Pre Delay for perfect soundscapes.

Tips For Adjusting Pre Delay Settings

  • Start with a baseline: Begin at 0 ms and increase gradually to hear the effect.
  • Consider the tempo: Match Pre Delay time with the song’s BPM for rhythm synergy.
  • Use your ears: Listen carefully so Pre Delay complements, not clutters, the mix.
  • Context is key: Adjust depending on whether the track is solo or within a full mix.

Common Pre Delay Ranges And Uses

Range (ms) Use
0-30 Small spaces, intimate feel
30-60 Live room, more presence
60-120 Larger spaces, distinct echo

Master Pre Delay settings to fine-tune the depth in your mixes. Use these hints and ranges as starting points and tweak from there. Each track demands unique attention for optimal reverberation. Trust your ears and let creativity lead the way.


Mixing With Intention: Creative Uses Of Pre Delay

‘Mixing with Intention: Creative Uses of Pre Delay’ is about shaping your music’s atmosphere. Reverb is not just an effect. It is a powerful tool. You can make sounds feel distant or close with Pre Delay. Think of Pre Delay like the echo in a canyon. It can add a real sense of space to your tracks. Let’s explore how you can craft unique sonic environments and manipulate depth in your mix with intentional Pre Delay settings.

Crafting Space And Depth In Your Mix

Understanding Pre Delay lets you position sounds in a mix. It’s like choosing where your band stands on a stage. Imagine a singer right in front of you and a drummer in the back. This is what you do in a mix with Pre Delay.

  • Small Pre Delay – Feels like sounds are close to you.
  • Large Pre Delay – It makes sounds seem far away.
  • Just Right – Balances the mix and adds life to the sound.

Use Pre Delay to separate vocals from the instrumental. This can make your singer stand out. Or blend them in, making everything feel united. Try experimenting with various settings until you find the perfect match for your mix.

Genre-specific Pre Delay Techniques

Different music styles often require unique Pre Delay approaches. A dance track might need tight echoes, while a ballad might crave long, flowing reverbs. Here are some tips:

Genre Pre Delay Setting Effect
Rock 30-50ms Keeps drums punchy.
EDM 0-20ms Makes synths full.
Jazz 50-70ms Adds air to horns.
Pop 20-40ms Sparks vocal energy.

Remember to adjust settings based on your track’s needs. There’s no one-size-fits-all. Pre Delay shapes emotion in music. Adjust it to match your song’s story.

The Technical Side: Pre Delay Calculations

Diving into the technical aspects of reverb, pre delay sits as a cornerstone. It’s the tiny gap before the reverberation kicks in. This gap shapes how we perceive space in audio. Understand the math and tools for setting the perfect pre delay, and you elevate the listening experience.

Math Behind The Magic: Bpm To Pre Delay

Reverb pre delay timing can sync with the beat of your music. You can calculate the perfect pre delay time if you know the song’s BPM (beats per minute). The formula looks like this:

60,000 ms / BPM = one beat in milliseconds

For instance, if a song is 120 BPM:

  • 60,000 ms / 120 BPM = 500 ms per beat

A fraction of that beat gives us the pre delay:

  • 1/8th note pre delay = Beat ms / 8
  • 1/16th note pre delay = Beat ms / 16

So, for a 1/8th note pre delay at 120 BPM: 500 ms / 8 = 62.5 ms.

Using Tools And Plugins For Precision

Calculating by hand is cool, but tools and plugins make it accurate. They let you dial in the exact pre delay time. Many modern reverb plugins come with built-in calculators. Just input your BPM, choose a note value, and it sets the pre delay for you. Look for these features:

  • Pre delay sync to the project BPM
  • Tappable tempo for manual BPM entry
  • Note value selector for rhythm

With these, your pre delay is always in time. This is crucial for a natural sound. It creates a believable audio space. Use precision tools to captivate listeners with stunning depth and clarity.

Real-world Applications: Pre Delay In Studio Recordings

Studio recordings give life to music; the magic often lies in the subtle details. One such detail reverb pre delay can define a track’s space and depth. This technique separates the initial sound from its reverberation, enhancing auditory clarity. It’s especially effective in giving vocals and instruments a distinct ‘place’ in a mix. By tweaking pre delay times, engineers create sounds ranging from intimate settings to grand, echoing spaces.

Case Studies: Famous Tracks

Pre delay is not a new concept and has been a secret weapon for many hit songs. The following are some renowned tracks that perfectly executed this effect:

  • “When the Levee Breaks” – Led Zeppelin: An enduring example where pre delay provides a powerful, spacious drum sound.
  • “In the Air Tonight” – Phil Collins: The iconic drum solo uses pre delay for a dramatic, tension-filled presence.
  • “Rolling in the Deep” – Adele: The vocals utilize pre delay making them stand out crisply against the dense mix.

Balancing Reverb And Clarity In Vocals

Vocal tracks benefit immensely from the right use of pre delay. It offers the singer’s voice a distinct space without muddying the instrumental backdrop. Adjusting pre delay settings, engineers produce a sensation of separation, where the voice seems to float above the mix.

Pre Delay Setting Effect on Vocals
Short Pre Delay (0-30 ms) Creates a sense of intimacy, as if whispering closely in your ear.
Medium Pre Delay (30-50 ms) Makes vocals stand out, giving the impression of a small room.
Long Pre Delay (50+ ms) Gives a grandiose feel, as if singing in a large hall or cathedral.

Tweaking Live Sound: Pre Delay On Stage

Wondering how to make live music sound even better? Pre Delay in reverb is key. It helps vocals and instruments stand out. Let’s dive into tweaking Pre Delay on stage for perfect live sound!

Enhancing Live Vocals And Instruments

Getting the right reverb makes all the difference. Pre Delay shapes how reverb interacts with your sound. It’s the tiny gap between the original sound and the reverberation. This pause can make vocals soar and instruments pop.

  • Start small: Use slight Pre Delay adjustments to find what works.
  • Listen and adjust: Aim for clarity without muddiness.
  • Keep it natural: Too much delay can sound unnatural. Strike a balance.
  • Match the space: Reflect the venue’s size in your reverb settings.

Common Challenges And Solutions

Pre Delay tweaking isn’t always straightforward. Here are common issues and how to fix them:

Challenge Solution
Vocals getting lost Increase Pre Delay to separate vocals from reverb.
Instruments blend too much Adjust Pre Delay so each instrument stands out.
Sound is too echoey Reduce reverb mix or shorten decay time.
Reverb doesn’t fit the venue Customize Pre Delay based on room size and acoustics.

Reverb Pre Delay Explained: Enhance Your Mixes Now!


Credit: www.izotope.com

Advanced Techniques: Beyond Basic Pre Delay Settings

Delving into advanced techniques takes your music production to new heights. Move past the basic pre delay settings. Discover how modulation and combining effects can transform your sound.

Modulating Pre Delay Time For Creative Effects

Modulating pre delay breathes life into your tracks. This technique involves changing the pre delay time during a song. It creates a sense of movement and rhythm within the reverb effect itself.

  • Automate the pre delay – Gradually increase or decrease the time to match the song’s groove.
  • Sync to tempo – Make the pre delay time hit with the beat for a pulsing effect.
  • Random fluctuations – Add a touch of unpredictability to the audio landscape.

Combining With Other Effects For Unique Sounds

Pairing pre delay with other effects results in unique soundscapes. Consider experimenting with the following combinations:

  • Pre Delay and Distortion – Adds grit before the reverb tail.
  • Pre Delay and Modulation – Chorus or flanger before reverb creates a swirling effect.
  • Pre Delay and EQ – Sculpt the reverb’s frequency response for better mix.

Experimenting is key. Blend the effects until you find a unique sound that elevates your mix.

Pre Delay Pitfalls: Common Mistakes To Avoid

Reverb pre delay shapes the sense of space in music production. It requires careful calibration. Even small missteps with pre delay settings affect the sound. Below, explore common mistakes to avoid when setting pre delay.

Misjudging The Space: Over Or Under Applying Pre Delay

Pre delay helps mimic natural environments in audio tracks. A wrongly set pre delay disrupts this illusion, making the space seem unrealistic. Avoid these errors:

  • Excessive pre delay can detach the reverb from the source.
  • Insufficient pre delay causes a washed-out sound, losing clarity.

Match pre delay to the intended space size for authentic soundscapes.

Ensuring Pre Delay Works In The Full Mix

Pre delay must complement the entire mix, not just soloed tracks. A common oversight is setting pre delay in isolation. This can lead to problems:

Setting Pre Delay Solo Setting in Full Mix
Sounds right on its own, but not in context. Integrates well with all elements.
May clash with the rhythm and tempo of other tracks. Syncs with the dynamics of the entire arrangement.

Always adjust pre delay while listening to the full arrangement. This ensures a cohesive and harmonious result.

Wrapping Up: The Final Polish

Mastering the art of Reverb Pre Delay is like giving your track a final polish. It’s the subtle, yet impactful difference that defines a good mix from a great one. Now, let’s dive into understanding its role in a finished mix and discover how industry veterans use it to craft sonic masterpieces.

Evaluating The Impact Of Pre Delay In A Finished Mix

Reverb Pre Delay shapes space around vocals and instruments. It’s the gap between the direct sound and the reverb that comes after. The right setting can make your track stand out.

Listen to your mix with and without Pre Delay. Ask yourself:

  • Does it sound natural?
  • Can you hear clarity in the vocals?
  • Do the instruments sit well in the mix?

Adjust Pre Delay until everything feels right. Small tweaks can lead to a big impact. It’s all about finding that perfect moment when the track truly shines.

Instrument Without Pre Delay With Pre Delay
Vocals Muddy Clear
Drums Flat Dynamic
Guitar Crowded Spacious

Learning From The Masters: Further Listening And Resources

Delve into tracks produced by the greats. Listen for the use of Reverb Pre Delay. Notice the space around each instrument.

Explore these resources:

  1. Classic tracks with notable reverb.
  2. Interviews with leading producers.
  3. Books on audio mixing techniques.

Practice regularly and compare your work. Every attempt is a step closer to perfection. Embrace the journey, and polish your mix until it shines.

Frequently Asked Questions On Reverb Pre Delay

What Is Reverb Pre-delay In Audio Mixing?

Reverb pre-delay is the time gap between the original dry sound and the onset of reverberation. This control allows sound engineers to simulate the size of a physical space, making the reverb more natural-sounding. Short pre-delays make spaces feel smaller, while longer ones imply larger environments.

How Does Pre-delay Affect Sound Perception?

Pre-delay can greatly affect how we perceive the size and depth of a room in a mix. Shorter pre-delays can make the sound seem closer, and longer pre-delays give a sense of a larger space, as they mimic the time it takes for sound to reflect off distant surfaces.

Can Pre-delay Improve Vocal Clarity In Mixes?

Yes, using pre-delay can enhance vocal clarity in mixes. By setting a slight delay before the reverb kicks in, the initial vocal attack remains clear and distinct, preventing the reverb from washing out the direct sound and maintaining vocal presence in the mix.

What’s The Ideal Reverb Pre-delay Time?

The ideal reverb pre-delay time depends on the type of space being emulated and the desired effect. Generally, times between 20 to 50 milliseconds are common for small to medium spaces. For a bigger, more dramatic space, values up to 100 milliseconds or more might be used.

Conclusion

Understanding reverb pre-delay is crucial for achieving the desired depth and clarity in your mix. By setting the right interval, you create space for your vocals and instruments to truly shine. Experiment with different settings to find the perfect ambiance for your track.


Remember, a little adjustment can make a huge impact on your final sound. Let the tweaking begin!

Categories
Archive

Waves Studiorack: Unleash Pro Audio Magic Effortlessly

Waves Studiorack is a powerful plugin chainer and manager for audio processing. It enables users to create complex chains of effect plugins.


Waves Studiorack serves as a versatile tool in the digital audio workstation (DAW) environment, appealing to both novice and experienced audio producers. It streamlines workflow by allowing the creation, saving, and recall of multi-plugin chains. The Studiorack’s compatibility with various DAWs and its support for Waves’ SoundGrid technology ensures it fits seamlessly into any audio production setup.


It offers a flexible approach to signal processing, providing the capability to manipulate audio with precision. Utilizing Studiorack, audio professionals efficiently organize their plugin collections and maximize their creative potential. With its user-friendly interface, Studiorack has revolutionized plugin management, making it an indispensable tool for music production and audio engineering.


Unveiling Waves Studiorack

Imagine a toolbox where all your favorite tools are just a reach away. Waves Studiorack is that toolbox for audio professionals and enthusiasts alike. It brings a world of plugins under one roof, letting you mix, match, and meld them into your perfect sound.

The Power Behind The Plugin

Waves Studiorack isn’t just a plugin; it’s a powerhouse for sonic creativity. Users dive into a universe where their plugin chain possibilities are endless. With Studiorack, you can:

  • Save and load entire plugin chains.
  • Access macro controls to tweak multiple plugins.
  • Utilize CPU-efficient processing to run more plugins.

Compatibility across all major DAWs means Studiorack slots seamlessly into any studio setup.

Bridging Pro And Home Studios

With Waves Studiorack, the line between pro and home studios blurs. Both beginners and seasoned pros can:

  • Create with studio-quality tools at home.
  • Share presets with an ever-growing community.
  • Experiment with industry-standard plugins.

You can start crafting professional-grade audio from your bedroom or basement. Studiorack makes top-tier sound shaping accessible to everyone.


Key Features Of Studiorack

Key Features of Studiorack

Breathe new life into your audio production process with Waves Studiorack. This powerful plugin manager boasts revolutionary features. Designed to streamline your workflow and ignite creativity, Studiorack ensures precision and efficiency.

Dynamic Plugin Chaining

Streamline your mixing and mastering with effortless plugin chaining. Studiorack’s layout allows you to add plugins in any order you wish, creating versatile signal paths. This modular approach permits unparalleled flexibility in shaping your sound.

  • Drag-and-drop functionality
  • Configure chains with up to 8 plugins per chain
  • Instantly switch between chains for A/B testing

Parallel Processing Prowess

With Studiorack’s parallel processing, merge the power of multiple plugins. Split signals in real-time to apply distinct effects simultaneously. This feature empowers users to blend wet and dry signals, achieving fuller sounds without hassle.

  1. Intuitive macro controls for blending signals
  2. Create intricate layers of effects
  3. Optimize dynamics and tone with ease

Seamless Workflow Integration

The Waves Studiorack shines when it comes to Seamless Workflow Integration. In the world of digital audio workstations, efficiency defines creativity. Studiorack brings a streamline flow to your projects, allowing you to focus on what matters most: crafting your sound. Wave’s commitment to a smooth studio experience is evident with features that cater to both novice users and seasoned professionals.

Customizable Macros

Unlock your studio’s potential with Customizable Macros. With a single click, you perform complex tasks. This feature transforms your workflow, making operations both swift and effortless.

  • Automate repetitive tasks: Save precious time and avoid manual repetition.
  • Easy access: Quick execution of multiple actions with macro buttons.
  • Assign to any function: Bind macros to your most-used plugin parameters and controls.

Multi-plugin Management

Multi-Plugin Management allows you to control your mix from a single window. Streamlined navigation and plugin adjustment simplify your creative process, making it a breeze.

Feature Description
Centralized Control Manage all plugins through a unified interface.
Quick Swaps Replace plugins without losing settings.
Chain Presets Save and recall your favorite effect chains.


Compatibility And System Requirements

The Waves Studiorack provides an invaluable toolset for mixing and sound processing. Yet, knowing the Compatibility and System Requirements is crucial for seamless operation. This segment covers all you need to ensure Studiorack runs perfectly in your studio environment. Let’s dive in and check if your system is ready to harness the power of Waves Studiorack.

Software And Hardware Compatibility

Waves Studiorack plays well with a range of DAWs and operating systems. Below we list the compatible software and hardware requirements:

DAW Compatibility Operating Systems
  • Pro Tools 11+
  • Logic Pro X
  • Ableton Live 9+
  • Cubase 9+
  • FL Studio 12+
  • Studio One
  • REAPER
  • Windows 10 & 11
  • macOS 10.12 and up

Optimizing For Different Setups

Your setup may vary: from bedroom studios to professional environments. Follow these steps for optimization:

  1. Check RAM: Ensure 8GB minimum; 16GB recommended.
  2. Processor Power: A recent multicore CPU will perform best.
  3. Storage Space: Have at least 8GB free on your main drive.
  4. Graphics: Make sure your system supports a minimum 1024×768 resolution.
  5. Internet: An active connection needed for installation and updates.
  6. Screen Configuration: For multiple screens, ensure they’re configured before launching.

Different systems require tailored configurations. Tweak buffer sizes and sample rates according to your project needs. For lower latencies, a faster CPU and more RAM help enormously. Lastly, ensure you have the latest Waves Central application to manage and install your plugins.

Creative Possibilities Unlocked

Wave’s StudioRack opens a world of sound that sparks creativity. It’s a powerful plugin-hosting environment. It lets producers and musicians twist, turn, and transform audio easily. With StudioRack, your music production gets an injection of fresh, creative energy.

Sculpting Sound With Precision

StudioRack offers tools for detailed sound shaping. Experience flexibility with signal chains. They are customizable to your taste. Mix, match, and manipulate plugins. They all work together to refine and polish tracks. Use split racks. They offer parallel processing paths. Create distinct chains. They bring out subtle nuances or bold transformations in your audio.

  • Dynamic control: Compress and expand with expert precision.
  • Frequency shaping: EQs cut and boost for the perfect tone.
  • Effects modulation: Apply vibrato, tremolo, or chorus seamlessly.

Inspiring Presets And Artist Chains

Jumpstart sessions with StudioRack’s presets. These include settings by top sound engineers. Find your sound instantly with curated artist chains. Use them to spark your imagination. Choose from a diverse preset collection. They fit any genre or style. No need to start from scratch. Get pro-sounding results quickly.

Preset Type Benefits
Artist Chains Mimic professional setups easily.
Genre-specific Find the right vibe for rock, pop, or hip-hop.
Effect-themed Explore new sonic terrain with creative effects.

The Studiorack Community

Waves Studiorack unlocks a universe of sonic possibilities. It’s not just a tool; it’s a thriving hub for audio creatives. Beginners and experts unite, expand their networks, and share their passion for sound.

Collaborating And Sharing Setups

Imagine connecting with fellow sound enthusiasts easily. Studiorack Community fosters this connection. Share presets, get custom chains, and boost your creativity.

  • Upload your own setups
  • Download ready-to-use presets
  • Exchange ideas with peers
  • Build your own sound library

Learning From Industry Professionals

Top-notch producers and engineers share their wisdom. They post about their latest techniques. You learn from their experience. Improving your skills becomes fun and easy.

  1. Watch tutorial videos
  2. Read interviews with pros
  3. Join live Q&A sessions
  4. Apply tips to your own mixes

Maximizing Studiorack In Live Settings

Maximizing Studiorack in Live Settings unlocks powerful workflows for sound engineers. Real-time processing becomes a breeze while ensuring pristine audio quality. Let’s dive into optimizing this versatile tool during live performances.

Live Sound Reinforcement

Live sound demands clarity, balance, and impact. Studiorack shines here with its dynamics processing and sonic shaping. The ability to save and recall complex chains simplifies the setup process. Bulletproof live mixes emerge through this tidy, resource-light package.

  • Presets for Quick Access: Store favorite chains for instant recall.
  • Parallel Processing: Blend untouched and processed signals for power without muddiness.
  • Snapshots: Switch settings between songs or scenes fluidly.

On-the-fly Mixing Techniques

Juggling the spontaneity of live mixing is a skill. With Studiorack, you swiftly tweak effects to suit the moment. MultiRack’s integration means immediate adjustments. Consider quick tips to elevate the mix instantly.

  1. Macro Controls: Map critical parameters for one-knob adjustments.
  2. Low-Latency Monitoring: Ensure artists hear themselves without echo.
  3. Dynamic Side-Chaining: Let vocals cut through with compressor chaining.

Engineers value flexibility. Studiorack grants it by hiding complexity within easy-to-manage macro controls. Turning a single knob could adjust multiple effects, adapting to each song’s demands.

From Studio To Stage: Real World Applications

Imagine a world where sound flows seamlessly from the recording studio to a live concert. This is the reality with Waves Studiorack. It’s not just software; it’s a bridge connecting the creative bursts of the studio to the electric energy of the stage. Let’s explore real-world applications where Waves Studiorack shines.

Case Studies: Studio Sessions

Recording magic happens when artists and sound engineers have the right tools. Waves Studiorack plays a vital role here. See it in action:

  • Enhancing Vocals: Smooth harmonies are crafted in the studio, where Studiorack’s customized chains fine-tune vocal tracks.
  • Layering Instruments: Each chord and drum hit gets its spotlight, thanks to the precision processing power of Studiorack.
  • Sound Experimentation: Artists push boundaries, creating new sounds with Studiorack’s vast plugin ecosystem.

Live Performance Breakdowns

Every live show is unique, but Waves Studiorack ensures consistency and quality. Here’s how it makes a difference on stage:

Aspect Benefit of Studiorack
Real-Time Processing Delivers studio-grade effects live, keeping the sound crisp.
Quick Preset Access Switch settings fast between songs, making transitions smooth.
Hardware Integration Works with different gear, allowing easy setup for tours.

Future-proofing With Waves Updates

As the digital music world evolves, staying ahead is key.
Waves Studiorack makes this easy.
With each update, your sound gets sharper, your tools more powerful.
Constant improvements ensure your creativity never hits a wall.
Let’s dive into how Waves keeps you at the forefront of audio production.

Staying Current With New Features

Waves Studiorack consistently grows with fresh, innovative features.
Each update unlocks new potential in your audio workstation.
Here’s why these updates make a difference:

  • Enhanced compatibility: Work with the latest operating systems and digital audio workstations.
  • Innovative presets: New presets from top producers help you find the perfect sound.
  • Advanced controls: Navigate new parameters for detailed sound shaping.
  • Efficiency: Optimizations reduce CPU load, keeping your workflow smooth.

Expectations For Upcoming Releases

Excitement surrounds what’s next for Waves Studiorack.
Upcoming releases promise further advancements.
Producers can look forward to:

  • Revolutionary tools: Expand your creative arsenal with cutting-edge plugins.
  • User experience enhancements: Expect even more intuitive interfaces.
  • Deeper control: More parameters for precise adjustments are on the horizon.
  • Community-driven updates: Waves listens to user feedback for practical improvements.

Your First Steps With Studiorack

Welcome to ‘Your First Steps with Waves Studiorack’ – a journey into the world of professional audio processing. Whether you’re a seasoned pro or just starting out, Studiorack opens up a realm of creative possibilities. Let’s dive into the basics.

Installation And Setup

Getting Studiorack up and running is a breeze.

  1. Download the Studiorack software from the official Waves website.
  2. Install the application by following the on-screen instructions.
  3. Launch your DAW (Digital Audio Workstation) and scan for new plugins.
  4. Insert Studiorack onto a track to activate it.

With Studiorack now set up, you’re ready to build your first signal chain and explore its rich sonic landscape.

Building Your First Signal Chain

Creating your first signal chain is a foundational skill in Studiorack.

Think of a signal chain as a sequence of effects that alter your sound.

  • Select a plugin from the Studiorack library and add it to your chain.
  • Experiment with plugin order by dragging them up or down.
  • Keep adjusting settings on each plugin until you find the perfect sound.

Remember, there’s no single ‘correct’ chain – the best one is whatever sounds good to you!

Frequently Asked Questions For Waves Studiorack

What Is Waves Studiorack?

Waves Studiorack is a powerful plugin chainer that allows you to load, save, and manage complex plugin chains. It simplifies workflow and enhances CPU performance by hosting multiple plugins within a single interface.

How Does Studiorack Improve Workflow?

Studiorack improves workflow by enabling users to create and recall complex processing chains with a single click. It eliminates the need to individually load and configure each plugin, saving time and streamlining studio operations.

Can Studiorack Work With Any Daw?

Yes, Studiorack is compatible with most major DAWs. It is designed to function seamlessly within different DAW environments, making plugin management universal across platforms.

Does Waves Studiorack Support Third-party Plugins?

Waves Studiorack primarily supports Waves plugins; however, it can also host third-party VST3 plugins. This flexibility expands creative possibilities for users.

Conclusion

As we wrap up our exploration of Waves Studiorack, it’s clear this powerful tool redefines audio mixing and plugin management. Its versatility and user-friendly interface cater to both novices and pros. Embrace Studiorack for an elevated audio production experience that pushes creative boundaries.


Your tracks deserve this innovative edge.

Categories
Archive

BMI vs ASCAP: Unveiling the Best for Musicians

BMI and ASCAP are both performing rights organizations that manage licensing and royalties for music creators. They distribute performance royalties to songwriters, composers, and music publishers.


BMI (Broadcast Music, Inc. ) and ASCAP (American Society of Composers, Authors, and Publishers) serve as intermediaries between music creators and the businesses that use their music. These organizations ensure that artists are fairly compensated when their work is played over various platforms, including radio, television, and live venues.


Established in 1940, BMI was created as an alternative to ASCAP, which was founded in 1914, to provide more competitive licensing options. Both operate on a non-profit-making basis and distribute royalties based on their own surveys and formulas. Their impact on the music industry is substantial, as they allow musicians to earn a living from their compositions while granting businesses legal access to a vast array of music. Membership with these organizations is essential for creators seeking to secure income from their music being performed publicly.


Bmi And Ascap: Titans Of Music Licensing

BMI (Broadcast Music, Inc.) and ASCAP (American Society of Composers, Authors, and Publishers) stand as giants in the world of music licensing. They ensure songwriters and composers get paid for their music. With vast libraries of songs, these entities play a key role in the music industry. Their impact spans from radio to restaurants, ensuring creators earn when their music plays.

The Roles Of Bmi And Ascap

Both BMI and ASCAP serve to protect and advocate for music creators. They issue licenses to businesses that use music publicly. These range from radio stations to dining spots. In return, they collect fees. These fees then go to the artists, composers, and publishers as royalties. Think of BMI and ASCAP as the bridges between music users and creators.

  • License music rights to various entities
  • Collect licensing fees from music users
  • Distribute royalties to the rights holders
  • Advocate for legal protections in music copyrights

History And Establishment

BMI emerged in 1939 as a not-for-profit organization. It was a response to the increasing need for representation of all music genres. ASCAP, founded in 1914, is the older of the two and steeped in tradition. It was the first U.S. performing rights organization.

Comparison of BMI and ASCAP Establishment
Organization Founding Year Background
BMI 1939 Formed to represent all music genres
ASCAP 1914 First U.S. performing rights group

ASCAP started with songwriters from Tin Pan Alley. Today, it continues to see growth in diverse music. BMI then gained ground by including genres like jazz, R&B, and country. Both organizations champion the rights of music makers and ensure the continuity of music as a sustainable career.

Understanding Performance Rights Organizations

When it comes to the music industry, Performance Rights Organizations (PROs) play a crucial role. PROs like BMI and ASCAP protect and manage the rights of songwriters, composers, and publishers. They ensure that these artists get rightfully paid for their work. Let’s dive deeper into what PROs offer artists, and the importance of performance rights.

What Do Pros Do For Artists?

  • Collect Royalties: PROs track where songs play and collect money owed to artists.
  • Negotiate Licenses: They negotiate deals with music users like radio stations and streaming services.
  • Distribute Earnings: PROs then distribute the collected funds to their members as royalties.
  • Advocate Rights: They fight for the legal rights of music creators in all venues.
  • Provide Resources: Artists gain access to educational resources and networking events.

The Importance Of Performance Rights

Performance rights mean artists earn money when their music plays publicly. These rights are crucial because they:

  1. Ensure fair pay.
  2. Protect intellectual property.
  3. Promote creativity and sustainability in the music industry.

Membership And Affiliation: A Comparison

Choosing the right Performing Rights Organization (PRO) can make a world of difference for songwriters and publishers. BMI and ASCAP stand as giants in the music rights industry. Let’s dive into the specifics of joining these organizations and the perks and limits that come with membership.

How To Join Bmi Or Ascap

Joining BMI or ASCAP is a pivotal step for music creators. The process is straightforward, but each organization has unique requirements.

  • BMI (Broadcast Music, Inc.)
    • Open to songwriters, composers, and music publishers
    • No fee for songwriters; publishers pay a fee
    • Registration available online through BMI’s website
  • ASCAP (American Society of Composers, Authors, and Publishers)
    • Open to songwriters, composers, lyricists, and music publishers
    • One-time nominal fee for both writers and publishers
    • Application submitted via ASCAP’s website

Membership Benefits And Limitations

Membership with BMI or ASCAP unlocks a variety of benefits but also comes with some constraints. Let’s weigh the options.

BMI ASCAP
  • Royalties from live and broadcast performances
  • Educational and networking workshops
  • Discounts on services and products
  • Royalties from live, broadcast, and online streaming
  • Career development resources
  • Various discount programs

Limitations to consider:

  • Exclusive contracts limiting registration with other PROs
  • Restrictions on withdrawing specific works
  • Varying payment schedules and rules

BMI vs ASCAP: Unveiling the Best for Musicians


Credit: www.etsy.com

Royalty Collection And Distribution

Musicians rely on royalties as a vital source of income. Royalty collection and distribution are crucial processes. They ensure that songwriters and composers receive payment for their work. Two giants in this field are BMI (Broadcast Music, Inc.) and ASCAP (American Society of Composers, Authors, and Publishers). These organizations monitor music use and distribute royalties. But how do they track music usage? What are their payout processes? Let’s dive into the specifics.

Methods Of Tracking Music Usage

Both BMI and ASCAP use advanced technology to track where and how often a song is played. This includes radio, television, live performances, and digital platforms.

  • BMI uses digital monitoring services. They keep tabs on over 16 million works.
  • ASCAP has its media tracking system. It identifies performances across various media.

These methods ensure every note composed earns its merit and due compensation.

Payout Processes Of Bmi And Ascap

Once music usage is tracked, royalties get calculated. Then comes the payout process.

BMI gives quarterly payments. They cover public, digital, media, and licenses.

ASCAP also provides quarterly payouts. They consider performances, digital streams, and more.

BMI Payouts ASCAP Payouts
Quarterly Quarterly
Various royalty streams Inclusive of all platforms

The commitment is to compensate creators fairly and timely. This encourages ongoing creative endeavors.

Genre Diversity And Representation

The conversation about genre diversity and representation in music is crucial in today’s eclectic industry. Both BMI (Broadcast Music, Inc.) and ASCAP (American Society of Composers, Authors, and Publishers) play pivotal roles in this. They recognize and foster talent spanning a multitude of genres, ensuring that all music creators have an opportunity to be heard and protected.

Bmi’s And Ascap’s Genre Inclusivity

BMI and ASCAP champion music from all corners of the auditory spectrum. Through comprehensive licensing, they accommodate various music styles. These include pop, rock, country, R&B, hip-hop, classical, jazz, Latin, electronic dance music (EDM), and additional burgeoning categories.

  • Pop: Capturing global audiences with catchy beats and hooks.
  • Rock: Power chords and anthemic choruses that resonate with fans.
  • Country: Storytelling that echoes the American spirit.
  • R&B/Hip-Hop: Grooves and rhymes that shape culture.
  • Classical: Timeless pieces that continue to inspire.
  • Jazz: The art of improvisation and soulful expression.
  • Latin: Rhythms that get the heart racing with passion.
  • EDM: Beats that make the crowd move.

Genre inclusivity allows these organizations to support a variety of artists, no matter the sound or cultural background.

Success Stories Across Genres

Success stories peppered across the musical landscape attest to the effectiveness of BMI and ASCAP’s support systems.

Genre Success Story (BMI/ASCAP)
Pop Award-winning songwriters with chart-topping hits.
Rock Iconic bands inducted into the Rock and Roll Hall of Fame.
Country Singers celebrated at the Country Music Awards.
R&B/Hip-Hop Artists topping the Billboard charts and winning Grammys.
Classical Composers receiving prestigious fellowships and awards.
Jazz Musicians honored at international jazz festivals.
Latin Stars gaining recognition at the Latin Music Awards.
EDM DJs headlining major global music events.

These success stories not only highlight individual achievements but also underscore the organizations’ commitment to diverse music representation. BMI and ASCAP nurture the growth of genres and their creators, paving the way for a richer musical tapestry.

The Cost Of Joining: Fees And Dues

When you dive into the music world, choosing between BMI (Broadcast Music, Inc.) and ASCAP (American Society of Composers, Authors, and Publishers) is crucial. Knowing the fees involved can impact your decision and career. Let’s unpack the costs.

Initial And Recurring Fees For Members

Both BMI and ASCAP have structures for their members. We break them down for ease.

BMI ASCAP
Joining Fee Free for songwriters $50 for songwriters
Publishers $150 for individuals $50 for individuals
Annual Fee No annual fees None, but workshops can cost

Financial Implications For Choosing Bmi Or Ascap

Choosing between BMI and ASCAP affects your wallet.

  • BMI can save you upfront costs.
  • ASCAP’s initial cost can be a small hurdle for new songwriters.
  • No recurring fees means more money for your music.
  • Attend workshops and events at ASCAP may add to your expenses.

Legal Battles And Copyright Protection

Musicians and songwriters rely on royalties for their hard work.
Legal issues can arise when others use their music without permission.
BMI (Broadcast Music, Inc.) and ASCAP (American Society of Composers, Authors, and Publishers) play pivotal roles.
They make sure that music creators get paid for their work.

High-profile Lawsuits And Their Outcomes

The music industry has seen notable lawsuits over copyright infringement.
These cases often involve big names and huge sums of money.
Let’s explore some key lawsuits and what they mean for the future of music rights.

Lawsuit Parties Involved Outcome
Williams vs. Bridgeport Pharrell Williams, Robin Thicke, Bridgeport Music Damages awarded to Bridgeport
Gaynor vs. AdShare Gloria Gaynor, AdShare for a third party Settlement reached

How Bmi And Ascap Protect Musicians’ Rights

BMI and ASCAP ensure creators are compensated when their music is used.
They monitor usage across mediums and collect royalties.
Here’s how they advocate for musicians:

  • Collecting payments: They track when and where music is played and ensure proper compensation.
  • Licensing agreements: BMI and ASCAP issue licenses to venues and platforms to use members’ music.
  • Legal support: They provide legal backing for members involved in copyright disputes.


Experiences And Testimonials From Industry Insiders

Choosing between BMI and ASCAP is vital for music creators. Insight from music industry insiders can guide this choice. Real experiences highlight crucial differences. We delve into these perspectives below.

Musicians Weigh In On Bmi Vs Ascap

Every musician’s journey with publishers is unique. Their choices often reflect personal career goals. We gathered thoughts from musicians about BMI and ASCAP. They noted membership benefits, such as workshops. Distribution timelines also stood out. Both organizations collect royalties, but some artists prefer one due to their payment schedule.

Musicians praised BMI for:

  • No upfront fees for joining
  • Quarterly royalty payments
  • Access to industry events

Artists appreciated ASCAP for:

  • Ongoing career development resources
  • Opportunities for networking
  • Member discounts on gear and services

Industry Experts Share Their Recommendations

Industry experts have a wealth of knowledge. They understand the subtleties of BMI and ASCAP. The choice can depend on the type of music created. Certain genres may fare better with one over the other. Their main concerns center on royalty tracking accuracy and member support.

They recommend considering:

  1. Type of music you create
  2. Your need for performance royalties
  3. Digital versus live performance royalties

Industry professionals highlight key points:

Aspect BMI ASCAP
Distribution frequency Quarterly Annually
Membership cost Free One-time fee
Networking opportunities Varied Extensive

International Reach And Global Collections

Musicians and songwriters aiming to gather royalties globally must understand the international reach of BMI and ASCAP. These organizations extend far beyond U.S. borders. They ensure that artists earn their deserved share from worldwide plays. Let’s explore how BMI and ASCAP expand their umbrella to collect global royalties effectively.

Bmi And Ascap In The International Arena

BMI and ASCAP stand out for their global collections. They collect royalties for their members from over 200 countries. Strong relationships with foreign performance rights organizations (PROs) allow them to track plays across continents. This ensures creators get paid no matter where their music makes waves. The stats are impressive:

  • ASCAP boasts ties with over 100 foreign PROs.
  • BMI partners with nearly 90 countries’ music rights entities.

BMI and ASCAP ensure musicians enjoy international recognition. This translates into a regular revenue stream for music creators worldwide.

Working With Foreign Pros And Partners

Collaboration is key in the world of music rights. BMI and ASCAP’s ability to work alongside foreign PROs is vital. These partnerships help to:

  1. Track song plays accurately across the globe.
  2. Collect and remit royalties to rightful owners swiftly.
  3. Manage legal aspects of international licensing.

Their work with partners ensures creators receive their earnings without delay. By doing so, BMI and ASCAP uphold their commitment to serving songwriters, composers, and music publishers.

The Future Of Music Licensing

Music licensing is experiencing a rapid transformation. With technological advancements, the way music is created, shared, and monetized is evolving. Broadcast Music, Inc. (BMI) and the American Society of Composers, Authors, and Publishers (ASCAP) stand at the forefront of this change. Let’s explore what the future holds for these giants in the realm of music royalties.

Emerging Trends And The Implications For Bmi And Ascap

The landscape of music licensing is shifting due to several key trends:

  • Data-Driven Royalty Distribution: Algorithms now track music usage more precisely.
  • Global Expansion: Music licensing crosses borders more fluidly.
  • Direct Licensing Deals: Artists are forging individual paths outside traditional systems.
  • These tendencies present both opportunities and challenges for BMI and ASCAP.

    Trend Opportunity Challenge
    Data-Driven Royalties Accurate payouts Massive data management
    Global Music Use New markets Complex rights negotiations
    Direct Licensing Artist empowerment Potential revenue loss

    Adapting to the Digital Age and Streaming Services

    Adapting To The Digital Age And Streaming Services

    Streaming services have revolutionized music consumption. BMI and ASCAP must adapt:

    1. Modernizing Licensing Frameworks: They need to overhaul old systems.
    2. Enhancing Online Platforms: Digital tools should be user-friendly.
    3. Negotiating Fair Rates: They must ensure creators are fairly compensated.

    These organizations are already taking strides to embrace digital innovations.

    Learn about the platforms and tools used by BMI and ASCAP for digital age adaptation.

BMI vs ASCAP: Unveiling the Best for Musicians


Credit: musicrow.com

Frequently Asked Questions On Bmi Vs Ascap

What Are Bmi And Ascap?

BMI (Broadcast Music, Inc. ) and ASCAP (American Society of Composers, Authors, and Publishers) are both performance rights organizations. They collect and distribute royalties for public performances of music.

How Do Bmi And Ascap Differ?

BMI and ASCAP differ in their history, membership structure, and distribution methods. However, both serve to ensure that songwriters and composers are compensated for the public performance of their music.

Which Is Better For Songwriters, Bmi Or Ascap?

The choice between BMI and ASCAP depends on the specific needs and preferences of a songwriter. Both offer unique benefits and have various payment and membership structures.

Can You Be A Member Of Both Bmi And Ascap?

Songwriters cannot be active members of both BMI and ASCAP simultaneously. They must choose one organization to register their works with and collect performance royalties.

Conclusion

Navigating the realms of BMI and ASCAP can be complex. Both organizations offer vital services to artists and composers. Ultimately, your choice hinges on personal needs and career goals. Remember, a well-informed decision can significantly impact your music rights management and earnings.


Embrace the journey and protect your creative works wisely.

Categories
Archive

M Audio M Track Duo Review: Unbeatable Value?

The M-Audio M-Track Duo is an affordable, entry-level audio interface with dual input channels. This compact unit offers clear audio recording ideal for beginners and home studios.


M-Audio caters to the budding artist and podcaster with the M-Track Duo, providing a straightforward solution for high-quality audio capture. This audio interface is perfect for users seeking a reliable recording experience without breaking the bank. It features two combo XLR/TRS inputs, direct monitoring, and 48V phantom power, all packed in a lightweight design that fits any desk space.


The inclusion of M-Audio’s Crystal Preamps assures users that their recordings will be crisp and clear. Compatible with both Mac and PC, and supporting most recording software, the M-Track Duo stands out for its versatility and ease of use, making it a compelling choice for newcomers to music production and audio recording.


Introduction To M Audio M Track Duo

Welcome to a detailed exploration of the M Audio M Track Duo – a nifty audio interface perfect for various audio recording scenarios. Discover what this device can offer musicians and creators of all levels. With its straightforward functionality and quality, the M Audio M Track Duo might just be the tool you need.

Compact Design And Build

The sleek and robust build of the M Track Duo fits any work environment. Weighing hardly anything, it’s a breeze to take on the go. Set up is easy – plug into your computer and start creating.

  • Metal chassis for durability
  • Portable size for on-the-move production
  • Accessible controls for easy operation

Target Users And Applications

The M Track Duo is a hit with beginners and pros alike. It’s perfect for small studios, podcasters, and musicians. Anyone can capture quality sound without a fuss.

Users Applications
Home Studios Music Production
Content Creators Podcasting
Singer-Songwriters Live Streaming

Key Features At A Glance

Are you ready to dive into the M-Audio M-Track Duo? This compact interface packs a punch with features musicians and podcasters love. Let’s check out the highlights that make the M-Track Duo a must-have for anyone starting their audio journey.

Channel Inputs And Output Overview

The M-Track Duo has two audio channels. Each channel has a combo input. You can plug in both XLR and 1/4″ TRS. This means microphones, guitars, and keyboards are welcome.

Want to hear what you’re creating? There are stereo outputs for speakers. There’s also a headphone out. This lets you listen as you record or mix. With the Duo, you control your sound at every step.

Input/Output Type Quantity
Combo Inputs XLR / 1/4″ TRS 2
Headphone Output 1/4″ TRS 1
Stereo Outputs 1/4″ TRS 2

Usb Connectivity And Compatibility

The Duo connects to your computer with USB. This is fast and easy. No power supply needed. It’s USB 2.0. This means it works with most computers.

It’s compatible with both Mac and Windows. You won’t worry about your operating system. The Duo comes with software. You start making music right away. Everyone can create with the M-Track Duo.

  • USB 2.0 Connection – Simple, fast, and reliable.
  • No External Power Required – Power via USB.
  • Software Included – Start creating immediately.
  • Mac and Windows Compatible – Works for everyone.

Setting Up The Interface

Preparing to make music with the M-Audio M-Track Duo means setting it up right. Whether you’re a novice podcaster or an aspiring musician, clear steps can get you started without the fuss. Let’s dive into the seamless installation process and explore the software bundle
and drivers that come with this compact interface.

Installation Process

Unboxing your M-Track Duo is the first step to an amazing audio journey.

  • Find a suitable spot on your desk.
  • Connect the interface to your computer with the provided USB cable.
  • Power on the device with its switch.

Your computer might recognize the M-Track Duo immediately. No extra power source needed, a simple USB connection brings it to life. For advanced use, read the quick start guide. It has all the details for a smooth setup.

Software Bundle And Drivers

Interesting software comes with your M-Track Duo to create professional audio.

  • Pro Tools | First M-Audio Edition: Perfect for recording and mixing.
  • MPC Beats: Create beats and musical patterns easily.
  • Xpand!2: A virtual instrument software, adds sounds to your creation.
  • Eleven Lite guitar amp plugin: Offers various amp simulations.

Downloading drivers is simple:

  1. Visit the M-Audio website.
  2. Go to the Support section.
  3. Choose ‘M-Track Duo’ from the list.
  4. Download the latest drivers.
  5. Run the installer and follow instructions.

Once the drivers are installed, your software is ready to use. Restart your computer to apply all changes. Then open your favorite Digital Audio Workstation (DAW). Select ‘M-Track Duo’ as your input and output device. Now, you are ready to record.

Recording Quality

The M-Audio M-Track Duo offers a portable recording solution without compromising on quality. Ideal for solo artists, podcasters, and any content creators seeking professional-grade recordings. Let’s delve into the duo’s preamps and sound clarity, and gauge its latency performance.

Preamps And Sound Clarity

The heart of any audio interface lies in its preamps. The M-Track Duo boosts two crystal preamps that guarantee a transparent sound capture. Musicians and producers benefit from a pure tone, clear of any unwanted coloration or noise.

  • Phantom Power support for condenser mics.
  • Balanced inputs minimize noise.
  • High headroom allows dynamic recordings.

These preamps also ensure high-quality sound clarity. Each recording dazzles with detail, allowing for nuanced performances. Expect crisp highs and robust lows, whether recording vocals, instruments, or spoken word.

Latency Performance

Latency can disrupt the seamless recording and monitoring experience. The M Track Duo handles this with aplomb. Offering a direct monitor switch, it enables hearing the performance with no noticeable delay.

  • Zero-latency monitoring for real-time feedback.
  • Compatible with all major DAWs.
  • Drivers designed for optimal speed and efficiency.

Users experience fluid recording sessions, perfecting takes without the technical distractions. The swift performance here is ideal for tight sync requirements, such as overdubbing or sound design.

Durability And Portability

For music creators on the move, a dependable audio interface is key. The M-Audio M-Track Duo stands out not just for its audio performance, but also its ability to withstand the rigors of travel. Let’s delve into what makes this device a sturdy companion and a breeze to carry along.

Materials And Build Quality

The M-Audio M-Track Duo boasts a robust design. It employs high-grade materials for endurance. The compact casing is constructed from metal, which shields it from the dents and dings that can occur during travel. It’s built to endure intense use, making it a reliable pick for producers and musicians who demand longevity.

Component Material
Outer Casing Metal
Knobs Durable Plastic
Connectors Reinforced Metal

Ease Of Transport For Mobile Setups

The M-Track Duo shines when it comes to portability. Its lightweight frame makes it a charm to carry, fitting easily into backpacks or gear bags. Its compact size is ideal for set-ups where space is at a premium. No matter where creativity strikes, the M-Track Duo is ready to go with minimal hassle.

  • Weight: Light enough for hassle-free movement
  • Dimension: Compact to fit snugly in tight spaces
  • Power: USB-powered for cable simplicity

M Audio M Track Duo Review: Unbeatable Value?


Credit: www.sweetwater.com

The Software Tie-in

When you unwrap the M-Audio M-Track Duo, you’re not just getting an interface.
You dive into a world bustling with creative software ready to bring ideas to life.
Whether you’re a producer, a musician, or a mix engineer,
this bundle bolsters your setup with powerful tools.

Included Daws And Plugins

M-Track Duo comes bundled with Pro Tools First M-Audio Edition.
This is a gateway to the industry-standard recording platform.
Alongside MPC Beats, it provides an arsenal for music production.

  • Xpand!2 – Synths, pads, drums, and more at your fingertips.
  • Eleven Lite – Amplify guitar and bass with various amp models.
  • 20 Avid plugin effects – Enhance your mix with pro-level polish.

This suite empowers users to start creating immediately. Edit, arrange, and mix with top-notch tools.

Third-party Software Compatibility

Creativity should never face limits.
The M-Track Duo supports all major DAWs.

DAW Compatibility
Ableton Live Yes
Logic Pro X Yes
Cubase Yes
FL Studio Yes

Users explore other VSTs and AU plugins. M-Track Duo is the bridge.

Comparing With Competitors

Today we are diving into how the M-Audio M Track Duo stands among its peers. With a slew of audio interfaces on the market, it’s vital to see what sets it apart. Let’s explore its price-to-performance ratio and feature set alongside its rivals.

Price To Performance Ratio

In the budget-friendly market, the M-Audio M Track Duo makes a bold statement. For aspiring musicians and podcasters, it presents a high-quality audio interface without breaking the bank. Here’s how it stacks up in terms of value for money:

  • Cost-effective solution for beginners
  • Provides professional audio quality at a fraction of the price
  • Beats many competitors with its clean preamps and low noise floor

Price-wise, it holds its ground against popular alternatives, offering key features needed for quality recording.

Interface Price Input/Output Preamps
M-Audio M Track Duo Very Affordable 2 in / 2 out Excellent
Competitor A Higher 2 in / 2 out Good
Competitor B Comparable 2 in / 4 out Good

Feature Set Comparison

When assessing features, the M Track Duo holds many surprises. It touts a compact, user-friendly design perfect for on-the-go recording. Let’s compare its features against others in its class:

  • Easy plug-and-play setup for quick recording
  • Includes Crystal Preamps™ for pristine, studio-quality sound
  • USB-powered for maximum portability

Compared to its peers, M-Audio’s contender often outperforms or matches in essential areas needed for quality audio production.

Feature M-Audio M Track Duo Competitor A Competitor B
Preamps Crystal Preamps™ Standard High Quality
Power USB Bus-powered AC Adapter USB Bus-powered
Software Bundle Included Not Included Included

While the competition may offer similar input/output configurations, the Duo’s intuitive design and complete software package give it an edge. It has what beginners and professionals need, all while maintaining an accessible price.

M Audio M Track Duo Review: Unbeatable Value?


Credit: m.youtube.com

User Reviews And Reactions

M-Audio M-Track Duo has sparked a buzz among recording enthusiasts and bedroom producers alike. Scouring through user reviews and reactions reveals real-world experiences with this audio interface. Let’s dive into what users are saying.

Customer Satisfaction Overview

The customer satisfaction for the M-Track Duo seems to be a mix of highs and lows. Users have taken to various platforms to voice their opinions. A pattern emerges from their feedback.

  • Easy setup and operation
  • Quality build for the price
  • Some users face driver issues

Common Praises And Criticisms

Praises Criticisms
Compact and portable Issues with software compatibility
Clear sound quality for entry-level Some find the preamps lacking
Limited inputs and outputs

Final Thoughts

The journey through the specs, performance, and user-experience of the M Audio M Track Duo has been revealing. As we wrap up, the crucial question remains: is it the right audio interface for your needs? Let’s break down its value proposition to help you decide.

Is the M Audio M Track Duo for you?

Is The M Audio M Track Duo For You?

This interface pitches to both budding musicians and podcast creators. If a compact setup with essential features is what you seek, this could be a match. Consider the M Track Duo if you:

  • Need a portable recording solution.
  • Want to record two inputs simultaneously.
  • Are starting out and have a limited budget.
  • Require 24-bit/48kHz audio quality for clarity.

Summarizing The Value Proposition

Feature Benefit
Compact Design Easy to carry, perfect for mobile setups.
Dual XLR/Line Inputs Records two sources without hassle.
Crystal Preamps Ensures professional sound quality.
USB-Powered No need for external power supply.
Software Bundle Includes tools to start creating instantly.

The M Audio M Track Duo balances functionality with affordability, appealing to those just dipping their toes into music production or podcasting. Its user-friendly nature ensures you spend less time troubleshooting and more time creating.

M Audio M Track Duo Review: Unbeatable Value?


Credit: musictech.com

Frequently Asked Questions For M Audio M Track Duo Review

Is The M-audio M-track Duo Good For Beginners?

The M-Audio M-Track Duo is excellent for beginners due to its user-friendly interface. It’s plug-and-play, affordable, and has essential features that make it easy for those new to audio recording to start their journey.

How Does M-track Duo Perform With Daws?

The M-Audio M-Track Duo performs well with most Digital Audio Workstations (DAWs). It offers seamless compatibility and stable drivers, ensuring a smooth recording and production experience across various software platforms.

Can I Use M-track Duo For Podcasting?

Yes, the M-Track Duo is suitable for podcasting. It provides quality preamps and dual inputs, perfect for hosting guests or co-hosts, making it a reliable option for podcast creators.

What Is The Audio Quality Of M-track Duo?

The M-Audio M-Track Duo delivers 24-bit/48kHz audio quality. It ensures professional-grade sound clarity for recordings, making it ideal for various audio projects, from music to voice-overs.

Conclusion

Wrapping up our detailed examination of the M Audio M Track Duo, it’s clear that this interface balances affordability with quality. For beginners and budget-conscious musicians, it stands out as a solid choice. Its ease of use, combined with decent performance specs, makes it a contender in its category.


Whether you’re laying down tracks or mixing, the M Track Duo could be the right tool to enhance your audio journey.

Categories
Archive

Impedance in Headphones: Unleash Optimal Audio Quality

Impedance in headphones refers to their resistance to electrical current. Lower impedance requires less power to deliver high audio levels.


Understanding the concept of impedance is crucial when selecting headphones, especially if you are an audiophile or a professional in the music industry. Headphone impedance, measured in ohms, directly affects the sound quality and compatibility with various audio devices. Generally, low-impedance headphones are better suited for portable devices like smartphones, as they can operate efficiently with less power.


On the contrary, high-impedance headphones might require dedicated amplifiers to achieve their full potential but can offer superior sound fidelity. Knowing the impedance of your headphones ensures you match them correctly with your audio equipment for optimal sound clarity and performance. This aspect of headphone specifications is a key consideration for anyone serious about their listening experience.


The Essence Of Impedance In Headphones

The Essence of Impedance in Headphones is not just technical jargon. It shapes how we hear music and sounds. In fact, understanding this key feature can enhance our audio experience significantly. Let’s dive into what impedance means and why it’s critical for your headphones.

What Is Impedance?

Impedance, measured in ohms (Ω), refers to the resistance a device presents to the flow of electrical current. In headphones, impedance affects how much power they require. There’s a simple rule: lower impedance needs less power; higher impedance needs more power. This concept is crucial for picking the right pair to match your devices.

Why Impedance Matters In Audio Devices

  • Sound Quality: Impedance affects the clarity and crispness of audio.
  • Compatibility: Matching impedance ensures your headphones work well with your device.
  • Volume Control: High-impedance headphones need more power for loud volumes.

This attribute determines both performance and versatility. For instance, low-impedance headphones are perfect for smartphones. On the other hand, high-impedance models are ideal for studio settings with dedicated amplifiers.

Impedance in Headphones: Unleash Optimal Audio Quality


Credit: fastercapital.com

Low Vs High Impedance Headphones

Understanding impedance in headphones is vital for any audiophile or music enthusiast. Impedance affects sound quality and the power needed for headphones to work well. It measures electrical resistance in ohms (Ω). Headphones come in low and high impedance varieties. Both have unique features and benefits.

Characteristics Of Low Impedance Headphones

Low impedance headphones usually have an impedance of less than 50 ohms. They are designed to efficiently work with devices with weaker amplification. Examples include smartphones and portable music players.

  • Easier to drive – these headphones use less power.
  • Can produce loud volumes with smaller devices.
  • Convenient for on-the-go use.

Benefits Of High Impedance Headphones

High impedance headphones typically start around 100 ohms. These are tailored for professional or studio settings. They often pair with specialized equipment.

  • Better sound quality for those who seek perfection in their audio.
  • Durable due to fewer demands on the drivers.
  • Offer a wide dynamic range for an immersive experience.

Decoding The Technicalities

Welcome to our deep dive into the world of headphones and their intricacies.

In this section, we’ll unravel the complex terms you’ve likely encountered.

Get ready to understand what all the technical jargon really means for your listening experience!

Understanding Ohm Ratings

Think of Ohm ratings as a road that your music travels on from your device to your ears.

Ohms measure how much a headphone resists the electrical signal from your player.

Low ohms mean less resistance and easy travel for sound.

Headphones with high ohm ratings need more power.

They often deliver superior sound detail.

Ohm Rating Player Type Sound Quality
Under 32 Ohms Standard Devices Good for everyday use
Over 32 Ohms High-Power Players Richer and clearer

The Interplay Between Impedance And Sensitivity

Imagine impedance and sensitivity are dance partners in sound quality.

They work together to create a perfect balance.

Impedance is about resistance and sensitivity is about loudness.

  • High sensitivity means louder volume at a given power.
  • Low impedance makes headphones loud even on normal devices.

Balance the two for the best sound without damaging your gear or ears.

Impedance Sensitivity Result
Low High Loud and clear on any device
High Low Needs more power, but offers detailed sound

Impedance in Headphones: Unleash Optimal Audio Quality


Credit: www.amazon.com

Matching Headphones With Audio Sources

Finding the perfect pair of headphones can transform your audio experience. An essential factor often overlooked is impedance. This determines how headphones interact with the audio source. Let’s explore how to pair them correctly.

Finding The Right Amp For Your Headphones

A good amp can enhance your listening experience. Here’s how:

  1. Check your headphones’ impedance rating in ohms.
  2. Choose an amp with a compatible output impedance.
  3. Look for amps that can deliver clean and stable power.

For low-impedance headphones, portable amps work well. For high-impedance ones, consider desktop amps.

What Happens When Impedance is Mismatched?

What Happens When Impedance Is Mismatched?

Matching is crucial. Mismatches lead to poor sound quality. Below are the effects:

  • Too low impedance causes distortion.
  • High impedance reduces volume levels.

Always aim for an ideal balance. This ensures the best sound from your headphones.

The Impact On Sound Quality

When you plug in your headphones, you expect a transformative audio experience. Not all headphones are created equal, and their impedance plays a pivotal role in defining sound quality. Let’s explore how different impedance levels can either enhance or dampen your listening experience.

Clarity And Detail At Different Impedance Levels

Impedance in headphones refers to their resistance to the electrical signal from your audio source. This factor can profoundly affect audio clarity and detail.

  • Low-impedance headphones, typically under 35 ohms, require less power to deliver high audio levels. Thus, they pair well with devices with weaker amplification like mobile phones and portable music players.
  • Medium-impedance headphones around 35-100 ohms strike a balance, offering versatility across different audio sources.
  • High-impedance headphones, above 100 ohms, often unveil intricacies in music when connected to powerful amplifiers. They usually require dedicated audio equipment to reach their full potential.

Does Higher Impedance Equal Better Sound?

Higher impedance often suggests a pair of headphones may provide better sound quality. Yet, this isn’t always the case. It’s not a straightforward measure of audio performance.

Impedance Level Audio Source Requirement Potential Sound Quality
Low Less power needed Can be dynamic, but may lack finesse without a proper match
Medium Moderate power Good balance, suits a variety of devices
High More power, dedicated source High detail and clarity with the right setup

Navigating The Market

Choosing the right headphones can feel like finding a needle in a haystack. With so many options, it’s crucial to consider impedance, which affects sound quality and device compatibility. This section makes it easy to understand what to look for, spotlighting top choices for low and high impedance headphones and helping align your pick with your audio source.

Top Picks For Low And High Impedance Headphones

Headphones come in all shapes, sizes, and impedance levels. Knowing the right impedance for your needs is key.

Impedance Level Headphone Model Best For
Low (Under 32 Ohms) Sennheiser HD 450BT Mobile devices, casual listening
High (Over 250 Ohms) Beyerdynamic DT 1990 Pro Professional studios, High-quality audio gear

Low impedance headphones require less power, perfect for everyday gadgets. High impedance models suit high-power audio equipment. Your choice should match your listening gear.

Considering Your Audio Source In Your Purchase

Your audio source plays a pivotal role in headphone performance. Below are points to ponder before selecting.

  • Portable Devices: Better suited for low impedance headphones.
  • Sound Systems: May handle both low and high impedance depending on power output.
  • Professional Audio Equipment: Typically requires high impedance for optimal sound fidelity.

Align your headphone impedance with the intended audio source for the best experience. This ensures clear, quality audio without extra amplifiers.

Expert Advice For Audiophiles

Understanding impedance in headphones is key for any audiophile. It affects audio quality and power needs. To get the best sound, knowing when to pair headphones with an amplifier is crucial. Equally important is tailoring your audio setup for the perfect impedance match. Let’s dive into these topics.

When To Invest In An Amplifier

Headphones with high impedance require more power to deliver quality sound. This power comes from an amplifier. An amplifier also enhances sound details in quality recordings. Consider the following to decide on an amplifier:

  • Headphone Impedance: Over 50 ohms may need an amplifier.
  • Sound Source: Weak sources like smartphones benefit from amplifiers.
  • Audio Quality: Amplifiers improve high-resolution audio.

Customizing Audio Setups For Ideal Impedance Balance

Matching headphone impedance with audio source improves performance. For the best balance:

  1. Determine your headphones’ impedance rating.
  2. Check your audio source’s output impedance.
  3. Aim for an 8:1 ratio of headphone impedance to source impedance.

This ratio ensures minimal sound distortion and maintains audio quality.

Impedance Rating Recommended Action
Low (below 25 ohms) Typically no amplifier needed.
Medium (25-50 ohms) Amplifier optional, based on preference.
High (above 50 ohms) An amplifier might be necessary for best sound.

Future Trends In Headphone Impedance

As technology races forward, headphone impedance is not left behind. New designs are emerging, shaping the way we experience sound. In this section, we explore cutting-edge developments and what might come next for headphone enthusiasts and casual listeners alike.

Innovations In Headphone Design

Designers are crafting headphones that tackle old challenges in fresh ways.

  • Smart materials for automatic impedance adjustment.
  • Lightweight circuits that enhance portability without compromising quality.
  • Integration of active noise-cancellation technology with impedance optimization.

This focus on innovation delivers unparalleled audio experiences whether on-the-go or in the comfort of your home.

Predictions For Impedance Standards In Next-gen Audio

With technological progression, the standards for headphone impedance are poised to evolve.

  1. We might see a trend towards lower impedance ranges for easier device compatibility.
  2. Wireless models could boast better battery life even with sophisticated impedance features.
  3. The advent of high-resolution streaming services could push for headphones with adaptive impedance for optimal sound resolution.

All signs point to a more user-centric approach where ease and quality coexist in audio gear.

Frequently Asked Questions On Impedance In Headphones

What Does Impedance Mean For Headphones?

Impedance in headphones refers to their resistance to the electrical signal from the audio source. Lower impedance headphones need less power, so they’re suitable for mobile devices. High impedance headphones usually offer better sound quality but require more power.

How Does Impedance Affect Headphone Sound Quality?

Headphone impedance affects sound quality in terms of audio clarity, volume, and the richness of the sound. High impedance headphones generally provide a clearer and more detailed sound, which is favored in professional settings, but they may require an amplifier.

Can Low Impedance Headphones Damage Your Phone?

No, low impedance headphones will not damage your phone. In fact, they are designed to work well with devices that have less power output, such as smartphones and portable music players, without requiring additional amplification.

What Is The Ideal Headphone Impedance For Smartphones?

The ideal headphone impedance for smartphones is typically between 16 to 32 ohms. This range ensures that the headphones can be driven easily by your phone, allowing for optimal sound quality without the need for an external amplifier.

Conclusion

Understanding headphone impedance is key to matching your audio gear for optimal sound quality. Remember, low impedance suits mobile devices well, while high impedance thrives with dedicated amplifiers. Choose wisely to elevate your listening experience. Dive into the audio world with confidence and enjoy every note to its fullest!

Categories
Archive

True Peak Limiting: Mastering Audio Dynamics

True Peak Limiting is an audio processing technique that prevents digital clipping. It ensures the audio signal does not surpass the digital maximum.


The limiter is vital for preserving audio quality during mastering and broadcasting. Also, by using this technique, audio professionals can guarantee that the sound remains distortion-free and clean across various playback systems. Limiters specifically designed for true peak control detect inter-sample peaks that could otherwise cause unwanted distortion.


This is especially important when converting audio to lossy formats, which can exacerbate peak levels and lead to clipping. In addition, ensuring compliance with broadcasting standards, peak control is a critical step for content destined for TV, radio, or online streaming, where consistent audio levels are required. Also, it allows for maximizing loudness without compromising the integrity of the audio signal, making it a key tool in any sound engineer’s arsenal.


The Essence Of True Peak Limiting

Moreover, the essence of inter-sample peaks lies at the heart of achieving a perfect final sound mix. For example, whether you are a sound engineer, a music producer, or a content creator, understanding the concept of the limiter is pivotal. It ensures audio does not distort when played on different devices. Let’s delve into why this technique is a game-changer in the digital audio space.

The Essence of peak control

Digital Audio And The True Peak Concept

In addition, inter-sample peaks is a cornerstone in digital audio processing. It involves managing audio signals to prevent clipping, which is when audio exceeds the maximum level that digital systems can handle. As a result, this leads to distortion, a feared enemy of pristine sound. True Peaks relate to the highest level an audio signal reaches. Unlike average or RMS levels, true peaks can be elusive, spiking higher than what most meters show. Use true peak meters to ensure accurate readings.

Furthermore, bullet points with quick facts about Digital Audio and True Peaks

  • Additionally, Digital audio translates sounds into binary data.
  • Clipping happens when sound waves are too high for a system.
  • Also, the limiter ensures signals stay below the clipping point.

Why True Peak Limiting Is Crucial For Mastering

Moreover, Mastering is all about balance and consistency. However, it is the final step where tracks are polished to sound their best on any device. Peak control protects the integrity of audio. It prevents those unintentional spikes that can ruin listeners’ experience. For streaming platforms, inter-sample peaks is essential. These services often require specific loudness standards. An unchecked true peak can mean a track is turned down automatically, losing its competitive edge in loudness.

In addition, table with the relationship between true peaks and streaming platforms

Platform Required Loudness Standard Consequence of High True Peaks
Spotify -14 LUFS Volume Reduction
Apple Music -16 LUFS Quality Deterioration
YouTube -13 LUFS Normalization

Furthermore, in mastering, achieving audio that translates well across all systems is the target. Light touches of the limiter preserve dynamics while securing uniformity. Then, adopting a true peak limiter in the mastering chain is a non-negotiable for audio professionals who aim for excellence.


Additionally, anatomy Of A True Peak Limiter

The ‘Anatomy of a True Peak Limiter’ dives deep into the complex world of audio mastering. In short, within this realm, True Peak Limiters play a pivotal role in preserving sound quality. These limiters work by ensuring audio signals do not exceed a specified ceiling. A True Peak Limiter operates with precision, considering both the analog and digital peaks that can cause distortion.

Key Features And How They Affect Sound

Moreover, True Peak Limiters stand out with several key features:

  • In addition, inter-sample Peak Detection: It addresses peaks that occur between digital samples.
  • Furthermore, Oversampling: This feature helps to accurately monitor peaks that are not evident at a standard sample rate.
  • Additionally, advanced Algorithms: They ensure more natural limiting, reducing the risk of distortion.

Also, the impact on sound through these features is profound. Distortion becomes a rare incident, yet overall loudness is balanced. Dynamically, the audio remains true to the source while being tightly controlled.

Differences Between True Peak And Standard Limiters

True Peak Limiter Standard Limiter
Oversampling is a core mechanism. Lacks the advanced oversampling.
Targets both digital and analog peak levels. Primarily focused on digital sample peaks.
Higher computational requirements. Less demanding on computing power.

Moreover, True Peak Limiters offer enhanced protection against distortion across all devices. Similarly, their sophisticated approach ensures maximum fidelity. Standard limiters might miss certain peaks, making True Peak Limiters the safer bet for pristine audio.

Setting The Stage: Pre-limiting Considerations

In addition, getting your audio tracks ready for the final touch in sound mastering is crucial.
Also, this stage is about preparing your tracks for peak control .
Inter-sample peaks ensures your audio doesn’t clip and distort when played across various platforms.
Let’s dive into the steps to take before we apply limiting.

Assessing The Dynamic Range for True Peak Limiting

Furthermore, the dynamic range is the difference between the loudest and softest parts of your audio.
In addition, a wider dynamic range can mean a richer sound.
But too much can cause issues in the limiter .

Additionally, start by listening to your tracks.
For example, use a metering plugin to note down the dynamic range values .
This helps you understand how much limiting is needed.

Preparing Audio Material For True Peak Limiting

Before applying peak control, clean up your tracks.
As a result, look for unwanted noise and clicks.
Make sure to balance out the levels of your tracks so that the limiting can be even and effective.

  • Edit out noises and static.
  • Also, balance the volume levels of your sounds.
  • Check stereo imaging for consistency.
  • Moreover, use equalization to remove frequency clashes.
  • In addition, apply compression gently to even out levels.

True Peak Limiting: Mastering Audio Dynamics


Credit: www.plugin-alliance.com

Diving Into The Technical Side

Furthermore, as we delve into the technical nuances of inter-sample peaks, we uncover the mastery required to produce pristine audio. However, this journey into sound excellence ensures every beat hits with utmost clarity and volume control. It’s the kind of detail that separates the amateurs from the experts in the audio production world. Let’s explore the complexities that make up the unseen backbone of sound engineering.

Inter-sample Peaks And Oversampling

Additionally, inter-sample peaks are often the culprits behind distorted audio. These peaks occur between digital samples, causing unexpected clipping even when traditional meters show safe levels.

  • Also, inter-sample peaks evade standard peak meters.
  • Moreover, Oversampling predicts and reveals hidden peaks.

Through oversampling, we stretch out the audio signal, exposing these peaks. By simulating a higher sample rate, we can detect and tame these rogue waves, ensuring the audio stays true to the listener’s ear while protecting equipment from potential harm.

Audio Codecs And True Peak Detection Algorithms

Dealing with various audio codecs involves intricate considerations. Then, Compression algorithms can introduce peaks not originally in the music. True Peak Limiters anticipate this by analyzing how codecs will interact with the audio.

True Peak Detection Algorithms are the brains behind True Peak Limiters. They:

  1. Scan for potential peak issues.
  2. Operate with precision across multiple codecs.
  3. Prevent audio distortion for any format.

The algorithms work tirelessly. They ensure the final audio is polished, crisp, and free from unexpected spikes, regardless of the chosen format. In short, your music stands strong, true to its intended form, in any listening scenario.

Operational Techniques For True Peak Limiting


Operational Techniques for the limiter

Understanding peak control is crucial for anyone working with audio. Similarly, consider it as a toolset to ensure your audio does not clip or distort . Professional sounds depend on proper limiting techniques. Here’s a dive into the operational know-how.

Adjusting Threshold And Ceiling Parameters for True Peak Limiting

  • Threshold: The level where limiting begins. Set this wisely to manage loudness.
  • Ceiling: The maximum output level allowed. It prevents peaking above this point.

Adjust these parameters for a balance between loudness and dynamic range. Also, a lower threshold leads to more compression ; a higher one allows more dynamics . A lower ceiling ensures no peaking but can affect loudness. Find the sweet spot for your audio.

Release Time And Attack Settings Explained

Setting Function
Attack How quickly the limiter responds to peaks.
Release Time taken for the limiter to stop compressing after a peak.

Fast attack times help in catching peaks but can affect transients. Slow attack times preserve transients but might miss short peaks. In addition, a short release time can cause distortion. A longer one can reduce pumping and breathing effects.

Balance attack and release settings based on the audio content’s nature. This ensures smoothness while maintaining clarity. For example, quick attacks for percussive sounds , slower attacks for melodic content . Release times should complement the rhythm and pace of your audio.

The Impact Of True Peak Limiting On Playback

Understanding the role of inter-sample peaks in audio playback matters to creators and listeners alike.

Maintaining Consistency Across Playback Devices

The limiter is essential for sound that’s uniform. As a result, it ensures that audio levels remain constant no matter the device. Users can expect the same quality from earbuds, car speakers, or home theaters.

This feature avoids the frustration of constantly adjusting volume. However, listeners enjoy a smooth experience across different listening environments.

  • Smartphones: Preserves battery life by reducing the need for volume boosts.
  • Laptops: Provides clear audio during video calls and media playback.
  • Speakers: Delivers crisp sound at any volume.

Avoiding Distortion And Clipping In Various Formats

Distortion and clipping distort your audio. Then, they can ruin your listening experience. Peak control prevents these issues.

Audio formats like MP3, AAC or WAV need careful level management. In short, True Peak Limiters regulate peaks. They stop unwanted noise. This makes the audio clean and professional.

Format Without True Peak Limiting With True Peak Limiting
MP3 Potential for distortion Smooth playback
AAC Risk of clipping Clear, balanced output
WAV Uneven sound levels Consistent audio experience

True Peak Limiting In Different Genres

Inter-sample peaks in Different Genres is a crucial aspect of music production that ensures audio signals do not exceed a certain level. Similarly, this prevents distortion across various playback systems. Each genre demands a unique approach to the limiter. Whether it’s the hard-hitting bass of electronic music or the nuanced dynamics of an acoustic set, understanding how to adjust peak control techniques can make a world of difference.

Adapting Techniques For Electronic Vs. Acoustic Music

Electronic and acoustic music present different challenges for inter-sample peaks .

  • Electronic Music: Often characterized by synthesized sounds, it requires precise control to maintain energy without distortion.
  • Acoustic Music: Demands a softer touch to preserve the natural ebb and flow of live instruments.

It’s essential to adjust the limiter’s attack and release settings based on the genre.

Genre-specific Dynamics Management

Different genres have unique dynamic ranges that affect how true peak limiting is applied.

Genre Dynamic Range Limiter Settings
Classical Music Wide Transparent limiting
Rock Music Moderate Medium attack/release
Pop Music Narrow Aggressive limiting

Producers must fine-tune the limiters to respect the genre’s integrity while preventing clipping.

Advanced True Peak Limiting Strategies

Advanced True Peak Limiting Strategies

True peak limiting is essential in audio mastering. It prevents digital distortion. Also, it ensures the audio plays back perfectly on all platforms.

Serial Limiting for Enhanced Control

Serial Limiting For Enhanced Control

In addition, serial limiting involves using multiple limiters. It’s more precise than single-stage limiting. In addition, you can shape the sound subtly without over-compression.

  • Start with gentle ratio settings on the first limiter.
  • Apply a faster attack time on the next limiter for transients.
  • Adjust release times to avoid distortion and maintain energy.

Use several limiters with different settings. For example, each handles a part of the limiting process.

Combining Limiting with Other Dynamic Range Tools

Combining Limiting With Other Dynamic Range Tools

Limiting works well with other dynamic range tools. As a result, this technique brings out the best in audio tracks.

  1. Compression: Tame dynamics before the limiter.
  2. Expansion: Increase dynamic range after limiting.
  3. Transient shaping: Add punch or smoothness to the sound.
Tool Purpose Position in Signal Chain
Compressor Reduces dynamic range Before limiter
Expander Increases dynamic range After limiter
Transient Shaper Enhances or reduces transients Before or after limiter based on the desired effect

Integrate limiters with compressors and expanders for a full dynamic range treatment. However, add transient shapers for more precision.

Avoiding Common Pitfalls for True Peak Limiting

Avoiding Common Pitfalls in true peak limiting is vital. Then, producers strive for the perfect balance. Push too hard and audio loses its life. Go too easy and loudness suffers. Knowing the traps helps craft pristine sound.

Over-limiting And Loss Of Transients

Over-limiting can kill a track’s dynamic spirit. The result? In short, a flat and lifeless sound. Transients, or those tiny spikes in audio, provide punch and clarity. Overdo the limiting, and these sharp sounds vanish.

  • Keep an eye on your limiters’ gain reduction.
  • Watch for signs of over-compression, like muffled highs.
  • Use limiting carefully to preserve those peak moments.

Preserving transients means a lively mix. To keep them intact:

  1. Adjust attack and release times in your limiter.
  2. Target a conservative gain reduction amount.
  3. Check the true peak meter for any clipping.

Achieving Loudness Without Sacrificing Quality

Loudness is desired, but quality trumps all. Similarly, aim for a powerful mix that retains its crispness and depth. Distortion-free loudness is the goal.

Technique Benefit
Serial Compression Reduces the load on any single limiter.
True Peak Limiting Ensures no overshoots occur.
Dynamic EQ Preserves audio quality at different frequencies.

Using the right tools and techniques brings both worlds together. With careful adjustments:

  1. Apply multiple stages of limiting rather than one heavy-handed step.
  2. Tweak to taste while constantly monitoring the true peak levels.
  3. Choose limiters designed specifically for mastering, ensuring precision.

Crafting sound with both loudness and quality assures a stellar listening experience.

True Peak Limiting: Mastering Audio Dynamics


Credit: www.tcelectronic.com

Case Studies And Practical Examples

Exploring True Peak Limiting through compelling Case Studies and Practical Examples offers an insightful journey into the heart of audio perfection. Also, this section delves deep into how audio professionals deploy true peak limiting to master their sounds.

Real-world Applications In Mastering

Mastering is the final step in producing polished audio. In addition, True peak limiting plays a crucial role here. It ensures that audio does not distort when played back on different devices.

  • Music Production: Limiters control the peaks in a final mix, making songs loud without distortion.
  • Broadcasting: TV and radio use limiters to meet strict audio standards.
  • Streaming Services: True peak limiters optimize audio to prevent clipping across various platforms.

One case study highlighted a mastering engineer’s work on a hit album. For example, by applying true peak limiting, the engineer achieved a clean, consistent sound across all tracks.

Expert Insights And Tips From Industry Professionals

Industry veterans share their wisdom on true peak limiting.

  1. Always monitor true peak meters to detect inter-sample peaks.
  2. Use true peak limiting alongside other dynamics processing tools for best results.
  3. Remember to adjust attack and release settings based on the genre of music.

A professional mastering engineer suggests using a high-quality true peak limiter plugin. As a result, this plugin can detect and manage true peaks efficiently. Utilizing this tool, they were able to maintain dynamic range while preventing any possible distortion.

Problem Solution
Preventing Clipping in Digital Platforms Engaging True Peak Limiters
Maintaining Loudness Standards Adjusting Limiter Thresholds

Adhering to these methods ensures pristine audio output and industry-standard compliance. However, real-world examples reveal true peak limiting as an indispensable tool, shaping the future of sound across multiple platforms.

Future Of True Peak Limiting

The world of audio is evolving, and true peak limiting is at the forefront. Then, this process ensures audio signals do not exceed the digital maximum. It preserves quality across various devices. Let’s explore the exciting horizon for this crucial audio technology.

Technological Advances On The Horizon

The leaps in digital audio technology shape true peak limiting’s future. In short, cutting-edge software developments and smarter algorithms are incoming. They promise more accuracy and speed in audio processing. We foresee innovations including:

  • Adaptive threshold algorithms that respond to changing audio dynamics in real time.
  • Machine learning to predict and control peaks more effectively than ever before.
  • Increased integration with digital audio workstations (DAWs), enhancing workflow and efficiency.

Evolving Standards In Audio Production

Audio production values push for higher fidelity and better listener experiences. Similarly, the standards that guide audio production must evolve. True peak limiting plays a vital role in this advancement. Key focus areas include:

  1. Consistent loudness normalization across all streaming platforms, crucial for listener satisfaction.
  2. Compliance with international broadcast standards, such as ITU-R BS.1770, ensuring global audio quality consistency.
  3. Incorporating true peak measurement and limiting into the early stages of audio design, emphasizing its importance.

Frequently Asked Questions Of True Peak Limiting

What Is True Peak Limiting?

True Peak Limiting is a process used in audio mastering. Also, it ensures that the audio signal’s peak levels do not exceed a specified threshold. This maintains audio quality and prevents distortion.

Why Is True Peak Limiting Important?

True Peak Limiting is crucial for preventing digital clipping. In addition, it preserves audio integrity across various playback systems. It is essential for broadcast standards compliance.

How Does True Peak Limiting Work?

True Peak Limiting works by analyzing and processing the audio signal. It reduces peaks that could cause distortion while maintaining the overall loudness.

Can True Peak Limiting Affect Sound Quality?

When applied correctly, True Peak Limiting does not affect sound quality. It controls peaks while preserving the original audio characteristics.

Conclusion

Mastering true peak limiting is essential in the audio production process. For example, it ensures your tracks maintain pristine quality across all platforms. Remember, the right limiter and settings make all the difference. Embrace these techniques to elevate your sound to professional heights.


Let your audio stand out, loud and clear.

Categories
Archive

Best USB C Audio Interfaces: Top Picks for 2023!

The Focusrite Scarlett Solo and Universal Audio Apollo Twin X are leading USB-C audio interfaces. These devices offer high-quality audio conversion and minimal latency for professional recording.

As an Amazon Associate I earn from qualifying purchases.


In the quest for the perfect home recording setup, a USB-C audio interface is a must-have for music producers and audio engineers. It serves as the bridge between your microphone or instrument and your computer, ensuring that the sound you capture is crisp, clear, and true to the source.


While the Focusrite Scarlett Solo is renowned for its affordability and excellent preamps, the Universal Audio Apollo Twin X is praised for its real-time UAD processing and elite-class converters. Both interfaces connect seamlessly via USB-C, which provides faster data transfer rates and a more stable connection than traditional USB-A ports. Whether you’re a seasoned producer or an aspiring podcaster, selecting a USB-C audio interface equipped with the right features can elevate your audio production to professional standards.

Best USB C Audio Interfaces: Top Picks for 2023!


Credit: www.nytimes.com

Introduction To Usb C Audio Interfaces

Introduction to USB C Audio Interfaces unlocks a new era for music creators. The emergence of USB C audio interfaces brings faster data transfer rates and a reversible connection, simplifying studio setups and recordings. Gone are the days of USB-A’s limited data bandwidth and awkward plug orientations. USB C delivers more power, enabling robust interfaces with enhanced capabilities.

The Shift To Usb C

USB Type-C is the latest evolution in audio interface connectivity. This shift from older USB types is significant. USB C’s design allows for a symmetrical, flippable plug, removing the guesswork from connections. Speed, power delivery, and convenience have all seen substantial improvements with USB C interfaces.

  • High-speed data transfer for zero-latency recording
  • Increased power output supports more device charging options
  • Reversible plug for a frustration-free experience

Why Musicians Are Upgrading

Musicians and producers strive for the best sound quality and reliability. Upgrading to a USB C audio interface ensures they’re not left behind. Enhanced data rates mean crisper audio reproduction and seamless multi-track recording. With better power handling, users can power more devices, such as MIDI controllers, without extra power supplies.

Benefits of USB C Impact on Musicians
Faster Data Transfer Reduced latency
Better Power Delivery More devices, one interface
Reversible Design Easy connectivity

Factors To Consider When Choosing An Audio Interface

Choosing the right USB C audio interface can be a game-changer for your recording sessions. Whether you’re a musician, podcaster, or producer, the interface you pick impacts the sound quality and ease of use. Consider these vital aspects to find the perfect match for your audio needs.

Connectivity And Compatibility

Before anything else, confirm your device’s compatibility with the audio interface. A USB C port is a must for modern connectivity, but also check for driver support for your operating system. Compatibility ensures a seamless integration with your existing setup.

  • USB C port: Faster data transfer and easier connection
  • OS compatibility: Must work with your Windows, Mac, or Linux system
  • Additional ports: Look for extra inputs/outputs if needed

Latency Issues

Latency can interrupt the creative flow. Opt for interfaces that boast low latency performances. This ensures real-time audio playback and recording without the lag that can disrupt your work.

Feature Benefit
Direct Monitoring Instantaneous audio feedback
Low Buffer Sizes Reduced delay in audio processing

Audio Quality And Preamps

The core of any great audio interface is its sound quality and preamps. Look for units with high-resolution converters and pristine preamps. These components ensure that your recordings capture every nuance of the performance.

  • 24-bit converters: Capture detailed audio recordings
  • High-quality preamps: Provide clean gain without noise

Software Bundles And Extras

Many interfaces come with software packages that add value. These can include digital audio workstations (DAW), plug-ins, and virtual instruments. Extras like these can help jump-start your production capabilities.

  1. DAW compatibility: Should integrate well with your preferred DAW
  2. Included software: Extra tools and effects are a bonus

Compact And Portable Interfaces For Mobile Producers

Mobile producers need the best tools for their on-the-go studios. Compact and portable USB C audio interfaces fit the bill. These devices pack high-quality recording into small packages. Perfect for musicians, podcasters, and producers making music anywhere.

Top Picks For On-the-go Recording

Bold sound quality meets portability. Here are some top USB C audio interfaces:

  • Apollo Twin MkII – Perfect for tight spaces, top-notch converters power your recordings.
  • Focusrite Scarlett 2i2 – Well known for its solid preamps, plugs directly into your laptop.
  • Zoom U-44 – A swiss army knife for audio, flexible connectivity keeps you ever-ready.

Size Vs. Functionality

Choose the right interface. Think about size and what you need it to do.

Interface Size Main Features
Audient iD4 Compact High-performing preamp, durable metal build
TASCAM US-4x4HR Medium Four inputs/outputs, ideal for multitrack recording
PreSonus Studio 24c Portable Amazing software suite, creates quality soundscapes

All contenders offer something unique. Smaller interfaces carry fewer inputs but simplify your setup. Larger models give more flexibility.

Mobile producers, say goodbye to limits. Great sound can come from small interfaces. Keep creating amazing music, anywhere and everywhere!

Best USB C Audio Interfaces: Top Picks for 2023!


Credit: www.gearank.com

High-end Options For Studio Quality Recording

For those seeking studio-grade sound, high-end USB-C audio interfaces transform recording experiences. They bridge the gap between amateur and pro-level setups, offering unbeatable audio quality. Let’s explore some top-tier features and why they’re worth the investment.

Premium Features Explained

  • High Fidelity Preamps: Capture every nuance with clear, low-noise amplification.
  • High-Resolution Audio: Record and playback at professional bit depths and sample rates.
  • Multiple Inputs/Outputs: Connect a variety of mics, instruments, and outboard gear.
  • Robust Build Quality: Durable construction ensures consistent performance.
  • Latency-Free Monitoring: Hear your performance in real-time without delay.
  • Advanced Connectivity: USB-C offers fast, reliable connections to modern devices.

Investment In Your Sound

Investing in a high-end USB-C audio interface is a game-changer for any studio. It means:

  • Crisp Recordings: Your music will shine with pristine audio clarity.
  • Long-Term Reliability: Top-quality gear stands the test of time.
  • Enhanced Workflow: Features that speed up the recording process save time.

These interfaces are not just about specs; they’re about uplifting your sound to professional realms.

Budget-friendly Choices For Beginners

Starting your audio journey doesn’t mean breaking the bank. Budget-friendly options are widely available and can deliver professional results. Whether you’re a podcast rookie, an aspiring music producer, or just need a reliable interface for your home setup, economical choices abound. Let’s explore what makes an audio interface both affordable and quality-rich for those just starting out.

Affordable Quality

Not all low-cost USB-C audio interfaces are made equal. Seek out devices that offer crisp preamps, phantom power for microphones, and direct monitoring. Look for a solid build that can handle regular use. Driver stability is key for seamless recording sessions. Here are some top picks that don’t skimp on quality:

  • Focusrite Scarlett Solo: Renowned for its high-quality preamps and sturdy design.
  • Behringer U-PHORIA UM2: Offers great value with essential features for starters.
  • PreSonus AudioBox USB 96: Known for its excellent sound clarity and ease of use.

Limitations To Consider

While the price might be right, there are certain trade-offs. Beginners need to understand the limitations. Lower-cost interfaces might feature fewer inputs/outputs. This limits the number of instruments that can be recorded simultaneously. Conversion quality is not always on par with professional units. This affects the audio’s final sound. Users may also experience limited software bundles, hindering the range of production tools available.

Feature Pros Cons
Inputs/Outputs Sufficient for solo artists Restrictive for large projects
Conversion Quality Adequate for beginners Lesser than high-end devices
Software Bundle Basic tools included Advanced features may be missing

Selecting a budget-friendly USB-C audio interface is a smart move for beginners. Balance affordability with functional requirements to kickstart your audio adventures!

Best USB C Audio Interfaces: Top Picks for 2023!


Credit: emastered.com

Expert Reviews On 2023 Top Contenders

Let’s dive deep into the realm of 2023 Top Contenders in USB-C audio interfaces. Musicians and podcasters, prepare for professional-grade sound quality and lightning-fast data transfer rates with these expert-reviewed devices.

Professional Insights

Specialists have tested these interfaces. Here are their thoughts:

  • Preamp Quality: Pristine audio with ample gain.
  • Latency: Reported as near-zero for seamless recording.
  • Build: Rugged yet portable for studio and on-the-go.
  • Software Compatibility: Smooth with popular Digital Audio Workstations (DAWs).

Comparative Analysis

Each interface brings unique features. Compare them in this table:

Interface Input/Output Preamps Dynamic Range Price Range
Interface A 4/4 Top-tier High $$$
Interface B 2/2 Quality Medium $$
Interface C 8/8 High-end Very High $$$$

Compatibility With Various Operating Systems

An audio interface bridges your instruments and computer, turning analog sound into digital data. USB-C audio interfaces offer fast data transfer. But they must work well with your operating system. So, let’s dive into which interfaces play nice with Windows, Mac, and Linux.

Windows Compatibility

Windows users often have a diverse range of USB-C audio interfaces. Many brands offer seamless integration with Windows 10 and above. Noteworthy interfaces include the Focusrite Scarlett series and the PreSonus Studio range. Always check the product specifications for confirmed compatibility.

Mac Affinity

USB-C is the standard for Macs, especially on newer models. Interfaces like the Universal Audio Apollo Twin and the MOTU M2 are designed with Mac users in mind. They usually support macOS X and newer. Plug-and-play is typically expected, with minimal setup.

Linux Showdown

Linux may require more research. However, interfaces such as the Behringer U-Phoria and the Native Instruments Komplete Audio offer Linux support. Speak to the manufacturer or check online forums for guidance. Compatibility can vary by distribution and kernel version.

Drivers And Firmware Updates

Most modern interfaces are class-compliant, but some may need specific drivers. Brands like Roland and Yamaha often provide easy-to-install drivers. Firmware updates keep your interface running smoothly. It’s important to regularly check the manufacturer’s website for updates.

Here is a table for quick reference on system compatibility:

System Compatibility
Windows 10+
Mac OS X+
Linux Varies

Usb C Audio Interface Accessories To Consider

When building a dream audio studio, choosing the right USB C audio interface is just the start. The accessories you pair with it can make a huge difference. Excellent cables and adapters, and a few key upgrades, can elevate your audio experience. Let’s look at some must-have extras!

Essential Cables And Adapters

Apart from the audio interface itself, cables and adapters play a pivotal role in maintaining a high-quality signal flow. Ensure you invest in premium cables that match your interface’s capabilities for the best sound.

  • USB-C to USB-C: Connects your interface to computers with a USB-C port.
  • USB-C to USB-A: Useful for linking to older computers.
  • MIDI cables: If your interface has MIDI I/O, you’ll need these.
  • XLR cables: Essential for microphones.
  • TRS cables: For studio monitors.

In case your setup includes devices with different port types, here’s when adapters come in handy. They bridge the gap between your gear and interface seamlessly.

Upgrading Your Studio Setup

Your audio interface is the heart of your setup, but let’s pump up the volume with some upgrades. Investing in a few strategic pieces can transform your sound.

  1. Quality Studio Monitors: Hear the clarity of your mixes.
  2. Headphone Amplifier: Drive multiple sets of headphones effortlessly.
  3. Acoustic Treatment: Control your room’s acoustics for accurate monitoring.
  4. Microphone Stands and Isolation Shields: Capture clean audio recordings.

Picking the right accessories ensures your USB C audio interface operates at its peak. Embrace these upgrades and notice the difference in your audio production.

Customer Feedback On Latest Models

Latest USB-C audio interfaces have taken the market by storm.
Users from home studios to professional productions have been giving their honest opinions.
Let’s dive into what they are saying about the newest models.

Real User Experiences

Real User Experiences

The proof is in the pudding, as they say, and real user experiences are as real as it gets.
People have shared their thoughts and they’re not holding back.

  • “Amazing clarity!” – Multiple users have praised the crisp sound quality.
  • “Low latency” is a recurring complement, critical for live monitoring.
  • “Compact and sturdy,” say users who appreciate the portability and build.

Community Recommendations

Community Recommendations

Recommendations can make or break a product.
The community has spoken.
Their guidance helps others decide.

Interface Model Pros Cons Verdict
Model A Portable, user-friendly Lacks advanced features Great for beginners
Model B High-quality preamps Pricier than others Worth the investment
Model C Extensive I/O options Requires external power Best for studios

Future Of Audio Production Technology

The future of audio production technology is rapidly evolving with the introduction of USB C audio interfaces. These sleek, powerful devices promise to revolutionize how professionals and hobbyists alike create and consume audio. With breakneck data transfer speeds and improved connectivity, USB C audio interfaces are setting the stage for a new era in audio production.

Upcoming Trends

USB C is fast becoming the standard in audio interface technology. Its versatility allows for multiple connections with a single cable, simplifying studio setups. Future trends indicate:

  • High-resolution audio support for the most exact sound.
  • Mobile compatibility for on-the-go production.
  • Increased plug-and-play functionality, making devices easier to use.
  • Integration with virtual reality and 3D audio, for immersive experiences.

What’s Next For Usb C Interfaces

The horizon for USB C interfaces is brimming with possibilities. Expect to see:

  1. More compact designs that don’t skimp on power.
  2. Wireless capabilities that untether producers from the studio.
  3. Enhanced durability for interfaces that stand the test of time.
  4. Seamless integration with DAW and software updates, ensuring interfaces remain cutting-edge.

USB C audio interfaces are poised to become the backbone of modern studios.

Frequently Asked Questions For Best Usb C Audio Interfaces

What Are Usb-c Audio Interfaces Used For?

USB-C audio interfaces connect microphones and instruments to computers with a USB-C port. They are essential for high-quality audio recording and production, offering improved speed and connectivity compared to older USB versions.

How Do Usb-c Audio Interfaces Improve Recording Quality?

USB-C audio interfaces often have lower latency and faster data transfer rates. This means clearer, more precise recordings with minimal delay, enhancing overall sound quality and production performance.

Can Usb-c Audio Interfaces Charge Devices?

Many USB-C audio interfaces can charge connected devices. This feature provides power to laptops or tablets during lengthy recording sessions, ensuring uninterrupted work and productivity.

Are Usb-c Audio Interfaces Compatible With All Daws?

Most USB-C audio interfaces are designed to be compatible with a wide range of digital audio workstations (DAWs). Always check compatibility with your specific DAW to ensure seamless integration.

Conclusion

Navigating the sea of USB-C audio interfaces can be daunting. Yet, the right choice elevates any audio setup. We’ve highlighted the best options, ensuring you find a match for your sonic needs. Remember, your creative endeavors deserve quality sound. Choose wisely and enhance your audio journey.