Categories
Archive

From Bedroom To Studio How To Improve Your Production Quality On A Budget

As an Amazon Associate I earn from qualifying purchases.

If you want to improve your production quality on a budget, start by investing in good quality studio monitors and headphones. From there, experiment with room treatment and strategically upgrade your gear as needed.


As an aspiring home studio producer, it can be challenging to find the perfect balance between creating a professional sound while working within a tight budget. With so many gear options available, it’s difficult to know where to begin the journey of upgrading your home studio.


However, by investing in a few key items and adopting some basic techniques, you can drastically improve the quality of your productions. This article will provide you with some practical tips on how to improve your production quality on a budget, starting with the essentials and working towards more advanced upgrades.


Start With The Basics

If you’re an aspiring music producer, you might feel limited by your bedroom setup when it comes to creating professional-sounding tracks. However, with the right tools and techniques, you can improve your production quality without breaking the bank.

Invest In A Good Computer

A good computer is the backbone of any music production setup. Be sure to invest in a computer that has enough processing power, memory, and storage to handle the demands of digital audio workstations (DAWs). Look for a computer with at least 8GB of RAM, a multicore processor, and a solid-state drive (SSD).

Get A Quality Audio Interface

Investing in a quality audio interface is crucial to ensure that you capture high-quality recordings. Audio interfaces convert analog audio signals into digital data, which can be used by your computer. Look for an interface that has high-quality preamps and analog-to-digital converters (ADCs) to capture clean, accurate recordings.

Select The Right Digital Audio Workstation (daw)

Choosing the right DAW is crucial for any music producer. There are dozens of DAWs on the market, each with its own strengths and weaknesses. Look for a DAW that suits your workflow and has the features you need. Popular DAWs for beginners include Ableton Live, FL Studio, and Logic Pro.

By starting with the basics—having a good computer, a quality audio interface, and the right DAW—you can improve your production quality without spending a lot of money. With dedication and practice, you can create professional-sounding tracks from the comfort of your own home.

Optimize Your Studio Setup


Transform your music production results from a decent bedroom setup to a professional studio on a budget. Elevate your production quality by optimizing your recording environment and using top-quality equipment.

Optimizing your studio setup is one of the most important steps in improving your production quality. The ideal studio setup will make a world of difference in your productions, regardless of whether you are working within strict budgetary constraints or have unlimited funds. With some smart investments, you can turn your bedroom production setup into a professional recording studio.

Take Care Of Your Room Acoustics

Clean, unobstructed sound is fundamental to producing high-quality recordings. And to achieve that, you must consider the acoustics of your studio space. Sound waves reflect off walls and other surfaces, and if your studio has a ton of concrete walls or exposed wood, you may end up with a distorted audio quality. There are several ways you can treat the acoustics of your studio room without breaking the bank. Here are some recommendations: – Make use of sound-absorbing panels or bass traps to reduce reverb. – Consider diffusers, which scatter sound waves and reduce the impact of standing waves. – Reduce noise reflections by positioning your speakers at an angle to your workspace.

Get Proper Studio Monitors And Headphones

The advantages of having decent-sounding headphones can’t be overstated. The right headphones or monitors will assist you in fine-tuning your mixes and identifying errors that you may not have heard before. Investing in headphones that deliver balanced and genuine sound can be a game-changer. Here are some recommendations for studio monitors and headphones: – Invest in flat-response studio monitors to get an accurate representation of your tracks. – Opt for over-the-ear headphones that provide excellent noise isolation and driver for more bass. – Choose open-back headphones if you need to mix while still being conscious of the outside world.

Add Affordable Accessories For Better Comfort

One reason why you might be struggling to stick with long recording sessions is discomfort. It might be a sore back, neck problem, or just plain old headphone-fatigue that drives you to go away from your studio setup. You need to ensure that your workspace is comfortable and ergonomic enough, so you can focus on being productive. Here are some recommendations for affordable accessories that can enhance your comfort: – Proper studio chair that doesn’t hurt your back – Armrests for your chair and/or desk – A stand for your laptop or monitor that raises the screen to your eye level. – Wrist pads or ergonomic mouse pads to reduce discomfort while working with a mouse for extended periods of time. In conclusion, optimizing your studio setup is key to getting the best out of your production quality. Take care of acoustics, invest in proper monitors and headphones, and add accessories for better comfort to ensure that you’re not only producing high-quality music but also doing it comfortably.


Master The Techniques

Mastering the techniques of music production is one of the most important steps to improving your production quality on a budget. By learning the basics and implementing them through practice sessions, you can take your music production skills to the next level.

Learn The Fundamentals Of Music Production

First and foremost, it’s important to learn the basics of music production. This includes understanding different software programs and how to use them to create different sounds and effects. You can start by researching online or checking out books on the subject to get you started.

Find Online Tutorials Or Enroll In Affordable Courses

Another great way to master music production techniques is to find online tutorials or enroll in affordable courses. Many online platforms offer comprehensive courses on various aspects of music production, including sound design, mixing, and mastering. You can also find plenty of free resources on YouTube and other websites.

Implement What You Learn Through Practice Sessions

Lastly, once you’ve learned the fundamentals and studied up on all the latest techniques, it’s time to apply what you’ve learned. Set aside time for regular practice sessions, experiment with different techniques, and push yourself out of your comfort zone. The more you practice, the more comfortable you’ll become with your tools and the more confident you’ll be in your abilities.

By mastering the techniques of music production, you can take significant strides in improving your production quality, even on a tight budget. Start with the basics, seek out additional resources, and dedicate yourself to regular practice sessions. With time and patience, you’ll be amazed by how far you can progress.

Focus On The Quality


By focusing on the quality of your production equipment and techniques, you can improve the overall sound of your music without breaking the bank. With a little research and effort, it’s possible to upgrade your home studio and take your music to the next level.

Pay Attention To Sound Design And Arrangement

Quality matters when it comes to music production. You may have the skills to create great melodies and beats, but if you don’t pay attention to the sound design and arrangement, your music may lack the professional touch. Therefore, it is important to focus on your sound design, ensuring each element of your track sounds great individually and as a whole. Make sure that your sound arrangement is coherent and produces a musical flow that keeps the listener engaged.

Learn How To Properly Eq And Mix Your Tracks

As you progress further into music production, you need to understand how to EQ and mix your tracks correctly. The mixing process enables you to balance different elements of your track so that they all sound in harmony. EQing, on the other hand, allows you to shape the tonal balance and sound of your elements. It enables you to ensure that every element of your track meets the industry’s standard. Therefore, take time to learn how to apply EQ and mix your tracks professionally. This will enhance your sound and establish your music in a professional manner.

Master The Art Of Mastering For A Professional Sound

To produce a professional sound, it is essential to master the art of mastering. Mastering your tracks enables you to add the final touch to your music, ensuring that everything sounds balanced, polished, and mastered to industry standards. By doing this, your music receives the extra shine which makes it stand out and able to compete in today’s industry. Therefore mastering is essential to the final piece of quality music. Make sure that you finalize every track with a professional mastering engineer to achieve your desired quality. In conclusion, ensuring quality in your music production process is attainable. Stick to the H3 headings mentioned in this article. Focus on your sound design and arrangement. Learn how to properly EQ and mix your tracks. Finally, master the art of mastering for a professional sound. Apply these tips to your production process, and you will start to notice an improved quality of your music.

Collaborate With Others In The Industry


Collaborating with others in the music industry is a great way to improve your production quality on a budget. You can work with other producers, engineers, or artists to share knowledge and skills and enhance the production. This will enable you to learn new techniques and get feedback on your work, helping you to advance your skills and improve your overall production quality.

Join Music Production Groups On Social Media

Collaborating with others in the industry can be beneficial in many ways. One of the most effective ways to connect with like-minded music producers and artists is joining music production groups on social media. These groups are the perfect platform to share your work, ask for feedback, and collaborate on projects with other music producers and artists. Being a part of these groups can open up opportunities to share ideas, learn new techniques, and connect with others who share your passion for music production. Additionally, you can explore new genres, styles, and sounds by interacting with other music producers and artists from around the world.

Attend Local Music Production Meetups And Workshops

Attending local music production meetups and workshops is another fantastic way to connect with other producers and artists and improve your production quality on a budget. These meetups and workshops allow you to learn new production techniques and connect with other music creators in person. Local meetups and workshops often feature industry experts who can guide you on the latest music production trends and answer your questions. Moreover, you can find potential collaborators and explore various opportunities in the local music industry.

Connect With Other Producers And Artists For Feedback

Connecting with other producers and artists for feedback is an excellent way to improve your production quality and enhance your skills. Building a network of trusted peers and mentors who can provide constructive criticism is crucial to growing as a music producer. Feedback from other producers and artists can help you identify areas of improvement and develop a better understanding of industry trends. Additionally, you can exchange ideas, collaborate on projects, and learn new production techniques from others in the community. In conclusion, collaborating with others in the industry can have a profound impact on your music production quality. Joining music production groups on social media, attending local music production meetups and workshops, and connecting with other producers and artists for feedback are three practical ways you can improve your production quality on a budget.

Find Affordable Resources


Improve your production quality without breaking the bank by finding affordable resources! From setting up a home studio to investing in budget-friendly equipment, there are many ways to enhance the audio and visual elements of your content.

Take Advantage Of Free Plugins And Sound Libraries

By using free plugins and sound libraries, you can enhance the quality of your production without spending a dime. Some of the most popular free plugins include TAL-NoiseMaker, Spitfish, and Noise Gate. These plugins offer various features such as EQ controls, compression, and noise reduction. In addition, there are numerous free sound libraries available online, including sounds from nature, instruments, and even synthesized sounds. By taking advantage of these resources, you can add more depth and dimension to your music without breaking the bank.

Invest In Affordable Gear That Still Delivers Quality

When it comes to buying new gear, it can be tempting to go for the most expensive option. However, there are many affordable options available that still deliver high-quality sound. For example, the Audio-Technica AT2050 microphone is an affordable option that offers a clear and natural sound. The Presonus AudioBox USB 96 is another great option for those on a budget, as it offers high-quality recording capabilities and is easy to use. With a little bit of research, you can find affordable gear that will take your production quality to the next level.

Look For Open-source Software Alternatives For Budget

When it comes to software, open-source alternatives can be a fantastic option for those on a budget. Some of the most popular open-source software for music production includes LMMS, Audacity, and Ardour. These programs offer features such as multitrack recording, MIDI support, and a range of effects and plugins. By using open-source software, you can save a significant amount of money without sacrificing quality. Plus, these programs are often updated regularly, so you can be sure you’re using the most up-to-date software available.

Get Creative With Sampling

If you are looking to improve your production quality on a budget, sampling is an excellent place to start. Sampling is the process of taking a small section of a sound or piece of music and using it in a new context, allowing producers to create unique and interesting sounds without the need for expensive instruments or equipment.

Experiment With Field Recordings And Found Sounds

One way to get creative with sampling is to experiment with field recordings and found sounds. Field recordings are sounds recorded in the outside world, like street noise, bird song, or natural environments. Found sounds are non-musical objects, like a slamming door or a tapping pencil, that can be recorded and manipulated to create unique percussive sounds.

By including these kinds of sounds in your productions, you can create a sense of realism and authenticity that can be challenging to produce artificially. You can record these sounds using a simple microphone or even your phone, then use audio editing software to manipulate and mix them with other sounds.

Use Free Samples And Recorded Instrument Libraries

Another way to get creative with sampling is to use free samples and recorded instrument libraries. Many websites offer free samples and instrument libraries that can be downloaded and added to your productions. These samples can range from simple drum hits to complex synth sounds, allowing producers to add a wide range of sounds to their productions without the need for expensive equipment or software.

Some popular websites for free samples include Samplephonics, Freesound, and Musicradar. In addition to free samples, many companies offer recorded instrument libraries that can be downloaded and used in productions. These libraries can range from orchestral instruments to synthesizers and can add a level of depth and complexity to your productions.

Manipulate Samples Creatively To Make Unique Sounds

Once you have your samples, the key to creating unique sounds is to manipulate them creatively. This can involve pitch-shifting, time-stretching, or applying various effects to the sample to create something entirely new. By manipulating the sample, you can create something that is unique to your sound, and not just a copy of an existing sound.

One example of creative sample manipulation is the use of granular synthesis, where a small section of audio is broken down into tiny grains and re-ordered to create a unique sound. Other effects like reverb or delay can be used to create space and interest in a sound, while filters and EQ’s can be used to clean up or mangle the sound as needed.

In conclusion, by getting creative with sampling, you can create unique and interesting sounds that can improve the overall quality of your productions. Whether you are experimenting with field recordings, using free samples, or creatively manipulating your samples, there are many ways to incorporate sampling into your productions without breaking the budget.


Stay Motivated And Inspired

Music is more than just a hobby for many people. It’s a passion and a career that requires a lot of hard work. If you want to take your music production output to the next level, one of the most important things is to stay motivated and inspired.

Set Realistic Goals For Your Music Production Career

One way to stay motivated is to set realistic goals for yourself. Establishing concrete goals will help you keep track of your progress and give you a sense of purpose. Make sure your goals are achievable and specific. Start by breaking up a large goal into smaller, actionable steps that you can work on every day. For example, if you aim to release a track in six months, break down the production process into smaller tasks such as creating a melody, adding bass, mixing, etc. Keep track of your progress and acknowledge each small achievement.

Find Inspiration From Other Artists And Genres

Another great way to stay motivated and inspired is to seek out inspiration from other artists and genres. Listen to different kinds of music, go to live shows, and watch interviews with musicians that you admire. Learning about different genres and techniques will give you new ideas and fresh perspectives on your own music production. You don’t have to copy what other artists are doing, but allow yourself to be inspired by them.

Take Breaks And Step Away From Your Studio When Needed

Your work should energize you and not exhaust you. It’s essential to take breaks and step away from your studio when you need it. There’s no shame in taking a day off or weekend to recharge your batteries. Make sure you’re not overworking yourself, which could lead to burnout, anxiety or depression. Instead, allow yourself to recharge by engaging in other creative pursuits or hobbies. When you come back to your studio, you’ll be rejuvenated, focused and ready to create your music masterpieces.

By setting realistic music production goals, finding inspiration from other artists and genres, and taking breaks when needed, you will be able to stay motivated and inspired to create your best music. Remember to be kind to yourself and enjoy the journey!

From Bedroom To Studio How To Improve Your Production Quality On A Budget


Credit: www.levelsmusicproduction.com


Frequently Asked Questions On From Bedroom To Studio How To Improve Your Production Quality On A Budget


How To Make A Studio At Home Cheap?


To make a cheap studio at home, you should start with a corner of a room or a small space, pick up some basic equipment, such as a microphone, a webcam, and a computer, and install some software for audio and video editing.


You can also improve the acoustics with blankets and pillows, or create a DIY background set if needed.


How Do I Turn My Room Into A Music Studio?


To turn your room into a music studio, start by clearing out all unnecessary items. Invest in soundproofing materials and quality speakers. Buy or rent musical instruments and recording equipment that fit your budget and needs. Consider hiring a professional to help you design the layout and workflow of your studio.


Experiment and make tweaks until you achieve the desired sound quality.


How Can I Make My Home Studio Better?


To make your home studio better, start by choosing a quiet room with good acoustics and invest in quality equipment. Optimize your space by arranging furniture, adding sound-absorbing materials, and creating a comfortable atmosphere. Lastly, don’t forget to experiment with different positions and settings to find what works best for you.


How Do I Turn My Room Into A Studio Apartment?


To turn your room into a studio apartment, you need to declutter and organize your space. Invest in furniture with storage and multi-functional pieces. Use room dividers to create separate living areas. Make use of vertical space by installing shelves and wall-mounted storage units.


Finally, add lighting and décor to enhance the ambiance of your new studio.


Conclusion


Upgrading your studio equipment isn’t necessarily the secret to producing music of great quality. You can still take steps to optimize your recording space, mixing skills, and techniques to enhance your sound. With the techniques discussed in this blog post, you can efficiently transition your bedroom to a studio for improving your production quality on a budget.


Always remember that quality music doesn’t always have to burn a hole in your pocket. Start implementing these steps and create music that truly represents your artistry without breaking the bank.
Categories
Archive

How To Reduce Resonances In Vocals Synths Percussion And A Full Mix

To reduce resonances in vocals, synths, percussion and a full mix, use an equalizer to identify and minimize the problem frequencies. This technique is commonly known as EQing, a process that can significantly improve the quality of your audio output.


EQing involves reducing the amplitude of unwanted frequencies in a mix while enhancing the desired frequencies, resulting in a more polished and balanced sound. Reducing resonances in vocals, synths, percussion, and a full mix may seem daunting, especially for beginner sound engineers.


However, the use of EQing is a practical and effective solution to this problem. By identifying and attenuating unwanted frequencies, one can improve the overall quality of a mix while maintaining its tonal balance. We will discuss the basics of EQing and provide some tips and guidelines for reducing resonances in vocals, synths, percussion and a full mix.


Identifying Resonances In Vocals


Reducing resonances in vocals, synths, percussion, and a full mix can improve the overall sound quality of a track. By identifying the frequencies that cause these resonances and using equalization to attenuate them, you can achieve a more balanced and polished mix.


Remember to use your ears, not just your eyes, and make subtle adjustments to avoid compromising the natural sound of the instruments.

Resonances in vocals can be identified by listening closely and identifying any unwanted tones or frequencies that stick out. They can often be heard as harshness or nasal sounds in the vocal recording. Fortunately, you can use techniques to reduce or eliminate these resonances and improve the overall sound of your vocals.

Using Narrow Eq Cuts

Narrow EQ cuts can be an effective way to reduce resonances in vocals. By using a precise EQ, you can isolate and remove the offending frequencies. Start by identifying the frequency that needs to be reduced and make a narrow cut using a parametric EQ. Be careful not to cut too much as this can negatively affect the overall sound of the vocal.

Applying Dynamic Eq To Tame Resonances

Dynamic EQ is another effective tool that can be used to tame resonances in vocals. This EQ allows you to target specific frequencies with precision and also limit the amount of reduction applied. The dynamic EQ responds in real-time, making it ideal for situations where certain frequencies may only need to be reduced during certain parts of a vocal recording. In conclusion, identifying and reducing resonances in vocals is an important step in achieving a high-quality vocal recording. Using techniques such as narrow EQ cuts and dynamic EQ can help to improve the overall sound of the recording and make it more pleasant to listen to. Try out these techniques in your own recordings to see the positive impact they can have on your vocals.

How To Reduce Resonances In Vocals Synths Percussion And A Full Mix


Credit: www.adsrsounds.com


Reducing Resonances In Synths


Reducing resonances in synths is crucial to achieving a well-balanced sound in your vocals, percussion, and the full mix. You can use a combination of EQ, compression, and sound absorption techniques to tame any unwanted frequencies and create a polished, professional-sounding track.

Reducing Resonances in Synths Synths are electronic musical instruments that generate sound automatically, but on occasions, they produce unwanted resonances. Reducing these unwanted frequencies or resonances requires specific techniques designed to remove them without affecting the overall sound of the synths. Here are some go-to techniques to remove resonances in synths: Surgical EQ to Target Resonant Frequencies One of the most efficient methods of removing resonances in synths involves using a surgical equalizer. A surgical EQ targets the exact frequency range that has a resonance and reduces it while leaving the rest of the sound unaffected. It is a powerful tool that enables you to pinpoint the problematic frequency area and remove any possible resonances. To effectively use a surgical EQ, follow these steps: 1. Load the result of your synth recorded in the audio editor. 2. Insert a surgical EQ plugin into the synth channel. 3. Identify the problematic frequency range by enabling the bandpass filter and sweeping the frequencies (in case you’re not sure). 4. Set the band gain control to reduce the identified resonant frequency range. 5. Disable the bandpass filter and listen to the synth again. Using Frequency Shifters or Pitch Modulation to Reduce Resonance If your synth still has some resonances, frequency shifters and pitch modulation techniques come in handy. You can use these to tweak the resonance area in such a way that its frequency is shifted out of the audible range or pitch-modulated so that it fits harmoniously with the overall sound. Here are the steps: 1. Load the synth recording into your audio editor. 2. Insert a frequency shifter/plugin or pitch modulation plugin on the synth channel. 3. Shift the frequency range of the problematic part of the sound up or down to a range outside the audible range. 4. Or, use pitch modulation to add vibrato or other minor variations in the pitch that make the resonance sit more harmoniously with the overall sound. 5. Listen to the synth again while monitoring the changes you have made. In conclusion, reducing resonances in synths requires a little bit of know-how and a lot of fine-tuning. With the right surgical EQ, frequency shifters, or pitch modulation, you can eliminate unwanted resonances without compromising the overall sound of your synth.

Taming Resonances In Percussion


Resonances in percussion can cause a muddy and unclear mix. To reduce these unwanted tones, use EQ adjustments and damping techniques on both the natural and electronic sounds of your tracks. With these techniques, you can achieve a clear and polished final mix free from unwanted resonances.

Percussion instruments like drums, cymbals, and tambourines are great for adding energy to a track, but they can also introduce unwanted resonances. These resonances can be distracting and take away from the overall quality of the track. Luckily, there are techniques that can reduce resonances in percussion and make your mix sound clean and professional.

Using Transient Shapers To Reduce Resonance

One effective way to reduce resonances in percussion is by using transient shapers. Transient shapers work by adjusting the attack and release of a sound, which can help to reduce resonances. This technique is especially effective for drums, which can have strong resonances on the attack of the sound. To use a transient shaper, start by selecting a percussion track that has prominent resonances. Then, use the transient shaper to adjust the attack and release of the sound until the resonance is reduced. This technique can take some time to get right, but once you find the sweet spot, the result can be a much cleaner and professional sound.

Applying Short-plate Reverb To Mask Resonance

Another technique for reducing resonances in percussion is to use short-plate reverb. Short-plate reverb works by adding a short, reflective space to the sound. This can help to mask any unwanted resonances in the track. To use short-plate reverb, start by selecting a percussion track that has strong resonances. Then, add a short-plate reverb to the track and adjust the settings until the resonance is masked. Be careful not to add too much reverb, as this can make the sound muddy and unintelligible.

In Conclusion

By using transient shapers and short-plate reverb, you can effectively reduce resonances in percussion and make your mix sound clean and professional. These techniques take some time to master, but with practice, you can achieve great results and take your productions to the next level.

How To Reduce Resonances In Vocals Synths Percussion And A Full Mix


Credit: www.masteringthemix.com


Reducing Resonances In A Full Mix


Reduce resonances in a full mix by using dynamic EQs, notch filters and de-essers. Addressing resonances in vocals, synths, percussion and the overall mix will result in a cleaner, clearer and more balanced sound.

Reducing resonances in a full mix is crucial to achieve a polished audio production. Resonant frequencies can cause unpleasant ringing, muddiness and distortion in almost every element of the music. The good news is that reducing unwanted resonances can be achieved through smart EQing and dynamic processing. In this article, we will explore different techniques that can be applied to reduce resonances in vocals, synths, percussion, and a full mix. Below we will deep-dive into applying Multiband Compression and using Side-Chain Compression to achieve a polished mix.

Applying Multiband Compression To Reduce Resonances

Multiband Compressors are a powerful tool to reduce resonant frequencies in a full mix. As the name suggests, multiband compressors are compressors that have multiple bands – typically 3-4. Each band has its own set of controls that allow you to process different frequency ranges independently. To use Multiband Compression for reducing resonances, you need to identify the frequency range that needs processing. Adjust the compressor settings to reduce the frequency range’s volume, where there are resonances. Some Multiband Compression plugins already come with presets that are designed specifically for reducing resonances. For example, the “De-Esser” preset, usually found in vocal Multiband Compression plugins, can help in reducing unwanted resonances in vocal recordings.

Using Side-chain Compression To Tame Resonant Frequencies

Side-chain Compression is a technique where the compressor is triggered by an external signal. In other words, you’re controlling the compressor’s action based on another sound source. To use Side-Chain Compression to tame resonant frequencies in a full mix, you need to identify the frequency range that needs processing and find another element in the mix that is not competing with that range. For example, if you want to tame resonances in the bass guitar, you could side-chain a compressor that’s inserted on a pad sound. The idea is to lower the volume of the pad sound every time the bass guitar plays in that resonant frequency range. This will create pockets of space for each element to exist without clashing. You can also use Side-Chain Compression creatively to create rhythmic pumping effects that are common in electronic dance music. Mixing is all about problem-solving. The more techniques you have under your belt, the better-equipped you will be to tackle any mix. By using Multiband Compression and Side-Chain Compression creatively, you can reduce resonances in a full mix, resulting in a polished and professional-sounding production.

Tips And Tricks


Learn how to reduce unwanted resonances in vocals, synths, percussion and a full mix with these tips and tricks for sound engineering. Eliminate frequencies that muddy your sound and achieve a cleaner, more polished mix.

Resonances are a common issue that many music producers face when mixing their tracks. Resonances can occur in various elements of a mix, including vocals, synths, and percussion. These unwanted frequencies can create a harsh, unpleasant listening experience, ultimately leading to an unprofessional-sounding final product. To help you avoid these issues and create clear, polished mixes, we’ve put together some tips and tricks for reducing resonances in your tracks.

Avoiding Resonances During Recording And Sound Design

When recording vocals, it’s important to pay close attention to the microphone’s placement and the recording space’s acoustics. A poorly placed microphone or a room with poor acoustics can result in resonances that are challenging to remove during the mixing process. Similarly, when designing sounds, it’s crucial to pay attention to the harmonic content and frequency range of each element. Creating sounds with extreme resonances or narrow frequency bands can cause problems later down the line. Here are some ways you can avoid resonances during recording and sound design:

  • Use a high-quality microphone and audio interface for recording
  • Select microphones that are less sensitive to resonances, such as dynamic microphones
  • Record in a room with acoustic treatment, such as absorption panels or bass traps
  • Choose sounds with a balanced frequency distribution
  • Use frequency spectrum analyzers to identify problematic frequencies during sound design

Mastering Techniques To Reduce Resonances

Once you have recorded and mixed your track, the final step is mastering. Mastering is the process of preparing a mix for distribution, often involving corrective and enhancement processes that address minor issues in a mix. Here are some mastering techniques you can use to reduce resonances:

  1. Use EQ to reduce resonances in specific frequency bands
  2. Use multiband compression to control resonances in a mix
  3. Use saturation or distortion plugins to add harmonics and reduce resonances
  4. Use stereo imaging plugins to limit the amount of frequencies in the center channel

By using these tips during recording, sound design, mixing, and mastering, you’ll be able to reduce resonances and achieve a clear, polished final product, leaving a great impression on your listeners. Keep in mind that the key is not to eliminate all resonances but to reduce them just enough to create an enjoyable listening experience.

How To Reduce Resonances In Vocals Synths Percussion And A Full Mix


Credit: www.masteringthemix.com


Frequently Asked Questions Of How To Reduce Resonances In Vocals Synths Percussion And A Full Mix


How Do You Remove Vocal Resonance?


To remove vocal resonance, use EQ to cut frequencies between 200-500Hz, boost around 5kHz, and roll-off below 100Hz. You can also try using a high-pass filter, compression, or repositioning the microphone. Experimenting with these techniques can improve the clarity and intelligibility of the vocals.


How Do You Reduce Resonant Frequencies?


Reducing resonant frequencies can be achieved by adding damping material, changing the shape or size of the vibrating object, or adjusting the tension of the structure. Another option is to alter the frequency of the input vibration or introduce a vibration-canceling system.


How Do You Tame Resonant Frequencies?


To tame resonant frequencies, a common practice is to use acoustic panels, bass traps, and diffusers. Acoustic panels are used to absorb sound waves, while bass traps reduce low-frequency sound reflections. Diffusers scatter sound waves to disperse them efficiently. By using these tools, you can reduce the impact of resonant frequencies and improve the overall sound quality in a room.


What Is Resonance In Vocal Mixing?


Resonance in vocal mixing refers to the enhancement or reduction of specific frequencies in a singer’s voice. These frequencies can either complement or clash with the instruments in the mix. Balancing the resonant frequencies results in a clear and natural sound.


Conclusion


Thus, reducing resonances in your vocals, synths, percussion, and full mixes is crucial to attain a professional sound. Understanding the basics of EQ and utilizing tools like notching, dynamic EQ, and multiband compression can help you get there. Remember to use your ears when making these adjustments and trust the process.


With practice and experimentation, you can achieve a clean and balanced mix free from unwanted resonances. Happy mixing!


Categories
Archive

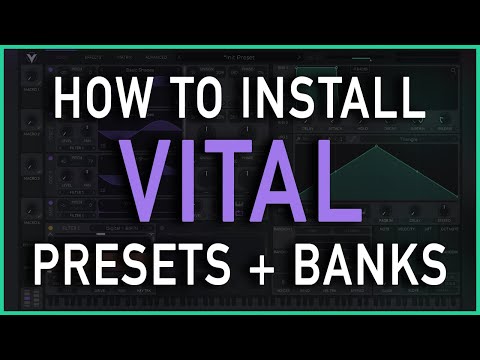
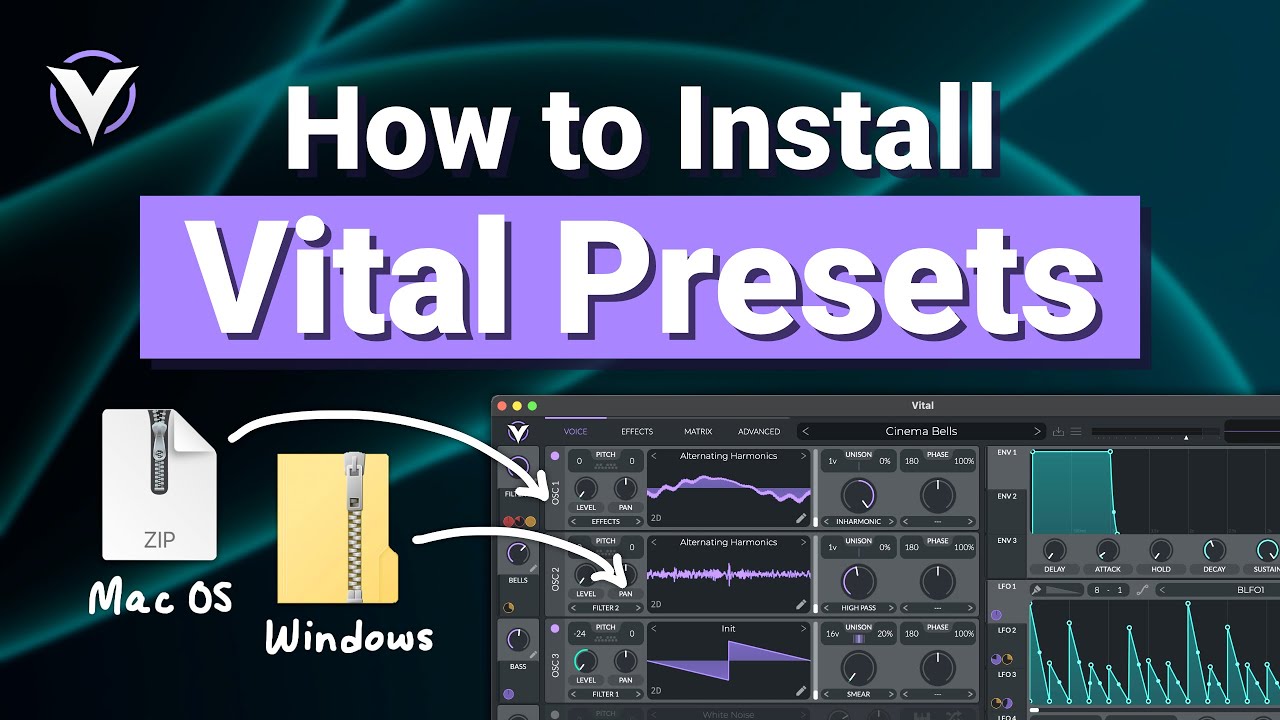
How To Install Banks And Presets For Vital Vst Synthesizer Guide

To install banks and presets for the Vital VST synthesizer, download and extract the files before placing them in the proper directory. The Vital VST synthesizer is a powerful software instrument used by music producers worldwide.


With its extensive library of banks and presets, it offers endless creative possibilities to those who use it. However, installing the banks and presets correctly can be a daunting task for beginners. In this guide, we will provide you with step-by-step instructions on how to install banks and presets for Vital VST, so you can start making music immediately.


We’ll cover everything from downloading the files to using the proper directory, and everything in between, so you can get the most out of your new software instrument without any hassle.

How To Install Banks And Presets For Vital Vst Synthesizer Guide


Credit: www.youtube.com


Downloading Banks And Presets


Learn how to easily download and install banks and presets for the Vital VST synthesizer with this comprehensive guide. Boost your music production game with the right sounds and take your tracks to the next level.

If you are a music producer, then having access to a wide range of sound presets is essential. The Vital VST synthesizer is great for creating all sorts of sounds for your productions. In this guide, we will go over how to download and install banks and presets for the Vital VST synthesizer.

Find Reputable Websites

The first step to downloading banks and presets for the Vital VST synthesizer is to find reputable websites that offer them. It is important to download your files from a trusted source, as downloading from an untrusted site could result in malware or viruses infecting your device. Make use of a search engine and research forums or websites that offer presets and banks for Vital. Check out the user comments and ratings to ensure that the website is trustworthy.

Check Compatibility With Vital

Before downloading any presets or banks, it is crucial to make sure they are compatible with the Vital VST synthesizer. Not all sounds are compatible with Vital, so it is important to do your research and only download presets that are designed for this synthesizer. This ensures that the sounds you download will work correctly and that you won’t waste time trying to get them to work.

Download And Unzip The Files

Once you have found a reputable website and checked compatibility, download the presets or banks files to your computer. Save them in a location that you can easily access later. The items you download will generally be in .zip format, so you need to unzip them so that you can use them. To do this, right-click on the .zip file and select “Extract All” or “Uncompress”. In conclusion, downloading banks and presets for the Vital VST synthesizer is an easy task that can be done by anyone. All you need is to find reputable websites, check compatibility, download the files and unzip them. By following these simple steps, you can add a wide range of sounds to your music productions.

Installation Of Banks And Presets In Vital


Learn how to install new banks and presets for your Vital VST synthesizer with this helpful guide. Follow simple steps to easily add new sound libraries to your music production software and enhance your creative potential.

Are you looking to enhance your music production experience with Vital VST synthesizer? One way to do this is by adding new presets and banks to your Vital library. In this guide, we’ll walk you through the process of installing new banks and presets in Vital.

Locate Vital Vst Folder

Before you start, make sure you know where to find your Vital VST folder. This is usually located in your Digital Audio Workstation (DAW) software’s plugin folder. Once you locate this folder, you can proceed with the installation process.

Copy The Presets And Banks Files

To install new presets and banks in Vital, you need to copy the files into the correct folder. First, download the presets and banks you want to install from a trusted source. Then, open your Vital VST folder and locate the “Presets” and “Banks” subfolders. Copy and paste the downloaded files into the appropriate folders.

Restart Vital

After copying the files, restart Vital to ensure the new presets and banks are loaded. If you had Vital open during the installation process, close and reopen it again.

Authorize The Presets And Banks In Vital

Now that your new presets and banks are installed, you need to authorize them within Vital. Open the Vital plugin in your DAW software and navigate to the “Presets” or “Banks” menu. From there, find the new presets and banks you installed and authorize them by selecting them. By following these four simple steps, you can easily install new banks and presets in Vital and start exploring new sounds and possibilities for your music production.


Troubleshooting


This guide offers a step-by-step process for installing banks and presets for Vital VST synthesizer, including troubleshooting tips. It is designed to be user-friendly and easy to follow, ensuring that even beginners can successfully install and use this powerful tool.

Presets And Banks Are Not Showing In Vital

If the presets and banks are not appearing in your Vital VST Synthesizer after installation, there are a few potential issues to consider. First, ensure that you have installed the presets and banks correctly by following the instructions provided in the installation guide. If you have done this and are still experiencing issues, try the following troubleshooting steps:

  • Check that the location of the presets and banks is correctly set in the Vital Plugin Settings.
  • Restart Vital and your DAW.
  • Ensure that the presets and banks you downloaded are compatible with the version of Vital VST Synthesizer that you are using.
  • Try reinstalling the presets and banks again.

Vital Is Not Responding After Installation

If Vital is not responding at all after you have installed it, there could be a variety of issues. First, ensure that Vital is correctly installed and compatible with your operating system. If you have confirmed this and are still experiencing issues, try the following:

  • Check that your DAW and Vital are both up to date.
  • Try reinstalling Vital.
  • Disable any other plugins you have running to eliminate potential conflicts.
  • Restart your computer.

Authenticity Of The Banks And Presets

It is important to ensure the authenticity of the banks and presets that you install into Vital VST Synthesizer. Some tips to spot fake or unauthentic presets and banks are:

Signs of inauthentic presets or banks: Signs of authentic presets or banks:
Too-good-to-be-true pricing Reasonable pricing
Low-quality audio demos or no demos at all High-quality audio demos
Unprofessional website or seller Professional website or seller
No refund or exchange policy Clear refund or exchange policy

It is important to protect your computer and your music by only downloading and installing authentic presets and banks from reputable sources.

How To Install Banks And Presets For Vital Vst Synthesizer Guide


Credit: www.productionmusiclive.com


How To Install Banks And Presets For Vital Vst Synthesizer Guide


Credit: m.youtube.com


Frequently Asked Questions On How To Install Banks And Presets For Vital Vst Synthesizer Guide


Where Are Vital Synth Presets Stored?


Vital synth presets are stored in a specific folder located in your computer’s hard drive. The exact location may vary depending on your operating system and the version of the software. However, you can usually find the presets by navigating to the Vital folder in your home directory.


How Do I Import Vital Presets Into Ableton?


To import vital presets into Ableton, first locate the preset files and copy them. Then, open Ableton and click “Options” > “Preferences” > “File Folder”. Under “Plug-In Sources”, click “Browse” and select the folder containing the presets. Finally, click “Rescan” to make sure Ableton recognizes the new presets.


How Do I Install Banks For Vital Vst Synthesizer?


Installing banks for Vital VST Synthesizer is very easy. First, download the desired bank file and extract it. Open Vital Synthesizer, go to the “Presets” dropdown menu and select “Show Folder”. Move the extracted bank folder to the “User Presets” folder.


The bank will now be available in the “User” section of the presets menu.


What Is A Preset In Vital Vst Synthesizer?


A preset is a pre-made sound that can be loaded into the Vital Synthesizer. Presets are a great way to quickly test out different sounds and see how they fit into your music production project. Each preset can be customized to the user’s liking by adjusting the various parameters of the sound.


Conclusion


To conclude, installing banks and presets for the Vital VST synthesizer doesn’t have to be complicated. By following the step-by-step guide and tips we provided, you can easily customize and expand your music production capabilities. With the vast variety of preset options available, you can experiment and create unique sounds fitting for your musical genre.


By continuously exploring and upgrading your sound library, you can take your music production to new heights!

Categories
Archive

What is the Difference between Analog And Digital Synthesizers

Analog synthesizers use analog circuits to generate soundwaves, while digital synthesizers use digital signal processing. Analog synthesizers produce a warmer and more organic sound, while digital synthesizers offer greater versatility and easier sound manipulation.


While analog synthesizers are often preferred for their classic sound and tactile interface, digital synthesizers are more practical for modern production techniques and offer a wider range of sounds and features. Despite their differences, both analog and digital synthesizers have their unique advantages and can be used effectively in a variety of musical settings.


We’ll explore the key differences between analog and digital synthesizers and help you decide which one is best suited to your needs as a musician or producer.


Analog Synthesizers


Analog synthesizers use electronic circuits to create sounds, while digital synthesizers use digital signal processing. The main difference is in the way the sound is produced: analog synthesizers create a continuous waveform, while digital synthesizers generate discrete values. This results in some differences in sound quality and character.

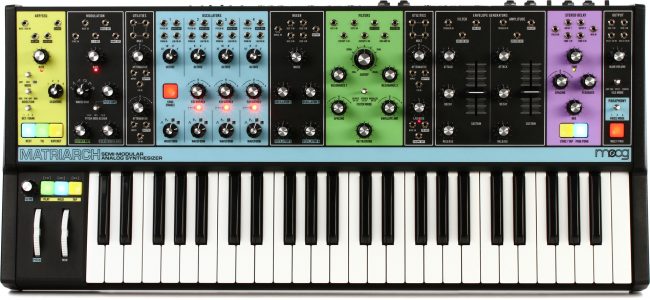
Analog synthesizers are a type of electronic music instrument that creates sound waves by manipulating electrical currents. They are often considered to be the original type of synthesizer since they have been around since the 1960s. Analog synthesizers use physical components such as oscillators, filters and amplifiers to generate sounds. In this section, we will discuss how these synthesizers work, their sound characteristics, advantages and disadvantages.

How They Work:

Analog synthesizers work by generating an electrical signal that is then modified by various components within the synthesizer. The signal is usually generated by an oscillator, which produces a waveform of a specific frequency. This waveform can be modified by filters, which remove or emphasize specific frequencies, and by amplifiers, which increase or decrease the signal’s strength.

Sound Characteristics:

Analog synthesizers are known for their warm, organic sound quality. This is because their sound is generated by the physical components within the synthesizer, which can add unique character and imperfections to the sound. Analog synthesizers are also capable of producing a wide range of sounds, from classic synth tones to experimental and avant-garde sounds.

Advantages:

One of the main advantages of analog synthesizers is their ability to produce rich, complex and organic sounds. They are also often more intuitive to use, with many physical knobs and sliders for controlling parameters. This makes them a popular choice for musicians who prefer a more hands-on approach to sound design.

Disadvantages:

Analog synthesizers can be prone to drift, which means that their tuning can vary over time due to changes in temperature and other factors. They can also be more expensive and less reliable than digital synthesizers, which use computer processing to generate sounds. Additionally, analog synthesizers can be more challenging to incorporate into digital music production workflows. Overall, analog synthesizers are a popular choice for musicians who prefer a more hands-on approach to sound design and value the unique character and imperfections of analog sound. However, they also come with a few challenges and limitations to consider.


Digital Synthesizers


Analog synthesizers produce sounds through electrical signals, while digital synthesizers use computer technology to replicate sounds digitally. Digital synths tend to have a wider range of tones and effects, while analog synths offer a warmer, more natural sound.

Digital Synthesizers are the more modern version of their analog counterparts and use digital signal processing to create and manipulate sounds. These instruments have become increasingly popular due to their versatility and adaptability, especially in the realm of electronic music production. In this section, we will explore how digital synthesizers work, their sound characteristics, as well as their advantages and disadvantages.

How They Work

Digital Synthesizers use a microprocessor to manipulate sound waves, which are generated from mathematical algorithms. When a note is played on the keys, the synthesizer converts the analog signal into digital data, and the microprocessor then uses this data to create the desired sound. The waveforms can then be modified using filters, envelopes, and modulation effects, to name a few.

Sound Characteristics

Digital Synthesizers offer a wide range of sound possibilities and can produce anything from classic analog sounds to complex digital soundscapes. They are known for their ability to create lush pads, intricate arpeggiations, and rich textures. Compared to their analog counterparts, digital synthesizers have a cleaner, more precise sound due to the lack of noise and signal interference.

Advantages

One of the most significant advantages of digital synthesizers is their versatility. They can be programmed to produce virtually any sound imaginable and can easily switch between sounds with the push of a button. Additionally, they offer storage for preset sounds, which can be easily recalled for live performances or studio sessions. Digital synthesizers are also relatively inexpensive compared to their analog counterparts, making them a great option for beginner producers.

Disadvantages

Despite their advantages, digital synthesizers can sometimes lack the warmth and character of an analog synthesizer. Because they rely on mathematical algorithms, their sound can sometimes sound sterile or artificial. Additionally, they can be challenging to program for beginners, as they often require an understanding of synthesis and sound design. Finally, some purists argue that digital synthesizers lack the authenticity and soul of analog synthesizers. In conclusion, digital synthesizers offer a ton of capabilities and versatility, especially for electronic music producers. While they may not offer the same warmth and character of analog synthesizers, they more than make up for it with their precision, efficiency, and ease of use.

Comparison


Analog synthesizers produce sound through electronic circuits that simulate traditional sound waves, while digital synthesizers produce sound through computer processing. The difference between the two lies in their sound quality, flexibility, and pricing. Analog synthesizers produce warmer and more organic sounds, while digital synthesizers offer more sound effects and editing possibilities at a lower cost.

Sound Quality

Analog synthesizers produce warmer, richer, and more natural sound, free from the sterile characteristics of digital synthesis. The sound is produced by electronic circuits, which create continuous waves, resulting in subtle fluctuations and a unique character. Digital synthesizers produce more precise, clean, and clinical sound, generated by binary code using algorithms. The output is more defined and can be manipulated with great accuracy for different applications.

Ease Of Use

Analog synthesizers have a user-friendly interface with tactile knobs, sliders, and buttons for editing and manipulating sound in real-time. There is no need to go through complicated menus or programming screens. On the other hand, digital synthesizers have extensive menus and complex programming screens, making it challenging to modify the sound. However, digital synthesizers have the advantage of storing presets and patches, making it easy to recall sounds.

Cost

Analog synthesizers are generally more expensive than digital synthesizers, due to the complexity of the circuits and the production process. Moreover, analog synthesizers require periodic maintenance, such as calibration, cleaning, and replacing components, which adds to the cost. Digital synthesizers are more affordable and require less maintenance, as they do not have moving parts or wear-and-tear issues.

Maintenance

Analog synthesizers require regular maintenance to keep them functioning optimally. The circuits can drift out of tune, and components can degrade over time, affecting the sound quality. Regular calibration and cleaning are necessary to maintain the analog synthesizer’s accuracy and sound quality. On the other hand, digital synthesizers are more reliable and require less maintenance. The components are not prone to wear-and-tear, and the digital circuits remain stable over time, ensuring consistent sound quality. In conclusion, the choice between analog and digital synthesizers comes down to personal preference and practical considerations. Analog synthesizers are ideal for musicians looking for a traditional, warm, and organic sound, with a user-friendly interface. However, digital synthesizers offer more precision, versatility, and affordability for modern music production.

What is the Difference between Analog And Digital Synthesizers


Credit: www.sweetwater.com


Which Synthesizer To Choose?

When it comes to choosing between an analog and digital synthesizer, the decision can seem daunting. However, once you understand the differences between the two, you can make a more informed decision based on your music genre, personal preferences, budget, and future plans.

Music Genre

The type of music you produce will have a significant impact on your synthesizer choice. For example, if you produce electronic dance music (EDM), a digital synthesizer may be the best choice for you since it allows for the creation of complex sounds and has a wide range of built-in effects and modulation options.

Alternatively, if you produce more vintage or retro-style music, such as synthwave or vaporwave, an analog synthesizer may be a better fit. Analog synthesizers have a warm and organic sound that is well-suited to these genres.

Personal Preferences

Personal preferences play a crucial role in choosing between an analog and digital synthesizer. Some musicians prefer the tactile feel of analog knobs and sliders, while others prefer the versatility and convenience of digital interfaces.

Consider whether you prefer the hands-on approach of analog synthesis or the convenience of saving presets and recalling them at any time with a digital synth. Think about how you make music and what features will make the process more comfortable and enjoyable for you.

Budget

The budget is always a significant consideration when making a purchase decision. Analog synthesizers tend to be more expensive than their digital counterparts due to their complex circuitry and the higher cost of production.

If you’re just starting with music production, a digital synthesizer may be a more affordable option. However, keep in mind that higher-end digital synthesizers can be just as expensive as analog counterparts.

Future Plans

Finally, it’s essential to consider your future plans when choosing between analog and digital synthesizers. If you plan to perform live, you may want to consider the portability and durability of your synthesizer.

If you plan on building a collection of hardware synths, analog synths may be a better long-term investment since they hold their value quite well, whereas digital models tend to depreciate more rapidly.

Consideration Analog Synthesizer Digital Synthesizer
Music Genre Warm, organic sound ideal for vintage and retro genres. Allows for complex sounds and a wide range of built-in effects and modulation options, ideal for electronic dance music.
Personal Preferences The tactile feel of analog knobs and sliders. Versatility and convenience of digital interface, saving presets and recalling them at any time.
Budget Tends to be more expensive due to complex circuitry and higher cost of production. Can be more affordable options, but higher-end models can also be just as expensive.
Future Plans Long-term investment, as analog synths tend to hold their value well. Portability and durability can be crucial when planning to perform live.
What is the Difference between Analog And Digital Synthesizers


Credit: www.sweetwater.com


Frequently Asked Questions For What Is The Difference Between Analog And Digital Synthesizers


What Makes A Synthesizer Analog?


Analog synthesizers utilize electrical signals generated by analog circuits to produce sound, whereas digital synthesizers use digital processing to create sound. The analog circuitry provides a warm, organic sound with rich harmonic content, making it popular in certain genres of music.


What Is The Difference Between Analog And Digital Keyboards?


Analog keyboards transmit electrical signals that vary continuously. Digital keyboards use a microprocessor to sample the keyboard’s state at regular intervals. So, analog keyboards are more responsive and realistic, while digital keyboards are more versatile and offer features such as MIDI compatibility.


Do Analog Synths Sound Different?


Yes, analog synths sound different from digital synths. Analog synths create a warmer, more organic sound due to the use of voltage-controlled circuitry. They also often have more tactile controls which allow for greater expression and variation in sound.


Do I Need An Analog Synth?


An analog synth is not essential, but it offers unique sound qualities that cannot be replicated by digital synths. If you are into creating vintage or experimental sounds, then you should consider getting an analog synth. However, digital synths are more versatile and can emulate a variety of sounds.


Ultimately, your decision should be based on your musical needs and preference.


Conclusion


So, there you have it – a comprehensive guide on the difference between analog and digital synthesizers. While both have their pros and cons, ultimately, it comes down to personal preference and what kind of sound you are aiming for.


Each type offers its unique sonic characteristics, and it’s up to you to decide which is best suited for your music. Whether you’re a fan of the warm and organic sounds of analog or the versatility and convenience of digital, there’s no denying these two types of synthesizers have revolutionized the music industry in countless ways.


As technology advances, who knows what exciting advancements await us in the world of synth!


Categories
Archive

How To Improve Your Mixdown With Animate 3 Sound Engineering Tips

To improve your mixdown with Animate, follow these three sound engineering tips. Use automation to add movement, focus on EQ, and use creative effects sparingly.


Mixing is a complex process that requires attention to detail and a variety of techniques to achieve a polished sound. Animate is a powerful tool that can help you enhance your mixdown and take it to the next level. Whether you are a beginner or a seasoned producer, using Animate in your sound engineering workflow can add depth, dimension, and excitement to your mix.


We will explore three tips that will help you improve your mixdown using Animate. These tips include automation, EQ, and creative effects. By following these tips, you can elevate your mix and create a professional sound that will impress your listeners.

How To Improve Your Mixdown With Animate 3 Sound Engineering Tips


Credit: www.youtube.com


Start With Proper Gain Staging

The process of mixing is an integral part of audio production, and it involves adjusting different audio elements to create a cohesive and balanced sound. One of the most critical steps in the mixing process is proper gain staging, which is the act of setting the correct levels for audio elements before they enter the mixing console. By doing this correctly, you can ensure that all elements in your mix are at optimal levels, thus leading to better sound quality. Here are some tips on how to improve your mixdown with Animate 3:

Setting Proper Levels

The first step to proper gain staging is to set proper levels for all audio elements. Setting the correct level of each individual track is essential in preventing distortion and enhancing the overall sound quality. It is crucial to ensure that the audio signals are neither too loud nor too low to prevent clipping or an overly muddy mix, respectively. You can use the meters in Animate 3 to check the incoming signal levels and ensure that they are within a reasonable range.

Identifying And Eliminating Clipping

Clipping is a phenomenon that occurs when the audio signal level exceeds the maximum level that can be processed, resulting in distortion. Clipping can be detrimental to your mix, especially when left unchecked. Therefore, it is crucial to identify clipping early enough and eliminate it. You can identify clipping by checking the meter levels for your tracks. A red light on the meter indicates clipping. To eliminate clipping, you need to reduce the gain of the offending track until the red light disappears, or alternatively, you can use a limiter plugin to control the peaks of the audio signal.

Balancing Levels Between Tracks

Ensuring that the levels between tracks are balanced is essential in producing a cohesive sound. You don’t want some tracks to be louder than others, making the mix sound unbalanced. Therefore, balancing levels between tracks is an essential step in the mixing process. The best way to balance the levels between tracks is to use your ears and listen to the mix critically. Adjust the fader levels and use the pan controls to ensure that each track occupies its space in the mix. In some cases, you may also have to use EQ and compression to make tracks stand out in the mix.

In conclusion, starting with proper gain staging is the foundation for achieving a well-balanced and cohesive mix. By applying the tips mentioned above, you can improve your mixdown with Animate 3 and take your audio production skills to the next level.

Use Dynamic Processing


Dynamic processing is a powerful technique that can help improve your mixdown and bring your tracks to life. By using compression, EQ, and other effects dynamically, you can create a more interesting and engaging sound that will capture your listeners’ attention.


With these three sound engineering tips, you can make your music stand out and sound professional.

Using Dynamic Processing To Improve Your Mixdown

Using dynamic processing in your mixing process is a fantastic way to improve your mixdown. Dynamic processing refers to the manipulation of audio levels to control the dynamic range of a track. This can help to bring out the full potential of the song without any distortion.

Using Compression

Compression is a popular audio processing technique that involves reducing the volume of loud sounds and amplifying the volume of softer sounds. This evens out the levels and creates a more consistent overall sound. When applying compression, it’s essential to determine the correct threshold and ratio to achieve the desired result. Additionally, you can use multiband compression for more nuanced control over different frequency ranges.

Using Limiting

Limiting is a technique used to cap the maximum level of a signal. It is similar to compression but with a higher ratio, which means it’s more extreme. In the mixing process, limiting is used to keep the audio from going beyond a certain point, which could cause distortion. It’s crucial not to over-limit, as this can lead to a loss of dynamics and make the mix sound flat.

Using Eq

Equalization (EQ) is used to balance out the different frequencies in a mix. This technique is used to enhance or reduce individual frequencies to achieve a more consistent sound. When using EQ, start with cutting unwanted frequencies before boosting others. This approach will help to prevent the mix from sounding muddy or cluttered. In conclusion, dynamic processing is an essential tool that will help you improve your mixdown. By using compression, limiting, and EQ, you can achieve a more balanced and cohesive sound. Remember to experiment with your settings to find the perfect combination that suits your particular track.

Create Space And Depth

Creating space and depth in your mix is crucial to give your listeners an immersive experience. With Animate 3 sound engineering tips, it is easier than ever to add space and depth to your mixdown. Here are three sound engineering tips that will help you:

Using Reverbs And Delays

Reverbs and delays are the go-to effects for creating space and depth in your mix. Reverbs can help you create the illusion of bigger spaces, while delays can help you create echoes and repeats. To use reverb, you need to select the right reverb type and set the reverb time and decay parameter. For delays, you need to set the delay time, feedback, and mix settings. Use these effects in moderation to avoid muddying your mix.

Creating Space With Panning

Panning is another effective way to create space in your mix. When you pan an instrument, you create the illusion of it coming from a specific direction, which helps to create a sense of space. For example, if you pan a guitar to the left, it will sound like it’s coming from the left. You can use panning to create a wide stereo field or to place sounds in a particular location. Be careful when panning bass frequencies as they can cause phase issues.

Creating Depth With Automation

Automation is a powerful tool that can help you create depth in your mix. With automation, you can change the volume, panning, and effects of each instrument at different points in the song. For example, you can automate the reverb level of a vocal track to make it sound like it’s moving closer or further away. You can also use automation to create builds and drops in your track.

By using these Animate 3 sound engineering tips, you can create space and depth in your mixdown, and take your mixes to the next level.

Add Movement And Energy


Adding movement and energy to your mixdown can greatly improve the overall sound quality. Three tips for achieving this with sound engineering include adjusting the panning, using EQ to enhance specific frequencies, and experimenting with various effects like delay or reverb.

Using Modulation Effects

The use of modulation effects such as chorus, phaser, and flanger can add movement and energy to your mix. These effects work by modulating certain aspects of the sound, such as its pitch, phase, or time. They can create a sense of movement and space, adding depth and interest to your mix. For example, a chorus effect can create a doubling effect, where the original sound and a slightly delayed and modulated copy of it are played together. This creates a sense of spaciousness and adds movement to the sound.

Adding Interest With Filters

Filters can also be used to add movement and interest to your mix. Filters work by cutting or boosting certain frequencies in the sound. For instance, a low-pass filter can be used to cut off the higher frequencies of a sound, creating a muffled effect. By automating the filter cutoff frequency, you can create a sense of movement and interest in your mix. You can also use a high-pass filter to cut off the lower frequencies of a sound, creating a thin and bright sound. Filters can be used creatively to add texture, movement, and interest to your mix.

Using Sidechain Processing

Sidechain processing is another technique that can help add movement and energy to your mix. Sidechain processing involves using a trigger signal, such as a kick drum, to control the level of another sound, such as a bassline or synth. The effect is that the bassline or synth ducks in volume every time the kick drum plays, creating a pumping effect. This effect can be used creatively to add movement and energy to your mix, especially in dance and electronic music. In conclusion, by using modulation effects, filters, and sidechain processing, you can add movement and energy to your mix. These techniques can help create a more interesting, dynamic, and engaging mix. Experiment with these techniques and find creative ways to apply them to your music.

Pay Attention To The Low End


Improve your mixdown with these three sound engineering tips, including paying attention to the low end. By balancing the frequencies and using proper EQ techniques, you can take your music to the next level with Animate 3.

As a sound engineer, it is essential to pay close attention to the low end of your mix. The low end of your mix can make or break a track. A well-balanced low end can provide depth, warmth, and character to the mix. In contrast, an unbalanced or muddy low end can make the mix sound unprofessional and difficult to listen to.

Controlling Low End With Eq

One of the most effective ways to control the low end of your mix is by using EQ. The EQ can help you identify the problematic frequencies in your low end that need to be boosted or cut. For instance, cutting around 200-300Hz can help eliminate muddiness in your mix, while boosting around 50-60Hz can add warmth and depth to your track. Always remember to make subtle cuts and boosts rather than drastic adjustments, as it can alter the overall balance of your mix.

Eliminating Muddiness

Muddiness is the most common issue with mixing low end. To eliminate muddiness, listen to your mix carefully and identify the frequency range that sounds unbalanced and cluttered. Muddiness is generally caused by too much energy in a particular frequency range. You can use EQ to eliminate muddiness by making slight cuts in the problematic frequency range. You can also try using a high-pass filter on non-bass instruments to declutter the low end.

Balancing Levels Of Kick And Bass

Balancing the levels of kick and bass is crucial to create a powerful low end. The kick and bass should complement each other and not compete. A common mistake is to have the kick and bass playing at the same frequency range, causing them to clash and create a muddiness issue. Try lowering the level of the bass or using EQ to cut the frequency range where the kick is playing. You can also sidechain the kick to the bass, making the bass duck when the kick hits and create a separation between the two. By paying close attention to the low end of your mix and using these tips, you can achieve a well-balanced and professional-sounding track. Remember to make subtle adjustments and trust your ears to guide you in creating the perfect low end.

How To Improve Your Mixdown With Animate 3 Sound Engineering Tips


Credit: medium.com


Mastering For Clarity And Loudness


Improve your mixdown with Animate 3 sound engineering tips, focusing on mastering for clarity and loudness. With careful attention to EQ, compression, and limiting, these techniques will help your tracks stand out in any mix.

Level Matching And Compression

Level matching and compression are crucial in mastering for clarity and loudness. Beginning with level matching, it is essential to match the volume levels of different tracks in the mix to ensure a balanced sound. Compression helps to smooth out inconsistencies in volume and help the mix sound cohesive. You can use different types of compressors to achieve different results. For instance, a mix bus compressor can be used to compress the entire mix, while a multiband compressor can be used to compress specific frequency ranges.

Stereo Widening Techniques

Stereo widening techniques can add depth and spaciousness to the mix while maintaining clarity. You can use techniques like panning, stereo imaging, and stereo enhancement plugins to widen the stereo image. However, it is important not to overdo it, as too much stereo widening can cause phasing issues and make the mix sound unnatural. Additionally, it is recommended to check the mix in mono to ensure it still sounds balanced and cohesive.

Mastering Eq

Mastering EQ is used to balance the frequency spectrum of the mix and ensure that each frequency range is clear and present in the mix. It can also be used to add warmth and punch to the mix. However, it is important not to boost or cut frequencies excessively, as it can cause distortion or other issues. A good approach is to use a gentle shelving EQ to boost or cut the low or high frequencies, and use a parametric EQ to make more precise adjustments. In conclusion, mastering for clarity and loudness is essential in achieving a polished and professional sound. By using level matching and compression, stereo widening techniques, and mastering EQ, you can achieve a balanced, clear, and loud mix. Remember to use these techniques judiciously, and always trust your ears when making adjustments.

Listen And Make Improvements

One of the most crucial stages in the production process of a music track is the mixdown. It is the process of balancing and blending all of the individual elements that make up a track to form a cohesive and polished final product. Even after a great recording session and editing, a mix can still be improved to bring out the intended sound. In this section, we will discuss how to improve your mixdown with Animate 3 sound engineering tips, focusing on the subheading ‘Listen and Make Improvements’.

Taking Breaks

One of the most significant things that you should do after getting done with the mixdown is to take breaks. It’s very crucial to take small breaks to rest your ears, especially if you have been working for an extended period. The human ear is susceptible to fatigue, and because of this, it’s essential to give your ears enough time to recover. When you come back to the mix, you will be ready to assess if the mix still sounds natural or if there’s something that you need to change.

Reference Material

Having a reference track is a great way to ensure that your mix sounds balanced, polished, and competitive- ready. Listen to professionally mixed tracks that are similar to what you are working on and use them as a guide. You can do this by referencing the volume level, the sound-stage presentation, EQ, and how elements are balanced. Reference tracks can help you to identify some of the mistakes that you could have missed in your mix by pointing out challenging challenges that you might have overlooked during the mixing process.

Collaborating And Feedback

Another way to improve your mixdown is to collaborate with other people, especially sound engineers and producers. Collaborating can help to take your mix to the next level, mainly when working with someone experienced and knowledgeable in the industry. Also, getting constructive feedback is crucial when it comes to mixing. It is not easy to produce good music alone, and sometimes you need to hear what others have to say to get better perspective. Share your track with other producers for fresh ears to give you their opinion. Accept their suggestion and work on improvements while maintaining your style.

How To Improve Your Mixdown With Animate 3 Sound Engineering Tips


Credit: splice.com


Bonus Tips And Tricks


Optimize your mixdown with three sound engineering tips using Animate 3. Boost the quality of your tracks with bonus tips and tricks in this comprehensive guide.

Bonus Tips And Tricks After following the three sound engineering tips outlined in the previous sections, there are a few bonus tips and tricks that can take your mixdown to the next level. These tips can help you find the sweet spot in your mix, ensure mono compatibility, and utilize hardware and software tools effectively. HTML H3 heading: Finding The Sweet Spot One essential aspect of creating a great mix is finding the sweet spot. This is the point in the mix where all individual elements blend together seamlessly. To find this spot, start by adjusting the faders of each element in your mix until you can hear every part clearly. Then, begin panning each element to its proper position in the stereo field. Finally, adjust the levels of each element until they all blend together smoothly. By continually fine-tuning the levels and panning of each part, you can achieve a mix that is well-balanced and engaging. HTML H3 heading: Mono Compatibility Another important consideration is mono compatibility. This refers to how well your mix will translate to a mono playback system, such as a car or smartphone speaker. To ensure mono compatibility, make sure you are not relying too heavily on stereo effects or panning. Check your mix in mono mode periodically throughout the mixing process to ensure that all elements maintain their clarity and presence. This will help ensure that your mix sounds great on any system. HTML H3 heading: Hardware And Software Tools Finally, utilizing hardware and software tools can help take your mix to the next level. Some popular hardware tools include high-quality studio monitors and room treatment materials such as acoustic panels. Software tools such as EQ, compression, and reverb can help you achieve the sound you are looking for. Experiment with different tools to find what works best for your mix. Don’t forget that less is often more with processing, so use these tools sparingly to avoid creating a mix that sounds overly processed and unnatural. In conclusion, by following these additional bonus tips and tricks, you can take your mixdown to the next level. Finding the sweet spot, ensuring mono compatibility, and utilizing hardware and software tools effectively can make all the difference in creating a well-balanced and engaging mix.

Frequently Asked Questions On How To Improve Your Mixdown With Animate 3 Sound Engineering Tips


What Is Mastering The Mix Animate?


Mastering the Mix Animate is a plugin used for mixing and mastering audio. It allows users to add movement and dimension to their tracks using automation and modulation features. Animate offers precise control over various parameters such as ADSR, LFO, filter and pan effects, and more.


How To Use Animate Plugin?


To use Animate plugin, first, open the Animate software on your computer. Then, create a new document or open an existing one. You can explore the different features and tools available in the software and start animating your designs. Save your work frequently to avoid losing any progress.


How Does Animate 3 Help Improve Mixdown?


Animate 3 helps improve mixdown by adding character to sounds and creating dynamics in the mix. It allows for manipulation and shaping of sound, adding depth and dimension to the overall mix. Animate 3 can also add width and richness to individual sounds, making them stand out in the mix.


What Are Some Tips For Using Animate 3 In Sound Engineering?


Some tips for using Animate 3 in sound engineering include experimenting with different settings to find the perfect sound, using automation to control the level of each sound, and using parallel processing to add depth and warmth to the mix.


It’s also important to use high-quality sounds and focus on the details of each sound.


Conclusion


To sum up, using Animate 3 can drastically improve your mixdowns and overall sound engineering skills. Implementing these three tips – automating effects, adjusting pan and stereo, and altering EQ – can give your tracks more depth and character. Don’t be afraid to experiment and play around with different settings until you find what works best for your sound.


With patience, practice, and the right tools, you can take your music to the next level.


Categories
Archive

Mixing Tips In Ableton Live Mixing Problems Every Producer Will Face

To mix efficiently in Ableton Live, use EQ and compression, balance frequencies, and work with a critical ear. By using automation, adding effects and paying attention to arrangement, you can help fix the most common mixing problems that producers face.


Mixing is an unavoidable part of music production that requires more than just adjusting the volume. Failure to pay attention to how instruments interact with one another can result in a messy mix that isn’t enjoyable to listen to. Similarly, failing to identify and fix mixing problems can result in instability and subpar results.


Fortunately, Ableton Live has everything you need to craft a fantastic mix, from EQ and compression to automation and effects. In this post, we’ll cover all the essential mixing tips in Ableton Live and how to fix the most common mixing problems that every producer will face.

Mixing Tips In Ableton Live Mixing Problems Every Producer Will Face


Credit: www.productionmusiclive.com


How To Overcome Mixing Problems In Ableton Live


Learn how to overcome common mixing problems in Ableton Live with these expert tips. From managing levels to utilizing effects, every producer will benefit from these techniques to elevate their tracks to the next level.

One of the biggest obstacles producers face in music production is mixing. It can be challenging to ensure that all the elements of a song are balanced correctly. Mixing problems can range from frequency conflicts to a lack of depth in your mix. While there may be no one solution to these issues, there are some tips that can help you overcome them. In this article, we will discuss common mixing problems that every producer will face and how to address them using Ableton Live, one of the most popular DAWs on the market today.

Understanding The Common Mixing Issues

Mixing is the process of balancing and adjusting the different elements of a song to create a cohesive and polished final product. Some of the most common mixing problems include:

  • Clashing frequencies
  • Lack of depth and space in the mix
  • Unbalanced levels
  • Muddy or unclear sounds
  • No separation between instruments

Addressing Frequency Conflicts

One of the most common mixing problems is frequency conflicts. This happens when two or more instruments occupy the same frequency range, causing them to clash and compete for attention in the mix. To solve this, you can use techniques such as EQ to carve out space for each instrument. You can also use sidechain compression and volume automation to create more room for each element in the song.

Creating Space With Panning

Another way to address mixing problems in Ableton Live is by using panning to create space in the mix. Panning allows you to position each instrument in the stereo field, giving them a specific place in the mix. This can help create separation between instruments and make the mix sound more spacious.

Using Eq To Clean Up Your Mix

EQ is a powerful tool that can help you clean up your mix and ensure that each instrument has a defined place in the frequency range. By cutting unnecessary frequencies from each instrument, you can create more space in the mix and prevent frequency conflicts.

Compressing To Balance Your Mix

Compression is another useful tool in Ableton Live that can help you balance your mix. By reducing the dynamic range of each instrument, you can ensure that they sit well together in the mix. Compression can also be used to add sustain and punch to certain elements of the song, such as the drums or vocals.

Applying Reverb And Delay For Depth

Reverb and delay are two effects that can add depth and dimension to your mix. By applying these effects to specific elements of the song, you can create a sense of space and make the mix sound more cohesive.

Automation Techniques For Dynamic Mixing

Automation is a powerful technique that can help you create a dynamic and interesting mix. By automating volume, panning, EQ, and other parameters, you can create subtle changes that keep the listener engaged throughout the song.

Mastering Tips To Bring Your Mix To Life

Mastering is the final step in the mixing process and is essential for creating a polished and professional mix. Some tips for mastering in Ableton Live include using EQ and compression to balance the mix, adding saturation and harmonic excitement to enhance the sound, and adjusting the stereo width to create a wider sound. With these tips, you can bring your mix to life and create a final product that is ready for the world to hear.

Mixing Tips In Ableton Live Mixing Problems Every Producer Will Face


Credit: m.youtube.com


Frequently Asked Questions On Mixing Tips In Ableton Live Mixing Problems Every Producer Will Face


Is Ableton Bad For Mixing?


No, Ableton is not bad for mixing. In fact, it’s quite popular among producers and DJs. Its intuitive interface makes it easy to mix tracks and create complex soundscapes. Ableton also offers a range of powerful effects and plugins that can improve the quality of your mixes.


So, if you’re looking for a reliable mixing tool, Ableton is definitely worth considering.


Can You Mix Professionally In Ableton?


Yes, Ableton is a professional music production software with advanced mixing features. Mixing in Ableton allows you to control audio levels, adjust dynamics, apply effects, and more. Its intuitive interface and powerful tools make it a popular choice for both amateur and professional producers.


Is Ableton Good For Producers?


Ableton is an excellent DAW for music producers due to its intuitive interface, powerful MIDI capabilities, and customizable layout. With features such as the Session View and extensive sample library, Ableton is a popular choice for electronic and live performance-based music production.


Its efficient workflow and compatibility with various plugins also make it great for professionals and beginners alike.


How Can I Get Better At Sound Mixing?


Practice regularly and listen to different types of music and sounds to develop your skills. Learn to use mixing software and tools effectively. Attend workshops, classes, and tutorials to learn from experienced sound mixers. Collaborate with others and seek feedback on your work to improve.


Keep up with industry trends and continuously learn new techniques.


Conclusion


Successful mixing in Ableton Live requires patience, practice, and a good understanding of sound engineering principles. Whether you’re dealing with and fixing phase cancellation, applying EQ cuts and boosts, or using compression to level out your mix, the key is to trust your ears and make changes that improve the overall sound.


Use these tips and techniques to confidently tackle common mixing problems and take your productions to the next level.


Categories
Archive

How To Prepare Your Music For Apple Spatial Audio With Dolby Atmos

To prepare your music for Apple Spatial Audio with Dolby Atmos, you need to mix and master it in a specific way. First, create a stereo mix and then include the spatial audio mix.


Apple recently introduced Dolby Atmos support for its music streaming service, allowing artists and producers to create an immersive audio experience for their listeners. However, to take full advantage of this technology, you need to prepare your music properly. One of the critical steps to achieving this is mixing and mastering your music in a way that translates well to the Spatial Audio format.


We’ll explain the steps you need to take to prepare your music for Apple Spatial Audio with Dolby Atmos, so your work can stand out and create an unforgettable experience for your listeners.

How To Prepare Your Music For Apple Spatial Audio With Dolby Atmos


Credit: 9to5mac.com


1. Understanding Spatial Audio With Dolby Atmos


Learn how to optimize your music for Apple’s Spatial Audio with Dolby Atmos. Understanding Spatial Audio is essential in preparing your music for the best immersive experience.

If you’re a music artist looking for ways to enhance your music experience and engage with your audience, you need to know about Spatial Audio with Dolby Atmos. This technology creates a 3D audio experience for listeners, bringing them into the heart of the music.

1.1 What Is Spatial Audio With Dolby Atmos?

Spatial Audio with Dolby Atmos is a technology that creates a 3D audio experience, which elevates the listening experience for the audience. Unlike traditional stereo audio, Spatial Audio immerses listeners within a soundscape that envelops them, providing the feeling of being in the center of music, no matter where they are.

1.2 How Does Spatial Audio With Dolby Atmos Work?

Spatial Audio with Dolby Atmos works by incorporating metadata into the music tracks that allows the sound engineer to place sounds in 3D space. The listener hears the music as if they’re in the middle of the soundscape, with instruments and vocals coming from different directions. The feeling is that of being in the center of the music, surrounded by the sounds, resulting in a more immersive listening experience.

1.3 Why Is Spatial Audio With Dolby Atmos Important For Music Artists?

Spatial Audio with Dolby Atmos is essential for music artists because it creates a more engaging and immersive music experience for listeners, which can lead to increased streaming and sales. As more music platforms adopt this technology, it is wise for music artists to prepare their music for Spatial Audio with Dolby Atmos to stand out from the competition and provide their fans with an incredible experience.

How To Prepare Your Music For Apple Spatial Audio With Dolby Atmos


Credit: www.masteringthemix.com


2. Preparing Your Music For Spatial Audio With Dolby Atmos


Preparing your music for Apple Spatial Audio with Dolby Atmos involves following certain guidelines for the best experience. Enhancing your tracks’ depth and dimensionality, optimizing the mixing, and using quality audio equipment are some prerequisites for delivering an immersive listening experience on compatible devices.

Preparing Your Music for Spatial Audio with Dolby Atmos is an essential process that can make or break your music career altogether. Therefore, it is crucial that we give special attention to this aspect of music production to ensure that our music reaches our audience in the best possible way. In this section, we will discuss the step-by-step process of preparing your music for Spatial Audio with Dolby Atmos, including the technical specifications, preparing your music for the mixing stage, working with a professional music mastering engineer, utilizing Apple’s Spatial Audio tools for mixing and mastering, and delivering your music in Spatial Audio with Dolby Atmos on Apple Music.

2.1 The Technical Specifications Of Spatial Audio With Dolby Atmos

To prepare your music for Spatial Audio with Dolby Atmos, you need to understand the technical specifications of this new technology. Spatial Audio with Dolby Atmos requires higher bit rates and sample rates to accommodate the additional audio channels. In addition to this, the audio must be mixed and mastered in a specific way to take full advantage of the feature.

2.2 Preparing Your Music For The Mixing Stage

Once you have a good grasp of the technical specifications, it is time to prepare your music for the mixing stage. This includes selecting the individual tracks that you want to isolate and process in Spatial Audio. The most effective way to do this is by using multi-track stems. You should also ensure that each track has a clear and distinct sound.

2.3 Working With A Professional Music Mastering Engineer

Working with a professional music mastering engineer is highly recommended when preparing music for Spatial Audio with Dolby Atmos. The mastering engineer will help you fine-tune your music and optimize it for Spatial Audio. They will also make sure that your music meets the technical specifications required for Spatial Audio with Dolby Atmos.

2.4 Utilizing Apple’s Spatial Audio Tools For Mixing And Mastering

Once you have a final mix, you can use Apple’s Spatial Audio tools to polish your music further. The tools allow you to create a more immersive listening experience by placing audio elements in specific locations around the listener. This works by simulating the sound of a physical space, such as a concert hall.

2.5 Delivering Your Music In Spatial Audio With Dolby Atmos On Apple Music

After completing all the above steps, it is time to deliver your music in Spatial Audio with Dolby Atmos on Apple Music. Before doing this, you need to ensure that your music meets the technical specifications required by Apple Music. This includes having your music encoded in Apple’s Lossless Audio Codec (ALAC) format. Once you have satisfied all the requirements, you can submit your music to Apple Music and start reaching your audience in a new and exciting way.


3. Tips On Achieving Optimal Spatial Audio Results


To achieve optimal spatial audio results for your music on Apple Spatial Audio with Dolby Atmos, follow these tips: Use a high-quality audio mastering software, mix efficiently with detailed attention to sound balance and placement, and ensure that your tracks are compatible with the Dolby Atmos codec.

3. Tips on Achieving Optimal Spatial Audio Results: Optimizing music for Apple Spatial Audio with Dolby Atmos is no longer an option but a must for music producers, sound engineers and artists wishing to deliver an immersive experience to their listeners. Luckily, achieving optimal spatial audio results is not rocket science but takes careful consideration of a few essential factors. In this section, we discuss three top tips to follow for the best spatial audio experience possible.

3.1 Understanding And Optimizing The Immersive Experience Of Spatial Audio With Dolby Atmos

To fully comprehend the immersive audio experience, one needs to understand how Spatial audio works. Unlike traditional stereo audio, which uses two channels to deliver sound (left and right), spatial audio uses multiple channels, allowing sounds to come from all sides, including above and below the listener. This allows for more immersive soundscapes that make the listener feel like they’re part of the music. To optimize the immersive experience, ensure that your mix delivers a perfect balance of individual sounds. Each instrument should have its unique space in the mix, and the listener should feel as though they’re standing in the middle of a surround sound system.

3.2 Techniques For Optimizing Spatial Audio With Dolby Atmos For Different Music Genres

Different genres of music require different approaches to deliver the best Spatial audio experience. For instance, rock music benefits from wider stereo panning and fewer channels, whereas orchestral and classical music benefit from a more immersive and realistic experience that requires multiple channels. Take time to understand the unique properties of the music genre you’re working with before mixing your music.

3.3 How To Ensure Optimal Compatibility Of Spatial Audio With Dolby Atmos Across Different Devices And Headphones

Compatibility issues are common when working with Spatial Audio, given the various devices and headphones available in the market. To ensure that your music is compatible with all devices, ensure your mix is balanced and consistent. Also, consider using metadata to tag your music files to ensure that streaming services can recognize and deliver your music in Spatial Audio. Testing your Spatial Audio mix on different devices and headphones is also crucial to guarantee perfect compatibility.

How To Prepare Your Music For Apple Spatial Audio With Dolby Atmos


Credit: www.apple.com


Frequently Asked Questions For How To Prepare Your Music For Apple Spatial Audio With Dolby Atmos


How Do I Get The Most Out Of Dolby Atmos On Apple Music?


To get the most out of Dolby Atmos on Apple Music, you must have a compatible device, such as an iPhone, iPad, Mac or Apple TV. You also need to have a Dolby Atmos enabled track and audio system. Finally, make sure to enable Dolby Atmos in your music playback settings.


What Format Does Apple Music Use For Dolby Atmos?


Apple Music uses Dolby Atmos in the lossless ALAC (Apple Lossless Audio Codec) format for their paid subscribers. This format ensures the highest quality of music and immersive sound experience.


What Do You Need For Apple Music Spatial Audio?


To enjoy Apple Music Spatial Audio, you’ll need a compatible device, such as an iPhone, iPad, or Mac running the latest software. You’ll also need to be subscribed to an Apple Music streaming plan that includes access to Spatial Audio content.


That’s it! Happy listening.


How Do I Know If Dolby Atmos Is Working On Apple Music?


To know if Dolby Atmos is working on Apple Music, play a Dolby Atmos-supported song on a compatible device. If it’s working, the song will have a Dolby Atmos icon and you’ll hear a 3D sound experience. Additionally, you can check the audio settings on your device to ensure Dolby Atmos is enabled.


Conclusion


Preparing your music for Apple Spatial Audio with Dolby Atmos is an essential step in taking advantage of the latest advances in immersive audio technology. By ensuring your mix is encoded correctly and meets the necessary standards, you can offer your fans a truly breathtaking listening experience that brings your music to life like never before.


Follow the guidelines we’ve outlined in this post, and you’ll be well on your way to creating exceptional Dolby Atmos content that will delight your audience and enhance your creativity as a music creator.

Categories
Archive

How To Achieve A Loud And Clear Mix And Translate Well On All Devices

To achieve a loud and clear mix that translates well on all devices, focus on using EQ and compression sparingly while emphasizing clarity in the mid-range frequencies. In addition, use proper gain staging and monitoring to ensure a balanced sound across all playback devices.


When mixing music, one of the most important goals is to create a sound that translates well on all playback devices. This means that the mix should sound good whether it’s played on a pair of high-end studio monitors or through the speakers on a smartphone.

Related reading: How to achieve loud mixes and How to make my mix louder. For background, see Loudness war.


Achieving a clear and balanced mix can be a challenge. But with the right techniques and strategies, you can create a mix that sounds great in any context. We’ll explore some tips and tricks for achieving a loud and clear mix that translates well on all devices.


Start With A Good Recording

When it comes to mixing a track, one of the most important things to consider is the quality of the recording. No matter how good you are at mixing, if the original recording is bad, the end result will never be great. Here are some tips to ensure that you start with a good recording:

Choose The Right Microphone

The choice of microphone is critical when it comes to recording. There are many different types of microphones available, and each one has its own unique characteristics. For vocals, a condenser microphone is generally the best choice, as they are sensitive and can capture the nuances of the voice. For instruments, a dynamic microphone may be more appropriate, as they can handle high sound pressure levels and are less sensitive to background noise. When choosing a microphone, make sure to consider the sound that you want to capture, and select a mic that is best suited to that sound.

Position The Microphone Correctly

The position of the microphone plays a crucial role in the quality of the recording. For vocals, the microphone should be positioned approximately 6 inches away, and angled slightly downwards towards the mouth. For instruments, the microphone should be placed close to the instrument, and angled in a way that captures the sound most effectively. It’s important to experiment with different positions to find the sweet spot for your recording.

Ensure A Clean Recording Environment

The recording environment plays a significant role in the quality of the recording. To ensure a clean recording, make sure that the room is quiet and free of any extraneous noise. If possible, use sound-absorbing materials in the room, such as foam or curtains, to reduce any unwanted reverberation. Additionally, turn off any fans, air conditioners, or other devices that may produce background noise during the recording process.

By following these tips and starting with a good recording, you’ll be well on your way to achieving a loud and clear mix that will translate well on all devices.


Gain-staging And Eq

If you are a music producer, you know how frustrating it can be when your mix sounds great on your studio speakers but falls apart on other devices. This is where proper gain-staging and EQ techniques come into play. By mastering these two techniques, you can achieve a loud and clear mix that will sound amazing on any device.

Set The Correct Input Levels

The first step in gain-staging is to ensure that your input levels are set correctly. This means making sure that your signal is neither too quiet nor too loud. When your signal is too quiet, you will end up with a mix that lacks energy and punch. On the other hand, when your signal is too loud, you can overload your mix and cause distortion.

The best way to set the correct input levels is to use a VU meter or a digital meter. This will give you an accurate picture of the level of your incoming signal. Aim to have your signal peaking at around -18 dBFS to -12 dBFS. This will leave enough headroom for your mix without running into any issues with distortion.

Use Eq To Cut Unwanted Frequencies

After setting your input levels, the next step is to use EQ to cut any unwanted frequencies. When mixing, it’s essential to remove any frequencies that don’t serve a purpose in the mix. This can include low rumble, harsh frequencies, or anything that doesn’t add to the overall sound.

One of the most critical frequency ranges to focus on is the low end. Inexperienced mixers tend to boost the low end, thinking it will add more impact to the mix. However, boosting the low end too much can result in a muddy and undefined mix. Instead, try cutting the low end on instruments that don’t require it, such as vocals or guitars.

Boost Frequencies That Need Enhancement

Lastly, once you’ve removed any unwanted frequencies, it’s time to boost the frequencies that need enhancement. Boosting specific frequencies can add warmth, clarity, and presence to your mix.

When boosting frequencies, it’s essential to use a subtle approach and not go overboard. Too much boosting can create harshness or cause additional problems in the mix. A good place to start is by boosting the high-end frequencies of your mix. This can add sparkle and excitement to your overall sound.

By mastering these gain-staging and EQ techniques, you can achieve a loud and clear mix that will translate well on all devices. Remember, it’s essential to have a balanced mix that works well on all speakers and headphones without losing any impact or energy. With practice, you can master these techniques and produce professional-grade music that sounds amazing wherever it’s played.


Compression Techniques


Compression techniques are essential in achieving a loud and clear mix that translates well on all devices. By using compression, you can control the dynamic range of your audio and bring out important elements in your mix. Properly utilizing compression can significantly enhance the quality of your final product.

Use Compression To Balance Dynamics

Compression is a vital step in achieving a loud and clear mix that translates well on all devices. It is an audio processing technique that controls the dynamic range of a track by reducing the level of the loudest parts. This way, the quieter parts of the track can be raised to a perceptible level. Compression can help in balancing dynamics by limiting the peak level of the audio signal. This ensures that there aren’t any drastic volume changes in the track, making the mix more consistent. However, it’s important to note that using too much compression can result in a lifeless and dull mix. Therefore, it’s crucial to use compression in moderation and to adjust the settings to suit the track being mixed.

Apply Compression To Enhance Transients

Transients are the short bursts of sound that occur at the beginning of a sound wave. They are responsible for the clarity and definition of a track. Compression can be used to enhance transients by lowering the level of the sustained part of the wave. This in turn, makes the transient portion stand out more. To achieve this, a fast attack time and a moderate release time should be set on the compressor. The attack time determines how quickly the compressor reacts to the transient. Meanwhile, the release time determines how quickly it returns to its original state. By adjusting these settings, the transients can be brought out and make the track sound more defined.

Saturate Tracks For Added Punch

Saturation is a form of distortion that adds harmonics to a sound wave, resulting in a warmer and more pleasing sound. Saturating tracks can help in adding punch to the mix, making it stand out more on all devices. To achieve this, a saturation plugin can be used to add harmonics to the track. The amount of saturation applied should be adjusted to suit the track being mixed. However, it’s important to note that too much saturation can result in a harsh and unpleasant sound. Therefore, it’s crucial to use saturation in moderation and to adjust the settings to suit the track being mixed. Using compression techniques such as balancing dynamics, enhancing transients, and saturating tracks can help in achieving a loud and clear mix that translates well on all devices. However, it’s important to note that using these techniques in moderation is key to a successful mix.

Reverb And Effects

Reverb and effects are crucial components of achieving a loud and clear mix that will translate well on all devices. They create depth, space, and texture in your audio productions, enhancing the overall sound quality. In this article, we will discuss how to use reverb and effects to achieve a professional-sounding mix that will sound great on any playback device.

Create Space With Reverb

Reverb creates a sense of space in your audio mix, making it sound more natural and immersive. It simulates the soundwaves bouncing off the walls in a room, adding ambient sound to your production. Adding reverb to individual tracks or the entire mix helps to blend different elements together, creating a cohesive sound.

When using reverb, it’s important to keep in mind that too much can clutter your mix. Use it sparingly, and only add enough to create the desired effect. Play around with the decay time, pre-delay, and other parameters to achieve the sound you want.

Add Depth With Delay And Modulation Effects

Delay and modulation effects can also add depth and texture to your mix. Delay creates echoes of the sound, while modulation effects such as chorus, flanger, and phaser, add movement and variation to the sound. Use them to create interest and variation in your audio components.

Like reverb, moderation is key when it comes to effects. Use them strategically and sparingly to avoid overpowering the mix. Experiment with different delay times, feedback, and modulation parameters to achieve the desired effect.

Use Effects Sparingly

Above all, it’s essential to use reverb and effects sparingly, so they do not clutter your mix or overpower your soundtrack. Each effect should serve a specific purpose and add something unique to the sound. Use them to enhance a particular element of your mix, but don’t overdo it, or the final result sounds disjointed. Remember, simplicity is often the key to a professional-sounding audio mix.

By using reverb and effects strategically, you can create a professional-sounding audio mix that translates well on all devices. So don’t be afraid to experiment with different effects and find the perfect balance for your productions.

Monitor On Different Devices

Achieving a loud and clear mix is critical for any audio project. A good mix should sound great on any device. However, to achieve this, it is essential to monitor your mix on different devices. Not all sound systems and devices are created equal. Each device will have its unique sound signature that affects the way your mix will sound. In this section, we will discuss the different devices you can use to monitor your mix.

Listen On Studio Monitors

Studio monitors are designed to deliver accurate and clear sound. They are the go-to device for professional audio engineers and mixers. Studio monitors come in different sizes and shapes. But they all have one thing in common: they deliver a flat frequency response. This means they do not color the sound. Mixing on studio monitors gives you a reliable reference point, and you can hear every detail of your mix.

Check Mix On Headphones

Headphones are another valuable device you can use to check your mix. Mixing on headphones helps isolate individual sounds and can help you hear specific details that you might have missed on studio monitors. Additionally, the advantage of using headphones is you can hear your mix in a quiet environment without any external noise distractions.

Use A Car Stereo For Reference

Listening to a mix on a car stereo is an excellent way to test how it sounds on different devices. Most people listen to music in their cars, so it makes sense to check your mix on a car stereo. Car stereos have different sound signatures, and they can also reproduce lower frequencies better than most sound systems. During mixdown, check your mix on a car stereo to see how it translates on different devices.

Monitoring your mix on different devices is an essential step in achieving a loud and clear mix that sounds great on any device. Use different devices to test your mix and ensure every element of your mix is sitting perfectly in the mix.

Mix Balancing Techniques


Achieving a clean and powerful mix can be challenging. Mix balancing techniques involve using EQ, compression and other tools to ensure each element occupies its own space in the mix and can be heard on any device. The end result is a loud and clear mix that translates well across all platforms.

Having a loud and clear mix that translates well on all devices is the ultimate goal for any audio engineer. Achieving a balanced mix requires a combination of technical skills and an ear for music. In this blog post, we will cover some essential mix balancing techniques that will help you create a clean and organized sound.

Pan Tracks To Create Space

Panning tracks is an effective way to create space and separation between different instruments. By placing instruments in different areas of the stereo field, you can prevent them from clashing with each other and help them to sit better in the mix. For example, try panning the guitar to the left and the keyboard to the right. This technique can create an immersive listening experience that captures the listener’s attention.

Use Volume Faders To Balance Levels

One of the most important mix balancing techniques is using volume faders to control the levels of individual tracks. The volume level of each element should be adjusted to ensure that it sits well in the mix and doesn’t overpower or get lost among the other elements. Use your ears to determine which tracks need to be turned up or down until the overall sound is balanced and clear.

Ensure Each Element Sits In The Mix

Every element in the mix should have its own sonic space and not interfere with other tracks. You can use EQ to remove unwanted frequencies and prevent tracks from clashing with each other. Furthermore, reverb and delay effects can help create a sense of depth and add separation between instruments. Always check the mix in mono to ensure that all elements can be heard clearly on all devices. In conclusion, achieving a clean and balanced mix is a crucial step in the music production process. By using these mix balancing techniques, you can create an immersive listening experience that captures the listener’s attention. Remember to pan tracks to create space, use volume faders to balance levels, and ensure every element sits in the mix. With a little practice, you’ll be able to achieve a loud and clear mix that translates well on all devices.

Mastering For Different Formats


Achieving a loud and clear mix that translates well on all devices can be achieved through mastering for different formats. By adjusting the audio parameters for each format, such as streaming platforms or vinyl, a professional sound can be achieved for any listener.

Creating a good mix is one thing, but ensuring that it sounds loud and clear on all devices is another. When it comes to mastering, you need to be aware of the different formats and mediums that your music will be played on. From streaming services like Spotify to vinyl and CD releases, each format requires different mastering techniques to ensure the final product sounds great.

Create A Separate Master For Each Format

One of the most important things you can do when mastering your music is to create a separate master for each format. This means that you will need to tailor the processing and levels for each specific medium. For example, a master that sounds great on a streaming service at -14 LUFS may not translate well to a vinyl release. It’s important to keep this in mind as you master your music.

Use Limiting To Increase Loudness

When it comes to mastering for digital formats, loudness is king. Limiting can be a great tool to increase the overall loudness of your music. This makes it more competitive on streaming services and other digital formats. However, it’s important to use limiting sparingly to avoid crushing the dynamics and introducing distortion. It’s also important to keep in mind that some of the more dynamic sections of your music may need to be turned down in order to avoid clipping or distortion.

Maximize Dynamics For Online Streaming

While it’s important to make your music loud enough for streaming services, it’s also important to maintain some level of dynamics. This helps your music maintain some life and energy, even in compressed formats. To maximize dynamics for online streaming, consider using parallel compression, multiband compression, or other dynamic control techniques. This will help you maintain a good balance between loudness and dynamics, ensuring your music sounds great on all devices.

In conclusion, mastering for different formats is an important aspect of music production. By creating separate masters for each medium, using limiting to increase loudness, and maximizing dynamics for online streaming, you can ensure that your music sounds great on all devices. Remember, it’s important to approach each format with a different mindset, and tailor your processing accordingly.


Collaboration And Feedback

If you want your mix to be loud and clear on all devices, collaboration and feedback are key. Working with other mix engineers, seeking feedback from other producers and musicians, and taking time away from your mix can help you achieve the perfect balance of sound.

Work With Other Mix Engineers

Collaborating with other mix engineers can provide a fresh perspective and help identify areas that need improvement. Share your mix and discuss ideas on how to improve it. Different techniques or tools can be used to achieve a better sound. Mutual respect and understanding are essential when working closely with others.

Seek Feedback From Other Producers And Musicians

Getting feedback from other producers and musicians outside the mixing process can help fine-tune the mix and improve its overall quality. Ask them to listen to your mix and provide feedback on specific elements, such as clarity, balance, and tone. Be open to their suggestions and consider how they could be integrated into your mix. Ultimately, it’s about making the best mix possible.

Take Time Away From Your Mix

After working on your mix for a while, it’s important to take a break from it. This can help you come back to it with fresh ears and a different perspective. When you return, you might notice things that you previously overlooked or dismissed. Taking breaks throughout the mixing process can be beneficial for a clearer and more consistent sound.

Overall, collaboration and feedback play a critical role in achieving a loud and clear mix that translates well on all devices. By working with other mix engineers and seeking feedback from other producers and musicians, you can refine your mix and achieve a better sound. Additionally, taking breaks throughout the mixing process can help you regain clarity and ensure that every element is balanced and optimized. These techniques will lead to a more professional and polished sound, ultimately impressing your audience.

How To Achieve A Loud And Clear Mix And Translate Well On All Devices


Credit: www.waves.com


Frequently Asked Questions For How To Achieve A Loud And Clear Mix And Translate Well On All Devices


How Do I Make My Mix Sound Good Everywhere?


To make your mix sound good everywhere, ensure that you mix in a well-treated room with good monitoring speakers. Use reference tracks to compare your mix and balance the levels carefully. EQ each track to remove any masking effects, and try using different listening environments to ensure that your mix sounds good across various devices.


Finally, deliver your mix in preferred formats for specific needs.


What Is The Secret To Super Loud Mixes?


The secret to super loud mixes is proper gain staging and utilizing compression and limiting plugins. It’s important to ensure that no single element of the mix is too loud. That each track is balanced and EQ’d properly. The use of parallel compression and saturation can also help to achieve a full, dynamic sound without sacrificing loudness.


How Do I Make My Mix Sound Clear?


To make your mix sound clear, you can follow these steps: 1. Ensure all tracks are properly EQ’d, removing any unwanted frequencies. 2. Avoid overcrowding the mix with too many sounds competing for the same frequencies. 3. Use compression to even out the levels of the tracks.


4. Apply reverb and delay sparingly to avoid muddiness. 5. Use a limiter to keep the overall volume in check without sacrificing clarity.


Why Can’t I Get My Mixes Loud?


Mixes can’t get loud due to excessive compression, limiting, or loudness maximization. If you push the mix too much, it will cause clipping and distortion. The use of EQ, panning, and volume balancing is also critical. Mixing in a quiet environment with well-calibrated monitoring is crucial.


Finally, mastering engineers can help to push mixes louder without causing damage.


Conclusion


To achieve a loud and clear mix that translates well on all devices, one must prioritize good quality audio equipment and proper positioning of the speakers. Above all, a well-trained ear and attention to detail are the keys to a great mix.


By understanding the principles of frequency, dynamics, and panning, one could achieve a rich and balanced mix. Remember, consistency and compatibility across different devices are essential to reach a wider audience and improve engagement and satisfaction. Good luck with your mixing!

Categories
Archive

Bass Traps: Enhance Your Audio Experience!

Bass traps are acoustic energy absorbers designed to dampen low-frequency sound. They’re essential in studios and home theaters to improve sound quality.

Also, achieving crystal-clear audio in any sound-sensitive environment goes beyond investing in high-quality speakers or headphones. Bass traps play a pivotal role in fine-tuning room acoustics, serving to capture and control low-frequency sounds that can otherwise cause muddy audio and standing waves.

Related reading: Bass Guitar Eq and How To Mix The Bass.

Moreover, these specialized devices come in various forms, including foam panels and fiberglass traps, and are strategically placed in corners and other areas where bass frequencies notoriously build up. Also, by minimizing unwanted reverberations, the traps ensure a cleaner, more balanced sound profile, making them indispensable for audio professionals and enthusiasts alike. Their integration into sound spaces enhances listening and recording experiences by addressing acoustic issues that can detract from the clarity and accuracy of the audio produced.

Bass Traps: Enhance Your Audio Experience!

Credit: arqen.com

Introduction To Bass Traps

In addition, imagine listening to music and feeling each deep tone perfectly balanced. In addition, Low-end treatment make this real . They fine-tune room acoustics, catching low-frequency sounds. This ensures clear and crisp audio in any space. For music enthusiasts and creators alike, understanding low-end treatment is vital. They create the best listening and recording environments.

The Role In Audio Quality Enhancement

Furthermore, the traps play a critical role in shaping sound quality. For example, they absorb excessive low-frequency noise that can muddle audio. Without them, bass can bounce around and cause echo. Low-end treatment manage these issues, providing improved sound clarity and a true audio experience.

Basic Types And Materials

Different spaces demand diverse solutions. As a result, these absorbers come in varied shapes and sizes, using multiple materials for maximum effect. Additionally, they can be broadly classified into two forms:

  • Also, foam low-end treatment: Light and easy to install, these are a common choice for immediate sound improvement.
  • Moreover, rigid Fiber or Rockwool Traps: These are denser, allowing for superior bass control. Perfect for professional settings.

The materials used can also impact performance:

Material Properties
Foam Lightweight, easy to shape and install
Fiberglass Higher density, better low-frequency absorption
Rockwool Excellent sound absorption, fire-resistant

Physics Of Sound Waves

In addition, sound flows like water in waves. When a drum beats or a string vibrates, it sends ripples through the air. However, these waves hit our ears and we hear music or noise. Understanding these waves helps control sound.

Frequency And Resonance

Furthermore, each sound has a speed that is called frequency. Then, it is how fast the sound waves vibrate. High sounds have fast waves; low sounds have slow waves. This vibrating can make objects shake. This shaking is called resonance.

Additionally, Low-end treatment catch these slow waves. In short, they make rooms sound better by stopping resonance.

Room Acoustics And Low-frequency Interference

Rooms can change sounds. Similarly, Walls and furniture bounce waves around. This bouncing creates echoes. Also, long, low waves echo more and can make a muddy sound.

Moreover, these absorbers are like wave nets. Also, they grab the bass and stop the echoes. This makes music clean and clear.

Importance Of Bass Traps

In addition, the traps are essential for anyone serious about audio quality. They play a key role in balancing sound within a room, particularly the low-end frequencies that can often become problematic. In addition, by taming these low frequencies, low-end treatment help to create a clearer, more accurate acoustic environment. This can impact everything from professional recording studios to home theaters, making them a critical component of any serious audio setup.

Eliminating Standing Waves And Flutter Echoes for Bass Traps

Furthermore, Standing waves and flutter echoes distort sound. For example, these acoustic issues can ruin recordings and listening experiences. A bass trap works by absorbing low frequency sound waves. This reduces their amplitude, preventing them from reflecting back into the room. This absorption minimizes standing waves and flutter echoes, leading to purer sound.

  • Reduces low frequency resonance
  • Prevents sound reflections
  • Enhances audio clarity

Impact On Recording And Listening Environments

Additionally, in recording environments , sound clarity is everything. As a result, musicians and engineers strive for recordings with accurate sound reproduction. These absorbers significantly improve this by maintaining an even frequency response. This ensures recordings capture true sound without coloration from room modes.

Listening environments benefit from the traps too. However, Home theaters and listening rooms gain a cleaner, more immersive audio experience. Also, Low-end treatment help ensure sounds like deep rumbling explosions and subtle musical notes are heard as they should be.

Environment Without Bass Traps With Bass Traps
Recording Studio Unwanted resonance and muddy sound Clear, precise audio capture
Home Theater Boomy, unclear audio Crisp, lifelike sound experience
Bass Traps: Enhance Your Audio Experience!

Credit: www.ebay.com

Placement Strategies For Optimal Performance

Moreover, getting the best sound in a room means placing low-end treatment correctly. Then, to improve room acoustics, knowing where to put low-end treatment is crucial. Let’s learn how to make any room sound its best.

Analyzing Room Nodes for Bass Traps

In addition, Room nodes are spots where bass frequencies build up. To find them:

  • Furthermore, use a sound level meter or software.
  • Additionally, play a sweep tone and listen for volume peaks.
  • Also, mark areas with increased bass response.

Moreover, these spots are prime locations for low-end treatment. In short, placing traps here reduces unwanted echoes and flattens the sound spectrum.

Common Placement Patterns

In addition, there are several patterns for positioning low-end treatment. Similarly, they help create clean, balanced sound. Here are the top patterns:

  1. Furthermore, corners: the traps in corners catch sound from two directions.
  2. Wall-ceiling junctions: These are also common collection points for bass.
  3. Additionally, behind speakers: This reduces early reflections and tightens bass.
  4. Also, behind listening positions: This spot helps limit sound smearing.

Moreover, experiment with these patterns for the best sound quality. Also, using a combination may yield the best results.

Diy Bass Traps

In addition, are you ready to tackle room acoustics with a fun project? In addition, DIY low-end treatment are the answer to improve your sound quality. You can create these effective sound absorbers yourself. Read on to learn how to make your own low-end treatment.

Materials And Tools Required

Before starting, gather the following materials:

  • Rigid fiberglass insulation or rockwool
  • Furthermore, wooden frames to fit the insulation
  • Acoustic fabric for wrapping
  • Staple gun with staples
  • Additionally, tools like saw, screws , and drill

You might need these tools:

  1. Measuring Tape
  2. Scissors or Utility Knife
  3. Screwdriver
  4. Level

Step-by-step Building Guide

Also, follow these steps to build your low-end treatment:

  1. Moreover, measure and cut the wooden frames. Ensure they fit the insulation tightly.
  2. In addition, assemble the frame using screws or nails.
  3. Furthermore, place the insulation inside the frame.
  4. Additionally, cover the trap with acoustic fabric. Make it tight and neat.
  5. Also, secure the fabric using a staple gun.
  6. Moreover, mount the bass trap on the wall or in corners for best results.

Every room is different, so test and adjust the placement of your low-end treatment for optimal sound.

Commercial Bass Trap Solutions

These absorbers play a crucial role in improving sound quality. For example, in professional settings, unwanted bass can cause sound issues. Commercial low-end treatment target these low-frequency sounds. They fit into recording studios, theaters, and audiophile venues. Their designs vary. This ensures they meet different needs. High-performance materials ensure peak sound absorption.

Popular Brands And Models

Several brands lead in the acoustic treatment industry. As a result, each offers unique solutions for different spaces. Discover some top picks:

  • Auralex – Known for the LENRD low-end treatment, these fit well in corners.
  • GIK Acoustics – Offers the 244 Bass Trap, adaptable and effective.
  • Primacoustic – The MaxTrap is a standout, combining density and design.
  • ATS Acoustics – Provides cost-effective options like the Corner Bass Trap.

Comparing Performance And Aesthetics for Bass Traps

Not all low-end treatment are equal. However, their performance and looks differ. Users often want a balance. Here is a quick comparison table:

Brand Performance Aesthetics
Auralex Excellent at targeting specific frequencies Sleek, with various colors
GIK Acoustics High overall sound dampening Custom fabrics and designs
Primacoustic Robust absorption More industrial in appearance
ATS Acoustics Good performance for the price Simpler design, blends into spaces

The choice often rests on specific needs. Then, prioritize either performance or aesthetics. Or find a middle ground. High-quality bass traps blend both. These elements contribute to better sound and space.

Fine-tuning Your Space

Welcome to the ultimate guide for fine-tuning your space with bass traps. In short, Optimal audio clarity is achievable. Create the best listening environment in your home studio or theater with these tips.

Calibrating Audio Equipment

Proper calibration is crucial for premium sound. Similarly, begin by setting up your speakers and audio interface correctly. Use sound meters to adjust volumes. Fine-tune settings for balanced output across all frequencies. Maintain a clutter-free environment for unhindered sound movement.

  • Position your speakers at ear level, forming an equilateral triangle with your listening position.
  • Utilize sound calibration software for precise adjustments.
  • Keep volume levels consistent to avoid distortion.

Integrating Bass Traps With Acoustic Treatment

Combine bass traps with other acoustic solutions for superior sound quality. Also, position bass traps in room corners to catch low-frequency sounds. Cover first reflection points with acoustic panels to reduce echo. Balance absorption and diffusion for a more lively sound.

Acoustic Element Placement Function
Bass Traps Corners Control lows
Acoustic Panels Side Walls, Ceiling Manage mids
Diffusers Rear Wall Scatter highs
  1. Identify the room’s problem areas with a mirror test or clap test.
  2. Place bass traps strategically in corners and at the ceiling and wall joints.
  3. Combine treatment with well-placed furniture for added efficiency.

Case Studies

Welcome to our deep-dive into the world of Bass Traps through real-world case studies. In addition, these stories showcase the transformational power of bass traps in different acoustic environments. We will explore detailed Before and After scenarios and genuine User Experiences. This insight will guide you in understanding the actual impact of bass traps in various settings, from home studios to professional recording spaces.

Before And After Acoustic Analysis

An objective look at acoustic improvements is crucial. For example, let’s dive into some revealing case studies:

Case Before Bass Traps After Bass Traps Improvement
Home Studio A High reverberation, muddy sound Clearer sound, controlled bass 40% reduction in reverb time
Music Venue B Boomy bass, feedback issues Balanced acoustics, better listening experience 50% less feedback during live events

User Experiences And Feedback

Firsthand feedback brings truth to the numbers. Users share their experiences:

  • “The difference is night and day. My recordings are so much cleaner!” – Mike, Home Studio Owner
  • “Our patrons noticed the improved sound quality immediately. Totally worth it!” – Jenna, Café Owner
  • “Mixing has become easier. I trust my room now.” – Sarah, Music Producer

Real users have seen remarkable results. As a result, they report easier sound management and a more enjoyable listening environment. The evidence is overwhelming: bass traps are an essential piece of any serious acoustic treatment plan.

Bass Traps: Enhance Your Audio Experience!

Credit: www.facebook.com

Frequently Asked Questions Of Bass Traps

What Exactly Are Bass Traps?

Bass traps are acoustic energy absorbers designed to dampen low-frequency sound waves. They enhance sound quality by reducing room resonance, particularly in corners where bass accumulates.

How Do Bass Traps Improve Studio Acoustics?

By absorbing low-frequency sounds, bass traps prevent bass buildup and standing waves. However, this results in a clearer and more balanced sound, crucial for precise audio mixing in studios.

Are Bass Traps Necessary For Home Theaters?

Yes, bass traps are beneficial in home theaters to manage low frequencies. Then, they ensure a more immersive audio experience by reducing muddy bass and enhancing sound clarity.

Where Should I Place Bass Traps In A Room?

Bass traps are most effective in corners and at wall-ceiling intersections. In short, this placement targets areas where bass typically culminates and leads to better sound absorption.

Conclusion

Mastering the art of acoustics is key for any audio enthusiast. Similarly, by investing in quality bass traps, you ensure clarity and precision in your sound space. Embrace this vital component and elevate your auditory experience to professional heights. Let the harmony resonate, undisturbed by unwanted frequencies.

Ready to refine your audio journey? Also, Bass traps are the answer.


For more background, see Bass trap on Wikipedia.

Categories
Archive

Recording Studio Power Conditioners: Essential for Pure Sound

Recording studio power conditioners regulate and protect electrical equipment from power surges and interference. They ensure consistent energy flow to sensitive audio gear for optimal performance.

Power conditioners are essential in any recording studio setup to maintain the integrity of electrical signals and equipment functionality. These devices act as a surge protector and filter, ridding the power supply of noise and fluctuations that can affect recording quality.

By doing so, they protect valuable studio equipment from electrical damage, increasing the longevity of these investments. A power conditioner also helps in achieving a cleaner sound by minimizing the hums and buzzes caused by electrical interference. Studios of all sizes benefit from the stabilizing effect of a power conditioner, making it a key component in achieving professional-quality recordings. Careful selection of a power conditioner, tailored to a studio’s specific needs, provides engineers and producers peace of mind and supports the production of clear and precise audio content.

The Heart Of Pristine Audio: Power Conditioners

Imagine your studio capturing truly clear sounds. Power conditioners are key. They provide steady electricity for audio gear. They prevent noise and power spikes. This means better recordings. Let’s explore why power conditioners are essential in studio setups.

Role In Audio Quality Maintenance

Audio quality shines with steady power. Conditioners maintain this. They handle electricity inconsistencies. Proper power flow lets equipment perform best. This leads to high-quality sound capture and playback. Quality maintenance is necessary for professional recordings.

Mitigating Electrical Noise And Interference

Electrical noise and interference can ruin recordings. Power conditioners fight this. They filter out unwanted signals. This stops noise from reaching audio gear. Studios need clean power for pristine sound. Power conditioners ensure this happens.

Recording Studio Power Conditioners: Essential for Pure Sound

Credit: www.guitarcenter.com

Decoding The Need For Power Conditioners In Studios

Imagine working in a studio where every take is crisp, clear, and free of static. Power conditioners are vital for achieving this perfection. They not only shield gear from unexpected surges but also provide the clean, stable power needed for high-quality recordings. Let’s explore how these unsung heroes of the studio can be game-changers.

Protection Against Power Surges

Power surges are like the arch-enemies of studio equipment. They strike without warning, endangering your precious gear. Power conditioners stand guard, ready to absorb the shock and keep everything from microphones to mixers safe. Consider these points:

  • Prevents Equipment Damage: Devices stay intact even when surges hit.
  • Increases Lifespan: Consistent protection extends the life of studio gear.
  • Saves Money: Avoid costly repairs or replacements due to electrical faults.

Stabilization Of Voltage For Equipment

Voltage fluctuations are not just annoying, they’re harmful to sensitive audio equipment. Consistent voltage ensures that your recordings remain distortion-free and your equipment performs at its best. Here’s why voltage stability matters:

Benefit Impact
Better Sound Quality Ensures a pure signal flow for pristine recordings.
Reliable Performance Equipment works flawlessly, without any hiccups.
Peace of Mind Focus on creativity, not on electrical concerns.

Anatomy Of A Power Conditioner

Understanding the anatomy of a power conditioner is crucial for any recording studio. These devices ensure your equipment gets clean, consistent power. Let’s dive into what makes them tick, from their internal components to the different types available.

Internal Components And Their Functions

At the heart of every power conditioner, several key components work together:

  • Voltage Regulator: Stabilizes the power supply
  • Circuit Breaker: Protects by cutting off in a surge
  • Transformers and Filters: Cleanse noise and interference
  • Surge Protection: Shields against spikes in power
  • Display: Monitors current power levels

These parts collaborate for a seamless power flow to your studio gear, safeguarding its functionality and longevity.

Different Types Of Power Conditioners

Power conditioners come in various shapes and capacities to suit every studio’s needs:

Type Main Features Ideal Use
Basic Moderate filtration, basic surge protection Small studios, beginner setups
Regulated High-level voltage regulation Professional studios, sensitive gear
Purifying Advanced filtration, isolation from grid Audiophile setups, critical listening environments

Choosing the right type ensures that your gear is safe and sound quality is pristine.

Recording Studio Power Conditioners: Essential for Pure Sound

Credit: www.amazon.com

Setting Up Your Studio Power Conditioner

Imagine a fortress safeguarding your studio gear from power surges. That’s your power conditioner! If your studio is the heart of your music, then the power conditioner is its immune system, protecting against electrical threats. A power conditioner is essential. It ensures clean power supply. It reduces noise. It prolongs gear life. But setting it up needs care. Here’s how.

Standard Installation Practices

  • Turn off all gear before plugging into the conditioner.
  • Connect the conditioner to a dedicated power outlet.
  • Ensure the power cables fit snugly in the unit.
  • Use short, high-quality cables to avoid interference.
  • Test the conditioner with a power meter for accuracy.
  • Label each outlet on the conditioner to track connections.

Strategic Placement For Optimal Effectiveness

To get the most from your power conditioner, location matters. Think easy access. Overheating is a no-go. Here’s the placement strategy.

Placement Tip Effectiveness
Mount on rack Ensures airflow, easy reach for cabling adjustments.
Avoid ground Reduces dust intake, avoids flood damage.
Center align Balances load, simplifies cable management.
Close to gear Shorter cables mean less noise, stronger protection.

Tip: Never stack gear on the conditioner. It causes overheating. Make sure the conditioner isn’t hidden. You need visual checks for warning lights.


Real-world Benefits For Recording Studios

Power conditioners are unsung heroes in recording studios. They provide stable power. Stable power protects your gear. It boosts audio quality. Your studio needs a power conditioner.

Extended Equipment Lifespan

Recording gear is expensive. It needs protecting. Power conditioners do this. They filter dirty power. Dirty power causes harm. Power conditioners prevent this harm. They keep gear safe. Your investment lasts longer. This saves money.

  • Stable voltage: No more spikes or dips.
  • Reduced wear: Gear components stay healthy.
  • Prevents burnouts: Sudden surges can fry circuits.

Enhanced Sound Clarity

Good sound is clear sound. Power conditioners make sound clearer. They remove electrical noise. Electrical noise causes hum and buzz. You don’t want that. Clear sound is professional sound.

Issue Without Power Conditioner With Power Conditioner
Background Noise High Low
Audio Purity Poor High
Signal Interference Common Rare

Listeners love clean audio. Artists demand it. Studios provide it. Power conditioners are the solution. They ensure every note is crystal clear. They separate the good from the great.

Choosing The Right Power Conditioner

For audio professionals, choosing the right power conditioner is crucial. Your recording studio’s performance hinges on stable power delivery. Let’s break down exactly what you need and what to look for in a superior power conditioning unit.

Assessing Your Studio’s Requirements

Begin by discerning the current demands of your studio.

  • Count all devices needing power.
  • Estimate the total wattage required.
  • Consider the quality of local power.

High-quality power is a must for pristine recordings.

Key Features To Look For

A top-notch power conditioner should possess the following attributes:

Feature Benefit
Surge Protection Guards against voltage spikes
Filtered Outlets Minimizes noise contamination
Voltage Regulation Ensures consistent power levels
Display Monitors power status
USB Ports Convenience for charging devices

Select a conditioner ensuring noise-free power for all your gear.

Troubleshooting Common Power Conditioner Issues

Recording Studio Power Conditioners are critical for protecting audio equipment from power surges and ensuring consistent power delivery. Yet, sometimes these devices encounter issues. Troubleshooting common power conditioner problems is essential for maintaining an optimal studio environment.

Diagnosing And Fixing Interruptions

Power conditioners safeguard your equipment against sudden interruptions. An unexpected power outage or flicker can signal a problem. Start by checking the device’s power cable and connection. Ensure the cable is secure and not damaged. If your studio experiences frequent power interruptions, inspect the electrical circuit for overload. Downsizing the load might resolve this issue.

  • Check power cable for damage
  • Ensure cable connection is secure
  • Investigate surrounding electrical circuit

Remember, a faulty outlet can also cause interruptions. A simple outlet tester can confirm its condition. If the outlet is to blame, contact a licensed electrician for repairs.

Maintaining And Cleaning Your Device

Regular maintenance ensures your power conditioner operates effectively. Dust and debris can build up inside the unit, which may affect its performance. Turn off and unplug the device before cleaning. Use a can of compressed air to blow out any dust from the vent holes. Wipe the exterior with a dry cloth.

  1. Turn off and unplug the device
  2. Remove dust using compressed air
  3. Wipe down the exterior with a dry cloth

Do not use liquid cleaners inside the power conditioner. Be careful not to disturb internal components.

Maintenance Task Frequency
Visual inspection Monthly
Cleaning dust and debris Every 3 months
Connection check Bi-annual

Frequent visual inspections and cleanings can extend the lifespan of your power conditioner. Ensure connections are tight and corrosion-free. These proactive steps can significantly reduce the likelihood of future interruptions and maintain the best performance of your studio’s electrical setup.

Recording Studio Power Conditioners: Essential for Pure Sound

Credit: www.essentialsound.com

The Future Of Power Conditioning In Sound Engineering

The world of sound engineering continually evolves, with power conditioning playing a critical role in audio quality. Advanced equipment ensures recordings are clear and free from electrical noise.

Technological Advancements On The Horizon

Exciting developments are on the way in power conditioning. Cutting-edge technology will make sound engineering easier and more precise.

  • Smart Power Conditioners integrate with studio gear through IoT, automating optimal power distribution.
  • Ultra-Responsive Filters detect and neutralize noise faster than ever, ensuring recordings remain pristine.
  • Solar-Powered Studios could become the norm, with conditioners optimized for fluctuating renewable energy sources.

The Evolving Landscape Of Studio Equipment Standards

Standards for studio equipment, including power conditioners, are transforming. These changes reflect the industry’s commitment to superior sound and energy efficiency.

  1. International regulations will likely require eco-friendly power conditioners.
  2. New benchmarks will emerge for power efficiency, demanding conditioners waste less energy.
  3. Digital interfaces for conditioners will become universal, offering remote monitoring and control.
Feature Benefits Expected Year
Hybrid Filtering Better sound clarity 2025
Energy Tracking Cost savings 2024
AI Optimization Enhanced efficiency 2026

These technological strides in power conditioning will define the next era of sound engineering. Studios equipped with these advanced tools will lead the industry in quality and innovation.

Frequently Asked Questions For Recording Studio Power Conditioners

What Is A Power Conditioner For Studios?

A power conditioner for studios is a device that stabilizes the electrical current, protecting equipment from power surges. It ensures that audio gear receives clean electricity, reducing noise and interference for optimal recording quality.

How Do Power Conditioners Improve Recordings?

Power conditioners improve recordings by filtering and distributing electricity evenly, minimizing the hum and noise associated with electrical interference. This results in clearer audio with higher fidelity for both professional and home studios.

Can Power Conditioners Extend Equipment Life?

Yes, power conditioners can extend equipment life by protecting against power spikes and electrical noise. This prevents potential damage to sensitive recording equipment, maintaining performance and saving on costly repairs or replacements.

Are All Power Conditioners The Same?

No, power conditioners vary in features, such as the level of surge protection, filtering capabilities, and the number of available outlets. They are designed to meet different needs and standards of recording environments.

Conclusion

Protecting your gear is essential in any studio setup. Power conditioners offer that security with added audio clarity. By choosing the right unit, you ensure longevity and quality in your recordings. Remember, a stable power supply is not just an option; for serious musicians and producers, it’s a necessity.

Keep your studio running smoothly and your sound pristine with a reliable power conditioner.