Categories
Archive

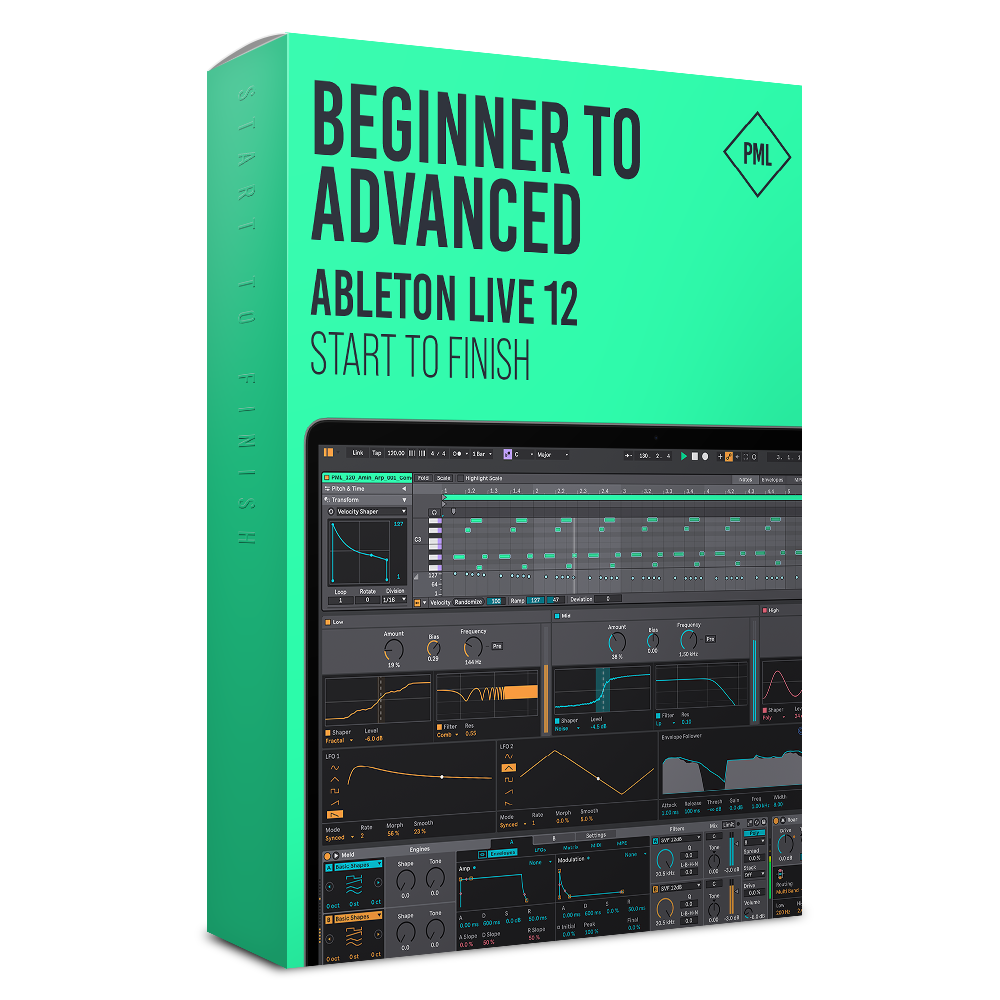
One To One Lessons Ableton Live Beginners

One-to-one lessons for Ableton Live beginner level are available, offering personalized instruction for efficient learning. These lessons are designed to cater to individual needs, ensure comprehension, and inspire musical creativity.

As a beginner, understanding the fundamentals of Ableton Live software can be challenging, and one-to-one lessons can provide clarity and motivation, and offer the structure to advance through the program. Ableton Live is a software package designed explicitly for live performance and loop-based recording.

Its interface is minimalistic, and its workflow can be overwhelming for a beginner just starting in music production. One-to-one lessons for beginners offer a personalized and directed approach to learn the basics and kick-start the learning process with Ableton Live. These lessons provide a more structured learning environment, allowing the student to progress at their own pace while practicing in the familiar surroundings of their own homes.

Why Choose One-to-one Lessons?

If you are a beginner looking to learn Ableton Live, one-to-one lessons could be your best bet. In a group class, it can be tough to get one-on-one attention, and you might find yourself falling behind or not getting answers to your questions. One-to-one lessons eliminate this issue, ensuring you receive personalized attention and move at your own pace. Here are some of the benefits of choosing one-to-one lessons:

Personalized Learning

One-to-one lessons with an Ableton Live expert can help tailor the lessons to your individual goals and learning style. If you’re struggling with a particular feature or concept, the instructor can spend more time on that topic and ensure you understand it before moving on. On the other hand, if you already have a good understanding of certain aspects of Ableton, the instructor can adjust the program accordingly and focus on other topics.

Flexible Scheduling

Unlike group classes with fixed schedules, one-to-one lessons allow flexible scheduling that can be adjusted to your schedule. This flexibility can be particularly useful for those with busy lifestyles or unpredictable schedules. Additionally, if you are looking to learn Ableton Live for a specific purpose, such as producing a track or performing live sets, one-to-one lessons can help you achieve your goals faster.

Ultimately, choosing one-to-one lessons for Ableton Live can provide more personalized attention and flexibility to tailor the program to your goals and needs. Contact us to learn about our one-to-one Ableton Live lessons and how they can help you achieve your music production goals.

Understanding The Basics

Learning Ableton Live is an exciting journey, but for a beginner, it can be overwhelming. However, with the right one to one lessons, learning the basics of Ableton Live can be an enjoyable and rewarding experience. Understanding the basics is crucial for anyone who wants to get the most out of Ableton Live. In this article, we will take a deep dive into the fundamental concepts of Ableton Live and cover some essential topics such as the Ableton Live interface, MIDI and audio clips, and the difference between arrangement view and session view.

Introduction To Ableton Live Interface

The Ableton Live interface may look daunting at first, but once you understand it, you’ll find that it’s straightforward and easy to use. The Ableton Live interface consists of several different elements, including:

  • The menu bar, which contains various menu items for creating and editing projects, modifying preferences and settings, and more.
  • The browser, where you can access your sounds, presets, and other resources.
  • The session/arrangement view switcher, which allows you to toggle between the two primary views of Ableton Live.
  • The track headers, where you can adjust track settings, add and remove tracks, and more.
  • The clip slots, where you can arrange your audio and MIDI clips.
  • The transport bar, which contains controls for starting, stopping, and looping your project.

Midi And Audio Clips

MIDI and audio clips are the building blocks of Ableton Live. MIDI clips contain musical information, such as notes, velocities, and durations, that can be sent to virtual and hardware instruments. Audio clips, on the other hand, contain pre-recorded audio data that can be arranged and processed in various ways. One of the most significant advantages of Ableton Live is its ability to manipulate audio and MIDI clips in real-time, allowing for creative experimentation and improvisation.

Arrangement View Vs. Session View

One of the distinguishing features of Ableton Live is its two primary views: arrangement view and session view. Arrangement view is a traditional linear timeline, where you can arrange your clips to create a complete song or composition. Session view, on the other hand, is a non-linear, performance-oriented interface that allows you to trigger and manipulate clips in real-time. While arrangement view is ideal for finalizing a project, session view is perfect for live performances and creative experimentation.

Conclusion

By understanding the basics of Ableton Live, you’ll be well on your way to becoming an expert. Remember that the key to mastering Ableton Live is practice and experimentation. With the right one to one lessons, you’ll be able to unlock your creative potential and create music that is truly unique.

Getting Hands-on With Ableton Live

If you are a beginner in electronic music production or want to explore the world of Ableton Live, one to one lessons with a professional Ableton Live instructor could be the way to go. These lessons offer customized instruction that caters to your learning style, pace, and interests. In one to one lessons, you can learn the fundamentals of Ableton Live and start creating music in a hands-on way.

Creating Your First Track

Creating your first track in Ableton Live is an exciting moment. In one to one lessons with an Ableton Live instructor, you can take steady steps towards building a track. Your instructor could teach you how to brainstorm ideas, structure your track, use MIDI to create melodies and chord progressions, and add drums and percussion using Ableton Live’s built-in virtual instruments. By the end of your first lesson, you may have a short track ready to share with your friends and family.

Recording Midi And Audio

Ableton Live offers several features that allow you to record MIDI and audio. In one to one lessons, your Ableton Live instructor could teach you the basics of recording and editing MIDI and audio clips in Ableton Live. You can learn how to use MIDI controllers to record your performance, edit MIDI notes, and adjust velocity and timing. Additionally, you can learn how to record audio from your microphone, guitar, or any other external instrument.

Using Ableton Live Instruments And Effects

Ableton Live comes with an impressive collection of virtual instruments and effects that you can use to create a variety of sounds. One to one lessons with an Ableton Live instructor will introduce you to these instruments and effects, show you how to use them and explain their controls. You can learn how to use Simpler, Sampler, Wavetable, and other instruments to create different sounds. You can also learn how to use effects, such as reverb, delay, and EQ, to enhance your production.

One To One Lessons Ableton Live Beginners

Credit: www.youtube.com

Advanced Features

Once you have a good grasp of the basics of Ableton Live, it’s time to dive into the advanced features. These tools allow you to take your music production to the next level and create truly unique and professional tracks. In this post, we’ll take a closer look at some of the advanced features in Ableton Live, including Sampling Techniques, Warping Audio, and Automation.

Sampling Techniques

Sampling is a technique where you take a small section of audio from an existing track and use it in your production. Ableton Live offers various ways to sample audio, including:

  • Recording audio directly into Ableton Live
  • Dragging and dropping audio files into Ableton Live
  • Using the “Slice to MIDI” feature to automatically chop up audio files into individual notes

One powerful sampling feature in Ableton Live is Simpler, a versatile instrument that lets you combine a sample with various synthesis and effects tools to create new sounds.

Warping Audio

Warping is the process of changing the tempo and timing of audio files to fit your project. Ableton Live’s warp modes enable you to stretch and compress audio while minimizing artifacts. Some of the warp modes include Beats, Tones, and Texture.

You can also use the “Warp Marker” feature to manually adjust the timing and pitch of individual sections of a track, making it a handy tool for remixes or transitioning between two tracks with different tempos.

Automation

Automation allows you to dynamically control various parameters of your tracks over time. This could be anything from adjusting the volume of a track to adding a filter sweep or changing the pitch of a note. In Ableton Live, you can create automation clips that allow you to draw curves for specific parameters over time and fine-tune the automation with various tools.

Overall, mastering Ableton Live’s advanced features can take your music production to a whole new level. By experimenting with sampling, warping, and automation techniques, you can create unique sounds and take your tracks from good to great.

Mixing And Mastering Your Tracks

One To One Lessons Ableton Live Beginners

Credit: m.youtube.com

Preparing For Live Performances

Preparing for live performances can be daunting, especially for beginners of Ableton Live. One-to-one lessons can provide tailored guidance and advice, covering everything from setup to performance. Gain confidence and hone your skills with expert support.

Preparing for Live Performances: Live performances require a different kind of preparation compared to creating music in a studio environment. One to one lessons on Ableton Live Beginners empowers learners with the necessary skills to perform their music live. The setup requirements, techniques and tactics are unique to live performances and require dedicated attention. In this post, we will discuss creating a performance setup, using looping techniques and adding instruments and effects in real-time. Creating a Performance Setup: A performance setup is all about having the right gear and equipment for a live performance. Here are a few things to consider when setting up: – Dedicated Audio Interface: The right audio interface is essential to ensure high-quality output during your live performance. – MIDI Controllers: MIDI controllers help in creating and managing sounds, beats and melodies on the fly. – Microphones: Microphones help in adding live vocals and other audio inputs to the performance. – Laptop stand: A laptop stand provides a stable base for the laptop to be used during the live performance. Using Looping Techniques: Looping is a powerful technique that helps in creating a continuous and seamless performance from start to finish. Here are a few tips for using looping: – Identify the best sections of the song that can be looped and fine-tune them until they are perfect. – Use the MIDI controllers to create live sounds on top of the pre-recorded loops. – Experiment with different looping configurations to create different moods and sounds during the live performance. Adding Instruments and Effects in Real-Time: Live performances require adding instruments and effects in real-time to create a unique and dynamic sound. Here are some tips for doing so: – Use MIDI-based software instruments to create live sounds that complement the pre-recorded music. – Add effects like reverb, delay, and distortion to the instrument tracks in real-time to create a unique sound that cannot be replicated in the studio. – Use the MIDI controller to change the parameters of the effects and instruments on the fly for added creativity. In conclusion, one to one lessons on Ableton Live Beginners help learners to prepare for live performances. Creating a performance setup, using looping techniques and adding instruments and effects in real-time are crucial elements of live performances. With the right skills and techniques, live performances can be a unique and unforgettable experience.

Expanding Your Knowledge

Looking to expand your knowledge in music production? One to one lessons for beginners in Ableton Live are available, allowing you to learn at your own pace and ask questions as needed. Start your journey towards creating professional-quality music today.

Discovering Third-party Plugins

One of the most exciting aspects of learning Ableton Live is discovering the wealth of third-party plugins available to expand the program’s capabilities. Third-party plugins can be used to create unique sounds, add new effects, and streamline your workflow. During One-to-One lessons, you’ll learn how to install and use these plugins to take your productions to the next level. With access to a world of plugins, the possibilities for your music are practically endless.

Using Max For Live

Max for Live is an incredibly powerful tool for Ableton Live users. This visual programming environment allows you to create custom plugins and devices to use in your productions. From creating your own instruments to developing unique audio effects, Max for Live can help you take your production to new heights. During One-to-One lessons, you’ll learn how to use Max for Live to create custom tools for your music production needs.

Collaborating With Other Artists

Music production is often a collaborative process, and Ableton Live makes it easier than ever to work with other artists. During One-to-One lessons, you’ll learn how to use Ableton Live’s collaboration features to work on tracks with other musicians, producers, and engineers. You’ll learn how to share your projects and work together in real-time, no matter where you or your collaborators are located. The possibilities for collaboration are endless, and with One-to-One lessons in Ableton Live, you’ll be ready to take on any project with confidence. Overall, One-to-One lessons in Ableton Live for beginners are essential to expanding your knowledge and taking full advantage of the program’s capabilities. From exploring third-party plugins to developing unique tools with Max for Live and collaborating with other artists, there’s always something new to discover. Sign up for One-to-One lessons today and start taking your music production skills to the next level.
One To One Lessons Ableton Live Beginners

Credit: www.productionmusiclive.com

Frequently Asked Questions On One To One Lessons Ableton Live Beginners

Is Ableton Live Good For Beginners?

Yes, Ableton Live is a great choice for beginners. It has a user-friendly interface, with various built-in tutorials and a large online community for support. Its unique features and workflow appeal to many music producers and artists, making it an excellent starting point for beginners.

Can I Learn Ableton Myself?

Yes, you can learn Ableton yourself. There are many tutorials, online courses and resources available that you can use to teach yourself Ableton. With dedication, practice and patience, it is possible to become proficient at using Ableton on your own.

How Long Does It Take To Learn Ableton Live?

Learning Ableton Live can take anywhere from a few weeks to several months, depending on your familiarity with music production software, your skill level, and how much time you can dedicate to practice. It’s important to stay consistent and focused in your learning approach to see progress.

How Hard Is Ableton Live To Learn?

Ableton Live may seem daunting at first, but with consistent practice and proper guidance, it is relatively easy to learn. Beginners can start by familiarizing themselves with its interface and basic functions, and gradually move on to more advanced techniques and features.

With dedication and patience, anyone can become proficient in using Ableton Live.

Conclusion

Overall, one-to-one lessons on Ableton Live for beginners can be incredibly useful in helping aspiring producers and musicians develop their skills and reach their goals. With the guidance of an experienced instructor, students can learn the ins and outs of this powerful software and gain the confidence they need to create their own unique music.

Whether you’re looking to start a career in music or simply want to have fun making beats and tracks, these personalized lessons can provide you with the knowledge and skills you need to succeed. So why wait? Sign up for your one-to-one Ableton Live lesson today and start creating your own music masterpiece!

Categories
Archive

Mastering The Art Of Limiting And Loudness

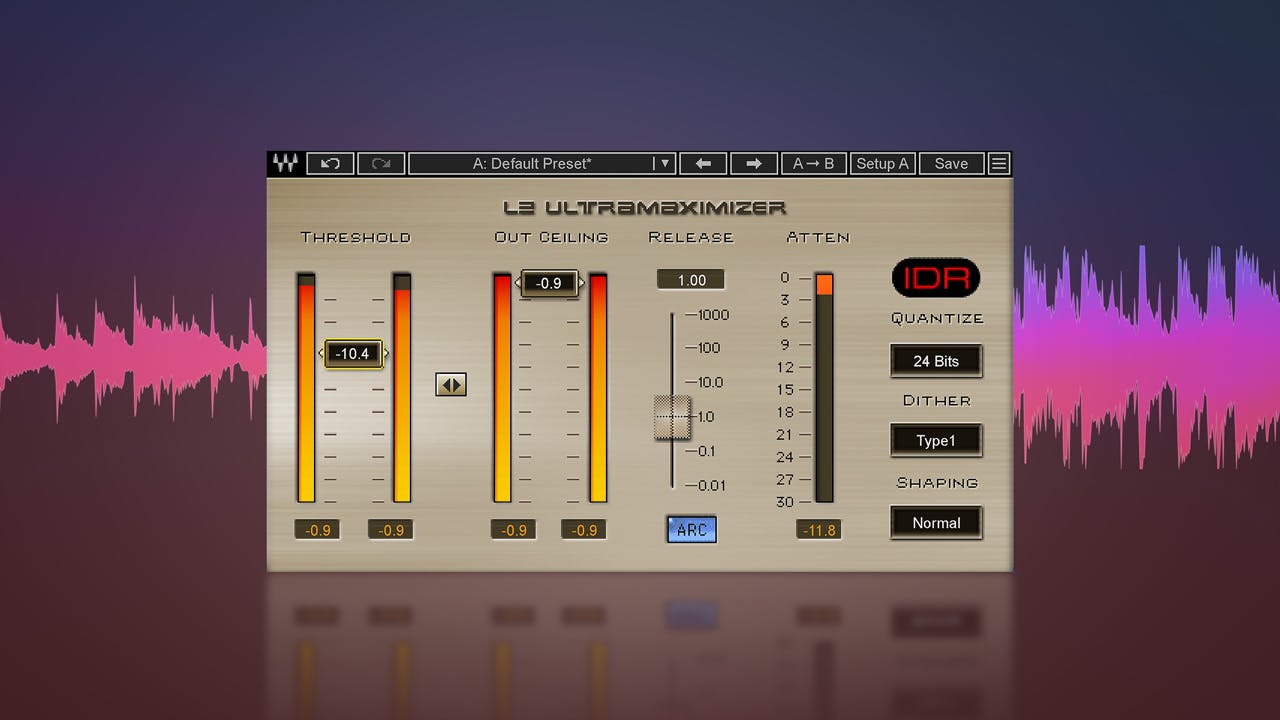
Mastering the art of limiting and loudness is essential for producing professional-quality audio. To achieve this, one must understand the technical aspects of dynamic range and compression, as well as have a keen ear for balancing levels and removing unwanted noise.

Limiting is a crucial tool in managing loudness and preventing distortion, while also preserving the dynamics of the original recording. Through careful use of these techniques, one can achieve a polished sound that is both impactful and pleasing to the ear.

Related reading: Limiting Your Options While Mixing and True Peak Limiting: Mastering Audio Dynamics. For background, see the Wikipedia article on Loudness war.

In today’s music production, the quest for loudness dominates everything, and it’s easy to see why. Listeners expect music to have a certain punch and dynamic range that only a masterful mix can deliver. In this regard, mastering the art of limiting and loudness is what separates professional-quality music from mediocre music. It is also important to note that loudness and limiting are not synonymous, and one should not always prioritize loudness at the expense of musicality. Thus, to produce top-quality sound, one must balance the two factors while utilizing various techniques to control dynamics, remove unwanted noise and distortion, and ultimately achieve a well-rounded sound.

Mastering The Art Of Limiting And Loudness

Credit: www.masteringthemix.com

Why Mastering Is Important

Mastering is a critical step in the music production process that takes raw audio tracks and transforms them into a final cohesive product ready for distribution. It involves putting the final touches on a track to ensure it meets the industry-standard quality.

Enhances Sound Quality for Limiting and Loudness

Mastering helps take the sound quality of a track to the next level. By using advanced audio tools, mastering engineers can balance the sound levels, get rid of unwanted noise, and accentuate the various instruments used in the track. These techniques help produce better sounding music that meets the industry standard.

Ensures Compatibility Across Multiple Platforms for Limiting and Loudness

Another crucial reason mastering is essential is the ability to ensure compatibility across multiple platforms. Without mastering, the sound levels in a track may be too high or low to play well on certain devices. Mastering balances sound levels across all devices and keeps the overall quality high.

Skipping mastering can keep a track off some platforms. Listeners may also skip a track that sounds unpleasant.

Conclusion

You should prioritize mastering in the music production process. It enhances the sound quality and ensures the track is compatible with multiple platforms. Don’t skip this critical step as it can make the difference between a good and bad track!

Mastering The Art Of Limiting And Loudness

Credit: www.waves.com

Understanding Loudness

Mastering the art of limiting and loudness is crucial for musicians and producers alike to achieve a professional sound. Understanding loudness involves using limiting techniques to increase the perceived volume of a track without causing distortion or compromising its dynamics.

Mastering the art of limiting and loudness is essential for a sound engineer to determine the overall loudness and dynamic range of an audio track. Loudness is an important part of audio mastering and refers to the perceived volume of a sound. Understanding loudness helps you ensure that your audio tracks play at a consistent volume, eliminating the need for constant volume adjustments.

What Is Loudness?

Loudness means the perceived volume of a sound. A sound’s amplitude, frequency range and duration, plus the listener’s hearing, all shape it. It’s essential to understand loudness to ensure that the sound level of a track is maintained consistently and that the audio experience remains pleasant.

Why Is It Important In Mastering?

Mastering engineers use loudness to control the volume of tracks in the final stages of music production. Understanding loudness and its importance in mastering allows sound engineers to adjust the volume levels of tracks to ensure they are consistent with one another. This consistency eliminates the need for constant adjustments in volume from one track to another. This provides an optimal listening experience for the audience. In summary, understanding loudness is essential in mastering as it helps control the perceived volume of a track. With consistent attentiveness to loudness, audio tracks’ listening experience can be improved, making it more enjoyable for the listeners.

Factors Affecting Loudness

Understanding the factors affecting loudness is crucial in mastering the art of limiting. Factors such as the dynamic range of the mix, the frequency balance. The use of compression can all affect the loudness of the final product. By understanding and utilizing these factors, you can achieve optimal loudness and clarity in your music.

Factors Affecting Loudness To master the art of limiting and loudness, it’s essential to first understand the factors affecting loudness. The three primary factors are dynamic range, EQ and compression, and mix levels. Let’s take a closer look at each one. H3: Dynamic Range Dynamic range refers to the difference between the loudest and quietest parts of a sound. A larger dynamic range means the sound has a wider range of volume. Meanwhile, a smaller dynamic range means less variation between loud and quiet parts. In music production, controlling dynamic range is crucial to achieving a balanced and polished sound.

Limiting the dynamic range with compression can help increase the overall loudness of a track. H3: EQ and Compression EQ and compression are two essential tools in music production that can significantly impact loudness. EQ is used to adjust the tonal balance of a track by boosting or cutting certain frequencies. Cutting low frequencies can help tighten up the low-end of a mix, giving it a more defined and punchy sound.

Practical Tips for Limiting and Loudness

Compression, on the other hand, can even out the level of a track by reducing the volume of loud parts and boosting the volume of quiet parts. With proper use of EQ and compression, you can achieve a balanced and polished sound without sacrificing loudness. H3: Mix Levels Mix levels are a crucial factor in achieving a loud and defined sound. The levels of each track in a mix must be balanced to prevent any one element from overpowering the rest. Aim for a balanced mix with all elements sitting in their appropriate frequency ranges.

A balanced mix translates to a stronger and more impactful sound, even at lower volume levels. In conclusion, mastering the art of limiting and loudness requires an understanding of the factors affecting loudness. By controlling dynamic range with compression, using EQ to adjust tonal balance, and balancing mix levels, you can achieve a polished and loud sound that stands out.

Mastering The Art Of Limiting And Loudness

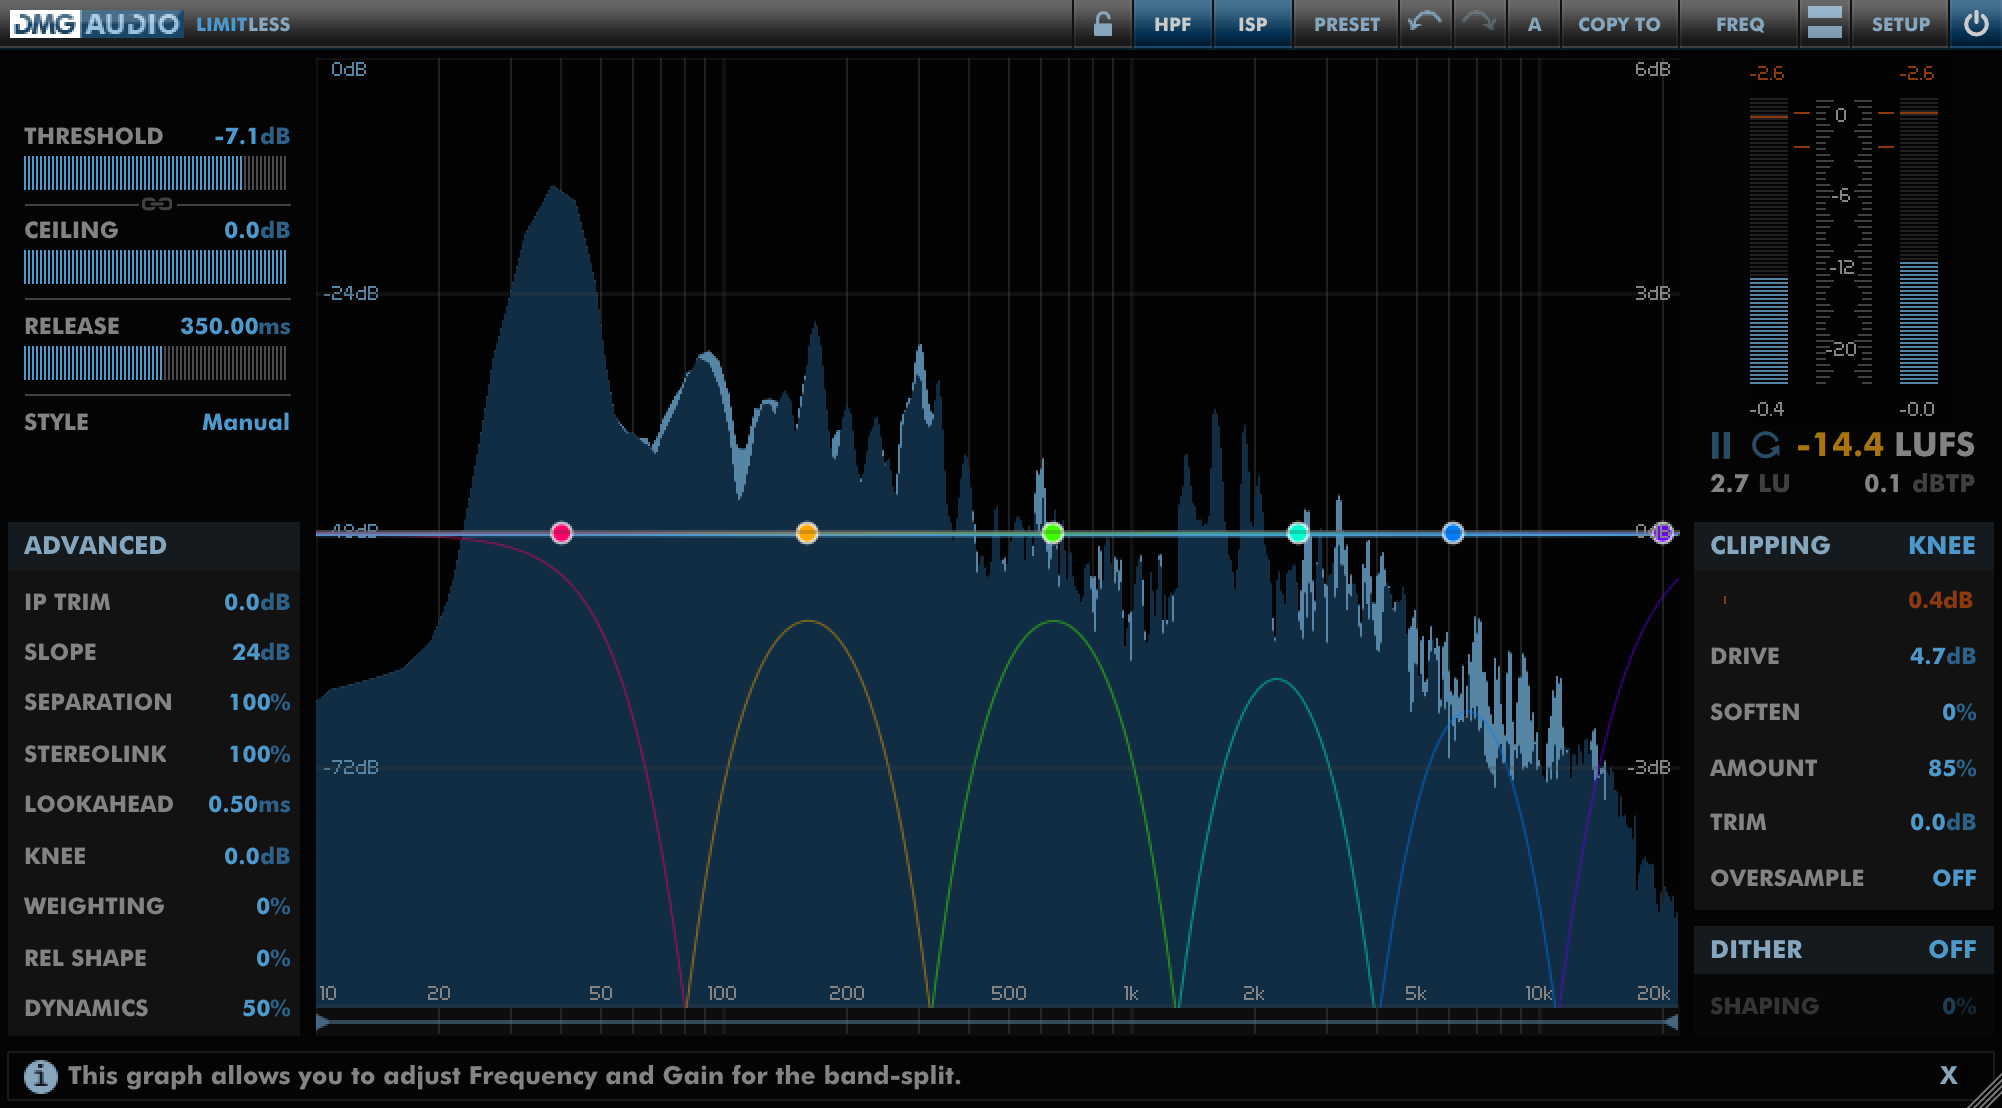
Credit: www.dmgaudio.com

Limiting Techniques

Mastering the art of limiting and loudness involves utilizing techniques to control dynamics and volume levels, without sacrificing the clarity and quality of the music. Through careful application of compression, EQ and limiting, a skilled audio engineer can bring out the best in a track. This makes it sound clear, balanced and impactful.

Limiting is an essential technique in audio processing and mastering, used to control the dynamic range of audio content. It helps to regulate the loudness and ensure that the audio does not get distorted while playing at high volumes. Limiting can also improve the overall sound quality of the content by making it more punchy and impactful. There are different types of limiting techniques, each with its own advantages and disadvantages. In this blog post, we will discuss the three primary limiting techniques: Peak Limiting, True Peak Limiting, and Multi-Band Limiting.

Peak Limiting

Peak Limiting is the most basic form of limiting. It works by setting a threshold above which the signal cannot pass. When the audio signal exceeds the threshold, the limiter kicks in and reduces the volume of the signal that exceeds the threshold. This technique is effective in controlling peak levels. But it may not be suitable for reducing the dynamic range of the audio content. Peak Limiting can cause distortion and pumping if applied too aggressively.

True Peak Limiting

True Peak Limiting is an advanced form of peak limiting that takes into account the inter-sample peaks that can occur when converting digital audio to analogue. Inter-sample peaks are caused by the reconstruction filters used in digital-to-analogue converters. They can cause clipping even if the peak levels of the audio signal are within the limit. True Peak Limiting solves this problem by applying a pre-emphasis filter before the limiter and then applying a post-de-emphasis filter after the limiter. This technique ensures that the audio does not clip, even when played back at the highest level.

Multi-band Limiting

Multi-Band Limiting is a more complex technique that divides the audio signal into multiple frequency bands and applies limiting independently to each band. This technique allows for more precise control over the dynamic range of the audio content, as different frequency bands may have different levels of loudness. Multi-Band Limiting can also target specific frequency ranges, such as the bass or treble, to avoid distortion in those areas. However, this technique requires more processing power and may introduce phase issues if not applied carefully. In conclusion, mastering the art of limiting and loudness requires a sound understanding of the different limiting techniques available, their advantages, and their limitations. By selecting the right technique and applying it correctly, you can ensure that your audio content sounds its best, regardless of the listening environment.

Mastering Eq Techniques in Limiting and Loudness

Mastering the art of limiting and loudness is crucial in EQ techniques. By carefully controlling the levels of your audio, you can boost specific frequencies to make them stand out while still maintaining a balanced sound. Proper use of limiting and loudness settings can give your tracks a professional boost.

EQ (Equalization) is an essential tool in mastering music production. Great EQ skills can make a significant impact on the final sound of your mix. Mastering EQ involves making careful decisions about boosting or cutting frequencies in a track to achieve the desired results. In this post, we will explore various mastering EQ techniques that will help you take your music production skills to the next level.

Boosting And Cutting Frequencies for Limiting and Loudness

When you are using EQ to master a track, it’s essential to understand how to boost and cut frequencies. Boosting frequencies is when you increase the amplitude of a specific frequency in a track, and cutting is the opposite. There, you decrease the amplitude of a specific frequency. A useful tip when boosting is to use a narrow bandwidth. This makes sure you don’t boost other frequencies that can cause clutter. On the other hand, make sure you use a wide bandwidth when cutting frequencies. This makes sure you remove all the unwanted frequencies that cause clutter in your mix.

Linear Phase Eq for Limiting and Loudness

Linear Phase EQ is another essential EQ technique used in mastering. This involves adjusting the phase of the signal’s frequency components. It allows you to adjust the frequency response without affecting the phase. This ensures that the signal’s time response remains unaltered. It’s crucial to ensure that it’s used correctly and not overdone. Meanwhile, it can cause unwanted side effects such as pre-ringing.

Minimum Phase Eq

Minimal Phase EQ is another technique of mastering EQ. This involves adjusting the frequency response of the signal while maintaining the relative phase relationship between the frequency components. Unlike linear phase EQ, minimum phase EQ can affect the signal’s phase, which causes phase distortion. But it is less noticeable than with linear phase EQ. Therefore, it’s crucial to ensure that it’s used in moderation and only when necessary. In conclusion, mastering EQ techniques are fundamental in mastering a quality track. By learning how to boost and cut frequencies, understanding linear and minimal phase EQs, we can control the signal’s phase, removing unwanted frequencies and enhancing our tracks’ overall sound quality. Keep practicing, and soon you will be doing this effortlessly.

Multiband Compression Techniques

When it comes to mastering audio, there are many techniques that engineers use to achieve the best possible sound. One of the most important aspects of mastering is managing the dynamics of the track. This includes the overall loudness, as well as the dynamic range. In order to achieve the right balance, multiband compression techniques are often used. In this post, we’ll be taking a closer look at what multiband compression is, when to use it, and how to incorporate it into your mastering process.

What Is Multiband Compression?

Simply put, multiband compression is a type of dynamic range compression that allows you to control specific frequency bands independently. Unlike standard compression, which applies the same ratio to the entire frequency spectrum, multiband compression divides the audio signal into several bands and applies different compression settings to each band. This makes it easier to control the dynamic range of each frequency band, resulting in a smoother, more balanced sound.

When To Use Multiband Compression?

There are several scenarios where multiband compression can be particularly useful:

  • When there are specific frequency ranges that need to be controlled
  • Also, when the overall mix is unbalanced, with certain frequencies being too loud or too quiet
  • When certain elements of the mix (such as drums or vocals) need to be brought out more

It’s worth noting that multiband compression should be used sparingly. Meanwhile, it can be easy to overdo and result in a lifeless, squashed sound. As with any mastering technique, subtlety is key.

Parallel Compression

One way to incorporate multiband compression into your mastering process is to use parallel compression. This involves splitting the audio signal into two separate channels: one for the compressed signal, and one for the uncompressed signal. The compressed signal is then mixed back in with the original signal. This results in a more controlled but still dynamic sound. Multiband compression can be applied to the compressed channel, allowing for more granular control over the frequency bands.

When used correctly, multiband compression can be a powerful tool for achieving a balanced, professional sound in your mastering projects. By carefully controlling the dynamic range of each frequency band, you can achieve a more polished, cohesive mix that will stand out from the crowd.

Stereo Imaging Techniques

Achieving optimal stereo imaging can be a challenge, but mastering the art of limiting and loudness can help. With the right techniques, you can ensure your audio has the desired level of loudness while maintaining clarity, depth, and width in the stereo field.

Are you tired of your mixes sounding dull and lifeless? Look no further than stereo imaging to add depth and dimension to your sound. In this post, we’ll dive into what stereo imaging is, as well as some widening and centering techniques to help you master this important element of audio production.

What Is Stereo Imaging?

Stereo imaging refers to the placement of sounds within the stereo field. The stereo field is the space between the left and right speakers or headphones. Sounds that are panned hard left or hard right create a wider stereo image, while sounds that are centered create a more narrow stereo image.

Widening Techniques in Limiting and Loudness

One technique for widening the stereo image is using the Haas effect. This involves delaying one channel by a few milliseconds to create the illusion of a wider sound. Another technique is using chorus or flanger effects to add subtle pitch variations to duplicate tracks, creating a wider sound. Finally, EQ can boost the stereo information in sounds such as guitars or keyboards to widen the overall image.

Centering Techniques in Limiting and Loudness

A common technique for centering sounds is using mid-side processing. This involves splitting the stereo signal into mid and side channels. The mid channel contains sounds that are panned center. Meanwhile, the side channel contains sounds that are panned left or right. By reducing the level of the side channel and boosting the level of the mid channel, the stereo image can be centered. Another technique for centering sounds is using mono reverb, applying reverb to individual sounds in mono before panning them to the desired location. Stereo imaging is an essential component of audio production that can take your mixes from amateur to professional. By using these widening and centering techniques, you’ll be well on your way to creating a rich and immersive stereo image for your listeners.

Preparing For Mastering for Limiting and Loudness

Before mastering, it’s crucial to understand the art of limiting and loudness. This requires proper equipment, knowledge of the sound source, and an ear for detail. With practice, you can achieve the perfect balance between loudness and clarity, resulting in a polished and professional sound.

Preparing for Mastering Mastering is the final phase of music production. There, the tracks are polished to sound as professional as possible. Before mastering, there are a few crucial steps that you need to undertake. These include setting mix levels, exporting stems, and communicating with the mastering engineer. Setting Mix Levels Setting mix levels is all about balancing the individual audio components to make the song sound great. It would be best to conduct a final and careful listening to your mix, checking for any pops, clicks, or hissing sounds that may be distracting.

Putting It Into Practice for Limiting and Loudness

Ensure that your mix is not clipping or hitting the red zone on meters. It’s important to note that loudness should not be your primary focus when mixing. Instead, focus on achieving a balanced mix. Doing this right may give the mastering engineer adequate headroom to improve your mix’s dynamics in mastering. Exporting Stems Before sending your tracks to mastering, you need to export the individual audio components or stems. Stems refer to the separate audio tracks that makeup every song. Exporting stems gives the mastering engineer room to apply their techniques without affecting the mix’s other components.

Ensure you export your tracks as 24bit/96khz WAV files, with correct labeling of each track. Communication with Mastering Engineer Communication is an essential aspect of mastering. It would be best to communicate your expectations to the mastering engineer. This includes the goals and visions you have with the track. You can also provide references to previously mastered songs that you admire, to give the mastering engineer an idea of your preferences. Keep in mind that every mastering engineer has their approach; therefore, be open to feedback and suggestions.

In conclusion, mastering involves meticulous preparation, including setting mix levels, exporting stems, and communication. It would be best to pay attention to every detail for a successful final stage of audio production.

Frequently Asked Questions Of Mastering The Art Of Limiting And Loudness

What Does Limiting Do In Mastering?

Limiting in mastering is a technique used to control the dynamic range of audio by reducing the audio level peaks. This helps to increase the overall loudness of the audio signal. But it can also lead to a loss of dynamics and impact the overall sound quality if used excessively.

How Do You Master Loudness?

To master loudness, you need to ensure that your audio content is mixed and mastered appropriately, levels are balanced, and dynamic range is controlled. You can also use loudness meters and limiters, and choose the appropriate output format to optimize your audio for loudness.

Finally, always listen and test your content across a range of devices and environments to ensure the best listening experience.

Is It Ok To Master At Lufs?

Mastering at LUFS is a common practice in the music industry. However, it is important to keep in mind that mastering at a certain LUFS level does not guarantee a good mix. It is crucial to focus on the quality of the mix before applying mastering techniques.

How Do I Increase Loudness With A Limiter?

To increase loudness with a limiter, follow these steps: 1. Insert the limiter plugin on the desired track. 2. Set the desired threshold level and makeup gain. 3. Adjust the attack and release time for optimal results. 4. Use a multiband limiter for more control over specific frequency ranges.

5. Be cautious not to over-limit and damage the audio quality.

Conclusion

Mastering the art of limiting and loudness is crucial for any music producer, audio engineer, or sound designer. It is a fine balance between making the track sound powerful and impactful while ensuring that it doesn’t distort or damage the listener’s ears.

By following the tips and techniques outlined you can confidently apply the right amount of limiting and loudness to your next project. Remember, less is often more when it comes to audio processing, and always trust your ears. With practice, you can achieve a professional-sounding mix that will stand out from the rest.

Happy mixing!

Categories
Archive

Release Music On Every Streaming Service

To release music on every streaming service, you can use a distribution company like TuneCore or DistroKid. In today’s digital age, music streaming is one of the most popular ways for people to listen to and discover new music.

As an artist, getting your music onto every major streaming service is crucial for reaching a wider audience and potentially increasing your revenue. One way to accomplish this is by using a distribution company, such as TuneCore or DistroKid, which will distribute your music to all of the major streaming services for a fee.

These services not only streamline the distribution process, but also provide valuable insights and analytics on the performance of your music. We’ll explore the benefits and drawbacks of using distribution companies, as well as some tips for successfully releasing your music on streaming services.

Release Music On Every Streaming Service

Credit: distrokid.com

Why Release Music On Every Streaming Service?

Releasing your music on every streaming service ensures maximum exposure, accessibility, and potential revenue. Listeners on different platforms can discover your music, increasing your chances of gaining a broader fan base. This also helps to maintain your music’s longevity in the digital space with all the streaming services having their algorithm.

In the digital era, music streaming services have changed the way people consume music. Now, billions of people have access to music from all over the world, which means that it is now possible to reach a global audience without leaving your home. If you are a musician or an independent artist, utilizing these streaming services is crucial to reach your target audience and expand your fan base.

Benefits Of Wide Distribution

1. Access to Global Markets: By releasing your music to every streaming platform, you can reach a larger audience worldwide. This opens up opportunities to connect with new fans and build a global following. Moreover, your music can be discovered by potential collaborators, record labels, and playlist curators from different countries, leading to more exposure and more opportunities. 2. Increased Revenue: Releasing your music on all streaming platforms can lead to a higher revenue stream by maximizing your exposure to all potential fans. By distributing your music worldwide, you can increase your play count, royalties, and build a following that can support you through merchandise sales, ticket sales for live shows, and more. 3. More Control: By releasing your music on every streaming platform, you have more control over your music career. You are not restricted to a single platform, and you can choose to release your music individually in case you prefer to have more control over your music distribution strategy.

Conclusion

In conclusion, releasing music on every streaming platform is a vital aspect of music promotion and distribution. It not only increases your reach to a global audience but also provides more revenue and control over your music career.

Release Music On Every Streaming Service

Credit: routenote.com

How To Release Music On Every Streaming Service

Releasing your music on every streaming service can help you reach a wider audience and increase your revenue. To do this, you’ll need to use a digital music distributor such as DistroKid or TuneCore, which can distribute your music to multiple platforms including Spotify, Apple Music, and Amazon Music.

Additionally, make sure to have a strong social media presence and engage with your fans to increase your chances of success.

As a musician, your ultimate goal should be to get your music out to as many people as possible. One of the most effective ways to do this is to release your music on every streaming service available. By doing so, you increase your visibility, your chances of being discovered by new fans, and ultimately your chances of making it big. But how do you go about releasing your music on every streaming service? Here are the steps you need to take.

Selecting A Digital Distributor

The first thing you need to do is select a digital distributor. This is the service that will get your music onto all the major streaming platforms, from Spotify and Apple Music to Tidal and Deezer. There are several digital distributors to choose from, such as DistroKid, TuneCore, and CD Baby. Each has its own pricing model and features, so be sure to do your research and decide which one is best for you.

Preparing Your Audio Files

Once you have selected your digital distributor, you need to prepare your audio files. This means making sure that your music is of the highest quality possible. You need to ensure that your recordings are mixed and mastered properly, and that you have all the necessary files in the correct format (usually WAV or MP3). You may need to hire a professional to help you with this step, especially if you are not a sound engineer yourself.

Creating Metadata For Your Release

The final step in releasing your music on every streaming service is creating metadata for your release. This is the information that will be displayed alongside your music on the streaming platforms, such as the title, artist name, album title, track list, and album artwork. You need to make sure that this information is accurate, consistent, and well-organized. Your digital distributor will usually guide you through this process, but it is important to double-check everything before you hit the “publish” button. In summary, releasing your music on every streaming service is an essential step in reaching a larger audience and growing your fanbase. By following these steps, you can ensure that your music is available on all the major platforms and that it is presented in the best possible way. So what are you waiting for? Get your music out there and start making waves in the music industry!

Maximizing Exposure And Engagement

Maximize your exposure and engagement by releasing your music on every streaming service available. This ensures a wider reach and accessibility for your audience, increasing your chances for success. Don’t miss out on potential listeners by limiting your distribution to just one or two platforms.

Releasing your music on every streaming service is a great way to reach a wider audience and increase your chances of success in the music industry. However, simply releasing your music on these platforms is not enough to guarantee exposure and engagement. In order to get the most out of your release, you need to take additional steps to promote it. Here are three key strategies to maximize exposure and engagement:

Creating A Social Media Campaign

One of the most effective ways to promote your music is through social media. By creating a social media campaign, you can generate buzz and excitement around your upcoming release. To create a successful campaign, start by choosing the right social media platforms for your audience and setting clear goals for your campaign. You should also plan out your content in advance, including teasers, behind-the-scenes footage, and exclusive promotions for your followers. By consistently sharing high-quality content with your followers, you can build a dedicated fan base and increase engagement with your music.

Collaborating With Influencers

Another powerful way to get your music in front of new audiences is by collaborating with influencers in your niche. Influencers have built up a following of engaged fans who trust their recommendations and opinions. By partnering with influencers to promote your music, you can tap into their audience and reach new listeners. When choosing influencers to work with, look for ones who align with your brand and music style, and who have a genuine interest in your music. You can collaborate with influencers in a variety of ways, including sponsored posts, guest posts, and exclusive content.

Leveraging Analytics To Optimize Your Campaign

To ensure that your social media campaign and influencer collaborations are as effective as possible, you need to track and analyze your results. By leveraging analytics tools, you can identify which posts and promotions are resonating with your audience, and adjust your strategy accordingly. You can also track key metrics such as engagement rate, follower growth, and conversion rate to evaluate the success of your campaign. With this data, you can fine-tune your approach and optimize your efforts for maximum exposure and engagement. In conclusion, releasing your music on every streaming service is just the first step in a successful music career. By creating a social media campaign, collaborating with influencers, and leveraging analytics, you can maximize exposure and engagement for your music and grow your fan base.

Considerations For Independent Artists

Independent artists who want to release their music on every streaming service should consider factors such as distribution costs, royalty rates, and promotion strategies. Researching and comparing different options can help artists make informed decisions and maximize their exposure on various platforms.

Independent artists, who are just starting in the music industry, understand that it is crucial to release their music on every streaming service, as it can lead them to gain more recognition and get their music heard. However, before diving into the distribution process on different platforms, several factors must be considered to set the foundation for a successful release. This article will cover the two main considerations for independent artists when releasing their music and how to overcome them.

Budgeting For Distribution And Promotion

Releasing music on several streaming services comes at a cost. Although some platforms offer free distribution, it is essential to invest in the promotion and marketing of the product to get them heard by the listeners. This is where budgeting plays a significant role. It is crucial to prepare a budget for distribution, promotion, and other additional expenses that might come up during the release. An estimate of the cost can guide independent artists towards the most cost-effective approach while staying within the budget. Consideration must also be given to the pricing strategies for each streaming platform, as some may charge more than others.

Building And Maintaining Your Artist Brand

As an independent artist, establishing a brand plays a critical role in releasing music successfully. Building a brand that aligns with the music’s genre can help develop a fan base and increase the artist’s online presence. However, it is essential to maintain and be consistent in the brand image across different platforms. Artists must create a plan to develop and maintain their brand continually, defining their style, genre, and audience to connect better with their listeners. A checklist that consists of the social media platforms and promotional tools required can help in the branding process.

In Conclusion

For independent artists, releasing music on every streaming service is a significant milestone in their career. However, careful planning and consideration must be taken to ensure the release is successful. Budgeting and branding should be prioritized, as they play a critical role in the process. By taking these considerations into account, independent artists can establish a solid foundation and increase their chances of success in the industry.

Release Music On Every Streaming Service

Credit: routenote.com

Frequently Asked Questions On Release Music On Every Streaming Service

How Do I Release A Song On All Streaming Platforms?

To release a song on all streaming platforms, you need a distributor such as DistroKid, CD Baby, or TuneCore. First, sign up with one of these distributors and select a package. Then, upload your song, album art, metadata, and pay the distribution fee.

Your song will then be distributed to various streaming platforms such as Spotify, Apple Music, and more.

Should You Release Music On All Platforms?

Yes, it’s highly recommended to release your music on all platforms! This will provide the maximum exposure and access to your fans. Your music can be discovered on various platforms like Spotify, Apple Music, YouTube Music, SoundCloud, and more. It’ll also generate more revenue from streams and downloads.

How Much Does It Cost To Put Your Music On All Platforms?

The cost to put your music on all platforms varies depending on the distribution service you choose. Some services offer a flat rate starting at around $9. 99 per year, while others charge a percentage of your sales or streams.

Additionally, some services require a one-time fee for set up and submission. It’s best to research and compare prices before making a decision.

How Do I Publish My Music On All Platforms?

To publish your music on all platforms, you need to distribute it using a digital distributor. There are several reputable distributors available to choose from. Simply upload your music, select which platforms you want it to be available on, and wait for it to be approved and distributed.

Conclusion

Releasing your music on every streaming service is vital to ensure maximum exposure and reach a wider audience. With the steady increase in users across all platforms, it’s more important than ever to have your music available everywhere. Utilizing music distribution services that offer global delivery can help you achieve this and improve your chances of success.

By taking advantage of this strategy, you’ll be able to expand your fan base, earn more royalties, and grow your career as an artist.

Categories
Archive

Colors Dimension And The Dynamic Of Your Mix

Colors dimension and the dynamic of your mix are essential for creating a visually appealing and harmonious result. In order to achieve this effect, you need to understand the basic principles of color theory and how they interact with each other.

Colors have a significant impact on our emotions and can evoke different moods and feelings. For instance, warm colors such as red, yellow, and orange are associated with energy, passion, and excitement, while cool hues like blue, green, and purple create a calm and peaceful atmosphere.

Mixing colors can be challenging, especially when attempting to achieve a particular effect. Consequently, knowing how to combine colors, play with different tones, and adjust lightness and darkness is imperative. This article will explore the dimensions of color and how to create the perfect mix for your design project.

Dimensions Of Color

Colors can have different dimensions that affect your mix’s dynamism. By understanding these dimensions, you can create color schemes that evoke emotions, express personality, and set the tone for your project.

The Dimensions of Color are an essential aspect of your mix and a fundamental part of graphic design. The three dimensions of color are hue, saturation, and brightness. Understanding these dimensions can help you create a balanced color mix and produce effective and visually pleasing designs. H3: Hue The hue refers to the basic color of an object, and it’s what most people refer to when discussing color. It’s sometimes referred to as the color family, and examples of hue include red, blue, yellow, and green. Mixtures of hues can produce various colors, such as orange, purple, and turquoise. H3: Saturation Saturation refers to the intensity or purity of a color. High saturation means that a color is pure and vibrant. When a color is desaturated, it becomes dull and grayish. Adding saturation can give a design more energy, while decreasing saturation can make it more subdued. H3: Brightness Brightness, also called value or lightness, refers to how light or dark a color is. Adding white to a color results in a higher brightness value, while adding black decreases the brightness. Brightness can also be used to create contrast between different elements in a design. Understanding the Dimensions of Color and their relationship to each other can help you create more effective designs that draw attention and produce a cohesive look. Consider various combinations of hue, saturation, and brightness in your designs to find the right balance for your project.

Color Theory

In the visual world, colors play a vital role in creating an impact on the viewer’s psyche. The study of colors and their interaction is known as Color Theory.

Primary Colors

Primary colors are the building blocks of all other colors on the color wheel. Red, blue, and yellow are considered as primary colors. They cannot be created by mixing any other two colors.

Secondary Colors

Secondary colors are created by mixing two primary colors. Green, violet, and orange are the secondary colors. Green is made by mixing blue and yellow, violet by mixing blue and red, and orange by mixing red and yellow.

Tertiary Colors

Tertiary colors are created by mixing one primary color with one secondary color. There are six tertiary colors in total, and they are yellow-green, blue-green, blue-violet, red-violet, red-orange, and yellow-orange.

Color Wheel

A color wheel is a visual representation of how colors relate to each other and showcase the relationships between primary, secondary, and tertiary colors. The primary colors are placed at the top of the wheel, secondary colors in the middle, and tertiary colors at the bottom. Colors opposite to each other on the color wheel are called complementary colors.

Primary ColorsSecondary ColorsTertiary Colors
RedGreenYellow-Green
BlueVioletBlue-Green
YellowOrangeBlue-Violet
Red-Violet
Red-Orange
Yellow-Orange

Understanding color theory helps designers and artists to make informed decisions while creating art and design work. It also helps in making the right color choice while creating visual content that resonates with the target audience.

Colors can be a powerful tool for businesses to create brand recognition, evoke emotions, and establish a brand personality. It is important to keep color theory in mind while creating any marketing materials or developing a brand identity.

Color Psychology

Color psychology is the study of hues and their effect on human behavior and emotions. Colors have a significant impact on us, and they can convey a wide range of emotions, from happiness to anger, peace to sadness. Understanding the psychology of colors is vital because it can help you create a message that resonates with your audience.

Red

Red is a powerful color that can evoke strong emotions such as love, passion, and excitement. It is often used in advertising and marketing to grab attention and create urgency. In some cultures, red represents luck and prosperity. However, it can also symbolize danger and warning.

Orange

Orange is a warm, energetic color that is associated with happiness, enthusiasm, and creativity. It is often used to create a sense of fun and playfulness. Orange can also suggest caution, similar to red.

Yellow

Yellow is a bright, cheerful color that is associated with optimism, happiness, and sunshine. It can also represent caution, similar to orange and red. Yellow is often used in marketing to create a friendly and welcoming tone.

Green

Green is a calming, natural color that represents growth, balance, and harmony. It is often used to promote environmental causes and represents health, wealth, and stability.

Blue

Blue is a cool, calming color that symbolizes trust, loyalty, and intelligence. It is often used in marketing to create a sense of professionalism and authority. Blue is also associated with nature and the sea.

Purple

Purple is a royal, luxurious color that is often associated with creativity, spirituality, and wealth. It can create a sense of mystery and intrigue and is often used in branding and marketing for high-end products.

Colors Dimension And The Dynamic Of Your Mix

Credit: vintageking.com

Mixing Colors

Colors are fascinating, and the way they blend together can create a mesmerizing effect. Whether you are a graphic designer, artist, or DIY enthusiast, you need to understand the colors’ dimensions and dynamics to create an appealing palette.

Additive Mixing

Additive mixing is the process of adding colors of light to form a new color. It is based on RGB (Red, Green, Blue) model, where adding all three colors creates white light. Adding different amounts of the three colors creates an array of hues visible on the screen.

For instance, combining green and red light creates yellow, while adding green and blue produces cyan. Conversely, red and blue form magenta while red, green, and blue combined form white.

Subtractive Mixing

Subtractive mixing involves mixing colors of pigments, such as ink, paint, or dyes. Unlike additive mixing, subtractive mixing is dependent on reflections from a light source. In this model, adding all colors creates black since each color absorbs certain light wavelengths.

For instance, combining cyan, magenta, and yellow forms black. Subtractive mixing is based on the CMYK (Cyan, Magenta, Yellow, Black) color model, used mainly in printing and photography.

Color Mixing Techniques

There are various ways to mix colors, and each technique produces a unique result. Some of the popular techniques include:

  • Blending: Blending involves applying two colors side-by-side and merging them for a seamless transition. This technique is perfect for creating shadows, contours, and depth in artworks.
  • Layering: Layering involves applying multiple layers of different color paint or ink to create a solid, opaque shade. This technique is ideal for creating bold, vibrant colors.
  • Dry Brushing: This technique involves using a dry brush with a minimal amount of paint to create a textured and rough effect. Dry brushing is perfect for creating surfaces like bricks, stones, and rocks.
  • Gradient: A gradient involves a smooth transition of color from light to dark or vice versa using a color spectrum. This technique is ideal for creating a soft and smooth effect with distinct and defined colors.

Understanding color mixing is critical to create a visually engaging palette. By using the various color models and mixing techniques, you can create endless possibilities of color combinations to make your art or design stand out.

Color Harmony

Color harmony refers to the way colors interact with one another and how they blend together to create a dynamic mix. Understanding the dimensions of colors can help you create unique and visually pleasing designs.

Creating a visually appealing design is all about balance, and the foundation of that balance is color harmony. When colors work well together, they can elevate a design from ordinary to extraordinary. Color harmony is a combination of colors in a way that is pleasing to the eye and creates a sense of balance.

Complementary Colors

Complementary colors are colors that are located opposite each other on the color wheel. Pairing complementary colors is a great way to create a striking and eye-catching contrast. Some classic examples of complementary colors include blue and orange, red, and green, and yellow and purple.

Analogous Colors

Analogous colors are colors that are located next to each other on the color wheel. This color scheme is ideal for creating a design that is harmonious and cohesive. If you want to create a subtle and refined design, try using analogous colors like blue and purple or orange and yellow.

Triadic Colors

Triadic colors are three colors that are evenly spaced apart on the color wheel. This color scheme is ideal for creating bold and vibrant designs that demand attention. Use colors like red, yellow, and blue, or green, purple, and orange to create a triadic color scheme. In conclusion, understanding the dynamics of different colors and their combinations can help you create visually appealing designs. Whether you’re using complementary, analogous, or triadic colors, always aim for color harmony to create a sense of balance and cohesiveness.

Application Of Colors

The application of colors is a fascinating topic that has a significant impact on multiple industries. Colors play a crucial role in communication and can evoke emotions and influence decision-making. Understanding how colors work in different dimensions is necessary, particularly in graphic design, interior decoration, and fashion. In this article, we will explore how colors dimension and dynamic affect the mix in these industries.

Graphic Design

Graphic design is a field where colors are essential. It’s all about creating visually appealing graphics that communicate a message. In the graphic design industry, colors are used to evoke emotions and create an impact. The color wheel is an essential tool for graphic designers. The different colors and their combinations can make or break a design.

ColorMeaning
RedPassion, danger, love
BlueTrust, loyalty, calmness
YellowHappiness, optimism, creativity

Understanding color theory is crucial for graphic designers. It helps them create designs that attract attention, convey emotions, and communicate a message effectively.

Interior Decoration

Colors can create an ambiance in a room. It can make a room feel cozy, elegant, or modern. Interior decorators use colors to create an atmosphere that aligns with their client’s vision. The color wheel is also an essential tool for interior decorators. It helps them create a color scheme that complements each other.

  • Complementary colors: These are colors that are opposite each other on the color wheel, such as red and green. These colors create a high contrast and are suitable for creating a dramatic effect.
  • Analogous colors: These are colors that are adjacent to each other on the color wheel, such as blue and green. These colors create a harmonious effect and are suitable for creating a calming ambiance.

Interior decorators should also consider the lighting in a room when choosing colors. The natural and artificial lights in a room can affect the appearance of colors.

Fashion

Colors are an essential element in fashion design. It can change the mood of an outfit and highlight its features. Fashion designers use colors to create a visual impact on the runway or showroom. They also consider color trends for the season or occasion.

Monochromatic, complementary, and analogous colors are also used in fashion. The color combinations can create a cohesive look for an outfit.

In conclusion, understanding how colors dimension and dynamic affect the mix in graphic design, interior decoration, and fashion is necessary in these industries. A proper application of color theory can significantly impact how a message is perceived and create the right ambiance and mood for a client.

Frequently Asked Questions For Colors Dimension And The Dynamic Of Your Mix

What Are The Three Dimensions Of A Mix?

The three dimensions of a mix are timbre, space, and loudness.

What Is The Color Theory Of Mixing?

Color theory of mixing involves the primary colors red, blue, and yellow and the secondary colors green, violet, and orange. Mixing primary colors creates secondary colors while mixing secondary colors produces tertiary colors. The theory also includes complementary colors and color harmonies that are based on color wheel relationships.

What Is The Best Dynamic Range For A Mix?

The ideal dynamic range for a mix varies depending on the genre and style of the music being produced. Generally, a dynamic range of around 8-14 dB is recommended to ensure that all elements of the mix are audible while still maintaining a sense of depth and dynamics.

However, this can vary depending on the specific track and intended sound.

What Colors Make What When Mixed?

Mixing primary colors can create secondary colors. Red and blue make purple. Yellow and blue make green. Red and yellow make orange. Mixing all three primary colors (red, blue, and yellow) can make brown or black.

Conclusion

Color is an essential aspect of any design process. Colors have a significant impact on how a brand is perceived by the target audience. Understanding color psychology and mixing colors in the right way can help brands create messages that resonate with their audience.

Colors are a powerful tool to communicate your message, and the right mix can create a unique and dynamic presence for your brand. So, make sure to use colors wisely to create an unforgettable and successful brand identity.

Categories
Archive

How To Use Analog Gear With Logic Pro

To use analog gear with Logic Pro, you need an audio interface with enough inputs and outputs to accommodate your gear. Then, you can connect your gear to the inputs of the audio interface and use Logic Pro to record and process the signal.

Analog gear can add warmth, texture and character to digital recordings. It is a common practice to use analog gear in conjunction with digital audio workstations (DAWs) like Logic Pro to get the best of both worlds. However, the process of using analog gear with Logic Pro can be daunting for new producers.

We will break down the steps you need to take to use analog gear with Logic Pro. We will discuss the gear you need, how to set it up, and some tips for getting the most out of your analog gear. Whether you’re a seasoned producer or just starting out, this guide will help you get the most out of your recording setup.

Connecting Analog Gear To Logic Pro

Connecting your analog gear to Logic Pro is simple and easy. With the right cables and interface, you can enhance your sound and add warmth to your digital productions. Improve your workflow and get creative with analog gear in Logic Pro.

Using An Audio Interface

Analog gear can be connected to Logic Pro by using an audio interface. This hardware enables analog signals to be converted into digital signals. It is essential to select an audio interface that matches your analog gear’s input types. For example, if you have a microphone, you should opt for an audio interface with XLR inputs. Connect your analog gear to the audio interface inputs, then connect the interface to your computer via USB or thunderbolt.

Connecting Via Midi

MIDI (Musical Instrument Digital Interface) is an alternate way to connect analog gear to Logic Pro. MIDI is used for transferring digital data between electronic devices and computers. To connect analog gear via MIDI, you’ll need a MIDI interface. The interface will convert the analog signal into digital data that can be transmitted via MIDI. Connect your analog gear to the MIDI interface input, then connect the interface to your computer via USB or thunderbolt.

Ensuring Proper Compatibility

Ensure that your analog gear is compatible with Logic Pro. Check the manufacturer’s website to see if there are any specific drivers or software needed for the gear to work with Logic Pro. It is also important to check if the audio interface or MIDI interface is compatible with your computer’s operating system. It is recommended to use the latest version of Logic Pro and the latest drivers for your audio or MIDI interface to ensure the best performance. In conclusion, connecting analog gear to Logic Pro is a great way to enhance your music production. Using an audio interface or connecting via MIDI can help you achieve the desired sound quality from your analog gear. Make sure to check for compatibility and use the latest software and drivers for optimum performance.

How To Use Analog Gear With Logic Pro

Credit: m.youtube.com

Tips For Using Analog Gear In Logic Pro

Discover how to integrate analog gear with Logic Pro for a warmer and more authentic sound. Learn tips and techniques for seamlessly incorporating hardware into your digital workflow.

Tips For Using Analog Gear In Logic Pro Logic Pro is a highly versatile digital audio workstation that allows you to produce quality music. However, if you are a music enthusiast, you are likely to have analog equipment in your studio. Integrating analog gear with Logic Pro can add warmth and character to your recordings. Here are some essential tips to help you use analog gear in Logic Pro that delivers outstanding results. Signal Flow Considerations When integrating an analog gear into your Logic Pro setup, the first thing you should consider is the signal flow. The signal flow determines the path through which the sound will travel from its source to the computer. It is crucial to understand this aspect because it affects the final outcome of your audio production. You need to ensure that the signal flow is optimal and that it produces the desired results. Gain Staging Best Practices One of the most important factors to consider when integrating analog gear with Logic Pro is gain staging. Gain staging contributes significantly to the final sound quality of your audio production. You need to set the optimal level for each piece of gear, taking into consideration its function and how it interacts with other gear. Proper gain staging ensures that your analog gear and digital equipment work efficiently together, thus preventing any distortion or clipping. Using Inserts Vs. Sends And Returns In Logic Pro, you can either use inserts or sends and returns methods when integrating analog gear. Inserts allow you to route the signal through the analog gear while keeping it within the digital realm. Conversely, sends and returns send the signal outside of Logic Pro and requires the gear to have a separate input and output. While both methods have their benefits, you need to understand the differences, and choose the best approach for your specific needs. Creative Analog Use Cases Integrating analog gear with Logic Pro allows you to be creative with your sound. You can use various gear to enhance your recordings and make them stand out. For instance, you can add vintage-style compressors to your drum tracks or use an equalizer to fine-tune your vocals. Creatively using analog gear in Logic Pro can bring in a new dimension to your recordings, giving them the warmth and character that only analog gear can provide. Optimizing analog gear in Logic Pro requires experience and patience. By following these tips, you can create a streamlined workflow that produces outstanding results. Understanding how analog gear interacts with Logic Pro, setting gain staging correctly, selecting the best signal routing method, and being creative with analog gear can help you produce amazing music that stands out from the crowd.

Common Analog Gear Used In Logic Pro

Logic Pro users can incorporate analog gear into their production process for a warmer, more authentic sound. Popular analog gear used with Logic Pro includes compressors, equalizers, and tape emulators. Understanding how to effectively use this gear can enhance the overall quality of your productions.

Common Analog Gear Used In Logic Pro Have you ever wondered how professionals get that warm, classic sound in their recordings? One way is by using analog gear in conjunction with their digital audio workstation, like Logic Pro. Analog gear, like synthesizers, preamps, equalizers, compressors, reverb units, and even tape machines, can add a certain character and color that cannot be replicated digitally. In this post, we will explore the different types of analog gear commonly used in Logic Pro and how to use them to enhance your sound. Analog Synthesizers Analog synthesizers add a unique warmth and texture to any sound. By using oscillators, filters, and envelopes, you can create lush pads or biting leads that cannot be emulated by digital instruments. When using an analog synth in Logic Pro, make sure to record the audio as MIDI data first, then feed that data into your synthesizer. This way, you can manipulate the sound even after it has been recorded. Preamps Preamps boost the signal of your microphone or instrument before it enters your audio interface. This extra gain can add warmth and color to your sound, or even drive it into distortion for a gritty effect. When using a preamp in Logic Pro, make sure to set your input level low so that you are not overloading the recording. Then, tweak the gain knob on your preamp until you achieve the desired sound. Equalizers Equalizers allow you to boost or cut certain frequencies in your audio signal. In the analog world, equalizers can add a pleasing saturation or color to the sound. When using an equalizer in Logic Pro, it is important to understand the frequency ranges and how they affect different instruments. For example, boosting the high frequencies on a snare drum can add definition and clarity, while cutting the low frequencies on a bass guitar can help it sit better in the mix. Compressors Compressors even out the peaks and valleys in your audio signal, making it sound more consistent and controlled. In the analog world, compressors can add a certain character and warmth to the sound, especially when driven hard. When using a compressor in Logic Pro, make sure to set your threshold, ratio, attack, release, and makeup gain appropriately. Compression is one of the most important tools in mixing, and understanding how to use it can make the difference between a good recording and a great one. Reverb Units Reverb units add artificial reflections to your sound, creating the illusion of a space or environment. In the analog world, reverb units can add a certain color and character to the sound, depending on the type of unit used. When using a reverb unit in Logic Pro, make sure to adjust the decay time, damping, and mix parameters to achieve the desired sound. Be careful not to overdo it, as too much reverb can make your mix sound muddy and washed out. Tape Machines Tape machines were once the dominant recording medium before digital technology took over. Analog tape can add a certain warmth, saturation, and compression to your sound, but it also comes with its own set of challenges, like noise and maintenance. When using a tape machine in Logic Pro, make sure to calibrate the machine properly, understand the different tape speeds and tape types, and transfer the audio back into your DAW for further processing. In conclusion, adding analog gear to your digital setup can open up new creative possibilities and add a classic, vintage sound to your recordings. By understanding the strengths and limitations of each type of gear, you can make informed decisions about which ones to use and how to use them in Logic Pro.

How To Use Analog Gear With Logic Pro

Credit: www.audiomixingmastering.com

How To Incorporate Analog Gear Into Your Workflow

To incorporate analog gear into your Logic Pro workflow, start by assessing what you want to achieve. Identify the specific equipment you need, integrate it with your digital gear, and experiment with the sound. Take the time to understand how the analog gear impacts your sound and use it in a complementary way.

In the era of digital audio workstations, analog gear still holds a special place in music production. The warmth and character that analog gear brings to the table is unmatched by digital plugins. However, incorporating analog gear into your Logic Pro workflow can seem daunting at first. In this post, we’ll explore the basics of using analog gear with Logic Pro, including how to balance analog and digital in your mixes, how to use analog gear for unique processing, and how to incorporate analog gear into recording sessions.

Balancing Analog And Digital In Your Mixes

When mixing in Logic Pro, it’s important to strike a balance between analog and digital gear. Too much of either can result in a mix that sounds flat and lifeless. One way to achieve this balance is by using analog gear on select tracks. For example, you might use an analog compressor on a vocal track to add warmth and character, while using digital EQs and reverbs on other tracks. Another approach is to mix entirely in the box, then send the mix through an analog summing mixer to add analog warmth and depth. Whatever your approach, the key is to experiment and find what works best for your music.

Using Analog Gear For Unique Processing

Analog gear is known for its ability to add unique character and tone to audio signals. This is especially true of vintage gear, which often has a distinctive sound that’s difficult to replicate with digital plugins. When using analog gear for processing, it’s important to keep in mind that every piece of gear adds its own flavor to the signal. For example, a vintage tube preamp might add warmth and saturation, while a modern solid-state compressor might add clarity and punch. By experimenting with different combinations of analog gear, you can create a truly unique sound that sets your music apart.

Using Analog Gear In Recording

In addition to mixing and processing, analog gear can also be used during recording sessions. For example, you might use an analog preamp to add warmth and character to a guitar or bass track. Or, you might use an analog compressor to create a more natural-sounding dynamic range on a vocal track. When using analog gear in recording, it’s important to pay attention to gain staging, as analog gear can be more sensitive to input levels than digital gear. Additionally, you may want to consider using a dedicated audio interface with high-quality converters to ensure the best possible sound quality.

Analog-modeled Plugins Vs. True Analog Gear

Finally, it’s worth noting the difference between analog-modeled plugins and true analog gear. Analog-modeled plugins use algorithms to simulate the sound of analog gear, while true analog gear uses physical components to create a unique sound. Both have their strengths and weaknesses, but ultimately it comes down to personal preference. Some producers prefer the convenience and flexibility of digital plugins, while others swear by the sound of true analog gear. Whichever you choose, the most important thing is to experiment and find what works best for your music.

How To Use Analog Gear With Logic Pro

Credit: m.youtube.com

Frequently Asked Questions Of How To Use Analog Gear With Logic Pro

How Do You Use Virtual Instruments In Logic?

To use virtual instruments in Logic, select the track you want to add the instrument to. Then, click on the library and drag the desired instrument to the track. You can adjust parameters such as volume and pan to customize the sound.

Additionally, you can use MIDI controllers to play and record the virtual instrument.

How Do I Use Headphones With Logic Pro?

To use headphones with Logic Pro, simply plug them into the headphone jack on your device. You can then adjust the volume and panning of individual tracks to your liking using the mix console. Be sure to check that your headphones are compatible with your device and have sufficient sound quality for recording or mixing purposes.

How Do I Change Input Device In Logic?

To change the input device in Logic, go to Preferences, then Audio. In the Audio preferences window, select the Devices tab. Under Input Device, select the device you want to use. If the device is not listed, make sure it is connected and turned on.

How Do I Change Output In Logic Pro?

To change the output in Logic Pro, you need to use the Mixer. Go to the Mixer view, and select the channel strip that you want to adjust. Adjust the output by using the Output slot at the bottom of the channel strip.

You can also use the Send slot to send the audio to a bus or an effect processor.

Conclusion

Incorporating analog gear with Logic Pro can be a daunting task, but with this guide, it’s a manageable one. By stepping out of the digital realm and adding warmth and character to your music, analog gear can take your productions to the next level.

By following these tips, you can successfully integrate these two worlds and create unique and engaging music. Embrace the classic sounds of analog gear and bring creativity to your productions.

https://www.youtube.com/watch?v=OPL_2gJQwbo

For more background, see Logic Pro on Wikipedia. You may also like our guide: How to Use Synths in Logic Pro X.

Categories
Archive

Tips For Increasing Loudness In Your Mix

Increase loudness in your mix by using compression, limiting, EQ, and maximizing plugins. These tools effectively boost the volume while retaining the quality of the mix.

Also, the volume of a mix can make or break its success. Many factors come into play when striving to create a balanced loudness level. In today’s music industry, loudness is just as important as the production quality of a track.

Related reading: The Loudness War and Loudness vs Dynamics: What’s the Difference?. For background, see the Wikipedia article on Loudness war.

Streaming platforms like Spotify and YouTube also have loudness normalization in place that requires your mix to hit a certain level to be competitive. Moreover, we will explore some tips and techniques for increasing the loudness of your mix without compromising the quality. We will discuss using compression, limiting, EQ, and maximizing plugins as powerful tools to improve the overall volume of your mix.

Tips For Increasing Loudness In Your Mix

Credit: in.pinterest.com

Use Compression for Loudness in Your Mix

Use Compression:

In addition, one of the most important tools for achieving a loud mix is compression. Compression can help you control the dynamics of your mix, making the loudest parts quieter and the quietest parts louder. In this section, we’ll explore some tips for using compression effectively to increase the loudness of your mix.

Adjusting Compression Threshold:

Furthermore, adjusting the compression threshold is an essential step in using compression to increase the loudness of your mix. The threshold determines at what point the compressor will start to reduce the level of the signal. Setting the threshold too high will result in a mix that is not compressed enough, while setting it too low will result in a mix that is over-compressed and lacks dynamics. A good starting point is to set the threshold. That way, the compressor is triggered by the loudest parts of the mix.

Using A High Ratio To Control Dynamics:

Using a high compression ratio is another effective way to control the dynamics of your mix. A high ratio means that the compressor will reduce the level of the signal more aggressively when it exceeds the threshold. This can help to even out the levels of different elements in your mix and make the overall mix louder. However, be careful not to overdo it, as using too high of a ratio can also result in a lack of dynamics and a mix that sounds squashed.

Additionally, by using compression effectively, you can achieve a louder mix that stands out and grabs the listener’s attention. Remember to adjust the compression threshold and use a high ratio carefully to create a mix that is both loud and dynamic.

Cut Low-end Frequencies

When it comes to mixing music, increasing loudness is always a challenge. Also, one essential technique that can help you achieve a louder mix is cutting low-end frequencies. This technique helps you remove unnecessary bass frequencies that eat up your headroom and ultimately reduce the overall loudness of your mix.

Using A High-pass Filter

Moreover, a high-pass filter is a tool that allows you to filter out unwanted low frequencies from your tracks. Applying a high-pass filter to your tracks can help you reduce the muddiness and increase clarity. This can ultimately give you more headroom to work with. When using a high-pass filter, it’s important to set the cutoff frequency properly. Make sure you’re not cutting too much from the low end. Meanwhile, that can make your track sound thin and weak. A good rule of thumb is to start at around 100Hz and move the cutoff frequency up slowly until you find the sweet spot for your track.

Removing Unnecessary Bass Frequencies for Loudness in Your Mix

Another way to cut low-end frequencies is by identifying and removing unnecessary bass frequencies. In addition, to do this, you need to pay attention to each instrument in your mix and identify the frequencies that are producing unnecessary bass. For example, some guitar and synth patches may have low frequencies that are not needed in the mix. By removing these frequencies, you can create more headroom for other instruments. This can ultimately help you achieve a louder mix.

Conclusion

Furthermore, cutting low-end frequencies can help you increase the loudness of your mix by reducing the muddiness and creating more headroom. Using a high-pass filter and removing unnecessary bass frequencies are two effective techniques that can help you achieve a clearer, louder mix.

Use Saturation For Loudness In Your Mix

Saturation is a powerful tool to increase loudness in your mix. By adding subtle saturation to individual tracks and the master bus, you can add warmth and presence to your mix without sacrificing headroom.

Dynamics processing is an essential tool for mixing, but it can only get you so far. If you want your mixes to sound louder and more powerful, saturation is a great technique to consider. Saturation can add warmth, harmonics, and overtones to your tracks, making them sound fuller and more exciting. Let’s take a look at how you can use saturation to increase the loudness of your mix.

Applying Saturation To Tracks for Loudness in Your Mix

One way to use saturation is to apply it to individual tracks. For example, if you have a bass guitar part that you want to stand out more, you can add a saturation plugin to the channel strip. This will drive the signal harder, creating a more aggressive sound with more harmonics and overtones. You can experiment with different saturation plugins to find one that works best for your mix.

Using A Tape Simulator Plugin

Another way to use saturation is to use a tape simulator plugin on your entire mix. Tape simulators aim to recreate the warm, rich sound of analog tape. This can help to glue your mix together and make it sound louder. Tape plugins typically include controls for adjusting the amount of saturation, as well as features like flutter and wow to add more character and vibe to your mix.

Incorporating Saturation Into Your Workflow for Loudness in Your Mix

Saturation is a powerful tool for increasing the loudness of your mix, but it’s important to use it in moderation. Too much saturation can lead to a harsh, distorted sound that can be unpleasant to listen to. As with any mixing technique, it’s essential to use your ears and make subtle adjustments until your mix sounds just right. By incorporating saturation into your workflow, you can add warmth, character, and energy to your mix. This makes it sound louder and more polished.

Apply Limiting For Loudness In Your Mix

If you want your music to sound professional, loudness is one of the most important factors to consider. One way to increase the volume of your mix is by using limiting. In this post, we’ll go over some tips for applying limiting to your mix and getting the most out of your sound.

Setting A Ceiling Limit for Loudness in Your Mix

The first step in applying limiting is to set a ceiling limit. This will prevent any peaks or sudden spikes in volume that could lead to distortion. The ceiling limit is the maximum volume that any part of your mix can reach. It’s typically set just below the point of distortion.

When setting a ceiling limit, it’s important to consider the type of music you’re producing. For example, the ceiling limit for electronic dance music will be higher than that for acoustic music.

Using A Brickwall Limiter

The next step in applying limiting is to use a brickwall limiter. This type of limiter is designed to prevent any volume spikes above the ceiling limit. This ensures that your mix stays within the desired loudness range.

When using a brickwall limiter, it’s important to set the release time correctly. A short release time will result in a more defined sound. Meanwhile, a longer release time will create a smoother sound.

In Conclusion

Applying limiting is an essential step in getting your mix to the desired loudness level. By setting a ceiling limit and using a brickwall limiter, you can prevent distortion and ensure that your music sounds professional and polished.

Using Eq for Loudness in Your Mix

To increase loudness in your mix, try using EQ. Boost the frequencies that add punch to your track, such as the low-end and high-end frequencies. Be cautious not to over-boost, as it may lead to distortion and affect audio quality.

Using Eq: Tips For Increasing Loudness In Your Mix

Equalization (EQ) is a crucial tool in achieving a balanced and louder mix. When used correctly, it can enhance the sonic qualities of individual tracks by boosting or cutting specific frequencies. But how can you use it effectively to increase the overall loudness of your mix? Here are some tips:

Using A Boost To Increase Volume

One popular technique for increasing loudness in your mix is using a boost EQ. This involves increasing the level of specific frequency ranges like the bass or treble, to make them more dominant in the mix. You should be careful when using boost EQ as it can lead to distortion and damage to equipment. It’s important to identify which frequency range needs boosting and by how much. You can do this by using a frequency analyzer. This displays a visual representation of the frequencies present in your mix. Boosting frequencies with large gaps between them creates a more transparent and louder sound.

Cutting Frequencies That Clash for Loudness in Your Mix

Cutting frequencies that clash with each other can make a huge difference in achieving a louder mix. Two or more instruments or parts in your mix can share common frequencies that could sound muddy and clash with each other. By identifying these particular frequency ranges and cutting them, you can reduce clutter and create more headroom for other frequencies to stand out. Using surgical EQ cuts of just a few dBs to some frequency ranges like the low mids, can make the mix sound cleaner, and overall louder.

A good way to start is by soloing each track and listening for problematic frequency areas. Be careful not to cut too much as this could cause the track to sound thin and hollow. In summary, proper use of EQ is essential when aiming for a louder and more balanced mix. Using boost EQ to increase the volume of specific frequency ranges can give your music the extra push it needs. Also, cutting frequencies that clash with others can help create more headroom, and in turn, a louder mix.

Tips For Increasing Loudness In Your Mix

Credit: www.worshipministrytraining.com

Check Loudness In Your Mix With Meters

Checking your levels is critical when it comes to increasing the loudness of your mix. It ensures that each instrument is at the correct volume and that the mix is well-balanced. Here are a few tips to consider:

Using A Loudness Meter

Using a reliable loudness meter could be the key to taking your mix to the next level. A loudness meter helps you determine the perceived loudness of your mix. This gives you an idea of how it will sound on various platforms. Some popular loudness meters include:

NamePriceDescription
Youlean Loudness MeterFree/PaidA feature-packed loudness meter with an easy-to-use interface.
iZotope Insight 2$499A powerful loudness meter with comprehensive metering and analysis tools.
Waves WLM Plus$249A professional loudness meter with loudness and true peak metering.

Avoiding Clipping

Clipping is a common issue that arises when the volume of a track is too high, causing distortion. Here are some ways to avoid clipping:

  • Reduce the volume of each track until the mix is more manageable.
  • Use compression to compress dynamic range and avoid sudden spikes in volume.
  • Use a limiter to limit the maximum level of the output signal.

By checking your levels, using the appropriate loudness meter, and avoiding clipping, you can increase the loudness of your mix while maintaining a high-quality sound.

Spread The Mix For Perceived Loudness

Get your mixes to sound louder with these helpful tips from Spread The Mix. Learn how to use compression, EQ, limiting, and other techniques to achieve the desired level of loudness without sacrificing quality.

When it comes to mixing a track, achieving a balanced and dynamic sound is key. One way to increase the loudness without sacrificing quality is by spreading the mix. This involves using various techniques to widen the stereo image and create depth within the mix.

Using Panning To Widen Tracks

One way to spread the mix is by panning instruments to different positions within the stereo image. By panning instruments to opposite sides, you can create a wider sound and make room for other elements in the center. For example, panning the rhythm guitar to the left and the lead guitar to the right can create a wide and spacious sound, while leaving space for the vocals in the center.

Creating Depth With Reverb

In addition to panning, adding reverb can also help to create depth within the mix. By adding a short and subtle reverb to a lead vocal or instrument, you can push it slightly back in the mix and create the illusion of it being further away. Conversely, adding a longer and more pronounced reverb to a background vocal or instrument can make it sound further back in the mix. This can create a sense of depth and space within the mix that can help increase overall loudness.

Layering Multiple Instruments

Another way to spread the mix is by layering multiple instruments together. By layering similar sounds like guitars or synths, you can create a thicker and wider sound that fills out the stereo image. Additionally, layering instruments with different frequencies can help to create a more balanced and dynamic sound. For example, layering a bass guitar with a synth bass can help to create a more powerful low-end. This can help increase overall loudness.

Conclusion

By using techniques like panning, reverb, and layering, you can spread the mix and create a wider and more dynamic sound. These techniques can help increase loudness and create depth within the mix without sacrificing quality. By experimenting with these techniques and finding the right balance, you can create a mix that is both balanced and powerful.

Use Arrangement To Add Loudness In Your Mix

To increase loudness in your mix, proper arrangement is essential. Organize your tracks in a way that each element has its own space and is not fighting for attention. Focus on the placement of your instruments and adjust volume levels accordingly.

Avoiding Frequency Buildup

When arranging the different elements of your mix, it’s essential to avoid frequency buildup. One of the most common problems with a mix is that it becomes cluttered. This results in a lack of clarity and a significant loss of loudness. To prevent frequency buildup, it’s important to make room for each element in your mix. You can do this by using EQ to cut out frequencies that don’t add value to the individual sounds. When arranging different elements in the mix, you should also consider using panning, reverb, and delay to create sonic space for each sound.

Creating Contrast In Sections

Creating contrast between different sections of your mix is essential to ensure that your mix doesn’t become one-dimensional. Dynamic changes in your mix can help to maintain listener interest and keep them engaged throughout the song. You should consider making changes in the instrumentation, dynamics, and texture of the song to create contrast. For example, you could create a breakdown section where elements of the mix are gradually stripped away before building back up to the main section. By doing this, you create a sense of tension and release that will give your mix more impact.

Conclusion

In conclusion, paying attention to arrangement is crucial if you want to increase loudness in your mix. By avoiding frequency buildup and creating contrast in different sections of your mix, you can create a more impactful and engaging mix. With a little practice and experimentation, you can achieve a professional-sounding mix that will impress even the most discerning listeners.

Tips For Increasing Loudness In Your Mix

Credit: in.pinterest.com

Frequently Asked Questions On Tips For Increasing Loudness In Your Mix

How Do I Increase Loudness In Mixing?

Increase loudness with compression and limiting to control dynamic range. Use EQ to enhance tone and volume automation to even out sections. Be cautious not to over-compress and cause distortion or loss of quality.

How Do People Get Their Mixes So Loud?

Professional producers achieve loud mixes by using the right tools and techniques, such as using a limiter and EQing each track. They also understand the importance of gain staging, compression, and proper use of the frequency spectrum. Finally, they reference their mixes on different speakers and systems to ensure maximum impact and loudness without sacrificing sound quality.

Why Is My Mix Not Loud Enough?

Your mix may not be loud enough due to a few reasons such as improper gain staging, lack of compression, incorrect use of EQ, weak mastering, and low-quality speakers or headphones. Analyze each element of your mix and make necessary adjustments.

How Can I Increase The Loudness Of My Sound?

To increase the loudness of your sound, you can try adjusting the volume settings on your device or using an external speaker with higher wattage. Additionally, you can turn off any audio enhancement or equalizer settings that may be limiting the sound output.

It’s important to not exceed the recommended volume levels to avoid damaging your hearing or audio equipment.

Conclusion

In closing, achieving the desired loudness in your mix can take some experimentation. But with the right approach, it is achievable. Remember to focus on the quality of your source material, choose the right tools for the job, and pay close attention to your levels and EQ.

Implementing these tips and techniques will help you take your mixes to the next level, whether you’re working on your bedroom studio or in a professional setting. With practice, experience, and attention to detail, you can achieve a powerful and polished mix that will shine in any setting.

Categories
Archive

9 Best Free Vst Plugins For Trap Beats

The 9 best free VST plugins for trap beats are: 1) Valkyrie by Infected Sounds, 2) Kickstart by Nicky Romero, 3) Ozone Imager by iZotope, 4) TAL Reverb 4 by TAL Software, 5) Pancake 2 by Cableguys, 6) OTT by Xfer Records, 7) Rough Rider 2 by Audio Damage, 8) FLEX by Image-Line, and 9) Fruity Waveshaper by Image-Line. Producing trap beats requires complex sound design and effects to create the signature sound of trap music.

Fortunately, there are many free VST plugins available that can help producers achieve the desired sound. We have compiled a list of the 9 best free VST plugins for trap beats that can take your production to the next level.

These plugins include a variety of effects and instruments that can help you create hard-hitting drums, distorted 808s, and atmospheric soundscapes. Keep reading to find out more about each plugin and how to use them in your next trap production.

9 Best Free Vst Plugins For Trap Beats

Credit: www.youtube.com

Xfer Serum

Xfer Serum is a must-have plugin for trap beat producers, with its wide range of features and high-quality sound. It allows you to create unique sounds and textures, making it one of the best free VST plugins out there.

Xfer Serum is one of the most popular virtual synthesizer plugins among music producers in the trap music genre. This powerful software is renowned for its user-friendly interface and state-of-the-art sound quality. In this post, we’ll be exploring the features and benefits of Xfer Serum, one of the 9 best free VST plugins for trap beats.

Features

Xfer Serum boasts a plethora of features that make it stand out among other synthesizer plugins. Some of these features include:

  • Advanced wavetable synthesizer
  • Real-time wavetable manipulation
  • Ability to import custom wavetables
  • Dual oscillator system
  • Advanced unison engine
  • Built-in effects including filters, reverb, and distortion
  • XY pad for real-time parameter control
  • MIDI learn functionality

Benefits

The benefits of using Xfer Serum as a virtual synthesizer plugin are numerous. Some of these benefits include:

  • Unrivaled sound quality and clarity
  • Ability to create complex and unique sounds
  • Real-time wavetable manipulation for on-the-fly customization
  • User-friendly interface for easy navigation and parameter control
  • Efficient CPU performance for running multiple instances of the plugin
  • Built-in effects reduce the need for additional plugins
  • The ability to import custom wavetables allows for even more sound customization
  • MIDI learn functionality streamlines workflow for improved productivity

Overall, Xfer Serum is a must-have plugin for any music producer looking to create high-quality trap beats. Its advanced features and powerful functionality make it a popular choice among professionals and beginners alike.

Splice

Splice is a popular digital music platform that offers free VST plugins for trap beat production. These plugins are essential for producers looking to add unique sounds and effects to their tracks. Try out some of their top-rated plugins for free today!

Splice is a popular online platform that offers a vast collection of sound samples, loops, and plugin presets for music producers. Among the numerous free VST plugins available on their website, here are some of the best ones that you can use to create killer trap beats.

Features

Splice VST plugins come with a range of features that make them useful for creating unique trap beats. One of the best things about Splice is that it allows you to customize your sounds fully, so you can tweak them to suit your style.

Benefits

Using Splice’s free VST plugins can help you to create trap beats that stand out from the crowd. The benefits of using these plugins include:

  • Access to a vast collection of high-quality sounds, samples, and presets
  • Customizable features that allow you to create unique sounds
  • Easy integration with DAWs like Ableton Live, FL Studio, and Logic Pro X
  • Regular updates that ensure you always have access to the latest sounds and features
  • No hidden charges or fees – all Splice plugins are fully free

If you want to take your trap beats to the next level, using Splice’s free VST plugins is an excellent way to do so. Whether you are a beginner or an experienced producer, these plugins give you the flexibility to create the perfect sound for your tracks.

Labs

Discover the top 9 free VST plugins for creating trap beats with LABS. Elevate your music production game with these versatile and powerful tools that can unleash your creativity and bring a unique flavor to your tracks.

LABS is a free VST plugin that offers a great selection of sounds suitable for trap beats. It is a plugin that has been developed by British sound design company Spitfire Audio. LABS is a virtual instrument that allows users to access high-quality sounds that are perfect for producing professional-sounding trap beats. This plugin is not only easy to use but also comes with a range of features that make it ideal for trap beat producers of all skill levels.

Features

LABS offers a range of features that make it a great plugin for producing trap beats. Firstly, the plugin has a clean, user-friendly interface that makes it easy to navigate. Secondly, it comes with a wide range of sounds, including strings, pianos, percussion, and synths, to name a few. This means that users have access to all of the sounds they need to produce a trap beat in one place. Finally, LABS has a range of effects and parameters that allow users to customize their sounds to create unique, professional-sounding trap beats.

Benefits

One of the major benefits of using LABS as a free VST plugin is that it comes with all of the sounds that are needed to produce a professional-sounding trap beat. This means that users don’t have to waste time searching for individual sounds or purchasing expensive plugins. Additionally, LABS is easy to use and comes with a range of features that allow users to customize their sounds to create unique, professional-sounding trap beats. Finally, as a free VST plugin, LABS is accessible to all producers, regardless of their budget. Overall, LABS is a great free VST plugin for trap beat producers. With its easy-to-use interface, wide range of sounds, and customizable features, it is a must-have for any producer looking to create professional-sounding trap beats.

Ozone Imager

If you’re a Trap music enthusiast or a producer who creates trap beats, you would know that having the right VST plugins in your arsenal can make all the difference. One such plugin is ‘Ozone Imager’, which is a free stereo image processor designed to add width to basslines, synths, and vocals. Let’s take a closer look at the features and benefits of this plugin.

Features

FeatureDescription
Mid/Side ProcessingAllows you to adjust the stereo width of the mid and side separately.
Global Width ControlChanges the stereo width of the entire mix.
Real-Time Visual FeedbackDisplays a real-time stereo field analyzer that shows you what’s happening to your mix.
PresetsComes with presets that you can use as a starting point for your mix.

With these features, you’ll have greater control over the width of your mix, and your tracks will have a wider stereo image.

Benefits

  • Enhanced Sound: By using Ozone Imager, you can add width to individual elements, which helps to create a bigger and wider sound in your mix.
  • Easy to Use: Ozone Imager is extremely user-friendly, with an intuitive interface that allows you to visualise your adjustments in real-time.
  • Free: The best thing about Ozone Imager is that it’s completely free, making it a great choice for producers on a budget.
  • Time-Saving: Ozone Imager comes with presets that can be easily tweaked, saving you time and effort in the mixing process.

Overall, Ozone Imager is a must-have plugin for anyone looking to create wide, spacious tracks in the trap genre. With its array of features and benefits, it’s no wonder that it’s one of the most popular stereo imaging plugins among producers today.

Ott

If you are looking to produce supreme quality Trap Beats, then you will likely need the OTT plugin, a multiband compressor designed specifically for electronic music. This plugin features both compression and upward expansion, providing precise control over your audio’s dynamics. 

Features

The OTT plugin comes with a range of user-friendly features, including:

  • Smooth compression algorithm for ultra-saturated sound
  • Upwards and downwards compression and expansion modes 
  • Variable depth and timing controls
  • Multiband lookahead

With such an extensive feature set, the OTT plugin proves to be an invaluable tool for any producer wishing to take their Trap Beats to the next level.

Benefits

The OTT plugin offers a number of benefits to producers, including:

  • Improved control over dynamics, allowing you to tighten up your mixes
  • Better loudness management, helping you to create tracks that are perfectly balanced
  • Ease of use, given the user-friendly interface and well-designed controls
  • Improved sound quality, thanks to the multiband compression and upward expansion

Perhaps the greatest benefit of the OTT plugin is its ability to add that extra level of saturation and energy to your Trap Beats.

Overall, the OTT plugin is an essential VST plugin for any Trap Beats producer serious about creating high-quality, professional-level tracks. Download it for free and start experimenting with its many features today!

9 Best Free Vst Plugins For Trap Beats

Credit: www.productionmusiclive.com

Tal-reverb-4

One of the best free VST plugins for trap beats is TAL-Reverb-4. This plugin provides a high-quality reverb effect, making your beats sound fuller and more immersive. The TAL-Reverb-4 is easy to mix and tweak, and it’s an essential addition to your plugin library.

TAL-Reverb-4 is a free VST plugin that adds depth and atmosphere to your trap beats. This high-quality reverb plugin enables you to create a unique sound that suits your music. With TAL-Reverb-4, you can experiment with different reverb settings and create professional-sounding trap beats with ease.

Features

TAL-Reverb-4 features a user-friendly interface that allows you to access all the essential reverb parameters. You can adjust the decay time, damping, high-frequency EQ, and low-frequency EQ settings, among others. Moreover, you can adjust the early reflections and stereo width settings to create a wider and more spacious sound. TAL-Reverb-4 also provides a dry/wet control that enables you to blend the original sound with the reverb effect.

Benefits

TAL-Reverb-4 is an excellent tool for enhancing the sound quality of your trap beats. It offers a range of customizable reverb options that enable you to add depth and space to your music. Using TAL-Reverb-4, you can create a warm and natural reverb sound that complements your mix. This plugin is ideal for musicians and producers who want to create professional-sounding trap beats without spending a lot of money. TAL-Reverb-4 is one of the best free VST plugins for creating trap beats. It adds depth, warmth, and character to your music, making it sound more professional and polished. With its user-friendly interface and customizable settings, TAL-Reverb-4 provides a range of reverb options that allow you to tailor your sound to your liking. So, if you are looking for a reliable and versatile reverb plugin for your trap beat productions, TAL-Reverb-4 is definitely worth a try.

Cableguys Pancake

Cableguys Pancake is a free VST plugin that provides limitless possibilities for manipulating sounds. With its easy-to-use interface, it’s the perfect tool for creating unique and dynamic trap beats.

Cableguys Pancake is one of the most popular VST plugins for trap beat music production. This plugin is a must-have for every music producer who wants to create professional audio mixes with ease. The Cableguys Pancake is a versatile plugin that can be used for creating various audio effects such as panning, filter modulation, volume modulation, and much more. In this section, we’ll discuss the features and benefits of the Cableguys Pancake VST plugin.

Features

The Cableguys Pancake is a highly versatile plugin that comes with a wide range of features. Here are some of its most notable features:

  • The plugin has a flexible panning modulation system that allows users to create complex panning effects easily.
  • The Cableguys Pancake can create up to 8 different modulation curves per channel, making it easy to create complex filter and volume modulation effects.
  • The plugin offers a wide range of filter types, including low pass, high pass, band pass, notch, and peak filters. This allows users to create a variety of filter modulation effects.
  • Cableguys Pancake has a user-friendly interface that makes it easy to use for both novice and advanced music producers.

Benefits

The Cableguys Pancake offers several advantages to music producers looking to create professional trap beat music. Here are some of its benefits:

  • The plugin allows users to create complex panning, filter, and volume modulation effects, making it easy to create unique and professional audio mixes.
  • The plugin is very user-friendly and easy to use, even for beginners. This saves time and reduces the learning curve needed to create professional audio mixes.
  • Cableguys Pancake is a free plugin, which makes it accessible to every music producer regardless of their budget.
  • The plugin is updated regularly with new features and improvements, which ensures that it remains relevant and useful for music producers.

In conclusion, the Cableguys Pancake VST plugin is an essential tool for music producers looking to create professional trap beat music. With its extensive range of features and benefits, it is the perfect tool for creating unique and professional audio mixes. Whether you are a novice or an experienced music producer, the Cableguys Pancake is a must-have plugin for your music production arsenal.

Rbxpads

RBXPads offers a collection of high-quality free VST plugins for producing trap beats. These plugins are perfect for adding unique effects and sounds that will make your tracks stand out from the crowd.

RBXPads is a free VST plugin designed for music producers, especially those creating trap beats. It is a versatile plugin that helps producers create unique sounding drums and percussions with ease. Let’s take a look at RBXPads’ features and benefits below.

Features

RBXPads offers a host of features to help producers create unique and high-quality trap beats. Some of the notable features of RBXPads include:

  • 16 drum pads with individual controls for volume, pan, and filter
  • Complex sound-shaping capabilities using distortion, saturation, and EQ features
  • Customizable MIDI mapping for added flexibility
  • Master volume control to adjust output level
  • High-quality sound output with minimal CPU usage

Benefits

RBXPads has several benefits that make it a great tool for producing trap beats. Some of the benefits of RBXPads include:

  • Free to download and use without any hidden charges
  • 16 drum pads that can be easily mapped to your MIDI controller
  • Customizable sound design features to create unique drum sounds for your tracks
  • High-quality sound output that cuts through the mix in any track

Overall, RBXPads is a great free VST plugin for producing trap beats. Its versatility and sound-shaping capabilities make it an excellent addition to any producer’s toolkit.

9 Best Free Vst Plugins For Trap Beats

Credit: m.youtube.com

Frequently Asked Questions On 9 Best Free Vst Plugins For Trap Beats

What Is The Best Vst For Trap Music?

For trap music production, the best VST is subjective based on personal preference. However, some popular options include Omnisphere, Serum, and Nexus. These VSTs offer a variety of sounds, including 808s, bass, and synths, which are commonly used in trap music.

What Vst Do Most Producers Use?

The VST most producers use varies based on personal preference and the type of music. Some popular plugins include Serum, Massive, Omnisphere, Sylenth1, and Kontakt. It’s recommended to try out different VSTs to find one that suits your style and needs.

How To Install A Vst In Fl Studio?

To install a VST in FL Studio, follow these steps: 1. Open FL Studio and go to the menu bar. 2. Click on “Options” and select “Manage Plugins”. 3. Click on the “Plugin search paths” and add the folder where the VST plugin is located.

4. Click on “Find plugins” and select the VST plugin you want to install. 5. Click on “Verify plugins” and restart FL Studio. The VST should now be available in your plugins list.

What Are Vst Midi Effect Plug Ins?

VST MIDI effect plug-ins are software components that run within a digital audio workstation, used to manipulate and enhance MIDI data. They offer various MIDI processing functions, such as arpeggiating, filtering, and modulation. These plug-ins can be used with virtual instruments, hardware synths, and MIDI controllers to enhance creativity and musicality.

Conclusion

It’s clear that the right VST plugins can make or break your trap beats. That’s why we’ve compiled this list of the 9 best free VST plugins for you to experiment with. From distortion to compression, these plugins offer a range of features to help make your trap beats stand out.

So why wait? Give them a try and see the difference they can make in your music. Happy producing!

Categories
Archive

How To Press Vinyl Records The Complete Guide

Pressing vinyl records requires specialized equipment, including a mastering studio, vinyl cutting lathe, and record press. The process involves transferring music onto lacquer discs, creating metal stampers, and using those stampers to press vinyl records.

Vinyl records have been making a comeback in recent years due to their warm sound and physicality. For music enthusiasts, the act of playing a vinyl record is a special experience that cannot be replicated by digital streaming. However, not many people know the process of pressing a vinyl record from scratch.

It requires a range of specialized equipment, including a mastering studio, vinyl cutting lathe, and record press. The process also involves several technical steps, such as cutting grooves into lacquer discs, creating metal stampers, and pressing vinyl records with heat and pressure. If you’re interested in learning more, keep reading for a complete guide on how to press vinyl records.

The Vinyl Pressing Process

The vinyl pressing process is a crucial step in creating high-quality records. It involves mastering, plating, and pressing the vinyl, resulting in a grooved disc that can be played on turntables. This complete guide will take you through the process, from start to finish, ensuring your records sound great every time.

Vinyl records have enjoyed a resurgence in recent years, and for good reason. They offer a high-quality sound that digital music just can’t match. If you’re interested in pressing your own vinyl records, there’s a lot to consider. In this guide, we’ll take you through the entire vinyl pressing process, from preparing the master recording to the final pressing. Let’s dive into each step in detail.

Preparing The Master Recording

The first step in pressing vinyl records is preparing a master recording. This is typically done in a recording studio, where the final mix is created and mastered specifically for vinyl. The mastering process involves adjusting the frequency, dynamic range, and stereo image to ensure the best possible sound on a vinyl record. The mastered recording is then sent to a cutting engineer, who will cut the music into a lacquer disc, which will serve as the template for creating the mother and stamper.

Creating The Mother And Stamper

Once the lacquer disc is cut, it’s electroplated to create a mother, which is a negative image of the recording. The mother is then used to create the stamper, which is the positive image that will be used to press the records. The stamper is made from metal, and it’s the key to creating high-quality vinyl records.

Preparing The Vinyl

Before the pressing process can begin, the vinyl needs to be prepared. Raw vinyl is in the form of small pellets, which are melted down and extruded into long strips. The strips are then cut into small pucks, which are placed in a hydraulic press. The press heats the vinyl and forms it into a flat disc with a centre hole. The disc is trimmed to size and then cooled.

The Pressing Process

Once the vinyl is prepared, the pressing process can begin. The stamper is placed in a press, and the vinyl disc is placed on top. The press applies heat and pressure to the stamper and the vinyl, which creates the grooves and sets the music in the record. The record is then cooled and trimmed to size. In conclusion, pressing vinyl records is a complex and fascinating process that requires the expertise of many professionals. With the right equipment and knowledge, anyone can press their own vinyl records and enjoy the unmatched sound quality that vinyl provides.

How To Press Vinyl Records The Complete Guide

Credit: thevinylfactory.com

Equipment Needed For Vinyl Pressing

To properly press vinyl records, you will need a range of equipment. These include a vinyl lathe, mastering equipment, a record press, stamper plates, and cleaning supplies. Proper equipment is essential to ensure high-quality vinyl recordings.

Vinyl pressing is an intricate process that requires a range of specialized equipment. In this guide, we’ll outline the essential equipment you need for vinyl pressing.

Vinyl Mastering Equipment

Mastering is the crucial initial step of vinyl pressing, where the audio is optimized for vinyl. The following are the essential equipment used in vinyl mastering:

  • Analogue or digital mixing desk
  • Equalizer
  • Compressor/limiter
  • Audio Interface
  • Stereo enhancers (optional)

Vinyl Cutting Equipment

Once the audio is optimized for vinyl, the next step is cutting the audio into the record’s grooves. The following equipment is required for vinyl cutting:

  • Audio Interface
  • Turntable
  • Cutting cartridges and styli
  • Cutting amplifiers
  • Computer with suitable cutting software

Pressing Equipment

Pressing equipment is the most crucial equipment required for vinyl pressing. The pressing equipment comprises the following machines:

EquipmentFunction
Record pressFlattens the heated vinyl puck into a record shape.
ExtruderUses the metal master plate to create a negative impression on the vinyl puck.
Vacuum armRemoves any dust or debris that may be present on the record.
Label pressEmbosses labels onto the center of the record.

Packaging Equipment

After pressing, the records are ready for packaging. The following are the machines required for packaging:

  • Record cleaning machine
  • Packing sleeves
  • Record Jackets

To sum up, vinyl pressing requires several specialized equipment. From mastering the audio to packaging the records, each stage requires specific machines to create the final product. Having the correct equipment is essential for creating high-quality vinyl records.

Preparing Your Master Recording

Preparing your master recording is a crucial step in pressing vinyl records. This involves ensuring that the audio is properly mixed and mastered, with no errors or distortion. A high-quality master recording will result in a cleaner and more accurate reproduction on the vinyl record.

Preparing your master recording is one of the most important steps in the vinyl record pressing process. This is where you create the final recording that will be used to press your vinyl records. In this section, we will cover the recording techniques, mastering for vinyl, preparing the lacquer, and sending your master to the manufacturer.

Recording Techniques

When it comes to recording your music, there are a few techniques that you need to keep in mind to ensure your final recording is suitable for pressing onto vinyl. Here are a few tips to get you started:

  • Use quality recording equipment to capture your music.
  • Avoid using compression or limiting in your recording process, as this can negatively affect the dynamic range of your music.
  • Avoid recording at high levels, as this can cause distortion and other issues that will make your final recording unsuitable for vinyl pressing.
  • Choose the right microphones for your recording – they can have a huge impact on the overall sound of your recording.

Mastering For Vinyl

Mastering for vinyl is a process that involves making specific adjustments to your audio to ensure it sounds great when pressed onto vinyl. Here are some tips for mastering your music for vinyl:

  • Avoid using excessive bass or treble, as this can cause issues with the grooves in your vinyl.
  • Choose a mastering engineer that has experience with vinyl mastering.
  • Avoid using limiting or compression in the mastering process.
  • Make sure the quiet parts of your music are truly quiet, as any noise in the recording can be magnified during the vinyl pressing process.

Preparing The Lacquer

The lacquer is a metal disc coated with a lacquer film that will be used to create the final stampers for your vinyl pressing. Here are some tips to ensure your lacquer is prepared correctly:

  • Clean the lacquer thoroughly before recording.
  • Avoid touching the lacquer with your hands, as any fingerprints or oils can affect the sound quality of your final recording.
  • Ensure your recording is centered on the lacquer, as any off-center recordings can affect the sound quality of your final vinyl pressing.
  • Label the lacquer with the appropriate information, including the artist name, album name, and track listing.

Sending Your Master To The Manufacturer

Once your master recording is complete and your lacquer has been prepared, you can send your materials to the manufacturer for vinyl pressing. Here are some tips to ensure your materials are prepared correctly:

  • Double-check all the information on your lacquer to ensure it is correct.
  • Prepare a separate sheet of information with the artist name, album name, track listing, and any other relevant information.
  • Use a reputable shipping company to ensure your materials arrive safely.
  • Include a contact number and email address in case the manufacturer needs to get in touch with you during the pressing process.

In conclusion, preparing your master recording is an important step in the vinyl record pressing process. By following the tips and techniques outlined above, you can ensure your final recording is suitable for pressing onto vinyl and will sound great for years to come.

Setting Up Your Vinyl Pressing Plant

Learn how to set up your own vinyl pressing plant with this complete guide on how to press vinyl records. From equipment to production processes, this article has got you covered.

Setting up your vinyl pressing plant requires careful planning and execution to ensure the highest quality of your final product. This process involves multiple factors, ranging from location and space requirements to staffing and training. Below we’ll discuss in detail each of these important factors in HTML syntax.

Location And Space Requirements

The location and space requirements of your vinyl pressing plant are critical for optimal production. You need to ensure that the factory is located in an area that is accessible to transportation systems such as highways, railways, and airports to facilitate easy movement of raw materials and finished products. The space in the factory should be large enough to accommodate all the production machinery, storage facilities, administrative offices, and employee facilities such as restrooms, break rooms, and meeting rooms. A spacious factory enhances the safety and comfort of employees while ensuring the proper flow of work.

Environmental Factors

Environmental factors such as temperature, humidity, and air quality can significantly impact the production process and the final product. Your vinyl pressing plant should have a controlled environment, with temperature and humidity levels maintained at specific values to ensure the quality of the final product. The air quality in the factory should also be maintained to avoid dust and other contaminants that may affect the product quality.

Installing Equipment

Vinyl pressing requires specialized equipment to produce high-quality records. You should invest in quality machinery that is efficient, reliable, and durable. The equipment should be strategically placed in the factory to ensure that the production process is optimized for efficiency, safety, and quality. Regular maintenance and replacement of equipment are also crucial to ensure the longevity of the machines.

Staffing And Training

Your employees play a crucial role in the success of your vinyl pressing plant. You need to hire skilled and experienced staff members and provide them with regular training to ensure they have the necessary skills to operate the machinery effectively. Training should include safety procedures, quality control, and maintenance of machinery. Proper training enhances employee satisfaction and productivity, ensuring that your plant meets the production demands of your customers. In conclusion, setting up a vinyl pressing plant requires careful planning and execution to ensure that your final product meets the quality standards of your customers. By adhering to the above factors, you can optimize the production process, ensuring that your vinyl pressing plant runs efficiently to produce high-quality records.

Quality Control In Vinyl Pressing

Vinyl production requires careful attention to detail throughout the entire process to ensure a high-quality end product. Quality control, in particular, is a crucial aspect of vinyl pressing that cannot be overlooked. In this guide, we will delve into the key areas of quality control in vinyl pressing, including inspecting raw materials, checking test pressings, maintaining consistency, and troubleshooting common issues.

Inspecting Raw Materials

Raw materials, such as vinyl pellets and labels, should be thoroughly inspected before being used in the pressing process. Inspecting the pellets involves conducting a color check to ensure consistency and evenness of the pigment. The labels should also undergo a quality check to ensure they adhere properly and are of the right size and specification.

Checking Test Pressings

Test pressings offer an opportunity to check for defects that may arise during the pressing process. These defects could include surface noise, distortion, off-center pressings, and skips. Regular test pressings help to catch these defects early and prevent them from occurring in larger quantities.

Maintaining Consistency

One of the most critical aspects of quality control is maintaining consistency in the pressing process. This involves ensuring that every record pressed is of the same quality and standard, including factors such as weight, thickness, sound quality, and visual appearance. Consistency is achieved through regular maintenance of equipment and the use of high-quality raw materials.

Troubleshooting Common Issues

Despite efforts to maintain consistent quality, some issues may still arise during the pressing process. These issues could include surface noise, warping, and pressing bubbles. Quick resolution of these issues is critical to maintaining quality and customer satisfaction. Troubleshooting common issues requires technical expertise, including identifying the root cause of the issue and making necessary adjustments to the pressing process.

In conclusion, quality control in vinyl pressing is crucial to ensuring a high-quality end product. Inspecting raw materials, checking test pressings, maintaining consistency, and troubleshooting common issues are key areas in which attention to detail is necessary. By carefully monitoring each step of the pressing process, you can achieve a high-quality vinyl record that meets or exceeds your customers’ expectations.

How To Press Vinyl Records The Complete Guide

Credit: recordhead.biz

Marketing And Selling Your Vinyl Records

Learn how to press vinyl records with this complete guide, so you can market and sell your music on a classic format loved by collectors and audiophiles alike. From the mastering process to pressing and packaging, this guide covers every step of the process.

Marketing and selling your vinyl records can be both exciting and overwhelming. After putting in countless hours and resources into producing your vinyl records, it is only natural that you would want to see them sell out – not just because of the return on investment, but also for the rewarding feeling of knowing that your music is out there in the world being enjoyed by others. In this section, we will provide you with tips on how to effectively market and sell your vinyl records.

Targeting Your Audience

Understanding your target audience is crucial when it comes to marketing and selling your vinyl records. Start by identifying the genre of your music and the age group of people who are likely to appreciate it. For instance, if your music is primarily jazz, look for venues that regularly host jazz-focused events or festivals. You can also use social media platforms to create a following, target interest groups and engage with potential fans. Once you identify your audience, you can go ahead and create marketing content that resonates with them.

Packaging And Design

The physical appearance of your vinyl records can make or break your marketing efforts. Packaging and design are significant selling points that must not be overlooked. Create visually attractive and captivating covers or sleeves that not only showcase your brand, but also your individuality and unique style. Consider using high-quality graphics, typography and imagery that represent your music style and resonate with your target audience.

Distribution Strategies

Your vinyl records need to reach your target audience in order to sell. This is where distribution strategies come in handy. You can approach distributors who can help you with the distribution process or take matters into your own hands and distribute the vinyls directly to record stores that you know will carry your music, both physically and digitally through popular platforms such as Amazon or Discogs.com.

Pricing And Profitability

When it comes to pricing your vinyl records, ensure that the price accurately reflects the production costs and profit margin. Research the pricing of vinyl records in your genre and make sure you are not overpricing or underpricing your vinyl records compared to competitors. Once you decide on the pricing, focus on profitability by ensuring that the production costs and all other associated costs are covered so that you can make a profit while selling your vinyl records.

Frequently Asked Questions On How To Press Vinyl Records The Complete Guide

How Do You Press Vinyl Records?

Vinyl records are pressed by first creating a lacquer master plate of the music to be recorded. This master plate is then used to create a stamper, which is used to press the vinyl. The vinyl is heated, molded, and then cooled, resulting in the final vinyl record.

The process requires specialized equipment and expertise to create high-quality vinyl records.

How Much Does It Cost To Press 1000 Vinyl Records?

The cost to press 1000 vinyl records generally ranges from $1,500 to $3,000, depending on factors such as the vinyl color, packaging, and mastering costs. It’s best to get quotes from multiple pressing plants to find the best deal.

Can I Press My Own Vinyl Record?

No, it is not recommended for an individual to press their own vinyl record. This process requires specialized equipment, machinery, and knowledge to ensure the best quality product. It is best to leave this task to professionals who have experience in creating high-quality vinyl records.

How Many Vinyls Should I Press?

Determining the amount of vinyl to press depends on various factors such as demand, budget, and storage capacity. It is recommended to start with a smaller quantity, around 100-300 copies, to test the market and adjust production accordingly. It’s advisable to work with a reliable vinyl pressing company to ensure quality and timely delivery.

Conclusion

Pressing vinyl records is an art that requires careful attention to detail and a passion for music. Using the right equipment, materials and techniques can make the difference between success and failure. Whether you are a musician, collector, or simply enjoy the unique sound of vinyl, this complete guide has everything you need to know to get started.

So, harness your creativity, let your music flow through the grooves of your vinyl records, and enjoy the timeless joy of analogue sound.

Categories
Archive

The Art Of Recording Drums With One Mic

Recording drums with one mic involves placing the mic strategically and experimenting with placement and levels to capture a balanced sound. Recording drums with one mic can be a daunting task for novice audio engineers or home studio enthusiasts who don’t have access to a full range of high-end recording gear.

As an Amazon Associate I earn from qualifying purchases.

Related reading: Record Drums With One Mic and Get Big Sounding Drums With Distortion. For background, see the Wikipedia article on Microphone practice.

However, with the right technique, one can achieve great results with just one microphone. Also, the key to success lies in understanding how drums produce sound and the best placement of the mic. We will explore the art of recording drums with one mic and provide some practical tips to help you get started.

These techniques give you a solid foundation for capturing drums. They work for demos, live sessions and full albums.

The Art Of Recording Drums With One Mic

Credit: mixandmastermysong.com

Best Mic For Recording Drums

Recording drums with just one mic can be challenging, but the Shure SM57 is a popular choice among drummers. Placed near the center of the kit, it can capture the overall sound with clarity and definition. With proper technique and placement, this mic can produce impressive results for aspiring drum recordists.

Recording drums with one mic can be challenging, but it is possible to achieve great results with the right equipment. When it comes to choosing the best microphone for recording drums, there are several factors to consider such as dynamic vs condenser and cardioid vs omni-directional.

Dynamic Vs Condenser for Recording Drums With One Mic

Dynamic microphones are the most popular choice for recording drums. They are rugged and can handle high sound pressure levels. This makes them ideal for picking up the impact of the drumsticks on the drumhead. Additionally, dynamic mics are less sensitive to background noise, making them suitable for live performances. Condenser microphones are more sensitive and capture the finer nuances of the drum sound. They are best suited for studio recording because they need a quiet environment and a power source to operate. Condenser mics produce a brighter sound with more detail and are great for picking up the cymbals’ shimmer and resonance.

Cardioid Vs Omni-directional for Recording Drums With One Mic

Cardioid microphones have a heart-shaped pattern that captures sound from the front and rejects noise from the sides and back. This pattern makes them suitable for recording a single drum or a drum set from one angle. The proximity effect of cardioid mics increases the bass response when the mic is placed closer to the drumhead. Omni-directional microphones pick up sound equally from all directions and do not have a proximity effect. They are great for capturing the natural ambiance of the drum room and can provide a fuller sound with more depth.

However, omni-directional microphones are more prone to picking up unwanted noise from the surrounding environment. In conclusion, there is no one-size-fits-all approach when it comes to choosing the best microphone for recording drums. Factors such as budget, recording environment, and personal preference all play a role in making the decision. Experimenting with different microphone types and placements can lead to unique and compelling drum recordings.

Mic Placement Techniques For One Mic Drum Recording

Achieving a great drum sound with just one mic can be challenging. But using the right mic placement techniques can make all the difference. Placing the mic between the kick and snare, adjusting the height and angle, and experimenting with distance can help capture the full drum kit sound with one mic.

Recording drum tracks with just one microphone can seem daunting. But with the right mic placement techniques, it is possible to achieve a great-sounding recording. In this post, we’ll dive into the best practices for mic placement when recording drums with just one mic.

Overhead

For one microphone drum recordings, the overhead placement is perhaps the most critical. Placing the microphone directly above the drummer’s head will capture the full drum kit sound. Make sure to position the microphone equidistant from the snare drum and the kick drum. This placement produces a balanced sound.

Kick Drum for Recording Drums With One Mic

For kick drum mic placement, position the microphone right in front of the kick drum’s resonant head and slightly off-center. It will help to capture both the beater and the kick drumhead’s sound while eliminating any unwanted bleed from the snare or cymbals.

Snare Drum for Recording Drums With One Mic

To capture the snare drum’s sound, position the microphone approximately 2-3 inches above the snare’s rim and slightly angled toward the center of the drum. This placement ensures that the snare’s crack and depth come through in the recording.

Room

One mic drum recordings can tend to sound boxy, given the proximity of the mic to the kit. To add some room sound, consider leaving some natural space in the recording. It may also help to experiment positioning the mic slightly further away from the kit or adding some reverb in post-production. In conclusion, achieving an excellent one mic drum recording is about finding the right balance between the mic placement and the drummer’s playing style. With the above tips, you can produce drum tracks with just one mic that sound impressive and full.

Setting Up The Recording Space For One Mic Drum Recording

To get the best drum recording with just one mic, the recording space needs to be set up carefully. The ideal space should minimize reflections and have good acoustics, with the mic placed at an optimal distance and height from the drum set.

With the right set up, capturing a great drum sound with one mic can be easy and effective.

Recording drums with one mic may seem like a daunting task. But with the right setup, it can be achieved with exceptional results. The key to recording great-sounding drums with one mic lies in the recording space. The right recording space will provide an optimal environment for acoustic treatment, adjust room size and shape, and assist in mic placement.

Acoustic Treatment for Recording Drums With One Mic

Acoustic treatment is crucial in creating an optimal recording space for one mic drum recording. The purpose of acoustic treatment is to control the sound reflections in the room. To achieve ideal recording acoustics, use acoustic panels on the walls, ceilings, and floors. Placing the drum kit in the right location in the room can also have an immense impact on the quality of the recording.

Room Size And Shape for Recording Drums With One Mic

The size and shape of the room will impact the sound of the recording. Big rooms with high ceilings are known to produce a reverb sound while small rooms with low ceilings will have a dry sound. A square room can lead to unwanted standing waves and ringing sounds; hence it’s preferable to choose a rectangular room.

Mic Placement

Mic placement is one of the most crucial aspects of recording drums with one mic. If done correctly, it can capture the essence of all elements of the drum kit. Ideally, positioning the mic in the center of the drum kit facing downwards, away from the cymbals, will provide an excellent balance between the kick drum, snares, and toms. Be cautious not to place the mic too close to the snare or toms to prevent undue emphasis on the drums’ attack sound. Basically, for one-mic drum kit recording, the kick drum sound is the backbone. Meanwhile, the snare and toms help the drums ring and groove.

In Conclusion

The right recording space is crucial in one mic drum recording. Proper acoustic treatment, room size and shape, and mic placement can help you capture the right sound. With these tips and tricks, you’ll be able to produce high-quality drum recordings with just one microphone.

The Art Of Recording Drums With One Mic

Credit: www.youtube.com

Tips For Getting The Best One Mic Drum Recording

The art of recording drums with just one mic can be challenging. But with some tips, you can achieve the best possible recording. Placement of the mic, adjusting the levels, and experimenting with the distance can result in a richer sound.

Recording drums with one microphone can be challenging. But with the right techniques and approach, it can produce some excellent results. Here are some tips to help you get the best out of your one-mic drum recording setup.

Playing Technique for Recording Drums With One Mic

The drummer’s technique plays a crucial role in getting a good one-mic drum recording. A drummer who hits the drums evenly and rhythmically will produce a more balanced sound than one who is inconsistent with their strikes. Encourage your drummer to keep a steady beat and hit the drums with equal force.

Drum Tuning for Recording Drums With One Mic

Drum tuning is also essential in getting a good one-mic drum recording. If the drums are out of tune, it will be challenging to mix and balance the sound. Take time to tune the drums before recording and ensure that all the drums are in tune with each other. You can use a drum tuner or tune the drums by ear.

Experimentation

Recording drums with one microphone allows for a lot of experimentation with mic placement and room acoustics. Try different positions and angles for the microphone and listen back to each take to see which one sounds best. Also, consider the room you are recording in and how it affects the sound. You might want to try recording in a room with more natural reverb or add artificial reverb in post-production. Consider the above tips when recording drums with one mic. These techniques will help you get the best possible sound from your recording setup. With some experimentation and practice, you can create high-quality drum recordings with just one microphone.

Mixing One Mic Drum Recordings

Recording drums with only one microphone can be challenging, but it’s an art form that can produce remarkable results. Mixing one mic drum recordings requires careful attention to levels, EQ, and compression to create a full and balanced sound. With the right techniques, even a single microphone can capture the energy and dynamics of a live drum performance.

Recording drums with one mic can be a great way to capture the sound of the drums in a natural and organic way. However, when it comes to mixing one mic drum recordings, it can be a bit tricky. You only have one source of audio to work with. This means you need to be strategic with your EQ, compression, and reverb choices to make the drums sound balanced and cohesive in the mix.

Eq

EQ is one of the most important tools for mixing one mic drum recordings. With only one source of audio, you need to carefully carve out space for each part of the kit and make sure everything sounds balanced and clear. Key EQ moves include boosting highs for cymbal shimmer and cutting lows to reduce boominess. Some midrange presence helps the snare and toms cut through.

Compression

Compression can help bring out the sustain and punch of the drums in a one mic recording. However, because you only have one source of audio to work with, it’s important not to overdo it and squash the dynamics of the performance. A good starting point is to set your compressor with a moderate ratio and threshold and adjust to taste from there.

Reverb

Adding reverb to a one mic drum recording can help the kit sound more spacious and cohesive. However, it’s important to be mindful of the reverb’s decay time and dampening settings to avoid muddying up the mix. A good rule of thumb is to use a smaller room reverb with a shorter decay time to add a sense of space without overwhelming the drums. Overall, mixing one mic drum recordings can be a bit of a challenge. But with careful use of EQ, compression, and reverb, you can create a well-balanced and natural sounding mix that highlights the performance of the drummer.

Famous One Mic Drum Recordings

Capture the essence of your drum kit with famous one mic drum recordings. Learn from seasoned engineers, the art of recording drums with a single microphone and elevate your recordings with a classic and timeless sound that captures your musical performance.

Recording drums with just one mic is a technique that has been around for a long time. While it may seem limiting, it can actually produce a unique and raw sound that you simply can’t achieve with more complex techniques. Legendary producers and engineers have used this method to create some of the most iconic drum sounds in music history.

Analyzing The Recording Techniques

When you record drums with only one mic, you have to be very strategic about where you place it. The most common approach is to position the mic above and slightly in front of the drum kit. This allows the mic to capture the full sound of the kit, including the kick, snare, and cymbals. However, there are variations on this method depending on the desired sound. One of the most famous examples of this technique is “When The Levee Breaks” by Led Zeppelin. The song features a massive drum sound that was achieved by recording the kit in a stairwell with a single mic placed at the top. This created a massive, explosive sound that has been copied countless times since.

Impact On Music And Culture for Recording Drums With One Mic

The use of one mic to record drums has had a profound impact on music and culture. It has allowed for a more stripped-down and raw sound, which has been embraced by many artists across genres. In particular, the technique has been associated with blues, rock, and punk music. The simplicity of this technique has also made it more accessible to amateur musicians and home recording enthusiasts. It has enabled anyone with a basic recording setup to achieve a professional-sounding drum recording.

This has democratized the recording process and has led to a wider variety of voices being heard in music. In conclusion, recording drums with one mic is a technique that has stood the test of time. While it may seem limiting, it can actually lead to some of the most iconic drum sounds in music history. From Led Zeppelin to The White Stripes, this technique has helped shape the sound of popular music for decades.

Advantages And Disadvantages Of One Mic Drum Recording

Recording drums with just one microphone can save time and money, but it also comes with drawbacks. The biggest advantage is that it’s a simple setup and can create a live, natural sound. However, it can lack clarity and balance in the mix, which can be challenging to fix in post-production.

When it comes to recording drums, using only one microphone might seem like a strange idea. However, one mic drum recording is an approach that can yield some surprising and excellent results. Below are some points to consider before embarking on a one-mic drum recording session.

Simplicity Vs Flexibility for Recording Drums With One Mic

The most obvious advantage of using a single mic for recording drums is its simplicity. It’s easy to set up, and you don’t need to worry about fiddling around with multiple microphones to get the desired sound. In addition, this can be great for capturing live sessions. However, one microphone drum recording can be limiting in terms of flexibility when trying to get a particular sound or incorporating EQ and effects. With only one mic, there are no other options in post-production, meaning there is less freedom in editing the sounds.

Sound Quality Vs Character

One microphone drum recording can provide a unique character to the sound. With a single mic, it’s capturing the overall drum kit sound. So the end result represents a more authentic image of the drum kit. The natural, warm and organic sound from the one-mic approach can be exactly what a song needs. However, when it comes to sound quality, using more than one microphone provides greater clarity and allows you to pick up nuances from individual drum components. This allows for more control and flexibility in the final production stages.

Moreover, using multiple mics will lead to recordings with a more detailed and polished sound with greater separation, providing clearer multi-track options. In conclusion, one-mic drum recording is a valid technique with its pros and cons. It can be an excellent way of capturing a particular sound in a cost-effective manner. Ultimately, whether you opt for single or multiple microphones will depend on the creative vision, budget, and desired outcome of the recording session.

The Art Of Recording Drums With One Mic

Credit: blog.zzounds.com

Frequently Asked Questions For The Art Of Recording Drums With One Mic

Can You Record Drums With 1 Mic?

Yes, it’s possible to record drums with 1 mic, but it won’t produce the best quality sound. You can use a single mic placed above the drum kit or slightly in front of it. But using multiple mics will give more depth and clarity to the sound.

It’s recommended to use at least 4 mics for a full recording.

What Is The 3 To 1 Rule For Drum Mics?

The 3 to 1 rule for drum mics is a guideline for microphone placement when recording drums. It suggests placing three microphones above the drummer’s head and one beneath the snare drum to capture the overall drum sound with clarity and balance.

What Is The Famous Drum Mic Technique?

The famous drum mic technique involves placing a small diaphragm condenser microphone on the snare drum and a larger diaphragm dynamic microphone on the kick drum. A third dynamic microphone is then placed overhead to capture the cymbals and toms.

This technique is commonly used in recording studios and live performances to achieve a balanced and clear drum sound.

How Many Mics Does A Drummer Need?

A drummer generally needs at least three mics: one for the kick drum, one for the snare, and one for other drums and cymbals. However, the number and placement of mics can vary depending on the playing style, venue, and desired sound quality.

Conclusion

Recording drums with one microphone can be challenging, but also rewarding. By understanding how to position the mic and utilizing different techniques, it is possible to capture a great sound. Whether you are a beginner or a professional, this approach can be a valuable addition to your recording skills.

Remember to experiment, trust your ears, and never be afraid to embrace simplicity. Happy recording!

Categories
Archive

How To Start A Track With An Acapella

Starting a track with an acapella requires finding the right key and tempo before building instrumental layers around it. When working with an acapella, it’s important to ensure that the lead vocals remain the focus of the track while adding supporting elements that compliment the acapella’s melody and rhythm.

Developing a system for organizing and pitching acapellas can make the process more efficient and help maintain a cohesive sound throughout the track. Utilizing a variety of editing tools, such as EQ and reverb, can help blend the acapella with the instrumental elements and create a seamless listening experience.

By following these steps and utilizing your own creativity, you can craft a successful track with an acapella.

Choosing The Right Acapella

Choosing the right acapella can make or break your track. A good acapella can breathe life into your song, while a bad one can derail the entire project. Here are a few things to keep in mind when you’re choosing an acapella:

Vocal Style And Key

The vocal style and key of the acapella can have a huge impact on the direction of your track. If you’re looking for a high-energy dance track, you might want to choose a powerful, uptempo acapella. On the other hand, if you’re writing a sad or emotional song, you might want to choose a more subdued, melancholy acapella.

It’s also important to choose an acapella that’s in the right key for your track. If the acapella is too high or too low, it can be difficult to match it with your instrumental track.

Lyrics And Theme

Another important factor to consider when choosing an acapella is the lyrics and theme of the song. If the lyrics don’t fit with the style or message of your instrumental track, it can create confusion or tension for listeners.

Make sure you choose an acapella with lyrics and a theme that complement your track. For example, if you’re writing a love song, you might want to look for an acapella with romantic lyrics and a slow, swooning melody.

Putting It All Together

Ultimately, the key to choosing the right acapella is to make sure it fits with your overall vision for the song. Keep in mind the vocal style, key, lyrics, and theme when making your decision. Consider the feeling you want to convey and choose an acapella that enhances that feeling.

Remember, the best acapella for your track may not be the most obvious choice. Experiment with different options and be open to trying something new. With some effort and a little creativity, you can find the perfect acapella to take your song to the next level.

Preparation

Starting a track with an acapella involves careful preparation. You need to choose the right key and tempo, isolate the vocals, and create a solid foundation for the track to blend with the acapella. It takes patience and skill, but the end result is worth it.

Before beginning to work with an acapella, it is essential to ensure that you have all the necessary materials and settings in place. This section will go through the essential preparation steps for working with an acapella track.

Crop And Isolate The Vocals

The first step in preparing to work with an acapella is to identify and isolate the vocals. The goal is to crop the acapella track, separating the vocals from the instrumental parts. You can use a suitable editing tool such as Audacity to crop and isolate the vocals. To crop, highlight the areas that have vocals and delete the rest. After cropping, save the vocal segment as a separate audio file.

Set The Tempo And Key

The next step is to set the tempo and key. To ensure the acapella fits with your instrumental track, you must match the tempo of the acapella track to that of your instrumental track. One effective way to do this is to use a metronome and tap along with the beat. Then set the tempo of the acapella track accordingly. Similarly, you must set the key to make sure that the acapella and instrumental tracks match harmoniously. You can use a software tool like Mixed in Key that provides a “key-detection” feature. This will analyze the acapella file and suggest suitable keys to use. By following these preparation steps, you are now well on your way to working with a suitable acapella for your music track. With the vocals separated and the tempo and key matched, you now have the foundation to build a music track that will leave a lasting impact on your audience.

Creating A Chord Progression

Starting a track with an acapella can be a challenging yet rewarding process. One effective way to begin is by creating a chord progression that complements the vocal melody. This can involve experimenting with different keys, chord types, and progressions until a fitting foundation is established.

Creating a Chord Progression: Starting a track with an acapella can be a daunting task, but it doesn’t have to be. One of the first steps you can take to make the process simpler is to create a chord progression. This will give you a foundation upon which to build the rest of the track. Let’s take a look at how you can create a chord progression. Start with Basic Chords: The first step to creating a chord progression is to start with basic chords. These can be major or minor chords, and they should be ones that complement the melody of the acapella. Some basic chords to start with include C major, G major, and A minor. These chords work well together and can create a simple yet effective progression. Add Variation and Tension: Once you have a basic chord progression, it’s time to add some variation and tension. This will keep the progression interesting and prevent it from becoming too repetitive. One way to add variation is to use different chord inversions. For example, if you’re playing a C major chord, try playing it as an inversion (G-C-E) instead of the root position (C-E-G). This adds a sense of movement to the progression. You can also add tension by using chords that are not part of the key of the song. These are called “borrowed chords.” For example, if you’re in the key of C major, you could use an F minor chord (not part of the key) to create tension and interest. In conclusion, creating a chord progression is an important step in starting a track with an acapella. By starting with basic chords and adding variation and tension, you can create a solid foundation for your track.

How To Start A Track With An Acapella

Credit: www.productionmusiclive.com

Building The Instrumental

Starting a track with an acapella can be a challenging task, but it allows producers to flex their creativity and come up with unique instrumental arrangements. By selecting the right acapella, adjusting the tempo and key, and experimenting with different instruments, producers can build a strong instrumental to complement the vocals.

Building the instrumental for your acapella track can be a daunting task. You want to create a foundation that complements the vocals without overpowering them. It requires the right combination of rhythm, melody, and harmony. In this post, we will guide you through the process of how to start a track with an acapella by showing you how to build the instrumental.

Compose The Rhythm Section

The rhythm section is the backbone of any instrumental track. It keeps the beat and provides a solid foundation for the rest of the song. When building an instrumental for an acapella track, focus on creating a rhythm section that complements the vocal melody. Start by selecting a drum kit and creating a basic beat that matches the tempo and groove of the acapella. Keep it simple and let the vocals lead the way. Once you have a basic beat, you can begin to layer in other percussive elements like shakers, tambourines, and claps.

Include Interesting Melodic Elements

Now that you have a rhythm section, it’s time to add in some melodic elements. The goal here is to create a melody that complements the vocal melody without overpowering it. Start by selecting a chord progression that works well with the acapella. Once you have a chord progression, you can begin to add in other melodic elements like bass, guitar, or keys. Remember, less is often more when it comes to building an instrumental for an acapella track. Keep it simple and let the vocals shine. By following these steps, you can create an instrumental that complements the acapella and takes your track to the next level.

Aligning The Acapella With The Instrumental

Aligning the acapella with the instrumental is one of the most crucial steps when starting a track with an acapella. If you don’t align them properly, it won’t take long before your entire track sounds out of sync. In this article, we will discuss the steps you need to follow to align your acapella with the instrumental.

Match The Tempo And Key

The first step in aligning the acapella with the instrumental is to match their tempo and key. This might sound obvious, but it’s surprising how many people overlook this step. You need to make sure that the BPM of your acapella matches the BPM of your instrumental. You can do this by using tools like Audacity or even your DAW’s tempo-match feature.

Once you have matched the tempo, you need to ensure that the key of your acapella and instrumental are compatible. The easiest way to do this is to use a pitch-correction plugin or software like Melodyne. It’s important to remember that pitching an acapella too much can result in a robotic and unnatural sound, so use pitch-correction plugins carefully.

Fit Vocal Phrases Into The Track

After matching the tempo and key, the next step is to fit the vocal phrases into your track. This involves identifying the start and end of each vocal phrase and ensuring that it aligns with the beat and rhythm of the instrumental. Pay close attention to the timing of each phrase and adjust them accordingly.

If your acapella has long pauses or gaps between phrases, you may need to add additional elements like effects, instruments, or percussion to fill in the gaps and keep the flow of the track consistent.

In Conclusion

Aligning an acapella with an instrumental can be a tricky process, but by following these steps, you can ensure that your track sounds professional and polished. Remember to match the tempo and key, fit the vocal phrases into the track, and use additional elements if necessary.

How To Start A Track With An Acapella

Credit: m.youtube.com

Arrangement

Starting a track with an acapella can be a great way to create an interesting arrangement. Begin by analyzing the vocals and finding the key and tempo, before experimenting with different instruments and beats to create a unique and compelling track.

Determine Verse, Chorus, And Bridge Sections

Before starting a track with an acapella, it’s important to determine the verse, chorus, and bridge sections. This will help to structure the song and create a cohesive arrangement. The verse is typically a recurring section that tells the story of the song. The chorus is the part of the song that is repeated multiple times and is usually the main hook or melody. The bridge is a section that provides a contrast to the verse and chorus and transitions the song to the next section.

Create Transitions Between Sections

Once you’ve determined the verse, chorus, and bridge sections, it’s important to create smooth transitions between them. This will help to create a cohesive and flowing song. One way to do this is by using a breakdown section between the verse and chorus. A breakdown section typically has fewer elements than the verse or chorus and provides a build-up to the next section. Another way to create transitions is by using fills, such as drum fills or vocal fills, to transition between sections. When arranging a track with an acapella, it’s important to ensure that each section is unique and provides a contrast to the previous section. One way to do this is by using different instrumentation or effects for each section. For example, using a stripped-down instrumental for the verse section and adding more instruments for the chorus section can create a contrast and keep the listener engaged. Additionally, consider adding variation to the vocal delivery, such as harmonies or doubling of the vocals, to create interest. Overall, when starting a track with an acapella, it’s important to determine the verse, chorus, and bridge sections, create transitions between sections, and ensure that each section is unique and provides a contrast to the previous section. By following these steps, you can create a cohesive and engaging track that highlights the acapella and keeps the listener interested.

Mixing

Once you have your acapella track imported into your digital audio workstation (DAW), it’s time to start mixing. Mixing is the process of balancing and blending multiple elements of a track to create a cohesive and harmonious sound.

Balance Levels Of Vocal And Instrumental Elements

The first step in mixing your acapella track is to balance the levels of the vocal and instrumental elements. This ensures that neither element overpowers the other and that they complement each other nicely. To do this, adjust the faders on your mixer or DAW until the vocals and instruments are at a similar volume.

Use Eq, Compression, And Effects To Enhance Sound

Once you have balanced the levels, it’s time to use EQ, compression, and effects to enhance the sound of your track. EQ can be used to cut out unwanted frequencies or boost desired ones, while compression can tighten up the sound and make it more consistent. Effects such as reverb, delay, and chorus can add depth and texture to the vocals and instruments.

Keep in mind that less is often more when it comes to mixing. It’s easy to get carried away with effects and EQ adjustments, but ultimately you want the focus to be on the vocals and the message they are conveying.

By following these steps, you can mix your acapella track and create a professional-sounding production that highlights the unique qualities of the vocal performance.

How To Start A Track With An Acapella

Credit: www.youtube.com

Final Touches

Starting a track with an acapella is a great way to create a unique and catchy song. Begin by selecting an acapella that fits the mood and style of your track and match the key of the vocals with your instrumental.

Then, add effects and manipulate the vocal and instrumental tracks to blend seamlessly for a track that stands out.

Once you have created the beat and added the acapella, it’s time to add the final touches to your track. This process is crucial as it can make or break your entire production. Here are a few things to keep in mind to enhance your track.

Fine-tune Automation And Panning

Fine-tuning automation and panning can be the cherry on top of your finished track. Automation helps to bring certain elements of the track to life and add dynamics to your production. You can create simple or complex automation to control the volume, panning, or effects on different parts of your acapella. Panning allows you to spread the sound of your acapella across the stereo field and give it depth, making it sound more professional.

Add Fills And Risers

Adding fills and risers will make your track more exciting and give it a sense of progression. Fills are short percussive or melodic sounds that fill gaps between different elements of your track. They can range from simple sound effects to complex rhythms. Risers, on the other hand, are a build-up of sound that creates tension and anticipation. They usually start quietly and gradually increase in volume and intensity before dropping into the next section of the song. In conclusion, the final touches are essential when creating a track with an acapella. Fine-tuning automation and panning and adding fills and risers will help improve your production and make it stand out. Remember to experiment with different techniques and have fun with the process.

Frequently Asked Questions Of How To Start A Track With An Acapella

How Do You Make An Acapella Track?

To make an acapella track, start with the original full track. Isolate the vocals using editing software and remove the instrumental elements. Make sure to carefully adjust the levels and add effects as necessary to achieve a clean, crisp acapella sound.

How Do I Start Singing Acapella?

To start singing acapella, begin by practicing your pitch, breath control, and rhythm. Listen to acapella groups and try to mimic their sound. Join a local acapella group or choir to improve your skills and gain experience. Practice regularly and have fun!

How Do You Start An Acapella Group?

To start an acapella group, follow these steps: 1. Find people who are interested in singing acapella. 2. Choose members who can sing harmonies. 3. Decide on the type of music to perform. 4. Practice regularly to improve your singing.

5. Perform in public to gain exposure and experience.

What Are The Basics Of Acapella?

Acapella is the art of singing without any instrumental accompaniment. It requires precise pitch, rhythm and harmony. Acapella singers usually perform in groups and depend on each other for vocals. This style of singing originated in religious music, but has now expanded to other genres like pop, Jazz, and soul.

Conclusion

Incorporating an acapella into your track can take it to the next level and make it stand out. With the right tools and techniques, starting a track with an acapella becomes a breeze. Remember to choose the right acapella, use the appropriate key and tempo and mix it in seamlessly.

Practice, trial and error, and patience are key to achieving a polished result. So, go ahead and give it a try; you never know what magic you might create!