Categories
Archive

Cello Mic Placement: Mastering the Art of Perfect Sound

For optimal cello mic placement, position the microphone 12-18 inches from the instrument’s f-hole. Proper placement of the microphone is crucial in capturing the rich and resonant sound of a cello during live performances or recording sessions.


When placed too close to the instrument, the mic may pick up unwanted vibrations or distortions. Conversely, positioning the microphone too far away can result in a loss of detail and clarity in the sound. By following some simple guidelines and experimenting with placement options, musicians and sound engineers can achieve the best possible sound quality and balance when miking a cello.
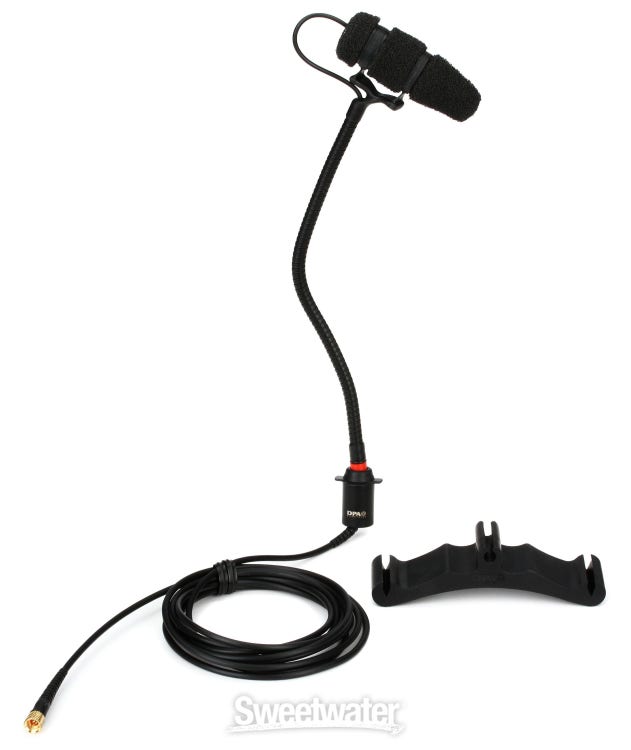
Cello Mic Placement: Mastering the Art of Perfect Sound


Credit: www.sweetwater.com


Choosing The Right Microphone

Mic placement is crucial for capturing the full range and depth of a cello’s sound. Selecting the right microphone is the first step towards achieving high-quality recordings or performances.

Consideration Of Mic Types

Microphones come in various types, such as dynamic, condenser, and ribbon. Each type offers different characteristics suitable for different recording environments and styles.

Factors For Mic Selection

  • Polar Pattern: Choose a microphone with a polar pattern that matches the sound projection of the cello.
  • Sensitivity: Consider the microphone’s sensitivity to capture the nuances of the cello’s sound.
  • Frequency Response: Look for a microphone with a flat frequency response to accurately reproduce the cello’s tones.
  • Mounting Options: Ensure the microphone has the necessary mounting options for easy attachment to the cello.
  • Directionality: Select a microphone with the appropriate directionality to capture the desired sound from the cello.

By taking these factors into consideration, you can choose the right microphone that complements the unique sound of your cello and enhances your recordings or performances.
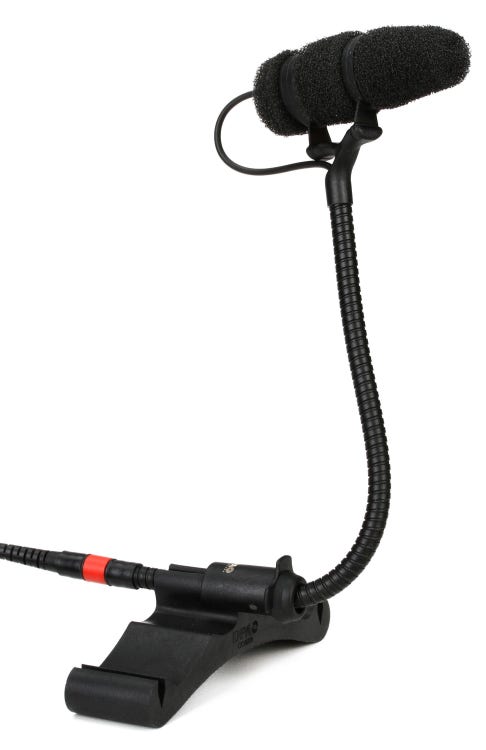
Cello Mic Placement: Mastering the Art of Perfect Sound


Credit: www.sweetwater.com


Placement Techniques

When setting up a microphone for your cello, the placement plays a crucial role in capturing the rich and nuanced sounds of this beautiful instrument.

Optimal Distance From Cello

The optimal distance between the microphone and the cello should be around 12-18 inches to capture a well-balanced sound.

Angle And Direction Of Mic

Position the mic at an angle pointed towards the f-hole of the cello to capture the full resonance and warmth of the instrument.


Addressing Common Challenges

Proper mic placement is crucial for capturing the rich, resonant tones of a cello. However, musicians often encounter challenges when positioning the microphone to achieve optimal sound quality. Addressing these common issues is essential in ensuring a seamless recording or performance experience.

Dealing With Feedback Issues

Feedback can be a significant problem when miking a cello. To mitigate feedback, consider using a directional microphone and positioning it at an angle that minimizes the pickup of monitor speakers. Additionally, using a feedback suppressor or notch filter can help control any unwanted resonance.

Minimizing Background Noise

Minimizing background noise is essential for capturing the pure sound of the cello. Start by selecting a quiet recording environment. To further minimize extraneous noise, use a cardioid or hypercardioid microphone with a close-miking technique. Placing the microphone strategically close to the cello can effectively reduce ambient noise.

Tips For Recording And Live Performance

When it comes to recording or performing live with a cello, getting the microphone placement right is crucial for achieving the best sound. In this article, we will provide you with some valuable tips on how to properly place a microphone for recording and live performances on the cello.

Adjusting Levels And Eq

To ensure optimal sound quality, it is important to adjust the levels and EQ settings of your cello microphone. By adjusting the levels, you can control the volume and prevent any distortion or overpowering of the sound. Using an equalizer (EQ) helps in fine-tuning the tonal balance by boosting or cutting specific frequencies.

For recording, start by positioning the microphone about 12 to 18 inches away from the cello, angled slightly towards the lower part of the instrument. This placement allows the microphone to capture both the rich low-end and the detailed highs of the cello. Experiment with different microphone positions and angles to find the sweet spot that suits your recording environment and desired sound.

Utilizing Room Acoustics

Taking advantage of the room acoustics can greatly enhance the sound of your cello during both recording sessions and live performances. The room you are in contributes to the overall sound by adding natural reverberation and spatial depth. Positioning the microphone strategically can help capture the best characteristics of the room.

For recording, consider placing the microphone closer to the sound source to capture more of the direct sound of the cello and less of the room reflections. For live performances, experiment with microphone placement to ensure the audience can enjoy a well-balanced and natural sound, taking into account the specific acoustics of each venue.

Remember to listen to the recordings or test the sound during soundchecks and make any necessary adjustments to levels, EQ, and microphone placement accordingly. Each environment and scenario may require slight modifications to achieve the best sound possible.

Advanced Mic Placement Strategies

When it comes to getting the best sound out of your cello, mic placement plays a crucial role. A well-placed microphone can capture the rich tones and nuances of your instrument, bringing your performance to life. In this section, we’ll explore some advanced mic placement strategies that can take your cello recordings to the next level.

Utilizing Multiple Microphones

By using multiple microphones, you can capture different aspects of your cello’s sound and create a more comprehensive recording. Here are a few ways to effectively utilize multiple microphones:

  • Close and Distant: Position one microphone close to the cello to capture the intimate details of the instrument’s sound, and another microphone placed further away to capture the overall ambiance of the room.
  • Stereo Pair: Position two microphones in an XY or AB configuration to create a wider, more immersive soundstage. This technique can add depth to your recordings, making the listener feel like they’re sitting in the room with you.
  • Spot Miking: Use additional microphones to specifically capture certain aspects of the cello’s sound, such as the bridge or the F-holes. This allows for precise control over different tonal characteristics during the mixing process.

Exploring Stereo Mic Techniques

Stereo mic techniques are often used to capture the natural stereo image of the cello and create a more realistic listening experience. Here are some popular stereo mic techniques:

  • XY Stereo: Place two microphones in an X and Y configuration at a 90-degree angle. This method ensures a precise stereo image and excellent mono compatibility, making it a popular choice for recording cello.
  • Mid-Side (M/S) Recording: Use one directional microphone (the mid mic) pointed towards the center of the cello, and one bidirectional microphone (the side mic) positioned perpendicular to the mid mic. This technique allows for precise control over the stereo width during the mixing process.
  • Blumlein Pair: Position two bidirectional microphones at a 90-degree angle, capturing the cello’s sound from all directions. This technique creates an immersive stereo image but requires careful placement to avoid phase cancellation.

Experimenting with different stereo mic techniques can help you find the one that best suits the unique sound of your cello and the desired recording environment. Keep in mind that each technique may require slight adjustments and experimentation to achieve optimal results.

Cello Mic Placement: Mastering the Art of Perfect Sound


Credit: www.amazon.com


Frequently Asked Questions Of Cello Mic Placement


Where Should I Place The Microphone On A Cello?


For optimal sound capture, place the microphone near the bridge on the lower bout of the cello. This placement ensures balanced tonal representation and captures the rich resonance of the instrument.


How Far Should The Microphone Be From The Cello?


Position the microphone around 12 to 18 inches away from the cello to strike a balance between capturing the full tonal range and minimizing unwanted noise. Experiment with different distances to find the sweet spot for your specific setup.


Should I Use A Condenser Or Dynamic Microphone For Cello Recording?


While both can produce excellent results, condenser microphones are generally preferred for cello recording due to their wider frequency response and higher sensitivity. They capture more detail and nuances, ensuring a more accurate representation of the cello’s sound.


What Are Some Common Microphone Placement Techniques For Cello Recording?


Two popular techniques are the close-miking method, where the microphone is placed near the bridge for direct sound capture, and the room-miking method, where the microphone is positioned further away to capture the cello’s natural ambience. Experiment with different techniques to achieve the desired sound.


Conclusion


The placement of the cello mic greatly impacts sound quality. Experimenting with different positions can help find the ideal balance of resonance and clarity. Take the time to test and adjust to achieve the best results for your recording or performance.


Keep in mind the importance of mic distance and angle for optimal sound capture.

Categories
Archive

Drum Recording Tips: Master the Art of Captivating Beats

For drum recording, ensure proper mic placement and invest in quality microphones for optimal sound quality. Good drum tuning is essential for a great recording as well.


Drums are one of the most crucial elements in a music production, and getting a good drum recording is essential for achieving a professional sound. Whether you are recording drums in a studio or at home, there are several tips and techniques that can help you get the best results.


From mic placement to drum tuning, every step in the recording process plays a significant role in capturing the perfect sound. We will explore some valuable drum recording tips that can help you achieve excellent results in your recordings.

Drum Recording Tips: Master the Art of Captivating Beats


Credit: unison.audio


Choosing The Right Drums

When it comes to drum recording, selecting the right drums is crucial for achieving the desired sound.

Acoustic Vs. Electronic

Acoustic drums provide a classic, authentic sound with varying tones and dynamics.

Electronic drums offer versatility, consistency in sound, and easy integration with recording software.

Types Of Drums

  • Snare Drums: Known for their sharp, crisp sound and are essential for providing rhythm and accents.
  • Bass Drums: Provide the foundation of the beat with a deep, low-end sound.
  • Tom-Toms: Enhance fills and transitions with a melodic tone.

Ensuring the drums match the style and genre of the music being recorded is key for a cohesive sound.

Setting Up Your Recording Space

If you want to achieve optimal sound quality, setting up your recording space is crucial.

Room Acoustics

  • Choose a space with minimal reverb and background noise.
  • Add acoustic panels or foam to absorb unwanted reflections.
  • Position your drum kit away from hard surfaces to prevent sound bouncing.

Microphone Placement

  1. Experiment with different microphone positions to find the best sound.
  2. Place microphones closer to the drum for a more focused sound.
  3. Use overhead mics to capture the overall drum kit sound.
  4. Avoid placing microphones too close to cymbals to prevent distortion.

Selecting The Right Microphones

When it comes to drum recording, selecting the right microphones is crucial for capturing the desired sound accurately. The right choice of microphones can make a significant difference in the quality of the recorded drum tracks. To ensure optimal results, consider factors such as microphone type, placement techniques, and the overall sound you want to achieve. Let’s delve into the world of drum recording and explore the essential tips for selecting the right microphones.

Dynamic Vs. Condenser

Dynamic microphones are rugged and versatile, making them well-suited for capturing the loud and dynamic sounds of drums. Their robust construction allows them to handle high sound pressure levels, making them ideal for close-miking drums. On the other hand, condenser microphones are known for their sensitivity and nuanced sound reproduction. They excel at capturing the subtle details and nuances of drum performances, making them a great choice for overhead miking and capturing the overall ambiance of the drum kit.

Best Mic Placement Techniques

When it comes to mic placement for drum recording, the overhead, kick drum, and snare drum mics play a crucial role in capturing the full spectrum of the drum sound. Placing the overhead mics in a spaced pair or coincident technique can provide a balanced stereo image of the drum kit. For kick drum miking, placing a dynamic microphone inside the drum near the beater can capture the punch and low-end frequencies effectively. As for the snare drum, a dynamic or condenser mic placed above or below the drum can capture the sharp attack and sizzle of the snare wires.

Tips For Achieving The Perfect Sound

Properly tuning your drums is crucial for achieving a perfect sound during recording. A well-tuned drum kit ensures that each drumhead resonates at the right pitch, allowing your drums to sound in harmony with one another. Here are a few tips to help you tune your drums:

  • Start by loosening all the tension rods on your drumheads.
  • Evenly tighten each tension rod in a star pattern to maintain even tension across the drumhead.
  • Use a drum key or a tuning app to achieve desired pitch.
  • Tap near the tension rod while turning it to hear the pitch change and find the desired tone.

Remember, tuning your drums is a continuous process that may take some trial and error, but it’s well worth the effort to achieve the perfect sound.

Room ambience plays a vital role in drum recordings, adding depth and character to the overall sound. Here are a few tips to help you use room ambience effectively:

  • Experiment with microphone placement to capture the natural reverb of the room.
  • Place microphones at different distances from the drum kit to capture varying levels of ambience.
  • Consider using a stereo microphone setup to capture a more immersive sound.
  • If your recording space lacks natural ambience, you can simulate it by using reverb plugins or recording in a different location.

By utilizing room ambience in your drum recordings, you can create a more spacious and lively sound that enhances the overall listening experience.

Recording Techniques To Enhance Dynamics

When it comes to recording drums, one of the most important aspects to consider is the dynamics. A well-recorded drum kit with enhanced dynamics can make all the difference in your final mix. In this section, we will explore two popular recording techniques – close miking and room miking – and discuss how drum compression can further enhance the dynamics of your drum recordings.

Close Miking Vs. Room Miking

Close miking and room miking are two common approaches to capturing the sound of a drum kit. Close miking involves placing microphones close to each individual drum and cymbal, allowing for precise control and isolation of each sound source. On the other hand, room miking focuses on capturing the overall ambient sound of the drum kit by placing microphones at a distance from the kit.

Both techniques have their advantages and can be used in combination to achieve the desired sound. Close miking provides greater control over the individual drum sounds and allows for easier mixing in post-production. It helps capture the individual characteristics of each drum and cymbal, resulting in a more detailed and defined sound.

Room miking, on the other hand, adds depth and natural ambiance to the drum sound. By capturing the reflections and resonances in the room, it creates a sense of space and enhances the overall sound of the drum kit. Room mics can be placed strategically to capture the desired balance between the direct sound of the drums and the room ambience.

Utilizing Drum Compression

Drum compression is a powerful tool that can enhance the dynamics of your drum recordings. Compression helps control the dynamic range by attenuating the loudest peaks and boosting the quieter parts, resulting in a more balanced and polished sound. It adds consistency to the drum sound and ensures that no drum hit gets lost in the mix due to excessive dynamics.

When using compression on drums, it is important to strike the right balance. Too much compression can squeeze the life out of the drum sound, making it sound unnatural and flat. On the other hand, too little compression may not effectively control the dynamics, resulting in an inconsistent and overpowering drum sound.

To use drum compression effectively, start by setting a moderate attack time to allow the initial transients of the drum hits to come through. Adjust the release time to ensure that the compression is released in time for the next drum hit. Set the compression ratio to achieve the desired amount of control over the dynamics.

In conclusion, close miking and room miking are two popular techniques for recording drums, each offering its unique advantages. By utilizing drum compression, you can further enhance the dynamics of your drum recordings, creating a more cohesive and impactful sound. Experiment with these techniques and find what works best for your drum sound and mixing style.

Drum Recording Tips: Master the Art of Captivating Beats


Credit: www.facebook.com


Drum Recording Tips: Master the Art of Captivating Beats


Credit: blog.native-instruments.com


Frequently Asked Questions Of Drum Recording Tips


How Do I Set Up My Drums For Recording?


To set up your drums for recording, start by tuning them properly and positioning them in a suitable acoustically-treated space. Use good quality microphones and experiment with placement to capture the desired sound. Make sure to set appropriate levels and record in a room with minimal background noise.


What Are Some Common Drum Recording Techniques?


Some common drum recording techniques include close miking, overhead miking, and room miking. Close miking involves placing microphones close to each individual drum and cymbal to capture their specific sound. Overhead miking captures the overall kit sound, while room miking captures the natural reverb and ambience of the room.


How Can I Reduce Cymbal Bleed In Drum Recordings?


To reduce cymbal bleed in drum recordings, try using tighter drum heads and positioning the cymbals further away from the microphones. You can also experiment with different microphones that have better off-axis rejection. Additionally, using noise gates and careful EQ can help minimize unwanted cymbal bleed in the mix.


Conclusion


Mastering these drum recording tips will undoubtedly elevate the quality of your music productions. By implementing these techniques, you can capture the essence and energy of your drumming, resulting in a richer and more impactful sound. Whether you’re a seasoned professional or a novice in the recording studio, these tips will help you achieve the perfect drum recording.


Categories
Archive

How To Craft An Irresistible Elevator Pitch For Your Music: Insider Tips

Craft a compelling elevator pitch by clearly stating your music genre, unique sound, and target audience succinctly. Showcase your passion and talent to captivate your listeners instantly.


Crafting an elevator pitch for your music is crucial in grabbing the attention of industry professionals, potential fans, and collaborators. The key lies in showcasing your uniqueness, passion, and talent in a concise and engaging manner. We will explore the essential elements of writing an effective elevator pitch for your music that will leave a lasting impact and open doors to new opportunities in the music industry.


Crafting Your Elevator Pitch

Define what sets your music apart from others.

Highlight strengths like genre, sound, or message.

Know who will connect with your music the most.

Consider demographics, interests, and preferences.


Credit: www.carminegallo.com


Structuring Your Pitch


Crafting an elevator pitch for your music is crucial for making a memorable impression. Keep it concise and captivating, highlighting your unique sound and what sets you apart. Grab the listener’s attention by focusing on your strengths and the essence of your music, aiming to leave a lasting impact with your pitch.

Creating an Elevator Pitch for Your Music requires a well-structured approach. For crafting an effective pitch, focus on the following elements:

Creating A Memorable Hook:

– Introduce your music with a catchy phrase or tagline. – Keep it concise and impactful to grab the listener’s attention. – Highlight what sets your music apart from others.

Crafting A Compelling Story:

– Develop a narrative that resonates with your audience. – Share your inspiration, journey, or message behind the music. – Engage emotions and create a connection through storytelling.


Delivering With Impact

Emphasizing Confidence And Passion

When crafting your elevator pitch for your music, it’s essential to emphasize confidence and passion. Your delivery should exude self-assurance and a genuine love for your music. Ensure that your words and demeanor reflect your unwavering belief in your music and its value.

Engaging Body Language And Tone

Another vital aspect of delivering an impactful elevator pitch is your body language and tone. Maintain open and confident body posture, make eye contact, and use gestures to express your enthusiasm. Your tone should be enthusiastic and engaging, effectively conveying the emotions and energy behind your music.

Refining And Testing

Once you have crafted your initial elevator pitch, it is crucial to refine and test it to ensure that it effectively communicates your music to your target audience. By seeking feedback and iterating on your pitch, as well as practicing it in various scenarios, you can fine-tune your message for optimum impact.

Seeking Feedback And Iterating

Feedback from others can provide valuable insight into how well your elevator pitch resonates with listeners. Share your pitch with friends, family, fellow musicians, or trusted mentors, and ask for their honest opinions. Are they able to grasp the essence of your music? Do they feel excited or intrigued by what you are offering? Take note of their feedback and use it to improve your pitch.

Iterate on your pitch by incorporating the feedback you receive. Make adjustments to the wording, structure, or emphasis, honing in on the most compelling aspects of your music. Keep in mind that refining your pitch is an ongoing process. Continuously seek input from others and be open to making changes as necessary.

Practicing In Various Scenarios

To gain confidence in delivering your elevator pitch, practice it in different scenarios. Consider the various situations where you might need to share your music, such as networking events, music conferences, or even chance encounters with potential fans. By rehearsing in these different settings, you can adapt your pitch to suit the specific context and effectively engage your audience.

Use different practice exercises to ensure you are comfortable and well-prepared. Role-play different scenarios with a friend, imagining you are meeting a radio host, a venue owner, or a music journalist. This will help you become more versatile in delivering your pitch with poise and clarity.

By refining your elevator pitch through feedback and iteration and practicing it in various scenarios, you can ensure that your message captivates and engages your target audience. Remember, an impactful elevator pitch is a powerful tool for promoting your music and leaving a lasting impression.

Utilizing Opportunities

An elevator pitch is a concise and compelling introduction to your music that can captivate potential listeners and industry professionals. One key aspect of crafting an effective elevator pitch is knowing where and how to take advantage of different opportunities to showcase your talent. By leveraging networking events and meetings, as well as social media and online platforms, you can maximize your chances of grabbing the attention of the right people.

Networking Events And Meetings

Attending networking events and industry meetings is an excellent way to meet like-minded individuals and establish valuable connections within the music industry. Whether it’s a local music showcase or a conference for music professionals, these gatherings provide a platform to showcase your elevator pitch and engage with potential collaborators or industry influencers. When attending such events:

  • Polish your elevator pitch to perfection. Be concise, passionate, and articulate about your music.
  • Be open to conversations. Networking is not just about pitching yourself, but also listening to others, learning, and building relationships.
  • Come prepared with business cards or other promotional materials that include your contact information and any relevant links.
  • Follow up after the event with anyone you connected with, expressing your gratitude and further discussing potential collaborations or opportunities.

Social Media And Online Platforms

In today’s digital age, social media and online platforms are indispensable tools for promoting your music and expanding your network. Here are some tips on how to effectively utilize them:

  1. Create a professional and engaging profile on platforms such as Instagram, Facebook, Twitter, and LinkedIn. Include your elevator pitch in your bio and leverage the platform’s features (such as stories, videos, or live streaming) to showcase your music.
  2. Engage with your audience regularly by sharing updates, behind-the-scenes content, and interacting with comments and messages.
  3. Collaborate with other musicians or influencers in your genre by leveraging their platforms to reach a broader audience.
  4. Explore online communities and forums dedicated to music, where you can share your elevator pitch and connect with fellow musicians.

Remember, consistency is key when utilizing social media and online platforms. Regularly update your profiles and engage with your audience to stay relevant and keep the momentum going.

In conclusion, by effectively utilizing networking events and meetings, as well as social media and online platforms, you can create opportunities for yourself and boost the visibility of your music. Mastering the art of presenting your elevator pitch in different settings will help you make a lasting impression on potential listeners and industry professionals.

How To Craft An Irresistible Elevator Pitch For Your Music: Insider Tips


Credit: fastercapital.com


How To Craft An Irresistible Elevator Pitch For Your Music: Insider Tips


Credit: www.amazon.com


Frequently Asked Questions On How To Write An Elevator Pitch For Your Music


What Is An Elevator Pitch For Music?


An elevator pitch for music is a concise and compelling description of your music that can be delivered in the time it takes to ride an elevator. It should capture the essence of your music and make a lasting impression on listeners.


Why Is An Elevator Pitch Important For Musicians?


An elevator pitch is important for musicians because it allows you to grab the attention of industry professionals, potential fans, and collaborators in a short amount of time. It helps you communicate your unique sound, style, and value as an artist, increasing your chances of being remembered and getting opportunities.


How Do I Write An Effective Elevator Pitch For My Music?


To write an effective elevator pitch for your music, start by defining your unique sound, influences, and target audience. Craft a clear and concise description that highlights your strengths and what sets you apart. Practice delivering it confidently and make sure it resonates with your intended audience.


How Long Should An Elevator Pitch For Music Be?


An elevator pitch for music should ideally be around 30 seconds to a minute long, depending on the situation. It should be short enough to grab attention and leave a lasting impression, but long enough to convey key information about your music and leave listeners wanting to hear more.


Conclusion


Crafting a compelling elevator pitch for your music is crucial for conveying your unique sound and capturing the attention of industry professionals. By incorporating your brand, story, and passion into a concise and memorable pitch, you can maximize your chances of leaving a lasting impression.


Remember to practice and refine your pitch, and don’t be afraid to showcase your authenticity. Elevate your music career with a standout elevator pitch!

Categories
Archive

Is Online Mastering Worth It: Uncover the Power of Digital Audio Enhancement

Online mastering can be worth it if you value convenience and cost-effectiveness in the post-production process. It offers a streamlined approach to fine-tuning audio quality.


Mastering services online allow musicians and producers to access professional audio mastering from the comfort of their own space. While traditional mastering studios have their merits, online mastering offers a quick and efficient way to achieve high-quality sound. With advancements in technology, online mastering platforms can provide comparable results to that of traditional mastering studios.


These services often come at a fraction of the cost, making it a practical choice for many independent artists and producers. We will explore the benefits of online mastering and discuss whether it is worth considering for your music production needs.


Credit: us.seenebula.com


The Rise Of Online Mastering

Online mastering has surged in popularity due to its convenience and technological advancements.

Accessibility And Convenience

Accessible 24/7 for artists globally. Easily upload and receive files instantly. Eliminates need for in-person sessions. Cost-effective compared to traditional mastering studios.

Advancements In Technology

Utilizes cutting-edge software tools for precision. Automated processes save time and ensure consistency. Real-time collaboration with mastering engineers.

Benefits Of Online Mastering


Online mastering offers a convenient and cost-effective solution for musicians and producers. The ability to work with skilled professionals, access to advanced tools, and the flexibility to collaborate remotely makes online mastering a valuable choice for enhancing the quality of music recordings.

Benefits of Online Mastering Quality Enhancement Online mastering offers enhanced audio quality through professional mastering engineers. Latest technologies are used to create polished and cohesive sound. Cost-Effectiveness It eliminates the need for expensive studio sessions. Online mastering is affordable and provides high-quality results. Time Efficiency Online mastering offers quick turnaround times without compromising quality. Convenient scheduling options save time and effort.

Challenges And Considerations

When considering the use of online mastering services, it’s essential to carefully evaluate the challenges and considerations that come with the process. While online mastering offers convenience and accessibility, it also presents some unique hurdles that need to be addressed.

Lack Of Direct Interaction

One of the primary challenges of online mastering is the lack of direct interaction between the mastering engineer and the artist. Without physical presence, it can be challenging to effectively convey preferences, creative nuances, and specific requirements.

Quality Control

Ensuring high-quality output can be a concern with online mastering. Without the ability to personally supervise the process, there is a risk of discrepancies in the final product. This necessitates a thorough vetting process for choosing a reliable online mastering service.

Security And Trust

Establishing trust and ensuring the security of the music files is crucial when utilizing online mastering services. Artists need to ensure that their intellectual property is protected and that the mastering service adheres to stringent security measures to safeguard their work.

Is Online Mastering Worth It: Uncover the Power of Digital Audio Enhancement


Credit: engineering.atspotify.com


The Future Of Online Mastering

As technology continues to advance rapidly, the field of music production is also undergoing a significant transformation. One area that has seen tremendous growth and potential is online mastering. With the integration of AI and machine learning, as well as the evolution of user experience, online mastering is poised to revolutionize the way we approach audio post-production.

Integration Of Ai And Machine Learning

AI and machine learning have already made their mark in various industries, and online mastering is no exception. These cutting-edge technologies allow for enhanced audio analysis, precise adjustments, and intelligent processing that can rival traditional mastering techniques.

Through AI and machine learning algorithms, online mastering platforms can analyze audio tracks, identify various elements, and make informed decisions based on this analysis. This includes recognizing the frequency range, dynamics, and spectral balance of the track. By processing vast amounts of data and using predictive models, these technologies can quickly and accurately apply mastering techniques, resulting in high-quality audio output.

Furthermore, the integration of AI and machine learning enables online mastering to learn from past projects, continuously improving its capabilities and delivering consistent results. This automation not only saves time but also offers a level of accuracy and precision that was previously unimaginable. Whether you’re a professional musician or an aspiring artist, these advancements in online mastering technology can provide you with an efficient and cost-effective solution.

Evolution Of User Experience

User experience is a critical aspect of any online service, and online mastering platforms have made significant advancements in this area. With intuitive interfaces, customizable options, and real-time previews, these platforms aim to provide a seamless and hassle-free experience to musicians and audio engineers.

Modern online mastering platforms allow users to access a wide range of settings and parameters, empowering them to make informed decisions regarding their audio tracks. From loudness and EQ adjustments to stereo widening and harmonic excitement, users can tailor the mastering process to suit their creative vision. The ability to visualize the impact of these adjustments in real-time fosters a collaborative and interactive experience between the user and the software.

Beyond the technical capabilities, online mastering platforms also offer convenience and accessibility. Musicians can submit their tracks for mastering from anywhere in the world, eliminating the need for physical studio visits. Additionally, the fast turnaround time ensures that projects can be completed efficiently, allowing musicians to focus on their creative pursuits.

In summary, the future of online mastering is indeed promising. With the integration of AI and machine learning, as well as the evolution of user experience, musicians and audio engineers now have access to powerful tools that deliver exceptional results. Whether you’re an independent artist or a music production professional, online mastering offers a convenient, cost-effective, and highly efficient solution for achieving professional sound quality.


Making The Decision


Considering whether online mastering is a wise investment can be daunting. However, with its convenience and cost-effectiveness, online mastering can provide valuable benefits to musicians and artists seeking professional sound quality. Making an informed decision based on quality, reputation, and affordability will ultimately determine if online mastering is worth it for your project.

Assessing Individual Needs

If you’re considering online mastering, it’s important to begin by assessing your individual needs. Each musician or producer has unique goals and requirements when it comes to mastering their tracks. Take the time to reflect on what you hope to achieve with your music and how professional mastering can help you reach those goals. Consider factors such as the genre of your music, the intended audience, and the overall sound you’re aiming for. By understanding your individual needs, you’ll be able to make a more informed decision when it comes to online mastering.

Seeking Professional Recommendations

While assessing your needs is crucial, it can also be helpful to seek professional recommendations when deciding if online mastering is worth it for you. There are experts in the field who have years of experience and can provide valuable insights based on their expertise. Research reputable mastering engineers or industry professionals who have worked with artists in a similar genre or style as yours. Reach out to them for their opinions or recommendations on online mastering services. Their expert advice can provide you with an external perspective and help you make a more confident decision.

Is Online Mastering Worth It: Uncover the Power of Digital Audio Enhancement


Credit: www.amazon.com


Frequently Asked Questions Of Is Online Mastering Worth It


Is Online Mastering Worth It For Musicians And Artists?


Online mastering is definitely worth it for musicians and artists. It provides affordable and convenient access to professional audio mastering services, ensuring that your music sounds polished and professional. With online mastering, you can easily collaborate with experienced engineers, get quick turnaround times, and achieve high-quality results that enhance the overall sound of your tracks.


Can Online Mastering Improve The Quality Of My Music Recordings?


Yes, online mastering can greatly improve the quality of your music recordings. Professional mastering engineers use their expertise and specialized tools to enhance the sonic characteristics of your tracks, including improving the overall clarity, balance, and dynamics. Online mastering ensures that your music sounds its best across different playback systems and platforms, giving your recordings a professional touch.


How Does Online Mastering Help In Achieving A Professional Sound?


Online mastering helps in achieving a professional sound by applying various audio processing techniques to your tracks. These techniques include equalization, compression, stereo widening, and mastering-grade limiters. Professional mastering engineers use their skills to fine-tune the mix, add depth and clarity, balance the frequencies, and bring out the best sonic qualities of your music.


This results in a polished and professional sound that stands out from the competition.


What Are The Benefits Of Using Online Mastering Services?


Using online mastering services offers several benefits. Firstly, it is cost-effective compared to traditional studio mastering. Secondly, it saves time and allows for easy collaboration with mastering engineers. Thirdly, it provides access to top-notch mastering facilities and equipment regardless of your location.


Lastly, online mastering offers quick turnaround times, ensuring that you can meet your release deadlines and take advantage of promotional opportunities.


Conclusion


Ultimately, online mastering presents a valuable opportunity for musicians to enhance the quality of their music. With the convenience, cost-effectiveness, and professional expertise it offers, it’s clear that online mastering is worth the investment for both experienced and emerging artists.


By leveraging these services, musicians can effectively elevate their sound and reach a broader audience.

Categories
Archive

Turn Your Indie Band into a Profitable Business: A Step-by-Step Guide

To run your indie band like a business, treat it with professionalism and strategize for success. Implement organization, marketing, and financial management practices to achieve your goals.


Starting an indie band is an exciting journey that allows you to express your creativity and connect with audiences. However, turning your passion into a successful business requires more than just talent and dedication; it demands a strategic approach. By treating your band as a business entity, you can effectively plan, manage finances, and market your music to reach a wider audience.


This guide will provide essential tips on running your indie band like a business to help you navigate the competitive music industry and build a sustainable career.


Credit: www.brushyourideas.com


Crafting Your Brand Identity

Defining Your Band’s Unique Image

Establish what makes your band stand out from others in terms of visual style and personality.

  • Use vibrant colors, distinctive fonts, and eye-catching logos for consistent branding.
  • Showcase your uniqueness through album artwork, stage attire, and promotional materials.
  • Emphasize your band’s strengths and values to create a memorable identity.

Creating A Compelling Story

Craft a narrative that resonates with your target audience and builds an emotional connection.

  1. Highlight the journey of how your band was formed and the challenges overcome.
  2. Share personal anecdotes, inspirations, and behind-the-scenes stories to engage fans.
  3. Weave a cohesive storyline that reflects the essence of your music and mission.

Building A Strong Online Presence

In today’s music industry landscape, it’s crucial for indie bands to establish a robust online presence to reach a wider audience and engage with fans effectively.

Designing An Engaging Website

  • Create a visually appealing website that reflects your band’s identity and showcases your music.
  • Ensure your website is user-friendly and easy to navigate for visitors.

Utilizing Social Media Effectively

  1. Focus on platforms where your audience is most active to maximize engagement.
  2. Regularly post content, including upcoming gigs, behind-the-scenes glimpses, and music releases.

Consistency is key in maintaining an online presence that keeps fans connected and attracts new followers to your indie band.

Monetizing Your Music

When it comes to running your indie band as a business, monetizing your music is a crucial aspect. By exploring different revenue streams and actively selling merchandise and exclusives, you can create a sustainable income for your band.

Exploring Different Revenue Streams

Diversifying your revenue streams beyond just music sales can help stabilize your band’s income. Consider offering live performances, licensing your music for films or commercials, and securing sponsorships or endorsements.

Table: Different Revenue Streams

Revenue Stream Description
Performances Booking live shows and concerts for ticket sales and appearance fees
Licensing Allowing your music to be used in films, TV shows, commercials, and video games for a fee
Sponsorships/Endorsements Partnering with brands for promotions and endorsements

Selling Merchandise And Exclusives

In addition to music sales and performances, selling merchandise and exclusive content can boost your band’s revenue. Create and sell branded merchandise such as t-shirts, hats, posters, and physical copies of your music. Additionally, offer exclusive content such as behind-the-scenes videos, limited edition releases, or personalized experiences for dedicated fans.

Turn Your Indie Band into a Profitable Business: A Step-by-Step Guide


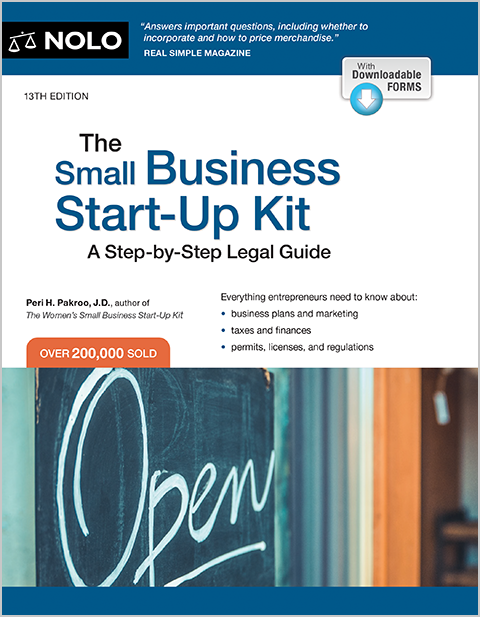
Credit: store.nolo.com


Growing Your Fanbase

Growing your fanbase is a crucial aspect of running your indie band like a business. The more fans you have, the higher the chances of success for your band. Building a loyal and engaged fanbase requires consistent effort and strategic planning.

Engaging With Fans Through Live Shows

Live shows are the lifeblood of any indie band. It’s a chance for you to connect directly with your fans and create memorable experiences. Here are some tips to engage with your fans through live shows:

  • Create a captivating stage presence: Make sure your band members have energy and charisma on stage to capture the audience’s attention.
  • Interact with the crowd: Engage with your fans during the show by talking to them, making eye contact, and encouraging them to sing along.
  • Offer unique experiences: Consider offering special meet-and-greet sessions or merchandise giveaways to reward your most dedicated fans.
  • Stay connected after the show: After the performance, make an effort to talk to your fans, sign autographs, and take photos. This personal touch will leave a lasting impression.

Connecting With Your Audience

To grow your fanbase, you need to connect with your audience on a deeper level. Here are some effective strategies to strengthen your bond with your fans:

  1. Create engaging content: Use social media platforms to share stories, behind-the-scenes footage, and exclusive content that provides a glimpse into your band’s journey.
  2. Communicate regularly: Foster a sense of community by regularly updating your fans about upcoming shows, new music releases, and other band-related news.
  3. Respond to fan messages and comments: Take the time to respond to your fans’ messages and comments, showing that their support and feedback are valued.
  4. Collaborate with fans: Involve your fans in the creative process by seeking their input, running contests, or featuring fan artwork in your merchandise or album covers.

By engaging with your fans through live shows and connecting with them on a personal level, you can cultivate a loyal and dedicated fanbase that will support your indie band’s success.

Managing Finances And Logistics


To run your indie band like a business, it’s crucial to efficiently manage finances and logistics. This involves budgeting for equipment and marketing, as well as organizing tours and merchandise. By treating your band as a business, you can ensure financial stability and maximize opportunities for growth and success.

Managing Finances and Logistics Running an indie band is not just about creating great music and performing on stage. To be successful, you have to treat your band like a business, which means carefully managing your finances and logistics. In this section, we will explore two crucial aspects of running your band as a business: budgeting for tours and recording, and understanding contracts and agreements.

Budgeting For Tours And Recording

Budgeting is a crucial skill that every indie band needs to master. It involves planning and allocating your financial resources in a way that allows you to achieve your goals effectively. When it comes to tours and recording, having a well-thought-out budget can make a world of difference in the success of your band. Here are some important factors to consider when budgeting for tours and recording:

  • Transportation: Calculate the costs of renting a vehicle or hiring a tour bus to transport your band and equipment between venues. Consider whether it’s more cost-effective to travel by air or by road.
  • Accommodation: Research different options for accommodations on the road, such as hotels, hostels, or even crashing at the homes of local fans. Compare prices and amenities to find the best fit for your budget.
  • Meals: Food expenses can add up quickly, especially when you’re on the road. Create a daily meal allowance or consider pre-planning meals to save money.
  • Equipment: Factor in the costs of maintaining and replacing your instruments, amplifiers, and other equipment. Allocate a portion of your budget for any necessary repairs or upgrades.
  • Promotion: Don’t overlook the importance of marketing and promoting your tours and music. Budget for advertising, press releases, and promotional material such as posters and merchandise.
  • Recording costs: Depending on your budget and goals, you may choose to record in a professional studio or opt for a more affordable home recording setup. Include expenses like studio time, mixing and mastering costs, and any additional production fees.

Understanding Contracts And Agreements

Contracts and agreements are an integral part of the music industry, and understanding them is crucial to protect your band’s interests. Whether it’s a performance contract, a recording contract, or a licensing agreement, knowing your rights and responsibilities is vital. Here are some tips to help you navigate contracts and agreements:

  • Read before you sign: Take the time to carefully read and understand every word of a contract before you sign it. If needed, consult an attorney or a music industry professional to clarify any confusing terms or clauses.
  • Know your rights: Familiarize yourself with the rights you have as an artist, such as copyright protection, performance rights, and royalties. Understand how these rights are affected by the contracts you enter into.
  • Budget for legal advice: While it may seem like an unnecessary expense, having legal advice when reviewing contracts can save you from potential pitfalls and protect your band’s interests in the long run.
  • Seek professional help: If you feel overwhelmed by the intricacies of contracts and agreements, consider hiring a music lawyer or manager with experience in the industry. They can help negotiate contracts and ensure you are getting the best possible deal.
  • Keep records: Maintain a record of all contracts, agreements, and communications related to your band. This will help you stay organized and protect your band’s legal rights in case of any disputes.

By budgeting wisely and understanding the legal aspects of the music industry, your indie band can navigate the financial and logistical challenges with confidence. Treat your band like a business, and you’ll be on the path to success.

Turn Your Indie Band into a Profitable Business: A Step-by-Step Guide


Credit: www.amazon.com


Frequently Asked Questions For How To Run Your Indie Band Like A Business


How Can I Promote My Indie Band To Gain More Visibility?


To promote your indie band, utilize social media platforms, collaborate with other artists, engage with fans, and submit your music to online directories and streaming services. Utilize email marketing campaigns, create a professional website, play live shows, and leverage local press.


What Strategies Can I Use To Monetize My Indie Band?


To monetize your indie band, consider selling merchandise, offering exclusive content, and using crowdfunding platforms. You can also explore licensing opportunities, secure sponsorships, and perform at ticketed events. Implement a strong marketing strategy to increase your fan base and generate revenue.


How Can I Effectively Manage My Indie Band’s Finances?


To effectively manage your indie band’s finances, create a budget, track expenses, and separate personal and band finances. Keep thorough records of income, investments, and taxes. Utilize financial management software and consult with a professional accountant or business adviser to ensure financial stability and growth.


Conclusion


Running your indie band like a business requires strategic planning and a focus on building a strong brand. By implementing effective marketing strategies, understanding your audience, and investing in quality content, you can set your band up for success in today’s competitive music industry.


Embracing the business side of music can help your band thrive, grow your fanbase, and achieve your goals.


Categories
Archive

Running Guitar Effects On A Computer: Unleash Your Digital Sonic Power

To run guitar effects on a computer, use digital audio workstation software with virtual plugins. This allows for versatile sound shaping.


Running guitar effects on a computer opens up a world of possibilities for musicians. By utilizing specialized software and plugins, guitarists can experiment with a wide array of effects such as distortion, reverb, delay, and modulation. This digital setup provides convenience and flexibility. This allows users to easily switch between different effects and customize their sound in real-time.

Related reading: How to mix acoustic guitars and Acoustic guitar eq. For background, see Effects unit.


Additionally, computer-based effects offer a cost-effective solution compared to traditional hardware pedals. This makes it accessible for musicians at any skill level. Whether recording in a home studio or performing live, running guitar effects on a computer is a modern and efficient way to enhance the music-making process.

Running Guitar Effects On A Computer: Unleash Your Digital Sonic Power


Credit: www.amazon.com


Benefits Of Running Guitar Effects On A Computer

Running guitar effects on a computer offers numerous advantages for musicians looking to expand their sound capabilities without breaking the bank. With advancements in technology, guitarists can now access a wide range of effects and tools right at their fingertips. Let’s delve into the benefits of running guitar effects on a computer.

Limitless Sound Possibilities

Running guitar effects on a computer opens up a world of limitless sound possibilities. Through software applications and plugins, musicians can experiment with a diverse range of effects, amp simulations, and virtual pedals to craft their ideal tone.

Cost-effective Solution

Utilizing guitar effects on a computer provides a cost-effective alternative to investing in multiple physical pedals and effects units. With a computer, musicians can access a plethora of high-quality effects at a fraction of the cost. This makes it an economical choice for those on a budget.

Setting Up Your Computer For Guitar Effects

Running guitar effects on a computer opens up a world of possibilities for musicians. The process involves selecting the right audio interface and choosing the suitable DAW software to achieve desired effects.

Selecting The Right Audio Interface

Having a quality audio interface is crucial for running guitar effects on a computer. Consider the number of inputs and outputs you need and make sure it is compatible with your computer.

Choosing The Suitable Daw Software

When setting up your computer for guitar effects, choosing the right DAW software is key. Look for software that supports VST plugins and offers intuitive interface for easy usage.

Choosing The Right Guitar Effects Software

When it comes to running guitar effects on a computer, choosing the right guitar effects software is crucial. The software can greatly impact the sound and performance of your guitar effects, so it’s essential to understand the different types of effects and explore popular software options to find the best fit for your needs.

Understanding Different Types Of Effects

Before diving into the world of guitar effects software, it’s important to grasp the different types of effects available. From distortion and overdrive to modulation and time-based effects, each type offers a distinct sound and style to enhance your guitar playing. Understanding these effects will help you make an informed decision when selecting the right software.

Exploring Popular Software Options

When it comes to guitar effects software, there are numerous options to consider. From standalone applications to plugins for digital audio workstations (DAWs), it’s essential to explore popular software options to find the best fit for your setup. Some popular choices include Amplitube, Bias FX, Native Instruments Guitar Rig, and Line 6 Helix Native. Each option has its unique features and capabilities, so it’s important to assess your specific needs and workflow before making a decision.

Running Guitar Effects On A Computer: Unleash Your Digital Sonic Power


Credit: www.amazon.com


Optimizing Your Guitar Effects Workflow

If you’re a guitar enthusiast, you know how important it is to have a smooth and efficient workflow when it comes to running guitar effects on a computer. Optimizing your guitar effects workflow can make a significant difference in both your creativity and productivity. In this article, we will explore two essential aspects of optimizing your guitar effects workflow: creating custom presets and incorporating MIDI control. Let’s dive in.

Creating Custom Presets

Custom presets allow you to save and recall your favorite guitar effects settings with just a click of a button. They are a time-saving feature that ensures consistency in your sound and eliminates the need for manual adjustments every time you switch effects. By creating custom presets, you can easily access your preferred settings for different songs, performances, or recording sessions.

To create custom presets, follow these simple steps:

  1. Set up your desired guitar effects chain.
  2. Adjust the parameters of each effect to achieve your desired sound.
  3. Save the preset with a name that reflects the intended sound or purpose.
  4. Organize your presets in a logical manner to quickly locate them.

Utilizing custom presets not only saves you time but also gives you the freedom to experiment with different effects without losing your initial settings. It’s a powerful tool for finding your unique sound and enhancing your overall guitar playing experience.

Incorporating Midi Control

MIDI control opens up a world of possibilities for controlling your guitar effects using external devices such as footswitches, MIDI controllers, or DAW (Digital Audio Workstation) software. It allows you to change effects, toggle parameters, and switch presets seamlessly during your performance or recording session.

Here are some advantages of incorporating MIDI control:

  • Hands-free operation: Control your guitar effects with footswitches or MIDI controllers, freeing up your hands to focus on playing.
  • Real-time adjustments: Perform live adjustments to your effects parameters without interrupting your performance.
  • Seamless preset switching: Switch between custom presets effortlessly, enhancing your live performance or recording process.
  • Integration with DAW: Sync your guitar effects with your DAW software for synchronized recording and automation.

To incorporate MIDI control, ensure your guitar effects software or hardware is MIDI-compatible. Set up your MIDI controller or footswitches according to the manufacturer’s instructions, and configure your software to map the desired actions to your MIDI devices. With MIDI control, you can take your guitar effects to the next level and unlock new creative possibilities.

Tips For Getting The Most Out Of Your Digital Effects


Maximize the potential of your digital effects by running guitar effects on a computer. Explore a range of tips to enhance your sound and performance, including utilizing software plugins and optimizing signal flow for a seamless and dynamic experience. Elevate your music with these effective digital techniques.

Experimenting With Signal Chain Order

When it comes to running guitar effects on a computer, the order in which you arrange your signal chain can significantly impact the sound and overall performance. By experimenting with different signal chain order setups, you can achieve unique and desirable tones for your guitar.

Here are some tips to help you get the most out of your digital effects through signal chain order:

  1. Start with the basics: Begin your signal chain with essential effects like compressors, EQs, and noise gates. These effects shape the overall sound and provide a solid foundation for the rest of your effects.
  2. Consider modulation effects: Next, incorporate modulation effects such as chorus, phaser, and flanger. These effects add movement and depth to your sound.
  3. Explore time-based effects: Time-based effects like delay and reverb should come after modulation effects. They can create spacious and ambient tones, enhancing the overall sound of your guitar.
  4. Don’t forget about drive and distortion: Place drive and distortion effects towards the end of your signal chain to ensure they interact with the tone shaping effects. This arrangement allows the drive and distortion to fully capture the modified sound.

Remember, these tips are not set in stone, and experimenting with different setups can lead to exciting discoveries.

Utilizing Impulse Responses For Realistic Tones

If you’re looking to achieve realistic and authentic tones when running guitar effects on a computer, utilizing impulse responses can make a significant difference. Impulse responses, or IRs, are digital snapshots of real-world speaker cabinets, microphones, and room acoustics.

Here’s how you can utilize impulse responses to enhance your guitar sound:

  • Find the right IRs: Look for impulse responses that match the sound you’re aiming for. Many websites and software platforms offer a wide variety of IRs for different amps, cabinets, and recording environments.
  • Load the IRs into your software: Once you’ve found the right IRs, load them into your preferred software or plugin that supports impulse responses.
  • Experiment with placement: Just like mic placement on a real cab, try different positions for the virtual mic in your software to find the sweet spot for your desired tone.
  • Combine with other effects: Don’t be afraid to combine impulse responses with other effects to create unique and personalized tones. Experimentation is key!

By utilizing impulse responses, you can achieve more realistic and immersive guitar tones, bringing your digital effects to life.

Running Guitar Effects On A Computer: Unleash Your Digital Sonic Power


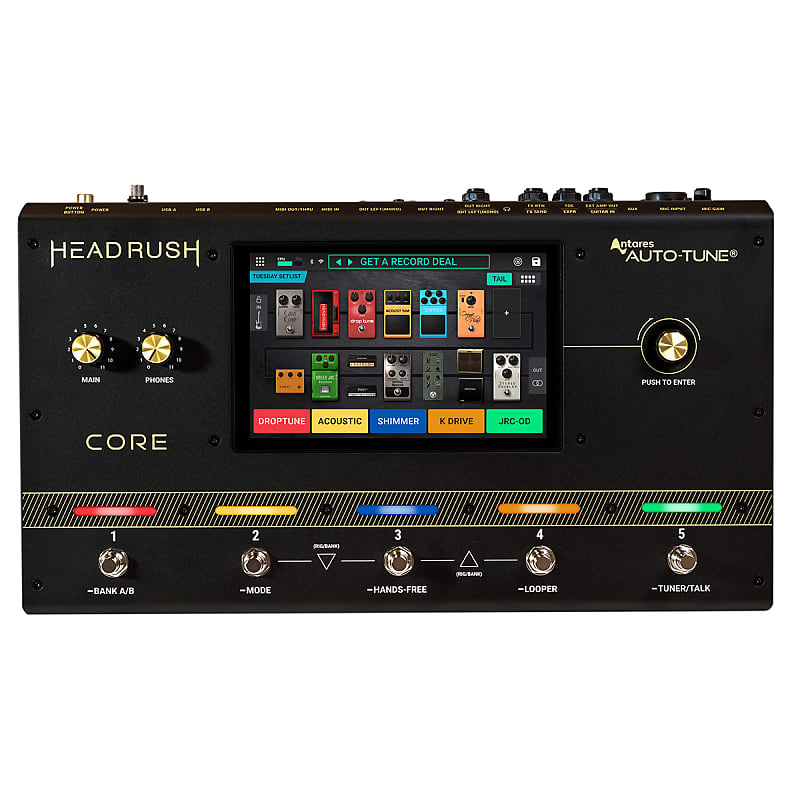
Credit: reverb.com


Frequently Asked Questions Of Running Guitar Effects On A Computer


Can You Use Guitar Effects On A Computer?


Yes, you can use guitar effects on a computer by connecting your guitar to an audio interface and using software plugins or DAWs to apply effects digitally. This allows you to experiment with a wide variety of effects without the need for physical pedals.


What Software Do You Need To Run Guitar Effects On A Computer?


To run guitar effects on a computer, you will need Digital Audio Workstation (DAW) software such as Ableton Live, Pro Tools, or GarageBand. Additionally, you may also need guitar amp modeling software or virtual effect plugins to achieve different tones and effects.


How Do I Connect My Guitar To A Computer For Effects?


To connect your guitar to a computer for effects, you will need an audio interface. Simply plug your guitar into the audio interface using a standard instrument cable, and then connect the interface to your computer using a USB cable.


This allows your computer to receive the guitar signal and process it with effects.


Conclusion


Running guitar effects on a computer opens up a world of possibilities for musicians. Whether you’re a beginner or a seasoned pro, the convenience and flexibility of computer-based effects can enhance your creativity and performance. Embracing this technology can empower you to explore new sounds and push the boundaries of your musical expression.


Categories
Archive

Best Digital Music Distribution Companies: Unleashing the Power of Music Online

TuneCore and DistroKid are among the best digital music distribution companies in the industry. They offer a user-friendly platform for independent musicians to distribute their music globally.


With their easy-to-use interfaces and competitive pricing, both TuneCore and DistroKid provide artists with the tools they need to reach a wider audience and maximize their revenue potential. Whether you are an up-and-coming artist or an established musician, these platforms offer comprehensive services to help you succeed in the digital music landscape.


Let’s delve into the features and benefits of these top digital music distribution companies to understand how they can elevate your music career.


The Rise Of Digital Music Distribution

Music distribution has come a long way with the rise of digital platforms. Let’s explore the Evolution of Music Distribution and the Impact of Digital Platforms in transforming the industry.

Evolution Of Music Distribution

The distribution of music has evolved from physical records and CDs to digital formats like streaming and downloads.

Impact Of Digital Platforms

  • Digital platforms have made music accessible globally.
  • Artists can reach a wider audience through online distribution.
  • Streaming services have changed how music is consumed.
Company Key Features
1. DistroKid Fast distribution, low fees, easy music management.
2. TuneCore Offers marketing tools, detailed sales analytics.
3. CD Baby Direct access to Spotify, iTunes, and more.
Best Digital Music Distribution Companies: Unleashing the Power of Music Online


Credit: cryptonews.com


Key Players In The Industry

Digital music distribution companies play a crucial role in helping artists reach a larger audience online. Some of the key players in this industry are:

Leading Digital Distribution Companies

  • Tunecore: Offers a wide reach with distribution to over 150 digital stores.
  • DistroKid: Known for its user-friendly interface and quick distribution process.
  • CD Baby: Provides a comprehensive suite of services for musicians to promote their music.

Comparison Of Services Offered

Company Services
Tunecore Extensive distribution network to major streaming platforms.
DistroKid Rapid music release process and affordable pricing.
CD Baby Artist-friendly tools for music promotion and monetization.

Factors To Consider When Choosing A Digital Music Distribution Company

Factors to Consider When Choosing a Digital Music Distribution Company

When selecting a digital music distribution company, it’s crucial to consider several factors that can significantly impact the success of your music career. From revenue models and royalties to platform reach and marketing support, making an informed decision will ensure that your music reaches the widest audience possible and maximizes your potential for earning.

Revenue Models And Royalties

One of the most critical aspects to consider when choosing a digital music distribution company is the revenue model and royalty structure. Ensure you thoroughly understand the distribution platform’s fee structure, including any upfront costs, subscription fees, or revenue share models that may impact your earnings. Transparent royalty rates and payment schedules are essential for long-term financial sustainability.

Platform Reach And Marketing Support

Platform reach and marketing support are also vital considerations. Evaluate the distribution company’s reach across various streaming platforms, download stores, and social media channels. Additionally, inquire about the marketing and promotional support they offer, such as playlist placement, social media promotion, and targeted advertising. A robust marketing strategy can significantly boost the visibility of your music, attracting a wider audience and driving revenue.

Best Digital Music Distribution Companies: Unleashing the Power of Music Online


Credit: openbots.ai


Success Stories In The Digital Music Industry

The digital music industry has revolutionized the way artists distribute and share their music with the world. With the advent of online platforms and streaming services, musicians now have more opportunities than ever to gain exposure and reach a global audience. In this article, we will explore the success stories of notable independent artists and major label artists in the digital music industry.

Notable Independent Artists

Taylor Swift: Taylor Swift is a prime example of an independent artist who achieved enormous success through digital music distribution. Initially signed with an independent label, Swift quickly gained a massive following on social media, which propelled her career to new heights. By strategically releasing her music on digital platforms, she was able to connect with a vast and diverse fan base, ultimately becoming one of the biggest pop stars in the world.

Chance the Rapper: Chance the Rapper is another independent artist who made waves in the digital music industry. Through releasing his mixtapes for free online and leveraging social media, he gained a significant following and was able to build a devoted fan base. His innovative approach to distribution and self-promotion earned him critical acclaim, multiple Grammy Awards, and a deal with a major label.

Major Label Artist Experiences

Adele: Adele’s success in the digital music industry is nothing short of exceptional. Her album “21” became one of the best-selling albums of all time, partly due to the immense popularity of its singles on digital platforms. Adele’s powerful vocals and emotionally charged lyrics resonated with millions of listeners worldwide, leading to numerous awards and record-breaking sales figures.

Ed Sheeran: Ed Sheeran’s rise to stardom is a testament to the power of digital music distribution. Through strategic partnership with streaming services and social media promotion, Sheeran was able to reach a massive audience and gain international recognition. His heartfelt songs and relatable lyrics struck a chord with listeners, earning him countless accolades and making him one of the best-selling artists of the decade.

Artist Success in the Digital Music Industry
Taylor Swift Strategic digital music releases and social media engagement led to global popularity and success.
Chance the Rapper Released mixtapes online for free, utilizing social media to build a dedicated fan base.
Adele Major success through digital platforms, with emotionally charged lyrics resonating with millions of listeners.
Ed Sheeran Strategic partnerships with streaming services and social media promotion led to international recognition and record-breaking sales.

These success stories illustrate the power of digital music distribution in launching and propelling artists’ careers. With the right strategy and utilization of online platforms, both independent and major label artists can achieve great success in the digital music industry.


The Future Of Digital Music Distribution

The landscape of the music industry has drastically transformed in recent years, largely influenced by technological innovations and the rising popularity of streaming services. With the shift from physical distribution to digital platforms, musicians and independent artists now have unprecedented access to a global audience. This blog post will explore the future of digital music distribution, focusing on two key aspects: the impact of streaming services and the technological innovations that drive the industry forward.

Technological Innovations

In the era of digital music distribution, technological innovations play a crucial role in enhancing the accessibility, efficiency, and profitability of the industry. One of the significant advancements is the development of blockchain technology, which revolutionizes the way musicians are compensated for their work. By utilizing blockchain-based platforms, artists can receive instant and transparent payments, eliminating the need for intermediaries.

Another notable innovation is the emergence of artificial intelligence (AI) algorithms that analyze user preferences and recommend personalized playlists. This not only improves the listening experience for music enthusiasts but also provides independent artists with an opportunity to gain exposure to a wider audience. AI-driven music recommendation algorithms aid in the discovery of new talent and facilitate the growth of independent music scenes.

Impact Of Streaming Services

The advent of streaming services has undoubtedly transformed the way people consume music, and this shift has influenced the future of digital music distribution. Platforms such as Spotify, Apple Music, and Tidal have disrupted the industry by offering unlimited access to vast music libraries through affordable subscription models. This accessibility has democratized the music scene, allowing undiscovered talent to potentially reach millions of listeners without the need for a major record label.

Key Benefits of Streaming Services:
  • Increased exposure and discoverability for artists
  • Real-time listener data and analytics
  • Global reach with minimal overhead costs
  • Opportunities for independent artists to monetize their work

Furthermore, the rise of streaming services has fueled the growth of the music streaming market, leading to a decline in illegal downloads and piracy. The convenience of streaming platforms has shifted consumer behavior towards legal, on-demand access to music. As a result, artists can now rely on legitimate channels to generate revenue and protect their intellectual property.

Best Digital Music Distribution Companies: Unleashing the Power of Music Online


Credit: www.simplilearn.com


Frequently Asked Questions Of Best Digital Music Distribution Companies


What Are The Benefits Of Digital Music Distribution?


Digital music distribution allows artists to reach a global audience, increase their exposure, earn revenue from streaming services, retain control over their music, and receive detailed analytics on their audience engagement.


How Do Digital Music Distribution Companies Work?


Digital music distribution companies act as intermediaries between artists and streaming platforms, ensuring that the artist’s music is available on various platforms worldwide. They handle the licensing, formatting, and delivery of music, ensuring it meets the platforms’ specifications.


What Should I Consider When Choosing A Digital Music Distribution Company?


When choosing a digital music distribution company, consider factors such as pricing, platforms supported, revenue sharing, customer support, additional services offered (such as marketing tools), and user-friendly interfaces to ensure a smooth experience for both the artist and their audience.


How Much Does Digital Music Distribution Cost?


Digital music distribution costs can vary depending on the platform and features offered. Some distribution companies charge one-time fees per release, while others may charge yearly or monthly fees. Additionally, some distribution companies offer tiered pricing plans with different features at each level.


Conclusion


Choosing the right digital music distribution company is crucial for independent artists. With a plethora of options available, it’s important to select a service that aligns with your specific needs and goals. By considering factors such as pricing, distribution reach, and customer support, artists can effectively navigate the ever-evolving music industry and maximize their potential for success.

Categories
Archive

Audio Compression : The Ultimate Guide to Achieving Studio-Quality Sound

Audio compression reduces the size of audio files without compromising quality, making them easier to store and transmit. It accomplishes this by removing redundant or irrelevant data from the files.


Audio compression is a vital tool in the digital world, allowing for efficient storage and streaming of audio content. While there are different methods of compression, they all aim to maintain a balance between file size and audio quality. Understanding how compression works can help optimize the audio experience across various platforms and devices.


This technology is used in various fields, from music production to telecommunications, enhancing accessibility and usability. By implementing compression effectively, users can enjoy high-quality audio without sacrificing storage space or transmission speed.

Audio Compression  : The Ultimate Guide to Achieving Studio-Quality Sound


Credit: www.amazon.com


Understanding Audio Compression

Understanding Audio Compression is essential in the field of audio production. It is a process that reduces the dynamic range of an audio signal, making it easier to store and transmit. Efficient utilization of audio compression can enhance the quality of sound recordings while minimizing file sizes.

How Does Audio Compression Work?

Audio Compression works by reducing the difference between the loudest and softest parts of an audio signal, known as dynamic range. It achieves this by applying algorithms that adjust the amplitude of the audio signal, ultimately decreasing the file size without significantly compromising audio quality.

Types Of Audio Compression

  • Lossy Compression – Removes some audio data to reduce file size, sacrificing some quality.
  • Lossless Compression – Preserves all original audio data while reducing file size.

Understanding the intricacies of audio compression allows audio professionals to optimize sound quality and file sizes for various purposes efficiently.

Choosing The Right Audio Compression Settings

Choosing the right audio compression settings is crucial to achieve optimal sound quality in your recordings. Getting familiar with the various parameters like threshold, ratio, attack, and release times will help you tailor the compression effect to suit your specific needs.

Threshold And Ratio

Threshold: Specifies the point at which compression starts to take effect.

Ratio: Determines the amount of compression applied once the signal crosses the threshold.

Attack And Release Times

  • Attack time: Controls how quickly compression is applied when the input signal exceeds the threshold.
  • Release time: Dictates how fast the compressor stops compressing once the signal falls below the threshold.

“` These settings play a key role in shaping the dynamics and overall sound of your audio recordings. Experimenting with different combinations of threshold, ratio, attack, and release times can help you achieve the desired outcome for your projects.

Applying Audio Compression Techniques

Compression For Vocals

When it comes to applying compression for vocals, it’s crucial to enhance the clarity and consistency of the singer’s performance. Vocal compression helps control dynamic range, making softer parts audible and ensuring louder sections don’t overwhelm the mix. A moderate compression ratio of 3:1 to 5:1 is ideal for vocals, preventing drastic level changes while maintaining dynamics.

Compression For Instruments

When considering compression for instruments, it’s essential to maintain the natural dynamics while controlling peaks and enhancing sustain. Different instruments may require unique compression settings. For instance, instrument compression for drums typically involves higher ratio and shorter attack times to control transients, while compression for guitars may emphasize warmth and character, often using smoother compression settings and makeup gain to preserve the instrument’s natural tone.

Audio Compression  : The Ultimate Guide to Achieving Studio-Quality Sound


Credit: verbit.ai


Avoiding Common Audio Compression Mistakes


Audio compression is essential in sound recording, but common mistakes can hinder its effectiveness. To achieve optimal results, ensure proper settings, avoid excessive compression, and use a gentle touch to maintain the dynamics of the audio. Overcompression can lead to a loss of quality and depth in the sound.

Over-compression

Ignoring Gain Staging

When it comes to audio compression, it’s essential to avoid common mistakes that can negatively impact the sound quality. Understanding these mistakes and knowing how to avoid them is crucial for creating professional-sounding audio. In this article, we will discuss two common audio compression mistakes: over-compression and ignoring gain staging.

Over-compression

Over-compression occurs when the audio signal is excessively compressed, resulting in a loss of dynamic range and a flat sound. It may seem counterintuitive, but too much compression can actually make your audio sound worse rather than better.

One mistake that people often make is setting the threshold too low, causing the compressor to kick in too frequently and aggressively. This can result in a squashed and lifeless sound, lacking the natural dynamics that bring a recording to life. To avoid over-compression, it’s important to find the right balance of compression that enhances the audio without sacrificing its dynamics.

Another common mistake is applying compression to every instrument or vocal track indiscriminately. Not all audio elements require the same level of compression, and a one-size-fits-all approach can lead to unnatural and unbalanced sound. It’s important to carefully evaluate each element and apply compression only when it enhances the audio quality.

Ignoring Gain Staging

Gain staging refers to managing the levels of audio signals throughout the signal chain, from recording to mixing and mastering. Ignoring proper gain staging can lead to issues like clipping, distorted sound, and poor signal-to-noise ratio.

One common mistake is recording audio with levels that are too low, resulting in a weak and noisy signal. On the other hand, recording with levels that are too hot can cause distortion and clipping, degrading the audio quality. It’s important to set the input levels correctly and ensure a healthy signal level without peaking or distorting.

In the mixing stage, it’s crucial to maintain proper gain staging by keeping the individual track levels in balance. If some tracks are too loud while others are too soft, it can lead to an unbalanced mix that lacks clarity and cohesion. By adjusting the levels of each track and utilizing techniques like volume automation, you can achieve a well-balanced mix with the desired dynamic range.

Another aspect of gain staging to consider is the output level. When exporting or bouncing your final mix, it’s important to ensure that the output level is appropriate for the intended destination, whether it’s streaming platforms, CD mastering, or any other medium. Improper output levels can result in a mix that’s too quiet or too loud, causing the listener to have a less than optimal listening experience.


Advanced Tips For Studio-quality Sound

When it comes to achieving studio-quality sound, understanding audio compression techniques is essential. In this article, we’ll explore two advanced tips for achieving professional results: Parallel Compression and Multiband Compression.

Parallel Compression

Parallel Compression, also known as New York Compression, is a technique used to add depth and punch to your audio tracks without sacrificing dynamics. By blending a compressed version of your signal with the original uncompressed signal, you can achieve a balanced mix that retains the natural dynamics while enhancing the overall impact.

To apply Parallel Compression to your tracks, follow these steps:

  1. Create a duplicate track of the original audio.
  2. Apply heavy compression settings to the duplicated track.
  3. Adjust the volume of the compressed track to blend it with the original track.

By combining the compressed and uncompressed tracks, you’ll get a mix that has the punch and energy of the compressed track while preserving the natural dynamics of the original track. This technique works wonders for drums, vocals, and any other elements that require added impact.

Multiband Compression

Multiband Compression is a powerful tool for controlling and shaping the dynamics of specific frequency ranges within your audio mix. Unlike regular compression, which affects the entire frequency spectrum, Multiband Compression allows you to target specific frequency bands independently.

Here’s how you can effectively use Multiband Compression:

  1. Identify the frequency ranges you want to control or enhance.
  2. Split your audio signal into multiple frequency bands using a Multiband Compressor plugin or effect.
  3. Apply compression settings to each frequency band individually.
  4. Adjust the threshold and ratio settings for each band to achieve the desired control and balance.

With Multiband Compression, you can address issues like excessive bass, harsh highs, or a lack of presence in a specific frequency range. By targeting these frequency areas and applying compression, you can create a more polished and balanced mix.

Audio Compression  : The Ultimate Guide to Achieving Studio-Quality Sound


Credit: www.avid.com


Frequently Asked Questions Of Audio Compression


What Is Audio Compression?


Audio compression is the process of reducing the size of audio files without significantly affecting their quality. It is used in various applications such as music streaming, audio encoding, and file storage. By removing redundant or unnecessary data, audio compression allows for efficient transmission and storage of audio content.


How Does Audio Compression Work?


Audio compression works by using various algorithms to encode audio data in a more efficient way. These algorithms identify patterns and redundancies in the audio signal, and then use mathematical techniques to reduce the amount of data needed to represent the signal accurately.


The compressed audio can then be decompressed and played back with minimal loss of quality.


Why Is Audio Compression Important?


Audio compression is important because it allows for more efficient storage and transmission of audio content. It enables faster streaming, reduced bandwidth usage, and smaller file sizes. This is essential in today’s digital age where audio content is consumed on various devices with different limitations on storage and data usage.


Without audio compression, it would be challenging to deliver high-quality audio content over the internet or store large collections of music.


Does Audio Compression Affect Sound Quality?


Yes, audio compression can affect sound quality to some extent. Lossy compression algorithms, which are commonly used, discard some audio data that is considered less important or less perceptible to the human ear. This can result in a slight loss of quality compared to the original uncompressed audio.


However, modern audio compression algorithms are designed to minimize the loss of quality and provide a balance between file size reduction and sound fidelity. Lossless compression algorithms, on the other hand, preserve the original audio quality but often result in larger file sizes.


Conclusion


Audio compression is an essential tool for managing files efficiently without compromising quality. By understanding the different types of compression and the impact on audio files, you can make informed decisions about the best approach for your specific needs. With the right balance, compression can enhance the overall listening experience while optimizing storage space.

Categories
Archive

Mastering Rock Music: Unleash the Power!

Mastering rock music involves understanding its history and techniques for creating powerful, high-energy sounds. From iconic bands like Led Zeppelin to modern rock artists, there are key elements that define the genre’s signature sound and appeal.


By mastering the use of electric guitars, drums, and passionate vocals, aspiring rock musicians can create impactful music that resonates with audiences worldwide, blending raw emotion and technical skill. With a focus on songwriting, stage presence, and musical creativity, mastering rock music is both a journey of self-expression and a connection to the rebellious, energetic spirit of the genre.


Whether learning classic rock riffs or experimenting with new sounds, mastering rock music is a dynamic process that requires dedication, passion, and a love for the music itself.

Mastering Rock Music: Unleash the Power!


Credit: www.mellostudio.com


The Origins Of Rock Music

Rock music has a rich history that spans back to the early 1950s. Understanding the origins of rock music is crucial in appreciating this influential genre.

A Brief History

Rock music emerged in the United States in the 1950s, combining elements of rhythm and blues, gospel, and country music. It quickly became popular due to its energetic sound and rebellious lyrics.

Key Musical Influences

Rock music was heavily influenced by various genres, including blues, jazz, and folk music. Artists like Chuck Berry, Elvis Presley, and Little Richard played a significant role in shaping the sound of rock music.

Rock music evolved over the decades, incorporating elements of psychedelic, punk, and alternative rock, creating a diverse and dynamic genre that continues to evolve to this day.

Mastering Rock Music: Unleash the Power!


Credit: www.abebooks.com


The Rise Of Rock Music Legends

In the 1950s, innovative artists such as Elvis Presley and Chuck Berry paved the way for rock music.

These visionaries blended elements of rhythm and blues to create a new sound that captivated listeners.

Rock music underwent a revolutionary transformation in the 1960s with bands like The Beatles and The Rolling Stones.

These bands pushed boundaries and redefined the genre, influencing generations of musicians.

The Evolution Of Rock Subgenres

The Evolution of Rock Subgenres has greatly influenced the music industry over the years. As the rock genre developed, it gave rise to various subgenres, each with its own unique style and sound. From classic rock to punk rock, and alternative rock to grunge, the evolution of rock subgenres has left a lasting impact on the contemporary music scene.

Exploring Different Styles

The rock genre has diversified into various subgenres, each exploring different styles and musical elements. From the heavy riffs of hard rock to the rebellious attitude of punk rock, and the introspective lyrics of alternative rock, each subgenre has carved its own niche in the music world. The flexibility and adaptability of rock music have allowed it to evolve and appeal to a wide range of audiences, contributing to its enduring popularity.

Impact On Contemporary Music

The impact on contemporary music from the evolution of rock subgenres cannot be overlooked. Many modern artists and bands draw inspiration from the diverse pool of rock subgenres, incorporating elements into their own music. This influence is evident in genres such as pop, indie, and even electronic music, showcasing the far-reaching impact of rock music on the broader musical landscape.

Instruments And Techniques

In the world of rock music, mastering instruments and techniques is essential for creating the powerful, high-energy sound that defines this genre. Whether it’s the mastery of the guitar, the expression and power of vocals, or the rhythmic foundation that drives the music forward, each element plays a crucial role in creating the signature sound of rock. In this section, we will explore the key instruments and techniques that contribute to mastering rock music.

Guitar Mastery

The guitar is arguably the most iconic instrument in rock music. From blistering solos to hard-hitting riffs, the guitar sets the tone and shapes the sound of rock music. To truly master the guitar, it’s important to develop a strong foundation in both technique and theory.

Here are some key techniques every aspiring rock guitarist should focus on:

  1. Bending: The ability to bend notes creates a distinctive sound and adds emotion to guitar solos.
  2. Alternate picking: This technique involves using a combination of upstrokes and downstrokes to play faster and more accurately.
  3. Power chords: Power chords are the building blocks of rock music, providing that raw and aggressive sound.
  4. Slide guitar: Using a slide allows guitarists to create unique, soulful sounds by sliding along the strings.

Mastering these techniques takes time and practice, but with dedication and perseverance, you can unlock the full potential of the guitar in rock music.

Vocal Power And Expression

While the guitar may be the face of rock music, vocals are its heart and soul. Powerful and expressive vocals can make or break a rock song, capturing the attention of the listener and conveying the emotions behind the lyrics.

Here are some essential techniques to help you enhance your vocal performance in rock music:

  • Proper breathing: Learning to control your breath is crucial for sustaining long, powerful notes and maintaining vocal stamina.
  • Vocal range exercises: Expanding your vocal range allows you to hit high notes with ease and add versatility to your performance.
  • Emotional delivery: Conveying emotions through your voice is key in rock music. Experiment with different vocal techniques such as growls, screams, and falsettos to add depth and intensity to your performance.
  • Stage presence: Engaging with your audience and projecting your energy on stage can elevate your performance and leave a lasting impression.

By honing these techniques, you can harness the power of your vocals and truly express yourself in the realm of rock music.

Rhythmic Foundations

Beyond the guitar and vocals, the rhythmic foundation is what gives rock music its driving force and groove. This foundation is built upon the interplay between drums, bass, and other accompanying instruments that provide the backbone for the music.

Here are some key aspects to consider when establishing a strong rhythmic foundation in rock music:

  1. Dynamics: Mastering dynamics is crucial for creating the ebb and flow of intensity in a rock song. Knowing when to play softly and when to unleash full power can add drama and impact to your music.
  2. Syncopation: Incorporating syncopated rhythms can create a sense of tension and excitement, adding complexity to your rhythmic patterns.
  3. Locking in with the drummer: The bass and drums form a tight rhythmic bond in rock music. Working together to create a solid groove is essential for driving the music forward.
  4. Creating catchy hooks: Crafting memorable and catchy basslines or guitar riffs can instantly hook the listener and make your music stand out.

By understanding and mastering the rhythmic foundations of rock music, you can ensure that every beat and every note contributes to the infectious energy that rock music is known for.


The Art Of Performance

Mastering rock music goes beyond having the right instruments and knowing how to play them. It involves the skill of delivering a captivating performance that leaves the audience spellbound. The art of performance encompasses various elements, such as stage presence and connecting with the audience. In this section, we will explore these aspects in detail and provide valuable insights on mastering the art of performance in rock music.

Stage Presence

When it comes to rock music, stage presence is a vital component that can elevate a performance from good to extraordinary. It involves the ability to engage the audience visually and energetically while delivering a transcendent musical experience.

  • Rock musicians should not only focus on their technical skills but also on their physical presence on stage.
  • Maintaining a confident and charismatic demeanor helps establish a connection with the audience.
  • The way musicians move on stage, their gestures, and facial expressions can amplify the emotional impact of their music.

Creating an unforgettable stage presence requires practice and a deep understanding of your music and persona. By honing your physicality and building confidence, you can leave a lasting impression on your audience.

Connecting With The Audience

Rock music is all about connecting with the audience at a deeper level, forging a bond that transcends the boundaries of the stage. The ability to establish this connection can transform an ordinary performance into a memorable experience for both the musicians and the listeners.

  • Engage the audience by maintaining eye contact and acknowledging their presence throughout the show.
  • Interact with the audience, whether through banter, storytelling, or involving them in the performance.
  • Understand the emotional state of the audience and adapt your performance accordingly, delivering the energy and message they crave.

Remember, connecting with the audience is a reciprocal relationship. As a musician, you must be receptive to their vibes and respond accordingly, creating a unique and intimate musical experience that resonates with everyone present.

Mastering Rock Music: Unleash the Power!


Credit: www.walmart.com


Frequently Asked Questions Of Mastering Rock Music


What Are The Origin And Influences Of Rock Music?


Rock music originated in the United States in the mid-1950s, blending elements of various music genres such as blues, country, and rhythm and blues. Influenced by artists like Chuck Berry and Elvis Presley, rock music brought a rebellious spirit and electrifying energy to the music scene.


How Has Rock Music Evolved Over The Years?


Rock music has evolved through various subgenres like classic rock, punk rock, grunge, and alternative rock. It has embraced new sounds and styles while staying true to its rebellious roots. From iconic bands like The Beatles to contemporary artists like Foo Fighters, the evolution of rock music continues to shape the music landscape.


What Impact Has Rock Music Had On Popular Culture?


Rock music has had a profound impact on popular culture, influencing fashion, art, and even political movements. It provided a voice for the youth, promoting individualism and challenging societal norms. From Woodstock to Live Aid, rock music events have brought people together, uniting them through the power of music.


How Does Rock Music Inspire Creativity And Self-expression?


Rock music encourages creativity and self-expression through its raw emotion, powerful lyrics, and energetic instrumentation. It empowers individuals to express their feelings, ideas, and identity. Whether it’s picking up a guitar or writing heartfelt lyrics, rock music allows people to channel their inner creativity and connect with others who resonate with the music.


Conclusion


In the world of rock music, mastering the craft is crucial for success. From understanding the roots to embracing modern techniques, the journey is never-ending. By honing your skills and staying true to the core principles, you can carve a path that leaves a lasting impact on both the genre and your audience.


Keep rocking on!

Categories
Archive

Vocal Recording : Unlock Your Voice’s Potential

For vocal recording, use a high-quality microphone in a soundproof environment to capture clean sound. Proper recording techniques are essential for achieving professional-sounding vocal tracks.


In the world of music production, capturing high-quality vocals through recording is a crucial step in creating a top-notch final product. Whether you are a beginner or a seasoned professional, understanding the fundamentals of vocal recording is key to producing polished and impactful tracks.


By using the right equipment, setting up a suitable recording environment, and implementing effective recording techniques, you can elevate the quality of your vocal recordings significantly. This guide will explore the essential aspects of vocal recording to help you improve your recording skills and create exceptional vocal tracks.


Unleashing Your Vocal Potential

Vocal recording is a powerful tool for capturing the raw emotion and energy of a performance. Whether you’re a seasoned pro or just starting out, understanding how to unleash your vocal potential can take your recordings to the next level.

Finding Your Unique Voice

Your voice is like a fingerprint—unique and special. Embrace your quirks and imperfections, for they make you stand out. Experiment with different styles and techniques to discover what suits you best. Don’t be afraid to showcase your personality through your vocals. Authenticity is key to finding your unique voice.

Overcoming Vocal Challenges

Every singer faces challenges. Stay patient and practice regularly to overcome vocal hurdles. Proper breathing techniques and vocal warm-ups are essential to prevent strain. Seek guidance from vocal coaches to improve your skills. Consistency is key in conquering vocal challenges.

Vocal Recording  : Unlock Your Voice's Potential


Credit: blog.bemelodic.com


Preparing For A Vocal Recording

Preparing for a Vocal Recording is crucial to ensure a successful session and optimal performance.

Vocal Warm-up And Exercises

  • Utilize vocal warm-up exercises to properly prepare your voice.
  • Practice breathing techniques and scales to improve vocal range.
  • Engage in lip trills and tongue twisters to enhance diction.

Optimizing Your Recording Environment

  • Choose a quiet space with minimal background noise for recording.
  • Control room acoustics by using soundproofing materials.
  • Ensure proper microphone placement to capture clear vocals.


Technical Aspects Of Vocal Recording

When it comes to vocal recording, understanding the technical aspects is crucial for achieving high-quality results. From choosing the right microphone to utilizing vocal effects and processing, there are various technical considerations that can impact the overall sound of the recording.

Microphones And Their Characteristics

Microphones play a pivotal role in capturing the nuances of a vocal performance. There are different types of microphones, each with its own characteristics that cater to specific recording needs.

  • Condenser microphones: Known for their sensitivity and wide frequency response, condenser microphones are ideal for capturing detailed vocal performances with clarity.
  • Dynamic microphones: These microphones are more rugged and versatile, making them suitable for recording powerful or aggressive vocal styles.
  • Ribbon microphones: Renowned for their warm and natural sound, ribbon microphones are excellent for capturing vintage or softer vocal tones.

Understanding Vocal Effects And Processing

Applying effects and processing to vocal recordings can greatly enhance the overall sound and emotional impact. From subtle compression to creative modulation, understanding the various techniques is essential for achieving a polished vocal mix.

  1. Compression: Helps in controlling the dynamic range and ensuring a consistent vocal performance throughout the recording.
  2. Equalization: Allows for shaping the tonal balance of the vocals, emphasizing certain frequencies, and removing unwanted resonances.
  3. Reverb and Delay: Adds depth and spatial effects, contributing to the sense of ambiance and creating a more immersive vocal sound.

The Art Of Expressive Vocal Performance

When it comes to vocal recording, it’s not just about hitting the right notes and having a good technique. The true magic lies in the ability to convey emotions through your voice, making the listener feel every word. This is what we call the art of expressive vocal performance.

Embracing Emotion In Your Recording

Emotions are the heart and soul of any vocal performance. Whether you’re recording a powerful ballad or a catchy pop song, it’s important to embrace the emotions behind the lyrics. By tapping into your own experiences and connecting with the message of the song, you can deliver a truly authentic performance.

Here are a few tips to help you embrace emotion in your vocal recording:

  • Connect with the lyrics: Take the time to analyze the lyrics and understand the story they tell. Identify the key emotions the song is trying to convey. This will help you deliver a performance that is true to the song’s message.
  • Visualize: Close your eyes and try to visualize the scene or situation described in the song. Imagine yourself experiencing the emotions described and let them flow through your voice.
  • Experiment with vocal techniques: Try out different techniques to enhance the emotional impact of your performance. Play with dynamics, phrasing, and vocal nuances to emphasize certain moments and create a captivating vocal delivery.

Techniques For Engaging Vocal Delivery

Engaging the listener goes beyond just singing the right notes. It requires a combination of techniques that draw them in and hold their attention throughout the recording. Here are a few techniques to help you achieve an engaging vocal delivery:

  1. Use dynamics: Varying the volume of your voice can add depth and nuance to your performance. Experiment with soft whispers and powerful belting to create contrast and keep the listener engaged.
  2. Pay attention to timing: The timing of your delivery can have a significant impact on the listener’s experience. Practice rhythmic precision and ensure your vocal delivery aligns seamlessly with the accompanying instrumentation.
  3. Express through phrasing: The way you phrase your lyrics can add emotional depth to your performance. Experiment with pauses, breath control, and subtle vocal embellishments to bring out the intended emotional nuances of the song.
  4. Stay connected: Maintain a strong connection with the audience by keeping eye contact with the microphone or envisioning a specific listener in your mind. This will help you deliver a more compelling and engaging vocal performance.

Post-recording Vocal Care


After vocal recording, it’s crucial to practice post-recording vocal care. Rest your voice, stay hydrated, and avoid straining your vocal cords. This will ensure the longevity and quality of your vocals for future recordings.

Vocal Recovery

After recording a vocal track, it’s important to prioritize vocal recovery to ensure the longevity and health of your voice. Here are a few key steps to incorporate into your post-recording vocal care routine:

  1. Hydrate: Drink plenty of water, as moisture is key to maintaining vocal health.
  2. Rest: Allow your voice to rest after an intense recording session, just as you would rest your body after exercise.
  3. Soothe: Use throat lozenges or warm tea with honey to soothe any irritation or strain that may have occurred during recording.
  4. Gargle: Gargling with warm saltwater can help reduce inflammation and clear any mucus or phlegm from your vocal cords.

Vocal Maintenance

For ongoing care, consider incorporating these vocal maintenance practices into your routine:

  • Warm-ups and Cool-downs: Just like athletes, singers should warm up their vocal cords before singing and cool them down afterward to prevent injury.
  • Proper Technique: Focus on using correct vocal techniques, such as proper breathing and posture, to minimize strain on your voice.
  • Vocal Exercises: Regularly practice vocal exercises to strengthen your voice and expand your range.
  • Healthy Lifestyle: Maintain a healthy lifestyle by eating a balanced diet, getting regular exercise, and avoiding excessive alcohol and tobacco.
  • Avoid Overuse: Be mindful of excessive talking or singing, especially in noisy environments, as this can strain your voice.

Reflecting On Your Recorded Performance

After recording your vocals, take a moment to reflect on your performance and make note of areas for improvement:

  • Listen Objectively: Set aside personal biases and listen to your recorded tracks objectively, taking note of any weak areas or areas where you excelled.
  • Evaluate Dynamics: Assess your performance in terms of dynamics, paying attention to volume, intensity, and emotional expression.
  • Seek Feedback: If available, share your recorded tracks with trusted individuals who can offer constructive criticism and feedback.
  • Set Goals: Based on your evaluation, set goals for future recordings to continue improving and growing as a vocalist.
Vocal Recording  : Unlock Your Voice's Potential


Credit: crescendovoice.com


Vocal Recording  : Unlock Your Voice's Potential


Credit: rhetoriclab.com


Frequently Asked Questions For Vocal Recording


What Is Vocal Recording?


Vocal recording is the process of capturing a singer’s voice and turning it into a digital audio file. It involves using microphones, audio interfaces, and recording software to ensure high-quality sound reproduction.


How Do I Prepare For A Vocal Recording Session?


To prepare for a vocal recording session, warm up your voice by doing vocal exercises and staying hydrated. Choose the right song, practice it well, and make sure you’re well-rested on the day of the session. Additionally, communicate with your engineer to ensure they understand your artistic vision.


What Equipment Do I Need For Vocal Recording?


For vocal recording, you’ll need a good quality microphone, headphones, a pop filter, and an audio interface. Depending on your budget and requirements, you may also invest in a microphone stand, shock mount, and studio monitors.


How Can I Improve My Vocal Recording Quality?


To improve vocal recording quality, choose a room with good acoustics, minimal background noise, and proper soundproofing. Use a high-quality microphone and plugin an audio interface for better control over the sound. Experiment with microphone placement, and consider using vocal techniques to enhance your performance.


Conclusion


In the end, vocal recording requires practice, patience, and the right equipment. By applying the tips outlined in this blog post, you can improve the quality of your vocal recordings and create professional-sounding audio. Remember to take care of your voice and experiment with different techniques to find what works best for you.


Keep recording!