Categories
Archive

Stem Mastering Techniques : Boost Your Tracks with Proven Methods

Stem mastering involves processing groups of tracks before the final mixdown, enhancing clarity and cohesiveness in songs. By focusing on individual elements, stem mastering can achieve a more polished sound.


Many audio engineers use stem mastering to address specific aspects of a mix, such as improving dynamics, frequency balance, and stereo width. By examining and adjusting stems separately, engineers can fine-tune the overall sound of a track with greater precision.


Utilizing specialized tools and techniques, stem mastering can result in a more professional and cohesive final mix, making it a valuable step in the audio production process.


What Is Stem Mastering

Stem mastering is a specialized audio production technique used to enhance the quality and dynamics of a final mix. In stem mastering, individual groups of audio tracks, known as stems, are processed separately before being masterfully combined to create a polished and cohesive sound.

Benefits Of Stem Mastering

Stem mastering offers enhanced control over different elements of the mix, resulting in a more precise and customizable mastering process. It allows for targeted adjustments to specific sections of the audio, leading to a more polished and professional final product.

Difference Between Stem Mastering And Stereo Mastering

In stem mastering, individual audio groups are processed independently, whereas stereo mastering involves working with a single stereo mix. This distinction enables stem mastering to provide greater flexibility in shaping the final sound, offering a higher level of detail and clarity compared to stereo mastering.


Credit: www.mdpi.com


Setting Up For Stem Mastering

When preparing individual stems for stem mastering, focus on organizing each element meticulously.

  • Ensure clean cuts at the beginning and end of each stem.
  • Label stems clearly for easy identification and manipulation.
  • Trim silence and excess noise to maintain a clear audio signal.

Quality stem files lay the foundation for successful stem mastering.

  1. High-resolution files preserve audio integrity during processing.
  2. Properly exported stems retain dynamics and clarity.
  3. Organized stems facilitate efficient workflow and better results.
https://www.youtube.com/watch?v=MY6yxLlCy08


Key Stem Mastering Techniques

Stem mastering involves the processing and balancing of individual groups of instruments or sounds, known as stems, before they are combined into a final mix. This approach allows for more precise control over the various elements of a track, resulting in a cleaner and more professional sound. In this section, we will explore the key stem mastering techniques that can significantly impact the overall quality and clarity of your music.

Balancing Levels And Frequencies

Adjusting the volume levels of each stem is crucial for achieving a well-balanced mix. By carefully adjusting the levels of the individual stems, you can prevent any particular element from overpowering the rest of the mix, ensuring that every instrument or sound has its place in the sonic landscape.

Identifying and addressing frequency conflicts among stems is vital to create a cohesive and harmonious mix. By using equalization (EQ) to adjust the frequencies of each stem, you can carve out space for different elements, reducing muddiness and enhancing clarity.

Applying Compression And Eq To Stems

By applying compression to individual stems, you can control the dynamic range and ensure a more consistent level of each element. This helps to maintain a cohesive and balanced sound throughout the entire track.

Using EQ on individual stems allows you to shape the tonal balance and character of each instrument or sound, making them fit together seamlessly within the context of the mix. By pinpointing and addressing problematic frequencies, you can enhance the overall clarity and fidelity of the music.


Credit: www.simplilearn.com


Advanced Stem Mastering Approaches

Here is an introduction to the advanced stem mastering approaches, focusing on two essential techniques: utilizing parallel processing and adding harmonic excitement with saturation.

Utilizing Parallel Processing

Parallel processing is a powerful technique used in stem mastering to enhance the dynamics, width, and overall impact of a mix. It involves splitting the stems into different processing chains, each with its unique set of plugins and settings. By doing so, you can apply specific processing tools to each stem independently, resulting in a more controlled and polished final mix.

Parallel processing enables you to experiment with various effects, such as compression, EQ, and reverb, ensuring each stem is handled with precision and tailored to its specific needs. It helps to bring out the best in individual elements of the mix, while also preserving the overall coherence and balance. By implementing parallel processing techniques, you can achieve a highly refined and professional sound.

Adding Harmonic Excitement With Saturation

Saturation is a key element in stem mastering that adds warmth, depth, and character to the mix. This technique involves introducing controlled amounts of harmonic distortion to the stems, mimicking the pleasant overtones and saturation of analog equipment. By doing so, you can enhance the perceived loudness and energy of the track without sacrificing its clarity and dynamics.

Through the use of saturation plugins, you can selectively add harmonic excitement to specific stems, such as drums, vocals, or guitars, adding color and richness to their sound. The result is a mix that is more vibrant, lively, and captivating to the listener’s ear.

It’s important to note that a delicate balance is required when applying saturation in stem mastering. Too much saturation can lead to an overly distorted and muddy mix, while too little may not produce the desired impact. By experimenting with different saturation plugins and settings, you can find the perfect balance that elevates your mix to the next level.

By utilizing parallel processing and adding harmonic excitement with saturation, you can take your stem mastering to new heights. These advanced techniques provide the tools and flexibility needed to sculpt your mix with precision, ensuring every element shines and captures the listener’s attention. Incorporate these approaches into your mastering workflow and witness the transformation they bring to your music.

Tips For Successful Stem Mastering


Mastering techniques for stems is vital for achieving balanced, professional sound. Use software tools to ensure consistency and clarity across all stems, apply compression carefully, EQ for depth and punch, and leverage bus processing to enhance cohesion. Paying attention to these details can make your stem mastering more successful.

When it comes to stem mastering, following a few key tips can help you achieve the best results. Here are two important aspects to consider:

Maintaining Headroom And Dynamic Range

One crucial factor in stem mastering is maintaining headroom and dynamic range. Headroom refers to the space between the loudest peak of your audio and 0 dBFS (decibels relative to full scale). This allows the audio to breathe and prevents any distortion or clipping.

Similarly, dynamic range is the difference between the quietest and loudest parts of your audio. Preserving dynamic range ensures that the elements within your music can be heard clearly and retain their impact. Here are a few tips to achieve this:

  1. Firstly, ensure that no individual stem is too close to 0 dBFS. Leave ample headroom to avoid any potential issues during the mixing and mastering process. Typically, keeping the peaks below -3 dBFS is recommended.
  2. Balance the levels of your stems to create a cohesive mix. Adjust the volume of each stem so that they all have similar perceived loudness.
  3. Use compression and limiting techniques carefully to control the dynamics of each individual stem. Applying compression can help to even out the levels and create a more polished sound.
  4. Avoid excessive equalization (EQ) adjustments on individual stems. Instead, focus on EQing the mix as a whole to enhance the overall tonal balance without compromising the individual stems.

Keeping The Focus On Musical Elements

While mastering stems, it’s essential to keep the focus on the musical elements of the track. This involves enhancing the impact, clarity, and overall feel of the music. Here are a few tips to achieve this:

  • Begin by listening critically to the mix and identifying the strengths and weaknesses of each stem.
  • Use precise EQ adjustments to highlight the important elements of each stem. This can help to bring out the desired tonal characteristics and improve clarity.
  • Consider using stereo imaging techniques to widen the stereo field and create a sense of space for each stem.
  • Apply creative effects, such as reverb or delay, to add depth and dimension to individual stems while maintaining their musical integrity.
  • Regularly reference the master mix while working on the stems to ensure that the overall musical balance is maintained.


Credit: www.linkedin.com


Frequently Asked Questions On Stem Mastering Techniques


Is Stem Mastering Better?


Yes, stem mastering can provide more control and customization options over individual elements in the mix.


How Do You Bounce Stems For Mastering?


To bounce stems for mastering, solo each track, set levels, add effects, export individually, and assemble in a new project.


What Are The Basic Mastering Techniques?


Basic mastering techniques include equalization, compression, stereo enhancement, and limiting. These techniques are used to balance the frequencies, control dynamics, widen the stereo image, and maximize the volume of a track. By applying these techniques, a mastering engineer can make a mix sound polished and professional.


What Is The Difference Between Stereo And Stem Mastering?


Stereo mastering involves processing the final mixdown of a song or audio track, focusing on overall tonal balance and volume. Stem mastering goes a step further, by separating the mix into individual groups of instruments or elements, allowing for more precise control over the final sound.


Conclusion


In mastering a stem track, an essential part of the mixing process, the right techniques can make all the difference. With the right tools and approaches, you can achieve a professional sound that sets your music apart. Keep experimenting with different methods to find the best fit for the unique characteristics of each track.


Categories
Archive

Vocal Recording Techniques: Master the Art of Captivating Vocals

For vocal recording, use a quality microphone in a soundproof room to capture clear and crisp vocals. Implementing proper microphone placement and experimenting with distance and angle can enhance the recording quality.


Understanding the characteristics of different microphones and learning how to control mic sensitivity are crucial for achieving the desired vocal sound. When it comes to vocal recording techniques, it’s essential to pay attention to microphone choice and placement. By using the right equipment and optimizing recording settings, you can capture high-quality vocals that stand out in your music production.


Whether you’re recording vocals for a song, podcast, or voice-over, implementing these techniques will help you achieve professional results. We’ll explore various vocal recording techniques and offer tips to improve your recording process.

Vocal Recording Techniques: Master the Art of Captivating Vocals


Credit: www.practical-music-production.com


Choosing The Right Microphone


Choosing the right microphone for vocal recording techniques is crucial to capturing clear and professional-quality vocals. Consider the specific characteristics of your voice, the intended use of the recordings, and the environment in which you’ll be recording. Whether you opt for a dynamic or condenser microphone, selecting the right one can make a significant difference in the final sound.

Condenser Vs. Dynamic

Choosing the right microphone for vocal recording can greatly impact the quality of your sound.

When deciding between condenser and dynamic microphones:
– Condenser microphones are sensitive and capture more detail.
– Dynamic microphones are rugged and handle high sound pressure levels better.

Consider the following factors when selecting a microphone:
– Vocal characteristics and tonal quality.
– Recording environment and sound isolation.
– Budget and intended use of the microphone.

Considerations For Different Vocal Tones

Each microphone type is suited for different vocal tones:
– Condenser microphones excel with airy and detailed vocals.
– Dynamic microphones are ideal for powerful and loud vocals.

Experiment with both microphone types to find the one that best suits your vocal style and recording needs.

Setting Up The Recording Space


Achieving optimal vocal recording involves setting up a suitable space. Ensure a quiet environment, control sound reflections, and use acoustic treatment for better quality recordings. Position the microphone correctly to capture clear vocals without unwanted background noise.

Setting Up the Recording Space

Optimizing Room Acoustics

Optimizing room acoustics plays a crucial role in creating high-quality vocal recordings.

Strategically position acoustic panels to absorb excess sound reflections within the room.

Consider utilizing bass traps in corners to minimize low-frequency build-up, improving overall sound clarity.

Use Of Soundproofing Materials

Choose soundproofing materials like acoustic foam, bass traps, and sound barriers to reduce unwanted noise interference.

  • Acoustic foam panels on walls can absorb mid to high frequencies.
  • Bass traps in corners address low-frequency issues effectively.
  • Sound barriers such as thick curtains or blankets help isolate sound.

Mic Placement And Technique

When it comes to achieving professional-grade vocal recordings, mic placement and technique play a pivotal role. The way a microphone is positioned and utilized can significantly impact the quality and clarity of the recorded vocals. Understanding the nuances of mic placement and technique is essential for capturing the best sound possible.

Distance And Angle

Distance and angle are crucial aspects of mic placement for vocal recording. The distance between the microphone and the vocalist affects the proximity effect, which can impact the bass response of the recording. Generally, a distance of around 6-8 inches from the mouth is ideal for most vocal recordings.

Pop Filters And Shock Mounts

Using pop filters is essential for minimizing plosives and sibilance in vocal recordings. Placing a pop filter a few inches from the microphone helps in reducing unwanted bursts of air that can cause distortion. Additionally, investing in a shock mount can mitigate vibrations and handling noise, resulting in cleaner and smoother vocal recordings.

Vocal Recording Techniques: Master the Art of Captivating Vocals


Credit: blog.native-instruments.com


Preamp And Eq Settings

One of the key factors in achieving a professional-sounding vocal recording is getting the right preamp and EQ settings. These settings can make a significant difference in the overall sound quality and clarity of your vocal recordings. In this section, we will explore the essential techniques for optimizing input levels and using EQ to enhance vocal clarity.

Optimizing Input Levels

Setting the optimal input level is crucial to capturing the full dynamics of a vocal performance without introducing any unwanted distortion or noise. To achieve this, follow these steps:

  1. Start by setting the preamp gain at a moderate level.
  2. Have the vocalist perform a few test phrases and monitor the input levels on your recording software.
  3. Ensure that the loudest parts of the performance reach close to 0dB without any clipping.
  4. If the signal is too weak, gradually increase the preamp gain until the desired level is reached.

Remember, it is better to have a slightly lower input level and bring up the volume during the mixing process than to have it too hot and risk distortion in the recording.

Using Eq To Enhance Vocal Clarity

EQ is a powerful tool that can help bring out the best in a vocal recording and make it stand out in a mix. Here are some tips for using EQ to enhance vocal clarity:

  • Start by using a high-pass filter to remove any unwanted low-frequency rumble or noise.
  • Identify the frequency range where the vocals sound the most prominent and apply a gentle boost in that area to bring out the desired character.
  • Use a narrow-band EQ to cut any frequencies that may be causing muddiness or harshness.
  • Consider using a de-esser to tame sibilance and control excessive “s” and “sh” sounds.
  • Always remember to make subtle adjustments and listen carefully to how each change affects the overall sound.

By using EQ effectively, you can ensure that the vocals sit well in the mix and have the clarity and presence they need to shine.

https://www.youtube.com/watch?v=h4T4VJOZHSA


Recording And Editing Tips

When it comes to vocal recording, getting the right sound can make or break your project. Here are some handy tips to help you achieve a professional vocal recording and successfully edit your tracks for the best results.

Managing Breath Sounds

Breath sounds are an inevitable part of vocal recordings, but they can distract from the overall performance if not managed properly. Here are some techniques to minimize breath sounds:

  • Position the microphone appropriately:

To reduce breath sounds, position the microphone slightly above or below the singer’s mouth rather than directly in front of it. This helps to capture the vocals while minimizing the intensity of breath sounds.

  • Use a pop filter:

A pop filter helps to reduce plosive sounds caused by puffs of air hitting the microphone. It acts as a shield between the singer and the microphone, effectively minimizing unwanted breath noises.

  • Adjust the singer’s technique:

Encourage the singer to take quieter breaths to reduce the intensity of breath sounds. Additionally, ask them to turn their head slightly away from the microphone when taking deep breaths.

Dealing With Vocal Fatigue

Vocal fatigue can affect the quality and consistency of vocal recordings, especially during long recording sessions. To prevent and manage vocal fatigue, consider the following:

  • Warm up the voice:

Before starting a recording session, warm up the voice with simple vocal exercises. This helps to relax the vocal cords and prevents strain during extended periods of singing or speaking.

  • Take regular breaks:

Allow the singer to rest their voice and take short breaks between recording takes. This gives the vocal cords an opportunity to recover and prevents overexertion.

  • Maintain proper hydration:

Ensure that the singer stays hydrated by drinking enough water. Hydration is crucial for maintaining vocal health and preventing dryness or strain.

  • Avoid excessive processing:

During the editing process, be cautious not to over-process the vocals. Excessive pitch correction or heavy effects can further strain the voice and compromise the natural sound.


Credit: www.amazon.com


Frequently Asked Questions For Vocal Recording Techniques


What Methods Are Used To Record Vocals?


Vocals are recorded using microphones to capture the singer’s voice. Pop filters help reduce plosive sounds. A vocal booth can minimize background noise. Compression and EQ are used for audio enhancement. Multiple takes are recorded for best performance.


How Do You Record Vocals Properly?


To record vocals properly, choose a quiet space, use a quality microphone, set the right input level, reduce background noise, and use pop filters. Practice good microphone technique and use headphones to monitor the recording for best results.


What Is The Best Pattern For Recording Vocals?


The best pattern for recording vocals depends on the desired sound. However, a popular choice is the cardioid pattern, which focuses on capturing sound from the front while minimizing background noise. Experimenting with different patterns can help achieve the desired effect.


How Do You Record Your Voice Perfectly?


To record your voice perfectly, follow these steps: 1. Choose a quiet environment with minimal background noise. 2. Use a high-quality microphone that suits your needs. 3. Adjust the microphone distance to optimize voice clarity. 4. Conduct a sound test to adjust audio levels and remove distortions.


5. Speak clearly and confidently to ensure a smooth recording.


Conclusion


To sum up, mastering vocal recording techniques takes dedication and practice. By employing the right equipment, creating the optimal recording environment, and honing your vocal performance, you can achieve professional-sounding results. Remember to experiment, have patience, and always strive for improvement.


With these tips, you can take your vocal recordings to the next level and make an impact in the music industry.

Categories
Archive

3 Techniques Music Transitions : Master Your Melodic Shifts

Three techniques for music transitions are fade-outs, crossfades, and stingers. These methods smoothly shift between tracks, creating a seamless listening experience for the audience.


Transition techniques play a crucial role in maintaining the flow of a music playlist, enhancing the overall listening experience. Each method offers its unique way of blending tracks, catering to different musical styles and preferences. Understanding and utilizing these techniques effectively can elevate the quality of music production, captivating listeners and keeping them engaged throughout the playlist.


By incorporating these transition techniques skillfully, music creators can craft cohesive and immersive listening experiences that resonate with their audience.


Exploring Different Transition Techniques


Elevate your music with these three dynamic techniques to create seamless transitions. Learn how to master crossfading, EQ blending, and filter sweeps to bring your tracks to life and keep your audience engaged throughout your performance. Embrace the art of fluid transitions and take your music to the next level.

In the realm of music, transitions play a pivotal role in maintaining the flow and coherence of a composition. Here, we delve into three distinct techniques – Utilizing Suspense and Tension, Creating Seamless Modulations, and Incorporating Innovative Rhythmic Transitions.

Utilizing Suspense And Tension

Utilizing suspense and tension engages the listener by creating anticipation and excitement.

Creating Seamless Modulations

Seamless modulations smoothly transition from one key or tonal center to another.

Incorporating Innovative Rhythmic Transitions

Innovative rhythmic transitions add flair and dynamism to a piece, keeping the audience captivated.


Credit: www.musicforyoungviolinists.com


Harnessing Emotional Impact

Music transitions play a crucial role in guiding the emotional journey of a listener. By mastering three key techniques, namely harmony changes, dynamics, and structure, musicians can evoke deep emotional responses in their audience.

Eliciting Emotions Through Harmony Changes

  • Harmony shifts can create a sense of tension and release, intensifying emotional impact.
  • Major to minor transitions evoke feelings of sadness or melancholy, while minor to major shifts bring hope and upliftment.

Utilizing Dynamics For Emotional Transitions

  1. Varying dynamics from soft to loud or vice versa can evoke a range of emotions, from calmness to intensity.
  2. Gradual build-ups in volume or tempo can create anticipation and excitement in the listener.

By skillfully combining these techniques, musicians can take their audience on a powerful emotional journey, making their music more impactful and memorable.

Maximizing Transition Effectiveness

In order to maximize the effectiveness of music transitions, it’s crucial to employ various techniques that seamlessly blend different sections of a composition. By understanding instrumentation variations and applying layering and textural progressions, musicians can create smooth transitions that captivate their audience.

Understanding Instrumentation Variations

Instrumentation variations play a key role in transitioning between different parts of a song. By altering the arrangement and combination of instruments, musicians can create a dynamic shift that keeps the listener engaged. For example, swapping a lead guitar for a piano melody can introduce a new sonic dimension, leading to a striking transition.

Applying Layering And Textural Progressions

Adding depth and complexity to the music through layering and textural progressions is a highly effective technique for enhancing transitions. By gradually introducing new layers of sound or evolving textural elements, musicians can guide the listener from one section to the next with a sense of anticipation and excitement.

Implementing Dynamic Tempo Changes

Dynamic tempo changes are a powerful tool for creating impactful transitions within a piece of music. By subtly altering the tempo as one section flows into the next, musicians can build tension and create a dramatic effect that heightens the emotional impact of the transition.


Credit: en.wikipedia.org


Mastering The Art Of Timing

Timing is the key to creating seamless music transitions. Whether you are a DJ or a music producer, understanding how to manipulate timing can take your transitions to the next level. In this article, we will explore three powerful techniques that will help you master the art of timing in music transitions.


Utilizing Syncopation For Smooth Transitions

Syncopation is a rhythmic technique that involves emphasizing the weak beats instead of the strong ones. By using syncopation in your music transitions, you can create a sense of anticipation and build tension, making the transition smooth and engaging.

To utilize syncopation effectively, consider the following:

  1. Identify the downbeat of the incoming track.
  2. Introduce syncopated elements, such as off-beat percussion or melodic accents, a few bars before the transition.
  3. Gradually increase the intensity of the syncopated elements to create a seamless flow from one track to another.

Leveraging Silence And Pauses

Silence can be a powerful tool in creating impactful music transitions. By strategically incorporating pauses and silence, you can create a sense of contrast and anticipation that captivates the listener.

Here are a few ways to leverage silence and pauses:

  • Experiment with abrupt pauses before a transition to create a moment of suspense.
  • Gradually decrease the volume or filter out the sound to introduce a moment of silence, giving the listener a breather before the next track.
  • Use brief moments of silence to highlight specific elements, such as vocals or instrumentation, before transitioning into a new section.
  • Combine silence with a sudden drop or fade out to create a dramatic effect.

Refining Your Artistic Expression


Enhancing your artistic expression through music transitions involves mastering three key techniques: smooth fades, rhythmic crossfades, and creative effects placement. By seamlessly blending tracks, alternating rhythms, and experimenting with effects, you can elevate your music production to new heights.

Experimenting With Unconventional Sound Shifts

Refining your artistic expression involves exploring new boundaries and pushing the limits of your music. One way to achieve this is by experimenting with unconventional sound shifts. Breaking away from the conventional transitions can add excitement, surprise, and innovation to your music. Here are a few techniques to get you started:

  1. Reverse Transitions: Take your audience on a sonic journey by reversing the sound progressions. This technique not only adds an unexpected element but also creates a sense of intrigue. Experiment with reversing individual notes, chords, or even entire sections of your composition. Be bold, and let your creativity flow.
  2. Sampling: Incorporating samples from various sources can revolutionize your transitions. Whether it’s snippets of dialogue, nature sounds, or even everyday noises, sampling adds a unique dimension to your music. Experiment with different samples, manipulate them, and layer them with your original compositions to create seamless and distinctive transitions.
  3. Electronic Manipulation: In the digital age, technology enables us to transform and manipulate sound in extraordinary ways. Utilize electronic effects to morph sounds, warp frequencies, and introduce unexpected distortions. These manipulations can create smooth, surreal transitions that transport listeners to another sonic realm.

The Importance Of Context In Melodic Shifts

While experimenting with transitions is crucial for artistic expression, it’s essential to consider the context of melodic shifts. Each transition should serve a purpose and contribute to the overall narrative of your composition. Here are a few guidelines to keep in mind:

  • Evoke Emotion: The melodic shifts need to resonate with the intended emotional journey of your music. Align the transitions with the mood you want to convey, utilizing shifts in key, tempo, or tonality to evoke specific emotions.
  • Enhance Contrast: Use melodic shifts to create contrast and highlight different sections of your composition. Contrast can generate tension, energy, and a sense of progression, captivating your listeners and keeping them engaged throughout the journey.
  • Seamless Flow: While experimenting with unconventional sound shifts, it’s important to maintain a seamless flow in your composition. The transitions should feel natural and organic, allowing the music to progress effortlessly without jarring the listener’s experience.


Credit: doublebasshq.com


Frequently Asked Questions On 3 Techniques Music Transitions


How To Do Transitions In Music?


To do transitions in music, use techniques like fades, crossfades, and musical bridges for smooth changes between sections.


What Is Transition In Musical Terms?


In musical terms, a transition is a passage between sections, connecting them with smooth flow and continuity. It helps to shift the mood or key and prepares the listener for what comes next. Transitions are essential for creating a cohesive and engaging musical experience.


What Is The Transition Music Called?


The transition music used is typically called a transition track or transition sound. It helps to smoothly connect different sections of a video or audio presentation. These tracks are often instrumental and designed to create a seamless flow between scenes or segments.


What Are Transition Effects In Music Production?


Transition effects in music production are techniques used to smoothly connect different parts of a song. They help create seamless transitions between sections, such as from verse to chorus or from one instrument to another, enhancing the overall flow and cohesion of the music.


Conclusion


Mastering music transitions is essential for a seamless and impactful listening experience. By incorporating rhythmic variation, using tension and release techniques, and crafting tailored sound effects, you can elevate your music to the next level. These techniques not only add excitement and cohesiveness to your compositions but also enhance the emotional journey for the listeners.


Embrace these approaches to captivate your audience and keep them engaged throughout your musical journey.


Categories
Archive

Panning Instruments Vocals: Unleash the Ultimate Sonic Impact!

To pan instruments and vocals, adjust their placement in the stereo field for a balanced mix. This technique enhances the overall sound and creates dimension.


When mixing a song, careful consideration should be given to the panning of instruments and vocals. By strategically placing each element in the stereo field, you can achieve a well-rounded and dynamic mix. Panning allows for greater separation between different sounds, making each individual track more distinct.


Additionally, panning can create a sense of movement within the mix, leading to a more engaging listening experience for the audience. With the proper use of panning techniques, you can enhance the clarity and impact of your music production.


Credit: www.facebook.com


The Art Of Panning

Creating Spatial Depth

By strategically placing instruments and vocals left or right in the stereo field,

you can achieve a sense of spatial depth in your mix.

Balancing Sound Distribution

Ensure each element is balanced and complements each other.

Avoid cluttering one side heavily for a well-rounded sound.

Strategies For Panning Vocals


To create a dynamic vocal mix, consider panning vocals to enhance the depth and space in your music. Experiment with placing different vocal tracks at varying positions within the stereo field to add dimension and interest to your production. By strategically panning vocals, you can achieve a balanced and immersive sound that captivates listeners.

Center-channel Focus

When panning vocals, keep the lead vocal primarily in the center channel for clarity and focus.

Using Stereo Imaging Techniques

Experiment with stereo imaging to create a sense of space without losing the vocal’s presence.

https://www.youtube.com/watch?v=8HQ37kMbZBM


Panning Instruments For Sonic Impact

Enhancing Instrument Separation

Instrument panning is a powerful tool in the hands of a mix engineer when it comes to creating a sense of space and depth in a mix. By panning instruments across the stereo field, you can separate them, preventing them from clashing with each other and creating a cluttered sonic landscape. When each instrument has its own place in the stereo field, it can be heard distinctly, enhancing instrument separation and clarity.

Adding Width And Fullness

When you pan instruments in a mix, you can expand the sonic landscape, adding width and fullness to the sound. By spreading instruments across the stereo field, you create a sense of spaciousness that makes the mix more engaging. This technique can lend a greater sense of immersion to the listener, making the music more captivating and enjoyable.

Common Pitfalls To Avoid

When it comes to panning instruments and vocals in your mix, there are a few common pitfalls that you’ll want to avoid. These mistakes can greatly impact the overall balance and cohesiveness of your sound. In this section, we’ll explore two key issues to watch out for: over-panning and ignoring mono compatibility.

Over-panning

Over-panning is a common mistake that many producers and engineers fall into. It occurs when you distribute your instruments and vocals too widely across the stereo field, creating an unnatural and disjointed sound. While panning can add depth and width to your mix, excessive panning can result in an imbalanced and confusing listening experience.

So, how do you avoid over-panning? The key is to find a balance that allows each element to shine while maintaining a sense of cohesiveness. One strategy is to focus on panning instruments that have similar frequencies or tonal characteristics. By grouping related sounds together, you can create a more unified stereo image.

Another approach is to use panning sparingly, reserving it for elements that really need the extra space. By keeping the majority of your instruments and vocals centered, you can maintain a strong foundation for your mix while still adding a touch of stereo width.

Ignoring Mono Compatibility

Ignoring mono compatibility is another mistake that can have a significant impact on the overall quality of your mix. Mono compatibility refers to how your mix translates when played back in mono, such as on a smartphone, radio, or club sound system. If you neglect this aspect, your carefully panned instruments and vocals may end up sounding muddled and unbalanced.

Ensuring mono compatibility starts with regular checks. A simple way to do this is to toggle your mix from stereo to mono and listen for any noticeable changes. If certain elements vanish or become overpowering, it’s a sign that your panning needs adjustment.

One technique to improve mono compatibility is to use mid-side processing. By applying this technique, you can control the width of your stereo image without affecting the center information. This allows your mix to retain its clarity and balance, regardless of the playback environment.

Remember, avoiding these common pitfalls will help you create a more balanced and enjoyable listening experience for your audience. By striking the right balance with your panning and considering mono compatibility, you can elevate your mix and deliver a professional sound.

Advanced Panning Techniques

When it comes to creating a captivating audio experience, panning is an essential tool in the audio engineer’s arsenal. Advanced panning techniques can take your instrumentals and vocals to the next level, immersing listeners in a rich stereo soundstage. In this article, we will explore two powerful techniques: automated panning and binaural panning for an immersive experience.

Automated Panning

Automated panning is a technique that involves dynamically moving the audio signal across the stereo field. This technique adds a sense of movement and depth to the mix, making it more engaging for the listener. By using automation, you can create a variety of panning effects such as swirling guitars, sweeping synths, or even a ping-pong effect between speakers.

Here are some key points to keep in mind when using automated panning:

  • Use automation to gradually pan elements, avoiding sudden jumps that may distract the listener.
  • Experiment with different panning speeds and shapes to find the right balance for your mix.
  • Consider using complementary panning movements for different instruments to create a sense of separation and width.
  • Remember to listen to your mix in both stereo and mono to ensure the panning effects translate well across different playback systems.

Binaural Panning For Immersive Experience

Immersive audio experiences are becoming increasingly popular, and binaural panning is a technique that can transport listeners into a three-dimensional sonic world. By simulating the way sounds are perceived by the human ears, binaural panning creates a more realistic, enveloping experience.

Here’s how you can incorporate binaural panning into your mix:

  1. Record or create binaural audio samples that capture the unique characteristics of different sound sources.
  2. Use specialized plugins or tools that allow you to position each sound source accurately in the virtual sound space.
  3. Experiment with the elevation, azimuth, and distance parameters to bring your mix to life.
  4. Consider using a dummy head microphone for recording sessions to capture the most accurate binaural audio.

By harnessing the power of automated panning and binaural techniques, you can elevate your mixes to create an immersive and captivating audio experience.

Panning Instruments Vocals: Unleash the Ultimate Sonic Impact!


Credit: www.native-instruments.com


Panning Instruments Vocals: Unleash the Ultimate Sonic Impact!


Credit: soundiron.com


Frequently Asked Questions For Panning Instruments Vocals


How Do You Get Panned Vocals?


To get panned vocals, adjust the audio signal to the left or right in the stereo mix. This creates a spatial effect, enhancing the overall sound and depth of the vocals.


How Instruments Should Be Panned?


Instruments should be panned based on their frequency range and importance in the mix. Balance is key to create a wide soundstage and prevent masking. Consider stereo field, stereo imaging, and overall clarity for optimal panning.


What Is Panning In Singing?


Panning in singing refers to the technique of adjusting the audio’s position within the stereo spectrum. It allows for a fuller sound by spreading the vocals across the left and right channels. This creates a more immersive listening experience while ensuring vocal clarity.


Should You Pan Vocals?


Panning vocals is a subjective choice in music production. It can create width and depth in the mix, adding a sense of movement. However, it’s important to consider the genre, context, and desired effect. Experiment with different panning techniques to find the right balance for your song.


Conclusion


In wrapping up, panning instruments and vocals enhances the depth and spatial dimension of your mix. By judiciously positioning each element across the stereo field, you can create a balanced and immersive listening experience for your audience. Experiment with panning to find the perfect placement for each track in your mix.


Explore various panning techniques, and remember that subtle adjustments can make a big difference. Happy mixing!

Categories
Archive

Audio Mixing Myths: Debunked & Demystified!

Audio mixing myths may hinder your music production. Understanding common misconceptions can improve your skills.


Mastering these myths unlocks creativity and elevates your sound to professional levels. Let’s explore the top myths in audio mixing to help you avoid common pitfalls and enhance your mixing prowess. Audio mixing is a crucial aspect of music production, often surrounded by various myths and misconceptions that can impact the quality of the final product.


By debunking these myths and gaining a clear understanding of the principles behind audio mixing, you can optimize your workflow and achieve professional-sounding mixes. We will delve into some of the most prevalent myths surrounding audio mixing and provide insights to help you navigate the world of music production effectively.


The Myth Of Perfect Sound

A common misconception in the world of audio mixing is the pursuit of achieving perfect sound. Audio engineers and music producers are often lured by the idea of flawlessness, believing that perfection is the ultimate goal in their craft.

The Allure Of Perfection

Many beginners in audio mixing are enticed by the myth that perfect sound is attainable with the right tools and techniques. They strive for flawless audio quality without realizing the limitations and nuances of the process.

The Reality Of Imperfection

In reality, perfect sound is a myth. Sound is subjective and dependent on various factors, making it impossible to achieve a universally perfect mix. Imperfections in audio are natural and can even add character to a track.

The Role Of Expensive Gear

Myth: Expensive Gear Guarantees Quality

Investing in high-end gear is often seen as a shortcut to impeccable audio mixing, but the truth is skill outweighs expensive tools.

Quality audio production is more about the expertise and finesse of the person operating the gear rather than the price tag of the equipment.

While premium gear can offer advanced features and capabilities, they do not automatically translate to superior results without a skilled operator.

Before splurging on pricey equipment, aspiring audio mixers should focus on honing their craft and mastering the fundamental techniques of sound manipulation.

The Importance Of Room Acoustics

In the realm of audio mixing, understanding the importance of room acoustics is crucial. The acoustic properties of a space can significantly impact the way sound is heard and captured, making it a fundamental factor for achieving optimal audio mixing results.

Misconceptions About Ideal Room Acoustics

One common misconception is that ideal room acoustics are solely about achieving complete sound isolation. While sound isolation is important, it’s equally essential to create a balanced acoustic environment that minimizes reflections and standing waves, resulting in a more accurate representation of the audio being mixed.

How To Work With Imperfect Acoustics

Even in less-than-ideal acoustic environments, there are techniques that can help mitigate the effects of imperfect room acoustics. Implementing acoustic treatment such as diffusers, absorbers, and bass traps can help to reduce unwanted reflections and resonances, ultimately improving the overall sound quality within the space.

Audio Mixing Myths: Debunked & Demystified!


Credit: joeysturgistones.com


The Myth Of One-size-fits-all Techniques

Audio mixing is an essential part of music production, often regarded as the secret ingredient that brings a song to life. However, when it comes to audio mixing, there are numerous myths that can hinder the overall quality of the final product. One common myth is that there are one-size-fits-all techniques that can be applied to any project. In reality, this is far from the truth. Each project comes with its own unique set of challenges and requirements, requiring a tailored approach to achieve the desired outcome.

Challenges Of Generic Approaches

Applying generic mixing techniques to every project can result in lackluster results. Sound elements, such as instruments, vocals, and effects, vary greatly from one piece of music to another. A generic approach fails to consider the distinct characteristics of each track, leading to poor balance, muddy frequencies, or a lack of cohesion. By blindly following predefined techniques, you risk diminishing the impact and uniqueness of the music.

Moreover, generic approaches overlook the importance of considering the intended context and target audience of the music. Whether it’s a high-energy dance track or a mellow acoustic ballad, the emotional connection music establishes varies greatly. Adopting a one-size-fits-all mindset fails to capture the essence of the intended experience, compromising its effectiveness.

Tailoring Techniques To Individual Projects

Instead of relying on generic approaches, skilled audio mixers understand the significance of tailoring their techniques to each individual project. This involves carefully analyzing the unique characteristics of the music, identifying the strengths, weaknesses, and intentions of the composition. By doing so, mixers can apply specific adjustments to enhance the clarity, balance, and overall impact of the audio.

One effective approach is to identify the key elements that drive the emotion and message of the music. It could be the vocals, a particular instrument, or even the rhythm section. By focusing on these elements, mixers can prioritize and emphasize their importance throughout the mix, creating a more compelling and engaging sonic experience.

Furthermore, different genres require distinct approaches. Techniques that work well for rock music might not be suitable for jazz or electronic music. Catering to the specific needs of each genre allows mixers to bring out the best in the music, ensuring it resonates with its target audience and retains its authenticity.


Debunking The ‘loudness War’

In the world of audio mixing, there are several myths that have been perpetuated over the years. One of the most common myths is the ‘Loudness War,’ which suggests that the louder a track is, the better it will sound. However, this myth has been debunked by experts in the field, and it is important to understand the truth behind it.

Understanding Dynamic Range

Dynamic range refers to the difference between the quietest and loudest parts of a track. It is a crucial element of a well-mixed song as it adds depth, emotion, and realism to the audio. The loudness war myth implies that by making a track as loud as possible, it will stand out among other tracks. This false belief has led to a trend of compressing and limiting tracks, resulting in compromised dynamic range.

However, it is important to note that dynamic range is essential for creating a natural and engaging listening experience. Without it, the music can sound flat and fatiguing to the ears. By debunking the loudness war, we can focus on preserving the integrity of the music and allowing it to breathe.

Striking A Balance For Modern Releases

While it is true that modern music benefits from a certain level of loudness, it is crucial to strike a balance between loudness and preserving dynamic range. By carefully controlling the levels of each element in the mix and utilizing techniques such as proper gain staging and multiband compression, it is possible to achieve a powerful and dynamic sound without sacrificing the integrity of the music.

It is also important to consider the listening environment in which the music will be played. In today’s world, music is consumed through various mediums such as streaming platforms, radio, and live performances. Each of these platforms has its own set of limitations and requirements when it comes to loudness. By understanding and adhering to these standards, we can ensure that our music sounds great, regardless of the platform it is played on.

Overall, the loudness war is a myth that has misled many in the audio mixing world. By understanding the importance of dynamic range and striking a balance between loudness and integrity, we can create music that is engaging, powerful, and true to its original form.

Audio Mixing Myths: Debunked & Demystified!


Credit: www.reddit.com


Audio Mixing Myths: Debunked & Demystified!


Credit: www.gearnews.com


Frequently Asked Questions Of Audio Mixing Myths


Can I Mix Audio On My Own Without Professional Help?


Yes, you can mix audio on your own without professional help. With the right tools and knowledge, you can achieve professional-quality results. However, keep in mind that professional audio engineers have years of experience and training, so their expertise can often take your mix to the next level.


Is It Necessary To Use Expensive Audio Equipment For Audio Mixing?


No, it is not necessary to use expensive audio equipment for audio mixing. While high-quality equipment can enhance the sound and provide more precise control, it is possible to achieve great results with affordable gear. What matters most is understanding the fundamentals of audio mixing and having a good ear for sound.


How Do I Achieve A Balanced Mix In My Audio Recordings?


To achieve a balanced mix, ensure that no single element overpowers the others. Focus on clear and distinct vocals, balanced instrument levels, and proper use of panning and EQ. Pay attention to the frequency range of each element to prevent muddiness and ensure that each instrument has its own space in the mix.


Is It Necessary To Use Effects Like Reverb And Delay In Audio Mixing?


Using effects like reverb and delay can enhance the depth and space in your audio mix. They can provide a sense of ambience and create a more polished sound. However, it is important to use them sparingly and appropriately, as too much can clutter your mix and make it sound unnatural.


Conclusion


In reality, debunking audio mixing myths can elevate your sound quality. Understanding the truth behind common misconceptions can have a significant impact on your mixing skills. By challenging these myths, you can improve the clarity and cohesiveness of your audio productions.


Ultimately, embracing the facts will lead to better, more professional-sounding results.

Categories
Archive

Music Production Laptops: Unlock Your Creative Potential

Music production laptops should have a fast processor, ample RAM, and high-quality audio output for optimal performance. These laptops are specifically designed to handle the demands of music production software and offer a seamless workflow for music producers.


When choosing a music production laptop, factors such as processing power, storage capacity, and portability should be considered to ensure a smooth production process. With the right laptop, music producers can create, edit, and mix music with ease, whether they are in the studio or on the go.


Let’s delve deeper into the essential features and considerations to keep in mind when selecting a music production laptop.


Credit: techcommunity.microsoft.com


The Importance Of Music Production Laptops

Music Production Laptops play a crucial role in creating high-quality soundtracks. They provide the necessary tools and resources for producers to bring their musical visions to life. Investing in a reliable Music Production Laptop can significantly enhance the efficiency and creativity of music professionals.

Powerful Performance

Music Production Laptops are equipped with powerful processors and ample RAM, allowing for seamless multitasking. This ensures smooth operation of software such as digital audio workstations (DAWs) and plugins, essential for music production.

Portability And Flexibility

Music Production Laptops offer the convenience of portability, enabling producers to work on their music projects from anywhere. Whether in the studio, on the road, or at a live performance, these laptops provide flexibility without compromising on performance.

Music Production Laptops: Unlock Your Creative Potential


Credit: online.berklee.edu


Key Features To Consider


When selecting a music production laptop, it is crucial to consider key features such as RAM, processor speed, storage capacity, and audio interfaces. The laptop should also support software used for music production and have a high-resolution display for editing and mixing.

Processing Power

Ram And Storage

Audio Interface Compatibility

In selecting a laptop for music production, it’s crucial to consider specific key features that can greatly impact the performance and capabilities of the device.

Processing Power

High processing power is essential for running resource-intensive music production software efficiently.

Ram And Storage

Adequate RAM and storage capacity are vital to ensure smooth operation and sufficient space for storing audio files.

Audio Interface Compatibility

Compatibility with audio interfaces is crucial for seamless integration with external sound equipment.


Optimizing Your Workflow

When it comes to music production, having the right tools and setup can significantly impact your creative process. To make the most of your music production laptop, it’s important to optimize your workflow through software choices and setup customization. This not only enhances efficiency but also allows for a seamless and enjoyable production experience.

Choosing The Right Software

Selecting the appropriate software for your music production needs is crucial. Look for digital audio workstations (DAWs) that offer intuitive interfaces, a wide range of plugins, and excellent compatibility with your laptop’s operating system. Consider popular options such as Ableton Live, FL Studio, or Logic Pro X, as they provide extensive features for creating and editing music tracks.

Customizing Your Setup

Customizing your setup according to your preferences and workflow can greatly improve productivity. Invest in quality audio interfaces, MIDI controllers, and studio monitors that complement your laptop. By creating an ergonomic workspace and incorporating efficient hardware peripherals, you can streamline your music production process and boost creativity.

Budgeting For A Music Production Laptop

When it comes to music production, having the right laptop is essential. But with so many options available, finding a high-performance laptop that fits your budget can be a challenge. In this blog post, we will guide you through the process of budgeting for a music production laptop, ensuring that you can strike the perfect balance between performance and affordability.

Balancing Performance And Affordability

When choosing a music production laptop within a budget, it’s important to strike a balance between performance and affordability. While you may be tempted to opt for the latest and most powerful laptop on the market, it may not be the best choice if it’s out of your price range. At the same time, settling for a low-budget laptop with mediocre specs can limit your ability to produce high-quality music.

To find the perfect balance, consider the following factors:

  1. Processor: Look for a laptop with a fast and powerful processor, such as an Intel Core i5 or i7. This will ensure smooth multitasking and quick processing of audio files.
  2. RAM: Aim for a minimum of 8GB RAM to handle resource-intensive music production software and prevent any lag or freezing during your creative process.
  3. Storage: Choose a laptop with sufficient storage space. A solid-state drive (SSD) can provide faster load times for your music projects.
  4. Graphics: While not as crucial for music production, a dedicated graphics card can improve visual performance if you plan on using your laptop for other creative tasks.

By considering these factors, you can prioritize the essential specifications within your budget and select a laptop that meets your music production needs.

Long-term Investment

A music production laptop is not just a short-term purchase but a long-term investment. Spending a little extra to get a laptop that can withstand the demands of music production software and future upgrades will save you money in the long run.

When budgeting for a music production laptop, think about your future needs. Are you planning to expand your music production skills or work on larger projects? If so, investing in a laptop with higher specifications now can prevent the need for an upgrade down the line.

Additionally, consider the laptop’s durability and build quality. Look for laptops with sturdy construction and positive reviews regarding their longevity. You want a laptop that can handle the wear and tear of an active music producer’s lifestyle.

Key Considerations for a Long-Term Investment
Upgradability
Build Quality
Warranty and Customer Support

By focusing on the long-term potential of your music production laptop, you’ll ensure that it remains a valuable asset as you grow and evolve as a music producer.

Final Considerations


For final considerations on music production laptops, prioritize processing power, storage, and RAM capacity. Consider portability and display quality for an optimal music production experience. Ensure compatibility with essential software and accessories. Choose a laptop that reflects your music production needs and preferences.

Ergonomics And Durability

When it comes to music production, ergonomics and durability play a crucial role in selecting the right laptop. The hours spent working on music projects can take a toll on your body, especially if you have to hunch over an uncomfortable laptop for long periods. Therefore, prioritizing an ergonomic design is essential to ensure maximum comfort and minimize the risk of back or neck strain. A durable laptop is an investment that will withstand the test of time and the rigors of music production. Look for laptops made from high-quality materials that can handle the demands of daily use, such as a sturdy chassis and reliable hinges. A laptop with a solid build not only provides peace of mind but also ensures that it will last for years without succumbing to wear and tear.

Future-proofing Your Purchase

When investing in a music production laptop, it’s crucial to consider its future-proofing capabilities. Technology is constantly evolving, and you want a laptop that can keep up with the ever-changing demands of music production software and hardware. Look for a laptop with a powerful processor, ample RAM, and expandable storage options. Opting for a laptop with a fast and efficient processor will help ensure smooth operation and faster rendering times. Additionally, having ample RAM is essential for seamless multitasking and handling resource-intensive projects. Finally, consider a laptop with expandable storage options to accommodate your growing collection of digital audio files and software plugins. By future-proofing your purchase, you can avoid the need for an upgrade too soon and make the most out of your investment in a music production laptop. In summary, when selecting a music production laptop, prioritize ergonomics and durability to maximize comfort and longevity. Additionally, future-proof your purchase by opting for a laptop with a powerful processor, ample RAM, and expandable storage options. By considering these final factors, you can make an informed decision and select the laptop that will meet your music production needs for years to come.


Credit: www.facebook.com


Frequently Asked Questions On Music Production Laptops


What Is The Best Laptop For Making Music?


The best laptop for making music should have a powerful processor, ample RAM, fast storage, and high-quality audio capabilities. Look for models from brands like Apple, Dell, or ASUS that cater to music production needs. Make sure it has sufficient ports for your audio equipment.


What Are The Requirements For A Laptop For Music Production?


A laptop for music production needs a fast processor, ample RAM, large storage, and a dedicated graphics card. Look for a laptop with a powerful CPU, at least 8GB of RAM, a spacious SSD, and a discrete GPU for optimal performance.


What Is The Best Ram For Music Production Laptop?


The best RAM for a music production laptop depends on your specific needs, but generally, a minimum of 8GB is recommended. However, for more advanced projects and smooth performance, 16GB or even 32GB would be better options. Make sure to check the laptop’s compatibility before upgrading.


Why Are Macs Good For Music Production?


Macs excel in music production due to their powerful performance, user-friendly interface, and reliable software. They offer seamless integration with popular digital audio workstations and a wide range of music production apps. The optimized hardware and stable operating system make Macs a top choice for creating high-quality music.


Conclusion


Choosing the right laptop for music production is crucial for success. Consider key factors like processing power, RAM, and storage when making your decision. By prioritizing performance and portability, you can enhance your creative process and productivity. Keep these tips in mind to find the perfect music production laptop for your needs.

Categories
Archive

Use Mix Automation Daw : Master Your Sound with Proven Techniques

To use mix automation in a DAW, assign parameters to automate and create automation curves. This allows for dynamic changes in your mix.


Mix automation in a DAW is a powerful tool that enables you to control various parameters such as volume, panning, and effects over time. By automating these settings, you can achieve a more dynamic and polished sound in your music production.


This feature is essential for adding movement and expression to your mixes, ensuring a professional and engaging final product. Learning how to effectively use mix automation can take your music to the next level, enhancing the overall quality and impact of your productions. We will explore the fundamentals of mix automation in a DAW and provide tips on how to optimize your workflow for maximum efficiency and creativity.

Use Mix Automation Daw  : Master Your Sound with Proven Techniques


Credit: www.production-expert.com


Understanding Mix Automation

What is Mix Automation?

Mix automation in a DAW allows for automated changes to volume, panning, and other settings.

  • Efficiently adjust levels without manual tweaking.
  • Create smooth transitions for a polished sound.
  • Free up time for creative aspects of music production.

Common Mix Automation Techniques

Common mix automation techniques are essential in enhancing the overall quality of a music production. By utilizing various automation tools, audio engineers can achieve a dynamic and polished sound that captivates listeners. Here are some key mix automation techniques:

Volume Automation

Adjusting the volume level of different tracks throughout a song to create a sense of musical dynamics.

Pan Automation

Placing the audio signal in the stereo field by automating the panning position to achieve a balanced mix.

Eq Automation

Applying dynamic EQ changes to specific frequency bands to enhance or attenuate certain elements in the mix.

Dynamic Processing Automation

Automating the parameters of compressors, limiters, and other dynamic processors to control the overall volume and intensity of the mix.

“` – Volume Automation: Adjust the volume level for dynamic effects. – Pan Automation: Position audio in the stereo field for balance. – EQ Automation: Dynamically alter frequency bands for clarity. – Dynamic Processing Automation: Control volume and intensity with dynamic processors.

Advanced Tips For Effective Mix Automation

Mix automation is a powerful tool that allows you to precisely control the movement and dynamics of your audio tracks. In this post, we’ll explore some advanced tips for using mix automation effectively in your digital audio workstation (DAW).

Subtle Automation Adjustments

Subtle automation adjustments can make a big impact on the overall sound of your mix. Instead of drastic volume changes, try making small adjustments to specific sections of a track to enhance the musical dynamics. Use the automation curves to gently shape the volume, panning, or other parameters to create a more nuanced and polished mix.

Creative Use Of Automation Lanes

Creative use of automation lanes allows you to control multiple parameters simultaneously, opening up a world of possibilities for adding depth and movement to your mix. Experiment with automating different effects, such as filters, EQ, or reverb, to create evolving textures and atmospheres throughout your tracks.

Using Automation For Emphasis And Movement

Using automation for emphasis and movement can bring your mix to life by adding dynamics and energy. Instead of leaving your tracks static, use automation to create builds, drops, and other dynamic transitions. By automating parameters like volume, panning, or effects, you can guide the listener’s attention and create a more engaging and immersive listening experience.

Use Mix Automation Daw  : Master Your Sound with Proven Techniques


Credit: www.waves.com


Maximizing The Potential Of Mix Automation

When it comes to audio mixing, achieving clarity and cohesiveness in your tracks can be a daunting task. However, with the help of mix automation, you can take your sound to the next level. Mix automation allows you to dynamically control various parameters of your audio, such as volume, panning, and effects, over time. This powerful tool can be a game-changer in fine-tuning your mix and ensuring that every element is in its rightful place.

Achieving Clarity And Cohesiveness

One of the key benefits of mix automation is its ability to achieve clarity and cohesiveness in your tracks. By automating the volume levels of different instruments and vocals, you can ensure that each element is heard clearly and without any overpowering. This is especially useful when working with complex arrangements where multiple instruments and sounds are competing for attention.

In addition to volume automation, automating panning can also help add depth and width to your mix. By smoothly moving sounds across the stereo field, you can create a more immersive listening experience for your audience. Whether it’s a guitar solo that gradually pans from left to right or a drum fill that bounces between speakers, automation can bring new life to your tracks.

Moreover, mix automation enables you to dynamically control effects parameters. For example, you can automate the cutoff frequency of a low-pass filter to gradually remove high frequencies and create a sense of muffled anticipation before a climactic drop. These subtle changes in effects can make transitions more interesting and add excitement to your music.

Enhancing Transitions And Builds

Transitions and builds are crucial elements in creating tension and excitement in your tracks. With mix automation, you can take these moments to new heights. By gradually increasing the volume of a riser or an impact sound, you can build anticipation and prepare the listener for the upcoming drop. Automating the panning of transitional elements can also create a sense of movement, leading the listener from one section to another seamlessly.

Additionally, mix automation allows you to shape the dynamics of your tracks. By automating the compression and equalization settings, you can ensure that every instrument sits perfectly in the mix, enhancing the overall cohesiveness of the song. Whether it’s a soft and intimate verse or a powerful and explosive chorus, automation can help you achieve the desired impact.

Wrap Up

Mix automation is a powerful tool that can elevate your mixes to new heights. By achieving clarity and cohesiveness, enhancing transitions and builds, and shaping the dynamics of your tracks, this technique allows you to maximize the potential of your music. So, don’t hesitate to dive into the world of mix automation and unleash your creativity.

Mastering Mix Automation In Your Daw

When it comes to achieving professional-level audio mixes, mastering mix automation is a crucial skill to have in your repertoire. By using automation in your Digital Audio Workstation (DAW), you can dynamically control various parameters of your tracks, allowing for precise adjustments and creative enhancements.

Utilizing Automation Lanes And Curves

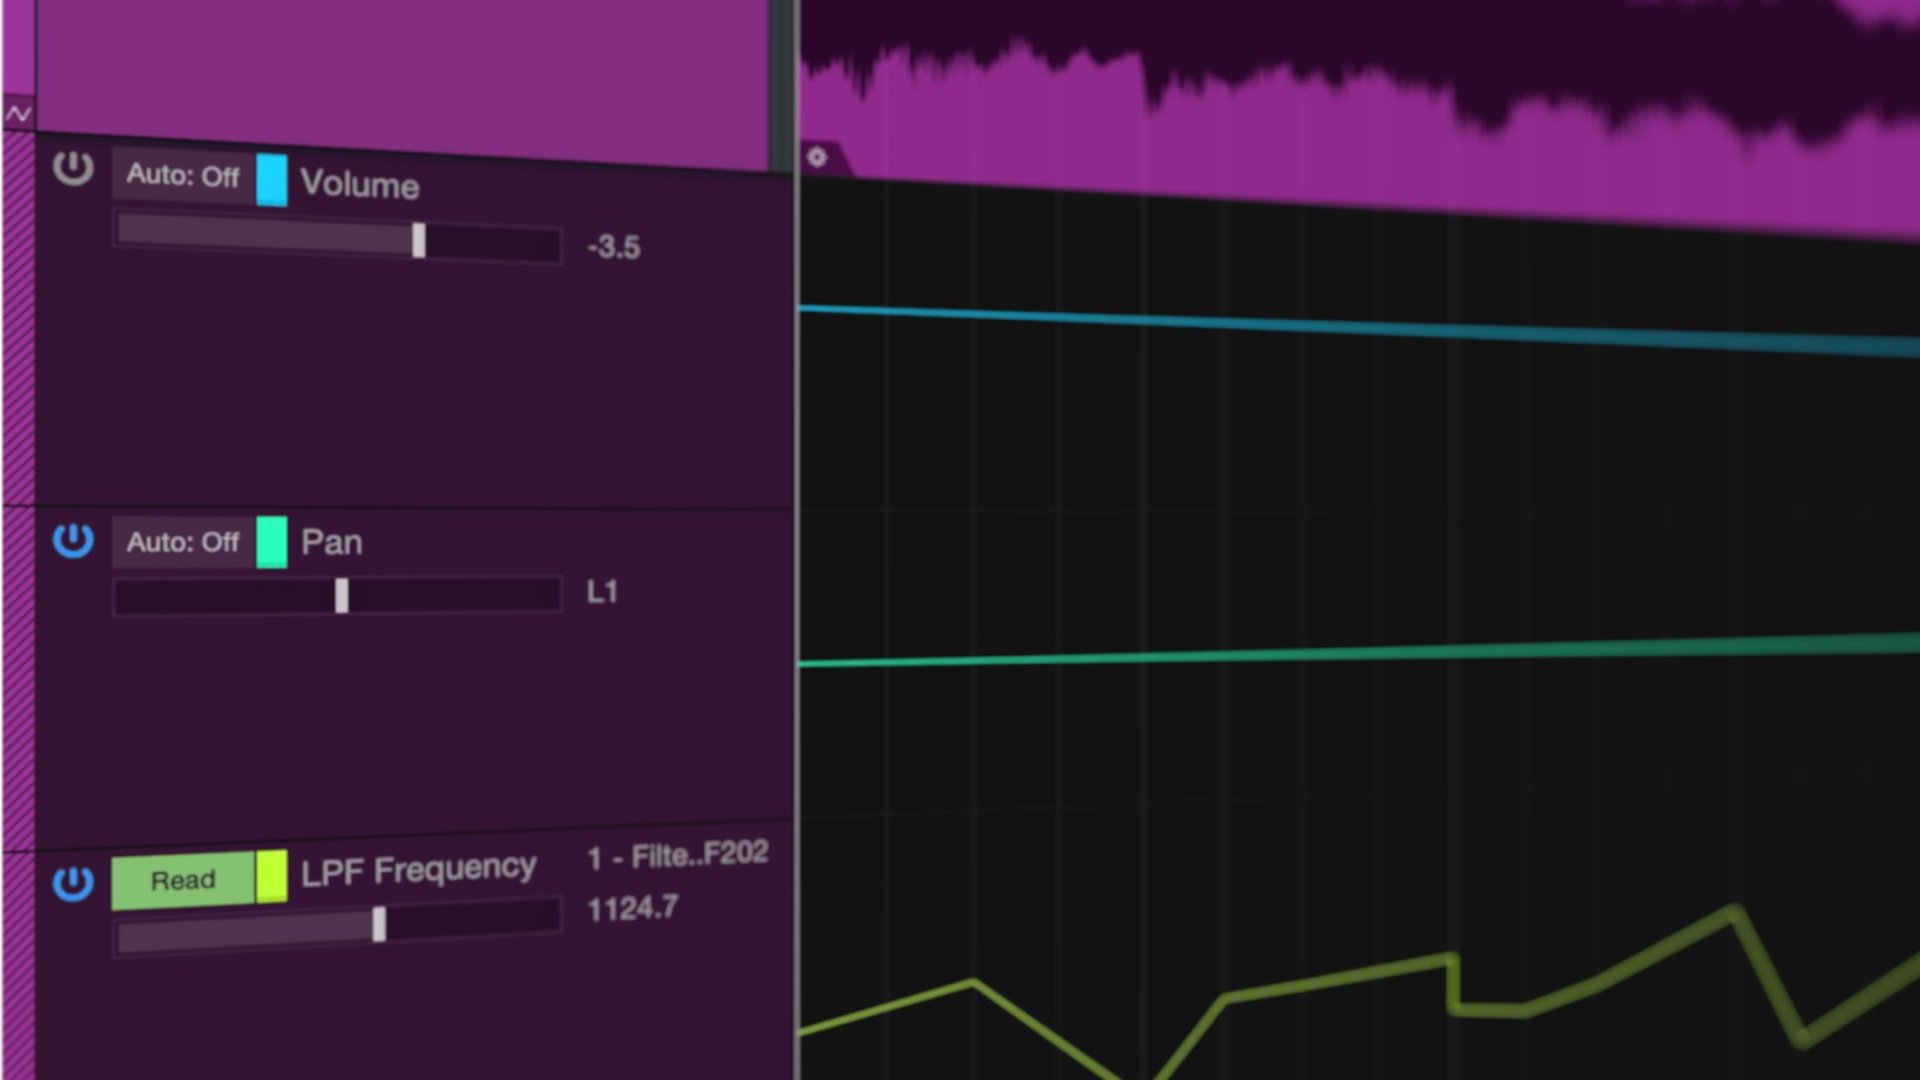
One of the key features that makes mix automation in DAWs so powerful is the ability to utilize automation lanes and curves. Automation lanes provide a visual representation of the changes you make to specific parameters, such as volume, pan, or effects settings, over time.

By utilizing automation lanes, you can easily create smooth transitions between different sections of your track or add dramatic effects that evolve over time. For example, if you want to gradually fade a track in or out, you can draw a volume curve in the automation lane to achieve a seamless transition.

Additionally, automation curves allow you to control the rate and shape of the parameter changes. This means you can create precise, gradual fades, or add sudden, impactful changes to certain elements of your mix. The flexibility of automation curves opens up a world of creative possibilities, helping you achieve the perfect balance and mood for your tracks.

Integrating Automation With Effects And Instruments

Another benefit of mastering mix automation in your DAW is the seamless integration with effects and instruments. Automation allows you to control various parameters within these plugins, enhancing your music production workflow.

For instance, imagine you have a synth lead that you want to add a filter sweep to for a buildup. With automation, you can smoothly automate the filter cutoff frequency, creating a dynamic and evolving sound. This technique can add excitement and anticipation to your music, keeping the listener engaged.

Additionally, automation can be used to control effects like reverb, delay, or modulation. By automating these parameters, you can create intricate textures, spatial movements, or rhythmic effects that enhance the overall sonic experience.

In conclusion, mastering mix automation in your DAW is a crucial skill that enables you to take full control of your audio mixes. By utilizing automation lanes and curves, as well as integrating automation with effects and instruments, you can achieve a professional and dynamic sound that captivates your listeners. So dive into your DAW’s automation features and start experimenting with this powerful tool!

Use Mix Automation Daw  : Master Your Sound with Proven Techniques


Credit: www.amazon.com


Frequently Asked Questions For Use Mix Automation Daw


What Does It Mean To Use Automation In A Daw?


Automation in a DAW means using tools to control mix parameters, like volume and panning, over time. It allows for precise adjustments and movements, enhancing the overall sound and expression of the music.


How Do You Use Automation In A Mix?


Use automation to adjust volume, pan, effects at specific times in a mix for dynamic changes.


Can You Mix In A Daw?


Yes, you can mix in a DAW. Digital Audio Workstations allow mixing, editing, and producing music efficiently.


Why Would You Use Automation In Pro Tools While Mixing?


Automation in Pro Tools is used to dynamically adjust volume, panning, and effects during mixing. It allows for precise control and enhances creativity. By automating changes, you can create more dynamic and professional-sounding mixes.


Conclusion


Incorporating mix automation in your DAW can elevate your music production to new heights. With precise control over levels, panning, and effects, you can achieve a polished and professional sound. By utilizing automation creatively, you can add dynamism and energy to your tracks, capturing the attention of your audience.


Embrace the power of mix automation in your DAW and unlock endless possibilities for your music.


Categories
Archive

Creative Recording Techniques : Mastering the Art of Sound

Creative recording techniques enhance audio quality, includes mic placement, room acoustics, and signal processing to improve sound production. Utilizing innovative approaches in recording can elevate the overall listening experience and optimize the final audio output.


Through strategic implementation of diverse recording methods and equipment choices, professional sound engineers and producers can capture and refine sound in unique and captivating ways. By leveraging advanced recording techniques, such as binaural recording, stereo miking, and ambient mic placement, musicians and audio professionals can craft immersive and dynamic recordings that resonate with audiences.


Experimenting with unconventional methods like tape saturation, microphone blending, and impulse responses can add depth and character to audio recordings, pushing the boundaries of creativity in the production process.


Exploring Different Microphone Types

Exploring Different Microphone Types opens up a world of possibilities in creative recording techniques.

Dynamic Microphones

Dynamic microphones, known for durability, are perfect for live performances and loud sources.

Condenser Microphones

Condenser microphones are sensitive, capturing nuances in vocals and acoustic instruments with clarity.

Ribbon Microphones

Ribbon microphones offer a warm vintage sound, ideal for recording strings and brass instruments.

Creative Recording Techniques  : Mastering the Art of Sound


Credit: amphion.fi


Understanding Room Acoustics

Understanding Room Acoustics is crucial for achieving high-quality recordings. The way sound behaves in a room can significantly impact the final outcome of your recordings.

The Impact Of Room Shape

Room shape can affect how sound waves travel and interact with surfaces, leading to issues like standing waves and uneven frequency response.

Dealing With Reflections And Resonance

Reflections can cause unwanted echoes and coloration in recordings. To minimize them, consider using acoustic panels and bass traps strategically within the room.

Utilizing Unconventional Sound Sources

Unconventional sound sources add a unique touch to recordings, sparking creativity and depth. Utilizing unconventional sound sources involves thinking outside the box, finding sounds in unexpected places, and incorporating them into the recording process.

Recording Ambient Sounds

Recording ambient sounds is a powerful technique for adding depth and atmosphere to a track. Place microphones strategically in different environments to capture organic sounds. Experiment with city streets, nature settings, and bustling cafes. This technique provides a rich, textured background that enhances the overall recording.

Incorporating Found Objects

Incorporating found objects into the recording process can yield surprising results. Explore the potential of everyday items such as glass bottles, kitchen utensils, or even rusty metal. Experiment with various textures and materials to create unique, unconventional sounds. It’s an opportunity to add a distinctive flair to the recording, setting it apart from the ordinary.

Embracing Alternative Recording Techniques


Discover innovative approaches to recording that elevate your sound. Implement alternative techniques to capture unique and original elements in your music production process. Unlock new dimensions in the creative recording process to enhance the depth and richness of your tracks.

Close-miking Vs. Distant-miking

When it comes to recording techniques, sound engineers have always relied on tried and true methods to capture the best possible sound. But sometimes, thinking outside the box and embracing alternative techniques can yield fascinating results. In this section, we’ll explore two popular approaches to recording: close-miking and distant-miking, and how they can revolutionize your recordings.

Binaural Recording

One such alternative technique that has been gaining popularity is binaural recording. This method involves using a specialized microphone setup that imitates the way our ears perceive sound, resulting in a more immersive and lifelike listening experience. By placing microphones in the ear-like positions, binaural recordings capture audio with a sense of depth and spatial realism.

Binaural recordings are particularly effective when it comes to capturing live performances, creating a sense of “being there” for the listener. Imagine the feeling of being front-row at a concert or in the middle of a bustling cityscape, all from the comfort of your headphones. It’s an incredible way to transport your audience and evoke emotions.

To fully take advantage of binaural recording, it’s important to utilize high-quality headphones. The subtle nuances and spatial cues captured in the recording can be lost when played through subpar speakers or ordinary earbuds. So, if you’re planning on experimenting with binaural techniques, make sure your audience has the proper equipment to fully appreciate the experience.

In addition to live performances, binaural recording can also add an extra dimension to your studio recordings. By capturing sound from various positions around the room, you can create an expansive sonic landscape that envelops the listener. Binaural recordings work particularly well for genres that aim to evoke a specific atmosphere, such as ambient or experimental music.

So, whether you’re looking to transport your listeners to another world or simply add a touch of realism to your recordings, binaural recording is a technique that shouldn’t be ignored.

Post-production Experimentation

Post-production is where the magic happens in the recording process. This critical stage allows musicians and sound engineers to explore their creativity to the fullest. By experimenting with different techniques and effects, they can take their recordings to new heights of artistry. In this article, we will delve into two exciting post-production techniques: Layering and Sound Manipulation, and Utilizing Spatial Effects.

Layering And Sound Manipulation

Layering and sound manipulation are powerful tools that can transform a recorded track into something totally unique and captivating. With layering, multiple tracks or instruments are combined to create a richer and more textured sound. The possibilities are endless – you can layer guitars, synths, vocals, or even unconventional sounds like field recordings or samples. By experimenting with different combinations and effects, you can achieve a truly distinctive and immersive listening experience.

One of the key aspects of layering is sound manipulation. This involves manipulating the individual layers to create interesting sonic effects. You can experiment with panning, EQ, reverb, and other audio processing techniques to shape the sound and give it depth and character. For example, by panning different layers to different positions in the stereo field, you can create a sense of movement and space. Similarly, applying selective EQ and reverb to specific layers can help emphasize certain frequencies or create a unique ambience.

Utilizing Spatial Effects

Spatial effects are another essential aspect of post-production experimentation. These effects allow you to manipulate the perception of space and spatial positioning in a recording. By using techniques such as reverb, delay, and stereo imaging, you can create a three-dimensional sonic environment, transporting the listener to new realms.

Reverb is perhaps the most commonly used spatial effect. It simulates the natural acoustics of different spaces, allowing you to add depth and ambience to your recordings. A short reverb can create a tight and intimate sound, while a long reverb can produce a sense of spaciousness and grandeur.

Delay is another valuable tool for spatial manipulation. By adding controlled repetitions of a sound, you can create echoes, reflections, and rhythmic patterns. This technique can give your recordings a sense of movement and dimension.

Stereo imaging techniques, such as panning and widening, can further enhance the spatial aspects of your recordings. By placing sounds in different positions within the stereo field, you can create a sense of width and separation. This can be especially effective when dealing with vocals, guitars, or other instruments that benefit from a clear placement in the mix.

By mastering layering, sound manipulation, and utilizing spatial effects, you can truly elevate your recordings to a whole new level. These post-production techniques offer endless opportunities for creativity and sonic experimentation. Embrace your imagination and let your recordings come alive with a touch of post-production magic!


Credit: www.amazon.com


Creative Recording Techniques  : Mastering the Art of Sound


Credit: medium.com


Frequently Asked Questions On Creative Recording Techniques


What Are Different Types Of Recording Techniques?


Common recording techniques include multi-microphone setups, close miking, room miking, stereo recording, and binaural recording. Each method offers unique sound characteristics.


What Are The Techniques Of Recorded Sound?


The techniques of recorded sound include microphone placement, equalization, compression, reverb, and mixing. These methods enhance audio quality for a professional sound recording.


What Makes A Great Recording?


A great recording has clear audio quality, balanced levels, and minimal background noise. It captures the emotions of the performance and has a professional mix and mastering. A good recording equipment and an experienced engineer are essential for creating a great recording.


How Do You Sound Professional When Recording?


To sound professional when recording: 1. Speak clearly and enunciate each word. 2. Use a confident and assertive tone. 3. Maintain good posture and proper breathing techniques for optimal voice projection. 4. Practice and rehearse your script beforehand to sound natural and fluid.


5. Use appropriate pauses and intonation to convey emphasis and maintain listener engagement.


Conclusion


In the evolving landscape of music production, creative recording techniques play a crucial role in shaping unique and memorable soundscapes. By experimenting with innovative approaches, recording engineers and producers can push the boundaries of sonic artistry, capturing the essence of musical expression.


Embracing these techniques can pave the way for groundbreaking musical experiences.


https://www.youtube.com/watch?v=FGIDyQoU40s


Categories
Archive

Why Can’t I Play Piano With Both Hands? Discover the Ultimate Techniques

Playing piano with both hands can be challenging due to coordination and independence skills required. Coordination difficulties may arise from not practicing each hand separately or lacking synchronization between the hands.


Developing hand independence through exercises and consistent practice can help improve your ability to play with both hands proficiently. For many beginners, the challenge lies in training each hand to perform different actions simultaneously. This can be compared to learning to pat your head and rub your stomach at the same time – it takes time and practice to master.


With dedication and persistence, honing your hand coordination skills will eventually allow you to play piano pieces with ease using both hands. Let’s explore some strategies and tips to help you overcome this hurdle and enhance your piano-playing skills.

Why Can't I Play Piano With Both Hands? Discover the Ultimate Techniques


Credit: www.hoffmanacademy.com


The Basics Of Playing Piano

Hand Independence

Each hand on the piano needs to move independently.

Coordination Challenges

Coordinating both hands to play different parts simultaneously can be difficult.

Playing piano requires developing hand independence. Coordinating both hands to play different parts simultaneously can be challenging. Each hand on the piano needs to move independently.

Understanding Hand Independence

Playing piano with both hands requires a crucial skill called hand independence. Each hand performs unique functions while playing the piano, making it challenging to coordinate both hands effectively.

Left Hand Vs Right Hand Functions

The left hand typically plays the accompaniment or supporting role, providing chords, bass lines, or rhythm.

Conversely, the right hand is responsible for playing melodies, harmonies, and intricate patterns that stand out in the music.

Developing Individual Hands

  • Focus on practicing each hand separately to strengthen and improve their coordination.
  • Start with simple exercises and scales to train each hand independently before combining them.
  • Gradually increase the difficulty of the exercises to challenge each hand’s dexterity and agility.

Techniques For Enhancing Coordination

Enhancing coordination is essential for playing the piano with both hands. Whether you’re a beginner or looking to boost your skills, incorporating these techniques into your practice routine can significantly improve your hand coordination.

Hand-separation Exercises

One effective technique for improving coordination is hand-separation exercises. This involves practicing each hand separately before attempting to play with both hands. Start by focusing on one hand at a time, playing simple exercises or scales to develop dexterity and strength in each hand.

Cross-training Activities

Engaging in cross-training activities that challenge both hands simultaneously can greatly enhance coordination. Cross-training activities include playing finger independence exercises, learning different musical styles, or even engaging in activities such as typing or playing video games that require independent hand movements.

Why Can't I Play Piano With Both Hands? Discover the Ultimate Techniques


Credit: www.wired.com


Mastering Both-hand Coordination

Playing the piano with both hands can be quite a challenging task, especially for beginners. You might find yourself struggling to coordinate your left and right hands, wondering why you can’t seem to play with both hands effortlessly. The key to mastering both-hand coordination lies in synchronized movements and gradual complexity expansion. By understanding these principles and implementing them in your practice, you can overcome this hurdle and unlock your full potential on the piano.

In order to play the piano with both hands, it is crucial to develop synchronized movements. This means that the actions of your left and right hands should be well-coordinated, working together harmoniously to produce the desired sound. Synchronizing your hands requires practice and repetition, as well as a strong focus on timing and rhythm.

One effective technique to improve synchronized movements is to start with simple exercises that involve both hands playing in unison. For example, you can practice playing the same note or chord simultaneously with both hands. This allows you to develop a sense of synchronization and begin to build a solid foundation for more complex pieces.

As you become more comfortable with synchronized movements, you can gradually expand the complexity of your piano playing. Start by incorporating melodies or harmonies that require different hand positions or fingerings. This will challenge your coordination skills and help you to develop the ability to play different parts independently.

Another effective method is to practice playing separate hands in different rhythms. For example, you can play a simple melody with your right hand while your left hand plays a steady accompaniment in a different rhythm. This exercise will train your hands to work independently and improve your overall coordination.

Remember to start with manageable complexity and gradually increase the difficulty level as your skills improve. Pushing yourself too hard too soon can lead to frustration and slow down your progress. Take the time to master each level of complexity before moving on to more challenging pieces or exercises.

Mastering both-hand coordination on the piano is a gradual process that requires patience, practice, and an understanding of synchronized movements and gradual complexity expansion. By incorporating these principles into your practice routine, you will gradually improve your ability to play with both hands effortlessly. Remember to stay consistent and enjoy the journey of discovering the beautiful harmony that comes with playing the piano.

https://www.youtube.com/watch?v=VXD0p_g_UTg


Overcoming Common Obstacles

Learning to play the piano with both hands can be a challenging endeavor for many beginners. However, with patience and persistence, along with the guidance of a professional, you can overcome these obstacles and master the skill of playing with both hands simultaneously.

Patience And Persistence

Patience and persistence are essential qualities to develop when learning to play the piano with both hands. It is natural to feel frustrated or discouraged at times, especially when it seems difficult to coordinate both hands. However, remember that learning any new skill takes time and practice.

By consistently setting aside time for practice and maintaining a positive mindset, progress can be made. Celebrate even the smallest of milestones, such as successfully playing a simple melody with both hands together. Over time, with continued effort, your coordination and dexterity will improve.

Seeking Professional Guidance

Obtaining professional guidance from a piano instructor is highly beneficial when learning to play with both hands. A skilled teacher can provide personalized instruction, tailored to your individual needs and learning style.

Working with a professional allows you to receive immediate feedback and correction on your technique, ensuring that you are practicing correctly and efficiently. They can guide you through exercises and drills specific to developing hand coordination, rhythm, and overall fluency.

Additionally, having a mentor can instill accountability and motivation, pushing you towards progress and helping you overcome any obstacles that may arise. They have the knowledge and experience to address common challenges and provide targeted solutions for your improvement.

Why Can't I Play Piano With Both Hands? Discover the Ultimate Techniques


Credit: www.youtube.com


Frequently Asked Questions On Why Can’t I Play Piano With Both Hands


Why Is It Hard For Me To Play Piano With Two Hands?


Playing piano with two hands can be challenging due to the need for coordination and independence between hands. It requires practice to develop muscle memory and dexterity. Start by practicing simple exercises and gradually increasing difficulty to improve hand coordination.


How Do You Train Your Brain To Play Piano With Both Hands?


To train your brain to play piano with both hands, practice hand coordination exercises daily. Start with simple pieces, focus on one hand at a time, then gradually combine both hands. Consistent practice and patience are key to mastering this skill.


How Long Does It Take To Learn Piano With Both Hands?


Learning piano with both hands typically takes 6 months to 2 years, depending on practice consistency and dedication.


Why Can’t I Play Piano With My Left Hand?


You may struggle playing piano with your left hand due to lack of practice or coordination. It’s essential to focus on strengthening your left hand and practicing regularly to improve your ability. Seeking guidance from a professional instructor can also be beneficial.


Conclusion


Incorporating all the helpful tips and techniques mentioned can greatly improve your ability to play the piano with both hands. Consistent practice, patience, and focused efforts will lead to significant progress over time. Embracing a positive mindset and seeking guidance from a skilled instructor will further enhance your journey toward mastering this beautiful skill.

Categories
Archive

Electronic Drum Samples: Revolutionize Your Beats with Cutting-Edge Sounds

Electronic drum samples are recorded drum sounds used in music production for realistic drum sounds. These samples are digitally created to replicate the sound of acoustic drums, providing a versatile option for producers.


You can easily add electronic drum samples to your tracks to enhance your music production process and create unique and dynamic beats. These samples are customizable, allowing you to manipulate them to suit your desired sound. With advancements in technology, electronic drum samples continue to evolve, offering a wide range of options for music creators.


Incorporating these samples in your music projects can elevate your compositions and provide endless creative possibilities.


Credit: soundoracle.net


The Evolution Of Electronic Drum Samples


The evolution of electronic drum samples has revolutionized modern music production. As technology advanced, electronic drum samples have become more realistic, versatile, and customizable. They offer musicians a wide range of sounds, from classic to cutting-edge, and have become an essential component of contemporary music composition and production.

From Analog To Digital

Originally, electronic drum samples were recorded from analog drum machines, offering a limited variety of sounds.

With the shift to digital technology, electronic drum samples now provide a vast range of realistic percussion sounds.

Impact On Music Production

The incorporation of electronic drum samples has revolutionized music production, allowing for endless creativity in sound design.

Modern music genres have been heavily influenced by the versatility of electronic drum samples.

Benefits Of Electronic Drum Samples

Electronic drum samples offer various advantages that make them a popular choice among music producers and drummers. One of the key benefits is their

Versatility In Sound

, allowing users to create a diverse range of drum sounds to suit different genres and styles.


Moreover, electronic drum samples are known for their

Cost-effectiveness

compared to traditional acoustic drum kits, making them a budget-friendly option for musicians looking to enhance their music without breaking the bank.


Choosing The Right Electronic Drum Samples

When it comes to creating music, electronic drum samples play a crucial role in shaping the sound and feel of a track. Whether you are a producer, musician, or composer, selecting the right electronic drum samples is essential for achieving the desired sound and style. Choosing the perfect electronic drum samples involves understanding different formats and considering the specific requirements of your genre. Let’s explore how you can make informed decisions when it comes to selecting electronic drum samples.

Understanding Different Formats

Electronic drum samples are available in various formats, each with its unique characteristics and advantages. Understanding these formats is crucial to make the right choice. The most common formats include:

  • WAV files: Known for their high-quality audio and compatibility with most music production software
  • AIFF files: Similar to WAV, these uncompressed audio files are commonly used in Mac-based environments
  • One-Shot Samples: Individual drum hits that can be used to create custom drum patterns
  • Sampler Patches: Pre-loaded drum kits for use in software samplers and virtual instruments

Considerations For Genre

When selecting electronic drum samples, it’s essential to consider the specific requirements of your genre. Different genres, such as hip-hop, electronic, rock, or pop, demand distinct drum sounds. Factors to consider include:

  1. Sound Character: Identify the sonic characteristics that define the drum sounds in your genre
  2. Rhythm Complexity: Evaluate the complexity and variation needed in drum patterns for your genre
  3. Dynamic Range: Consider the range of dynamics required, from subtle accents to hard-hitting beats
Electronic Drum Samples: Revolutionize Your Beats with Cutting-Edge Sounds


Credit: www.resonance-sound.com


Incorporating Electronic Drum Samples In Your Music

Electronic drum samples can be a game-changer when it comes to enhancing the rhythm and beats in your music. Whether you’re a beginner or a seasoned musician, incorporating these samples can add depth and creativity to your tracks. In this article, we’ll explore two essential techniques for incorporating electronic drum samples in your music: layering and processing and creating dynamic rhythms.

Layering And Processing Techniques

Layering and processing electronic drum samples can take your music to a whole new level. By layering different samples together, you can create a unique and complex sound that adds depth and texture to your beats. Here are some techniques you can use to layer and process your electronic drum samples:

  • Experiment with different combinations of samples to find the perfect blend for your track.
  • Adjust the volume and panning of each layer to create a full and balanced mix.
  • Apply effects such as reverb, delay, and distortion to add character and interest to your drums.
  • Use EQ to shape the frequencies of each layer and make them sit well together in the mix.

By incorporating these layering and processing techniques, you can transform your electronic drum samples into a cohesive and captivating element in your music.

Creating Dynamic Rhythms

Electronic drum samples offer endless possibilities for creating dynamic and exciting rhythms. Here are some tips to help you make the most of these samples:

  1. Experiment with different patterns and placements of your drum samples to create unique grooves.
  2. Use velocity and modulation to add variations in intensity and expression.
  3. Consider adding ghost notes and accents to create rhythmic complexity.
  4. Explore different time signatures and polyrhythms to introduce interesting rhythmic structures.

By exploring these techniques, you can create dynamic and engaging rhythms using electronic drum samples, giving your music a fresh and modern sound.

Future Trends In Electronic Drum Samples


Explore the evolving landscape of electronic drum samples, where futuristic trends are shaping the music production industry. Innovations in sound design, AI integration, and virtual reality are revolutionizing the way musicians create and manipulate digital percussion elements. Embrace the future of electronic drum samples for a cutting-edge musical experience like never before.

Advancements In Sampling Technology

With the constant evolution of technology, it is no surprise that electronic drum samples are also undergoing exciting advancements. Sampling technology has significantly improved, allowing for more realistic and immersive drum sounds. These advancements have led to a whole new level of creativity and authenticity in electronic drumming.

  • Sampling technology has become more sophisticated, enabling the capture of subtle nuances in drumming techniques.
  • Developers have focused on creating high-quality sample libraries that accurately reproduce the sound and feel of acoustic drums.
  • New techniques such as multi-sampling and round-robin sampling have been employed to ensure dynamic and realistic drumming experiences.
  • Advancements in recording technology have made it possible to capture drum samples in high-definition audio formats, surpassing the limitations of previous generations.

With these advancements, electronic drum samples are virtually indistinguishable from their acoustic counterparts. Musicians and producers can now enjoy the convenience of electronic drums while retaining the organic and expressive qualities of acoustic drumming.

Integration With Ai And Machine Learning

The integration of artificial intelligence (AI) and machine learning has revolutionized numerous industries, and the world of electronic drum samples is no exception. AI and machine learning algorithms have been employed to enhance the quality and versatility of drum samples.

  • AI algorithms can analyze existing drum samples and create new variations with enhanced realism and expressiveness.
  • Machine learning algorithms can adapt to a drummer’s playing style and offer personalized drum samples that suit their preferences.
  • Real-time processing capabilities powered by AI can adjust drum samples dynamically, leading to a more responsive and immersive drumming experience.
  • AI integration has made it possible to generate drum patterns and fills automatically, saving musicians valuable time and inspiring creative ideas.

By harnessing the power of AI and machine learning, electronic drum samples have become smarter and more intuitive, offering musicians a vast range of possibilities to explore. This integration has opened up new avenues for creativity and expression in electronic drumming.


Credit: www.facebook.com


Frequently Asked Questions For Electronic Drum Samples


Where Can I Download Drum Samples?


You can download drum samples from various online music production websites and marketplaces. Check out platforms like Splice, Loopmasters, and Native Instruments for a wide selection of drum samples.


Is It Ok To Use Drum Samples?


Yes, it’s okay to use drum samples for music production. They can enhance your sound and offer flexibility. Always ensure you have the proper licensing for the samples you use to avoid legal issues.


Where To Get Quality Drum Samples?


Quality drum samples can be found on reputable music production websites, such as Splice, Loopmasters, and ProducerSpot. These platforms offer a wide range of professionally produced drum samples that can enhance the sound quality of your music.


Do Electronic Drums Sound Like Real Drums?


Yes, electronic drums can sound very similar to real drums. They use advanced technology to mimic the sound and feel of acoustic drums. With high-quality samples and responsive pads, electronic drums can produce realistic drum sounds that are indistinguishable from their acoustic counterparts.


Conclusion


In closing, electronic drum samples offer a versatile and cost-effective solution for music production. With their ability to replicate a wide range of sounds and styles, they provide endless creative possibilities for musicians and producers. Whether you’re a beginner or a seasoned professional, integrating electronic drum samples into your work can take your music to the next level.