To setup Template Studio One, simply navigate to the preferences panel and click on “File” followed by “Show User Library.” From there, drag and drop your desired templates into the appropriate folder.
As an audio professional, having a streamlined workflow is essential for success in the industry. DAW templates are a great way to save time and stay organized, allowing you to focus solely on the creative process. Template Studio One is a must-have tool for any producer or engineer seeking efficiency in their music production sessions.
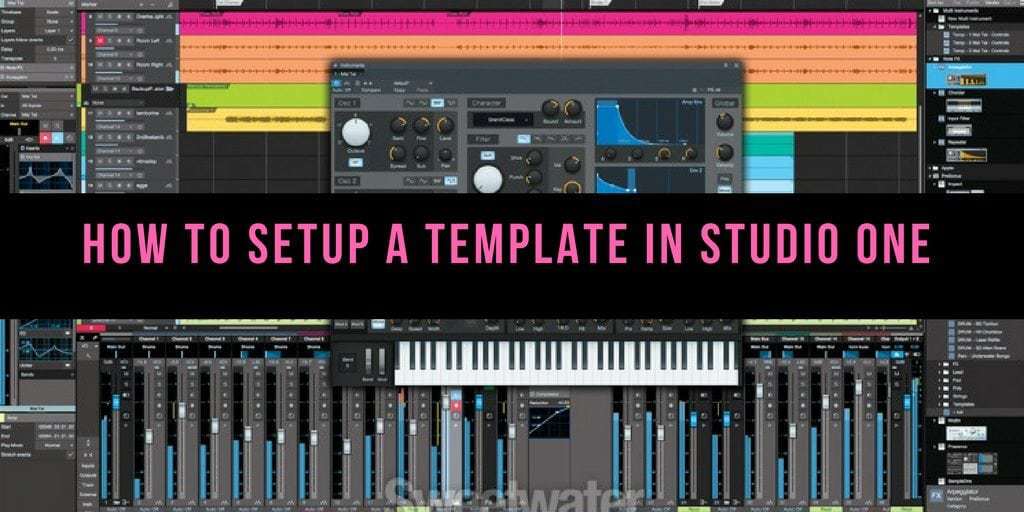
We will guide you step-by-step on how to set up and customize your own studio templates for Studio One. Whether you’re a seasoned veteran or a beginner, this guide will help you take your productions to the next level.
Download And Installation
To set up Template Studio One, first, download the software from the official website. Then double-click the installer and follow the instructions to complete the installation process. You can now start creating designs and templates on the user-friendly platform.
If you’re looking for a powerful DAW to help you create music, then Studio One is definitely a great option to consider. The software is packed with features and designed to help you make music from start to finish. If you’re keen to get started with Studio One, then the first thing you need to do is download and install it. In this section, we’ll look at the steps you need to follow to get Studio One up and running on your computer.
Download Studio One Installer
To get started, head over to the official Studio One website. From there, you should be able to find a download link for the latest version of the software. Make sure you choose the version that’s compatible with your operating system and computer architecture. Once you’ve clicked on the download link, the Studio One installer should begin downloading automatically.
Check System Requirements
Before you install Studio One, it’s important to make sure that your computer meets the minimum system requirements. These requirements can be found on the Studio One website and may vary depending on the version of the software you’re installing. Some of the common requirements include a multi-core processor, at least 4GB of RAM, and a sound card.
Run Installer
Once the installer has finished downloading, navigate to the location where you saved it and double-click on the file. This should launch the Studio One installer, which will guide you through the process of installing the software onto your computer.
Choose Installation Location
During the installation process, you’ll be asked to choose a location for Studio One to be installed. Make sure you choose a location that has enough disk space and is easily accessible. You may also want to create a desktop shortcut for Studio One so that you can easily launch the software later.
Start Installation
When you’re ready to proceed with the installation, click the ‘Install’ button in the Studio One installer. Depending on your computer’s speed and the version of the software you’re installing, the process may take a few minutes. After the installation is complete, you should be able to launch Studio One and start creating music right away. In conclusion, installing Studio One isn’t a difficult process as long as you follow the steps outlined in this section. By downloading the installer from the official website, checking your computer’s minimum requirements, and following the installation wizard, you should be up and running in no time. Start making music today by installing Studio One!
Credit: answers.presonus.com
Authorization And Registration
To set up Template Studio One, you need to first register and authorize the software. This process ensures that only licensed users can access the program’s features and templates. Once authorized, you can begin customizing templates to create unique marketing materials for your brand.
Creating your PreSonus account, authorizing Studio One and registering your product are integral to setting up your Studio One software. Here are the essential steps involved:
Create Presonus Account
To get started with Studio One, you need to create an account with PreSonus. It’s a simple process and only requires your name, email address, and a secure password. Once you create your account, you’ll receive an email with a verification link that you need to click to confirm your registration.
Authorize Studio One
After creating your account, you’ll need to authorize your Studio One software. This step ensures that you’re the legitimate owner of the software, and you’re allowed to use it on your computer. To authorize your software, you need to navigate to the Studio One tab on your PreSonus account and click the authorize button. Additionally, you’ll need to enter your computer’s unique hardware ID to complete the authorization process.
Register Your Product
Once you finish authorizing your software, the final step is to register your product. This step keeps you up-to-date with important software updates, new features, and bug fixes. To register your product, you need to navigate to your PreSonus account, go to My Products, and select the product you want to register. Then, enter your product key, and you’re done! By following these simple steps, you’ll have authorized Studio One and registered your product successfully.
Setup And Configuration
Setting up and configuring your digital audio workstation is crucial in bringing your musical ideas to life! In this section, we’ll focus on how to set up Studio One for the first time and optimize your preferences to suit your workflow. We’ll cover audio and MIDI device setup, adding plug-ins and virtual instruments, creating a new project, and customizing the interface to make your experience more efficient.
Audio Device Setup
The first step of creating a project is ensuring that your audio device is properly configured. The following are the steps you need to follow:
- Launch Studio One and open the Options menu.
- Select “Audio Setup.”
- Under “Devices,” select your audio interface from the dropdown menu.
- Configure your sample rate, bit depth, and buffer size according to your system requirements.
- Test your audio interface by playing audio through it to ensure everything is set up correctly.
Midi Device Setup
If you plan on using any MIDI devices in your Studio One project, you’ll need to set them up in the MIDI Devices menu. Here’s what to do:
- Go to the Options menu again and select “External Devices.”
- Click “Add” and select your device from the dropdown list.
- Name the device and select the appropriate MIDI input and output ports.
- Configure any additional settings for your MIDI device as needed.
Adding Plug-ins And Virtual Instruments
Studio One comes with a variety of built-in plug-ins, but you can also install third-party plug-ins and virtual instruments to expand your sound library. Here’s how:
- Go to the Studio One menu and select “Studio One Installation”
- Click on “Studio One Add-ons” tab and choose “Content location” for installing your desired software or plugin package.
- Select “Install” and follow the instructions to add your plug-ins or virtual instruments to your Studio One library.
Creating A New Project
Once your set up is done, we’re ready to create our first project:
- Click “New Song” in the Studio One welcome screen.
- Name your project and select the location you want to save it in.
- Configure your project settings such as tempo, time signature and sample rate. You can also choose to use a project template to get started quickly.
- Click “Create” and start making music!
Customizing The Interface
Studio One provides a customizable interface to suit your workflow. Here are some tips to make the most of it:
- Hover over the edge of a window to resize it.
- Click and drag the tabs of multiple windows to combine them into a single tabbed window.
- Customize your layout by arranging windows to your preference.
- Save your custom layout as a template for future projects.

Credit: www.youtube.com
Workflow And Navigation
Setting up a template in Studio One improves workflow and navigation, allowing for a more efficient and streamlined production process. By customizing your workspace layout and creating reusable templates, you can quickly access frequently used tools and plugins.
Setting up Studio One can seem like a daunting task, especially if you are new to music production software. But with its intuitive workflow and navigation features, even beginners can easily get started. In this post, we will focus on the important role played by workflow and navigation in Studio One setup. We will also cover key features of Studio One, from understanding the start page, to using the browser, working with tracks, and the mixing console overview.
Understanding The Start Page
When you open Studio One for the first time, you will be greeted by the start page. This page provides you with quick access to recent audio and MIDI files, links to helpful resources, instruments, and effects for your project. The start page also offers useful visual aids like RGB waveforms and an integrated video player to help you stay organized and get started with your project quickly.
Using The Browser
The browser is a valuable tool for managing and organizing resources in Studio One. With the browser, you can access files, virtual instruments, samples, and plug-ins with ease. You can even search for files and preview them without opening them. The browser also lets you create custom folders, rename files, and move files between folders. This feature makes it easier to manage large projects and reduces clutter.
Working With Tracks
Tracks are the heart of any project in Studio One. With Studio One, you can create and manage multiple tracks with various instruments, patterns, voices, effects, and automation. Furthermore, you can group tracks, change their display, and color code them for easy identification. Studio One also provides a great mix of pre-configured effects chains that help you to get started with your recordings quickly.
Mixing Console Overview
The mixing console overview is created with ease of use in mind. It has a simple and easy-to-use interface that lets you adjust and modify tracks’ audio before and after recording. You can adjust the volume, pan, add effects, and even modulate the frequency. The mixing console overview is hugely customizable, and you can change its visual appearance, rearrange tracks, add inserts and sends, and even automate the console with envelopes. In conclusion, Studio One’s intuitive workflow and navigation ensure that beginners and experienced producers alike can get started quickly. From the start page to the mixing console overview, Studio One provides powerful and straightforward tools for music production. By mastering the tools covered in this post, you can unlock your creativity and produce music with ease. Start creating your music today with Studio One!
Recording And Editing
Setting up a template in Studio One can streamline your recording and editing process. With pre-set settings for your preferred track and instrument settings, you can focus on creating music rather than technicalities.
Recording and Editing are two important aspects of music production. Whether you’re a beginner or an expert, having a reliable and user-friendly digital audio workstation is crucial. One such software is Studio One, which offers a Setup Template to make the process easier and faster.
Setting Up A Recording Session
To set up a recording session in Studio One, you need to create a new song file and select the appropriate input and output devices. You can then add audio and MIDI tracks, set their parameters, and choose their respective inputs and outputs. It is essential to ensure that the recording levels are optimal to avoid clipping or distortion.
Using Audio And Midi Clips
Studio One makes it easy to work with audio and MIDI clips. You can import them into your session, drag and drop them onto tracks, and customize their parameters. You can also use loops, virtual instruments, and plugins to enhance your tracks. Studio One has a built-in browser that enables you to search for and audition sounds from your sample library and the cloud.
Editing Audio And Midi Clips
Once you’ve recorded your tracks, it’s time to edit them. Studio One has a range of editing tools, such as cutting, copying, pasting, and dragging clips. You can also quantize MIDI notes, adjust pitch and timing, and apply fades and automation. Studio One’s user interface is intuitive and straightforward, making it easy for anyone to edit their tracks.
Working With Arrangement Markers
Arrangement markers are essential for organizing and structuring your tracks. With Studio One, you can add markers to your timeline, label them, and customize their colors. You can then use them to navigate your session, loop specific sections, and export your tracks. Studio One also has a range of export options, including MP3, WAV, and AIFF formats. In conclusion, Studio One’s Setup Template is a powerful tool for recording and editing music. Whether you’re a professional or a hobbyist, Studio One’s user-friendly interface, extensive library of sounds, and editing tools make it one of the best options on the market. With a bit of practice, you’ll be able to produce high-quality tracks in no time.
Credit: mixandmastermysong.com
Arranging And Mixing
Setting up a template in Studio One can save time when arranging and mixing songs. Use the “song” template to quickly set up instruments and effects, and customize your workflow to streamline the process.
Working With The Arrangement View
The arrangement view in Studio One is where you can organize your tracks, decide on the length and order of different sections of the song, and adjust the length of the song as a whole. It’s easy to work with this view, as you can drag and drop your audio and MIDI clips onto the timeline. You can also easily split, trim, and arrange your tracks to come up with a perfect arrangement for your song.
Using Automation
Automation is a powerful tool in Studio One that can help you take your mixes to the next level. With automation, you can control various parameters of your tracks such as volume, panning, and effects at different points in the song. You can create automation by simply clicking on a parameter in your mixer and drawing in automation data on the timeline. With automation, you can create dynamic, evolving mixes that capture the listener’s attention.
Mixing Techniques
Mixing is the art of blending all of the different elements of a song together to create a cohesive sound. In Studio One, you have access to a wide variety of mixing tools such as EQ, compression, and reverb. It’s important to use these tools in a way that complements the song and enhances the overall sound. For instance, you can use EQ to adjust the tonal balance of your tracks, compression to control the dynamic range, and reverb to add depth and space.
Exporting A Mixdown
Once you’ve arranged and mixed your song to perfection, it’s time to export it as a mixdown. Studio One makes this process easy and straightforward. From the file menu, simply select “Export Mixdown” and choose your desired file format and bit depth. You can also select if you want to export the entire mix or just a section of the song. With just a few clicks, you can have a high-quality mix that’s ready for sharing or mastering. In conclusion, arranging and mixing are critical steps in the music production process that can make or break your song. With Studio One, you have all the tools you need to create a professional-quality mix that will stand out from the crowd. Use the arrangement view to organize your tracks, automation to add dynamic movement, mixing tools to enhance the overall sound, and export your mixdown with ease.
Advanced Features
Setting up the Template Studio One can offer advanced features for music production. With tools like multi-track recording, mixing, and editing, it provides a comprehensive platform for musicians to create their music.
Studio One is a renowned Digital Audio Workstation (DAW) offering exceptional music production capabilities. The software comes with a set of advanced features that help music producers create unique sounds. In this article, we’ll focus on the advanced features of Studio One, specifically on the Project Page, external hardware integration, creating macros, and the Chord Track.
Using The Project Page
Studio One’s Project Page is the ideal location for mastering your music. It assists in organizing the album and song sections, editing tracks, and adding effects to the finished mix. It also allows you to integrate music from other music-making software such as Ableton and Reason.
Integrating External Hardware
Studio One’s software can connect to external hardware. This feature adds flexibility when creating sounds, particularly by recording and processing with analog equipment. To integrate external hardware, navigate to Studio One > Options > External Hardware. In the Devices tab, enter the necessary details of the hardware that you want to integrate with Studio One.
Creating Macros
Macros simplify the music production process by automating repetitive tasks, saving time and effort in the long run. To create a macro in Studio One, navigate to Studio One > Macros > Edit Macros. Click on “New Macro,” enter a name and description for the macro, then start recording the specific steps you want to automate in the DAW.
Using The Chord Track
The Chord Track’s primary objective is to provide a harmonic foundation in music production, giving direction to the melodic composition of tracks. It’s an exceptional tool for music producers whose strengths lie in melody and harmony. In Studio One, locate the Chord Track within the Inspector, right-click it, and choose “Create Chords” to start using it. In conclusion, Studio One’s advanced features elevate music production and give music producers exceptional results. Understanding how to use the Project Page, integrating external hardware, creating macros, and utilizing the Chord Track are a few examples of where these extraordinary benefits lie.
Troubleshooting And Support
Setting up and troubleshooting Template Studio One can be a bit challenging without proper guidance. Our support team is here to assist you step-by-step in this process, ensuring a smooth experience using this powerful software.
Setting up Template Studio One can be a smooth process, but there may be times when you encounter some issues. This is where having access to reliable troubleshooting and support resources can be very helpful. In this section, we will explore the common issues you may encounter and their solutions, as well as how to search the knowledge base and submit a support ticket for more complex issues.
Common Issues And Solutions
Here are some common issues you may encounter while setting up Template Studio One:
| Issue | Solution |
|---|---|
| The software fails to load | Ensure that your system meets the minimum requirements |
| The sound output is distorted | Check that your audio interface is properly connected and configured |
| Plugins fail to load | Ensure that they are properly installed and up to date |
| The software crashes frequently | Update your system and ensure that you are using a stable version of Template Studio One |
Searching The Knowledge Base
If you encounter an issue that is not listed above, you can search Template Studio One’s knowledge base for help. Here’s how you can do it:
- Open the Template Studio One website
- Click on the “Support” tab
- Select “Knowledge Base” from the dropdown
- Enter your query in the search bar
- Hit enter and browse through the results
You can also filter your search to get more targeted results.
Submitting A Support Ticket
If you are unable to resolve your issue using the knowledge base, you can submit a support ticket. Follow these steps:
- Open the Template Studio One website
- Click on the “Support” tab
- Select “Submit a ticket” from the dropdown
- Fill out the form with your issue details and attach any relevant files
- Submit the form and wait for a response from Template Studio One support team
Template Studio One’s support team typically responds to support tickets within 24-48 hours. Be sure to provide as much information as possible about your issue to get a quick resolution. With these troubleshooting and support resources, you’ll be able to address any issues that arise while setting up your Template Studio One software.
Frequently Asked Questions On Setup Template Studio One
How Do I Create A Preset In Studio One?
To create a preset in Studio One, first make the desired adjustments to a track or instrument. Then, click on the “Save Preset” button in the upper-left corner of the mixer channel or instrument window. Give the preset a name and click “OK” to save it for future use.
How Do I Install Studio One Add Ons?
To install Studio One add-ons, go to the “Studio One” menu, select “Studio One Installation”, click on “Install Extensions”. Then, select the add-ons you want to install and click ‘Install’ for each one. Finally, restart Studio One to use the installed add-ons.
How Do I Set Up Midi In Studio One?
To set up MIDI in Studio One, go to Studio One> Options> External Devices. Click “Add” and select your MIDI device from the list. Then, choose your MIDI input and output ports and assign a name. Finally, click “OK” to save your settings.
How Do I Set Output In Studio One?
To set output in Studio One: 1. Click on “Song Setup” at the top of the screen. 2. Select “Audio I/O Setup” from the menu. 3. Choose your audio device from the list. 4. Select the desired output channels. 5. Adjust the settings as necessary and click “OK” to save.
Conclusion
Overall, setting up Template Studio One is a relatively simple process that provides great benefits. With its many features and customizable templates, it is an excellent tool for both beginners and experienced designers. By following the steps outlined in this guide, you can feel confident in your ability to create eye-catching designs that will elevate your brand.
So what are you waiting for? Get started on your first design with Template Studio One today and take your creative skills to the next level!