To export individual tracks in Audacity for mixing, simply select the desired track and use the Export Audio feature. This allows you to save the track as a separate file for further editing or mixing.
Are you ready to take your audio editing skills to the next level? Audacity provides a user-friendly platform for creating and editing audio tracks. One essential feature is the ability to export individual tracks, which can be helpful for mixing multiple audio files seamlessly.
In this guide, we will walk you through the process of exporting individual tracks in Audacity, empowering you to enhance your audio projects effortlessly. Let’s dive into the steps to efficiently export your tracks in Audacity for a seamless mixing experience.
The Importance Of Exporting Individual Tracks
The Importance of Exporting Individual Tracks:
In Audacity, exporting individual tracks is crucial for achieving clarity in sound production.
Achieving Clarity And Quality
Exporting individual tracks enhances clarity and enables better mixing techniques.
Facilitating Precise Mixing
Exported tracks aid in precise mixing by allowing manipulation of each element separately.
Preparing Tracks For Export
To export individual tracks in Audacity for mixing, prepare your audio tracks by carefully labeling and organizing them. Ensure each track is properly balanced and edited for clarity before exporting. This step will help streamline the mixing process and ensure a smoother workflow when working with your audio files in Audacity.
Cleaning Up And Organizing
Before exporting, clean and organize each track to ensure clarity.
Adjusting Levels And Effects
Make sure to balance the levels and apply effects for a polished sound.
Exporting Individual Tracks In Audacity
When it comes to audio editing and mixing, exporting individual tracks in Audacity can be a crucial step in getting the perfect sound. By exporting each track separately, you can have more control over the mixing process and make adjustments to individual elements of your project. In this section, we’ll explore how to export individual tracks in Audacity for efficient and precise mixing.
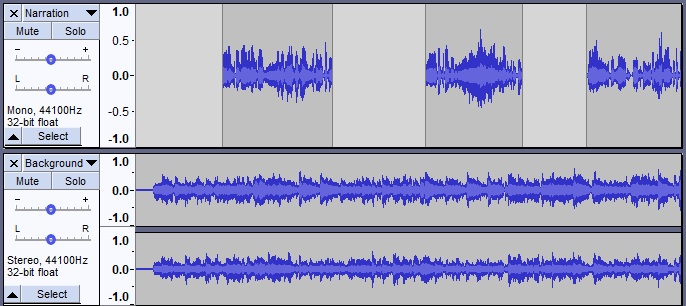
Selecting And Soloing Tracks
To export individual tracks in Audacity, start by selecting the specific track you want to export. You can do this by clicking on the track name or using the selection tool to highlight the portion of the track you want to export. Additionally, you can solo the track to isolate it from the rest of the project, ensuring that only the desired audio is exported.
Using The Export Option
Once you have selected and soloed the track you want to export, navigate to the “File” menu and click on “Export” to access the export options. From here, you can choose the desired file format, such as WAV or MP3, and adjust the export settings to meet your specific requirements. Finally, click “Export” to save the individual track to your desired location.
Credit: manual.audacityteam.org
Organizing Exported Tracks For Mixing
When it comes to mixing audio tracks in Audacity, organizing exported tracks is essential to ensure a smooth and efficient process. By creating a dedicated folder and properly naming and labeling tracks, you can easily navigate through your project and maintain a clear overview of your audio files. In this article, we will explore the trick to exporting individual tracks in Audacity and focus on the subheading: Organizing Exported Tracks for Mixing.
Creating A Dedicated Folder
To begin organizing your exported tracks, it’s important to create a dedicated folder for your project. This ensures that all your audio files are stored in one central location, making it easy to find and access them whenever needed. Additionally, having a dedicated folder helps to keep your project files organized and reduces the chances of accidentally deleting or misplacing important tracks. Here’s how you can create a dedicated folder for your Audacity project:
- Open File Explorer or Finder on your computer.
- Navigate to the location where you want to create the folder.
- Right-click (or Control-click on Mac) and select “New Folder” from the context menu.
- Give the folder a descriptive name, such as “Audacity Project,” or name it according to the specific project you’re working on.
Creating a dedicated folder ensures that all your exported tracks are stored in one place, simplifying the process of managing your audio files.
Naming And Labeling Tracks
To maintain a clear overview of your exported tracks, it’s crucial to properly name and label each track. This allows you to identify and distinguish between different audio files, making it easier to navigate through your project and locate specific tracks when needed. Here are some tips for naming and labeling your tracks effectively:
- Use descriptive names: When naming your tracks, be specific about the content or instrument they represent. For example, instead of naming a track “Track 1,” consider something like “Lead Guitar” or “Vocal Harmony.”
- Add numbers or letters for organization: If your project includes multiple tracks of the same instrument or content, numbering or using letters can help you differentiate between them. For instance, “Lead Guitar 1” and “Lead Guitar 2.”
- Apply color coding: Many digital audio workstations, including Audacity, allow you to assign colors to individual tracks. Utilize this feature to visually group similar tracks together or differentiate between different sections of your project.
- Add markers or labels: To mark important sections or specific points in your tracks, consider using markers or labels within Audacity. This can be useful for highlighting key moments or indicating sections that require further editing or adjustments.
By following these practices, you can effectively name and label your tracks, ensuring a well-organized and streamlined workflow during the mixing process in Audacity.
Ensuring Seamless Integration
When it comes to exporting individual tracks in Audacity for mixing, ensuring seamless integration is crucial to achieve professional-quality results. By maintaining consistency in settings and checking for compatibility, you can seamlessly combine and mix your tracks without any issues. In this article, we will explore these essential steps to ensure that your exported tracks integrate seamlessly.
Maintaining Consistency In Settings
Consistency is key when it comes to exporting individual tracks in Audacity. By maintaining consistent settings throughout your project, you can avoid any discrepancies or inconsistencies that may occur during the exporting process. Here’s how you can do it:
- Start by setting the appropriate sample rate and bit depth for your project. These settings should be consistent for all the tracks you plan to export.
- Ensure that the track gain and pan settings are uniform across all your tracks to maintain a balanced mix.
- Double-check the positioning and alignment of each track to avoid any unintended shifts in the final mix.
- Make sure to apply any necessary effects or editing to your tracks consistently before exporting.
Checking For Compatibility
Compatibility is vital to ensure that your exported tracks can seamlessly integrate into your mixing process. Here are a few steps you can take to check for compatibility:
- Verify that all the plugins and effects used in your project are compatible with the version of Audacity you are working with. Incompatible plugins can cause issues when exporting individual tracks.
- Check the file format of your exported tracks to match the desired format for your mixing software or platform. This will ensure that the tracks can be easily imported without any conversion problems.
- Test the compatibility of your exported tracks by loading them into your mixing software and listening for any anomalies or glitches. This step will help you identify and resolve any compatibility issues before the final mix.
By following these steps to maintain consistency in settings and checking for compatibility, you can export individual tracks in Audacity and seamlessly integrate them into your mixing process. This will ultimately result in a polished and professional-sounding final mix.

Credit: www.magix.com

Credit: www.amazon.com
Frequently Asked Questions Of Trick To Exporting Individual Tracks In Audacity For Mixing
How Do I Export Individual Tracks In Audacity For Mixing?
To export individual tracks in Audacity for mixing, you can use the “Export Multiple” feature. This allows you to select the tracks you want to export and specify the desired file format and settings. By exporting each track separately, you can then import them into another audio editing software for mixing.
Can I Export Tracks From Audacity As Separate Files?
Yes, you can export tracks from Audacity as separate files. By using the “Export Multiple” feature, you have the option to export each track individually. This allows you to save each track as a separate file, which can be helpful for mixing, editing, or sharing purposes.
What Is The Benefit Of Exporting Individual Tracks In Audacity?
Exporting individual tracks in Audacity has several benefits. Firstly, it allows you to work on each track separately in other audio editing software, enabling more precise mixing and editing. Secondly, it gives you the flexibility to use specific tracks for different purposes, such as creating a separate audio file for vocals or instruments.
Conclusion
To sum up, utilizing Audacity for exporting individual tracks can greatly enhance the quality of your mixing process. By following the steps outlined in this blog post, you can streamline your workflow and achieve a professional sound. Understanding this trick will enable you to take your audio production to the next level.