Yes, a drum bus is essential for any music producers to create a cohesive mix. A drum bus is a crucial element in music production that allows music producers to enhance the overall sound of their drum tracks.
It’s a group channel where all the drum sounds are routed to so they can be processed as one unit. The bus allows music producers to apply equalization, compression, and other effects to the drums more effectively. This helps to create a more cohesive mix, where all the drum sounds are working together rather than competing for space in the mix.
Without a drum bus, the drum sounds’ individual processing will result in conflicting sounds, causing clashing in the mix. We’ll dive into why you need a drum bus and how to set it up in your music production system.

Credit: www.noizemusic.io
Benefits Of Using A Drum Bus
Using a drum bus can greatly benefit your mixing process, providing a cohesive sound that ties together all the drum elements. It is an essential tool for achieving a professional sound and can also help save valuable mixing time.
Using a drum bus can help improve your drum sound significantly. A drum bus is a technique where all the drum tracks in a mix are combined into a single track, allowing you to apply the same processing to all drums collectively. This process has several benefits, including improved clarity and punchinessbetter control over individual drum levelsease of processing.
Improved Clarity And Punchiness
One of the essential benefits of using a drum bus is that it helps achieve better clarity and punchiness in your drum mix. By combining all the drum tracks into one, you can apply a compressor and EQ to all the drums collectively, eliminating inconsistencies in the mix. By doing so, you can make sure that none of the drums stand out too much or clash with each other.
Better Control Over Individual Drum Levels
With a drum bus, you have better control over each drum’s levels. Instead of adjusting levels for each individual drum track, you can use the bus fader to adjust the levels of all the drums collectively. This allows for greater precision in mixing, ensuring that the drums sit well together in the mix.
Ease Of Processing
Another benefit of using a drum bus is that it simplifies the processing chain. Instead of applying multiple plugins to each individual drum track, you can apply plugins to the drum bus. This saves time, streamlines your workflow, and makes it easier to achieve a cohesive drum sound. Additionally, it allows for quicker adjustments to the drum sound, should the need arise. In conclusion, using a drum bus can help achieve a more professional and polished drum sound. This technique provides better clarity and punchiness, better control over individual drum levels, and ease of processing. By utilizing a drum bus, you can create a more cohesive and balanced drum mix that will enhance your overall sound.
When Should You Use A Drum Bus?
When it comes to mixing drums, a drum bus is a powerful tool that can help glue all the individual drum tracks together and give your drums a more cohesive sound. It allows you to apply processing to all the drums at once, giving you more control over the overall drum sound. But when should you use a drum bus? Here are a few scenarios:
Mixing Live Drums
If you’re working with a recording of live drums, a drum bus can help you get a more natural sound by simulating how the drums were recorded together. This is especially useful if you’re dealing with multiple microphones on the kit. For example, if you have separate mics on the kick, snare, toms, and overheads, a drum bus can help you balance the levels and apply processing to all the tracks at once.
Working With Virtual Drums
If you’re using virtual drum instruments in your music production, a drum bus can help you make the drums sound more like they were played by a real drummer. By applying processing to all the drum tracks at once, you can create a more cohesive sound and add some character to the drums.
Creating Punchier Drum Sounds
If you want your drums to have more impact and punch, a drum bus can help you achieve that. By applying compression, EQ, and other processing to all the drums at once, you can create a more unified and powerful sound. You can also use parallel processing techniques, such as parallel compression or distortion, to further enhance the impact of the drums.
In conclusion, a drum bus can be a valuable tool in your mixing arsenal. Whether you’re working with live drums or virtual drums, or trying to create a punchier drum sound, a drum bus can help you achieve your goals. So give it a try and see what kind of results you can get!
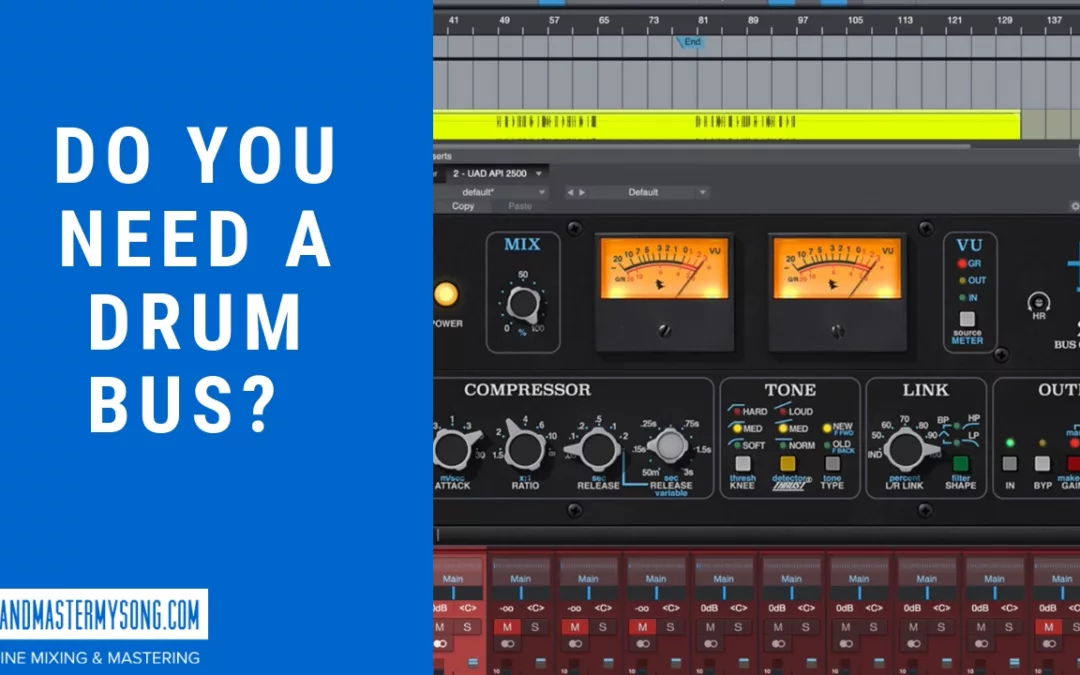
Setting Up A Drum Bus In Your Daw
Setting up a drum bus in your DAW is essential to achieve a cohesive drum sound. It allows you to group all your drum tracks together and apply the same processing to them. Whether you are working on a project with live drums or using virtual instruments, a drum bus can add depth and character to your mix.
If you’re looking to give your drums more presence and impact in your mix, setting up a drum bus can be a great technique to achieve this. By routing multiple drum tracks to a single bus, you can apply processing to the drums as a whole, rather than on an individual track basis. In this article, we’ll guide you through how to create a drum bus in your DAW, route your drum tracks to it, and add processing to it.
Creating A Bus Channel
Before you can set up a drum bus, you need to create a new bus channel in your DAW. This is simply a new audio channel that acts as a bus, allowing multiple tracks to be routed to it. Different DAWs will have different ways of creating a bus channel, but the basics are the same. Here’s an example of how to create a new bus channel in Ableton Live:
- Right-click on an empty area in the mixer and select “Insert Audio Track”.
- Click on the “Audio To” drop-down menu on your drum tracks and select the new bus channel you just created.
- Play your drum tracks and make sure their audio is now routing through the new bus channel.
Routing Your Drum Tracks
Once you’ve set up your bus channel, you need to route your individual drum tracks to it. This will vary depending on your DAW, but the basic idea is the same. Here’s how to route your drum tracks to your newly created bus channel in Logic Pro X:
- Click and hold on the output of a drum track in the mixer and drag it to your new bus channel.
- Repeat this for all your drum tracks.
- Play your drum tracks and make sure their audio is now routing through the new bus channel.
Adding Processing To The Bus
Now that you’ve set up your bus channel and routed your drum tracks to it, it’s time to apply processing to the bus. This is where you can really start to shape the overall sound of your drums. Here are a few examples of processing you might want to apply to your drum bus:
| Processing | Explanation |
|---|---|
| EQ | Cut or boost specific frequencies to shape the overall sound. |
| Compression | Even out the dynamics of your drums and add sustain. |
| Saturation | Add warmth and character to your drums. |
| Reverb | Add a sense of space and depth to your drums. |
By applying processing to your drum bus, you can really make your drums stand out in your mix. Experiment with different types of processing and find what works best for your particular drum sound. In conclusion, a drum bus can be a powerful tool in your mixing arsenal. By combining multiple drum tracks into a single bus, you can apply processing that affects the overall sound of the drums, giving them more presence and impact in your mix. Follow these steps to create a drum bus in your DAW, route your drum tracks to it, and add processing to it, and take your drum sound to the next level!
Credit: mixandmastermysong.com
Tips For Using A Drum Bus
If you are struggling with getting your drums to sound tight and cohesive, using a drum bus can be a great solution. It allows you to process all of your drum tracks collectively and apply EQ, compression, and other effects.
By doing this, you can achieve a more balanced and professional sound.
If you want to take your drum tracks to the next level, a drum bus can be a powerful tool. This technique involves routing all of your individual drum tracks to a single bus track, allowing you to process them as a group. Here are some tips for getting the most out of your drum bus:
Using Parallel Compression
Parallel compression is a technique that involves mixing a heavily compressed version of your drums with the dry signal. This can help to bring out the quieter elements of your drum mix, while still maintaining the punch and impact of the original tracks. To use parallel compression on your drum bus, follow these steps:
- Create a new aux/auxiliary track
- Route all of your individual drum tracks to the new aux track
- Apply heavy compression to the aux track
- Blend the compressed and dry signals to taste
Using Eq To Enhance The Mix
EQ can be a powerful tool for shaping the sound of your drum bus. By cutting or boosting certain frequencies, you can create more clarity and separation between the different elements of your drum mix. Here are some tips for using EQ on your drum bus:
- Cut any frequencies that clash with other elements in the mix (e.g. guitar, bass, vocals)
- Boost the high-end for more sparkle and presence
- Use a low-pass filter to roll off any unwanted high-end noise
- Sculpt the midrange to highlight the most important elements of your drum mix (e.g. kick and snare)
Using Saturation Or Distortion For Character
If you want to add some extra character and warmth to your drum bus, consider using a saturation or distortion plugin. This can help to add some grit and texture to your sound, and can be particularly effective for genres like rock and metal. To use saturation or distortion on your drum bus, try these tips:
| Step | Description |
|---|---|
| 1 | Insert a saturation or distortion plugin onto your drum bus track |
| 2 | Adjust the amount of saturation/distortion to taste |
| 3 | Use the plugin’s EQ controls to shape the sound further |
Overall, the drum bus can be a powerful tool for enhancing the impact and clarity of your drum tracks. By using techniques like parallel compression, EQ, and saturation, you can achieve a more professional and polished sound for your mix.
Common Mistakes When Using A Drum Bus
When it comes to mixing drums, using a drum bus is a popular technique to achieve a cohesive sound. However, not everyone uses it correctly, leading to common mistakes that can negatively impact the mix. In this blog post, we will discuss the most common mistakes when using a drum bus and how to avoid them.
Overprocessing The Bus
One of the biggest mistakes when using a drum bus is overprocessing it. It’s easy to get carried away with plugins, such as EQ and compression, and apply them heavily to the bus. But this can result in a muffled or distorted sound, which defeats the purpose of using a drum bus in the first place.
Instead, start with minimal processing and make small adjustments until the mix sounds balanced. Use a light touch with EQ and compression, and remember that less is often more. You can always add more processing later if needed.
Neglecting Individual Drum Track Levels
Another common mistake when using a drum bus is neglecting the individual drum track levels. It’s essential to balance the levels of each drum track before sending them to the bus. If one drum track is too loud or soft, it will affect the overall sound of the drums.
Use a reference track or listen critically to each drum track to make sure they’re balanced. Adjust the levels accordingly, and then send them to the drum bus. This will ensure a coherent and punchy drum sound.
Not Balancing The Mix Properly
Finally, not balancing the mix properly can lead to a weak or unbalanced drum sound. It’s important to balance all elements of the mix, including vocals, guitar, bass, and drums. Neglecting one element can result in the other elements overpowering it.
Use panning, EQ, and volume faders to balance the mix. Pay attention to the drum bus’s level and adjust it until it fits perfectly with the rest of the mix. This will result in a well-balanced mix with a cohesive drum sound.
In conclusion, using a drum bus can be an effective technique for achieving a cohesive drum sound. However, it’s important to avoid common mistakes such as overprocessing the bus, neglecting individual drum track levels, and not balancing the mix properly. By following these guidelines, you can achieve a powerful and punchy drum sound in your mix.

Credit: www.youtube.com
Frequently Asked Questions Of Do You Need A Drum Bus
What Is The Point Of A Drum Bus?
A drum bus allows you to group multiple tracks together and apply effects and processing to all of them simultaneously, resulting in a more cohesive and polished sound. It helps in enhancing the overall dynamics and tonality of the drums.
What Does Drum Buss Do In Ableton?
The drum buss in Ableton is a plugin that helps enhance and shape the sound of drum tracks. It adds warmth and punch, while also giving control over the individual elements of the drums for better mixing. It includes a variety of processing options such as compression, saturation, and transient shaping.
What Kind Of Compressor Do I Need For A Drum Bus?
For a drum bus, you’ll need a compressor that can handle fast transient peaks and has a fast attack/release time. A FET or VCA compressor would be a good choice. Look for a compressor with a high ratio and a low threshold.
This will prevent the drums from overpowering the rest of the mix.
Should I Put Reverb On Drum Bus?
Adding reverb to drum bus can enhance the overall sound and create a more cohesive mix. However, it depends on the type of music or the specific track. You should experiment with the amount of reverb and find the right balance that complements the drum and the rest of the instruments in the mix.
Conclusion
A drum bus can make a significant impact on your music production. Whether you are a professional or a bedroom producer, utilizing a drum bus can enhance the overall sound and energy of your drums. By adding depth, clarity, and punch to your mix, the drum bus can take your tracks to the next level.
Don’t underestimate the power of this tool and consider incorporating it into your workflow. Happy producing!