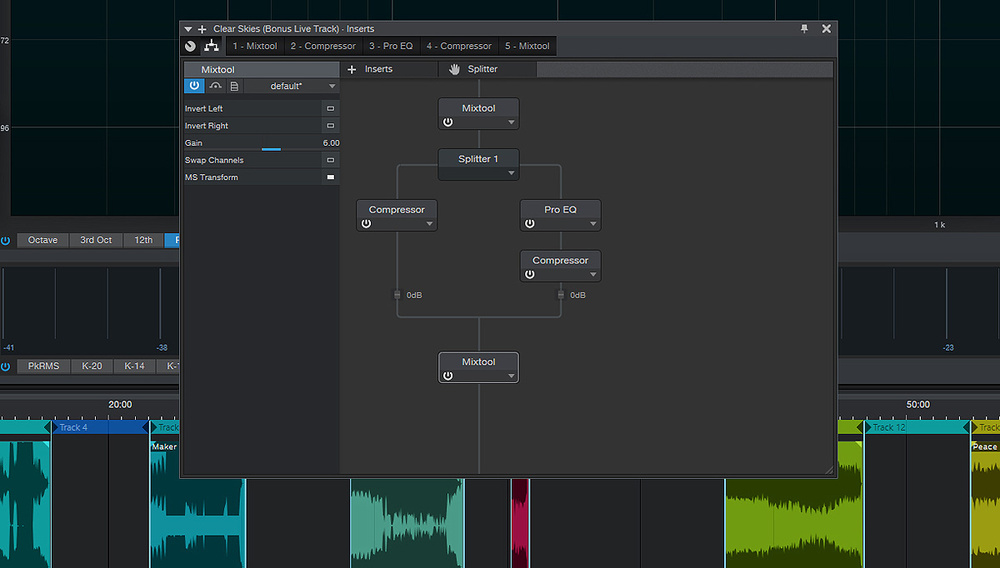
In Studio One 3, the splitter feature enables users to perform parallel compression effortlessly. By splitting the signal into two or more streams, it is easy to apply different processing to each stream and blend them together to achieve the desired effect.
To use the splitter feature for parallel compression, users need to send the audio to different buses and use a compressor on each bus. The compressed signals then get blended together to create a more natural and dynamic sound. With this feature, users can achieve a more transparent and musical parallel compression quickly and easily.
Studio One 3’s splitter feature is a powerful tool for achieving parallel compression. By splitting audio signals into two or more streams, users can apply different processing to each stream and blend them together for a more natural and dynamic sound. We will show you how to use Studio One 3’s splitter feature for parallel compression. We will walk you through the process of sending audio to different buses and using a compressor on each bus. We’ll also discuss how to blend the compressed signals together to achieve a transparent and musical sound. With this guide, you can use Studio One 3’s splitter feature to take your music production to the next level.

Credit: blog.presonus.com
Step-by-step Guide
If you want to add some punch and power to your mix, utilizing the splitter feature in Studio One 3 can be a game changer. In this guide, we’ll take you step-by-step through using the splitter feature for parallel compression.
Setting Up The Tracks
The first step is to set up the tracks you want to use for parallel compression. Let’s say you have a drum track that needs some extra oomph. Duplicate the track by right-clicking on it and selecting ‘Duplicate Track’. You can name the duplicate track something like ‘Drums Comp’.
Adding The Splitter Effect To The Track
Next, add the splitter effect to the new ‘Drums Comp’ track by selecting the track and clicking on Studio One 3’s ‘FX’ button. From there, select ‘Splitter’ from the list of effects. You should see the splitter effect at the top of the screen.
Adding The Compression Effect To The Split Tracks
Now that the splitter effect is in place, add a compressor to each of the split tracks. You can do this by selecting each track and clicking on the ‘FX’ button again and selecting ‘Compressor’.
Adjusting The Compression Settings
After you’ve added the compressor to each of the split tracks, it’s time to adjust the settings. Play back the track and adjust the compression parameters until it sounds the way you want it to. You can adjust the ratio, threshold, attack, release and makeup gain.
Blending The Compressed And Uncompressed Tracks
The key to getting the best sound using parallel compression is to blend the compressed and uncompressed tracks. To do this, go back to your original drum track and reduce its volume, up to 6 dB should be fine. Once you’ve done that, gradually bring up the compressor on the ‘Drums Comp’ track until you reach the desired sound.
There you have it, a step-by-step guide on using the splitter feature in Studio One 3 for parallel compression. Give it a try, and see how much power and punch you can add to your mixes.

Credit: www.soundonsound.com
Frequently Asked Questions For Using Studio One 3 Splitter Feature Parallel Compression
Should You Always Use Parallel Compression?
Parallel compression should not be used in all situations. It depends on the specific music production needs and goals. Parallel compression can enhance the sound and add depth, but it can also cause unwanted artifacts and distortions if not used properly.
Therefore, it’s important to evaluate the situation and decide whether to use parallel compression or not.
What Are The Best Parallel Compression Settings For Vocals?
For parallel compression on vocals, use a compression ratio of 2:1 to 4:1, a fast attack time of 10 ms and a slow release time of 100 to 300 ms. Adjust the threshold so the compression engages evenly across the vocal track.
Blend the compressed track with the dry track to taste.
How Do You Set Up Parallel Compression?
To set up parallel compression, follow these steps: 1. Create a duplicate of the audio track and send one to a compressor (that will affect the compressed track) 2. Apply a high ratio and low threshold on the compressor 3. Adjust the volume of the compressed track to match the level of the original track 4.
Blend both tracks together to get a noticeable yet balanced compression effect
Does Parallel Compression Cause Phasing?
Parallel compression can cause phasing if the phase relationships between the dry and compressed signals are not in sync. To avoid phasing, it’s important to match the phase of the compressed signal to that of the dry signal.
Conclusion
To sum it up, the splitter feature in Studio One 3 is a powerful tool that can be used to create unique and dynamic sounds through parallel compression. By splitting the signal and applying different processing to each part, you can achieve a more balanced and textured sound.
With a little experimentation and practice, you can take your production skills to the next level. So, give it a try and see the difference for yourself!