To monitor and control room acoustics in a home studio for mastering, it’s essential to invest in acoustic treatment and use quality monitoring equipment. Mastering in a home studio has become increasingly popular as technology has improved, making it possible to create professional-quality music at home.
However, one of the biggest challenges faced by those working from home is ensuring accurate monitoring and controlling room acoustics. Room acoustics refers to the way sound behaves in an enclosed space and can significantly affect the quality of the final mix.
Therefore, it’s essential to invest in acoustic treatment, such as absorption panels and bass traps, and utilize quality monitoring equipment, such as near-field monitors or headphones. This article will explore the essential guide to monitoring and controlling room acoustics in a home studio for successful mastering.
Credit: www.guitarcenter.com
Understanding The Basics Of Monitoring And Room Acoustics
Understanding the basics of monitoring and room acoustics is crucial for high-quality sound in home studio mastering. Proper positioning of monitors, use of acoustic treatment, and paying attention to room dimensions are key factors to consider.
When it comes to producing high-quality music, understanding the basics of monitoring and room acoustics is crucial. As a mastering engineer, it is essential to ensure that your home studio’s acoustics and monitoring systems are optimized to deliver the best sound quality possible. The following sections will discuss what monitoring is in audio engineering and the importance of room acoustics in mastering.
What Is Monitoring In Audio Engineering?
Monitoring is the process by which audio engineers listen to their mixes through speakers or headphones to detect and assess any sound issues. It includes checking the levels, frequencies, dynamics, and other technical aspects of the mix. The ultimate goal of monitoring is to achieve a balanced mix that sounds good on different playback systems, from car stereos to high-end speakers. When setting up a home studio, it is crucial to choose a monitoring system that accurately reproduces the sound of your music. This can be achieved by investing in high-quality studio monitors or headphones that have a flat frequency response. It’s also important to set up the monitors correctly by positioning them at an angle aimed towards the listener and away from reflective surfaces.
Importance Of Room Acoustics In Mastering
Room acoustics play a vital role in the mastering process. A poorly treated room can introduce unwanted sound reflections, standing waves, and resonances that can affect the final sound of the mix. To achieve accurate monitoring, it’s important to ensure that your home studio is acoustically treated. Acoustic treatment can involve adding bass traps, diffusers, and absorbers to your room to reduce unwanted reflections and standing waves. This will help you accurately hear the sound of your music and make informed decisions about the mixing process. In conclusion, understanding the basics of monitoring and room acoustics is essential to achieving high-quality results in your home studio. By investing in high-quality monitoring systems and treating your room’s acoustics, you can ensure that your mixes translate perfectly to different playback systems, resulting in a professional sound that meets the highest standards of music production.
Determining The Right Monitoring Setup For Your Home Studio
Choosing the right monitoring setup is crucial for achieving accurate sound when mastering in a home studio. Understanding how room acoustics impact sound quality is important to find the right setup.
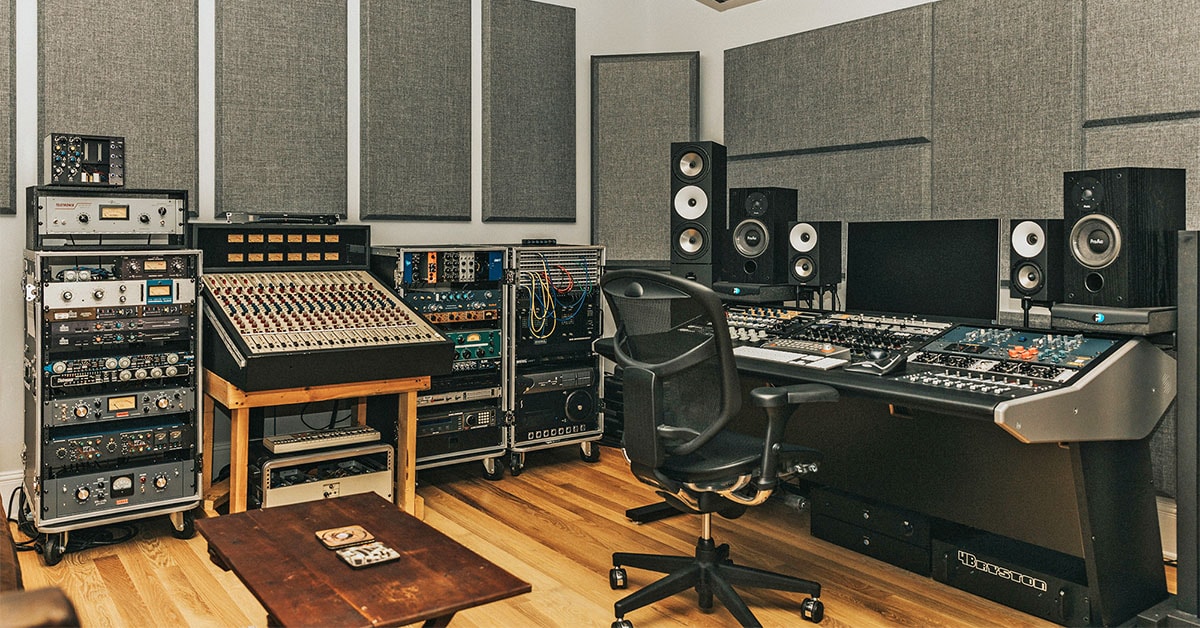
Determining the Right Monitoring Setup for Your Home Studio Once you have set up your home studio, the next important task is to determine the right monitoring setup. There are various factors to consider when it comes to choosing the right studio monitors for your home setup. This article will guide you on the types of studio monitors, their power and frequency range, as well as their placement and calibration to ensure that you achieve great results in your mastering process. Types of Studio Monitors (H3) Studio monitors can be categorized into two main types: active and passive monitors. Active monitors, also known as powered monitors, have an inbuilt amplifier and require just a connection to an audio source, whereas passive monitors require a separate amplifier. Active monitors are the commonly used type in home studios because they are easier to set up and offer better sound quality. Power and Frequency Range (H3) The power and frequency range of your studio monitors play a crucial role in the sound quality you can achieve in your home studio. It is essential to choose monitors that have sufficient power output and a frequency range that can handle the different sound types. The power output should be high enough to produce a clear, distortion-free sound, while the frequency range should be wide enough to handle all the frequencies in your music. Placement and Calibration (H3) It is crucial to position your studio monitors correctly for the best results in your mastering process. The monitors should be placed at an equal distance from your listening position, forming an equilateral triangle. Additionally, monitors should be angled towards your ears to aim the sound directly to your ears. Calibration should also be done to balance the sound and ensure that the frequencies are well-aligned. In conclusion, achieving great sound quality in your home studio is primarily dependent on your monitoring setup. By choosing the correct type of studio monitors, ensuring that they have enough power and a wide frequency range, and calibrating them correctly, you will get excellent results in your mastering process.
Optimizing Room Acoustics For Accurate Monitoring
Achieving accurate monitoring in a home studio requires considering the room acoustics. Optimizing elements like speaker position, sound absorption, and diffusion can improve your mixes. With this essential guide to monitoring and room acoustics, you can create a more accurate and professional sound in your home studio.
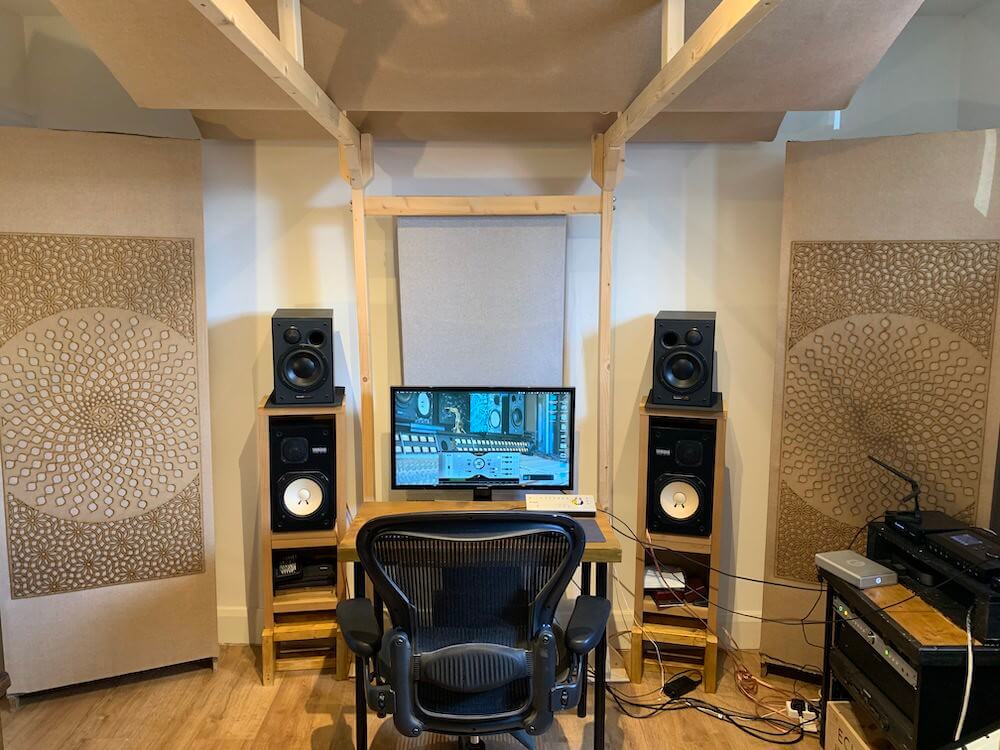
Optimizing Room Acoustics for Accurate Monitoring When it comes to mastering in a home studio, achieving accurate monitoring is essential for producing high-quality music. Optimizing your room acoustics is crucial in achieving this, as it greatly influences how sound is perceived in your space. It’s essential to control the reflections, resonances, and standing waves in your room to get the most accurate representation of your mix. Here are some room treatment options to consider:
Room Treatment Options
Room treatment options can be classified into absorption, diffusion, and bass trapping. Each option serves a specific purpose in optimizing your room acoustics.
Absorption
Absorption is used to control reflections in your room. Using absorbent materials such as acoustic foam, fiberglass, or mineral wool on your walls, ceiling, and floor will reduce the reflected sound energy in the room. This decreases any ‘coloration’ in your mix, giving you a clearer representation of your music.
Diffusion
Diffusion helps spread the sound energy throughout the room more evenly, providing a more natural sound. Rather than absorbing the sound energy, diffusion scatters it, preventing any unwanted reflections from becoming too noticeable. Using diffusers made of specific materials and shapes will scatter sound energy and randomize reflections, resulting in a more natural, even sound.
Bass Traps and Diffusers
Bass traps and diffusers are useful in controlling the low-frequency resonances in your room, which can produce standing waves and bass buildup. Bass traps are designed to absorb low-frequency sounds that bounce around your room, while diffusers scatter the trapped sound energy in various directions. Using bass traps and diffusers, especially around your listening position, can significantly improve accuracy in your monitoring.
Dealing With Standing Waves
Standing waves are a common issue in home studios, resulting from sound waves reflecting off parallel surfaces and creating resonances. These can cause peaks or nulls in the frequency response of your mix, and it’s essential to tame them. One of the most effective methods of dealing with standing waves is by using bass traps. Placing bass traps in the corners of your room absorbs low-frequency waves, reducing the impact of standing waves. When designing your studio, it’s also best to avoid creating parallel surfaces, as these can amplify the issue. Optimizing your room acoustics for accurate monitoring is crucial to producing high-quality music in your home studio. With the right room treatment options, and consideration of standing waves, you can ensure your mixes are accurate and free from unwanted coloration and resonance.

Credit: www.masteringthemix.com
Dealing With Common Room Acoustics Issues
Achieving optimal sound quality in a home studio is crucial for mastering music. Understanding common room acoustic issues and implementing effective monitoring techniques is essential for creating professional-level audio recordings. This guide provides an in-depth overview of how to tackle these challenges for optimal results.
When it comes to mastering music in a home studio, having proper room acoustics is crucial to achieving a professional sound. The room’s size, shape, and surfaces can impact how sound reflects and travels, leading to common issues like flutter echoes, resonance, and noise. By understanding these issues, you can take steps to address them and improve your studio’s acoustics.
Flutter Echoes And Reflections
Flutter echoes and reflections are common room acoustics issues that can be distracting and impact sound quality. Flutter echoes occur when sound waves bounce back and forth between parallel walls, creating a fluttering effect. Reflections can occur when sound bounces off surfaces like floors, ceilings, and furniture, leading to unwanted echoes. To address flutter echoes, adding acoustic panels or diffusers can help distribute sound energy evenly and reduce the echo effect. Placing panels strategically on walls, ceilings, and corners can help break up the parallel surfaces that lead to fluttering. For reflections, adding rugs or foam to floors and ceilings can help absorb sound and prevent it from bouncing around the space.
Resonance And Modal Issues
Resonance and modal issues can impact bass frequencies and make it difficult to balance low-end sound. Resonance occurs when sound waves bounce back and forth between two surfaces, amplifying specific frequencies. Modal issues are caused by standing waves, which occur when sound waves reflect off parallel walls and create nodes or peaks in specific frequency ranges. To address these issues, adding bass traps can help absorb low-end frequencies and prevent standing waves. Placing bass traps in corners or near walls can help address resonance issues by absorbing specific frequencies. Adjusting the position of speakers and listening position can also help reduce resonance and modal issues.
Noise And Vibration Control
Noise and vibration can also impact room acoustics and sound quality. Noise can come from external sources like traffic or air conditioning, while vibration can be caused by equipment or structure. Addressing these issues can help reduce distractions and improve sound quality. To address noise, adding acoustic curtains or soundproofing materials like mass-loaded vinyl can help absorb external sound. For vibration, using isolation pads or stands can help prevent equipment or floors from vibrating and impacting sound quality. By understanding and addressing common room acoustics issues like flutter echoes, resonance, and noise, you can create a better space for mastering music in your home studio. With these essential monitoring and room acoustics tips, you can achieve a professional sound and take your music to the next level.
Mastering Techniques For Improved Monitoring And Room Acoustics
Mastering techniques for improved monitoring and room acoustics are crucial for achieving professional-quality sound in a home studio. This essential guide covers everything from speaker placement and room treatments to understanding EQ and frequency response, ensuring that your music sounds its best.
Equalization And Dithering
Equalization and Dithering are two essential techniques used in the mastering process to enhance the sonic quality of a track. Equalization is the process of adjusting the frequency response of a track, making subtle changes to the levels of specific frequencies. The aim is to create balance and ensure that no frequency ranges are overpowering. Dithering, on the other hand, helps to minimize the impact of truncation noise that can occur during the conversion of digital audio. It is used to improve the quality of the audio as it is converted to a lower bit-depth format.
Multiband Compression And Limiting
Multiband Compression and Limiting are techniques commonly used in the mastering process to manage dynamics. Compression is the process of reducing the dynamic range of a track, making the louder sections quieter and the quieter sections louder. Multiband compression offers more precise control over specific frequency bands in the track. Limiting is a more extreme form of compression, which is used to prevent clipping and distortion at the loudest parts of the track. It is an essential tool to ensure that the final mastered track is loud, punchy, and competitive with other tracks in the same genre.
Phase And Stereo Imaging
Phase and Stereo Imaging are crucial techniques used to ensure that the final mastered track sounds good on all playback systems. Phase issues can cause problems with mono compatibility and affect the overall sound of the track. Stereo imaging is the process of adjusting the balance between the left and right stereo channels, creating a wider or narrower stereo image. Mastering engineers use specialist tools to ensure that no phase problems exist in the track, and the stereo image is perfectly balanced. In conclusion, mastering is a complex process that requires a professional level of skill and experience. Employing a range of specialist techniques such as equalization, limiting, compression, phase, and stereo imaging ensures that the final mastered track sounds amazing on all playback systems.
Advanced Monitoring And Room Acoustics Considerations
Mastering in a home studio requires more than just quality monitors and well-treated spaces. Advanced monitoring and room acoustics considerations are crucial to achieving a professional sound. This section will discuss advanced calibration techniques, the role of headphones in mastering, and surround sound mastering.
Advanced Calibration Techniques
Calibrating your monitors is an essential step in advanced monitoring. Proper calibration ensures that the sound you hear is accurate and reflects what the average listener will hear.
To achieve accurate calibration, you can use specialized software, such as Sonarworks Reference. This software measures the frequency response of your monitors and adjusts it to a neutral curve, compensating for any acoustic deficiencies in your room. Sonarworks Reference provides a more accurate reference point for mixing and mastering, allowing you to rely on your ears more than on your equipment.
The Role Of Headphones In Mastering
Headphones are a valuable tool in mastering, especially when you don’t have access to a treated room or have neighbours close by. However, the use of headphones can lead to overcompensation of certain frequencies, which could result in an inaccurate and unbalanced mix.
To avoid these issues, it’s recommended to have a secondary pair of headphones that sound different from your primary pair. This way, you can cross-reference the sound between the two and make informed decision-making.
Surround Sound Mastering
Surround sound mastering is becoming increasingly popular with the rise of home theatre systems. However, surround sound mastering requires additional considerations in terms of speaker placement and acoustic treatment.
For surround sound mastering, it’s recommended to have five identical speakers for the front, left, center, right, and surround channels, along with a dedicated subwoofer. The room should also be treated with acoustic panels and bass traps to minimize reflections and standing waves. Lastly, consider calibrating your surround sound system with specialized software, such as Sonarworks Reference 4 Studio Edition, to ensure accurate frequency response.
Overall, advanced monitoring and room acoustics considerations play a crucial role in achieving a professional sound in a home studio. Proper calibration, the use of headphones, and surround sound mastering are just a few aspects to consider when elevating your mastering game.
Best Practices For Maintaining An Ideal Monitoring And Room Acoustics Setup
Mastering music in a home studio can be a challenging task, and the secret to superior output lies in maintaining an ideal monitoring setup and room acoustics. There are a few best practices that every music enthusiast should follow in order to create an ideal setup for their projects.
Regular Calibration And Maintenance
Make sure your monitoring devices are calibrated regularly to ensure accurate sound reproduction. Monitor calibration should be carried out in a place free from external noise to avoid inaccuracies. Regular maintenance and cleaning will also protect your equipment from damage and ensure longevity.
Upgrading Your Equipment And Room Treatment
Investing in good-quality equipment can have a big impact on the overall quality of your final mix. Upgrading your speakers, amplifiers, and subwoofers can help achieve better sound reproduction. Additionally, room treatment like bass traps and acoustic panels can eliminate unwanted reflections and standing waves. This can help create a clear and focused sound image.
Testing And Comparing Your Mixes
It is essential to test and compare your mixes consistently. This will help you to identify any problems in the final output and make the necessary tweaks. Comparing your mixes across different devices and in different environments can also help you achieve a well-balanced track.
| Best Practices | Benefits |
|---|---|
| Regular Calibration and Maintenance | Ensure accurate sound reproduction and equipment longevity |
| Upgrading Your Equipment and Room Treatment | Better sound quality and reduction of unwanted reflections and standing waves |
| Testing and Comparing Your Mixes | Identification of any issues and achieving a well-balanced track |
- Regular calibration of monitoring devices is crucial to maintain accuracy in sound reproduction.
- Upgrading to high-quality equipment and incorporating room treatment can help eliminate unwanted reflections and standing waves.
- Consistent testing and comparing of mixes can result in well-balanced and high-quality track output.
- Regular calibration and maintenance of monitoring devices.
- Investing in high-quality equipment and room treatment to achieve a better sound quality.
- Consistent testing and comparing of mixes across different devices and environments to achieve a well-balanced track.
Credit: musixon.org
Frequently Asked Questions On The Essential Guide To Monitoring And Room Acoustics When Mastering In A Home Studio
How Do You Check The Acoustics Of A Room?
To check the acoustics of a room, clap your hands or snap your fingers while listening for reverberation. You can also use a sound level meter to measure the sound level and frequency response. Additionally, you can hire a professional acoustician or use acoustic simulation software to evaluate the room’s sound quality.
How Should A Monitoring Room Be Acoustically Treated In Order To Improve Accuracy?
To improve accuracy in a monitoring room, it is important to acoustically treat the space. This can be achieved by installing acoustic panels to absorb excess sound waves and create a more balanced listening environment. Additionally, it is recommended to position speakers and equipment correctly, to minimize reflections and optimize sound quality.
How Do You Treat A Room For Mastering?
To treat a room for mastering, you need to consider the acoustics, positioning of speakers, use of diffusion and absorption materials, and elimination of standing waves. Work with a professional acoustician and invest in quality equipment to get the best results.
How Do You Optimize Acoustics In A Room?
To optimize acoustics in a room, you can use acoustic treatment products such as absorbers, diffusers, and bass traps. Placing heavy furniture, bookshelves, and rugs can also help. Positioning speakers and listening positions accurately, soundproofing, and controlling background noise is important too.
Consulting a professional for advice can be helpful.
Conclusion
Having a good understanding of room acoustics and monitoring is crucial for producing a high-quality mastered track in a home studio. It is important to invest in quality equipment, monitor at a reasonable volume, and listen in various scenarios to ensure the best possible outcome.
With attention to detail and careful consideration of the factors discussed in this essential guide, you can take your home studio mastering to the next level. Start mastering like a pro today!