Setting up studio monitors involves placing them at ear level, forming an equilateral triangle with your listening position to ensure accurate sound reproduction. Proper setup is essential for optimal audio quality and mixing accuracy.
Before diving into the technicalities of studio monitor setup, you should first understand the basics of how studio monitors work and why their positioning matters. By following some key guidelines, you can create an effective, balanced sound environment in your studio.
This article will cover the steps and tips required to set up studio monitors correctly, helping you achieve the best possible audio performance for your recording and mixing needs.

Credit: www.blackghostaudio.com
Choosing The Right Studio Monitors
Understanding Your Needs
Consider room size, mixing style, and budget.
Comparing Different Types And Sizes
Key factors: near-field, mid-field, active, passive, and driver size.
Setting Up Your Studio Monitors
Properly setting up your studio monitors is crucial for achieving accurate sound reproduction in your workspace. From optimizing speaker placement to calibrating your monitors, these steps play a key role in ensuring the best audio quality.
Optimizing Speaker Placement
When positioning your studio monitors, create an equilateral triangle with your listening position. This means the distance between each speaker and your ears should be equal. Place the monitors at ear level to achieve optimal listening experience. Avoid placing them directly against walls to prevent sound reflections and distortions.
Calibrating Your Monitors
Before calibrating, ensure that your room is acoustically treated to minimize reflections. Use a calibration microphone and software to measure the frequency response of your monitors. Adjust the monitor’s settings based on the calibration results to achieve a flat frequency response. Regular monitoring calibration is essential for accurate sound reproduction.
Understanding Acoustic Treatment
When setting up a studio monitor, it’s crucial to consider acoustic treatment. This process involves addressing the sound reflections and resonances within the listening environment. Proper acoustic treatment can minimize distortions and improve the accuracy of the sound reproduction, allowing for better mixing and mastering results.
Identifying Problematic Frequencies
Before implementing any acoustic treatment, it’s essential to identify the problematic frequencies in the room. This can be done using measurement tools or by simply listening for areas where certain frequencies become exaggerated or muffled. Identifying these problematic frequencies is the first step in creating an effective acoustic treatment plan.
Implementing Acoustic Solutions
Once problematic frequencies have been identified, it’s time to implement acoustic solutions. This can involve various techniques and products such as bass traps, diffusers, absorbers, and acoustic panels. Each of these solutions targets specific issues within the frequency range, helping to create a more balanced and controlled listening environment.
Utilizing Monitor Controller And Eq
Maximize your studio monitor setup with a monitor controller and EQ. Achieve crystal-clear sound and precise audio adjustments for optimal mixing and mastering. Enhance your listening environment and elevate the quality of your music production.
Utilizing Monitor Controller and EQ
Maximizing Control and Flexibility
When it comes to setting up your studio monitor system, one important aspect that cannot be overlooked is the utilization of a monitor controller. A monitor controller acts as a central hub, allowing you to control and adjust the volume levels of your monitors, as well as switch between various audio sources.
By incorporating a monitor controller into your setup, you maximize your control and flexibility in managing your audio monitoring environment. It provides you with a convenient way to fine-tune the volume levels, enabling you to accurately hear and analyze your mix from different listening positions.
When selecting a monitor controller, consider features such as multiple inputs and outputs, talkback functionality, and headphone amplification. These additional features provide an extra layer of convenience and functionality to your studio setup, allowing for seamless monitoring and communication.
Applying EQ Techniques
Applying equalization (EQ) techniques to your studio monitor setup is another crucial step in achieving optimal sound reproduction. EQ allows you to manipulate the frequency response of your monitors, helping you address any imbalances or deficiencies in your audio playback.
One essential tool for applying EQ is a dedicated graphic or parametric equalizer. These EQ units provide you with precise control over the different frequency bands, allowing you to boost or cut specific frequencies as needed. By utilizing proper EQ techniques, you can finely shape the tonal balance of your mix, ensuring that each instrument and element is accurately represented.
Graphic Equalizers
Graphic equalizers display a series of sliders or knobs, each representing a specific frequency band. These sliders can be adjusted to boost or cut the corresponding frequencies, providing a straightforward and intuitive way to shape your audio playback. When using a graphic equalizer, take advantage of its visual representation to identify and address any problematic frequencies in your mix.
Parametric Equalizers
Parametric equalizers, on the other hand, offer more advanced control over the audio spectrum. They allow you to adjust not only the amplitude (boost or cut) but also the center frequency and bandwidth of each frequency band. This precise control gives you the flexibility to target specific problem areas in your mix and apply corrective EQ.
In conclusion, by utilizing a monitor controller, you enhance your control and flexibility in managing your studio monitor system. Additionally, applying EQ techniques using graphic or parametric equalizers enables you to finely shape the tonal balance of your mix, resulting in accurate sound reproduction. Take advantage of these tools to elevate the quality of your studio monitoring setup.
Maintaining And Monitoring Your Studio Monitors
When it comes to maintaining and monitoring your studio monitors, there are a few important steps you can take to ensure optimal performance. In this section, we will cover some key aspects of maintaining and monitoring your studio monitors, including cleaning and maintenance tips, and conducting regular sound checks.
Cleaning And Maintenance Tips
Your studio monitors are an essential tool for producing high-quality music and audio. To keep them in top condition, it’s important to regularly clean and maintain them. Here are some tips to help you with this:
- Keep them dust-free: Dust can accumulate on the surface and inside your studio monitors, affecting their overall performance. Use a soft, lint-free cloth to wipe away any dust regularly.
- Avoid liquid cleaners: Never use liquid cleaners directly on your studio monitors, as they can damage the electronics. Instead, dampen the cloth with a small amount of water or mild non-abrasive cleaning solution, and gently wipe the surface.
- Clean the drivers: Over time, the drivers of your studio monitors can accumulate dust and debris. Use a soft brush or compressed air to remove any particles from the driver cones and vents carefully.
- Check the cables: Regularly inspect the cables and connectors of your studio monitors for any signs of wear or damage. Replace damaged cables promptly to ensure optimal performance.
- Monitor the environment: Keep your studio monitors in an environment with stable temperature and humidity levels. Excessive heat or moisture can damage the internal components, so it’s important to maintain a suitable environment.
Conducting Regular Sound Checks
To ensure that your studio monitors are delivering accurate and balanced sound, conducting regular sound checks is crucial. Here are a few steps you can follow to conduct an effective sound check:
- Positioning: Make sure that your studio monitors are correctly positioned in your studio space. Refer to the manufacturer’s guidelines for the optimal placement.
- Calibration: Use a reference track or test tone to calibrate the volume levels of your studio monitors. This will help ensure consistent and accurate sound reproduction.
- Frequency response: Test the frequency response of your studio monitors using an equalizer or frequency sweep. Make adjustments if necessary to achieve a balanced sound across different frequencies.
- Audition different audio sources: Listen to a variety of audio sources, such as different genres of music, podcasts, or movies, to assess how your studio monitors handle different types of audio.
- Monitor for any abnormalities: Pay attention to any buzzing, distortion, or other unusual sounds coming from your studio monitors. If you notice any abnormalities, troubleshoot the issue or seek professional assistance if needed.
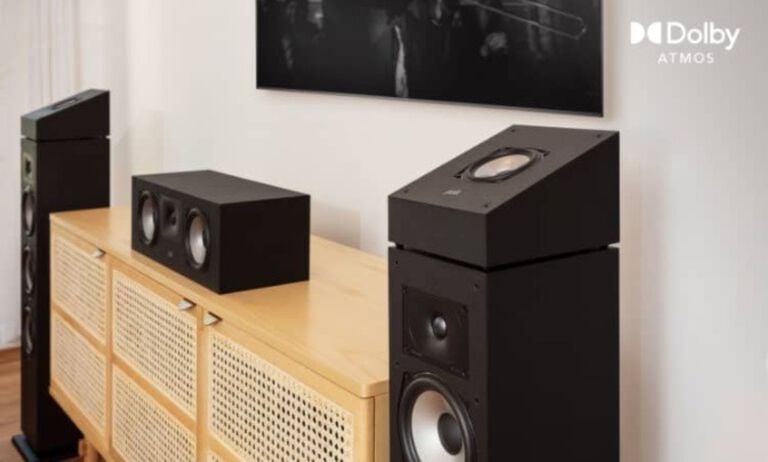
Credit: www.polkaudio.com
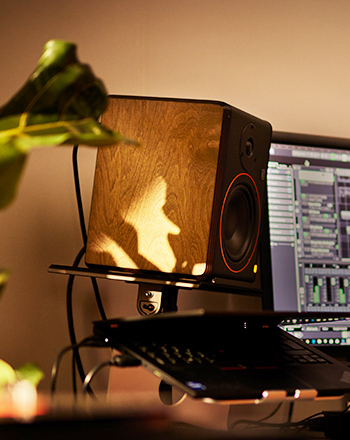
Credit: www.palmer-germany.com
Frequently Asked Questions On Studio Monitor Setup
How Should I Set Up My Studio Monitors?
Position studio monitors at ear level when seated, forming an equilateral triangle with your head. Angle them inward slightly. Keep them away from walls to avoid reflections. Experiment with placement for optimal sound. Use isolation pads to reduce vibrations.
What Is The 38 Rule For Studio Monitors?
The 38 rule for studio monitors states that speakers should be placed at a 38-degree angle towards the listener. This optimizes sound projection and enhances the listening experience.
How Far Apart Should Speakers Be In A Studio Monitor?
In a studio monitor setup, speakers should be positioned 3-5 feet apart for an optimal listening experience. This distance helps create a balanced stereo image and accurate sound reproduction. Experimenting with speaker placement can further enhance the listening environment.
What Is The Sweet Spot For Studio Monitors?
The sweet spot for studio monitors is the ideal listening position where the sound is accurately balanced. It’s the point where the speakers are positioned at ear level and form an equilateral triangle with your head. This ensures you hear the most accurate and balanced sound reproduction.
Conclusion
A well-calibrated studio monitor setup is crucial for audio professionals and enthusiasts. By considering room acoustics, speaker placement, and quality monitors, you can achieve accurate sound reproduction. This not only enhances the listening experience but also improves the overall quality of your audio productions.
Invest in a reliable setup and experience the difference in your sound.