Proper studio monitor placement is crucial for achieving accurate sound reproduction. Placing the monitors at an equal distance from each other and creating an equilateral triangle with the listener are key factors to consider.
When setting up a professional recording studio or a home studio, the placement of studio monitors cannot be overlooked. Studio monitor placement plays a vital role in achieving accurate sound reproduction. It is not just about the size or quality of the speakers, but where they are placed in relation to the room and the listener.
By properly placing the studio monitors, the sound engineer or producer can hear a true representation of the audio source. This allows for better mixing decisions that can positively impact the final outcome of the recording. We will discuss the importance of proper studio monitor placement and how to achieve the best sound results.
Credit: mixbutton.com
Optimizing Sound With Studio Monitor Placement
The placement of studio monitors plays a crucial role in optimizing your sound. Proper monitor positioning can affect the accuracy of the audio reproduced, reducing unwanted reflections and improving the stereo imaging. Follow some basic guidelines to position your studio monitors correctly, and you’ll be on your way to achieving a better sonic experience.
Studio Monitor Placement is critical for achieving the best results in music production and recording. Correct studio monitor placement enhances sound quality, making it easier to hear what is being recorded, while also providing a comfortable working experience for the producer. In this article, we’ll discuss finding the ideal listening position and the factors that affect monitor placement for achieving optimal sound with studio monitor placement.
Finding The Ideal Listening Position
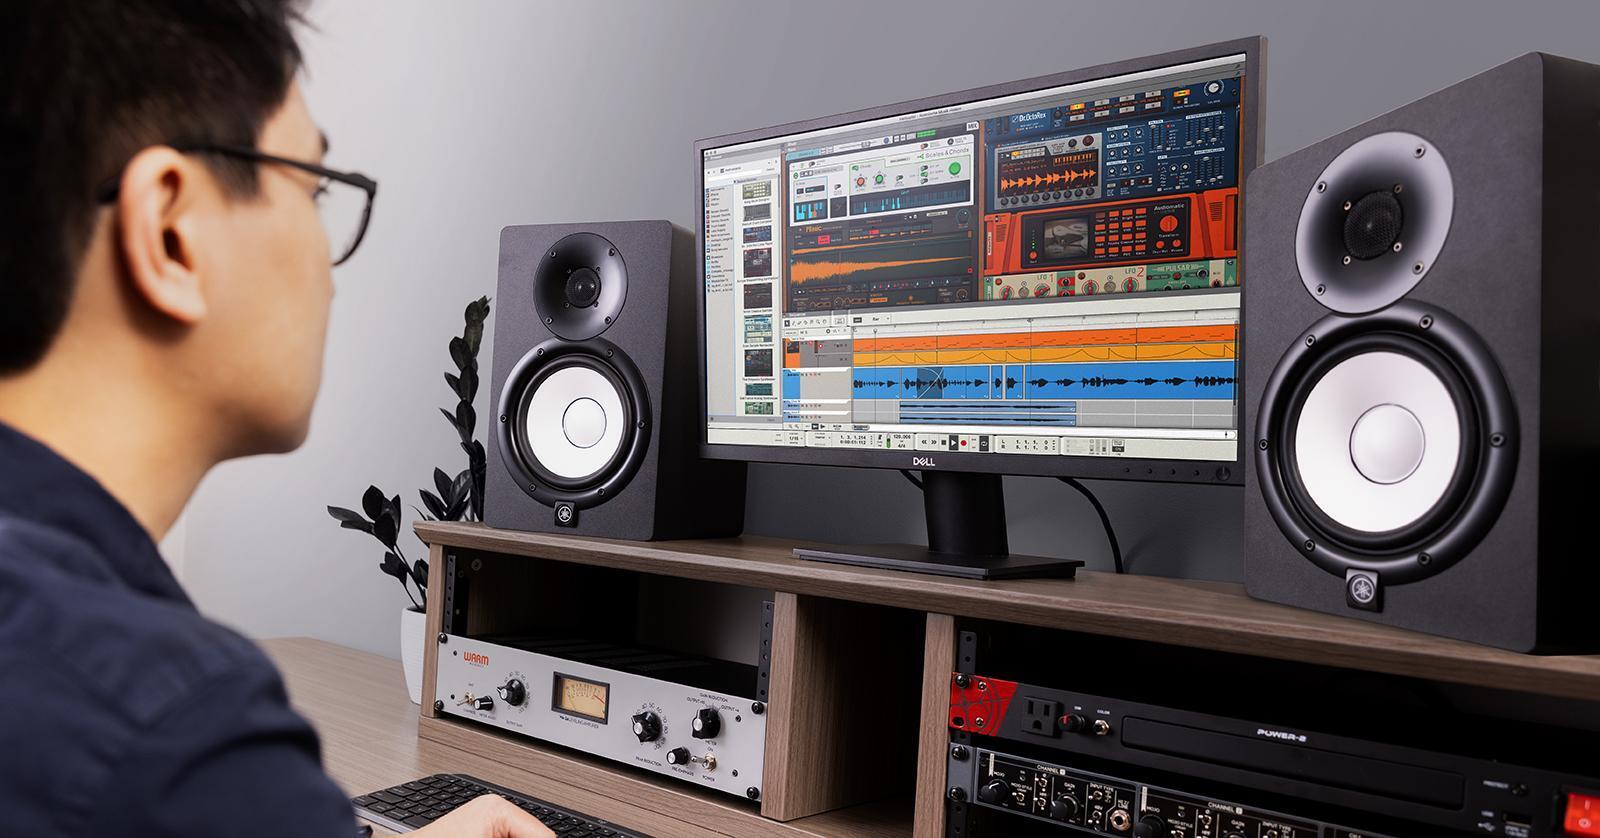
The ideal listening position is where the producer sits when working on music production or recording. Finding the right listening position is critical because it allows the audio engineer to hear an accurate representation of the music. The position should be along the equilateral triangle, with the distance between the listener and both studio monitors being the same. Here are some ways for finding the ideal listening position:
- Mark a point at ear height.
- Place the studio monitors at the same distance from the point.
- Sit at the marked point.
- Now, adjust the distance between the monitors till they form an equilateral triangle with you.
Factors That Affect Monitor Placement
Several factors affect monitor placement, and it’s important to pay attention to all of them while positioning studio monitors. Here are the key factors that affect monitor placement:
| Factor | Description |
| Room Reflections | Avoid placing the monitors near hard surfaces that can reflect sound, as it will lead to time-delay and a poor listening experience. |
| Room Size | The room size impacts the bass response. Ensure that the monitor placement is precise to avoid bass frequencies from building up in corners or unusually dead spots in the room. |
| Monitor Separation | Placing the studio monitors too close to each other will cause overlapping of sound waves. Leave enough space between two monitors to achieve stereo separation. |
| Headrest Reflections | Avoid placing the monitors facing a window or desk or any equipment that can reflect sound back towards the main listening position. |
When it comes to studio monitor placement, the goal is to create a consistent and authentic sound experience for the listener. Finding the ideal listening position and considering factors such as room size, monitor separation, and room reflections ensure an optimal studio monitor placement and improves sound quality.
Best Practices For Studio Monitor Placement
Proper studio monitor placement is crucial for achieving accurate and consistent sound in your mixing and recording sessions. Consider the room dimensions, listening position, and monitor angle and height to ensure the best sound possible.
Studio monitor placement is one of the crucial steps in achieving accurate and quality sound production. In this digital age, anyone can set up a studio, but getting the best out of your monitors requires strategic placement. In this article, we will explore the best practices for studio monitor placement, addressing relevant factors such as horizontal vs. vertical placement, distance from wall, and height of monitors.
Horizontal Vs Vertical Placement
One of the first steps in studio monitor placement is to decide on the orientation – vertical or horizontal. The correct orientation depends on your studio setup and the type of work you do. For instance, if you are mixing audio, it’s best to position your monitors vertically as this mimics the traditional speaker placement in theaters. This orientation provides a clear center image and helps you judge the balance of sound in stereo signals. On the other hand, if you are working with widescreen video content, it may be best to go for horizontal positioning as it provides better imaging. But, regardless of the orientation you choose, ensure that the monitors are positioned at an angle of 60 degrees apart and directly aimed at the listening position.
Distance From Wall
The distance between the monitors and the walls is another important factor to consider when setting up studio monitors. You need to ensure that the monitors are positioned far enough away from the wall to prevent bass buildup and low-end resonance. At the same time, they shouldn’t be too far away to avoid a loss in bass response, especially if you have a small room. A good starting point is at least two feet from the wall, but you can experiment with the distance to find the best position for your studio setup.
Height Of Monitors
The height of your studio monitors is equally important. Ideally, the tweeters should be at ear level, creating an equilateral triangle with your listening position. Some suggest that you measure the distance from the tweeters to the floor and use this measurement to elevate your monitors from your workstation’s surface. However, this may vary depending on your furniture height and, of course, personal preference. To avoid ear fatigue, ensure that the monitors are not too close to your ears. The distance between your ears and the monitor should be at least three feet. This helps avoid ear fatigue and maintains clarity of sound for extended periods of listening. To avoid any unwanted coloration, try to keep a clear line of sight between the monitors and your ears. Implementing these best practices for studio monitor placement will provide the most accurate and reliable sound output. Remember, getting the best studio monitor placement will help you achieve quality audio that will enhance your audio production work.
Room Acoustics And Studio Monitors
Proper studio monitor placement is crucial to achieving optimal sound quality. Consider the distance between the monitors, the height, and angle of placement, as well as the room’s acoustics to achieve the best results.
How Room Acoustics Impact Monitor Placement
Room acoustics play a critical role in determining the quality of sound produced by studio monitors. Understanding this impact is paramount for every sound engineer who aspires to produce high-quality mix tracks. Variations in the shape, size, and surface properties of a room can interfere with the sound produced by studio monitors. With that said, it’s crucial to consider the effect of the room on monitor placement to produce accurate sound. One key consideration is the distance between the walls and studio monitors. Placing studio monitors close to walls can result in bass build-up and other distortions. On the other hand, positioning studio monitors too far away from walls can result in uneven bass distribution. These issues can be addressed by utilizing appropriate room treatment measures.
Recommended Approaches For Treating Room Acoustics
Treating room acoustics entails addressing reflections and absorptions that result from variations in room surfaces. One approach is to install sound absorbers on the walls. These absorbers can either be in the form of foam pads or bass traps, and they work by absorbing sound waves before they reflect across the room. Additionally, you can use diffusers to help distribute the reflected sound waves evenly across the room. Another approach is to use furniture and other objects in the room to disperse sound waves. For example, a bookshelf can help with absorption while also providing a surface for the sound waves to reflect from. A rug or carpet can also help to absorb sound waves while simultaneously providing a different surface for sound waves to reflect from. In conclusion, every sound engineer needs to understand the impact of room acoustics on monitor placement. Proper treatment of room acoustics will ensure that studio monitors produce high-quality sound for accurate mixing and mastering.
Credit: www.sweetwater.com
Placement For Different Studio Environments
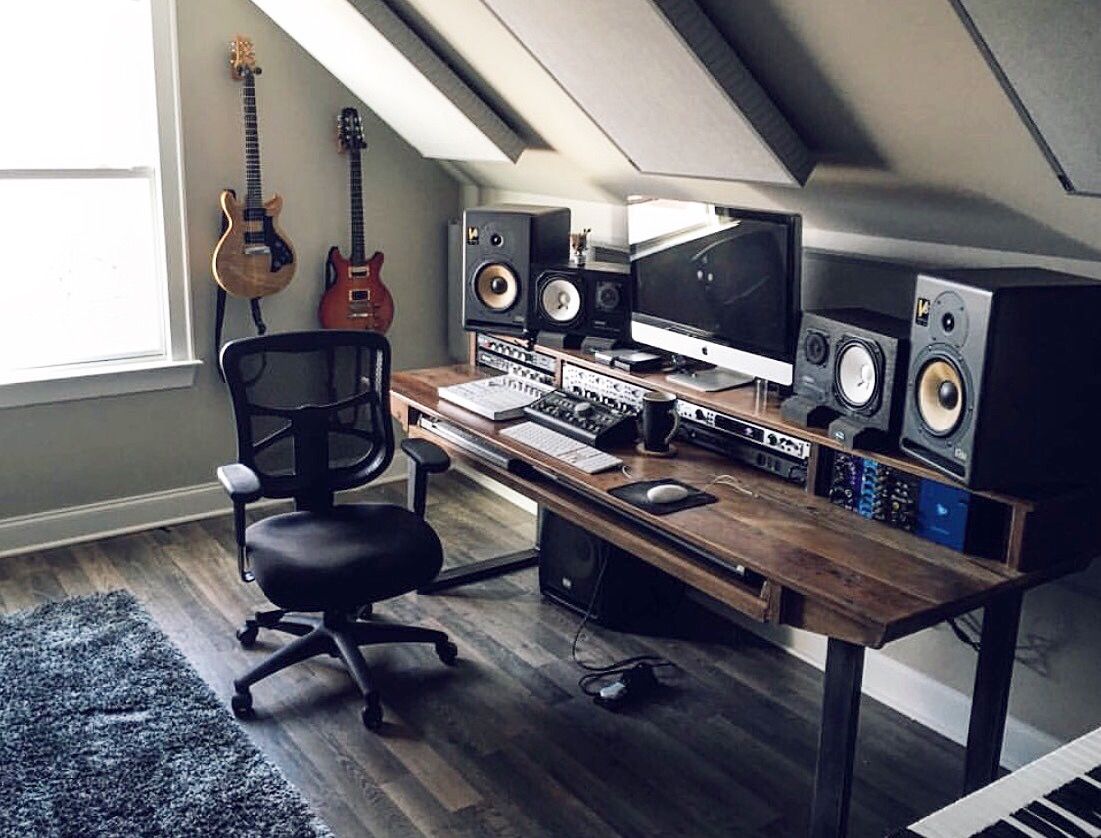
When it comes to setting up a studio, a major factor to consider is the placement of studio monitors. It’s crucial to place the monitors correctly to ensure that you’re getting an accurate sound from your recorded tracks. In this article, we will focus on the subheading: Placement for Different Studio Environments. Depending on whether you’re setting up a home studio or a large professional studio, the monitor placement can vary.
Home Studios
Setting up a home studio is a great way to get started with music production. However, it’s important to remember that most home studios have limited space. This means that you will have to work with what you have, and be creative with your monitor placement. Here are some tips for placing your studio monitors in a home studio:
- Place the monitors at ear level, forming an equilateral triangle with your head at the apex
- Keep the monitors at least 1-2 feet away from any walls to avoid unwanted reflections
- If you have limited space, consider getting wall mounts to save on desk space
- Make sure to angle the monitors to face your listening position
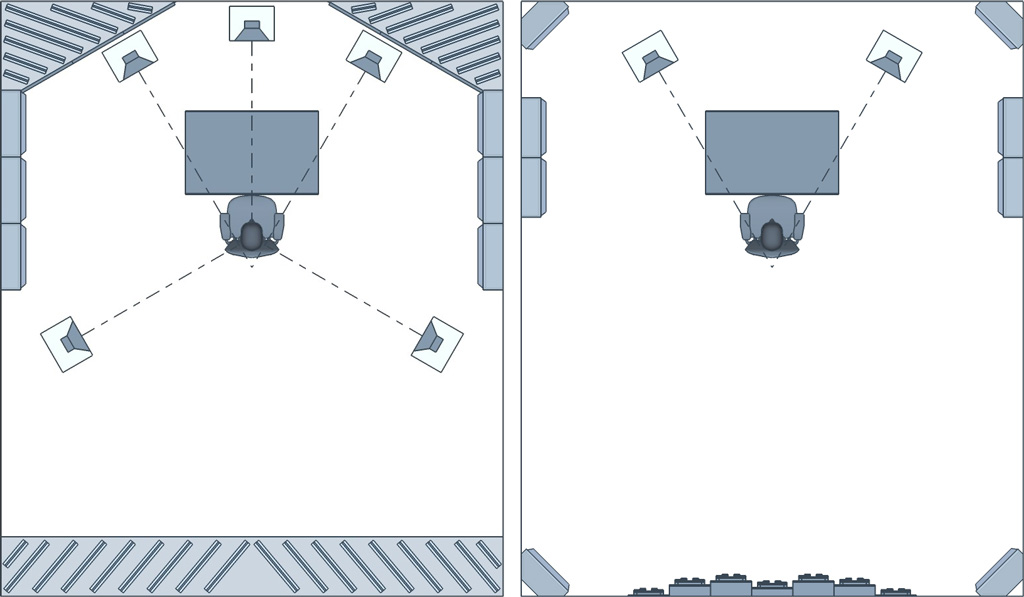
Large Professional Studios
If you’re lucky enough to have a large professional studio space, monitor placement won’t be as much of an issue. However, it’s still important to place your monitors correctly to ensure the best possible sound. Here are some tips for placing your studio monitors in a large professional studio:
- Place the monitors at a distance from your listening position that is 1.5 times the distance between your monitors
- Try to place the listening position and the monitors one-third of the length of the room to avoid standing waves
- Keep the monitors at least 3 feet away from any walls to avoid unwanted reflections
- Consider investing in acoustic treatment to improve the sound quality in the room
Tools And Technology
Proper studio monitor placement is crucial in achieving the best sound quality. Using tools such as monitor pads and stands and positioning them at ear level can optimize sound accuracy, making a big difference in your audio production.
Optimizing your studio monitor placement is crucial for achieving accurate sound reproduction. Fortunately, there are tools and technology available to help you achieve the best possible placement for your studio monitors. This section will cover using software to optimize monitor placement as well as recommended resources for further research.
Using Software To Optimize Monitor Placement
There are various software options available that can assist with optimizing your studio monitor placement. Using software can help you determine the best location for your monitors in relation to your listening position and room dimensions. A few popular software options include:
- Room EQ Wizard: A free, open-source software that helps you analyze and optimize your room acoustics.
- Sonarworks Reference 4: A paid software that uses DSP correction to calibrate your studio monitors to your specific room.
- Dirac Live: Another paid software that uses room correction technology to optimize the sound of your studio monitors in your specific room.
Using software to optimize your monitor placement can help you achieve a more accurate and balanced sound, ultimately leading to better mixes.
Recommended Resources For Further Research
If you’re looking to further your knowledge on studio monitor placement, there are plenty of resources available. Here are a few recommended resources:
- Sound on Sound: A popular music production magazine that covers a range of topics, including studio monitor placement.
- Genelec: A leader in professional studio monitor technology, offering resources and articles on monitor placement and room acoustics.
- AES: The Audio Engineering Society offers articles and papers on a variety of audio-related topics, including monitor placement.
By researching and understanding best practices for studio monitor placement, you can ensure that you’re getting the most out of your equipment and producing high-quality mixes.
Maintenance And Care Of Studio Monitors
Studio monitors are an essential tool for artists, producers, and engineers to create high-quality music productions. However, they require regular maintenance to ensure their optimal performance. Regular care of your studio monitors can significantly increase their lifespan and improve sound quality. In this article, we will discuss the importance of regular maintenance and cleaning of studio monitors.
Cleaning Monitors
Cleaning studio monitors is an essential part of their maintenance. Dust, dirt, and other debris can get inside the cones, affecting the sound quality. Here are some tips to clean the studio monitors:
- Use a soft-bristled brush: A soft-bristled brush can be used to clean the dust and other debris that might otherwise settle on the cones, affecting the sound quality.
- Use a soft, dry cloth: Wipe the surface of the monitors with a dry, soft cloth to remove the dust and fingerprints. Avoid using any cleaning solutions that could damage the monitor’s surface.
- Keep monitors free from moisture: Keep your monitors in a dry place to prevent moisture damage that might affect the speaker’s voice coil, magnetic structure, and other driver components.
The Importance Of Regular Maintenance
Maintenance of studio monitors is essential to ensure optimal sound performance. Regular inspection of cones, speaker cabinets, and connectors can help prevent issues. To avoid replacing a monitor that could have been preserved, ensure regular maintenance. Regular maintenance helps to avoid problems that can contribute to a shortened lifespan.
Credit: arqen.com
Frequently Asked Questions For Studio Monitor Placement
Where Should You Position Studio Monitors?
Position studio monitors at an equal distance from each other and at ear level with the listener’s head forming an equilateral triangle with the speakers. Place them away from any walls, and use acoustic treatment to minimize reflections. Also, use the same surface for both speakers.
What Is The 38% Rule?
The 38% rule is a guideline used in real estate to determine the maximum amount someone should spend on housing. This rule suggests that a person should spend no more than 38% of their gross income on housing costs, such as rent or mortgage payments, property taxes, and homeowners insurance.
How High Up Should Studio Monitors Be?
The ideal height for studio monitors is at ear level when seated in your listening position. This helps in achieving clear sound without any distortion. It’s important to also position them at an equal distance from each other and from the listener, forming an equilateral triangle.
Should Studio Monitors Be At Ear Level?
Yes, studio monitors should be placed at ear level to ensure accurate sound reproduction. This ensures that the sound waves hit your ears directly, reducing the impact of room acoustics or other factors that can alter the sound. This allows for a more precise mix and better overall sound quality.
Conclusion
Proper studio monitor placement is a crucial factor in producing a great audio experience. It should not be overlooked as it can greatly affect the overall quality of the recording or playback. Correctly positioning your monitors can help you hear all the nuances of your music and make informed decisions on adjustments.
Follow the above guidelines, and your studio monitor placement will undoubtedly enhance your audio experience.