FL Studio is a powerful digital audio workstation that offers a wide range of capabilities for music production. When setting up your audio interface in FL Studio, it is essential to ensure that the connection is properly configured to achieve the best results in recording and playback. In this guide, we will walk you through the step-by-step process of setting up your audio interface in FL Studio to optimize your music production experience.
Credit: www.image-line.com
Step 1: Selecting Your Audio Interface
Before you begin setting up your audio interface, it’s crucial to ensure that your audio interface is compatible with FL Studio. Check the manufacturer’s website or the product documentation to verify compatibility with FL Studio. Once you’ve confirmed compatibility, connect your audio interface to your computer using the provided USB or Firewire cable.
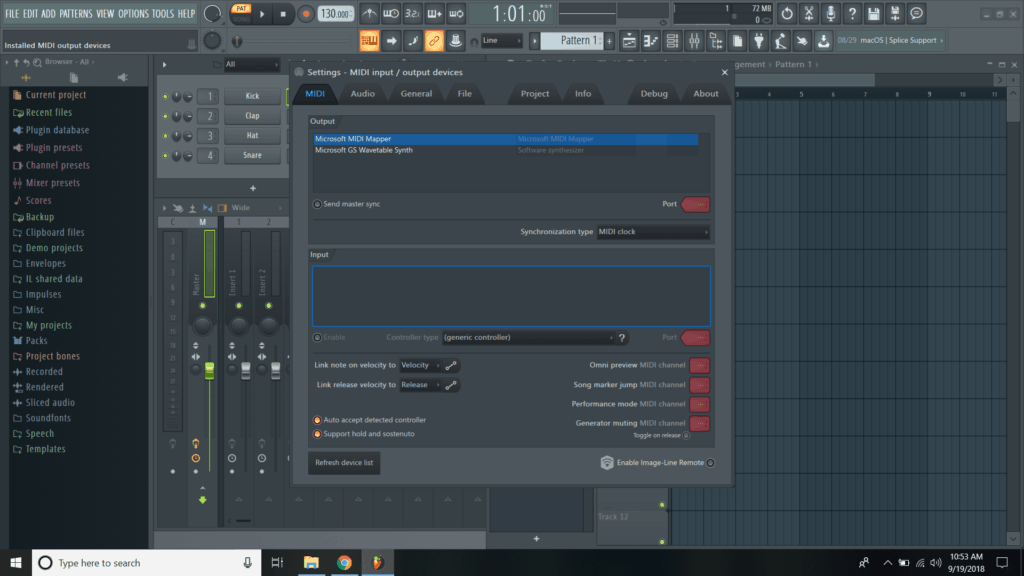
Step 2: Configuring Audio Settings in FL Studio
Open FL Studio and navigate to the “Options” menu. Select “Audio Settings” to access the audio preferences panel. Under the “Audio Device” dropdown menu, choose your audio interface from the list of available devices. Ensure that the input and output settings are correctly configured to correspond with your audio interface.
Credit: productionden.com
Step 3: Adjusting Buffer Length
One of the critical settings for optimizing audio performance is adjusting the buffer length. A shorter buffer length reduces latency but may require more CPU power. In contrast, a longer buffer length increases latency but can ease the CPU load. Experiment with different buffer lengths to find the optimal balance between latency and CPU usage for your specific setup.
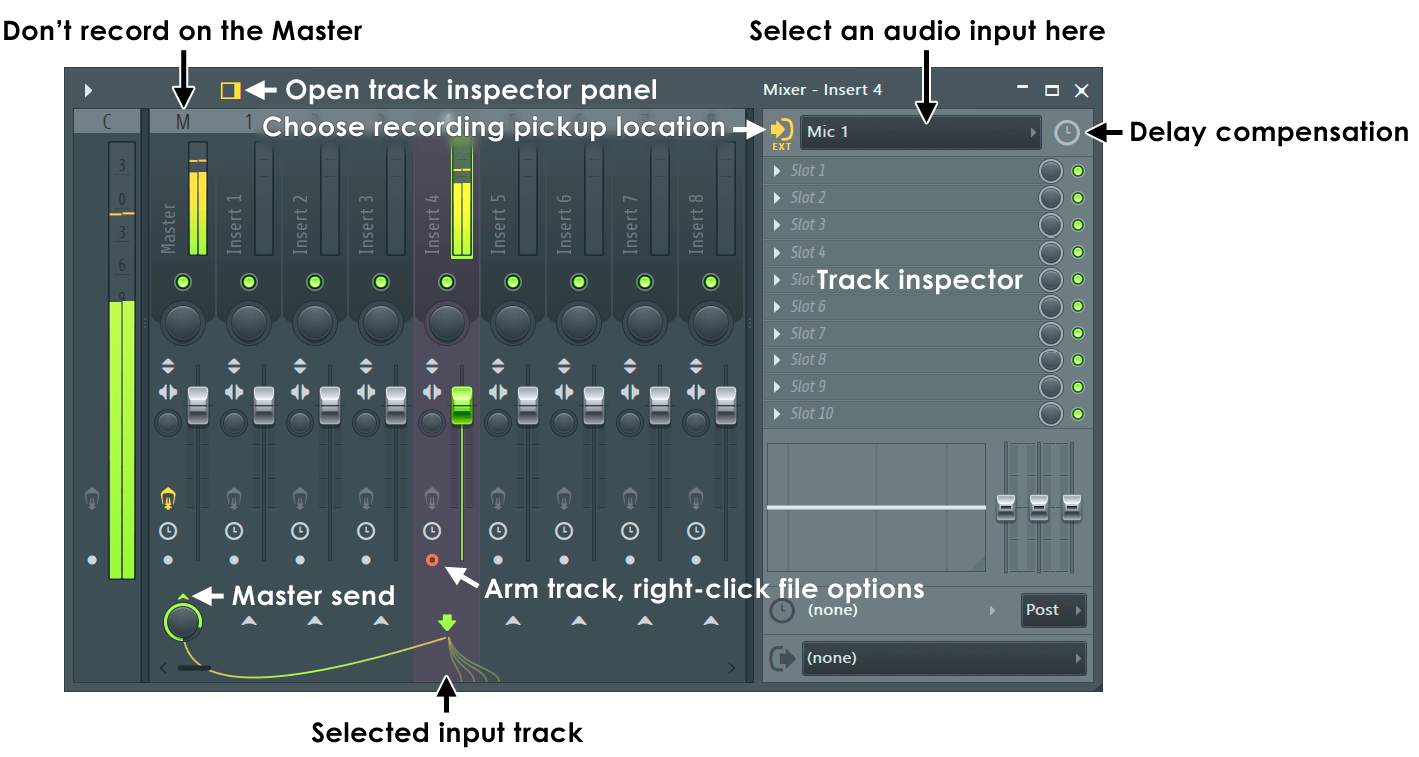
Step 4: Assigning Inputs and Outputs
After configuring the audio settings, navigate to the “Mixer” and select the input and output channels for your audio interface. Assign the inputs for recording and the outputs for playback. This step is essential for ensuring that FL Studio recognizes and utilizes the correct inputs and outputs from your audio interface.
Step 5: Testing and Calibration
Once you have completed the initial setup, it’s crucial to test the audio interface within FL Studio. Record a short audio clip and play it back to check for any latency, distortion, or other issues. If necessary, fine-tune the buffer length and audio settings to achieve the best performance from your audio interface.
Step 6: Additional Considerations
When setting up your audio interface in FL Studio, consider factors such as sample rate, bit depth, and driver settings. These factors can significantly impact the audio quality and performance of your setup. Ensure that these settings are optimized to align with the specifications of your audio interface for the best results.
Frequently Asked Questions On Setting Up Your Audio Interface In Fl Studio : Master The Setup
How Do I Set Up My Audio Interface In Fl Studio?
To set up your audio interface in FL Studio, go to the Options menu, select Audio Settings, and choose your device from the list of available ASIO drivers. Ensure the correct input and output channels are selected, and adjust your buffer size for optimal performance.
Can I Use Any Audio Interface With Fl Studio?
Yes, FL Studio is compatible with a wide range of audio interfaces. As long as your interface supports ASIO drivers, you should be able to use it seamlessly with FL Studio. Consult the manufacturer’s website or FL Studio’s official documentation for a list of recommended audio interfaces.
What Is The Best Buffer Size For Fl Studio?
The ideal buffer size for FL Studio depends on your system’s capabilities and the desired balance between low latency and CPU usage. Generally, a buffer size between 64 and 256 samples provides a good balance. Experiment with different buffer sizes to find the setting that works best for your specific setup.
How Can I Reduce Audio Latency In Fl Studio?
To reduce audio latency in FL Studio, make sure you’re using an audio interface with ASIO drivers, select a smaller buffer size, close any unnecessary applications running in the background, and make use of FL Studio’s “Smart Disable” feature to optimize CPU usage.
Additionally, using a higher quality and lower latency USB or FireWire cable can also help minimize latency.
Conclusion
Setting up your audio interface in FL Studio is a critical step in optimizing your music production workflow. By following the steps outlined in this guide, you can ensure that your audio interface is properly configured to deliver the best recording and playback performance in FL Studio. Remember to test and fine-tune your setup to achieve the optimal balance between latency, CPU usage, and audio quality for an enhanced music production experience.