To prepare for a studio session, ensure that you have practiced your material thoroughly beforehand and have all necessary equipment and accessories. Additionally, communicate effectively with the engineer and producer to ensure a smooth recording process.
Proper planning and organization are key to a successful session. The first step in preparing for a studio session is to practice your material sufficiently to ensure you are confident and comfortable with it. The second step is to ensure that you have all of the necessary equipment and accessories, such as cables, adapters, and backup storage devices.
It is also crucial to communicate effectively with the engineer and producer, discussing deadlines, revisions, and any other pertinent details to make the recording process a success. Finally, being organized and planning ahead can help prevent any unexpected issues or delays, helping to ensure a smooth and productive session.
Credit: ldb10.com
Prepare Your Gear
Preparing your gear properly is critical for an efficient and effective studio session. Don’t let technical difficulties ruin your creative flow. Here are some tips to help you prepare your gear for a successful recording session.
Check All Cables And Connections
Ensure that all your cables and connections are working correctly, and there are no loose connections. Faulty cables or connections can result in unwanted noise and audio dropouts, which can compromise your recording quality. Check every cable and connection, from microphones to headphones, to avoid any interruptions in your session.
Charge Batteries And Replace Memory Cards
Before you head to the studio, check your battery levels and replace any memory cards that are full or damaged. Keeping extra charged batteries and memory cards can save you time and prevent delays during a session. You don’t want to get stuck in the middle of a recording with a dead battery or a full memory card.
If you’re using a hard drive or other storage devices, make sure to format them before heading to the studio. Formatting will erase any files stored on the device, so backup everything before formatting.
Organize Your Gear And Pack Accordingly
Make a list of all the necessary gear that you need to bring to the studio. You don’t want to forget any essential items during your session. Organize your gear and pack it accordingly. Label your equipment bags properly to make it easier to set up and tear down. Keep your gear to a minimum, so it’s easier to pack and transport to and from the studio.
Avoid bringing distractions such as your phone, laptop, or tablet to the studio. Picking them up now and then will break your creative flow. Instead, switch them off and keep them away while you work.
By adhering to these tips, you will be on your way to a smooth and productive recording session. Proper gear preparation minimizes stress and maximizes creativity.
Organize Your Space
Organizing your space is probably one of the most crucial things you could do before a recording session. As you are preparing for your studio session, you have to ensure that the environment is conducive to creativity and productivity. The following are some tips that will guide you through this process.
Clean And Declutter The Studio
It is always important to keep your recording area tidy and organized. This means getting rid of all the clutter, and removing anything that may distract you or make it difficult to access the equipment. An untidy recording area can negatively impact your focus and creativity, so it’s important to take a few minutes to clean up the space. Keep all your cables and equipment well-organized, and ensure everything has its designated place.
Set Up Enough Chairs And Tables
Having enough space for everyone involved in the recording session is crucial for comfort and effectiveness. Make sure the session musicians, sound engineers, producers, and any other team members have a comfortable space to work. Tables and chairs should be arranged in a position that allows easy access to the recording equipment and keeps the space well-organized. Make sure everyone can see each other and communicate effectively throughout the session.
| Tip | Description |
|---|---|
| Invest in Storage Solutions | Make use of shelves, cabinets, and containers to keep all your equipment and accessories properly stowed away and easy to access. |
| Maximize Space | Ensure that the microphones, monitor speakers, and other studio equipment have good positioning to enable great performance for recording. |
| Eliminate Noise | Reduce background noise in your studio. It will increase comfort and enable the recording of high-quality audio. |
With these tips, you can make sure that your studio recording session goes without a hitch. Your setup will be comfortable, well-organized, and conducive to creativity, ensuring that the final result is a masterpiece everyone will be proud of.
Set Up Your Instruments
Properly setting up your instruments is crucial for a successful studio recording session. Ensure that all equipment is in working order, properly tuned, and positioned correctly for the best sound quality.
| Recording Preparation Tips For Any Studio Session |
|---|
As a musician, you want to make sure that every recording session is as productive as possible. One of the keys to a successful session is to set up your instruments properly. This will reduce the amount of time spent on fixing instrument-related problems during the recording process. Here are some preparation tips for setting up your instruments before diving into the recording process.
Tune Your Instruments
Before the recording session, ensure that your instruments are in tune. Your sound engineer may have a tuner in the studio, but it’s always a good idea to tune your instruments ahead of time. This will save time and ensure that there are no discrepancies in tuning during the recording process. A guitar that is out of tune can cause problems such as intonation issues, which can lead to a poor-sounding recording.
Warm Up Before Recording
Warming up before recording is crucial to ensure that you’re playing at your best. It’s vital to loosen up your fingers and get your hands warm before playing any faster or intricate parts. It’s also an excellent opportunity to practice the parts you’ll be recording. Take the time to play through the parts you’re going to record a few times and make any necessary adjustments. This will help ensure that you’re well-prepared and can perform at your best when you hit the record button. In conclusion, proper preparation is key to a successful recording session. By setting up your instruments correctly, you’ll save time and have a more productive recording experience. Remember to tune your instruments ahead of time and warm up before recording to avoid any unnecessary issues during the recording process.

Credit: www.studio77lv.com
Prepare The Musicians
Get ready for your next studio session with these recording preparation tips for musicians. Make sure to rehearse beforehand, double-check your equipment and settings, and communicate clearly with your sound engineer to ensure a successful recording session.
As a recording engineer, it is crucial to have a well-prepared team of musicians to make a successful recording session. Musicians play a vital role in creating memorable recordings. To get the best out of their performance, you will need to prepare them well before the recording session. Here are some tips to help you prepare the musicians for a recording session.
Communicate Your Expectations
The first step in preparing musicians for a recording session is to communicate your expectations. Discuss with them the project’s goals and what you want to achieve in the session. Be clear about your expectations, including the tone, style, and overall sound you are hoping to achieve. Make sure everyone understands the project’s scope, time frame, and deadline.
Guide Them Through The Arrangement
The arrangement of a song plays a significant role in how it will sound overall. You can guide musicians through the arrangement to get the best performance. The arrangement involves the structuring of the song, such as the intro, verse, chorus, bridge, and outro. Ensure that each part of the arrangement serves its purpose and that everything flows smoothly. A good arrangement will make it easier for the musicians to perform, and you will get an excellent recording.
Provide A Comfortable Environment
Creating a comfortable environment is essential to allow musicians to perform to their best. Ensure the recording room is comfortable, well-ventilated, and appropriately lit. Also, make sure the musicians have access to water and food during the session. Treatment options like diffusers and absorbers help control the room’s acoustics and make the musicians feel at ease.
Make Them Feel Valuable
Making musicians feel valued and appreciated is crucial for getting the best performance. Take the time to connect with each member of the team, encourage them, and offer positive feedback. When they feel appreciated, they are likely to put more effort into their performance, and this will get you a great recording. In conclusion, proper preparation of musicians is essential to the success of any recording session. Ensure you communicate your expectations, guide them through the arrangement, provide a comfortable environment, and make them feel valuable. Take the time to prepare your team, and you can expect a great recording that everyone will love.
Test The Levels And Eq
Proper sound recording preparation includes testing the levels and equalizer (EQ) to ensure the best quality possible for any studio session. This helps to eliminate any potential issues and ensure that the final result is as professional as possible.
Before starting any studio recording, you need to test the mics and levels first. Mics and levels are two of the most essential elements of a studio recording. You don’t want to spend time recording a track, only to find out that the levels are too low or too high. Likewise, you don’t want to experience the same thing with the EQ of your recording.
Test The Mics And Levels
Firstly, set up your microphone and test the levels. Make sure that it’s correctly connected to your audio interface. You could use a sound check recording to ensure everything is captured correctly. Once you have set up the microphones, test the levels by hitting the record button and playing the instrument or singing to ensure that the sound is captured correctly.
Use Eq To Balance The Sound
After setting up and testing your microphones, it’s time to balance the sound to make sure that it’s optimized. Use your EQ to balance the different frequencies of the instruments, giving each one a clear and crisp sound. Overcrowding frequencies may create a muddy or distorted sound. Thus, it’s essential to clear the sound by balancing the frequencies. You can cut some of the problematic frequencies with EQ to get the desired result. Using a high-pass filter, a low-pass filter, or a frequency band to cut some of the problematic areas can be helpful to obtain a clear and professional sound. In conclusion, testing the levels and EQ of your studio is the key to successful recordings. By doing this, you can avoid wasting time, energy, and resources in producing a poorly mixed track. So, be sure to meticulously check the mics and levels, and use powerful EQ to refine your recording to have a successful studio session.
Check The Recording Quality
Before starting any studio session, it is crucial to check the recording quality of your equipment. This includes testing your microphones, speakers, and recording software to ensure that everything is working correctly. Doing so can help you avoid any technical difficulties and ensure that your recordings come out sounding professional.
Monitor The Recording Quality
Before starting with the recording, it is crucial to check the recording quality. The recording quality has a huge impact on the final outcome. You don’t want to spend hours in the studio and then realize that the recording quality is not up to the mark. So, make sure to check the recording quality before starting with the recording.
Rerecord If Necessary
If you find that the recording quality is not up to the mark, then it’s better to rerecord the track. It’s always better to have a good quality recording as it can make a huge difference in the final outcome. Take your time and make sure to record the track again if necessary.
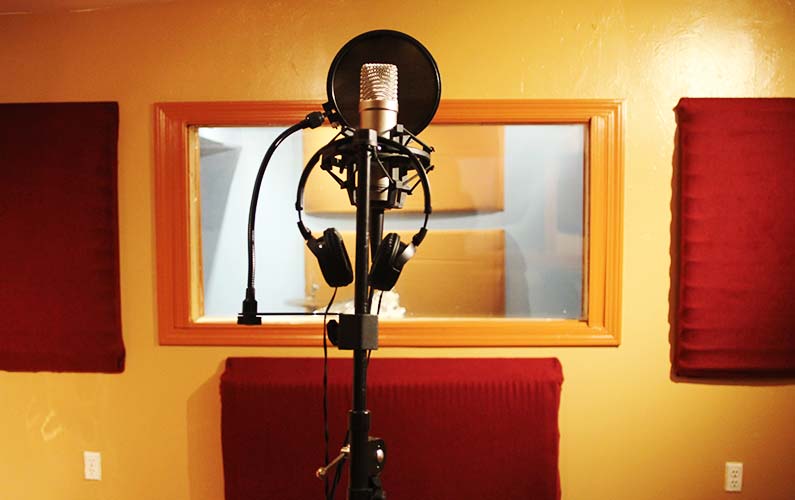
Use A Pop Filter
Pop filters are essential for a good recording. They help to eliminate popping sounds that occur when you pronounce words that have the letters ‘P’ and ‘B.’ Using a pop filter helps to smoothen out these sounds and gives a clean recording.
Check The Microphone Placement
The placement of the microphone plays a vital role in the recording quality. Placing the microphone in the right position can make a huge difference in the recording quality. So, make sure to check the placement of the microphone and adjust it accordingly.
Eliminate Background Noise
Background noise can ruin a recording. Make sure to eliminate all the background noise before starting with the recording. You can use a noise gate to eliminate low-level background noise, and use acoustic treatment to eliminate higher level noises.
Conclusion
By following the tips mentioned above, you can ensure to have a good recording quality. Take your time in the studio and make sure to check the recording quality before proceeding with the recording. With a little bit of effort and attention to detail, you can end up with a high-quality recording that you can be proud of.
Take Breaks Regularly
Recording in a studio can be a mentally and physically demanding task. It’s crucial to take breaks regularly to avoid burnout, stay hydrated, and rest your ears and eyes. Here are some tips on how to take breaks effectively:
Take Breaks For Hydration And Rest
It’s essential to take breaks for hydration and rest, especially during long sessions. Staying hydrated is crucial to maintain your energy levels and keep your voice healthy. Take a 10 to 15-minute break every hour to drink water, a sports drink, or any other non-alcoholic beverage. This helps you stay hydrated after hours of singing or playing an instrument, reducing the risk of vocal strain, cramps, and potential injuries.
Find Ways To Alleviate Stress
Recording in a studio can be a stressful situation, leading to frustration, exhaustion, and burnout. It’s essential to find ways to alleviate stress and maintain your mental state effectively. Consider taking a short walk or stretching during your break to help clear your mind and reduce the tension in your muscles. Practicing meditation or deep breathing exercises can also help reduce stress levels and allow you to refocus on the tasks ahead.
Remember, taking breaks regularly is crucial in keeping you energized and motivated throughout your studio session. Use your break time to recharge yourself physically, mentally, and emotionally, and you’ll perform to the best of your ability in no time.

Credit: www.mixinglessons.com
Wrap Up The Session
Recording studio sessions can be an intensive process and require meticulous attention to detail. Your hard work and preparation can all go to waste if you don’t wrap up the session correctly. The final stage of the session involves reviewing, backing up files and cleaning up the studio. This stage is essential to ensure that all completed recordings are safe and secure, enabling you to return to them at any time in the future.
Review The Recordings
Before wrapping up the session, it is essential to review all the recordings to ensure that you have captured everything you need and that the quality is up to standard. Play the tracks back and listen carefully for any glitches or errors that need to be corrected.
A useful tip is to compare the recordings to a reference track. The reference track can help you identify any areas that need improvement and guide your editing process.
Back Up The Files And Clean Up The Studio
Backing up all the audio files is crucial to ensure that you don’t lose anything during the recording process. It’s crucial to have multiple copies of the files stored in different locations, ensuring their safety. Create a final mix and master copy and also save a copy of the raw files for future use.
Once the files have been backed up, it’s time to clean up the studio. Ensure that all equipment is returned to its original place and cleaned to avoid any damage. Check that all cables and connectors are correctly coiled and stored away.
| Back Up Checklist |
|---|
| Save a copy of both raw and final mix files |
| Store files in multiple locations |
| Delete any unused files and folders to free up space |
In Conclusion,
The wrap-up stage is a critical aspect of any recording session. Review all the recordings, back up the files and clean up the studio to ensure that your hard work is safe and secure. These three vital tips will help you complete a successful recording session with peace of mind knowing that your recordings are safe and secure.
Frequently Asked Questions For Recording Preparation Tips For Any Studio Session
How Do You Prepare For A Studio Session?
To prepare for a studio session, first make a checklist of everything you’ll need. Practice your parts and ensure your instruments are in top condition. Get proper rest beforehand to maintain mental focus. Arrive early to set up and soundcheck.
Finally, stay hydrated and bring snacks to keep your energy level up.
How Do You Prepare A Song For A Studio?
To prepare a song for a studio recording, you need to follow a few steps. First, write the song and practice it thoroughly. Then, decide on the instrumentation and structure. Next, record a demo to get an idea of how the song will sound in the studio.
Finally, book a studio and hire a producer and engineer to help you perfect the final recording.
How Do You Plan A Recording Session?
To plan a recording session, you need to determine the goals and objectives of the session, select the appropriate recording equipment, set up the recording space, prepare the performers or speakers, and test the equipment and sound levels before recording.
It is also important to establish a clear timeline and schedule for the session.
What Not To Do In A Recording Studio?
When in a recording studio, avoid the following: 1. Don’t be noisy or careless with equipment. 2. Don’t waste time, especially if you’re paying by the hour. 3. Don’t argue or be negative with other members of the team. 4. Don’t rely too much on auto-tune or other editing tools.
5. Don’t make major changes to your music or lyrics without discussing it with the rest of your team.
Conclusion
To sum up, preparing for a studio session requires focused and structured work to ensure the best results. Understanding the equipment, practicing your performance, and taking breaks during recording sessions are just a few of the many important aspects to keep in mind.
Remember, preparation is key to success, and following these tips will help you create high-quality recordings that truly showcase your talents. Happy recording!