To record professionally at home, invest in quality equipment and create a well-treated recording space. Achieving high-quality recordings at home requires proper setup and equipment.
Creating a conducive environment with good acoustics and investing in a reliable microphone and interface are essential steps. By following these guidelines, you can produce professional-sounding recordings from the comfort of your home studio. Whether you’re a musician, podcaster, or voice-over artist, having a dedicated recording space with the right tools can elevate the quality of your work.
With a bit of effort and the right equipment, you can achieve impressive results without the need for a traditional recording studio.
Setting Up Your Home Studio
Set up your home studio to record professional-quality music or podcasts. With the right equipment and acoustic treatment, transform your space into a productive and creative environment. Embrace the convenience of recording at home to unleash your full potential.
Choosing The Right Space
Select a room with minimal noise distractions, ideally one without windows facing a busy street. Consider natural lighting for a pleasant recording environment.
Soundproofing And Acoustics
Soundproof your space with heavy curtains, carpets, or wall panels. Enhance acoustics by adding diffusers and absorbers strategically.
Selecting Essential Equipment
To get started with professional home recording, it’s essential to carefully select the right equipment. This ensures that your recordings are of high quality and sound professional.
Microphones And Accessories
Microphones play a crucial role in capturing clear and crisp audio. Consider a condenser microphone for vocals and dynamic microphones for instruments. Accessories like pop filters and mic stands are also important for optimal recording quality.
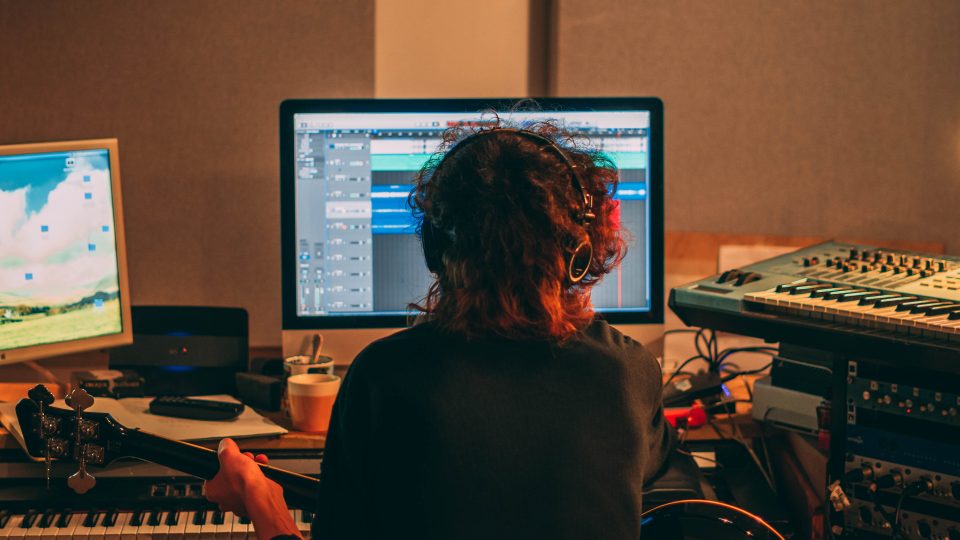
Digital Audio Workstation (daw) Software
Choosing the right DAW software is key to editing and mixing your recordings. Popular options include Pro Tools, Logic Pro, and Ableton Live. Make sure to also invest in plugins for additional functionality.
Mastering The Art Of Recording
Mastering the Art of Recording is paramount for achieving professional-quality audio recordings at home. Whether you’re a musician, podcaster, or voice-over artist, understanding the basics of recording is essential. With the right techniques and equipment, you can elevate your recordings to the next level. In this guide, we’ll delve into the fundamental aspects of recording professionally at home, focusing on the crucial elements that contribute to exceptional audio production.
Understanding Mic Placement
Proper mic placement is fundamental to capturing clear and balanced sound. Whether using a condenser, dynamic, or ribbon microphone, the position relative to the sound source significantly affects the recording quality. Experimenting with different placements can help you identify the sweet spot that optimizes sound capture. Ensuring the mic is positioned correctly also helps minimize background noise and unwanted reverberations, resulting in a cleaner recording.
Setting Input Levels
Setting input levels correctly is crucial for preventing audio distortion and maintaining an optimal signal-to-noise ratio. When recording, it’s essential to monitor and adjust the input levels to ensure the audio signal is neither too low, risking noise contamination, nor too high, risking clipping. Properly setting input levels not only preserves the integrity of the recording but also facilitates a smoother post-production process, saving time and effort in correcting audio imperfections.

Credit: m.facebook.com
Achieving Studio-quality Sound
Recording professionally at home is no longer a distant dream for musicians and content creators. With the right equipment and techniques, you can achieve studio-quality sound from the comfort of your own space. One of the key aspects to consider is signal processing tools. These tools play a vital role in enhancing and optimizing your recordings. Additionally, mixing and mastering techniques are essential for polishing the final product. In this article, we’ll delve into these two areas and explore how you can take your home recordings to the next level.
Utilizing Signal Processing Tools
Signal processing tools are powerful assets when it comes to creating professional-sounding recordings. These tools allow you to shape and mold the audio, correcting any imperfections and enhancing the overall quality. There are various types of signal processing tools that can be used, including:
- Equalizers (EQ): EQs enable you to adjust the frequency balance of your recordings. This helps in eliminating unwanted resonances and fine-tuning the sound to your liking.
- Compressors: Compressors even out discrepancies in volume levels, ensuring a consistent and balanced audio performance. They are especially useful for vocals and instruments with dynamic range variations.
- Reverbs: Reverbs add depth and ambience to your recordings, making them sound more spacious and immersive. Experimenting with different reverbs can help achieve the desired sonic texture.
- Dynamics Processors: Dynamics processors, including expanders and limiters, help control the dynamic range of your recordings. This ensures that loud sounds are not clipping or distorting, while softer sounds are still audible.
Mixing And Mastering Techniques
Mixing and mastering are vital stages in the production process, where individual tracks are combined and fine-tuned to create a cohesive and balanced final mix. Here are some techniques to consider:
- Volume Balancing: Ensuring that all the individual tracks blend well together by adjusting their respective volume levels. This prevents certain elements from overpowering others.
- Panning: Distributing the sound across the stereo field to create a sense of space and width. This technique helps in achieving a more immersive and natural sound.
- EQ and Frequency Carving: Using EQ to sculpt the frequency response of individual tracks, carving out space for each instrument to shine and reducing any conflicting frequencies.
- Compression and Dynamic Processing: Applying compression and other dynamic processing techniques to even out volume variations and enhance the overall balance of the mix.
- Spatial Effects: Utilizing spatial effects, such as reverb and delay, to add depth and dimensionality to the mix, placing elements in a virtual space.
By employing these signal processing tools and implementing effective mixing and mastering techniques, you can elevate your home recordings to professional levels of sound quality. Remember, practice and experimentation are key to finding the perfect combination of tools that suit your style and genre. With dedication and a bit of knowledge, your home studio can become a haven for producing remarkable audio.
Building Your Sound Engineer Skills
Aspiring sound engineers, are you ready to take your home recording to the next level? In this article, we will dive into two crucial areas that will help you build your sound engineer skills. Understanding EQ and Compression and Creating a Professional Workflow are essential components in achieving professional-sounding recordings from the comfort of your own home. Let’s get started!
Understanding Eq And Compression
EQ (Equalization) and Compression are two fundamental tools that sound engineers use to shape and enhance audio recordings. By grasping the principles behind EQ and Compression, you can significantly improve the quality of your home recordings.
Equalization (EQ) allows you to adjust and balance different frequencies within an audio signal, enhancing the clarity and tonal characteristics. By utilizing techniques such as boosting or cutting specific frequency ranges, you can sculpt the sound to achieve the desired result.
Compression, on the other hand, is used to even out the dynamic range of an audio signal. It helps control the highs and lows, making quieter parts louder and louder parts softer. Compressors play a crucial role in bringing balance and control to your recordings, ensuring a more polished and professional sound.
When working with EQ and Compression, it’s important to listen attentively and make subtle adjustments. Experiment with different settings to understand how they affect your audio. Remember, practice makes perfect, so keep refining your skills!
Creating A Professional Workflow
Having a well-defined and efficient workflow is essential for any sound engineer, whether working in a professional studio or a home setup. It ensures you can seamlessly navigate through your recording process and produce high-quality results consistently.
Here are some key steps to follow in order to create a professional workflow:
- Preparation: Before you start recording, ensure your equipment is in proper working condition and make any necessary adjustments. Set up your recording space with attention to acoustic treatment and microphone placement.
- Signal Flow: Understand how audio signals flow through your equipment and make sure everything is connected correctly. Avoid any potential signal loss or interference.
- Session Organization: Keep your recording sessions well-organized by naming tracks, using color coding, and creating folders or playlists for easy access and navigation.
- Recording and Editing: Pay attention to detail during the recording process to capture the best performance possible. Afterward, edit your recordings, removing any unwanted noises or mistakes.
- Mixing: Utilize your EQ and Compression skills to balance and enhance each element of your mix. Experiment with panning, reverb, and other effects to achieve a cohesive and dynamic mix.
- Mastering: Apply the final touches to your recordings, making them ready for distribution. Focus on achieving a balanced overall sound, ensuring your music translates well across different playback systems.
By following these steps and practicing regularly, you’ll streamline your workflow and develop the skills necessary to record professionally at home. Don’t be afraid to experiment and push your creative boundaries – the more you practice, the better you’ll become!
Credit: create.routenote.com
Frequently Asked Questions For Record Professionally At Home
How Can I Record Professional-quality Audio At Home?
To record professional-quality audio at home, invest in a good microphone, position it correctly, minimize background noise, and use acoustic treatment. Additionally, using software like Audacity or Adobe Audition can help you edit and enhance the audio.
What Are Some Affordable Microphones For Home Recording?
Some affordable microphones for home recording include the Audio-Technica AT2020, Shure SM58, and Rode NT1. These microphones offer excellent sound quality without breaking the bank, making them perfect for aspiring home recording enthusiasts.
Is It Necessary To Have A Soundproof Room For Home Recording?
Having a soundproof room is not necessary for home recording, but it is beneficial. It helps to minimize unwanted external noises and reflections, resulting in cleaner audio. If a soundproof room is not possible, consider using portable vocal booths or sound-absorption panels to improve the recording environment.
Conclusion
You can now comfortably record professional-grade audio at home. With the right equipment and knowledge, you can achieve high-quality results. Remember to experiment and be open to feedback to improve your skills. Embrace the convenience of home recording and elevate your music or podcasting journey.