To mix vocals in Logic Pro X with stock plugins, simply add the desired plugins to each vocal track and adjust accordingly. Utilize tools such as EQ, compression, and reverb to create a balanced, polished sound.
Mixing vocals is an essential aspect of music production. With Logic Pro X’s built-in stock plugins, achieving a professional sound is a simple and accessible feat. By utilizing tools such as EQ, compression, and reverb, the vocals can be balanced and polished.
Applying these plugins to individual tracks allows for an extremely customized sound, tailoring each vocal to fit the track’s specific needs. In this guide, we will go over the basics of mixing vocals in Logic Pro X with stock plugins, providing essential tips to elevate your productions. So, let’s dive in!
Preparing The Vocal Track
Prepare your vocal track by cleaning up background noise and adjusting levels before applying stock plugins for the best mixing results in Logic Pro X. Use EQ, compression, and reverb to enhance the vocals and make them stand out in your mix.
When it comes to mixing vocals in Logic Pro X, preparing the vocal track is a crucial step. To achieve an outstanding sound quality, some essential steps need to be followed. This article will provide detailed information on how to prepare the vocal track using stock plugins in Logic Pro X.
Cleaning Up The Track
Before diving into mixing, it is necessary to clean up the vocal track. A clean vocal track provides a better foundation for the mixing process. Here are some of the essential tips to clean up the vocal track:
- Delete any unwanted regions
- Delete background noise
- Adjust the vocal levels
- Remove any unwanted background vocals
Setting Up The Channel Strip
After cleaning up the track, it’s time to set up the channel strip. The channel strip in Logic Pro X provides an excellent starting point for processing the vocal signal. Here are some essential tips to set up the channel strip:
- Insert the Channel EQ and set a high-pass filter to remove any low-end rumble.
- Add the Compressor to control the dynamic range and create a consistent vocal level.
- Next, insert the Space Designer to add reverb and create a sense of space in the mix.
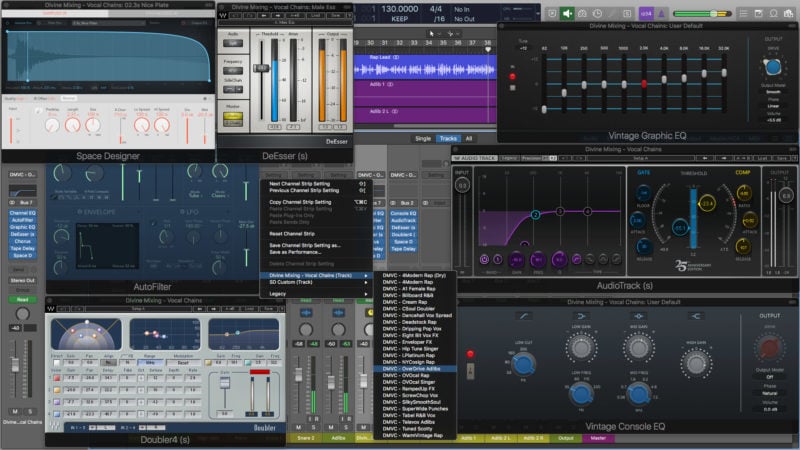
Choosing The Right Plugins
Choosing the right plugins is essential in mixing vocals in Logic Pro X. The stock plugins offer excellent sound quality and provide a vast array of options for processing vocals. Here are some of the essential stock plugins for mixing vocals:
| Plugin Name | Function |
|---|---|
| Channel EQ | Equalization |
| Compressor | Dynamic Range Control |
| Spatial Designer | Reverb and Space Creation |
| DeEsser | De-Essing |
| Tape Delay | Delay |
In conclusion, preparing the vocal track before mixing in Logic Pro X is an essential step. Cleaning up the track and setting up the channel strip can provide a better foundation for the mixing process. Choosing the right plugins is also crucial in achieving an outstanding sound quality. By following these tips and using the stock plugins, anyone can achieve a professional-sounding mix.
Equalizing The Vocals
Achieving a balanced and professional sound when mixing vocals in Logic Pro X can be challenging, but with the use of stock plugins and proper equalization techniques, it can become more manageable. Equalizing the vocals can help to remove unwanted frequencies, enhance necessary ones and create a pleasant listening experience.
Adjusting The Low Frequencies
When mixing vocals, adjusting the low frequencies is essential to give them warmth and weight. In Logic Pro X, use the Channel EQ plugin to modify the low end of the vocals. First, identify any problematic frequencies that are clashing with the instruments in the mix. Then, use a low-cut filter to remove any unnecessary low-end rumble and mud. Boosting frequencies around 100-200 Hz can add warmth to the vocals, while reducing around 400-500 Hz can help reduce boxiness or muddiness in the vocals.
Tweaking The Mid Frequencies
Equalizing the mid frequencies can help bring out the clarity and presence of the vocals. In Logic Pro X, use the Channel EQ plugin to adjust the mid frequencies. Start by identifying any harsh or nasal frequencies in the vocals, which can typically be found around the 1-2 kHz range. Use a narrow Q-factor and reduce those frequencies slightly to smooth out any harshness. Boosting frequencies around 2-5 kHz can add clarity and cut-through to the vocals, while reducing around 500-800 Hz can remove any muddiness in the mid-range.
Enhancing The High Frequencies
Finally, enhancing the high frequencies can add brightness and air to the vocals. Use the Channel EQ plugin to adjust the high frequencies in Logic Pro X. Start by boosting frequencies around 10 kHz to add sparkle and presence to the vocals. You can also use a shelving filter to adjust the frequencies above 10 kHz for a natural-sounding high-end boost. Be careful not to overdo it, as too much high-end boost can result in a harsh or sibilant sound. Overall, equalizing the vocals is an important step in mixing. With these tips and techniques, you can achieve a well-balanced and professional-sounding vocal mix using only Logic Pro X’s stock plugins.
Dynamic Processing
Achieving a professional vocal mix is possible with Logic Pro X’s stock plugins through dynamic processing. Using the compressor and EQ plugins, you can reduce unwanted frequencies and balance the vocal’s levels, making it fit seamlessly into your mix.
Dynamic Processing is an essential step to achieve a well-balanced vocal mix. It involves using a combination of compression, de-essing, and limiting to control and even out the dynamic range of the vocal track. In Logic Pro X, using stock plugins, dynamic processing can be done with ease. Here are some of the techniques you can use for dynamic processing.
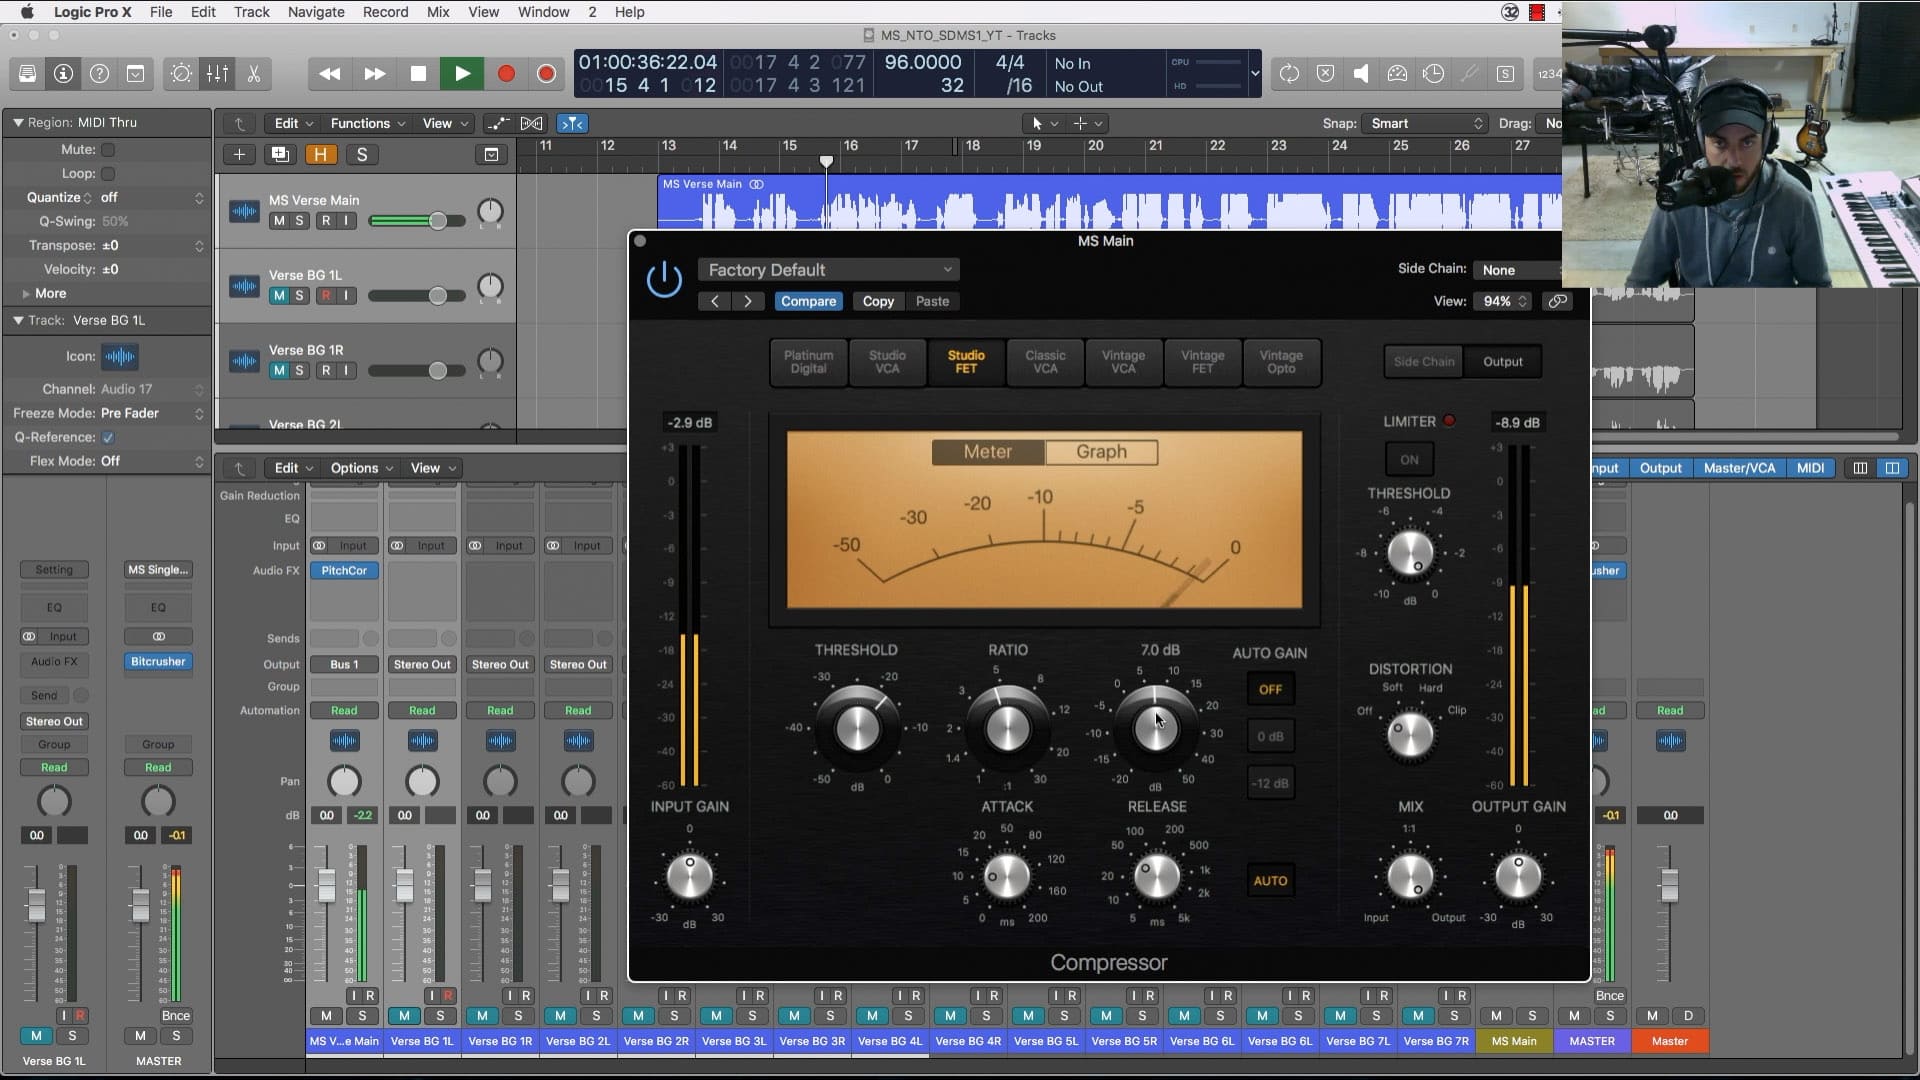
Using Compression
Compression is the most crucial tool in vocal mixing. It helps to reduce the dynamic range of the voice, making the quiet parts louder and the loud parts softer. In Logic Pro X, the stock compressor plugin is excellent for this purpose. To use it, insert the compressor on the vocal channel and adjust the threshold to around -15dB. Then set the ratio at 2:1 and adjust the attack and release times to taste. You’ll want to aim for a reduction of around 5dB to 6dB on the vocal track.
Adding De-essing
De-Essing is the process of reducing the harsh, sibilant sounds that can be present in vocals when the artist pronounces ‘s’ and ‘sh’ sounds. Logic Pro X comes with a stock de-esser plugin that makes this process easy. After inserting the plugin on the vocal channel, adjust the frequency band to target the offending sibilance and set the range so that it only reduces the harshness by around 3dB.
Applying Limiting
Limiting is the process of reducing the peaks in the vocal track, ensuring that it never exceeds a specific level. Logic Pro X’s Limiter plugin is an excellent tool for this purpose, with a transparent character that will not color your sound. Insert the limiter on the vocal channel and set the threshold to -0.1dB, then adjust the release time to ensure that the limiting is smooth and transparent. However, be careful not to overuse limiting as it can harm the dynamics of the vocal performance. In conclusion, using dynamic processing to mix vocal tracks is an essential part of achieving a well-balanced mix. Using stock plugins in Logic Pro X, you can achieve excellent results with compression, de-essing, and limiting. With the right adjustments and a careful ear, your vocal tracks can sound amazing without the need for expensive third-party plugins.
Credit: seandivine.com
Adding Effects
By using stock plugins in Logic Pro X, you can easily mix vocals and add effects to your tracks. From EQ, compression to reverb and delay, Logic Pro X provides a range of tools that help you create a professional-sounding mix.
So, explore the stock plugins and experiment with different effects to add depth and dimension to your vocals.
Adding Effects Adding effects is an essential step in producing a great vocal mix. Logic Pro X offers several stock plugins that can be utilized to make your vocals sound professional and polished. In this article, we will discuss how to use reverb, delay, and modulation effects to create depth and space in your vocal mix. Creating a Space with Reverb Reverb is a powerful tool that can be used to create a sense of space in your vocal mix. It simulates the sound of a room or hall, giving your vocals a natural and organic sound. To add reverb to your vocals in Logic Pro X, follow these steps: 1. Add a Space Designer plugin to your vocal track. 2. Choose a preset that matches the vibe of your song. 3. Adjust the Wet/Dry control to determine the amount of reverb that is applied to your vocals. 4. Use the Decay and Predelay controls to fine-tune the reverb sound. Adding Depth with Delay Delay is a classic effect that can add depth and dimension to your vocals. It can be used to create echoes, doubling effects, and more. Here’s how to add delay to your vocals in Logic Pro X: 1. Add a Delay plugin to your vocal track. 2. Choose a delay time that matches the tempo of your song. 3. Adjust the Feedback and Mix controls to create the desired effect. 4. Experiment with the various delay modes, such as Ping Pong or Tape Delay. Using Modulation Effects Modulation effects such as chorus, flanger, and phaser can add movement and interest to your vocal mix. They work by altering the pitch and timing of the vocal signal. To use modulation effects in Logic Pro X, follow these steps: 1. Add a Modulation plugin to your vocal track. 2. Choose the effect type that you want to use (e.g. chorus). 3. Adjust the Rate, Depth, and Mix controls to create the desired effect. 4. Experiment with different effect types and settings to find the perfect sound. By using reverb, delay, and modulation effects in Logic Pro X, you can create a professional-sounding vocal mix that will stand out in any genre. Don’t be afraid to experiment with different settings and plugins to find the perfect sound for your vocals.
Automation
Automating vocal mixing in Logic Pro X with stock plugins simplifies the otherwise tedious task of leveling and processing the vocals. By utilizing tools such as Compressor, EQ, and De-Esser, the vocal tracks can be refined to achieve a polished sound.
Automating Volume
Automation is a great tool for mixing vocals in Logic Pro X. Automating volume is one of the most common uses of automation. By automating the volume of your vocal tracks using the built-in Flex tool, you can adjust the levels of the vocals throughout the track as needed. Here are the steps you can follow to automate the volume of your vocal tracks:
- First, select the track you want to automate and click on the “A” button to reveal the automation controls.
- Click on the track’s volume bar and select “Create Track Automation” to create a new automation lane.
- Choose the “Flex” tool from the toolbar and drag over the automation points to create a smooth curve in the automation lane.
Automating Effects Parameters
In addition to automating volume, you can also automate effects parameters. Automation of effects parameters is a powerful way to create dynamic vocal effects throughout your track. For example, you can automate the reverb or delay amount to create a sense of space for your vocals. Here are the steps for automating effects parameters in Logic Pro X:
- Select the track you want to automate and click on the “A” button to reveal the automation controls.
- Choose the effect you want to automate from the track’s insert section and click on the effect’s parameter you want to change.
- Select “Create Track Automation” from the parameter’s drop-down menu.
- Use the Flex tool to create a smooth curve in the automation lane to automate the effect parameter.
Creating Fades
Fades are an essential part of mixing vocals in Logic Pro X. They help to smooth out the transitions between different sections of the track and can also be used to create more space for other elements of the mix. Here are the steps to create fades in Logic Pro X:
- Select the area of the track you want to fade.
- Click on the “F” button in the track’s Header to reveal the fade controls.
- Click and drag to create a fade-in or fade-out on the track.
In conclusion, automation is a powerful tool for mixing vocals in Logic Pro X. It can be used to create dynamic effects, adjust volume levels, and create smooth fades. By mastering the automation features in Logic Pro X, you can take your vocal mixing to the next level.
Credit: seandivine.com
Finalizing The Mix
In Logic Pro X, mixing vocals with stock plugins can produce professional-sounding results. Finalizing the mix involves adjusting the EQ, compression, reverb, and other effects to achieve a balanced and dynamic sound. With the right techniques and patience, it is possible to achieve a great sounding vocal mix without expensive third-party plugins.
Checking The Balance
Once you’ve added effects to your vocals, it’s time to check the balance to ensure they can be heard and understood clearly. The first thing to do is to solo the vocals and adjust the levels to make sure they sit well in the mix. You can then gradually bring the other instruments back in, adjusting their levels until the vocals can be heard comfortably without being drowned out by the other sounds.
A/b Testing
A/B testing is an important technique that can help you ensure the quality of your final mix. This involves creating two versions of the mix for comparison. You can then switch between the two versions of the mix to hear any differences and make necessary adjustments accordingly. This way, you can be sure that the final mix will sound great regardless of the device it’s played on.
Preparing For Mastering
After you’ve checked the balance and performed A/B testing, it’s time to prepare your mix for mastering. Before you send your mix for mastering, you want to make sure that all the audio files are consolidated and that there are no effects or plugins on the master track. You can also add fades and crossfades between each track to smoothen out any transitions. This way, the mastering engineer will be able to easily work with your mix to create the best possible master.
Conclusion
Mixing vocals in Logic Pro X may seem daunting at first, especially if you’re new to the software. However, by following the steps outlined here and using the stock plugins available, you can create a professional-sounding mix that stands out.

Credit: www.youtube.com
Frequently Asked Questions For Mixing Vocals In Logic Pro X With Stock Plugins
What Plugins Are Needed To Mix Vocals?
The necessary plugins for mixing vocals vary depending on the digital audio workstation (DAW) being used. However, some common plugins include EQ, compression, reverb, delay, and de-esser. It is important to use high-quality plugins and adjust settings according to the specific vocal recording.
What Are Logic Stock Plugins For Vocals?
Logic stock plugins for vocals are software tools pre-installed in the Logic Pro software used for enhancing and improving vocals in music productions. These plugins have built-in algorithms that correct pitch, equalize, compress and add effects to make vocals sound better and more polished.
What Order Should Plugins Go In For Mixing Vocals?
The order of plugins for mixing vocals depends on personal preference. However, a common recommendation for a starting point is EQ, compression, de-esser, reverb, and delay. It is important to use plugins in a way that enhances the vocals without overpowering or distorting them.
Experiment with different orders to find what works best for your vocals.
How Do I Master Stock Plugins In Logic Pro X?
To master stock plugins in Logic Pro X, practice their use in different settings and experiment with their settings. Take advantage of Logic Pro X’s user manual and online resources to learn more about each plugin. Utilize key commands to streamline your workflow and save time.
Regularly update your software to access new features and plugins.
Conclusion
Effective vocal mixing is a crucial aspect of producing a high-quality track. With Logic Pro X’s stock plugins, you can easily achieve professional-sounding vocals. Applying compression, EQ, and reverb can enhance the vocals and make them stand out in the mix.
Experiment with different settings until you find the perfect sound. With these tips, you can take your vocal mixing skills to the next level and create impressive tracks that will capture your audience’s attention.