Mixing and mastering with Animate is a powerful tool for audio engineers and producers. With its intuitive interface and advanced processing capabilities, it allows users to achieve professional-level sound quality in their music productions.
As an audio engineer or producer, you know that mixing and mastering are critical steps in the music production process. These two stages are essential for bringing out the best in your tracks, ensuring that they sound great across a wide range of playback systems.
Animate is a software tool that can help you achieve excellent mixing and mastering results without the need for expensive hardware or complex routing setups. We’ll explore what Animate is, how it works, and how you can use it to take your mixing and mastering skills to the next level.
An Introduction To Mixing And Mastering
Learn how to mix and master with Animate, the powerful tool for audio processing. This introduction to mixing and mastering will cover the basics of EQ, compression, and other techniques used in the music production process.
Mixing and mastering are two crucial steps in the production of music. Mixing involves combining individual tracks to create a polished and cohesive sound. On the other hand, mastering is the final stage of enhancing the overall sound quality of the mix. Both mixing and mastering require a deep understanding of audio processing, music theory, and technical skills. Animate is a powerful software that can simplify the mixing and mastering process while delivering professional-quality results.
The Difference Between Mixing And Mastering
Mixing and mastering are often used interchangeably, but they are distinct processes that serve different purposes. Mixing involves bringing together various tracks, including vocals, drums, bass, and guitars, among others, to create a balanced and cohesive sound. In contrast, mastering is the final step in music production that involves polishing the mix, enhancing its overall volume, and improving its clarity and depth.
Why It Is Important
Mixing and mastering are essential components of music production that can make or break a song. A poorly mixed or mastered track can sound unpolished, lacking in balance, or overly compressed. On the other hand, a well-mixed and mastered track can give the music a professional sound that stands out from the crowd. Proper mixing and mastering can improve the overall tonal balance, stereo imaging, and dynamic range, resulting in a polished and professional mix.
The Role Of Animate In The Process
Animate is a powerful tool that can help simplify and automate the mixing and mastering process. Animate offers a wide range of features, including compressors, equalizers, limiters, and stereo wideners, among others, that can be used to enhance the tonal balance, dynamic range, and stereo imaging of a mix. Animate’s intelligent algorithms can analyze the mix and make adjustments automatically, speeding up the production process and ensuring professional-quality results. In conclusion, Mixing and mastering are essential steps in music production that require both technical and creative skills. Animate can simplify and automate both processes, leading to a polished and professional sound.
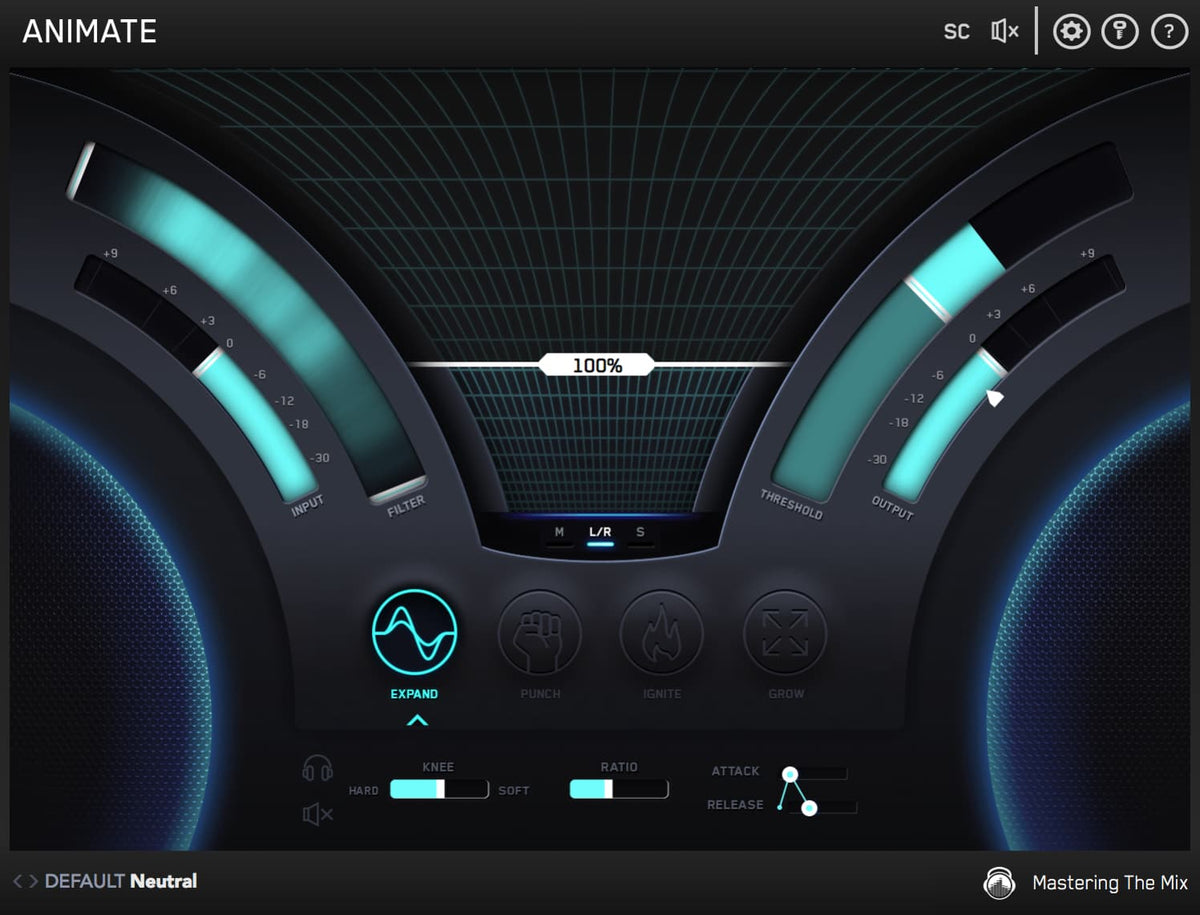
Credit: www.masteringthemix.com
Mixing Techniques With Animate
With Animate, anyone can learn to master the art of mixing and mastering for their music productions. Utilizing advanced techniques, Animate offers a wide range of features that will help musicians achieve the perfect sound for their tracks.
If you’re mixing and mastering your music tracks, it’s essential to have the right tools at your disposal. Animate is one such tool that gives you complete control over your mix. With its intuitive interface and a wide range of features and effects, Animate makes it easy to enhance your music’s sound quality. In this blog post, we’ll take a look at some of the mixing techniques with Animate to help you create a clear, polished sound that stands out in a crowded market.
Balancing Eq And Dynamics
One of the most critical steps in mixing and mastering any music is ensuring that each instrument and sound element has its own space in the frequency spectrum. Using Animate’s EQ and Dynamics controls, you can balance each element’s levels and ensure that they work together cohesively. EQ controls allow you to adjust the levels of each frequency range to bring out the desired tonal qualities of individual instruments or vocal tracks. Additionally, Dynamics controls help you define each element’s punch, presence, and clarity, resulting in a well-rounded and polished mix that sounds pleasing to the ear.
Using Audio Effects
With Animate’s broad array of audio effects, you can add depth and dimension to your mix. Use reverb and delay effects to give your music added space and create a sense of ambience. Chorus, flanger, and phaser effects can add movement and texture to your tracks. In addition, Animate’s distortion and saturation effects can help you add grit and warmth to your mix. However, it’s necessary to apply effects subtly, and in moderation, to avoid overwhelming the mix.
Working With Automated Mixing Techniques
One of the most exciting features of Animate is that it allows you to automate specific mixing tasks. For example, you can automate fader levels, pan positions, and even effects to achieve a more dynamic and coherent mix. Automation allows you to create gradual fade-ins, fade-outs, and volume changes smoothly. This technique enables you to bring out individual elements in the mix at the right times, creating excitement and anticipation for the listener.
In Conclusion
Overall, Animate provides a useful, powerful tool for mixing and mastering your music tracks. By using the right techniques and tapping into Animate’s range of features and effects, you can create a polished, professional sound that captures the essence of your music. The key is to experiment, listen critically, and use your creativity to achieve the desired results.
Mastering Techniques With Animate
Animate is an ideal software for mixing and mastering audio tracks effectively. By utilizing various techniques, audio professionals can deliver high-quality sound that is appealing to the listener.
When it comes to the final stages of music production, mastering is an essential step for producing a cohesive and professional sound. Animate is a powerful tool that provides a variety of mastering techniques to get the best out of your tracks. Here, we will discuss some of the mastering techniques you can use with Animate to achieve a polished and well-balanced sound.
Creating A Cohesive Sound
Creating a cohesive sound across multiple tracks requires careful consideration of each track’s arrangement and mixing. Animate’s mastering features can provide the final touch to tie it all together. One effective technique to create a cohesive sound is to use the same equalizer settings across all tracks. This creates consistency and balance, which helps the tracks blend seamlessly.
Adjusting Loudness And Dynamic Range
Loudness and dynamic range are critical elements of music production, and mastering techniques can help get them right. Animate’s mastering features provide precise control over both loudness and dynamic range, enabling you to make subtle adjustments that can transform the overall sound of your track. By adjusting the loudness and dynamic range of tracks, you can add depth and intensity to your sound.
Applying Eq And Compression
EQ and compression are essential techniques for mastering, and Animate provides a variety of powerful tools for applying them. EQ allows you to fine-tune the balance of different frequencies, while compression helps control dynamic range and can enhance the overall clarity and punch of your track. By carefully applying EQ and compression, you can achieve a polished and professional sound. To summarize, Animate provides a variety of mastering techniques to get the most out of your tracks. Whether you need to create a cohesive sound or adjust loudness and dynamic range, Animate’s mastering features can help you achieve a professional finish. By applying EQ and compression, you can add clarity and punch to your sound. With the right techniques and tools, you can take your music to the next level.
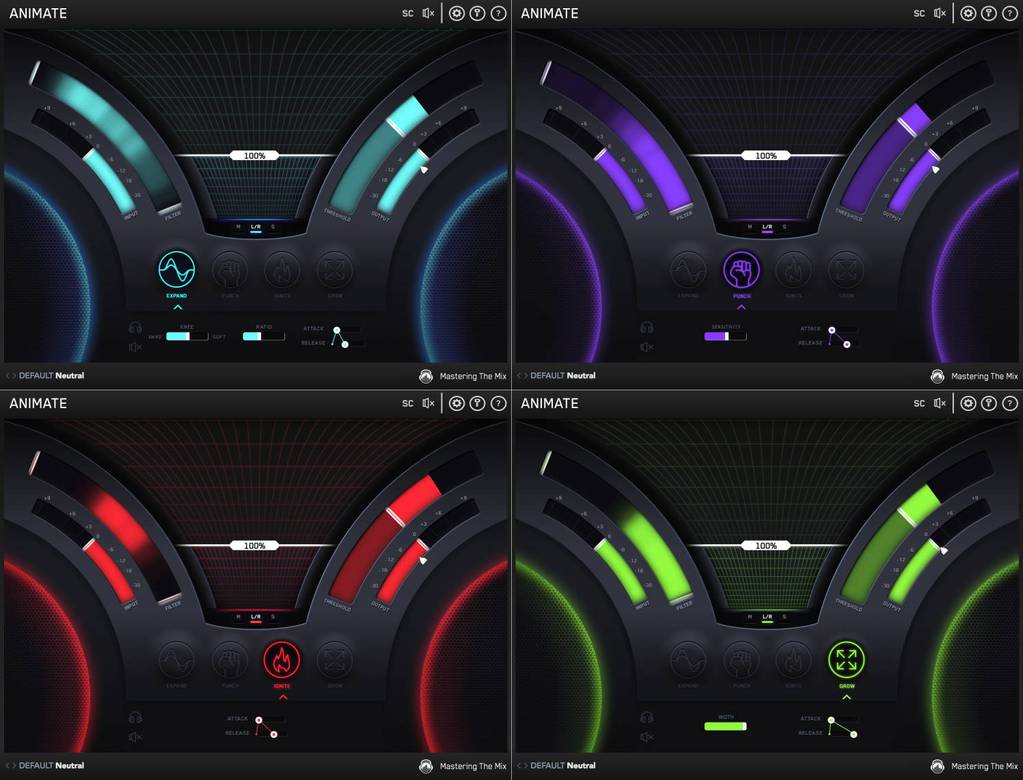
Credit: rekkerd.org
Advanced Tips For Mixing And Mastering With Animate
Discover new ways to enhance your mixing and mastering skills with Animate. This advanced tool provides unique features that allow you to add harmonic excitement, stereo width, and dynamic variation to your music production. Master your sound with Animate’s innovative technology and take your music to the next level.
If you’re producing music, then you know how crucial it is to have a polished and professional sound. That’s where mixing and mastering with Animate comes in. Animate is an excellent tool for manipulating sounds to create a balanced mix and master. In this blog post, we’ll delve into advanced tips for using Animate to take your music production to the next level.
Using Analytic Tools For Precision
When it comes to mixing and mastering, precision is key. Animate provides various analytic tools to help you achieve this. The visual analyzer is an excellent tool for identifying frequency imbalances in your mix. You can use this tool to spot problematic frequencies and adjust them accordingly. Another powerful tool is the peak analyzer, which identifies peak levels in your mix. You can use this tool to control the dynamic range and make sure your mix sounds consistent.
- Visual analyzer lets you identify frequency imbalances
- Peak analyzer is useful for controlling dynamic range
Understanding The Use Of Multiple Passes
Mixing and mastering with Animate can be a long process, and sometimes one pass isn’t enough. That’s where multiple passes come in. A second or third pass can help you identify any lingering problems in your mix. In your second pass, you can focus on fine-tuning your track to make sure everything is in its right place. You can also make use of different effects, such as EQ, compression, or reverb, to give your mix more depth and dimension.
- Multiple passes help identify problems in your mix
- You can fine-tune your mix and add more depth with effects
The Importance Of Room Acoustics In The Process
Room acoustics play a massive role in the mixing and mastering process, and it’s often overlooked. Your room’s size and shape, the type of materials used on the walls, and the position of your speakers can all impact the sound you’re hearing. To combat this, you can use a reference track to gauge how your mix sounds in other environments. You can also use room correction software to account for any acoustic deficiencies in your room.
- Your room’s acoustics can impact the sound you’re hearing
- Use a reference track to gauge how your mix sounds in different environments
- Room correction software can help account for acoustic deficiencies
In conclusion, mixing and mastering with Animate is an excellent way to achieve the polished, professional sound you’re after. With these advanced tips, you’ll be able to fine-tune your mix and master to perfection. By using analytic tools for precision, understanding the importance of multiple passes, and accounting for room acoustics, you’ll be well on your way to producing music that sounds amazing.
Common Mistakes To Avoid
Common Mistakes to Avoid in Mixing and Mastering with Animate
Audio mixing and mastering are critical stages in producing high-quality music. However, without the right skills and knowledge, even seasoned producers can make mistakes that negatively impact the final output. In this article, we will discuss some common mixing and mastering mistakes to avoid when using Adobe Animate to produce your music.
Over-eqing And Compression
One of the most common mistakes in mixing and mastering is over-EQing and compression. Over-EQing is the practice of boosting or cutting frequencies in a recording too much, which can cause unnatural-sounding audio. Similarly, over-compression involves applying too much compression on a track or the entire mix, which can cause the music to sound flat and lifeless. To avoid these mistakes, use EQ and compression in moderation and trust your ears to achieve a balanced mix.
Setting Incorrect Levels
Setting incorrect levels is another mistake that can ruin an otherwise great mix and master. Levels that are too high can cause distortion, while levels that are too low can result in unwanted noise. It is essential to keep an eye on your levels throughout the mixing and mastering process to ensure that they are balanced and cohesive. Often, using a metering plugin can help you keep an eye on your levels more effectively.
Neglecting The Importance Of The Listening Environment
The listening environment is also essential when mixing and mastering a track. Different environments can significantly affect the way a recording sounds, making it critical to ensure that your listening environment is conducive to accurate monitoring. Investing in high-quality headphones or studio monitors and working in an acoustically treated room can help ensure that your mix and master translate well to other systems.
By avoiding these common mistakes, you can enhance your music production skills and achieve a more professional and polished sound when mixing and mastering your tracks with Adobe Animate.
Putting Theory Into Practice: A Step-by-step Guide
Learn how to apply mixing and mastering theory using Animate with this step-by-step guide. From EQ and compression to reverb and delay, you’ll gain the skills needed to polish your audio tracks to perfection.
As a music producer, you understand the importance of mixing and mastering your tracks to ensure they sound their best. But, putting theory into practice can sometimes seem overwhelming, especially if you are new to the game. In this guide, we will walk you through a step-by-step process for mixing and mastering with Animate. From preparing your audio to finalizing your mix, we’ve got you covered. So, let’s get started.
Preparing Your Audio For Mixing
Before you start mixing your tracks, it’s important to ensure they are ready for the process. This means checking that all your audio files are properly labelled, backed up, and organized. You should also make sure that your recordings are free from any unwanted noise or effects, such as distortion or clipping. By taking the time to properly prepare your audio files, you will save yourself a lot of time and frustration down the line.
Setting Up Your Workspace
Once your audio files are prepared, it’s time to set up your workspace. This means selecting your DAW (digital audio workstation) of choice and creating a new project. You should also ensure that your audio settings are properly configured, including sample rate, bit depth, and buffer size. Creating a template for your mixing projects can save you time in the future by providing a consistent starting point for your mixes.
The Mixing Process: Step-by-step
Now that your audio is prepared and your workspace is set up, it’s time to start the mixing process. This involves adjusting levels, panning, EQ, compression, and effects to get the best possible sound out of your tracks. Here is a step-by-step guide to the mixing process:
- Set your levels: Start by balancing the levels of each track so that they are audible but not overpowering.
- Pan your tracks: Use panning to create space in your mix and ensure that each element can be heard clearly.
- Apply EQ: Use EQ to remove unwanted frequencies and enhance the tonal balance of your tracks.
- Apply compression: Use compression to even out the levels of your tracks and add sustain to individual elements.
- Add effects: Use reverb, delay, and other effects to create depth and atmosphere in your mix.
The Mastering Process: Step-by-step
Once you are happy with your mix, it’s time to move on to the mastering process. This involves adding the finishing touches to your tracks to ensure they sound polished and professional. Here is a step-by-step guide to the mastering process:
- Set your levels: Ensure that the overall level of your mix is consistent with industry standards.
- Apply EQ: Use EQ to enhance the tonal balance of your mix and remove any final unwanted frequencies.
- Apply compression: Use compression to add punch and glue to your mix.
- Add limiting: Use limiting to prevent your mix from clipping and to ensure it is loud enough for commercial release.
- Add dithering: Use dithering to minimize any potential distortion caused by the conversion from a higher bit rate to a lower one for distribution.
With these steps in mind, you should be well on your way to creating professional-quality mixes and mastering your tracks to perfection with Animate.
Tools And Resources For Mixing And Mastering With Animate
Discover a range of tools and resources for mixing and mastering with Animate. With features like auto-ducking, spectral frequency display and multi-track mixing, Animate offers a user-friendly audio editing suite for both beginners and professionals alike.
Mixing and mastering can be the most challenging yet crucial stages of music production. Without proper mixing and mastering, your music may sound unpolished and unprofessional. Fortunately, with the help of Animate, professional audio mixing, and mastering is achievable. In this article, we will highlight some of the essential tools and resources that can help you mix and master with Animate.
Recommended Plugins And Tools
One of the perks of using Animate is the vast selection of plugins and tools available to enhance your audio mixing and mastering experience. From equalizers and compressors to limiters and meters, the following plugins can help you achieve professional results:
- Equalizers – FabFilter Pro-Q, Waves SSL E-Channel, and iZotope Ozone Equalizer
- Compressors – Waves SSL G-Master Buss Compressor, SSL Native Bus Compressor, and Universal Audio LA-2A Compressor
- Limiters – Waves L2 Ultramaximizer, FabFilter Pro-L, and iZotope Ozone Limiter
- Meters – Waves WLM Plus Loudness Meter, iZotope Insight Metering Suite, and Klanghelm VUMT
Online Courses And Tutorials
If you are new to audio mixing and mastering with Animate, there are numerous online courses and tutorials available to help you get started. Some of the reputable platforms that offer courses and tutorials include:
- PureMix – Offers in-depth video tutorials covering various topics, including music production, mixing, and mastering.
- Coursera – Hosts free online courses taught by top instructors in the field of music production and audio engineering.
- Udemy – Provides affordable courses covering a broad range of topics, including audio mixing and mastering with Animate.
Finding The Right Studio Monitors And Headphones
Choosing the right studio monitors and headphones is essential when it comes to audio mixing and mastering. Here are some of the factors to consider when selecting studio monitors:
| Factors to Consider | Recommended |
|---|---|
| Frequency Response | Yamaha HS8, KRK Rokit 8 G4, and JBL 305P MkII |
| Sound Accuracy | Adam Audio A7X, Focal Shape 65, and Neumann KH 120 A |
| Budget-Friendly | Presonus Eris E4.5, Mackie CR-X Series, and JBL Professional 305P MkII |
When it comes to headphones, the following models come highly recommended:
- Sennheiser HD 660 S
- Beyerdynamic DT 1990 Pro
- Audio-Technica ATH-M50x
In conclusion, with the essential tools and resources highlighted above, you can achieve professional-level audio mixing and mastering with Animate. Remember to choose the right plugins, enroll in relevant courses, and select the appropriate studio monitors and headphones to help you achieve your desired audio quality.

Credit: www.youtube.com
Frequently Asked Questions For Mixing And Mastering With Animate
What Is Mastering The Mix Animate?
Mastering the Mix Animate is a plugin that allows you to add movement and lifelike dynamics to your mixes. With Animate, you can easily apply subtle or drastic changes to your sounds, adding character and dimension to your music. It’s a powerful tool for producers and engineers looking to enhance their creativity and bring their mixes to life.
Are There Plugins For Adobe Animate?
Yes, there are plugins available for Adobe Animate. These plugins can help you optimize your workflow and add new features to your animations. Some popular plugins for Adobe Animate include Bodymovin, Swift Publisher, and Extension Manager CC.
How Much Does It Cost To Mix And Master A Song?
The cost of mixing and mastering a song can vary greatly depending on a variety of factors, such as the experience and expertise of the engineer, the length and complexity of the track, and the studio’s location. On average, it could range anywhere from $50 to $500 per song.
How To Use Animate Plugin?
To use Animate plugin, first install it in your preferred software. Then select the object you wish to animate and apply the desired animations. You can adjust timing and other attributes to fine-tune your animation. Lastly, preview and export your animation.
Conclusion
To wrap things up, it’s clear that Animate is a powerful tool for mixing and mastering audio. Its intuitive interface and comprehensive range of features make it an ideal choice for producers of all levels. By experimenting with different settings and techniques, you can bring new life to your music and create a sound that’s truly your own.
Whether you’re looking to add depth and complexity to your recordings or simply clean up your sound, Animate is an essential tool in any producer’s arsenal. With continued practice and exploration, the possibilities are truly endless.