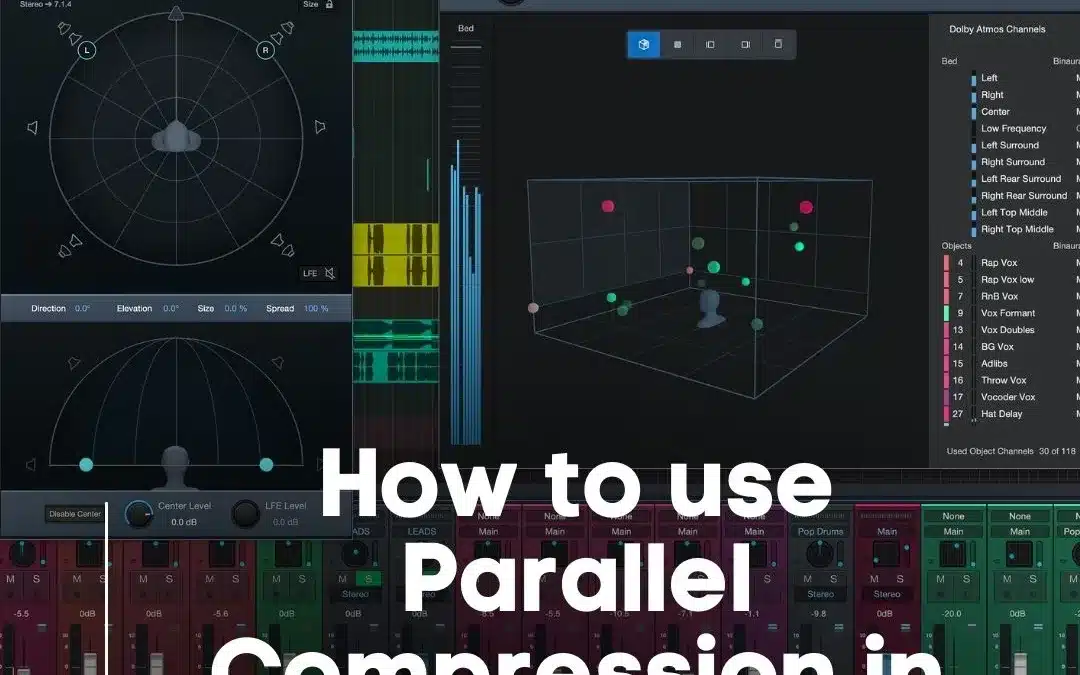
To use parallel compression in Studio One, create an auxiliary channel with the compressor inserted and blend it with the original signal. Parallel compression is a technique used to balance the dynamics of a track while preserving its original character.
It involves duplicating a track and compressing the copy, then blending it with the original. This results in a more controlled and consistent sound without sacrificing the track’s natural dynamics. In Studio One, parallel compression can be easily achieved by setting up an auxiliary channel with a compressor plugin inserted, and then blending it with the original track.
The amount of compression can be adjusted to taste, allowing for greater control over the track’s dynamics. Overall, parallel compression is a powerful tool for achieving a more polished and professional sound in your productions.
Credit: mixandmastermysong.com
Setting Up Parallel Compression In Studio One
Studio One offers the ability to use parallel compression to achieve a fuller and more polished sound. Setting up parallel compression is simple, just add a compressor to an effects bus and blend it with the dry signal. This technique is a great way to add depth to your mixes while still maintaining dynamic range.
When it comes to audio production, one technique that is commonly used to achieve a more impactful and dynamic sound is parallel compression. This technique involves mixing an uncompressed signal with a heavily compressed one, allowing you to achieve powerful dynamics without sacrificing the clarity and detail of the original audio. In Studio One, setting up parallel compression is an easy process that can be done in just a few simple steps.
Create A Parallel Compression Channel
The first step in setting up parallel compression in Studio One is to create a new channel for your compressed signal. To do this, simply right-click on the mixer and select “Add Bus Channel” from the dropdown menu. Give your new channel a name, such as “Parallel Compression,” and set the output to the main mix.
Route The Audio Signal
Once you have created your parallel compression channel, you will need to route the audio signal to it. To do this, select the track that you want to apply parallel compression to, and click on the sends section. Add a send to your parallel compression channel and adjust the level to taste.
Adjust The Levels
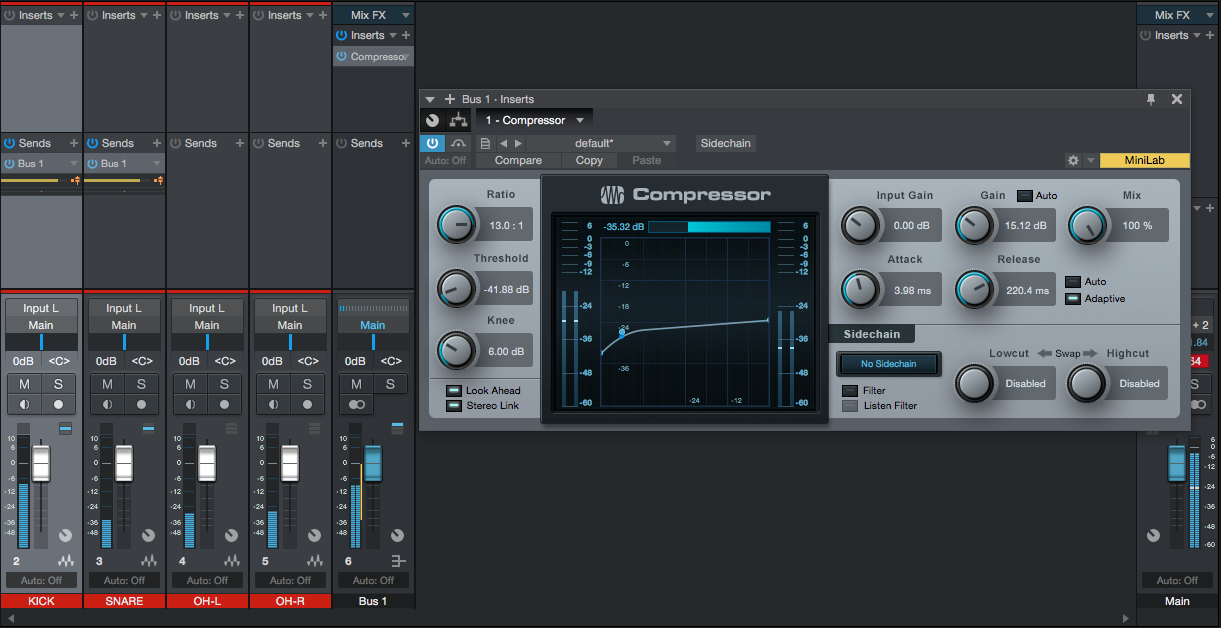
With your audio signal now being sent to the parallel compression channel, you can begin adjusting the levels to achieve the desired effect. Start by lowering the fader on your compressed channel to around -6dB, and adjust it from there. You will also want to adjust the threshold, ratio, and attack/release settings on your compressor to get the perfect balance of dynamics and clarity. In conclusion, parallel compression can be a powerful tool in your audio production arsenal, and Studio One makes it easy to set up and use. With just a few simple steps, you can add impact and energy to your tracks while preserving the original sound and character. Give it a try and see how it can take your mixes to the next level!
Choosing The Right Compressor Settings
Achieving the right compressor settings can be tricky, but using parallel compression in Studio One can help. By blending the compressed and uncompressed signals, you can achieve a fuller, more dynamic sound without sacrificing clarity.
When you are working on a mix, choosing the right compressor settings can make a huge difference in the final product. One technique that can be particularly helpful is parallel compression. This process involves blending a heavily compressed signal with the original, uncompressed signal, resulting in a more balanced and dynamic sound. However, to achieve the best results, it is important to choose the right compressor settings.
Attack And Release Time
One important aspect of compressor settings that you need to consider is the attack and release time. The attack time determines how quickly the compressor starts to reduce the level of the signal, while the release time dictates how quickly the compressor stops compressing the signal. A faster attack time means the compressor will start working more quickly, while a slower attack time will allow more initial transients to pass through. Similarly, a faster release time means the compressor will stop working more quickly, while a slower release time will allow more sustained sounds to be compressed. Adjusting these settings can help you achieve the right balance between preserving the dynamics of the original signal while still achieving a tighter overall sound.
Compression Ratio And Threshold
Another important factor in choosing compressor settings is the compression ratio and threshold. The compression ratio determines the amount by which the signal is reduced once it exceeds the threshold level. For example, a 2:1 compression ratio means that for every 2 dB the signal exceeds the threshold, it will only be allowed to increase by 1 dB. The lower the ratio, the less compression will occur, while higher ratios will lead to more intense compression. Similarly, the threshold determines the level at which compression begins to occur. Raising the threshold will reduce the amount of compression, while lowering it will increase it.
Types Of Compressors
There are also several types of compressors to consider when choosing settings. For example, a VCA (voltage-controlled amplifier) compressor is known for its fast and transparent response, making it particularly effective for controlling peaks. Alternatively, an opto (optical) compressor has a slower response and a smoother sound, making it better suited to overall level control. A FET (field-effect transistor) compressor can add a subtle warmth and color to the sound, while a variable-mu compressor is known for its musicality and ability to add a vintage character to the signal. Understanding the strengths and weaknesses of each of these types of compressors can help you choose the right one for your particular mix and goals. In conclusion, choosing the right compressor settings is crucial when using parallel compression to achieve a balanced and dynamic sound. Factors such as the attack and release time, compression ratio and threshold, and type of compressor all play a role in determining the final sound. By experimenting with these settings, you can find the perfect combination for your unique project.
Parallel Compression Tips & Tricks
Discover the power of parallel compression in Studio One with these expert tips and tricks. Learn how to achieve fuller, punchier, and more dynamic sounds in your mixes with this advanced technique, and take your music production to the next level.
Parallel compression is an effective technique that helps to enhance the sound quality of your mix. By blending the original signal with a heavily compressed version of the same signal, parallel compression can bring out the details of a track that may otherwise be lost in the mix. In this section, we will explore some useful Parallel Compression tips and tricks that can help you take your Studio One mixes to the next level.
Blending The Dry And Wet Signals
The key to effective parallel compression is finding the right balance between the dry and wet signals. You need to ensure that the compressed signal is not too loud, as it can easily overpower the original signal. One way to achieve this is by using the mix knob in the compressor plugin to blend the two signals. Alternatively, you can set up two busses in Studio One, one for the dry signal and another for the compressed signal, and use the mix knob to blend them to achieve the desired balance.
Using Parallel Compression On Specific Instruments
Parallel compression can be particularly effective when used on specific instruments in your mix. For instance, you can use it on drums to add punch and attack to your mix. To do this, send the drum mix to a parallel buss and compress it heavily. By blending this heavily compressed signal with the original signal, you can achieve a more balanced and powerful drum sound. The same technique can be applied to other instruments such as vocals, bass, and guitars.
Creative Use Of Parallel Compression
Apart from its conventional use in balancing the sound of your mix, parallel compression can also be used to create unique and creative sounds. For example, you can use it to add sustain and presence to a guitar solo or to fatten up a bass guitar sound. Experimenting with different compression settings and blending ratios can lead to exciting and unexpected results. Don’t be afraid to be creative with parallel compression and explore its possibilities. In conclusion, parallel compression is a powerful mixing technique that can help you achieve a more polished and professional sound in your Studio One mixes. By blending the dry and wet signals, using it on specific instruments and being creative with its use, you can achieve a balanced, powerful and unique sound in your mixes. Start experimenting today to discover its possibilities!
Credit: pcaudiolabs.com
Examples Of Parallel Compression
Parallel compression is a powerful mixing technique used in Studio One to achieve enhanced and dynamic sound. It involves blending a heavily compressed signal with an original uncompressed signal to create a balanced mix. In this blog post, we will explore how to use parallel compression in Studio One with specific focus on its implementation on Drums, Vocals, and Bass.
Drums
Drums are one of the most crucial elements in most tracks and can often be challenging to mix effectively. Enhancing drums through parallel compression can provide an effective way of controlling them in the mix. The technique involves grouping the individual drum tracks together and sending them to a bus channel. From there, duplicate the bus channel and compress the duplicated signal with heavy compression settings. Then, blend the compressed signal with the original signal to produce a heavily compressed yet balanced sound.
Vocals
Vocals are another crucial aspect of any track that requires attention to detail to achieve a perfect mix. Parallel compression can be used to enhance vocal tracks effectively. This technique involves routing the vocal track to a bus channel and duplicating the channel. Then you apply a heavy compression setting to the duplicate vocal track. Finally, blend the heavily compressed vocal signal back into the original signal to create a more significant and more sustained vocal sound.
Bass
Bass can make or break any track, and thus it is essential to get it right in the mix. By using parallel compression, you can create a more balanced and controlled bass sound. The technique involves routing the dry bass signal to a bus channel, duplicating the bus channel, and then applying heavy compression settings to the duplicated signal. Finally, blend in the heavily compressed signal with the original signal to create a sound that is both punchy and evened-out.
Common Mistakes To Avoid
To effectively use parallel compression in Studio One, it is important to avoid common mistakes. These include overusing compression, using too much gain, not adjusting attack and release times, not EQing properly, and not using a good mix balance. By implementing these tips, you can achieve a fuller and more dynamic sound in your tracks.
Common Mistakes to Avoid Parallel compression, also known as New York-style compression, is a technique that can add punch and sustain to your tracks. However, when not used carefully, parallel compression can lead to unnatural and over-processed sounds. In this section, we will discuss common mistakes to avoid when using parallel compression in Studio One. Overuse of Parallel Compression One of the most common mistakes in using parallel compression is overuse. Applying too much parallel compression can result in an overpowering and muddy sound, making it difficult to balance with other elements in the mix. To avoid this mistake, start with a low amount of parallel compression and gradually increase it until you achieve the desired effect. Setting the Compression Ratio Too High Another common mistake is setting the compression ratio too high. A high ratio setting can lead to pumping and breathing sounds, where the compressed signal is noticeable and distracting. Generally, a ratio of 2:1 or 3:1 is a good starting point for parallel compression. You can then adjust the ratio according to the dynamic range of your track. Not Adjusting the Attack and Release Times Properly The third mistake is not adjusting the attack and release times properly. The attack time determines how quickly the compressor starts to respond to the signal, while the release time determines how quickly it stops compressing after the signal falls below the threshold. If these settings are too fast, the compressor will be too aggressive and can cause distortion. Conversely, if they are too slow, the compressor will not be effective in controlling the dynamics. It is recommended to start with moderate attack and release times and adjust them according to the character of your track. Conclusion By avoiding these common mistakes, you can use parallel compression effectively to enhance the dynamics and impact of your tracks in Studio One. Remember to start with a low amount of parallel compression, set a reasonable compression ratio, and adjust the attack and release times appropriately. With these tips in mind, you can add punch and depth to your mixes without sacrificing clarity and balance.
Credit: m.youtube.com
Frequently Asked Questions On How To Use Parallel Compression In Studio One
How Do I Set Up Parallel Compression?
To set up parallel compression, first create a duplicate of the original signal. Then, apply heavy compression on the duplicate signal. Finally, blend the compressed signal with the original signal to achieve a thick and punchy sound. Experiment with different compression ratios and settings to find the ideal sound.
How Do I Parallel A Process In Studio One?
To parallel a process in Studio One, simply drag the process that you want to parallel onto a new track. Then, route both tracks to a bus channel, and insert a mixtool on the bus channel. Finally, adjust the mixtool’s pan settings to achieve the desired amount of parallel processing.
Do You Eq Parallel Compression?
No, EQ parallel compression is not a mandatory step. It depends on the specific situation and desired outcome. It may be used to shape the sound during compression or to avoid muddiness or harshness, but it is not always necessary.
What Are The Best Parallel Compression Settings For Vocals?
For parallel compression on vocals, start with a compression ratio of around 2:1 with a fast attack and slow release. Adjust the threshold to your liking, and blend the dry and compressed signals to taste. Experiment with different attack/release times and adjust to fit the specific track.
Conclusion
Parallel compression is a powerful technique that will add depth and dimension to your mixes. Whether you are working on a vocal track, drums, or any other instrument, this technique will help you achieve the desired sound. The use of parallel compression in Studio One can be a bit tricky at first, but with a little practice, you can easily master it.
Don’t be afraid to experiment with different settings and find what works best for you. Remember, the goal is to achieve a balanced mix that sounds professional and polished.