To use Auto-Tune as a pro, familiarize yourself with its controls and settings, then subtly adjust the pitch correction to achieve a natural-sounding result. Auto-Tune is an audio plugin that adjusts the pitch of a vocalist or instrument, resulting in a smoother and more polished sound.
This software has been used on countless hit songs to correct pitch issues or create unique vocal effects. It can be a powerful tool when used appropriately, but can also be overused and result in a robotic, unnatural sound. As with any tool in music production, understanding its capabilities and limitations is key to achieving professional results.
We will explore how to use Auto-Tune effectively to enhance your recordings.
Understanding Auto-tune
Auto-Tune is an innovative tool that can enhance the quality of music by correcting pitch and tempo. As a pro, understanding how to use Auto-Tune properly can help you create beautiful melodies and richer harmonies that sound professional.
As a musician or producer, you have probably heard of Auto-Tune, a tool used to correct pitch errors in vocal performances. However, there is much more to Auto-Tune than just pitch correction. Understanding the different types of Auto-Tune tools and how they work can help you get the most out of this powerful software.
Different Types Of Auto-tune Tools
Auto-Tune comes in several different versions, each with its own set of features and capabilities. Here are the most commonly used types of Auto-Tune tools:
| Type | Description |
|---|---|
| Auto-Tune Pro | The most advanced version of Auto-Tune, offering the most features and control. |
| Auto-Tune Artist | A simplified version of Auto-Tune, designed specifically for singers. |
| Auto-Tune Access | A lighter version of Auto-Tune with fewer features, ideal for beginners or those on a budget. |
How Auto-tune Works
Auto-Tune works by analyzing the pitch of a vocal performance and then correcting any errors in real-time. This is achieved through a process called pitch shifting, where Auto-Tune alters the pitch of the incoming signal to match a pre-defined scale or key. When using Auto-Tune, it is important to set the correct key and scale for your song to ensure that the pitch correction is accurate. You can also adjust the speed and depth of the pitch correction to achieve the desired effect. In addition to pitch correction, Auto-Tune also offers a range of other features, such as formant shifting, throat modeling, and vibrato control. These tools allow you to create a wide range of vocal effects and styles, from subtle pitch correction to extreme robotic vocals. By understanding the different types of Auto-Tune tools and how they work, you can take your vocal recordings to the next level, achieving professional-quality results that are sure to impress.
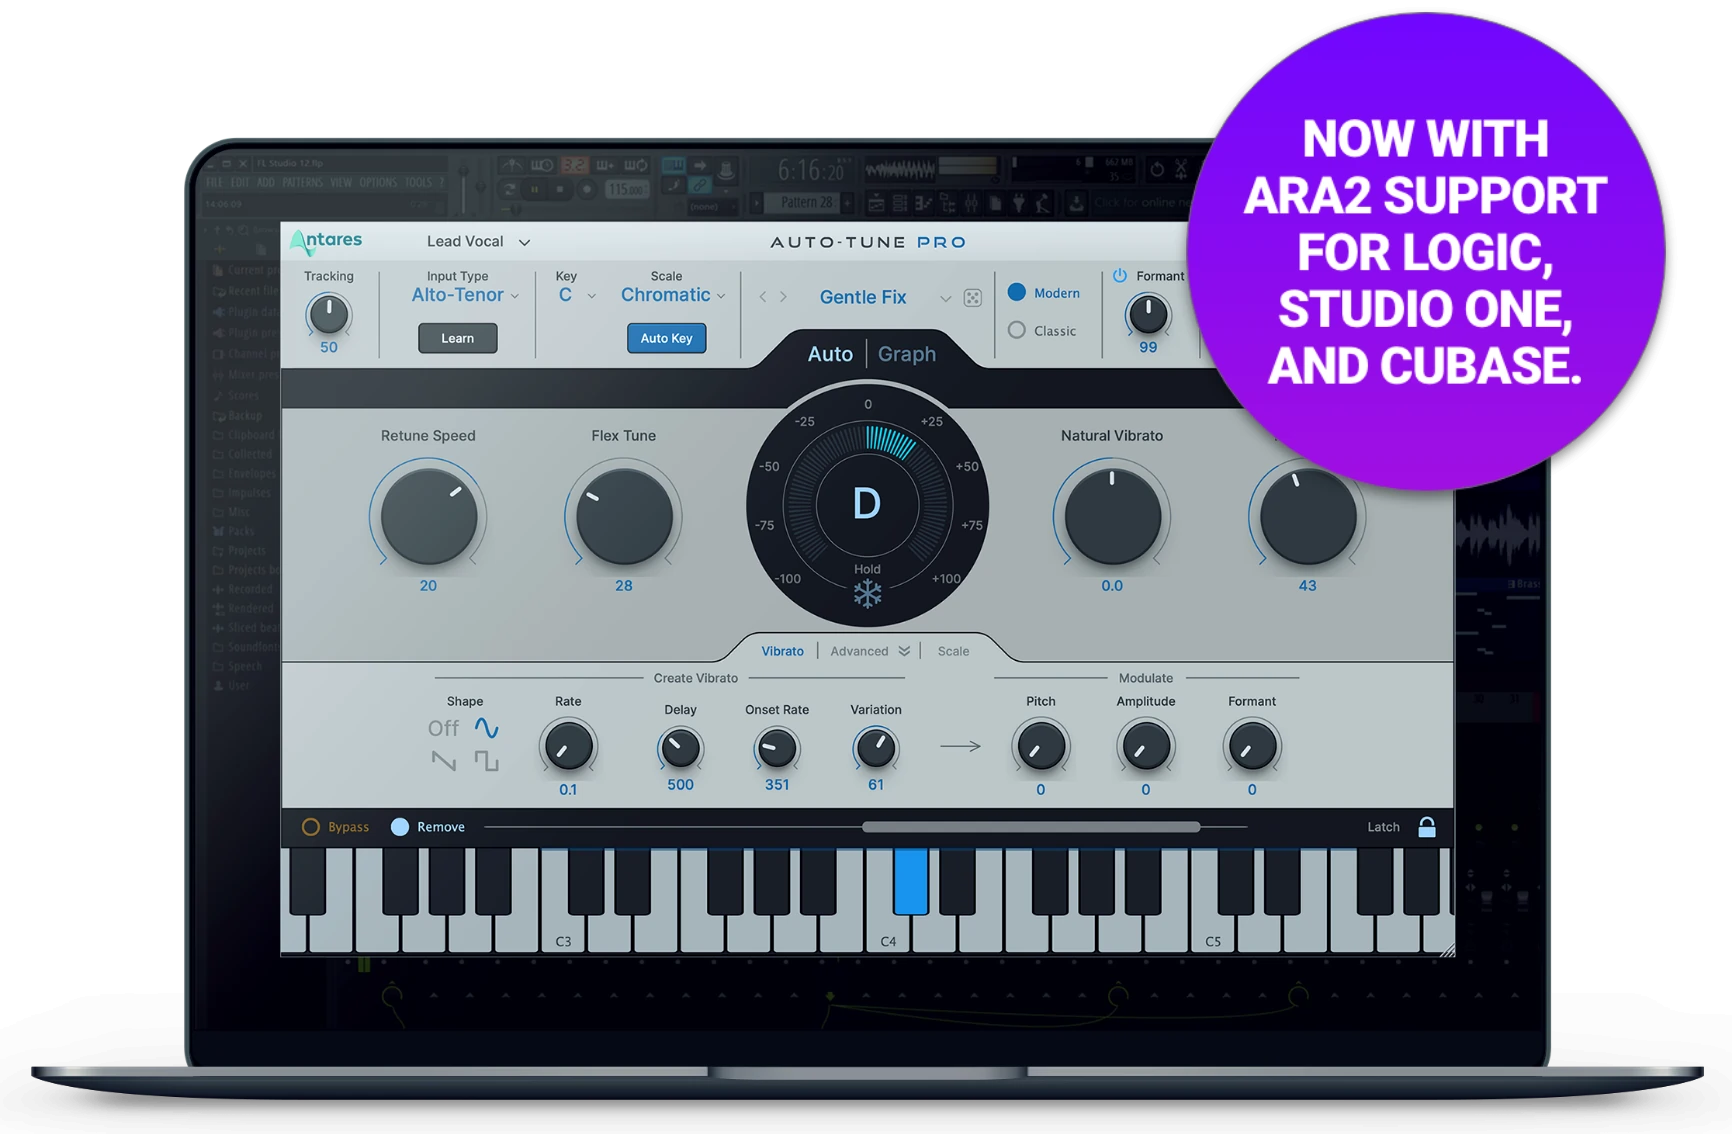
Credit: www.antarestech.com
Setting Up Auto-tune
If you’re an audio producer, engineer or a singer, you’re probably familiar with the term “Auto-Tune”. As the name suggests, it’s a tool that can automatically tune your vocals to the right pitch, making them sound more professional and pitch-perfect. Setting up Auto-Tune might seem like a daunting task at first, but with a few simple steps, you can be on your way to using Auto-Tune like a pro.
Installing Auto-tune Plugin
- To use Auto-Tune, you need to first install the Auto-Tune plugin on your computer. You can buy it from the official Antares website or a licensed vendor.
- Once you have downloaded the Auto-Tune plugin, unzip the file and run the installer. Follow the prompts and choose your preferred VST folder location.
- After the installation is complete, launch your digital audio workstation (DAW) and navigate to your plugins folder. Auto-Tune should now appear in your plugin list.
Setting Up Auto-tune In Your Daw
- Open your DAW and create a new track. In your track settings, choose the input source from your audio interface or microphone.
- Select Auto-Tune from your DAW’s plugin list and drag it to your track’s insert slot. This will open up the Auto-Tune interface.
- Choose your desired key and scale from the drop-down menus in the Auto-Tune interface. You can also adjust the retune speed and vibrato settings to your liking.
- Sing or record your vocal part, and you should notice that Auto-Tune is correcting your pitch in real-time.
- After recording your vocals, you can fine-tune the pitch correction by adjusting the retune speed and other settings.
With these simple steps, you should be able to set up Auto-Tune without any hassle. Remember, Auto-Tune is a tool that requires a bit of experience to master, so keep practicing and experimenting with different settings. Happy tuning!
How To Use Auto-tune For Pitch Correction
Auto-Tune is commonly used for pitch correction in music production. To use it like a pro, one must first understand how it works, adjust the settings to their liking, and use it sparingly to avoid sounding overly processed.
As a music producer or engineer, pitch correction is crucial when it comes to producing great sound. That’s where Auto-Tune comes in handy. If used correctly, Auto-Tune can polish an unpolished vocal performance to a professional level. However, using it requires some technical know-how. Here’s a step-by-step guide to help you use Auto-Tune as a pro.
Preparing Your Audio Track
Before using Auto-Tune, you need to prepare your audio track. First, ensure that the audio file is saved in a lossless format. You can use popular file formats such as WAV or AIFF. Then, adjust the volume of the track to ensure everything is audible. Finally, remove any unwanted noise using an equalizer or noise gate.
Selecting The Right Correction Type
Next, you need to choose the right type of correction for your audio track. Auto-Tune offers several modes including Auto, Graph, Classic, and Humanize. The Auto mode is the most commonly used, but you can experiment with other modes to find the best fit for your audio. Each mode offers different options to alter different characteristics of the sound.
Adjusting Key And Scale Settings
After selecting the correction type, it’s important to adjust the key and scale settings. The key setting should match the key of the song, while the scale setting should match the type of scale you are using. Auto-Tune has several preset scale settings that you can choose from. However, if you’re using a less common scale type, you can manually adjust it using the Graph mode.
Making Manual Corrections
Finally, after adjusting the key and scale settings, it’s time to make manual corrections to your voice track. This process involves using the Graph mode to create a pitch curve. The pitch curve ensures that the voice track is in tune with the key and scale of the song. You can make corrections by moving the pitch line up or down as needed. It’s important to note that while Auto-Tune can correct pitch, it can’t fix poor vibrato or timing issues. Using Auto-Tune for pitch correction can transform your audio tracks from mediocre to professional. Follow these simple steps to ensure that you get the most out of Auto-Tune for your music production needs.
How To Use Auto-tune Creatively
Auto-Tune can be used creatively to enhance vocals, add unique effects, and make pitch corrections. By experimenting with different settings and techniques, you can use auto-tune like a pro to bring your music to the next level.
Auto-Tune has been a popular tool for correcting pitch issues in music for years. However, there are numerous creative ways to use Auto-Tune beyond pitch correction that can enhance your music production skills. By using this software creatively, you can take your music production to the next level. In this blog post, we’ll explore how you can use Auto-Tune creatively. We’ll discuss how to use it for vocals, non-vocal tracks, and creating unique harmonies. Below are the instructions for each method. Creating Vocal Effects with Auto-Tune Auto-Tune is most commonly used for pitch correction in vocals. However, it can also be used to create unique vocal effects that add depth and character to your music. Here’s how you can use Auto-Tune creatively for vocal effects: – Create robotic vocals by setting the retune speed to 0 and adjusting the key and scale to match your track. – Use the formant control to create a “chipmunk” or “monster” effect. – Experiment with the humanize function to add a more natural feel to your vocals. – Adjust the vibrato and throat controls to create more expressive vocals. Using Auto-Tune on Non-Vocal Tracks Although Auto-Tune is designed for vocals, it can also be used creatively on non-vocal tracks to add a unique sound to your music. Here’s how you can use Auto-Tune creatively on non-vocal tracks: – Use Auto-Tune on guitar or other instruments to create a robotic or synthesized sound. – Use Auto-Tune as an EQ tool to cut certain frequencies from tracks that clash with other instruments. – Use Auto-Tune on percussion tracks to create interesting pitch variations. Creating Unique Harmonies with Auto-Tune Auto-Tune can also be used creatively to create unique harmonies that can add extra depth and texture to your music. Here’s how you can use Auto-Tune creatively to create harmonies: – Use the “Graph Mode” to create custom pitch curves to harmonize with your main vocal melody. – Use the “Key Correction” setting to automatically generate harmonies based on your main vocal melody. In conclusion, Auto-Tune isn’t just a tool for correcting pitch issues. With the creative techniques discussed in this blog, you can use Auto-Tune to enhance your music production skills and create unique, interesting sounds. By using these techniques, you’ll set yourself apart from other music producers and take your music to the next level.
Best Practices For Using Auto-tune
Want to use Auto-Tune like a pro? Here are some best practices you need to follow. Firstly, familiarize yourself with the features. Secondly, use it only to enhance your voice, not to mask it. Lastly, make sure you’re using the correct key and scale to avoid any off-pitch notes.
Auto-Tune is an indispensable tool for both professional and novice music producers. It enables you to correct pitch inaccuracies, maintain consistent pitch throughout the track, and give your vocals a polished sound. However, like any tool, it can be overused, leading to unnatural-sounding vocals which can detract from the overall quality of the track. In this article, we will explore the best practices for using Auto-Tune effectively and avoiding common pitfalls that can detract from your music’s quality.
Avoiding Overuse And Artifacts
When using Auto-Tune, it is essential to strike a balance between correcting pitch inaccuracies and retaining the natural sound of the vocals. Overuse of the tool can result in a robotic-sounding voice, which can detract from the overall quality of the track. Here are some tips to avoid overuse and artifacts:
- Maintain a natural pitch range: Avoid setting the correction to the extremes of the pitch range. This can result in a noticeable robotic voice.
- Use a slower correction speed: A slower correction speed will sound more natural, while a fast correction speed can produce noticeable artifacts.
- Adjust the retune speed: A low retune speed will result in a natural-sounding voice, while a high retune speed can produce noticeable artifacts.
Using Auto-tune To Enhance Rather Than Fix
Auto-Tune can be used to enhance the quality of your vocals, but it should not be relied on to fix pitch accuracy issues that can be resolved by the singer. Here are some tips to ensure you are using Auto-Tune to enhance rather than fix:
- Record dry vocals: Recording dry vocals without any effects will help you capture the natural sound of the singer’s voice.
- Mix the natural and Auto-Tuned vocals: Mixing the natural and Auto-Tuned vocals will help you achieve a more natural-sounding voice. This will also help avoid overuse of the tool.
- Use Auto-Tune to adjust the pitch only slightly: Using Auto-Tune to adjust the pitch only slightly will help you achieve a more natural-sounding voice by retaining the nuances of the singer’s voice.
Using Auto-tune In Combination With Other Effects
Auto-Tune can be used in combination with other effects to achieve various vocal effects. Here are some tips for using Auto-Tune in combination with other effects:
| Effect | Tips |
|---|---|
| Reverb | Use reverb to create a spacious and natural sound. Adjust the wet/dry mix to achieve the desired effect. |
| Delay | Use delay to create an echo effect. Adjust the feedback and timing parameters to achieve the desired effect. |
| Compression | Use compression to even out the vocal track. Adjust the threshold, ratio, and attack parameters to achieve the desired effect. |
In conclusion, Auto-Tune is a powerful tool for enhancing the vocals in your music tracks. By following these best practices, you can achieve a more natural-sounding voice and avoid common pitfalls that can detract from the overall quality of the track.
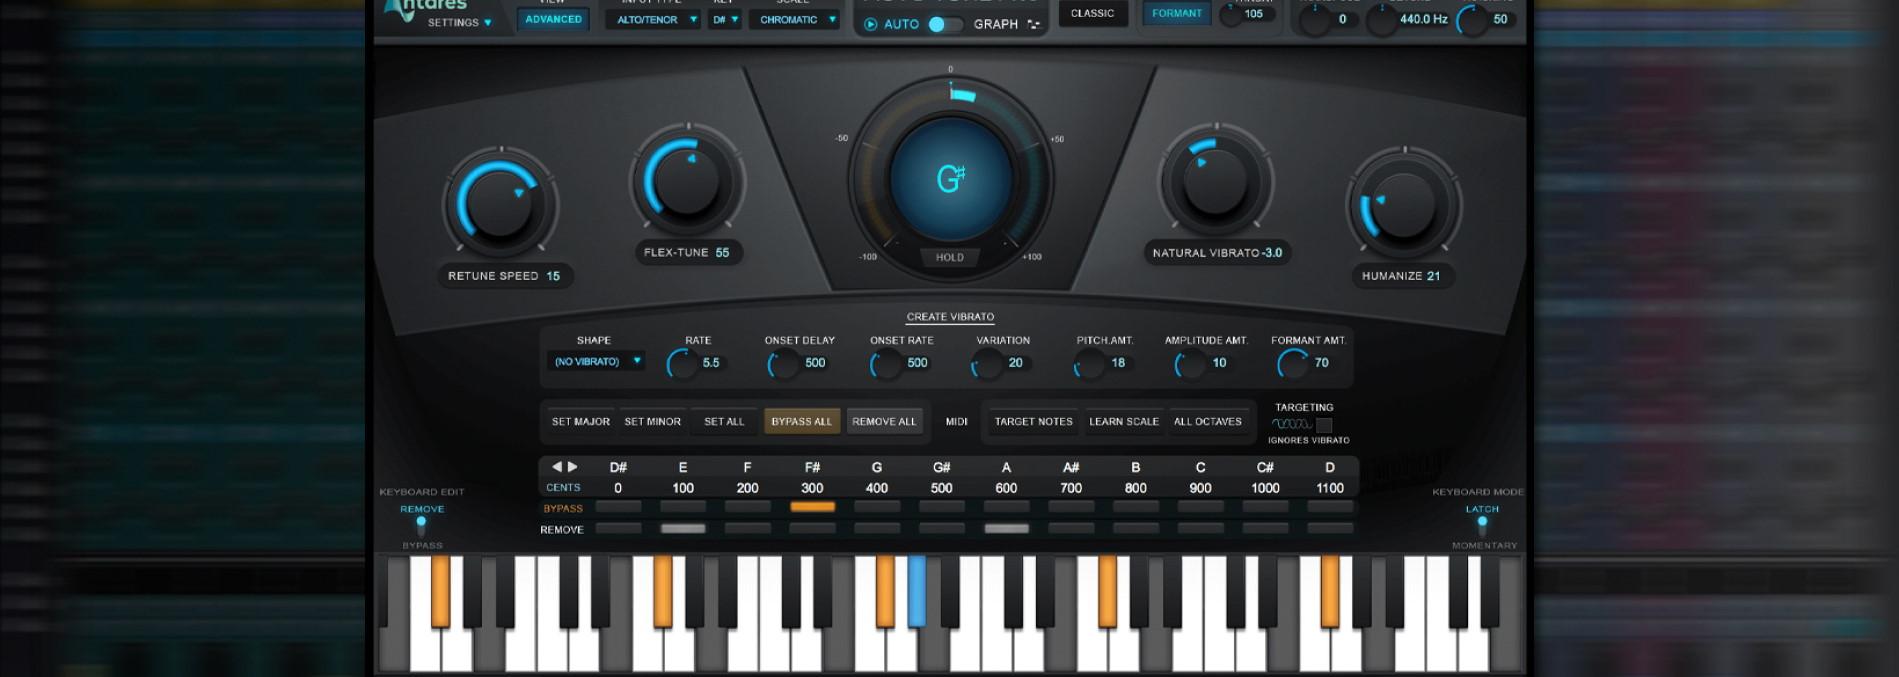
Credit: majormixing.com
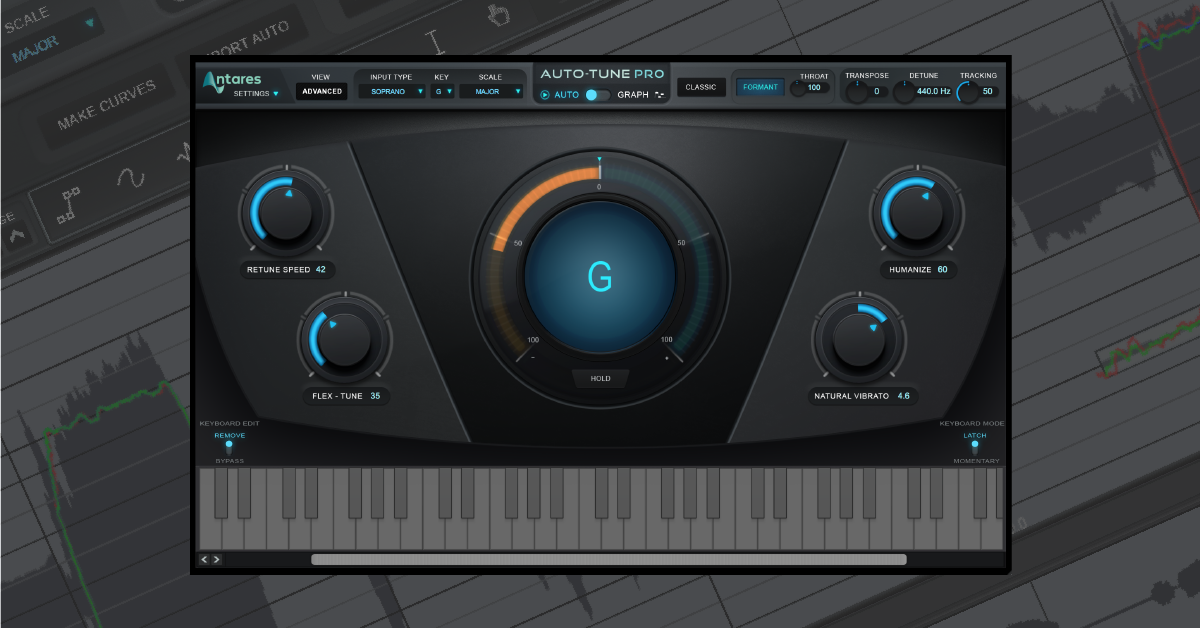
Credit: www.sweetwater.com
Frequently Asked Questions On How To Use Auto Tune As A Pro
How Do I Activate Autotune Pro?
To activate Autotune Pro, you need to follow these steps: 1. Download and install the software 2. Open your DAW or recording software 3. Insert Autotune Pro onto your desired track 4. Enter your activation code or use iLok 5.
Activate the software and start using it.
How Do You Autotune Professionally?
Autotuning professionally requires a good quality autotune plugin, understanding pitch correction, properly setting the key and scale of the track, adjusting the retune speed and sensitivity, avoiding excessive autotune, and adding some human touch to the performance. Practice and experimentation are also necessary for achieving desired results.
Do Professionals Use Autotune?
Yes, professionals do use autotune when recording music. Autotune helps to correct pitch issues and make the vocals sound smoother and more polished. However, it’s important to note that not all professionals use autotune and some prefer to record without it to maintain a more natural sound.
How Do I Use Autotune Pro In Pro Tools?
To use Auto-Tune Pro in Pro Tools, you first need to install and authorize the plugin. Then, create a new track, insert the Auto-Tune plugin, and choose a preset or adjust the settings to your liking. You can then apply the effect to the track during recording or after the fact.
Conclusion
Auto-Tune is a powerful tool for any music producer or artist. With the right approach, you can use it like a pro to enhance your music and take your career to the next level. Remember to use it creatively, and don’t overuse it to the point where it becomes a crutch.
Learning how to use Auto-Tune is just one piece of the puzzle, but with the right mindset and hard work, you can produce music that will captivate your audience and take your career to new heights. Happy tuning!