To set up your home studio, choose a dedicated space and gather necessary equipment. Creating a home studio is a great way to pursue your passion for music, podcasting, or other audio-related activities.
However, setting up a home studio can be a daunting task, especially if you are new to the world of audio recording. To make the process easier, you need to consider a few factors, such as choosing a dedicated space and gathering the necessary equipment.
These include microphones, an audio interface, headphones, a computer, and software. We’ll guide you through each step of setting up your own home studio and offer some tips for getting the most out of your gear.
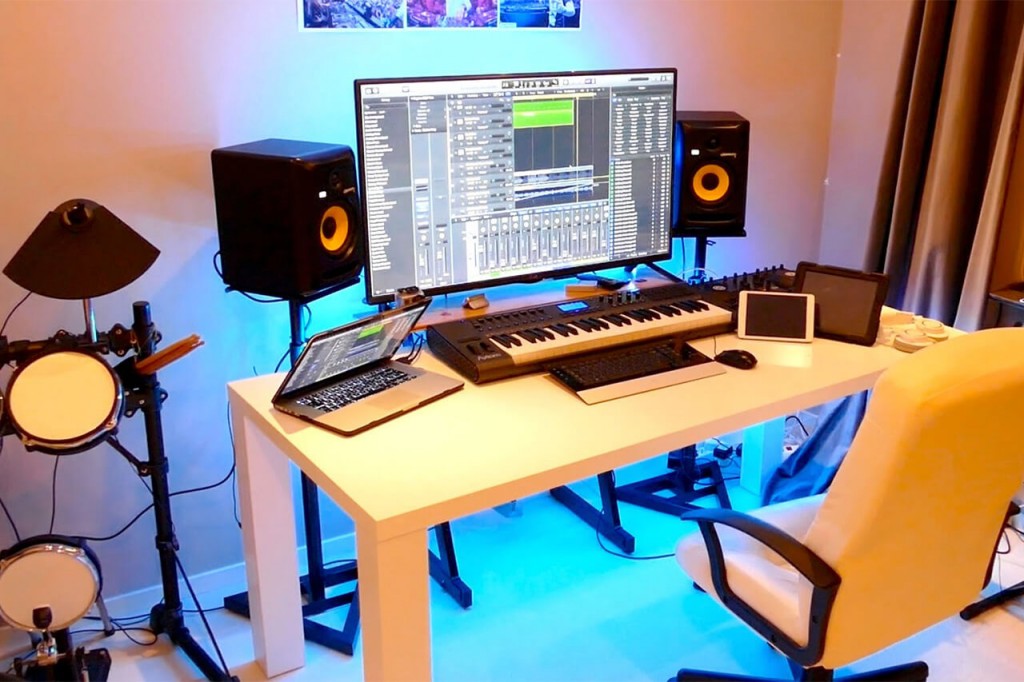
Credit: www.hauteresidence.com
Choose The Right Space
Choosing the right space is crucial when setting up your home studio. Look for an area with good acoustics, minimal sound leakage, and natural light. It’s also important to consider the size of the space and how it will fit all your equipment.
When it comes to setting up a home studio, choosing the right space is crucial. The space you choose will affect the quality of your recordings, and it’s important to consider a few key factors when making your decision.
Consider The Acoustics
One of the most important factors to consider when choosing a space for your home studio is the acoustics. You want a space that will help you achieve the best possible sound quality, and that means avoiding spaces with hard floors, walls, and ceilings. If you’re working with a smaller budget, consider investing in sound-absorbing materials like acoustic foam or a sound barrier curtain. You can also look for a space with soft furnishings like carpets and curtains, which will help to absorb sound.
Look For A Space With Minimal Noise
Next, consider the amount of noise in your chosen location. You want to avoid any spaces that are near busy roads, train tracks, or other sources of noise pollution. This will help you to get the cleanest possible recordings. If it’s not possible to find a space without any outside noise, consider investing in soundproofing materials like double-paned windows or a heavy door to help keep noise out.
Make Sure Your Space Has Enough Room
Finally, make sure the space you choose is large enough to accommodate your equipment and any other items you need for your studio. You don’t want to feel cramped or overcrowded in your space, as this can make it difficult to focus on your work. Consider measuring the space and visualize where you’ll store your equipment and how you’ll set up your work area. This will help you make the best decision for your home studio setup. By carefully considering acoustics, outside noise, and space requirements, you’ll be able to choose the ideal location for your home studio. A well-chosen workspace will help you achieve the best possible recordings and make your work more enjoyable.
Get The Necessary Equipment
To set up your home studio, it’s important to get the necessary equipment. This includes a computer or laptop, audio interface, headphones, microphone, and recording software. Having the right tools is essential for capturing high-quality recordings for your projects.
Setting up a home recording studio can be an exciting endeavor, but it can also be overwhelming, especially when it comes to deciding on what equipment to purchase. In this section, we will go over the essential gear you need to start building your at-home studio. Here are the important pieces of equipment you will need:
Computer Or Laptop
The first thing you will need is a computer or laptop. Most of the digital recording gear today works seamlessly with both Mac and Windows computers. When shopping for a computer, it’s best to look for one with a fast processor, a decent amount of RAM, and storage space for your digital audio projects. You can consider getting a desktop computer or a laptop, but make sure it has enough power to handle your recording needs.
Digital Audio Workstation (daw)
A Digital Audio Workstation (DAW) is the most important tool you will need for recording, mixing and mastering music. A digital audio workstation is software that enables you to record, edit, and produce your music projects on your computer. There are various DAW options you can choose from, including FL Studio, Logic Pro, Ableton Live, Pro Tools, and Cubase. Make sure to choose the one that is best suited for your budget, recording needs, and workflow.
Microphones
Microphones are essential for recording vocals, live instruments, and amplifiers. You might also use them for recording band rehearsals and songwriting sessions. There are various types of microphones available in the market, including condenser mics, dynamic mics, and ribbon mics. If you are just starting, a good-quality condenser or dynamic microphone will suffice.
Audio Interface
To connect your microphones, instruments, and other external audio gear to your computer, you will need an audio interface. An audio interface is a piece of hardware that allows you to convert analog signals into digital signals and vice versa. Most audio interfaces come with a built-in preamp, which amplifies the microphone or instrument signal before converting it into a digital format for your computer to record.
Studio Monitors
Studio monitors are specially designed speakers that are used to listen to the recorded audio with accuracy and clarity. When selecting the right studio monitor, make sure to look for one that reproduces the natural sound of your audio. Avoid getting speakers with too much bass or treble boost, as it can affect your mixing decisions.
Headphones
Headphones are another essential piece of equipment in your home studio. They are great for recording and editing audio tracks, especially when you can’t use your studio monitors. When shopping for headphones, make sure to look for ones with a flat frequency response, as it will help you hear the audio track accurately.
Cables And Stands
Finally, you will need various cables and stands to connect and support your audio equipment. Make sure to have enough XLR cables for your microphone and audio interface, and also get a decent mic stand, boom stand and pop shield. You will also need instrument cables for your guitar or bass, and speaker cables if you decide to get a separate monitor speaker. In conclusion, getting the necessary equipment for your home studio can be challenging, but knowing what you need makes the process more manageable. Remember, always choose quality equipment that best fits your recording needs and budget.
Setting Up The Studio
Setting up a home studio can be a daunting task for beginners. However, once the equipment and furniture are in order, you’re ready to start creating and producing content. Setting up a studio involves arranging furniture and equipment, treating the room with acoustic panels and managing cables and connections. To ensure a smooth setup process, we’ll take a closer look at each of these steps below.
Arrange The Furniture And Equipment
The first step towards setting up your studio is arranging furniture and equipment. Arranging the furniture in a tidy and orderly manner will allow you to utilize the space efficiently. Place your desk against a wall, preferably one with electrical outlets and network ports so that you can connect all of your equipment easily.
When it comes to selecting equipment, invest in high-quality products that meet your needs and budget. Your equipment list should have a computer, monitor, audio interface, microphones, headphones, and speakers. If you’ve got a webcam, make sure you’ve placed it at the right height where you’re facing the camera directly.
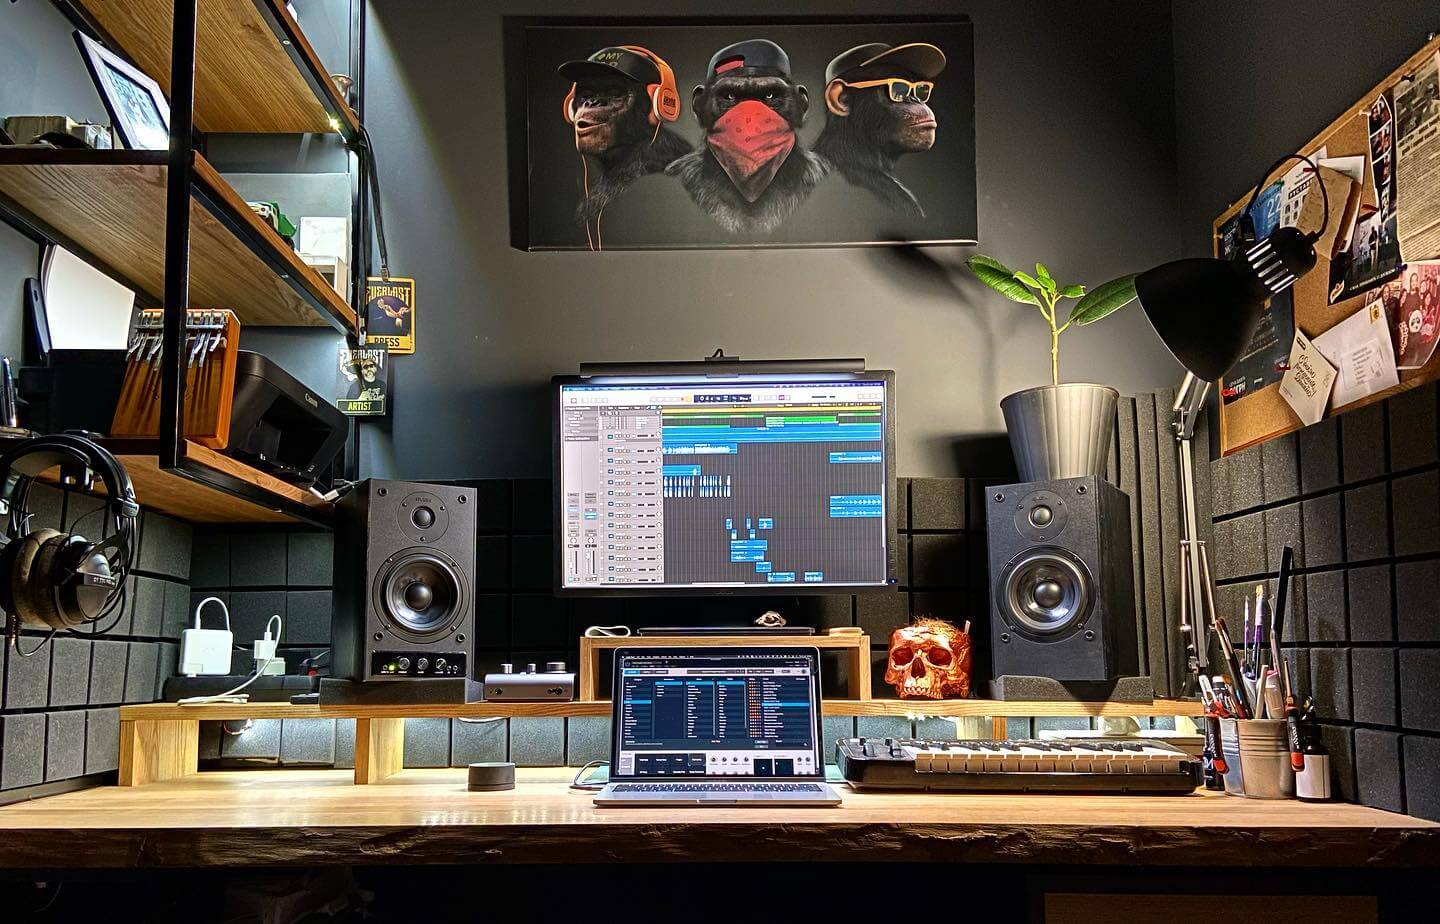
Treat Your Room With Acoustic Panels
Acoustic panels are essential in-home studios to improve sound quality. They absorb sound waves that would otherwise bounce off walls and create reverberation or echo, resulting in a much more natural and clear sounding audio. You can buy acoustic panels from online marketplaces such as Amazon, or create them at home using commonly available materials like fiberglass and foam. Place the panels appropriately in strategic positions throughout your workspace to ensure your voice sounds excellent with no echo or unwanted noise.
Manage Cables And Connections
Cables and connections are the backbone of any home studio. Proper cable management ensures that you don’t have loose cables lying around and tangles. Start by labelling your cables and creating a system for keeping them organised. You can use zip ties or velcro for keeping cables together. Also, make sure that power outlets and surge protectors are located close to your equipment, so there aren’t cables running from all over the room. As much as possible, run cables along walls and under carpets to avoid any trip hazards.
| Quick Cables Management Checklist: |
|---|
| Label your cables |
| Use zip ties or velcro to keep cables together |
| Place power outlets near the equipment |
| Run cables along walls and under carpets |
Setting up a home studio can be time-consuming, but it’s crucial for a quality product. Following the basic steps of arranging the furniture and equipment, treating your room with acoustic panels, and managing cables and connections will go a long way in ensuring your home studio is conducive to your work and production. Now that your studio is set up, you are ready to start creating and producing terrific content.
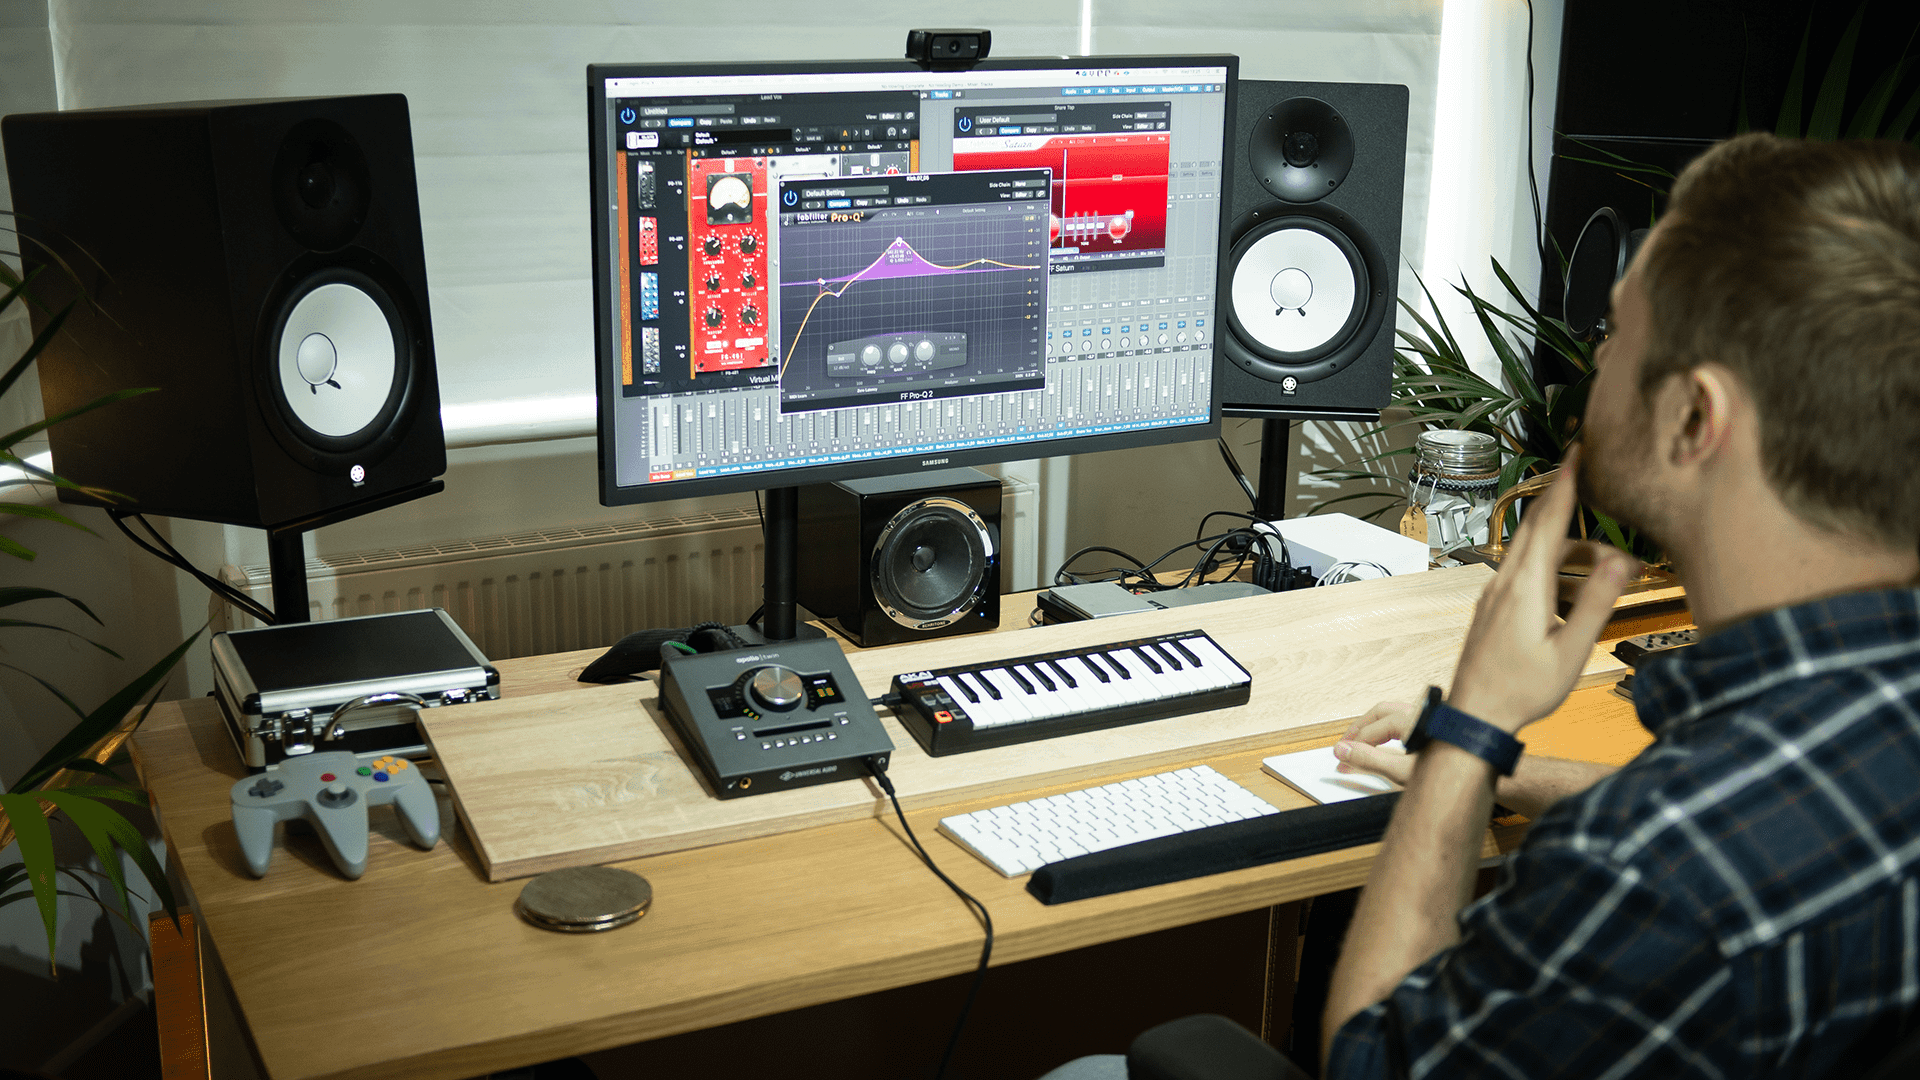
Credit: audient.com
Peripherals And Accessories
Peripherals and accessories are essential elements to consider while setting up a home studio. They are integral to ensuring that you have a quality recording experience. When it comes to peripherals and accessories, there are quite a few items that you will require to ensure that your recordings are of top quality. Here are some of the essential peripherals and accessories that you need for your home studio:
Midi Keyboard
A MIDI keyboard is an essential tool that will make your recordings sound more professional. It allows you to play and record different musical inputs into your computer or digital audio workstation (DAW) through a USB connection. A MIDI keyboard is convenient because it provides you with different control functions that you can use to play, record, and edit your music. You can choose from a wide range of MIDI keyboards in the market based on your requirements and budget.
Controller
If you are looking to create electronic music, a controller will come in handy. A controller is a device that gives you the ability to blend, sequence, and manipulate sounds. It is an essential tool that is used to program, control, and modify different synthesizers, drum machines, and other recording gear. You will find several types of controllers such as drum pads, mixers, and faders that will make your recording experience more satisfying.
Pop Filter
A pop filter is a device that is used to prevent popping sounds or plosives while you are recording vocals. It is a simple circular mesh that is placed between your mouth and the microphone. Pop filters are inexpensive and are easy to set up. They are an important accessory that should not be overlooked, as it can have a significant impact on your recordings.
Shock Mount
A shock mount is used to prevent vibrations that can disrupt your recordings. It is a device that isolates your microphone from external factors such as footsteps, vibrations, and other noise that can affect the quality of your recording. Generally, a shock mount will have a cradle that your microphone sits in, allowing it to isolate the vibrations from your desk or stand.
Microphone Stand
A microphone stand is an essential accessory to have in your home studio. It allows you to adjust your microphone’s height and position, making it convenient for you to capture the sound you desire. A microphone stand prevents vibrations, making it easier for you to get clean and clear sound.
Create A Comfortable Environment
Creating a comfortable environment in your home studio is important to help you produce high-quality content. Choose a quiet and well-lit space, invest in comfortable furniture, and ensure proper ventilation and temperature control to help you work for long hours without distractions.
Creating a comfortable environment is key to setting up your home studio. It’s important to ensure your space is not only functional but also supports your physical and mental well-being. Here are some tips to create a comfortable environment for your home studio setup.
Ergonomic Desk And Chair
Investing in a good quality ergonomic desk chair can make all the difference in your comfort level while working in your home studio. Choose a chair that supports your spine and encourages good posture. Pair your chair with an adjustable desk that allows you to change the height to suit your needs. This will help prevent eye strain and poor posture from working in an uncomfortable position for long periods.
Proper Lighting
Natural light is ideal for working in your home studio, but that isn’t always possible. The right lighting is essential for avoiding eye strain and headaches. Consider investing in a desk lamp with adjustable brightness settings to reduce glare, or add soft overhead lighting for a cozy feel. It’s important to balance the light in your room so you don’t experience any stress in your eyes when facing the computer screen.
Temperature Control
Ensure you can adjust the temperature in your home studio so you can maintain a comfortable working temperature. If your space is too cold, you’ll find it hard to concentrate, but if it’s too hot, you could feel sluggish. If you’re someone who gets cold easily, consider adding a space heater. Identify the optimal temperature that works for you and maintain it throughout your workday.
Refreshments
It’s essential to stay hydrated and nourished while in your home studio. Keep a water bottle near you so you can sip water regularly throughout the day. Keep some healthy snacks within reach and indulge in them whenever you feel the need for a quick pick-me-up. This will help you save time getting refreshments outside. Also, consider having some plants or bringing some artwork to add to your space to provide an aesthetic variety for your eyes. By following these tips for creating a comfortable environment, you’ll find it easier to focus on your work and achieve your goals in your home studio set-up.
Start Recording
To start recording in your home studio, you need to select the right equipment such as microphones, audio interfaces and a DAW software. Make sure to choose a space with good acoustics and minimal background noise. Set up your equipment and test your setup before starting to record.
Start recording Now that your home studio is set up and ready to go, it’s time to start recording! The recording process can seem overwhelming, but by following a few simple steps, you will be on your way to producing high-quality tracks in no time. Here’s how to get started: Set up recording tracks and levels The first step in setting up your recording tracks is to choose which instruments or vocals you want to record. Create a new track for each instrument/vocal and adjust the input levels to ensure that the sound is not too quiet or too loud. Use the gain knob to increase or decrease the input level and ensure that the recording meter does not exceed the red section, as this will result in distortion. Adjust EQ and effects Once you have recorded your tracks, it’s time to adjust EQ and add effects to make your vocals/instruments sound their best. Adjust the EQ to make sure that each instrument/vocal has its own space in the mix. Use effects like reverb, delay, chorus, and compression to enhance the sound. Don’t overdo it, though – adding too many effects can clutter the mix and make it sound unnatural. Mix tracks With each instrument/vocal recorded and EQ’d, it’s time to mix them all together. Start by panning each track to the left or right to create a stereo image. Then, adjust the volume levels of each track so that they blend nicely together and create a balanced mix. Master final tracks The final step in the recording process is mastering your tracks. This involves adjusting the overall volume levels, EQ and adding final touches to your songs. Ensure your tracks have the same volume levels, and use EQ to ensure your tracks sound cohesive when listened to in succession. Then add a limiter to ensure no loud parts of the tracks are too quiet. By following these simple steps, you’ll be on your way to producing high-quality tracks in no time!
Promote And Share Your Work
Learn how to set up your home studio properly with these step-by-step guidelines. Promote and share your work by showcasing your professional-quality creations online and building a strong online presence in your field.
Promoting and sharing your work is an essential step in setting up your home studio. You may have put in hours of effort in creating your music, but without proper promotion and sharing, your work will be left unheard. It’s important to get your music out there and reach your target audience. Here are some ways to promote and share your music:
Create A Website Or Social Media Page
Creating a website or social media page allows you to showcase your work and engage with your fans. Your website or social media page should be visually appealing and easy to navigate. Make sure to include your bio, images, and links to your music on different platforms. This will provide your visitors with a better understanding of who you are and what you create. Post regular updates on your website and social media pages, which will keep your fans engaged with your work.
Collaborate With Others
Collaborating with other artists or producers is a great way to get your music heard by a wider audience. You can collaborate with other artists on tracks, remixes, or mixes. It’s a great way to showcase your skills and build relationships with other musicians.
Post Your Work On Music Sharing Platforms
Posting your work on music sharing platforms is an excellent way to get your music seen by new fans and grow your audience. There are many music sharing platforms available, such as SoundCloud, Bandcamp, and YouTube. Don’t forget to tag your music with relevant keywords, which will help improve your visibility on search engines. In conclusion, promoting and sharing your music is an essential step in building your brand as an artist. Creating a website or social media page, collaborating with others, and posting your work on music sharing platforms are all great ways to get your music heard by new fans and grow your audience.
Upgrade And Improve
Upgrading and improving your home studio is an ongoing process that requires continuous attention and effort. Staying updated with the latest technology and gear is essential to ensure that you are producing high-quality content that stands out from the competition.
Stay Updated With Latest Technology And Gear
Technology and gear are constantly evolving, and it’s important to keep up with the latest trends and advancements. This means staying up-to-date with new software, hardware, and other technologies that can enhance your home studio setup.
When it comes to audio equipment, investing in high-quality microphones, headphones, and speakers can make a huge difference in the overall sound quality of your recordings. You should also consider upgrading your computer hardware and software to ensure that it’s powerful enough to handle your creative projects.
Experiment With New Techniques And Styles
As an artist, it’s important to experiment with new techniques and styles in order to grow and develop your skills. This can involve trying out new software or hardware, exploring different genres of music, or experimenting with different recording techniques.
One way to stay inspired and motivated is by listening to other artists and producers who work in your genre. This can give you new ideas and perspectives on how to improve your own work. You can also attend workshops, conferences, or webinars to learn from other professionals in your field.
Remember, creating a successful home studio is all about finding the right balance between experimentation and consistency. By staying updated with the latest technology and gear, and experimenting with new techniques and styles, you can continue to evolve and grow as an artist.
Credit: mastering.com
Frequently Asked Questions For How To Set Up Your Home Studio
How Do I Set Up A Basic Home Studio?
To set up a basic home studio, you need a quiet room, a computer, an audio interface, a microphone, headphones, and recording software. Choose a designated area with proper acoustics, eliminate any background noise, and position your microphone correctly. Adjust your settings, record, and edit your audio as needed.
Practice and experiment until you achieve the desired results.
How Do I Organize My Home Studio?
Organizing your home studio can be simple if you follow these steps: 1. Declutter and get rid of anything you don’t use 2. Invest in storage solutions for your equipment and supplies 3. Use labeling systems to easily locate items 4.
Arrange your workstation in a way that is convenient and functional 5. Routinely clean and maintain your space to prevent clutter from accumulating again.
How Can I Turn My Home Into A Studio?
To turn your home into a studio, designate a specific area for your workspace and ensure it has adequate lighting, ventilation, and storage. Purchase equipment such as a desk, chair, and computer, along with any tools or materials specific to your craft.
Create a schedule that maximizes productivity and minimizes distractions. Finally, consider soundproofing or acoustic treatment if necessary.
How To Start Your Own Studio?
To start your own studio, you need to follow these steps: 1. Determine your niche and specialty. 2. Establish a business plan, including funding, marketing, and operations. 3. Obtain legal permits and licenses. 4. Find a suitable location and set up your space.
5. Build your team, acquire equipment, and launch your studio.
Conclusion
With a little bit of patience, research and investment, setting up a home studio is a simple and rewarding process. A space where you have complete creative control and can work on your art in peace is truly invaluable. Whether you’re a musician, podcaster or voiceover artist, following these steps will help you set up a functional and efficient home studio that will take your craft to the next level.
So what are you waiting for? Get started on building your very own home studio today!