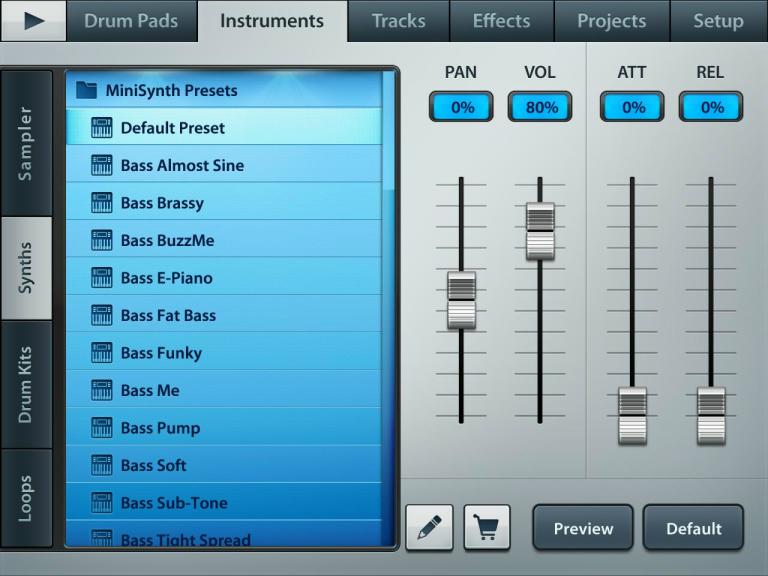
To make synths in FL Studio, use the software’s built-in synthesizer plugins. You can customize sounds by adjusting settings like oscillators, envelopes, and filters.
FL Studio is a powerful digital audio workstation with a variety of tools and features for creating electronic music. One key component of electronic music is synthesizers, which are virtual instruments that generate sound through digital signal processing. FL Studio has several built-in synthesizer plugins, including Harmor, Sytrus, and 3x Osc, that allow you to create and customize a wide range of synth sounds.
By adjusting settings like oscillators, envelopes, filters, and effects, you can create anything from classic analog synth sounds to futuristic electronic textures. We’ll show you how to make synths in FL Studio using these powerful tools.

Credit: www.image-line.com
Getting Started
Learn how to create your own custom synths in FL Studio with these easy-to-follow tutorials and step-by-step instructions. From choosing the right plugins to programming your sounds, you’ll be making music like a pro in no time.
Setting up your project
To get started making synths in Fl Studio, the first thing you’ll need to do is set up your project. To do this, open Fl Studio and create a new project. Once your project is open, you’ll want to set your project tempo and time signature so that you can start creating your synth sounds. Selecting the right plugins
The next step is to select the right plugins for your synth. Fl Studio has a huge library of plugins, so it’s important to choose the right ones for your project. Some popular ones include Sytrus, Harmless, and Harmor. Each plugin has its own unique features and sounds, so it’s important to experiment and find the ones that work best for you. Choosing the right sound
Once you have your plugins selected, the next step is to choose the right sound. This is an important step in making your synth sound great. You’ll want to experiment with different waveforms, filters, effects, and modulation to create the perfect sound. It’s also important to ensure that your sound is not too harsh or too soft, as this could affect the overall quality of your synth. In conclusion, getting started with making synths in Fl Studio is easy once you know the basics of setting up your project, selecting the right plugins, and choosing the right sound. With a little practice and experimentation, you can create amazing synth sounds that will take your music to the next level.

Credit: www.youtube.com
Creating Synth Sounds
Learn how to create unique and mesmerizing synthesizer sounds in FL Studio with these easy steps. Discover how to shape waveforms, add effects, and create custom presets that will take your music production to the next level.
Creating Synth Sounds is a fun and essential part of producing music in FL Studio. Creating your own synth sounds can give your tracks an original feel while also allowing you to produce the exact sound you want. In this post, we will guide you through the process of making your own synth sounds in FL Studio, starting with understanding oscillators.
Understanding Oscillators
Oscillators are the heart of any synthetic sound, and FL Studio offers a range of oscillators with different waveforms to choose from. The first step in creating a synth sound is selecting the waveform. The most popular waveforms used for synthesizing sounds are the sawtooth, triangle, square, and sine waveforms.
Adjusting Adsr Envelope
ADSR (Attack, Decay, Sustain, and Release) Envelope is a common tool used in synthesizing to shape the sound’s volume over time. The ADSR Envelope defines how the synthesizer reacts to the MIDI input. Altering the Attack, Decay, Sustain and Release parameters will change the amplitude of the sound.
Adding Effects
Adding effects can enhance a synth sound. Fl Studio offers various effects that you can use to add depth and texture to your sound. For example, you can add a reverb or delay to create a sense of space and depth in your sound or add distortion to create a gritty or aggressive sound. Once you have added the desired effects, you can adjust their parameters to fine-tune the sound to your liking. In Conclusion, creating synth sounds is a fun and integral part of producing music in FL Studio. Understanding oscillators, adjusting ADSR envelope and adding effects can help you create unique sounds that truly reflect your artistic vision. So why not start experimenting with these tools today and start producing your own synth sounds.
Creating Bass Synths
Learn how to create bass synths in FL Studio with these easy steps. Start by selecting the appropriate synthesizer, adjusting the oscillators, detuning, adding filters and effects to create a unique bass sound.
Creating Bass Synths: Bass synths are crucial in creating the foundation of a track, making it sound fuller and pleasing to the ears. FL Studio provides several options to customize and shape your bass synths. In this article, we will discuss how to create bass synths in FL Studio and make them sound even better. Using Distortion for a Strong Bass Sound: Distortion is an excellent tool to shape and define bass sounds. It adds character and warmth to the bass synths while making them sound more organic. The best way to use distortion on bass synths is to apply it sparingly to avoid overpowering the mix. We recommend using the Fruity Fast Dist or Hardcore VST plugin to add distortion to your bass synths. Creating a Sub-Bass Layer: Sub-bass is the foundation of every bass sound. It is essential to create a separate layer for sub-bass to avoid cluttering the mix and ensure that the sound is clean. Use a sine wave to create a sub-bass layer and route it directly to the mixer. To give the sub-bass a more authentic feel, you can adjust the pitch envelope to match the key of your track. Adding Resonance and Filtering: Resonance and filtering are crucial in shaping the overall sound of your bass synths. Adding resonance creates a peak around the cutoff frequency, making the sound more pronounced. On the other hand, filtering reduces the high and low frequencies, making the sound smoother and more refined. You can use the Fruity Love Philter or the Fruity Filter plugin to add resonance and filtering to your bass synths. Creating bass synths in FL Studio is a fun and creative process. By using the distortion, creating a separate sub-bass layer, and adding resonance and filtering, you can create unique bass sounds that will make your tracks sound better. Remember to experiment with different plugins and effects to create your signature bass sound.
Creating Lead And Pad Synths
Learn how to create lead and pad synths in FL Studio with these simple steps. Follow the tutorials and experiment with different effects to customize the sounds to your liking. Get ready to take your music production to the next level!
Creating lead and pad synths is a crucial task in music production, as they add depth and emotion to a track. In FL Studio, creating these types of synths requires knowledge of different tools and techniques. In this article, we will explore three essential techniques for creating lead and pad synths in FL Studio: Using detuning for a fuller lead sound, Creating chord progressions for pad synths, Using automation to bring life to your synths.
Using Detuning For A Fuller Lead Sound
One of the most important techniques for creating a fuller lead sound in FL Studio is detuning. Detuning is the process of slightly altering the pitch of a sound to create a sense of richness and depth. To detune a lead synth in FL Studio, follow these steps:
- Select the lead synth you want to detune.
- Open the oscillator section of the synth.
- Adjust the fine tuning knob on one or more oscillators to slightly alter the pitch of the sound.
- Experiment with different detuning amounts until you achieve the desired sound.
By using detuning, you can create a fuller lead sound that will stand out in your mix.
Creating Chord Progressions For Pad Synths
Pad synths are used to create atmospheric and emotional backgrounds in music production. To create a compelling pad synth in FL Studio, you need to understand the basics of chord progressions. A chord progression is a series of chords played in sequence that creates a sense of harmony and mood in a piece of music. Here’s how to create chord progressions for your pad synths:
- Select the pad synth you want to work with.
- Open the piano roll of the synth.
- Select a chord from the chord selector in the piano roll.
- Create a sequence of chords that sound harmonious together.
- Experiment with different chord progressions until you find one that fits the mood and emotion of your track.
By creating compelling chord progressions for your pad synths, you can add depth and emotion to your music.
Using Automation To Bring Life To Your Synths
Automation is the process of changing a parameter of a sound over time. It’s an essential tool for creating dynamic and evolving synths in FL Studio. To use automation to bring life to your synths, follow these steps:
- Select the synth you want to automate.
- Right-click on the parameter you want to automate.
- Select “Create Automation Clip”.
- Adjust the automation clip to shape the sound over time. You can create rising or falling sounds, fades, or any other effect you desire.
- Experiment with different automation clips until you find one that fits the sound and mood of your track.
By using automation to shape your synths over time, you can create dynamic and evolving sounds that add depth and emotion to your music. In conclusion, creating lead and pad synths in FL Studio requires knowledge of different tools and techniques. By using detuning, creating chord progressions, and using automation, you can create compelling and emotional sounds that stand out in your mix.
Sound Design Tips
Learn the best sound design tips to create amazing synths in Fl Studio. Utilize the different features and tools provided by the software to produce unique and high-quality sounds for your music. Master this skill and take your productions to the next level.
If you want to create your own unique sounds in FL Studio, it’s important to experiment with sound design. By using these tips, you can create synth sounds that stand out in your music production. Here are some sound design tips to improve your synth design skills.
Layering Sounds For A Unique Tone
Layering sounds is a powerful technique that can bring depth and character to your synth sounds. To layer sounds, start by selecting two or more sounds that complement each other. Then, adjust each sound’s volume, panning, and effects until they blend together smoothly. Use high-pass and low-pass filters to remove unwanted frequencies and create space in your mix. Remember, less is often more and simple sound layers can create a more complex and exciting sound.
Using Eq To Remove Unwanted Frequencies
EQ is one of the most important tools in sound design. By using an equalizer, you can isolate and control the different frequencies of your synth. Removing unwanted frequencies can create a cleaner sound and make room for other elements in your mix. For example, this technique is often used to remove the low end of a bass sound, making room for the kick drum in your drum mix. Play around with different frequencies until you find the right balance for your sound.
Experiment With Different Sound Combinations
There are countless possibilities when it comes to sound design. Experimenting with different combinations of sounds can lead to some unexpected and exciting results. Don’t be afraid to try new things or just play around with different sounds until you find something you love. Remember, the beauty of music is that there are no rules, so just have fun and let your creativity flow. By incorporating these sound design tips, you can create your own unique synth sounds in FL Studio. Remember to layer sounds, use EQ, and experiment with different combinations until you find the perfect sound for your music production. With practice and patience, you can become a master of sound design and create sounds that stand out in the music industry.

Credit: m.youtube.com
Mixing And Mastering
After creating your synth sounds, the next step is to mix and master your tracks to make them radio-ready. Mixing and mastering involve various techniques that will help glue your sounds together, clarify each element, and bring out the best in your tracks.
Eqing Your Synths To Fit In The Mix
The first step in mixing your synths is to ensure they fit in the mix. To do this, use equalization (EQ) to remove any unwanted frequencies or harmonics that conflict with other sounds in the mix. Make sure you cut the low end (below 40 Hz) to get rid of any low-frequency rumble and high end (above 16 kHz) to remove any unwanted hiss or fizz. Adjust the mid-range within the 400 Hz – 4 kHz range to ensure your synths sit in the right frequency zone.
Adding Reverb And Delay
Reverb and delay can add depth and space to your synths and help them sit better in the mix. When adding reverb, make sure it matches the size and depth of your track’s space, for example, use short decay times in a tight mix and long decay times in an open mix. Similarly, when adding delay, match the tempo of your track with the delay time, and use a ping-pong effect to add width to the sound.
Finalizing Your Synth Sound
Before finalizing your track, take some time to listen to your synth sounds in different contexts and ensure that there are no phase issues or conflicting frequencies. You want to make sure that your synths sound great on different playback systems, so test your mix on different speakers and headphones.
Finally, use a limiter to increase overall loudness without clipping or distorting your sounds. You can also use compression to bring out details and add punch to your mix. But be careful not to overdo it, as too much compression can make your track sound flat and lifeless.
By following these three steps, you can create quality synth sounds in FL Studio and make them ready for radio play. With practice, you can develop your own mixing and mastering techniques that fit your unique style and musical genre.
Frequently Asked Questions For How To Make Synths In Fl Studio
Does Fl Studio Have Synths?
Yes, FL Studio has synths. It comes with a variety of built-in synthesizers, including Sytrus, Harmor, GMS, and more. Additionally, users can install third-party synthesizers and plugins to enhance their sound library.
What Is The Best Synth Fl Studio?
The best synth for FL Studio is subjective and depends on personal preferences and needs. Some popular options include Serum, Sylenth1, and Massive. It is recommended to try out different synths and find the one that works best for you.
What Do You Need To Make Synth Music?
To make synth music, you will need a synthesizer, a computer or MIDI controller, and software to create and edit sounds. You may also need audio cables, headphones, and studio monitors for recording and playback. Additionally, a basic understanding of music theory and sound design will help in creating and arranging music.
How To Layer Synths In Fl Studio?
To layer synths in FL Studio, first load two or more synths into the Channel Rack. Then, assign each synth to a separate mixer channel and adjust their individual levels. Finally, use the mixer’s effects and EQ to blend the sounds together.
Conclusion
As you’ve learned, creating Synths in FL Studio is a process that requires dedication and patience. However, the results can be incredibly rewarding. By following the steps outlined in this post, you can start creating unique and exciting sounds that will set your music apart.
Remember to experiment, be creative, and never give up. With time and practice, you’ll be a synth-making pro. Happy creating!