To install plugins in Ableton, go to the options menu and select “Preferences”. Then, click on the “Plug-ins” tab and choose the folder containing the plugin you want to install.
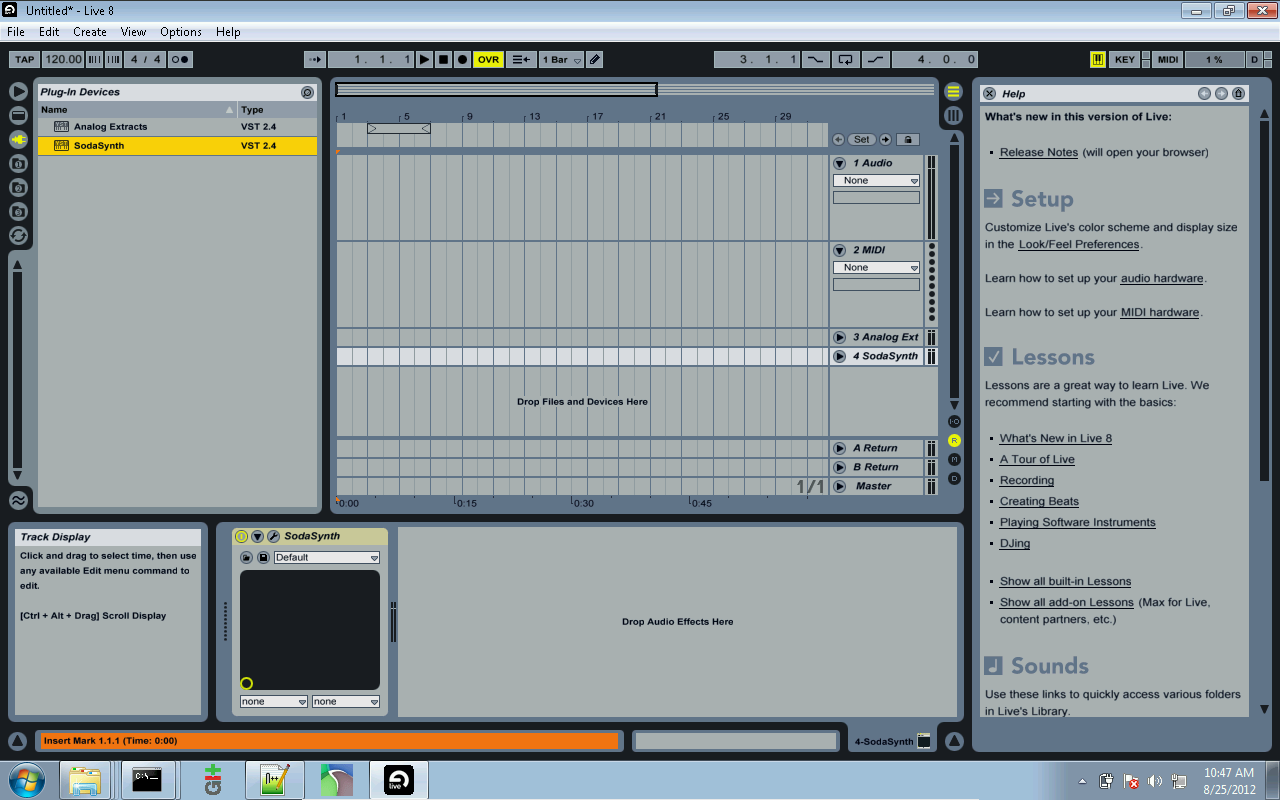
Ableton is a powerful digital audio workstation (DAW) used by music producers and professional DJs to create music and live performances. One of the benefits of using Ableton is the ability to install plugins to enhance its functionality. Plugins can be classified into two categories – effect plugins and instrument plugins.
The former modifies sound in different ways, while the latter produces sound using virtual instruments. With the right plugins installed, Ableton can be transformed into a fully-functional music production machine. We will guide you through the process of installing plugins in Ableton.
Types Of Plugins Available
There are many different types of plugins available for Ableton, including audio effects, virtual instruments, and MIDI controllers. To install these plugins, simply download the plugin and follow the installation instructions provided by the manufacturer.
Ableton Live is a digital audio workstation that offers users the ability to produce music using virtual instruments, audio effects, and MIDI. One of the most advantageous features is the ability to install plugins to enhance audio quality. There are different types of plugins available in Ableton, including VST, AU, and RTAS.
Vst
VST (Virtual Studio Technology) plugins are used to enhance audio quality and expand the functionality of Ableton’s mixer and instruments. These plugins can be easily installed in Ableton by following a few simple steps, such as selecting the plugin folder in the preferences menu, and then enabling the plugin.
Au
AU (Audio Unit) plugins are designed specifically for MAC OS, and they are compatible with Ableton Live. They offer users a wide range of features, such as virtual synthesis, effects, mixing, and mastering. Similar to VST plugins, AU plugins can be installed by locating the plugin folder and enabling it within Ableton.
Rtas
RTAS (Real-Time AudioSuite) plugins are used to process audio signals in real-time within Ableton. They are designed for Pro Tools users and can be installed in Ableton by first installing the Avid plugin, and then enabling it. These plugins offer users a variety of benefits, including advanced time-stretching, pitch-shifting, and EQ. Overall, the different types of plugins available in Ableton offer users endless possibilities when it comes to enhancing their audio quality and expanding their production capabilities. By following simple steps, users can easily install and enable VST, AU, and RTAS plugins to their Ableton system.
Credit: www.oscillicious.com
Choosing The Right Plugin For Ableton
If you’re a music producer or a sound engineer, you might know how important plugins are in the music production world. Plugins can add more creativity, effects, and customization options to your music, and Ableton has a vast collection of plugins that you can install on your system. When installing plugins in Ableton, it’s essential to choose the right plugins that fit your music style and requirements. In this article, we will guide you through the process of choosing the right plugin for Ableton.
Understanding Compatibility
Before choosing a plugin for Ableton, it’s crucial to understand the compatibility of the plugin with the Ableton version you’re using. Ableton releases regular updates that introduce new features and bug fixes. The plugins you are looking to install might not be compatible with the latest version of Ableton. It’s always best to check the plugin manufacturer’s website to ensure compatibility with the Ableton version you’re using.
Choosing The Right Plugin
There are several hundred plugins you can choose from when it comes to Ableton. How do you know which one will work for you? Here are a few considerations to make when choosing the right plugin for Ableton:
- What type of music do you produce or work with the most?
- What kind of plugin are you looking for? A synthesizer, an effect-based plugin, or something else?
- Does the plugin match your budget?
- What level of expertise do you have in using plugins in Ableton?
If you’re new to Ableton, it’s best to start with a simple plugin that matches your music style. Once you become familiar with Ableton and the plugin interface, you can explore more complex plugins. Budget is also a critical factor when choosing the right plugin—for example, you don’t want to spend a fortune on a plugin that you might not need. Lastly, make sure the plugin you choose matches your expertise level. Some plugins are simple to use, whereas others require advanced knowledge, and it’s always best to know what you’re getting into before purchasing a plugin.
How To Install Plugins In Ableton
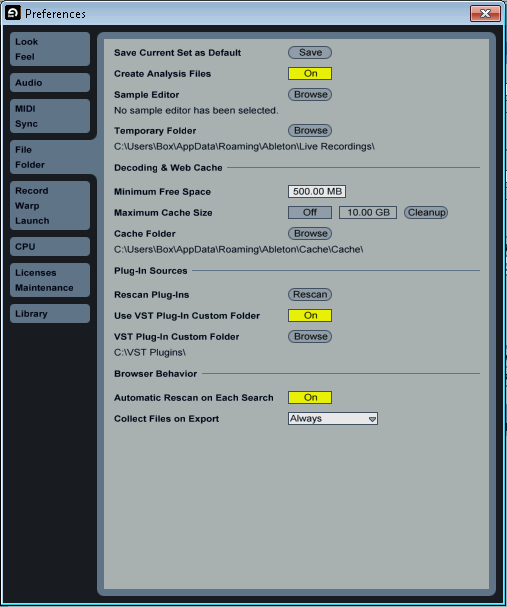
To install plugins in Ableton, simply open the preferences window, navigate to the “File/Folder” tab, and select the “Show VST Plug-in Custom Folder” button. Next, add the folder where your plugins are located and hit “Rescan. ” Finally, enable the plugin in the “Plug-ins” section and you’re good to go!
If you are a music producer using Ableton, you may want to use plugins to take your productions to the next level. Installing plugins in Ableton is a straightforward process, but it can be confusing for beginners. In this guide, we will show you step-by-step how to install plugins in Ableton.
Locating Plugins Folder
Before you can install a plugin in Ableton, you need to locate the plugins folder where you will place your downloaded plugins. Here is how to find the plugins folder in Ableton:
- Open Ableton and go to Preferences.
- Click on the ‘File Folder’ tab.
- Look for the ‘Plug-In Sources’ section and click ‘Browse’.
- Navigate to the plugins folder on your computer.
- Once you have located the plugins folder, click ‘OK’.
- Click ‘Rescan’ to allow Ableton to scan the new plugins.
Installing The Plugin
Once you have located the plugins folder, installing a plugin in Ableton is simple and easy:
- Download the plugin from the provider’s website.
- Extract the downloaded file if necessary.
- Copy the plugin file(s) to the plugins folder you located in Ableton.
- Restart Ableton if required.
- Open Ableton, create a new project and insert the plugin from the plugins list.
That’s it! You have successfully installed a plugin in Ableton. Now you can explore the endless possibilities of using different plugins to create unique sounds in your music production. Remember, plugins come in different formats such as VST and AU, so make sure you download the right format depending on your platform. If you ever want to remove a plugin, simply delete the plugin file from the plugins folder in Ableton and rescan the plugins in Ableton Preferences.
In Conclusion
Installing plugins in Ableton is a crucial part of music production. By following these simple steps, you can smoothly add new plugins to Ableton and unlock new possibilities for your music production.

Credit: www.productionmusiclive.com
Adding Plugins To Ableton
Installing plugins in Ableton is a simple process, just click on the “Plug-in” button, then “Manage Plug-ins”, and finally “Show Plug-in folder” to add new plugins. Make sure to choose plugins that are compatible with your version of Ableton and follow the installation instructions carefully.
Adding plugins to Ableton can significantly expand the capabilities of your software and help you create music that stands out. Regardless of whether you are a beginner or an experienced producer, the process of adding plugins to your software is simple and straightforward. In this guide, we will walk you through the steps to add plugins to Ableton. H3: Scanning for New Plugins Before adding any new plugins, it is essential to scan your software to ensure that Ableton can recognize the new files. To do this, click the “Plug-ins” tab in the preferences menu. Then scroll down and click “Rescan”, which will prompt Ableton to scan all the folders in your computer and load any new plugins that were not previously detected. This process can take several minutes, depending on the number and size of the plugins you have installed on your device. H3: Adding Plugins to a Track Once Ableton has scanned and detected all of your plugins, you can proceed to add the desired plugins to your track. To do this, open the audio or MIDI track you want to add a plugin to, click the “Devices” button on the left side of the screen, and then click the “Plug-ins” button to reveal a list of all the plugins available in Ableton. From here, select the desired plugin, and it will appear in the device chain of the track. Once added, you can adjust the plugin’s settings and parameters to your liking and start crafting unique sounds and effects. You can add multiple plugins to a track by repeating this process, and Ableton will automatically arrange them in a chain. Adding plugins to Ableton is a straightforward process that can significantly enhance your music production experience. By following these simple steps, you can expand your creative options and fine-tune your sounds to perfection.
Managing Plugins In Ableton
Learning how to install plugins in Ableton is essential to amplify your creativity as a musician. Managing plugins in Ableton is quick to grasp and unlocks limitless opportunities to experiment with different sounds and effects.
Plugins enhance the functionality of Ableton by providing added features that facilitate music production and editing. Installing a plugin on Ableton is a straightforward process that takes just a few clicks. However, it’s essential to learn how to manage these plugins to ensure a smooth workflow. In this section, we’ll explore how to remove plugins and disable them in Ableton.
Removing Plugins
Removing a plugin from Ableton is a simple way to free up space and clean up your workflow. Here’s how you can remove a plugin in Ableton:
- Navigate to the ‘Plug-ins’ folder on your computer where Ableton stores its plugins.
- Locate the plugin you wish to remove, right-click on it, and select ‘Delete’.
- Launch Ableton and wait for the ‘Plug-in Manager’ to refresh; the removed plugin will no longer be visible in the list of available plugins.
Disabling Plugins
Sometimes, you don’t need to remove a plugin from Ableton; instead, you can disable it temporarily to speed up the music production process. Here’s how you can disable a plugin in Ableton:
- Launch Ableton and navigate to the ‘Plug-in Manager’ by clicking on ‘Options’ and selecting ‘Preferences.’
- Select ‘Plug-ins’ from the left sidebar and navigate to the ‘VST’ or ‘Audio Units’ tab depending on the plugin type you want to disable.
- Find the plugin you wish to disable and click on the ‘On’ button to turn the plugin ‘Off.’
That’s it! With these simple steps, you can manage the plugins in Ableton to speed up your workflow and optimize your music production process.
Credit: www.oscillicious.com
Frequently Asked Questions Of How To Install Plugins In Ableton
How Do I Install Ableton Plugins?
To install Ableton plugins, first download the plugin to your computer. Then, navigate to Ableton Live’s preferences and select the “File Folder” tab. Click on the “Browse” button next to “Plug-In Sources” and select the folder where the plugin is saved.
Finally, click “Rescan. ” The plugin should now appear in Ableton’s browser.
How To Install Vst Plugins?
To install VST plugins, follow these simple steps: 1. Download the VST plugin to your computer 2. Extract the files and save them in a folder 3. Open your DAW (digital audio workstation) 4. Navigate to your preferences and select the VST plugins folder 5.
Select “Scan for plugins” and wait for the process to finish. Your VST plugin should now be available for use within your DAW.
How To Install A Plugin?
To install a plugin, login to your WordPress dashboard and navigate to “Plugins” in the left-hand menu. Click “Add New” and search for the desired plugin. Click “Install Now” and then “Activate” once the installation completes. Some plugins may require additional setup before use.
Why Can’t Ableton Find My Plugins?
Plugins may not be found in Ableton due to incorrect installation paths or missing file permissions. Ensure plugins are installed in the correct folder and have the necessary permissions. Also, try rescanning the plugin folder in Ableton’s preferences.
Conclusion
So there you have it! Nowadays, plugins have become a significant part of music production. Installing plugins in Ableton Live has now become a breeze, and you can easily access the vast range of plugins available. Now, it’s time to put your knowledge to work and experiment with the plugins available to make your music production experience more enjoyable and professional.
So go ahead, and let your creativity flow with Ableton Plugins!