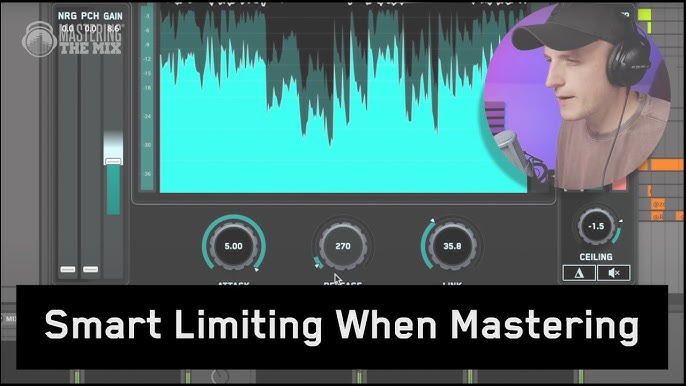
To fix harshness when mastering music, use a de-esser and EQ. Mastering music is the process of finalizing a mix by enhancing and balancing its sonic elements to achieve a polished and cohesive sound.
One common issue that may arise during mastering is harshness, which can distort or make certain frequencies too aggressive to the ears. Harshness can occur due to a variety of reasons, such as over-emphasizing certain high-frequency instruments or excessive compression.
Fortunately, there are techniques and tools to address this problem. We’ll explore how to fix harshness when mastering music, including using a de-esser and EQ.
Credit: m.youtube.com
Identifying The Source Of Harshness
Mastering music can often result in harshness, which can be frustrating for both the producer and the listener. Identifying the source of the problem is the first step towards finding a solution. By carefully analyzing the mix, EQ, compression and other factors, it is possible to pinpoint the source and make the necessary adjustments to fix the harshness.
Mastering music is essential to ensure that your tracks sound professional and polished. However, when your mastered tracks sound harsh to the ears, it can defeat the purpose of mastering. Harshness can be caused by various factors, including overcompression, frequency imbalance, and clipping. To fix this issue, you must first identify the source of harshness.
Overcompression
Overcompression is a common mistake that can cause harshness in a mastered track. It happens when the compressor is set too high or applied too much. This can lead to the loss of dynamic range and cause the track to sound flat and lifeless. To fix this issue, adjust the compressor settings and apply only enough compression to control the dynamics of the track.
Frequency Imbalance
Another source of harshness in a mastered track is frequency imbalance. This happens when certain frequencies are too loud and overpower the other elements of the track. The result is a track that sounds muddy or tinny. To fix this, use an equalizer to adjust the levels of each frequency and ensure that they are balanced.
Clipping
Clipping occurs when the input level of the audio signal is too high, causing it to be clipped at the maximum level. This can result in distortion and harshness in the final mix. To fix this issue, reduce the input gain or adjust the mixing levels to prevent clipping. In conclusion, identifying the source of harshness is crucial in mastering music. Overcompression, frequency imbalance, and clipping are the top culprits of harshness. To fix this issue, adjust the compressor settings, use an equalizer to balance frequencies, and prevent clipping by adjusting levels. With these tips in mind, you can achieve a professional and polished mastered track.
Using Dynamic Eq To Tame Harshness
Dynamic EQ is a powerful tool that can be used in mastering to tame harshness in music. With its ability to target specific frequencies, it allows for precise adjustments to be made, resulting in a more balanced and pleasing sound.
Mastering is a crucial element in the process of creating high-quality tracks. Harshness is a common issue that can arise during mastering, and it can negatively impact the overall quality of your work. Fortunately, dynamic equalization (EQ) is an excellent solution to fix harshness when mastering music. In this post, we will guide you through the process of using dynamic EQ to tame harshness in your tracks.
Setting Up Dynamic Eq
Dynamic EQ works in a similar way to traditional EQ but with one key difference: it enables you to track specific frequencies and adjust them in real-time. Before you start, you should ensure that you have access to a dynamic EQ plugin in your mastering software. Once you have this, load your track into your DAW and follow the steps below:
- Create a new instance of your EQ plugin on your mastering bus.
- Select your problematic frequency range. You can do this by using the frequency analyzer to identify the specific frequency ranges that are causing harshness.
- Set the thresholds for your dynamic EQ. This will determine how sensitive the plugin is to the problematic frequencies that you have selected.
- Adjust your EQ settings to reduce harshness. You can use an EQ curve to reduce the level of problematic frequencies without impacting other frequencies in your mix.
Identifying Problematic Frequencies
The first step in using dynamic EQ to tame harshness is identifying the problematic frequencies that are causing the issue. When you’re mastering a track, you may notice that certain instruments or vocals are causing harshness in specific frequency ranges. To identify these problematic frequencies, you can use a frequency analyzer plugin. This plugin shows the frequency spectrum of your track and helps you to pinpoint the specific frequencies that require attention.
Reducing Harshness With Dynamic Eq
Once you have identified the problematic frequencies, it’s time to reduce harshness using dynamic EQ. To do this, you should start by setting up the plugin as described above. Begin by selecting the problematic frequency range and setting the thresholds for your dynamic EQ. Then, adjust your EQ settings to reduce harshness while maintaining the overall balance and character of your track. One technique for reducing harshness is to apply a gentle cut to the problematic frequency range using a bell curve. This will reduce the level of the problematic frequencies without impacting other frequencies in your mix. You can also experiment with different EQ shapes to achieve different results. In conclusion, using dynamic EQ to tame harshness is an effective way to improve the overall quality of your mastering. By following the steps above, you’ll be able to identify problematic frequencies and reduce harshness with ease. With a little experimentation and practice, you’ll be able to achieve a professional-sounding mix that sounds great on any system!
Applying Multiband Compression To Targets Harsh Frequencies
Harshness is a common issue that arises when mixing or mastering audio tracks. It affects the quality of the sound and can cause listener fatigue. One way to combat harshness is by using multiband compression. In this technique, compression is applied to specific frequency ranges, allowing for more control over the sound.
Setting Up Multiband Compression
To apply multiband compression, first, set up a multiband compressor plugin on the master channel of your project. This will allow you to have more control over the dynamic range of the track. In the plugin, you can set the frequency ranges for each band and adjust the threshold, ratio, attack, and release settings based on your preferences.
Identifying Harsh Frequencies
Before applying multiband compression, it is essential to identify the specific frequency ranges that contain harshness. This can be done by analyzing the frequency spectrum of the track. Listen to the track carefully and note the frequency areas that sound harsh or sibilant. These are the areas you will target with multiband compression.
Smoothing Out Harshness With Multiband Compression
Once you have identified the harsh frequencies, you can start applying multiband compression to those frequency ranges. Start by lowering the threshold of the compressor to a point where it captures the harshness without affecting the overall tone of the track. Adjust the ratio to determine how much the compressor should reduce the harshness.
It’s essential to use the multiband compressor in moderation to avoid over-compressing the track, which can result in a dull and lifeless sound. As you apply multiband compression, keep an eye on the overall level and make sure it does not go over the limit. Also, it’s a good idea to listen to the track in different environments to confirm that the harshness has been adequately addressed.
In conclusion, applying multiband compression to targets harsh frequencies is an effective way to combat harshness in audio tracks. With the right settings, you can achieve a smooth, balanced sound that’s easy on the ears.
Pushing Back Against Ear Fatigue
Pushing Back Against Ear Fatigue is crucial when mastering music. It’s common to run into harshness when mastering and it can often lead to ear fatigue. To fix this, you need to be proactive and take preventative measures. Below are three techniques that can help you push back against ear fatigue:
Taking Breaks
Taking breaks is crucial when mastering music. It can be tempting to spend hours mastering a track, but it’s important to give your ears a break every so often. Taking a break every hour is a good starting point. During your break, step away from your computer and rest your ears. Go for a walk, make a cup of tea, or do something that doesn’t involve music. This will help reduce fatigue and ensure your ears are fresh when you return to work on the track.
Monitoring At Low Volumes
Monitoring at low volumes is another technique that can help reduce ear fatigue. If you’re constantly listening to loud music, your ears will become fatigued quickly. This can lead to harshness and other issues when mastering. To avoid this, consider monitoring at low volumes. This will reduce the strain on your ears and ensure you can work for longer periods without experiencing fatigue. If you need to hear something at a higher volume, only turn up the volume briefly and then lower it back down again.
Regular Hearing Check-ups
Regular hearing check-ups are essential for anyone who spends a lot of time working with music. Over time, exposure to loud music can lead to permanent hearing damage. This can affect your ability to work on tracks and can even impact your personal life. To avoid this, consider getting regular hearing check-ups. This will help you identify any issues before they become permanent and ensure you can continue to work on music without any problems.
Finalizing The Mastered Track
Mastering is an important step in preparing a musical track for distribution, and it involves enhancing the overall sound quality. While mastering, harshness can sometimes sneak into the track and result in an unpleasant listening experience. However, there are ways to fix harshness when mastering music, and one of the final steps to polishing the final product is the process of finalizing the mastered track. In this post, we’ll explore the best practices for finalizing the mastered track to ensure your listeners enjoy the best possible audio experience.
Making Final Adjustments
After the mastering process is complete, it’s time to listen to the track and make any final adjustments to ensure that the sound is overall balanced, with no drastic peaks or harshness. One way to achieve this is by using a multiband compressor that lets users adjust the compression levels of individual frequency bands. You can also tweak the EQ to balance out any problem areas and ensure every sound is heard without causing any harshness. Once you’re satisfied, it’s time to move on to the next step.
Listening On Different Systems
When mastering music, it’s important to consider that your listeners will be using different devices and output systems that will affect how they hear your track. This means that the mastering engineer should take some time to listen to the track on different systems like headphones, car stereos, and home theater systems to ensure it sounds good on all devices. This can help bring any potential harshness to light, and the mastering engineer can go back and make necessary adjustments to the mastering before moving on to the next step.
Revising If Necessary
After listening to the track on different systems, if you notice any harshness or issues that previously went unnoticed, don’t be afraid to go back and revise your track. You can re-run the mastering process and apply new tweaks to the EQ, multiband compressor, and other effects. It’s always better to take an extra step in fixing any problems rather than going out with a sub-par sound.

Credit: m.youtube.com

Credit: www.masteringthemix.com
Frequently Asked Questions Of How To Fix Harshness When Mastering Music
How Do You Reduce Harshness In Mastering?
Reduce harshness in mastering by limiting high frequencies, avoiding excessive compression, using EQ to balance the mix, using harmonic exciters and saturation plugins, and using reverb or delay to add space. Apply these techniques with care and listen to the mix in different environments to ensure a balanced sound.
How Do I Make My Audio Less Harsh?
To make your audio less harsh, you can adjust the equalizer settings to reduce the high frequencies that are causing the harshness. You can also try adding a bit of reverb or using a de-esser plugin to soften harsh sibilance.
Additionally, make sure to record in a good acoustic environment with proper mic placement to avoid harshness in the first place.
How Do You Soften Harsh Sounds?
To soften harsh sounds, you can use techniques such as adding reverb, EQing the frequency, and reducing harsh transients. You can also try using a pop filter or a windscreen to prevent excessive air noise, or adjust the distance and angle of the microphone to the source.
Additionally, using dynamic processors like compressors or limiters can help reduce level and balance out the sound.
What Frequencies Are Harsh?
Frequency ranges between 2 to 4 kHz are usually considered harsh, as they can cause ear fatigue and discomfort. These frequencies are common in instruments such as cymbals, sibilant vocals, and high-pitched guitar feedback.
Conclusion
Mastering music can be a daunting task, especially when dealing with harshness in the final mix. However, with the right techniques and a thorough understanding of the mastering process, it is possible to fix these issues. By following the tips and tricks outlined in this guide, you can achieve a polished and professional final product, free from harshness and distortion.
Mastering is an important part of the music production process, and with a little effort, anyone can achieve great results.