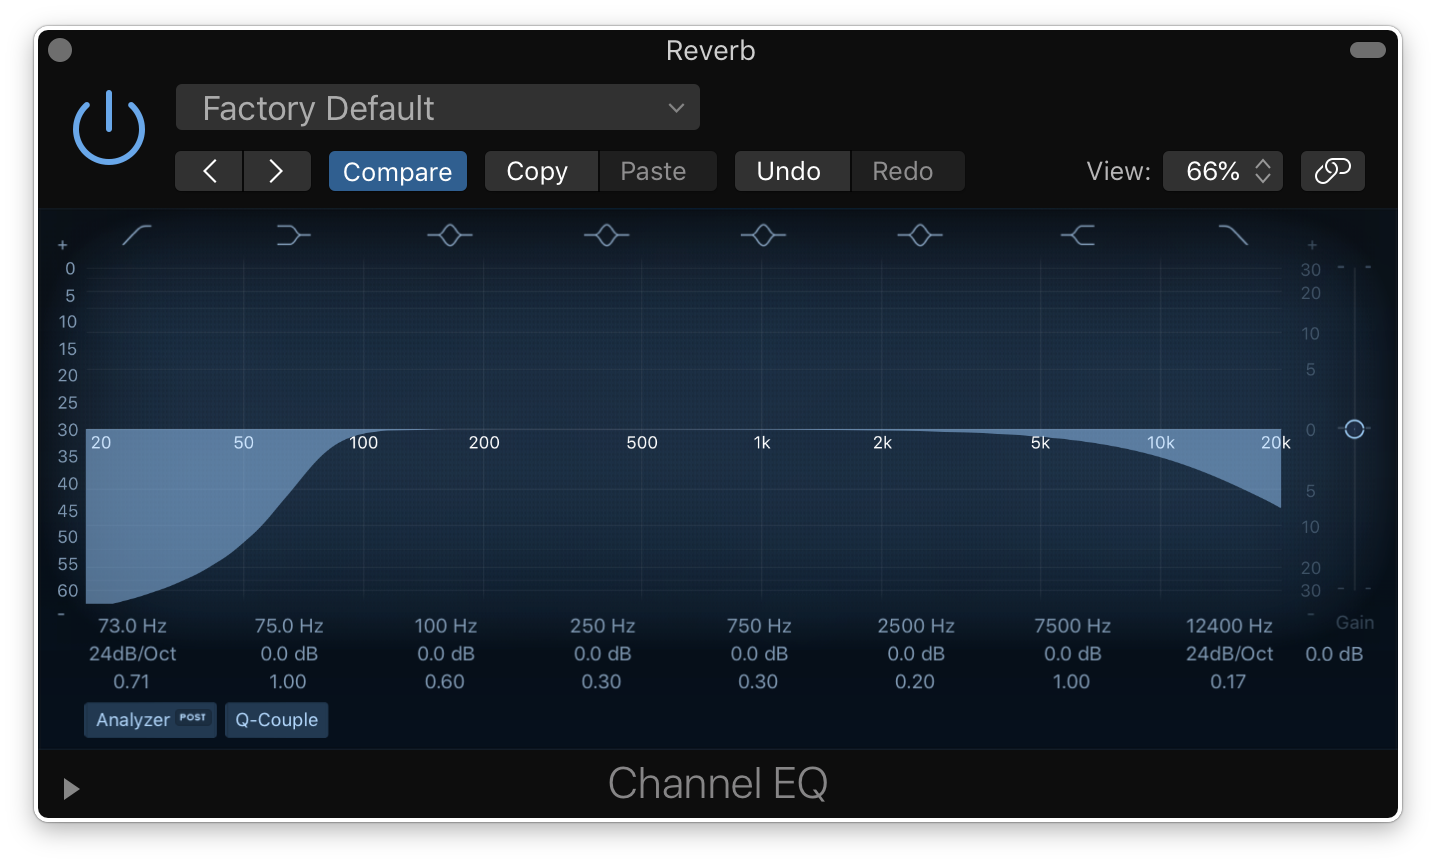
To EQ your reverbs, use a high-pass filter to remove unwanted low frequencies and a low-pass filter to tame high frequencies. Now, let’s dive into the world of reverb EQing.
Reverbs help to create a natural and rich sound space, but often, they come with unwanted frequencies that can ruin the mix. EQing is an important step to shape the reverb and make it sit well in the mix. EQing can help to cut low-end rumble, reduce harsh high-end, and adjust the mid-range to make it more pleasing to the ear.
We’ll look at some tips and tricks for EQing reverb to take your mix to the next level.

Credit: www.mixinglessons.com
Eq Techniques For Reverbs
EQ techniques are essential to make reverb sound great. You can reduce unwanted frequencies, emphasize certain parts of the sound, and add clarity with EQing your reverbs. It is crucial to apply these techniques to make your overall mix sound polished and professional.
When it comes to mixing a track or creating a sonic space, reverb is an essential tool in the kit. However, simply applying a reverb plugin won’t cut it; you need to balance it with the rest of the mix. And that’s where EQ techniques for reverbs come in handy. EQ allows you to manipulate the frequencies of your reverb to make it sound better in your mix. Here are some of the most effective EQ techniques for reverbs.
Using High Pass Filters
One of the most common problems with reverb is that it can make your mix sound muddy. It’s especially true for lows because reverb love low-frequency sounds. If you want to fix that issue, then you need to use a high-pass filter. High-pass filters remove low-end frequencies from your reverb, clearing up the mud and leaving space for other instruments.
Using Low Pass Filters
Although high-pass filters can be a game-changer when it comes to reverbs, using low pass filters can also be effective. Using a low pass filter on your reverb can soften harsh high frequencies and tame cymbals. It also adds a sense of warmth and coziness to your reverb.
Notching Out Problematic Frequencies
Sometimes there are particular frequencies that just don’t work in your mix. They can be a nuisance and detract from the overall sound. With EQ notching, you can remove those frequencies altogether. Identify the problematic frequency and dip it with a notch filter. Doing so will clear up any issues and make your reverb sound smoother.
Boosting Desired Frequencies
While notching out problematic frequencies, you can also boost desirable frequencies in your reverb. For example, if you want to bring out the high-end of your reverb, boost the top-end frequencies using a bell filter. Similarly, if you want a boomy kick drum, boost the low-frequencies.
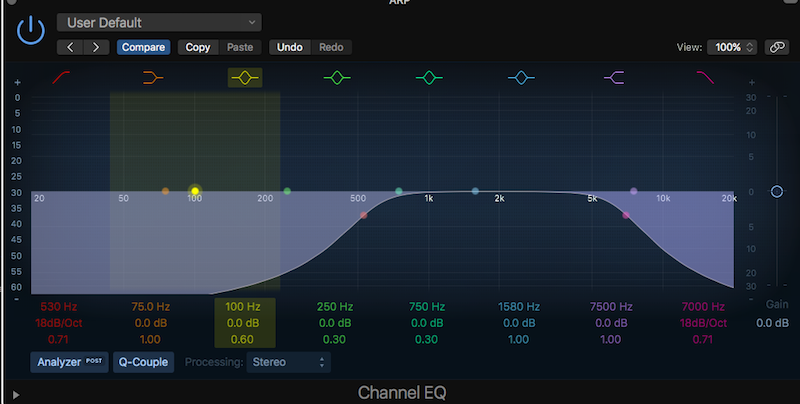
Using A Multiband Eq
Lastly, a multiband EQ is an excellent tool for EQing your reverbs. It allows you to separate frequencies and apply different EQ settings to each band. For example, you can use a multiband EQ to keep the low end of your reverb from interfering with your bass guitar. You can also boost the mid-range frequencies to add clarity and definition to a muddy reverb. In conclusion, using EQ techniques on your reverb can make a massive difference in the final mix. Apply high pass and low pass filters, notch out problematic frequencies, boost desirable ones, and use a multiband EQ to create a balanced and professional sound.
Credit: www.tunecore.com
Eq-ing Specific Reverb Types
HTML response:
EQ-ing your reverb can make a huge difference to your mix. Every reverb type responds differently to EQ. Therefore, it is essential to understand how to EQ specific reverb types.
Plate Reverbs
Plate reverbs offer a unique metallic sound that is highly desirable in certain genres such as rock and metal. To EQ plate reverb, follow these steps:
- Start with cutting the low-end frequency as it can muddy up the mix.
- Boost the high-end frequency between 2-6 kHz to add more brightness.
- For more depth and warmth, increase the mid-frequency between 500-700 Hz.
- Adjust accordingly, balancing the reverb with the original track.
Spring Reverbs
Spring reverbs were originally used in guitar amps. Their characteristic sound is often associated with vintage rock records. To EQ spring reverbs, follow these steps:
- Start by cutting the low-end frequency to prevent excessive boomy bass.
- Add more high-end frequency between 2-4 kHz to make the reverb more present.
- For more warmth, increase the mid-frequency around 800-1 kHz.
- Adjust the parameters based on your preferences.
Chamber Reverbs
Chamber reverbs simulate a small room with a short reverb tail. They are commonly used in classical and orchestral recordings. To EQ chamber reverbs, follow these steps:
- Start by cutting the low-end frequency to prevent muddiness.
- Add some brightness by boosting the high-end frequency between 5-8 kHz.
- For more depth, increase the mid-frequency around 800 Hz.
- Adjust the parameters based on your preferences.
Hall Reverbs
Hall reverbs simulate large spaces like concert halls, stadiums, and cathedrals. They have a long reverb tail and are commonly used in ambient music. To EQ hall reverbs, follow these steps:
- Start by cutting the low-end frequency to prevent muddiness and clash with the bass.
- Boost the high-end frequency between 2-5 kHz to add more clarity and air.
- For more depth, increase the mid-frequency around 500 Hz.
- Adjust the EQ to match with the original track.
Room Reverbs
Room reverbs simulate a small room, giving a sense of space to your mix. To EQ room reverbs, follow these steps:
- Start by cutting the low-end frequency to prevent excessive mud.
- Boost the high-end frequency between 2-4 kHz to add more presence.
- For more depth and warmth, increase the mid-frequency around 800 Hz.
- Adjust the EQ to balance the reverb with the original track.
EQ-ing specific reverb types is an essential part of mixing. By following these guidelines, you can make your mix sound more professional and polished.
Advanced Eq Techniques For Reverbs
Equalization is an essential tool for shaping the tone of your reverb, and knowing how to EQ your reverb correctly can make a big difference in the clarity and space of your mix. In this post, we’ll delve into some advanced EQ techniques for reverb that will take your mix to the next level.
Side-chaining Eq
Side-chaining is a useful technique in mixing, but it can also be used for EQing your reverb. When you side-chain your reverb, you send a separate audio signal to the reverb that triggers it only when that signal is present. By using a side-chain EQ, you can apply EQ to the reverb signal based on the frequency content of another track. This technique can be helpful in reducing muddiness or harshness in your mix.
Parallel Processing With Eq
Parallel processing is the technique of blending multiple versions of the same track together to achieve a desired sound. When using parallel processing with EQ, you can create a separate copy of your reverb and apply different EQ settings to each copy. By blending the two versions together, you can achieve a more balanced and nuanced reverb sound.
Creating Depth With Eq
Creating depth in your mix is essential, and EQ can help you achieve that depth. By cutting the low frequencies of your reverb signal and boosting the highs, you can create the illusion of a more distant sound source. Applying a low-pass filter to your reverb can also create a sense of distance.
Other techniques for creating depth with EQ include using a parametric EQ to notch out certain frequencies that may be causing muddiness, or using a high-pass filter to remove low frequency buildup.
Conclusion
Using advanced EQ techniques for reverb can make a significant difference in the clarity and depth of your mix. Whether you use side-chaining, parallel processing, or create depth with EQ, taking the time to EQ your reverb properly will pay off in the end.
Credit: producelikeapro.com
Frequently Asked Questions For How To Eq Your Reverbs
Can You Eq Out Reverb?
Yes, it is possible to EQ out reverb by reducing or cutting frequencies that are causing the reverb. However, this may also affect other aspects of the sound, so it is important to use the EQ sparingly and make adjustments carefully.
Should I Eq Before Or After Reverb?
EQ should be done before applying reverb. This is because reverb can amplify the unwanted frequencies created from the EQ process. EQing before applying reverb ensures a cleaner and more balanced sound.
How Do I Get Perfect Reverb Every Time?
To get perfect reverb every time, use proper microphone placement, adjust the input gain, select the right type of reverb, set the decay time, and adjust the dry/wet mix to preference. Experimentation and practice are key to achieving optimal results.
Should I Compress My Reverb?
Compressing your reverb is not necessary, but it may improve your final mix. It can help control excessive reverb tails and allow vocals or other instruments to be more present in the mix. However, be careful not to over-compress and eliminate the natural decay of the reverb.
Ultimately, it depends on your personal preference and the needs of the mix.
Conclusion
Incorporating EQ in your reverb can elevate your mixes and bring depth to your tracks. With a few simple steps, you can enhance the overall sound of your music. Understanding how each frequency affects your reverb is crucial, and experimenting with different EQ moves can help you achieve the perfect blend.
Remember to avoid over-EQing, use your ears, and trust your instincts. EQing your reverb is a process, but with practice and patience, you can create a professional-sounding mix that stands out. Happy mixing!