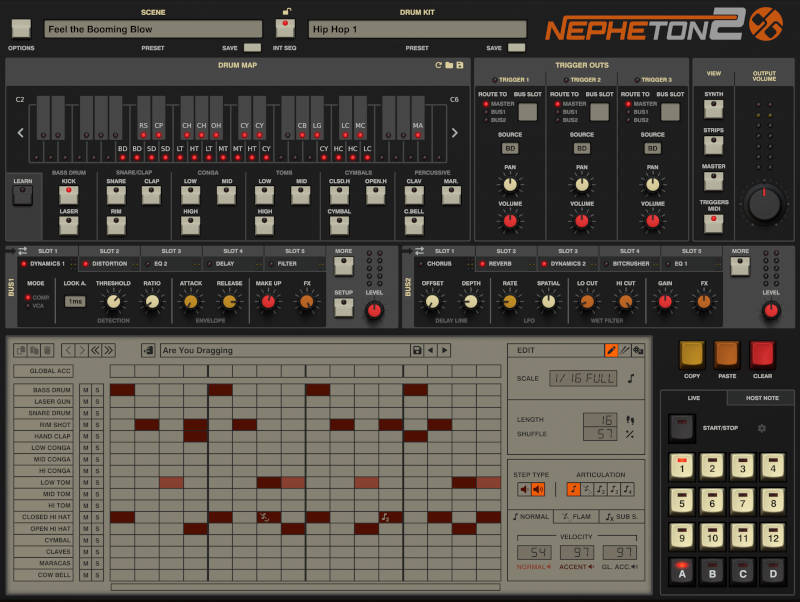
To add drum kits to FL Studio, import or drag and drop the desired kits into the software. You can also use the browser to locate and load drum kit samples.
Are you a music producer looking to enhance your beats in FL Studio? Adding drum kits to FL Studio is a straightforward process that can take your productions to the next level. By importing or dragging and dropping drum kits into the software, you can easily access a wide range of high-quality drum sounds.
This allows you to create unique and dynamic rhythms that will make your tracks stand out. Whether you’re a beginner or a seasoned producer, experimenting with different drum kits in FL Studio can inspire new ideas and help you craft professional-sounding beats.
Selecting The Right Drum Kits
When choosing drum kits for FL Studio, the process of selecting the right ones can greatly impact the quality and style of your music. Consider the following factors to ensure you pick the perfect drum kits for your next music project.
Considering Genre And Style
For coherence and authenticity in your music, match the drum kits with your genre and style. Ensure the sound of the drum kits complements the overall tone of your track.
Evaluating Sound Quality
Focus on sound quality when selecting drum kits. Pay attention to clarity, depth, and richness to enhance the overall production value of your music.
Adding Drum Kits To Fl Studio
To enhance your music production in FL Studio, adding drum kits is essential. This guide will walk you through Downloading Drum Kits and Installing Drum Kits in FL Studio.
Downloading Drum Kits
1. Search for websites offering free downloadable drum kits.
- Look for high-quality drum samples.
- Ensure the drum kits are compatible with FL Studio.
Installing Drum Kits
1. Download the drum kit files to your computer.
- Locate the FL Studio installation folder.
- Copy the downloaded drum kit files into the “Packs” folder.
Optimizing Drum Kit Usage
When creating music in FL Studio, one of the most essential elements is the drum kit. Effectively optimizing the use of drum kits can significantly elevate the quality and impact of your beats. Understanding how to utilize mixer channels, apply effects, and process your drum kit samples is crucial for achieving professional-quality sound. Here are some essential tips and techniques for optimizing drum kit usage in FL Studio.
Utilizing Mixer Channels
When adding drum kits to FL Studio, utilizing mixer channels is crucial for achieving a balanced and polished sound. Assign each drum element to its own mixer channel to have complete control over the levels, panning, and effects. Organizing your drum sounds within the mixer makes it easier to manage and process individual elements, allowing you to create a cohesive and dynamic mix.
Applying Effects And Processing
Applying effects and processing to your drum kit samples can immensely impact the overall sound of your beats. Experiment with a variety of effects such as compression, EQ, reverb, and saturation to enhance the individual elements and the overall kit. Additionally, consider using techniques like parallel processing and bus routing to apply effects to multiple drum sounds collectively, further enhancing their cohesion and impact.

Credit: swmrs.com
Creating Unique Patterns
Enhance your music production by incorporating new drum kits into Fl Studio. Create unique patterns by experimenting with different sounds and rhythms, allowing your tracks to stand out from the rest. With a few simple steps, you can easily add diversity to your music and take it to the next level.
Utilizing Step Sequencer
One of the key tools for creating unique drum patterns in FL Studio is the Step Sequencer. The Step Sequencer allows you to program individual drum sounds to play at specific moments in your music. This gives you complete control over the rhythm and timing of your drum beats.
- Open the Step Sequencer by clicking on the Step Sequencer tab at the top of the FL Studio interface.
- In the Step Sequencer, you will see a grid layout with rows representing different drum sounds and columns representing beats or steps.
- To add a drum sound, simply click on an empty cell in the grid and select the desired drum sound from the drop-down menu.
- After adding a drum sound, you can then click on the cells in the grid to activate or deactivate them. This allows you to create unique drum patterns by activating different combinations of cells for each drum sound.
Adding Variation And Dynamics
Once you have programmed your basic drum pattern using the Step Sequencer, it’s time to add variation and dynamics to make your drum beats more interesting and engaging.
- One way to add variation is to change the velocity or volume of specific drum hits. This can be done by adjusting the velocity settings for each drum sound in the Step Sequencer. By varying the velocity, you can create a more dynamic and expressive drum pattern.
- Another way to add variation is to introduce fill patterns or drum fills. Drum fills are short, rhythmic passages that are typically played between sections of a song to add excitement and transition smoothly. You can create drum fills by programming specific drum hits in a different pattern or by using the piano roll to manually input drum hits.
- Experiment with different drum sound combinations, patterns, and timings to create unique and interesting drum beats. Don’t be afraid to think outside the box and try unconventional rhythms or arrangements.
Advanced Drum Kit Techniques
When it comes to creating dynamic and professional drum tracks in Fl Studio, understanding advanced drum kit techniques can take your beats to the next level. In this section, we will explore two essential techniques: Layering Drum Sounds and Customizing Drum Samples. These techniques allow you to add depth, texture, and personality to your drum tracks, elevating your music production to new heights.
Layering Drum Sounds
Layering drum sounds involves combining multiple drum samples to create a unified and impactful sound. This technique allows you to blend different elements, such as the attack from one sample and the sustain from another, resulting in a more unique and interesting drum sound.
To layer drum sounds in FL Studio, follow these steps:
- Choose the primary drum sound that will serve as the foundation for your beat.
- Find complementary drum samples that enhance the desired characteristics of your primary sound.
- Layer the additional drum samples on top of your primary sound, adjusting their volume and panning to create a balanced blend.
- Experiment with EQ, compression, and other audio effects to further shape and refine the layered drum sound.
Customizing Drum Samples
Customizing drum samples allows you to tailor each individual drum sound to fit perfectly within your mix. This technique enables you to adjust the tone, dynamics, and character of each drum sample, giving your beats a distinct and polished sound.
To customize drum samples in FL Studio, consider the following:
- Use a sampler or drum plugin that offers comprehensive editing capabilities, allowing you to modify the sound properties of each drum sample.
- Experiment with parameters such as pitch, decay, attack, and release to alter the tonal characteristics of the drum.
- Apply effects like reverb, delay, and distortion to add depth and texture to the drum sound.
- Consider layering customized drum samples on top of each other to create even more nuanced and unique sounds.
By incorporating advanced drum kit techniques such as layering drum sounds and customizing drum samples, you have the power to transform your drum tracks from ordinary to extraordinary. These techniques allow you to unleash your creativity and craft drum beats that truly stand out in the crowded music production landscape. Experiment, explore, and let your imagination guide you as you master the art of advanced drum kit techniques in Fl Studio.

Credit: www.ac3filter.net

Credit: www.pluginboutique.com
Frequently Asked Questions Of How To Add Drum Kits To Fl Studio
How Do I Import Drum Kits Into Fl Studio?
To import drum kits into FL Studio, go to the Browser panel, select the “Packs” folder, and drag the drum kit folder into the “User” folder. Then open the Plugin database, refresh, and your imported drum kit will appear in the “User” section for use.
How Do I Add Packs To Fl Studio?
To add packs to FL Studio, go to the ‘Options’ menu, select ‘Manage Plugins’ and click on ‘Start scan’. Locate the pack on your computer and select it to add.
How Do I Add A Drum Kit To Studio One?
To add a drum kit to Studio One, open a new song, go to the Instruments tab, select Impact, and drag the desired drum kit onto the instrument track. Customize the kit using the Impact interface and start creating beats.
How Do I Add Percussion To Fl Studio?
To add percussion to FL Studio, follow these steps: 1. Open FL Studio and create a new pattern. 2. In the step sequencer, select a drum sound you want to use. 3. Click on the piano roll to add drum hits at desired time intervals.
4. Repeat this process to add more percussion sounds. 5. Play the pattern to hear the percussion in your FL Studio project.
Conclusion
Incorporating drum kits into FL Studio is a game-changer for music producers. Understanding the process and mastering the techniques can take your music to the next level. Experimenting with different sounds and rhythms can spark creativity and inspire unique beats.
By following these steps, you can elevate your music production skills and create professional-quality tracks. Flaunt your creativity and make some banging beats!