To master your music for Spotify, use a reference track and carefully consider loudness levels. In mastering for Spotify, it’s essential to ensure your music sounds its best and stands out on the platform.
Here are some tips on how you can achieve the best mastering for Spotify. To start with, mastering is the final polishing stage of audio production and is responsible for bringing out the best sound from your music tracks. Mastering for Spotify requires careful attention to detail and quality, mainly because Spotify prioritizes loudness normalization over sound quality.
Therefore, you need to ensure that your music is optimally balanced, sounds good across different devices, and meets the Spotify’s Recommendations for audio content delivery. Below are tips on how to get the best out of your mastering process and ensure that your music stands out on this popular streaming platform.
Preparing Audio Files
To prepare audio files for mastering on Spotify, it’s essential to choose the right mastering engineer with an understanding of the platform’s unique requirements. Some important factors to consider include loudness levels, frequency balance, and compression, all of which must be tailored to ensure the best possible listening experience for your audience on Spotify.
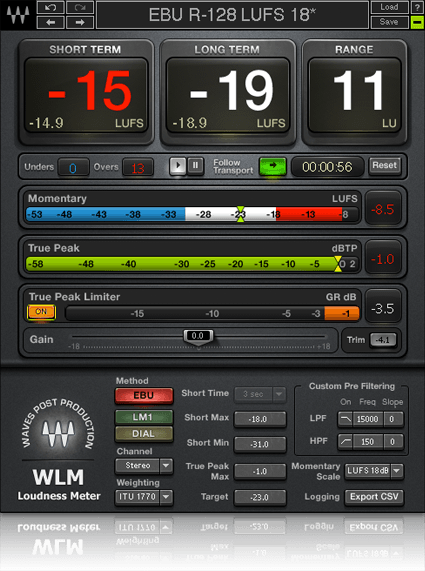
Preparing Audio Files Before you start mastering your tracks for Spotify, it’s crucial to get the preparatory steps right. The lack of attention to detail in preparing audio files can lead to poor quality sound and even an outright rejection by Spotify. Therefore, it’s essential to adhere to their guidelines for audio files. File Format and Bitrate The first step in preparing audio files is to make sure you have the correct file format and bitrate. Spotify recommends uploading your tracks in 16 or 24-bit WAV format or FLAC file format. It’s also essential to ensure that your audio files are at a minimum bitrate of 44.1kHz. This will ensure that your tracks sound great when streamed on Spotify. Track Spacing Equally important, is the track spacing, which affects the quality of the listening experience. Spotify suggests that there should be a two-second pause in between tracks. This spacing ensures seamless transitions between tracks, resulting in a more enjoyable listening experience. Headroom and Loudness Headroom and loudness are other crucial aspects to consider when preparing audio files. Headroom refers to the space between the loudest part of your track and 0dB. Spotify suggests leaving at least -2dB of headroom to prevent clipping and distortion. In contrast, loudness refers to the perceived volume of the track. To achieve the best loudness, it’s advisable to aim for a range of -14dB integrated loudness, with a true peak of -1dB. Adhering to these specifications ensures that your tracks stand out while maintaining excellent sound quality on Spotify. In conclusion, following these guidelines and recommendations will ensure that your tracks are uploaded without issues and meet the high-quality standards that Spotify requires. By adhering to these guidelines, you’ll be one step closer to achieving success on their platform.
Eq And Dynamics Processing
Achieving optimal mastering for Spotify requires effective use of EQ and dynamics processing. These tools assist in balancing levels, tonal balance, and dynamics control. By utilizing these techniques, you can achieve a commercially competitive and consistent sound for your tracks on the streaming platform.
Equalization
Equalization, commonly known as EQ, is a significant tool for mastering music on Spotify. It allows you to adjust and balance out different frequencies in your mix. By using EQ, you can emphasize and boost certain frequency ranges or cut down any unwanted frequencies that make your music sound muddy or appear unbalanced on Spotify. When EQ is used effectively in the mastering process, it can add clarity, depth, and definition to your music. It can enhance the overall listening experience for your audience. Remember, the goal is to enhance your mix and not to drastically change it. A small boost here or cut there can make all the difference.
Dynamics Processing
Dynamics Processing is another essential tool for mastering your music on Spotify. It is all about managing the dynamic range of your mix, which is the difference between the loudest and quietest parts of the audio track. Without effective dynamics processing, your music may sound flat or distorted on Spotify. The two primary techniques used in dynamics processing are compression and limiting. Compression helps to balance out the dynamics in your mix by reducing the volume of the louder parts and boosting the quieter parts, creating a more consistent sound. Limiting helps to prevent clipping and distortion by setting a ceiling on the maximum volume level. Remember, the goal of dynamics processing is to add warmth and punch to your music without negatively impacting the overall sound. A poor application of dynamics processing can lead to a loss of clarity, and your music may sound dull and lifeless. In conclusion, EQ and dynamics processing are two crucial components of mastering music on Spotify. By using these tools effectively, you can enhance the overall listening experience for your audience and make your music stand out on this platform.
Stereo Width Enhancement
To achieve optimal mastering for Spotify streaming, you can apply stereo width enhancement techniques. This helps create a wider and more immersive soundstage for listeners, resulting in a more enjoyable listening experience. Implementing this technique involves adjusting the stereo balance and adding subtle effects to the mix.
Panning
Panning is the process of distributing audio signals into a stereo field. By using the balance knob in your DAW, you can move the sound to the left, right, or center. This technique is essential in creating a wider stereo field for your tracks.
Stereo Width Processing
Stereo width processing expands the stereo image of your track and gives it a larger soundstage. This technique is often used in the mastering process to make the mix sound more professional and radio-ready. Stereo width enhancement is the process of manipulating the stereo image to create a more spacious and immersive listening experience. It involves using techniques such as panning, stereo wideners, and mid-side processing to make the mix sound wider and more full. To enhance the stereo width of your track, you can try the following techniques:
- Panning: Use panning to spread out the instruments and create a wider stereo image.
- Mid-Side Processing: Use a mid-side EQ to boost the stereo image and make it sound wider.
- Stereo Widener: Use a stereo widener plugin to increase the stereo spread and make the mix sound more full.
Remember that too much stereo width processing can result in a loss of mono compatibility and phase issues. Use your ears and trust your judgement to create a balanced and professional sound.
Credit: majormixing.com
Limiting And Dithering
To achieve optimum sound quality on Spotify, it’s essential to implement limiting and dithering techniques during the mastering process. This helps to avoid distortion and optimize the loudness of your tracks, ensuring they sound their best for streaming.
When it comes to mastering audio for Spotify, two crucial processes are limiting and dithering. Limiting ensures that the audio volume is consistent while dithering helps in reducing distortion. In this article, we will take a closer look at the Limiting and Dithering processes for mastering on Spotify.
Limiting
Limiting involves adjusting the amplitudes of the audio signals to ensure that they don’t exceed a certain level. The goal of limiting is to increase the overall volume of a track while keeping the dynamics intact. A limiter is a type of compressor that is used for limiting. The following are some of the key steps involved in limiting:
- Set the threshold – This is the level at which the limiter starts to work. The threshold should be set at a level such that the peaks are just below the maximum level of the digital audio format.
- Set the ratio – This determines how much the level of the signal will be reduced when the threshold is exceeded.
- Adjust the attack and release times – This determines how fast the limiter responds to changes in the audio level.
Dithering
Dithering is the process of adding low-level noise to a digitized signal to reduce quantization distortion. It helps to smooth out the abrupt transitions that can occur when converting a continuous analog signal to a discrete digital signal. The following are some of the key steps involved in dithering:
- Select the appropriate type of dither – There are different types of dither. The type of dither that you choose will depend on the bit depth of the audio signal.
- Set the level of dither – This refers to the amount of noise that is added to the audio signal. A higher level of dither can help to reduce quantization distortion but can also make the noise more audible.
- Apply the dither – Once you have selected the appropriate type and level of dither, you can apply it to the audio signal.
In conclusion, mastering audio for Spotify involves several steps, and limiting and dithering are two critical processes that must be performed correctly to ensure that the audio sounds great. By following the above guidelines and using the right tools, you can master your audio for Spotify with ease.
Mastering Tips
Learn how to do professional mastering for Spotify with our expert tips. Our step-by-step guide covers everything from EQ to compression, ensuring your tracks sound their best on the popular streaming platform.
Mastering is an important process that can help improve the sound quality of your music before it’s released on platforms like Spotify. There are certain mastering tips that can help you make your tracks sound the best they can be. In this section, we’ll go over three important tips that you should keep in mind when mastering your tracks for Spotify.
Don’t Make It Too Loud
One of the most common mistakes that artists make when mastering their tracks is making them too loud. While loudness may seem like a good thing, it can actually have a negative impact on the overall sound quality of your music. Too much loudness can lead to the loss of dynamics and detail in your track, resulting in a compressed and distorted sound. It’s important to find a balance between the volume levels and dynamics of your track to ensure it’s not too loud or too quiet.
Avoid Heavy Compression
Compression can help balance the dynamic range of your track, but overusing it can lead to a loss of clarity and detail. When compressing your track, use it in moderation and ensure that you’re not squashing the life out of your mix. Remember, less is often more when it comes to compression, and it’s important to let your track breathe to maintain its natural sound.
Match Volume Levels
When mastering your tracks for Spotify, it’s important to ensure that the volume levels of all your tracks are matched. This helps create a consistent listening experience for your listeners and ensures that one track doesn’t sound louder or quieter than the rest. One way to match the volume levels of your tracks is to use a reference track with similar dynamics as your own track and adjust the volume levels accordingly. By keeping these mastering tips in mind, you can ensure that your tracks are optimized for Spotify and sound the best they can be. Remember to find the right balance between loudness and dynamics, use compression in moderation, and match the volume levels of your tracks for a consistent listening experience.

Credit: www.morningdewmedia.com

Credit: www.masteringthemix.com
Frequently Asked Questions Of How To Do Mastering For Spotify
What Is The Best Mastering Level For Spotify?
The ideal mastering level for Spotify is -14 LUFS integrated with a true peak value of -1 dBFS. This ensures that your track’s volume is balanced with Spotify’s playback level and avoids any distortion.
Do You Need To Master For Spotify?
Yes, mastering for Spotify is recommended to ensure your music sounds its best on the platform. Spotify has specific loudness and formatting requirements that mastering can help you achieve. This can improve the overall sound quality, increase streaming potential, and ultimately enhance the listening experience for your audience.
Is Lufs Okay For Spotify?
Yes, LUFS is okay for Spotify. Spotify recommends that audio masters be between -14 and -8 LUFS for optimal loudness normalization.
What Is The Target Loudness Level For Spotify?
The target loudness level for Spotify is -14 LUFS (Loudness Units Full Scale). This is to ensure that all songs play back at a consistent volume level and to reduce the need for users to constantly adjust the volume between tracks.
Conclusion
To summarize, mastering your music for Spotify is a crucial step to ensure its success on the platform. Following the guidelines mentioned in this blog post can help improve the quality of your tracks and make them more appealing to listeners.
Remember to optimize your tracks for all devices and platforms, and to find a balance between loudness and dynamics. Keep experimenting with different techniques until you find the perfect sound for your music. With a little effort, you can take your music to the next level and reach a wider audience on Spotify.