To build a music studio desk, first measure the space and gather materials such as wood, screws, and power tools. Then, follow step-by-step instructions to assemble the desk, making sure to include features that will enhance the recording experience.
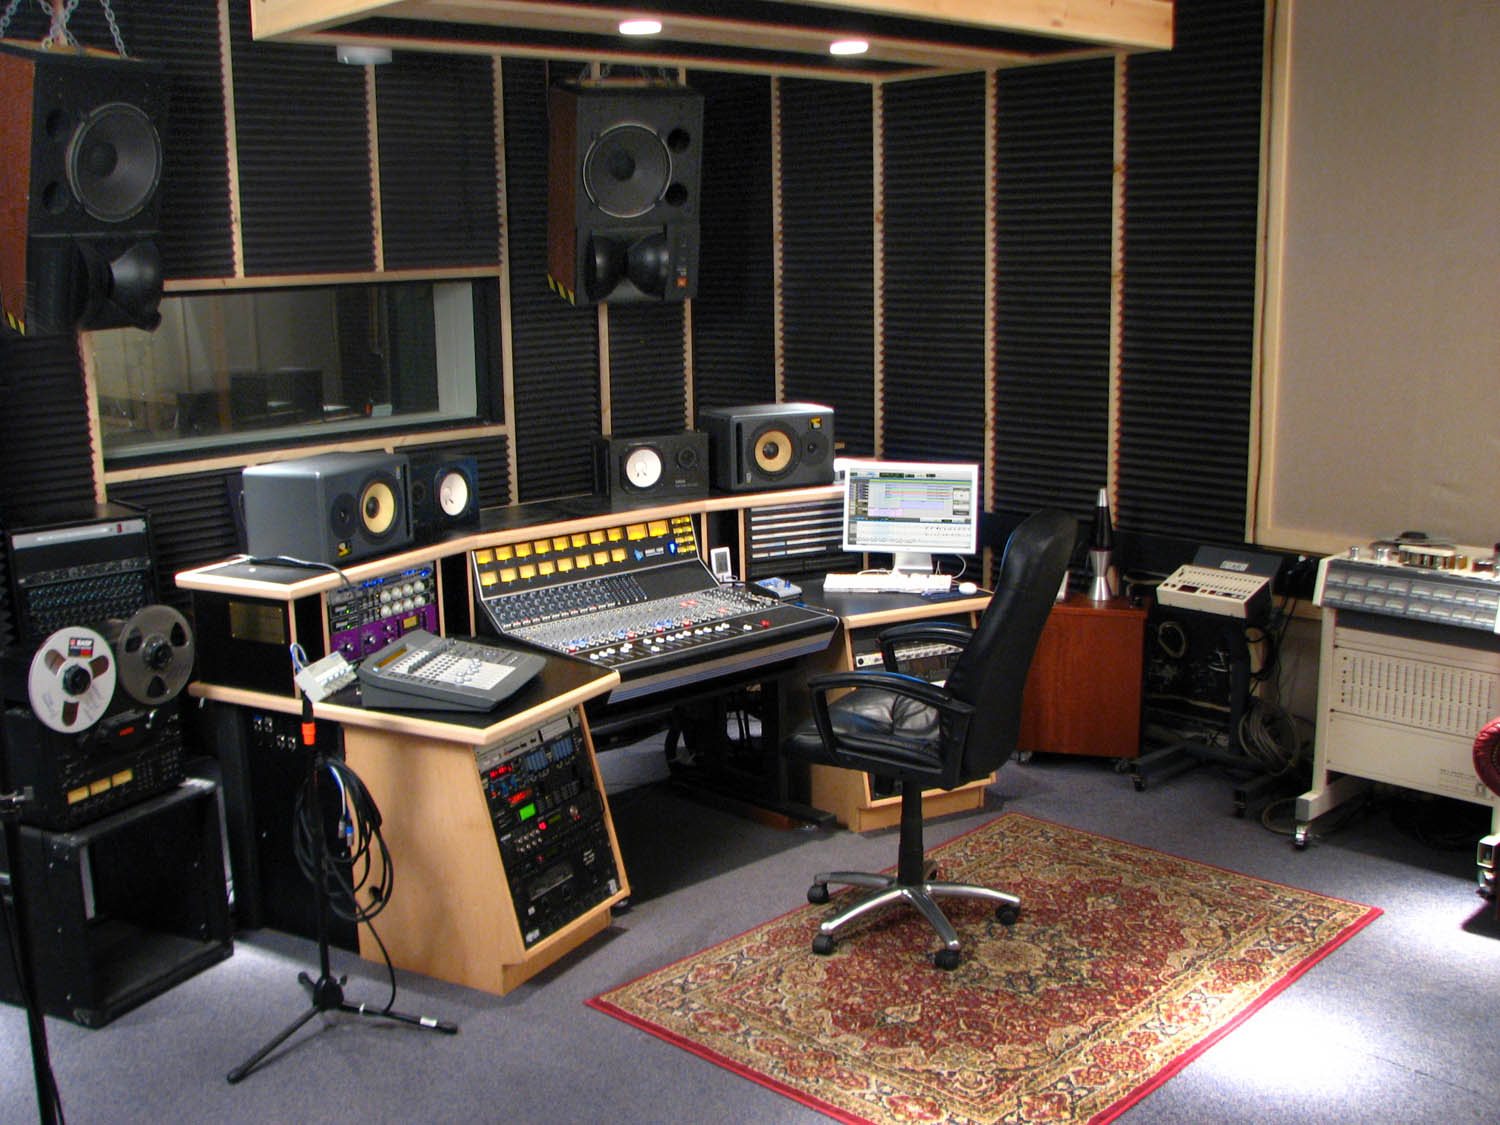
A music studio desk not only provides a stable work surface for equipment but also helps with cable organization and sound isolation. Building a custom desk allows for a personalized touch and can save money compared to purchasing a pre-made option.
With a little patience and attention to detail, creating a functional and visually appealing music studio desk can be a rewarding DIY project.
Choosing The Right Design
Selecting the perfect design for your music studio desk can significantly impact your productivity. Consider your desired layout, the size of your room and the tools you require for recording or producing music. A well-designed desk can help you create music with ease and comfort.
Building a music studio desk is an exciting process that allows you to create a workspace that is tailored to your needs. Choosing the right design is essential because it will impact the functionality of your studio and your comfort while working. We will cover three important factors to consider when selecting a design for your music studio desk – ergonomic considerations, design style, and available space.
Ergonomic Considerations
Your music studio desk should be designed to promote comfort and good posture, especially if you spend long hours working at your desk. It’s essential to consider the height of your desk, monitor placement, keyboard and mouse placement, and equipment placement. An ideal desk height is one that allows your wrists and arms to rest naturally while typing or using musical equipment. Your monitor should be positioned at eye level to prevent neck strain, and the keyboard and mouse should be at a comfortable distance to avoid unnecessary tension in your shoulders and arms. Additionally, equipment placement should be considered to ensure easy access during your music production.
Design Style
The design style of your music studio desk is essential because it sets the tone for your workspace’s overall aesthetic. Music studio desks come in various styles, including modern, industrial, traditional, or minimalist. Modern desks are sleek and feature clean lines with unique materials like glass or metal. Industrial desks feature raw, natural materials like wood and steel. Traditional models are timeless and exude a classic, elegant feel. Minimalist desks are simple, streamlined, and decluttered, making them ideal for small spaces.
Available Space
The amount of space available in your studio plays a crucial role when choosing a music studio desk design. You do not want a desk that is too cramped or too big for your production room. Consider the available square footage and configure a design that maximizes the space’s potential. Many music studio desks come in L-shaped or U-shaped designs that are perfect for corners, while some models are designed for tight spaces and come with space-saving compartments. In conclusion, choosing the right design for your music studio desk involves considering ergonomic factors, design style, and available space. A good design will promote comfort, elevate your workspace’s aesthetic, and maximize the available space in your studio.
Credit: www.youtube.com
Gathering Materials And Tools
To build a music studio desk, the first step is to gather all the essential materials and tools. This includes measuring tape, saw, wood screws, drill, sandpaper, and wood glue. It’s important to have everything on hand to avoid any delays during the construction process.
Building a music studio desk can be an exciting and rewarding experience, especially when you have the right materials and tools at hand. Before you start, it’s important to gather all the necessary materials and tools to make the process smoother. Below are the required materials and tools you need to have before starting your music studio desk project.
Necessary Tools
To get started on building your music studio desk, you will need the following tools:
- Electric drill and drill bits
- Measuring tape
- Screwdriver set
- Circular saw
- Jigsaw
- Clamps
- Sandpaper
- Safety goggles and gloves
These tools will help you measure, cut, and shape the materials required for your music studio desk project. It’s important to invest in good-quality tools to ensure accuracy and safety while using them.
Wood And Hardware
The next step is to gather all the necessary materials, including wood and hardware. You will need:
| Materials | Quantity |
|---|---|
| 2×4 Fir or Pine | 6 at 8ft long each |
| 3/4 inch Plywood | 2 sheets (4ft x 8ft) |
| 1 1/4 inch Pocket Hole Screws | 1 box (100 count) |
| 2 1/2 inch Wood Screws | 1 box (100 count) |
| Wood glue | 1 bottle |
| Corner brackets | 4 |
| Caster wheels | 4 |
| Drawer slides | 4 |
| Pull handles | 2 |
Make sure the wood you choose is straight, flat, and free of knots and cracks. The plywood should be thick and sturdy enough to support the weight of your equipment. You can also select your desired finish for the wood and hardware to match your studio’s aesthetic. Now that you have all the necessary materials and tools, it’s time to start building your music studio desk. The next step is to prepare the wood and hardware by cutting them to size and sanding them to achieve a smooth finish. Get ready to build a custom music studio desk that meets your specific needs and style!
Measuring And Cutting Wood
To build a music studio desk, measuring and cutting wood is essential. Use a tape measure, straight edge, and saw to cut the wood to the required size and shape for the desk’s frame and table surface. Measure twice and cut once to ensure the wood fits together precisely for a sturdy and reliable desk.
Taking Accurate Measurements
Before starting the process of cutting and building, it’s important to take accurate measurements of the studio desk. The desk must be functional, and the right measurements will ensure that the desk can accommodate the equipment without any issues. To take accurate measurements, use a measuring tape and measure the length, width, and height. Write these measurements down on a piece of paper so that you can use it as a reference when cutting the wood.
Cutting The Wood To Size
The next step is to cut the wood to the right size. This step is crucial as the wood pieces need to fit properly. Use a saw to cut the wood pieces to the correct length, width, and height. It’s essential to stay sharp, in order to get the best results. If you don’t have experience using a saw, it’s best to get help from someone who does.
Sanding And Finishing
After cutting the wood pieces to the right size, the next step is to sand the rough edges. Sanding can be done by using sandpaper to make the edges smooth and remove any splinters or rough areas before applying the finish. The finish can be applied in different ways, such as staining, painting, or using a clear coat. The finish not only adds visual appeal but also protects the surface from water damage and other elements that may harm the wood. To sum up, measuring and cutting the wood properly is key to ensure the desk fits all the equipment. In addition, sanding and finishing the surface provides protection and adds the desired visual appeal.

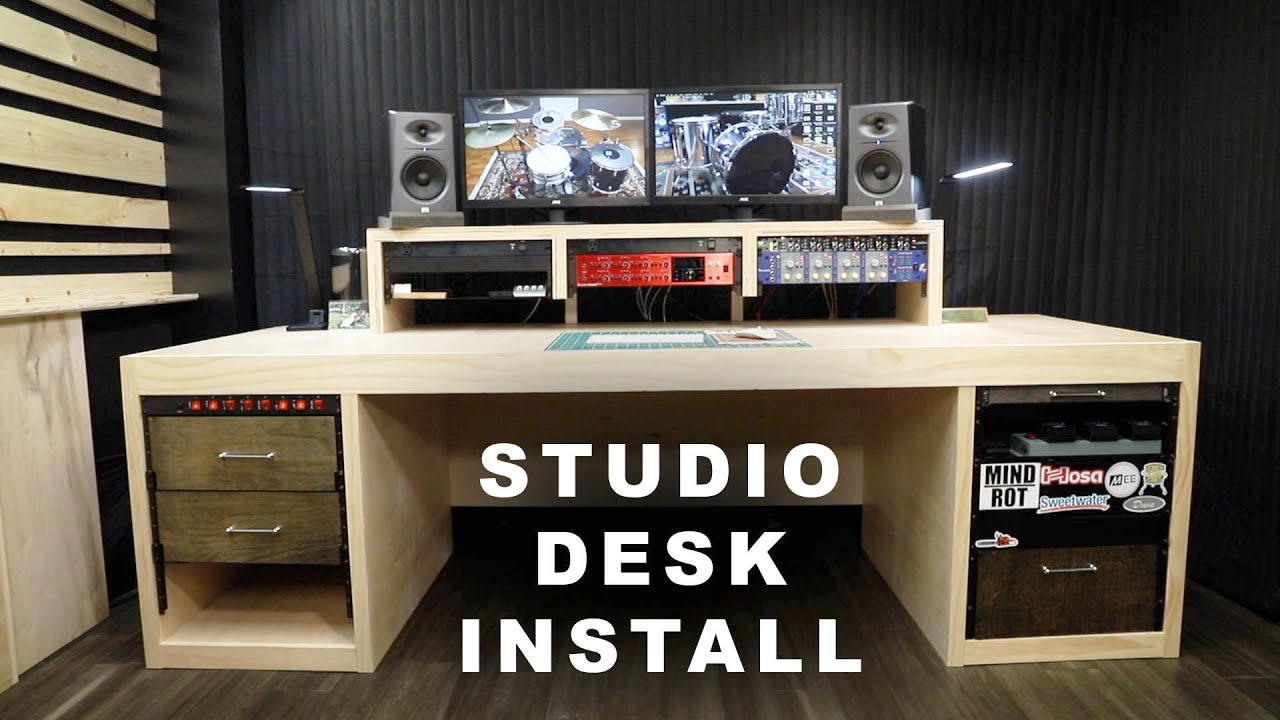
Credit: www.reddit.com
Assembling The Desk
Building a music studio desk is a fun and rewarding project. Begin by measuring the space and selecting the materials. Then, follow the instructions and assemble the pieces together to create a functional and comfortable desk that fits your specific needs.
Now that you have perfect measurements, cut the boards and sanded them. It’s time to start assembling the music studio desk. Here are the steps you need to follow:
Pre-drilling Holes
Before attaching any of the legs or supports, you should pre-drill holes in the legs’ bottom. You should drill holes according to the screws so that the legs can be attached to the desk without splitting. For this, use 1/8 size drill bits to drill holes.
Attaching Legs And Supports
After completing pre-drilling, attach the legs to the desktop with screws. First, place the legs under the desktop and align them perfectly, then drill in screws to firmly attach them. With the help of screws, attach the horizontal supports under the desk. Make sure that the support piece is evenly placed between the legs.
Securing The Desktop
Once the legs and supports are attached, carefully place the desktop on the supports. Makes sure that it is even and flush against the top edges of the supports. Using screws, attach the desktop to the horizontal supports. The screws should be placed at an angle to make sure the desktop is secure. If you plan to use drawers or shelves, now would be the time to attach them. Be sure to follow the instructions and measure precisely. Building a music studio desk is a perfect DIY project to make the most of your workspace. With these simple steps, assembling your music studio desk should be a breeze.
Adding Extra Features
Enhance your DIY music studio desk by adding extra features such as cable management, adjustable shelves, and workspace lighting. These improvements will not only make your desk more functional but also provide a welcoming environment for creativity and productivity.
Adding Extra Features: Keyboard Tray, Cable Management, and Monitor Mounts When building your own music studio desk, you might want to customize it to fit your specific needs. This is where adding extra features comes in handy. Here are some helpful suggestions for extra features you can add to your DIY music studio desk. Keyboard Tray One essential feature that can make a huge difference in your studio is a keyboard tray built into your desk. A keyboard tray can help you save space on your desk and place your keyboard at the ideal height for you to play comfortably. To add a keyboard tray to your DIY music studio desk, follow these steps: 1. Measure the width and depth of your keyboard. 2. Cut a piece of wood to fit those dimensions. 3. Attach drawer slides underneath the tray and make sure they are level. 4. Attach the tray to the slides and test it out before adding it to your desk. Cable Management Cable management is another important feature to consider when building a music studio desk. With all the wires and cables required for music production, having organized cables will keep your desk looking neat and tidy, and help prevent accidents from tripping over loose wires. Here are some tips for managing cables on your music studio desk: 1. Use cable ties to bundle cables together. 2. Use adhesive cable clips to secure cables to the underside of your desk. 3. Use a cable sleeve to hide and organize cables. Monitor Mounts Another useful feature to add to your DIY music studio desk is a monitor mount. A mount can help you free up desk space, adjust your monitor to the ideal height for your viewing comfort, and improve posture, which can reduce strain on your neck and eyes. Here are the steps to adding a monitor mount to your desk: 1. Choose a monitor mount that suits your specific needs. 2. Measure and mark the placement of the mount on your desk. 3. Drill holes in your desk for the mount’s screws. 4. Follow the mount’s assembly instructions and attach it to your desk. By adding a keyboard tray, cable management, and monitor mounts to your DIY music studio desk, you can improve functionality, organization, and comfort while producing music.
Customizing The Desk
Building a music studio desk is a fun and rewarding project that can help improve your music production experience. Customizing the desk to your specific needs and preferences can provide the perfect workspace for creativity and productivity.
Painting And Staining
To add a personal touch to your music studio desk, painting or staining is a great idea. It will not only give you the freedom to choose the color and style that will complement your studio but it also protects the desk from wear and tear. When painting or staining make sure to prepare the surface properly. Sanding the surface properly will not only smooth the surface but also helps the paint or stain to stick better. A primer will also help the paint or stain to adhere properly.
Adding Personal Touches
Adding personal touches to your desk is a great way to make it unique. You can add decals or stickers to the surface, or even spray paint designs. You can also add a personal touch by customizing the knobs and handles of the drawers or by adding a personalized nameplate. Another way to add a personal touch is by incorporating a photo collage on the desk surface or by using a unique fabric for the drawers or the chair cushion. These touches will make your studio desk truly one of a kind.
Incorporating Accessories
Incorporating accessories to your music studio desk not only makes it more functional but also adds a decorative touch. You can add a monitor stand to keep your monitor at eye level, or a keyboard tray to keep the keyboard at a comfortable level. You can also add a cable management system to keep the desk space clean and organized. A lamp or a desk fan can also be added to enhance the look. A plant can add a touch of greenery to the studio and can also positively impact the mood and productivity. By incorporating these accessories, you can create a studio space that is both functional and aesthetically pleasing.
Testing The Desk
Building a music studio desk requires testing its strength and durability to ensure it can hold the weight of equipment. Consider the layout and accessibility of the desk to determine the best design for your needs.
After building your own music studio desk, it’s important to test it properly to make sure it meets all your requirements and expectations. This step is crucial as it ensures that the desk is sturdy, comfortable, and functional. There are various aspects of the desk that need to be tested, and we will discuss them below.
Stability And Weight Capacity
One of the primary aspects that need to be tested is the stability and weight capacity of the desk. As you will be using heavy music equipment and machinery, you need to ensure that the desk is sturdy enough to support the weight of your equipment. Additionally, you don’t want the desk to wobble or shake as you work on it. To test the stability of the desk, place all of your equipment on it, and apply pressure from different angles to check if it can withstand the weight and pressure.
Ergonomic Comfort
Another essential aspect to test is the ergonomic comfort of the desk. Your studio desk is where you will spend most of your time, and you want to ensure that you can sit comfortably and work efficiently without hurting your back, neck, or arms. When testing the desk, sit in your chair and check if the desk is at a suitable height and if there is enough legroom. You should also check if the desk is at a proper depth and width, and your arms can rest comfortably while playing your instruments.
Functionality Of Extra Features
Apart from stability and comfort, you may have added some extra features to your music studio desk, such as drawers, shelves, cable management, and more. You need to test if these features are functional and serve their purpose. For example, you can check if the drawers slide-in and out smoothly without getting stuck. You can also check if the cable management system is efficient and keeps the wires organized and out of sight. Ensure that you test each feature individually and assess if it adds value to your desk. In conclusion, testing is a crucial part of building a music studio desk to ensure that the desk is sturdy, comfortable, and functional. By following the above steps and testing your desk, you can rest easy knowing that you have built a perfect work station that suits all your needs and enhances your productivity.
Credit: www.diymusicbiz.com
Final Thoughts And Tips
Before starting to build your own music studio desk, ensure you have a clear plan in place. Take note of the dimensions and materials required and don’t forget to leave some space for future equipment upgrades. With these important tips, you’ll be well on your way to creating a personalized workspace that suits your music production needs.
After following these steps for building your music studio desk, you should have a functional and stylish desk for all your music production needs. Here are some final thoughts and tips to keep in mind as you work on your desk:
Maintaining And Cleaning The Desk
To keep your music studio desk looking and functioning well, it’s important to keep it clean and maintained. Here are a few tips to help you do that:
- Dust your desk regularly with a soft cloth or duster to avoid buildup.
- Avoid using harsh cleaning chemicals, as they can damage the finish on your desk.
- Use coasters or mats under drinks and other objects to avoid scratches and water marks.
- If your desk gets a scratch or other damage, try adding a touch-up finish to restore its appearance.
Troubleshooting Common Issues
Even with the best build, you may run into a few issues with your music studio desk. Here are some common problems you may encounter, along with ways to troubleshoot them:
| Problem | Troubleshooting Tips |
|---|---|
| Wobbling or unstable desk | Make sure all screws and bolts are tight, adjust the feet or base legs, and check that the desk is level. |
| Scratches or other damage | Use touch-up finish or wood filler, sand down rough spots, or add a protective layer to prevent further damage. |
| Inadequate cable management | Add cable ties, clips, or raceways to organize cables and improve the desk’s appearance. |
| Not enough storage space | Add shelves, drawers, or other storage options to the desk or nearby area. |
Enjoying Your New Music Studio Desk
After all your hard work building and troubleshooting your music studio desk, it’s time to enjoy it! Here are a few tips to help you make the most of your new desk:
- Add personalized touches, like posters or pictures, to make the space your own.
- Keep your desk organized with specific places for all your equipment and cables.
- Treat your desk with care and respect to ensure it lasts a long time.
- Show off your new desk to friends and fellow musicians to inspire others to build their own!
With these final thoughts and tips, you should now have all the knowledge you need to build, maintain, and enjoy your very own music studio desk. Happy building!
Frequently Asked Questions Of How To Build A Music Studio Desk
How Much Does It Cost To Build A Studio Desk?
The cost to build a studio desk varies depending on the size, materials used, and custom features. You can expect to spend anywhere from $100 to $3,000. It’s best to research and compare prices for materials and pre-made desks before starting your project to get the most accurate estimate.
What Is The Best Height For A Music Studio Desk?
A music studio desk should ideally be at a height that corresponds with the height of the chair and the individual who will be using it. This usually ranges between 25 to 29 inches from the ground. It’s important to consider ergonomics and comfort when choosing the right height for a music studio desk.
How Deep Should A Studio Desk Be?
A studio desk should ideally be at least 30 inches deep for accommodating your computer/screen, keyboard, and other equipment. However, the depth may vary depending on personal preference and equipment size. Remember to leave a little extra space for maneuverability and organizing cables.
How To Build Your Own Music Studio?
Building your own music studio requires careful planning, research, and investment. Choose a suitable space, plan the layout, invest in good-quality equipment and acoustic treatment, and ensure proper electrical wiring and insulation. Consider hiring a professional to assist with the build and obtain necessary licenses and permits.
Conclusion
After reading this guide on how to build a music studio desk, you’re ready to take on this exciting project. With the right tools, materials, and careful planning, you can create a custom desk that meets your specific needs and preferences.
Remember to consider factors such as ergonomics and functionality while designing your desk to ensure a comfortable and efficient workspace. Don’t be afraid to seek input and guidance from other music producers or DIY enthusiasts to make your dream studio desk a reality.