Home studio essentials include a computer, audio interface, microphone, and headphones. Setting up a home recording studio can be a daunting task, but with the right equipment, it can be an affordable and rewarding experience.
Creating a home studio is a meaningful investment for musicians and producers of all levels. It not only allows for more creative control and flexibility, but it also provides a space to experiment and hone one’s skills. With technological advancements, it is now easier and more affordable than ever to build and operate a home recording studio.
In addition to the essentials mentioned above, other key elements may include a DAW (digital audio workstation), studio monitors, acoustic treatment, and various types of software and plugins. This article will explore each of these items in detail and provide guidance on selecting and setting up equipment for a successful home studio.
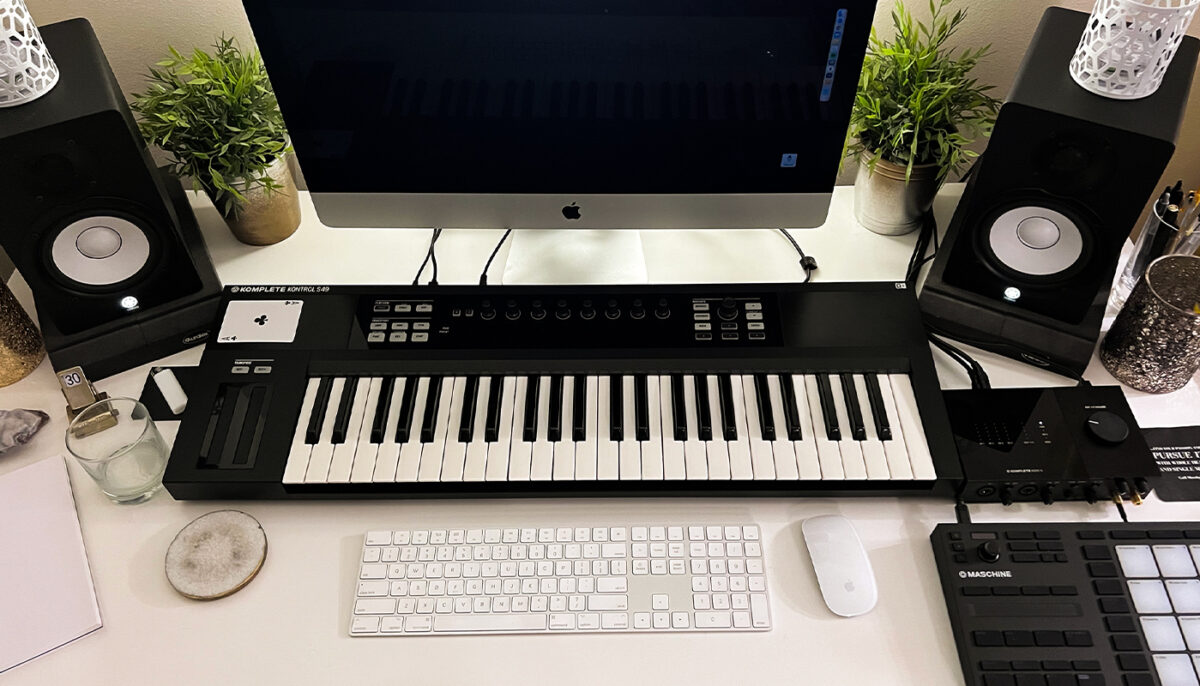
Credit: blog.native-instruments.com
Choosing The Right Room
A home studio can be a musician’s or content creator’s dream come true. However, having the right equipment, software or programs alone cannot guarantee success. The environment in which you produce your content plays an essential role in determining the quality of your output. This is why choosing the right room for your home studio is crucial. In this article, we will explore some factors to consider when selecting a room for your studio.
Size And Space
The first thing to consider when choosing a room for your home studio is the available space. A small room can be challenging to work with. You need adequate space to move around and arrange equipment, especially if you plan to record live instruments. On the other hand, a large room can have acoustic challenges if not appropriately treated. Ideally, you want a room that provides enough space for your studio equipment without leaving you feeling cramped.
A larger room also provides you with more options for sound treatment solutions. Acoustic foam panels, bass traps and diffusers can help to improve sound quality in your home studio. The right balance of absorptive and reflective surfaces can create a natural-sounding space for recording and mixing.
Acoustics
Acoustics is a critical factor to consider when choosing a room for your home studio. The right acoustic treatment can improve the quality of your audio recordings and enhance your mixing and mastering process.
If you are lucky, you may find a room that already has excellent acoustics. However, most rooms require some degree of acoustic treatment to achieve an ideal sound. The first step is to conduct an acoustical analysis of the potential room using a frequency response analyzer. This tool measures the response of the room to sound waves and identifies problem areas that need treatment.
- Acoustic panels absorb sound reflections and improve clarity
- Bass traps reduce low frequency build-up and control the room’s resonances
- Diffusers scatter sound waves and create a more natural-sounding space.
Striking a balance between these acoustic treatments can be difficult. You may want to consult with an acoustic treatment professional to achieve the perfect sound for your home studio.
Choosing the right room for your home studio can be the difference between a mediocre output and a sensational one. The size and space of the room, as well as its acoustics, are essential factors to consider when selecting a room for your studio. Take the time to choose the right room, find the right balance of acoustics treatments, and you’ll be on your way to producing quality content in no time.
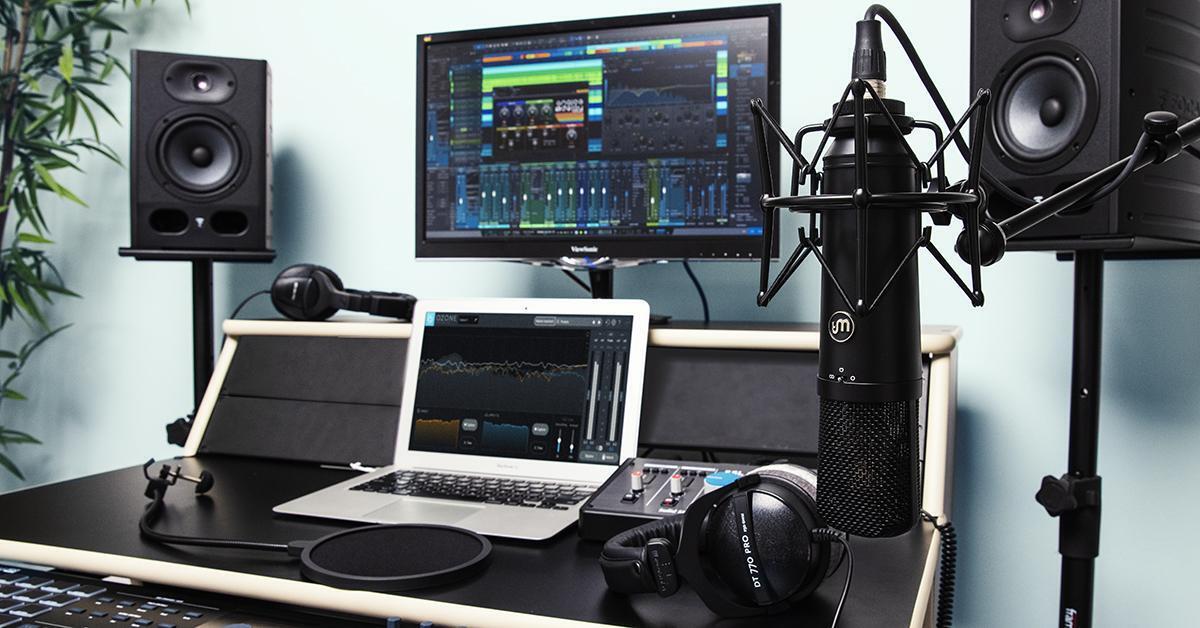
Credit: www.sweetwater.com
Basic Equipment Needed
Setting up a home studio can be a challenging task, but it’s worth the effort if you’re passionate about music production. One of the most crucial aspects of creating a home studio is acquiring the right equipment to ensure you produce high-quality music. Here is a breakdown of the basic equipment you need:
Computer
To create music, you need a computer that has a decent processing speed, RAM, and storage space. A good quality computer is the backbone of your studio as it plays an integral role in running software and processing the audio.
Daw Software
DAW (Digital Audio Workstation) software is used to record, edit, and mix music. It’s the heart of any home studio, and there are numerous software applications available in the market. Some popular DAW software includes GarageBand, Pro Tools, Ableton Live, Logic Pro, and FL Studio.
Microphones
A microphone is an essential tool for recording vocals and instruments. Dynamic microphones are generally cheaper and more durable, making them an ideal option for home studios. On the other hand, condenser microphones are more expensive and sensitive, making them better suited for recording high-quality vocals and acoustic instruments.
Audio Interface
An audio interface is an external device that connects to your computer and enables you to connect microphones, instruments, and studio monitors to your system. It’s crucial to invest in a good quality audio interface that has preamps to ensure that the sound captured by your microphones is of the highest quality.
Studio Monitors
Studio monitors are an essential component of a home studio as they enable you to hear the intricate details of your music. They differ from regular speakers as they produce a flatter frequency response, which means you’ll hear a more accurate representation of your sound. This allows you to make better mixing decisions as you’ll be able to distinguish between different levels and frequencies.
In conclusion, acquiring the right equipment is essential for creating a professional-sounding home studio. By investing in a good quality computer, DAW software, microphones, audio interface, and studio monitors, you can be well on your way to producing high-quality music.
Setting Up Acoustics
Setting up acoustics in your home studio is essential if you want to produce quality sound. Not everyone is aware of the fact that the room they record in can affect the final output of the recording. That’s why it’s crucial to understand different ways to set up acoustics in your home studio. The three essential components to consider while setting up acoustics are diffusion, absorption, and bass traps.
Diffusion
Diffusion is a technique that makes the sound waves spread out more evenly in the room. It breaks up any direct reflections that can cause a slap-back echo. Using diffusers is a great way to disperse the sound waves and create a better listening environment. Diffusers scatter sound waves in different directions, which helps prevent unwanted sound reflections. There are many diffusers available in the market, including quadratic and skyline diffusers.
Absorption
Absorption is an essential component for any home studio setup. An ideal recording space is one with minimal reverberation. Using acoustic panels is the easiest way to achieve this goal. Acoustic panels are designed to absorb sound waves and prevent them from bouncing off walls. These panels come in many shapes and sizes, and they can handle different frequencies. They’re an excellent investment for home studios, and they help set up a professional atmosphere for recording.
Bass Traps
If you’re looking for a way to control low frequencies in your home studio, bass traps are the way to go. The low-frequency sounds that accumulate in corners of the room are known as “room modes.” These room modes can cause a build-up of bass in the recording, which can be difficult to control during mixing. Bass traps can help absorb some of that trapped sound energy, resulting in a more balanced sound. Bass traps come in different shapes, including triangular and cylindrical shapes. They’re a great investment for any home studio set up.
Setting up acoustics might be confusing initially, but by using these essential components, you can achieve a professional sound recording in your home studio. Diffusion, absorption, and bass traps are essential components that should not be overlooked. By using these techniques, you can produce a high-quality sound in your home studio without breaking the bank.
Recording Techniques
Learn essential home studio recording techniques, including microphone placement, soundproofing, post-processing effects and mixing. Successfully implement these techniques to produce high-quality music right from your home setup.
Recording Techniques Recording music at home has never been easier, thanks to the wealth of affordable home studio equipment that is now available. With some basic gear and a few essential recording techniques, you can capture high-quality audio that rivals professional studio recordings. In this post, we’ll focus on recording techniques that will help you achieve fantastic results with your recordings. Mic Placement The placement of your microphone can have a significant impact on the sound that you capture. A few inches can mean the difference between a clear, articulate recording and a muddy, unintelligible mess. Here are a few tips for mic placement: – Place your microphone close to the sound source for a more intimate sound. – For a roomier, more spacious sound, place the microphone farther away. – When recording vocals, place the microphone at the singer’s mouth and slightly above it for a brighter sound. Choosing the Right Mic Choosing the right microphone is crucial for getting the sound you want. Here are some tips for finding the right mic: – Condenser microphones are great for recording vocals and acoustic instruments. – Dynamic microphones are better for recording electric guitars and drums. – Ribbon microphones are great for capturing natural, warm sounds. Recording Vocals When recording vocals, it’s essential to focus on capturing a clean, clear sound. Here are some tips for recording vocals: – Reduce background noise by using a pop filter or a noise gate. – Use a compressor to even out the volume of your vocal track. – Experiment with different microphone placements to find the perfect sound. Recording Instruments Recording instruments can be a bit trickier than recording vocals, but with some patience and practice, you can achieve great results. Here are some tips for recording instruments: – Use a close mic technique to capture the sound of the instrument up close. – Use a room mic to capture the natural sound of the instrument in the space. – Experiment with different microphone placements to find the perfect sound. With these recording techniques, you’ll be well on your way to creating fantastic recordings in your home studio. Remember to experiment, have fun, and never stop learning. Happy recording!
Mixing Essentials
Mixing is the process of combining different audio elements to create a cohesive sound. It involves balancing and blending different tracks while enhancing their individual qualities. In this section, we will discuss some of the essential tools and techniques that you need to know to achieve a professional sound in your home studio.
Eq
EQ or equalization is a crucial tool in mixing that allows you to adjust the balance and frequency content of individual tracks. With EQ, you can boost or cut specific frequencies to shape the sound of the individual tracks and make them fit together better in the overall mix. It’s essential to use EQ tastefully, so you don’t overdo it, and the tracks are still sounding natural.
Compression
Compression is another vital tool in mixing that helps you manage the dynamic range of audio tracks. It reduces the difference between the loudest and softest parts of a track, so all parts of the song are audible and sound well-balanced. By using compression, you can make the lead vocal sit nicely on top of the mix and the drums glue together, creating a cohesive sound.
Reverb
Reverb is all about creating a sense of space or depth in your tracks. It emulates the sound of a room or a hall and adds a sense of dimension to your tracks. Reverb can also be used creatively to create special effects or add emotional impact to specific parts of a song. As with EQ, it’s essential to use reverb tastefully and vary according to the genre of music you’re creating.
Delay
Delay is another popular effect used in mixing that creates an echo or a slapback effect in the track. It can add a sense of depth or playfulness to the sound while simulating the sound of a space or environment. When used correctly, delay can make vocals sound larger than life, or create a dreamy soundscape for an instrumental track.
| Summary of Mixing Essentials | ||
| Tool/Technique | Function | Usage |
|---|---|---|
| EQ | Balance & frequency adjustment of tracks | Tastefully to ensure natural sound |
| Compression | Management of track dynamic range | To create cohesive & well-balanced sound |
| Reverb | Creation of a sense of space or depth | To add dimension & emotional impact |
| Delay | Creation of echo, slapback effects | To add depth, playfulness & dreamy soundscape |
By mastering the four mixing essentials, you can achieve a professional and polished sound that can complete with major label releases. These are just the basics, and as you continue to hone your mixing skills, you can explore more complex techniques and tools and create your unique signature sound.
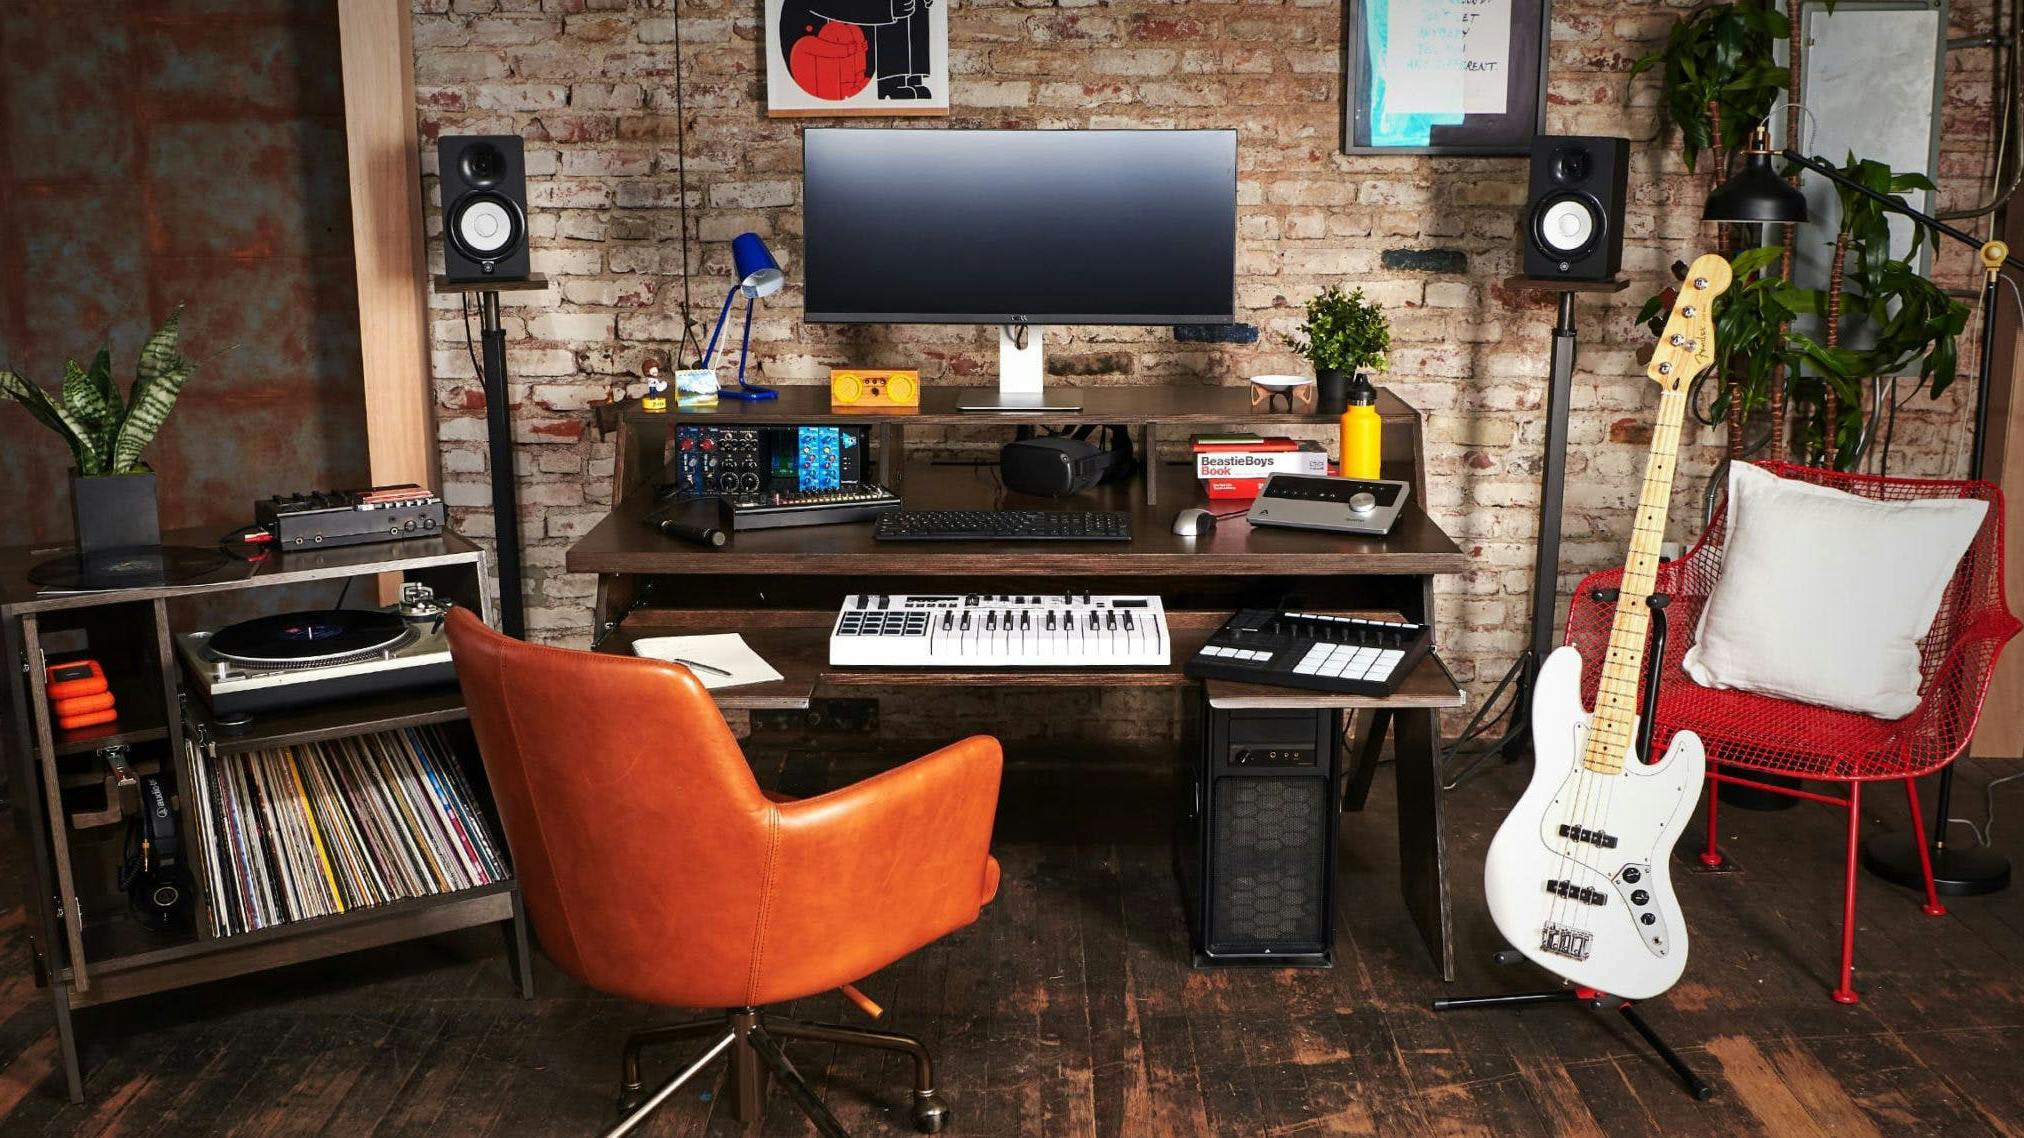
Credit: output.com
Mastering Your Tracks
Your home music studio is nearly complete, and you’ve recorded, mixed, and edited your music tracks. What’s next? It’s time to bring out the best in your music by mastering your tracks. Mastering is a crucial step in the music production process as it ensures that your music tracks have a consistent sound and volume across different platforms. In this post, we’ll discuss what mastering is and the essential tools you’ll need to get started.
What Is Mastering?
Mastering is the final process step to balance and optimize the sonic elements of your tracks. It involves adjusting the levels of various audio elements, equalization (EQ), compression, stereo imaging, and loudness to create a consistent, polished, and ready-for-distribution final product. You will need a good understanding of music production, mixing, and mastering, as well as quality headphones, studio monitors, or both.
Spectral Processing
Spectral processing allows you to visualize and edit audio frequencies. Spectral analyzers and equalizers let you identify and target the specific frequencies that need boosting, cutting or retaining for each instrument or track. EQ software helps in shaping the tone of your tracks. Select a high-quality EQ plugin to do the job right.
Stereo Imaging
Stereo imaging gives your music tracks their sense of space and depth. Panning audio elements in the stereo field influences how they sound. Reverbs, delays, and other effects affect how audio elements are perceived spatially. You can use a stereo imager tool to widen or narrow the stereo image of your music tracks.
Loudness Maximization
Loudness maximization is the process of maximizing the perceived volume of your music tracks while minimizing distortion. It’s essential to make sure that your music tracks sound consistent from the quietest part to the loudest part. A limiter is a tool used in loudness maximization to control the peaks in the music tracks and increase the perceived volume level.
You’ve now got a basic understanding of mastering your tracks essential tools: spectral processing, stereo imaging, and loudness maximization. Incorporating these tools and techniques into your home music studio setup will help you achieve that polished, professional sound that will sound great across all platforms.
Maintaining Your Home Studio
Maintaining your home studio is crucial to ensure a successful recording session. Keep your space clean and organized, invest in quality equipment, and optimize your acoustics with proper sound treatment. Regular maintenance and upkeep will guarantee a professional and productive work environment.
Creating a home studio is an exciting process that requires a lot of planning, effort, and investment in equipment. However, setting up a home studio is not enough; you also need to maintain it regularly to keep it in top condition. In this section, we’ll explore some essential home studio maintenance tips that every music producer should know.
Ear Protection
If you’re producing music, then you’re likely to be spending long hours in your home studio wearing headphones or monitoring speakers. Hearing protection is critical to ensuring that you don’t develop hearing damage from extended exposure to loud sounds. Investing in a high-quality pair of over-ear headphones or earplugs is a smart move. Look for headphones that provide adequate sound isolation, comfortable padding, and a relatively flat frequency response.
Regular Cleaning
Dust and dirt are the enemies of any home studio setup. Regular cleaning of your equipment and the studio environment is essential to ensure that your gear functions correctly, and the sound quality is not compromised. You can use a microfiber cloth or a soft-bristled brush to clean your monitoring speakers, computer screen, and other studio equipment. Avoid using harsh chemicals that will damage your gear and always read the manufacturer’s instructions.
Equipment Upgrades
Upgrading your home studio equipment is an ongoing process, but you need to ensure that you’re making informed decisions that will benefit your music production. Don’t just upgrade for the sake of it. Do your research to find out about the latest equipment trends in the market, as well as read reviews and watch demo videos to help guide your decision-making process. When choosing new gear, always consider your current setup and how the new addition will complement your workflow. In conclusion, maintaining your home studio is essential to ensure productivity, high-quality sound, and your own personal health. By investing in ear protection, regular cleaning, and equipment upgrades, you will maintain a functional and productive home studio for years to come.
Frequently Asked Questions On Home Studio Essentials
What Do You Need In A Home Studio?
A home studio needs a computer, digital audio workstation software, audio interface, microphone, headphones or studio monitors, and cables. The quality of each component should be considered, but you can start with budget-friendly options and upgrade as needed.
What Are The 10 Most Basic Things You Will Need When Starting Your Studio?
To start a studio, you will need 10 basic things. These are: a suitable location, professional equipment, finances, a business plan, legal permits, insurance, reliable software, a website, social media presence, and clients.
What Do You Need To Own A Studio?
To own a studio, you’ll need proper equipment like cameras, lighting, and backdrops. You will also need an ideal location, enough space, and a well-decorated setting to provide a conducive environment for photography or recording. Along with the necessary legal documentation for running a business, such as a license and insurance, you’re ready to successfully run your studio.
How Much Is A Basic Home Studio Setup?
A basic home studio setup can cost between $500 and $2000. It will typically include a computer, an audio interface, a microphone, headphones, and software for recording and editing. The cost may vary based on the quality of equipment and features needed.
Conclusion
To sum up, setting up a home studio could be challenging, but having the essential equipment makes things easier. The key to a successful home recording is to invest in high-quality gear and create an environment that is conducive to recording.
By following the tips mentioned above, you can now start producing professional-quality tracks from the comfort of your home. Keep exploring new techniques, experiment, and most importantly, have fun with your music-making!