The best studio monitors under $500 are the JBL Professional 305P MkII and the PreSonus Eris E5. Both models have received highly positive reviews from audio professionals and enthusiasts for their accurate sound reproduction and affordability.
If you’re a music producer, mastering engineer, or simply looking to upgrade your home studio setup, having a good pair of studio monitors is essential. They allow you to hear and mix audio with precision and accuracy, making sure your music sounds great on all types of speakers and headphones.
But with so many options available in the market, it can be overwhelming and confusing to choose the right one. That’s why we’ve researched and found two excellent studio monitor options that won’t break the bank: the JBL Professional 305P MkII and the PreSonus Eris E5. We’ll take a closer look at their features, pros, and cons to help you make an informed purchase decision.

Credit: m.youtube.com
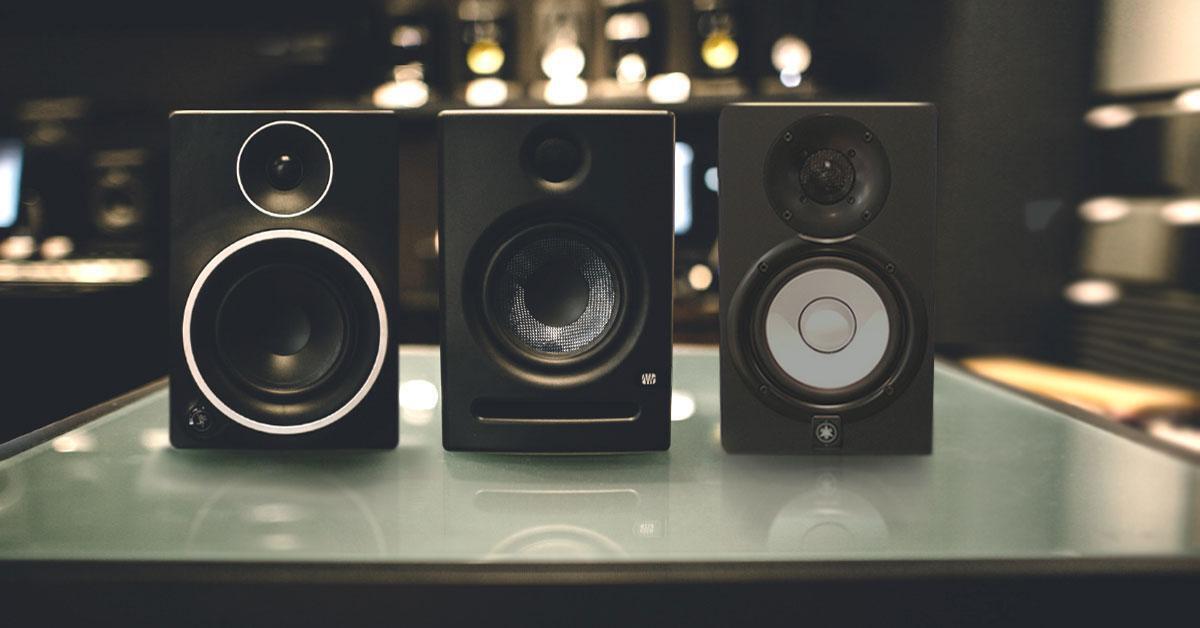
Top 5 Studio Monitors
Experience superior sound quality with these top 5 studio monitors for under $500. Whether you’re recording vocals or mixing tracks, these monitors offer excellent sound accuracy and clarity. Upgrade your home studio today.
Are you searching for the best studio monitor within a budget of $500? If yes, then you’re in the right place. Studio monitors play a crucial role in your music production journey. Whether you’re mixing, mastering, or recording, you need the best monitor available within your budget to get accurate and reliable feedback. In this article, we have compiled a list of the top 5 studio monitors under $500 with their features and benefits.
Monitor #1: Presonus Eris E5
The Presonus Eris E5 is a two-way active studio monitor that delivers an accurate and clean sound. With a 5.25-inch Kevlar low-frequency driver and a 1-inch silk-dome tweeter, the Eris E5 offers frequency response ranging from 53 Hz to 22 kHz. It also has a built-in Acoustic Tuning feature that compensates for low-frequency bass boost and high-frequency treble boost caused by room acoustics. With its compact size and well-balanced sound, the Eris E5 is perfect for small mixing and recording setups.
Monitor #2: Jbl Professional 305p Mkii
The JBL Professional 305P MkII is a renowned studio monitor that has been upgraded with the latest technology. With its 5-inch low-frequency transducer and 1-inch soft-dome high-frequency tweeter, it delivers an accurate and detailed sound. The 305P MkII has a wide sweet spot and an impressive frequency response ranging from 49 Hz to 20 kHz. It also offers flexible connectivity options, including balanced XLR and 1/4-inch inputs, making it a perfect fit for any studio environment.
Monitor #3: Mackie Cr-x Series Cr5bt
The Mackie CR-X Series CR5BT is a versatile studio monitor that provides excellent sound quality and connectivity options. With its 5-inch polypropylene-coated woofer and 0.75-inch ferrofluid-cooled silk-dome tweeter, it delivers crystal clear sound with a frequency response ranging from 60 Hz up to 20 kHz. It also has built-in Bluetooth connectivity, making it easy to stream audio from any compatible device. The CR5BT is perfect for small home studios or for music enthusiasts who appreciate a balanced and accurate sound.
Monitor #4: Krk Rp5 Rokit G4
The KRK RP5 Rokit G4 is a popular studio monitor among music producers worldwide. With its 5-inch Kevlar low-frequency driver and 1-inch Kevlar tweeter, it delivers a clear and precise sound with a frequency response ranging from 43 Hz to 40 kHz. It also has a built-in LCD screen that displays input level, EQ settings, and other vital information. The KRK RP5 Rokit G4 has a well-balanced sound that allows you to hear all the details in your music production.
Monitor #5: M-audio Bx5 D3
The M-Audio BX5 D3 is a compact studio monitor that offers great sound quality at an affordable price. With its 5-inch low-frequency driver and 1-inch natural silk-dome tweeter, it delivers a well-defined sound with a frequency response ranging from 52 Hz to 35 kHz. It also has a rear port that reduces boundary coupling and offers a more extended low-frequency response. The BX5 D3 is perfect for music producers who want a decent monitor within a tight budget. In conclusion, these are the top 5 studio monitors under $500. Whether you’re a professional music producer or just starting, these monitors will provide you with the necessary accuracy and clarity to produce quality music.
Features To Consider
When selecting the best studio monitors under $500, one must consider factors such as frequency response, size and design, power, connectivity, and accuracy. These features impact the overall sound quality and performance of the monitors, making thoughtful consideration crucial to achieving optimal results.
When it comes to producing music or any audio content, having the right set of studio monitors can make all the difference. However, with so many options available in the market, it can be overwhelming to choose the perfect one for your needs. Before making a purchase, it is important to consider the different features that are available to ensure that you get the best value for your money. Here are some important features to consider when choosing the best studio monitors under 500.
Size And Power
The size and power of a studio monitor determine its output capability, with larger monitors often having more power and producing a higher sound pressure level. It is important to consider the size and power of the studio monitor based on your room size and the distance between your listening position and the monitor. A 5-inch monitor might be enough for a small room, whereas a larger 8-inch monitor might be required for a larger space.
Frequency Response
The frequency response of a studio monitor refers to the range of frequencies that the monitor is capable of producing. A wider frequency range means that the monitor can reproduce a broader spectrum of sounds, resulting in more accurate and detailed sound reproduction. A good studio monitor should have a frequency response of at least 50Hz to 20kHz, which covers most of the audible frequency spectrum.
Driver Configuration
The driver configuration of a studio monitor refers to the number and type of drivers used to produce sound. A 2-way monitor uses a woofer for low and mid frequencies and a tweeter for high frequencies, while a 3-way monitor also includes a mid-range driver. A 3-way monitor provides more accurate and detailed sound reproduction, but it is more expensive than a 2-way monitor.
Connectivity Options
The connectivity options of a studio monitor determine the different ways in which it can be connected to your audio interface or mixer. Most studio monitors come with balanced XLR and TRS inputs, which provide a cleaner signal and reduce interference. Some monitors also include unbalanced RCA inputs, which are suitable for connecting consumer-level devices such as CD players and gaming consoles. In conclusion, choosing the right studio monitor requires careful consideration of its features to ensure that it meets your specific requirements. By considering the size and power, frequency response, driver configuration, and connectivity options of a studio monitor, you can make an informed decision and enhance your listening experience.
Budget-friendly Alternatives
Looking for budget-friendly alternatives for studio monitors? Check out our list of the best studio monitors under $500 for excellent sound quality without breaking the bank. These options are perfect for home studios and content creation.
Budget-Friendly Alternatives When it comes to studio monitors, you can easily spend a small fortune on a pair. However, if you’re just starting out or on a tight budget, there are plenty of affordable options available. Here are three monitors that won’t break the bank:
Monitor #6: Model And Description
JBL Professional 305P MkII is a compact two-way nearfield studio monitor that delivers high-quality sound without breaking the bank. With a 5″ low-frequency transducer and 1″ soft-dome high-frequency transducer, this monitor offers a frequency response of 49Hz – 20kHz. The JBL 305P MkII also features JBL’s patented Image Control Waveguide technology, which ensures a wide sweet spot and accurate imaging.
Monitor #7: Model And Description
Presonus Eris E5 XT may be just what you need. This monitor features a 5.25″ woven composite low-frequency driver and a 1″ silk-dome tweeter, which deliver a frequency response of 48Hz – 20kHz. The Eris E5 XT also includes acoustic tuning controls that allow you to adjust the monitor’s response to your room.
Monitor #8: Model And Description
Edifier R1850DB is an affordable option that’s ideal for home studios and desktop setups. This monitor features a 4″ bass driver and a 13mm silk dome tweeter, which deliver a frequency response of 60Hz – 20kHz. The Edifier R1850DB also includes a built-in amplifier, Bluetooth connectivity, and a remote control, making it a versatile option for music producers on a budget. No matter which monitor you choose, these budget-friendly options offer high-quality sound and are a great way to get started with music production.
How To Choose The Right Studio Monitors
If you’re an audio engineer or producer, you know that studio monitors are an essential tool in your kit. They allow you to accurately hear the sounds you’re working on, which is crucial when mixing or mastering music. However, with so many options available on the market, it can be challenging to choose the right one, especially if you’re on a budget. In this article, we’ll explore how to choose the right studio monitors under 500 dollars.
Define Your Budget
The first thing you need to do is to define your budget. Studio monitors can range from a few hundred to several thousand dollars. By setting a budget, you’ll narrow down your search options and can focus on models that fit your price point. It’s essential to keep in mind that more expensive doesn’t always mean better, and you can find excellent options under 500 dollars.
Consider Your Space
The space you’ll be working in can significantly impact your choice of studio monitors. If you’re working in a small room, you’ll need monitors that are efficient and compact. On the other hand, if you have a larger studio space, you may want to consider larger monitors with more power. Additionally, it’s essential to pay attention to the acoustics of your space as certain monitors may be more suited to particular room types.
Determine Your Needs
The type of music you’ll be working on and what you’ll be using the speakers for should also be considered when choosing studio monitors. For example, if you’re mixing music with a lot of bass, you’ll want monitors with good bass reproduction. Consider the genre you’ll be working with, the instruments used, and other factors that could impact your choice of studio monitors.
Research And Compare
Once you’ve narrowed down what you’re looking for, it’s time to research and compare different models. Look for reviews and feedback from other audio engineers or producers who have used the monitors you’re interested in. Compare specifications such as frequency range, wattage, and driver size of different models. Take your time, and don’t rush into buying the first studio monitors that pique your interest.
In conclusion, choosing the right studio monitors is essential for achieving accurate and high-quality sound. By defining your budget, considering your space and needs, and researching and comparing different models, you’ll be able to choose the best studio monitors under 500 dollars that will suit your needs and budget. Take your time and carefully weigh your options to make an informed decision.
Setting Up Your Studio Monitors
Great quality sound is important for any music producer, artist, or audio engineer. The sound quality depends mostly on the type of studio monitors and how they are set up. This section will focus on how to properly set up your studio monitors to ensure the best sound quality possible.
Placement
The placement of your studio monitors is crucial to achieve the best sound quality possible. Position your monitors at the same distance from the listener creating an equilateral triangle between your chair and the two monitors. Keep the monitors at an angle of approximately 30 degrees facing your ears. Ensure that the monitors are positioned at the same height as your ears or slightly tilted towards your ears.
Placing monitors against a wall or in a corner will create a bass build-up. Therefore, it’s recommended to pull the monitors away from the walls to reduce bass build-up and maintain proper stereo imaging.
Calibration
The next step to setting up your studio monitors is calibration. This means adjusting the volume levels and frequency response of the monitors. The ideal volume level for studio monitors is between 85 dB to 100 dB, but monitors should not exceed their maximum SPL at the listening position. This is important to protect your ears from hearing damage.
You can also calibrate your monitors using a software frequency-response measurement tool that allows you to measure the frequency response of your monitors and room. This calibration helps correct any anomalies in the frequency response caused by the room’s acoustic properties.
Room Treatment
Room treatment is crucial to achieve accurate sound reproduction from your studio monitors. Acoustic foam panels or bass traps can be added to the room to reduce unwanted room reflections, echoes, and resonance. The panels reduce the first reflections from walls, ceilings, and floors, which improves clarity and sound quality. It’s recommended to add absorptive panels to the first reflection points on the walls, ceiling and floor.
Another solution is to use digital room correction (DRC) to correct the frequency response caused by the room’s acoustics. DRC captures the frequency response of the room in real-time and corrects it to provide optimal sound quality.
Conclusion
Proper placement, calibration, and room treatment are key factors to achieve the best sound possible from your studio monitors. With these tips, you can get the most out of your monitors without having to spend a fortune.

Credit: plus.pointblankmusicschool.com
Credit: www.sweetwater.com
Frequently Asked Questions Of Best Studio Monitors Under 500
How Much Should I Spend On Studio Monitors?
The amount you should spend on studio monitors depends on your needs, budget and quality expectations. Decent budget monitors can cost around $200, while high-end models can go for $5,000 or more. It’s recommended to invest in quality monitors as they impact the overall sound quality.
Why Is Genelec So Popular?
Genelec is popular because of its superior sound quality, reliable performance, and innovative design in the professional audio industry. The company’s commitment to sustainability and green practices has also contributed to its popularity among environmentally conscious consumers.
Is It Worth Getting Studio Monitors?
Yes, it is worth getting studio monitors if you want to produce high-quality audio recordings. Studio monitors provide accurate and transparent sound which is essential for mixing and mastering audio tracks. They allow you to hear every detail of your recordings and make better decisions in the mixing process, resulting in better overall sound quality.
What Size Monitor Is Best For Home Studio?
The ideal monitor size for home studios is between 22 and 27 inches. This size range offers a perfect balance between screen size and desk space usage. A smaller monitor may compromise the visual details while a larger monitor may be too overpowering for smaller workspaces.
Conclusion
All in all, finding the best studio monitor under 500 dollars can be a challenge, but it’s definitely worth the effort. With the right pair of monitors, you’ll be able to hear your mixes more clearly, resulting in better songs and more satisfied clients.
Whether you’re a professional audio engineer or an aspiring artist, investing in a good set of monitors is never a bad idea. So, take a look at our top picks and choose the one that suits your needs the best – you won’t be disappointed!