Autotune Pro Tutorial is an informative guide on how to use Autotune Pro for pitch correction and vocal effects. Autotune Pro is a powerful tool that can be used to achieve pitch-perfect vocals, create creative effects, and tune instruments.
In this tutorial, you will learn how to use Autotune Pro to create polished vocals with a natural sound and add creative effects to your tracks. Whether you are a professional producer or a beginner looking to improve your vocal recordings, this comprehensive tutorial will provide you with the knowledge you need to get the most out of Autotune Pro.
Setting Up Autotune Pro
Learn how to set up Autotune Pro in this tutorial. Follow step-by-step instructions to get started with the popular pitch correction software and achieve professional-sounding results for your recordings.
Autotune Pro, an advanced pitch correction software, helps you polish your vocal tracks to make them sound professional. In this tutorial, we’ll walk you through the process of setting up Autotune Pro to take your vocal production to the next level. We’ll discuss everything from installation and authorization, to setting input and output sources.
Installation And Authorization
Before we can begin, you must download and install the latest version of Autotune Pro. Once the software is installed, it must be authorized. You can either authorize it online by following the step-by-step guide or you can use the ilok smartkey USB dongle.
Setting Input And Output Sources
After successfully downloading and authorizing Autotune Pro, it’s time to set up your audio input and output source. Autotune Pro supports a variety of input and output types, such as microphones, headphones, and speakers. Ensure that you have selected the correct input and output source settings by following these simple steps:
- Open the Autotune Pro plugin in your DAW
- Select the settings tab
- Select the audio tab
- Select your preferred input and output source from the available options
It’s important to ensure that your input and output sources are working properly before moving forward with using Autotune Pro. Following these steps will ensure that your settings are properly configured, and you’re ready to begin using Autotune Pro effectively.
Conclusion
Setting up Autotune Pro can seem daunting at first, but with the proper guidance, it can become straightforward. By following the step-by-step guide we have provided, you can set up your Autotune Pro software effectively. So, what are you waiting for? Get started today and produce some amazing vocal tracks with Autotune Pro!
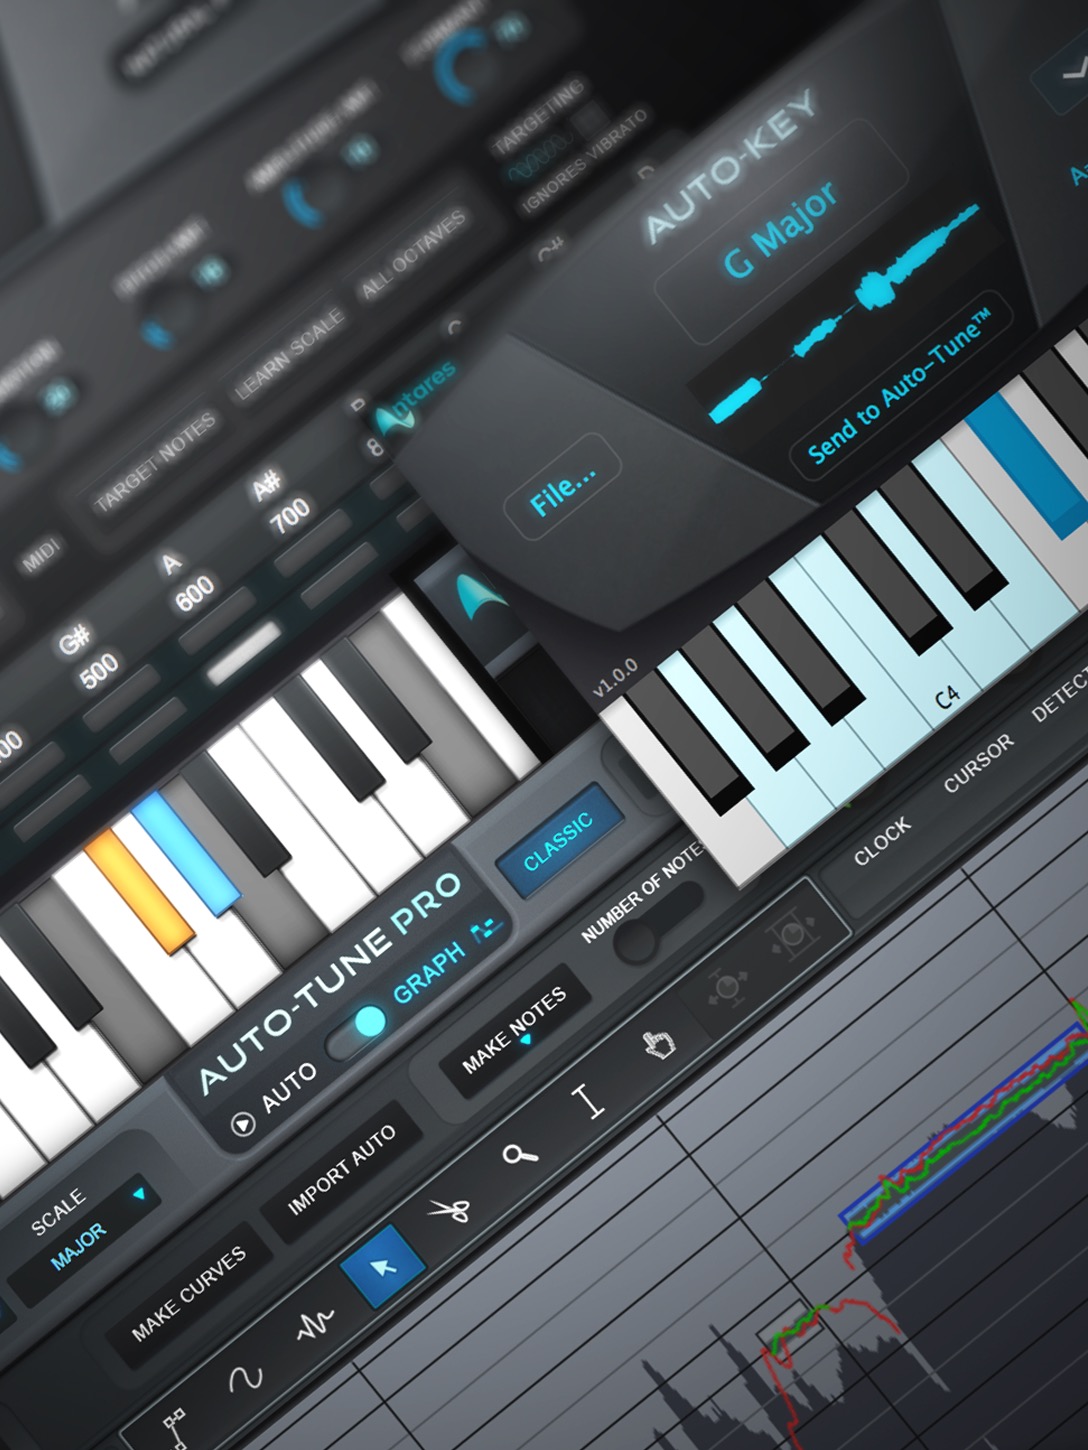
The Interface
If you’re familiar with music production or are an artist yourself, you’ve likely heard of Autotune Pro. This music production software is an industry favorite that has brought about a new way of recording and producing music. However, whether you’re new to the software or have some experience with it, navigating its interface can be challenging. In this Autotune Pro tutorial, we’ll look at an overview of the Autotune Pro interface, how to navigate the interface, and customizing the interface.
Overview Of Autotune Pro Interface
The Autotune Pro interface is carefully crafted to provide the best user experience for music production. It features an ergonomic, resizable, and easy-to-use interface that offers maximum usability and functionality. Additionally, the interface incorporates an efficient display of the settings and features of Autotune Pro without compromising on the screen’s real estate, ensuring that all the critical features are visible and easily accessible.
Navigating The Interface
The interface of Autotune Pro is well-organized with different sections and controls grouped according to their functions. The software features an easy-to-navigate menu and toolbar system, and everything is accessible via tabs. Once you become familiar with the interface’s layout, you can save time navigating through it, thereby allowing you to focus on your music. Moreover, Autotune Pro features a search bar function, easing the search for specific features and settings within the software.
Customizing The Interface
Customizing the Autotune Pro interface can significantly improve your music production workflow, allowing you to work more efficiently and effectively. The software’s interface is flexible, meaning you can customize it according to your preferences and needs. Autotune Pro lets users choose between Light and Dark modes or customize the software’s colors to their liking. Additionally, you can resize the interface according to your screen’s resolution, making everything clearer, crisper, and easier to spot.
In conclusion, the interface of Autotune Pro is incredibly versatile, well-organized, and intuitive, and once you familiarize yourself with it, its tools and features become more accessible. The software’s clear and intuitive interface design, combined with its range of powerful features, makes it an excellent choice for anyone who wants to take their music production to the next level.
Working With Tracks
In this Autotune Pro tutorial, we explore the benefits of using tracks within the software. Learn how to effectively organize your vocals and instruments, and streamline your recording process for optimal results.
Autotune Pro is a powerful tool for vocal processing and pitch correction. If you want to make the most out of it, it’s essential to understand how to work with tracks. In this tutorial, we’ll cover three crucial elements of working with tracks in Autotune Pro.
Importing Audio Tracks
Before you start tuning your vocals, you need to import the audio tracks you want to process. Here’s how to do it:
- Click on the “File” menu, then “New Session” to start a new project.
- Click on the “File” menu, then “Import Audio.”
- Select the audio file you want to import and click “Open.”
- Your audio file will now appear as a track in the main window.
Working With Midi Tracks
In addition to importing audio tracks, Autotune Pro also allows you to work with MIDI tracks. Here’s how to do it:
- Click on the “Track” menu, then “New Track.”
- Select “MIDI Track” from the dropdown menu.
- Choose the instrument you want to use and click “Create.”
- You can now start recording your MIDI track or add notes manually.
Creating New Tracks
If you want to add more tracks to your project, here’s how to do it:
- Click on the “Track” menu, then “New Track.”
- Select “Audio Track” or “Instrument Track” from the dropdown menu, depending on what you want to add.
- Choose the settings you want to use and click “Create.”
- The new track will now appear in your project, and you can start recording or importing audio.
With these tips, you should have a good foundation for working with tracks in Autotune Pro. Experiment with different settings and techniques to discover what works best for your project.
Credit: www.groove3.com
Basic Autotune Tools
Learn how to use basic autotune tools in this Autotune Pro tutorial. With step-by-step guidance, you can easily master the fundamentals of autotuning and enhance your vocal recordings.
Autotune Pro is a powerful tool in music production that helps to correct pitch and improve the overall quality of a vocal recording. For beginners, the software may seem complicated, but understanding the basic tools of pitch correction, formant correction, and vibrato control can make the process easier. In this Autotune Pro tutorial, we will look at each of these tools in detail.
Pitch Correction
Pitch correction is the most commonly used tool in Autotune Pro. It enables you to correct pitch errors and adjust the pitch of the vocal recording to match the desired key of the song. With Autotune Pro, you can correct pitch errors manually by drawing a pitch curve or let the software do it automatically. Autotune Pro can also correct pitch errors in real-time during live performances.
Formant Correction
The formant correction tool in Autotune Pro enables you to adjust the vocal timbre and change the sound of a vocal recording. It allows you to alter the characteristic of the voice while keeping the pitch intact. With formant correction, you can make the voice sound deeper, brighter, or more natural. Formant correction is especially useful when working with instruments that are difficult to play in tune, such as the human voice.
Vibrato Control
Vibrato control is a tool that enables you to adjust the vibrato effect in a vocal recording. Vibrato is the rapid variation in pitch that gives a voice its natural sound. Autotune Pro’s vibrato control tool allows you to adjust the depth, speed, and amount of vibrato in a recording. With this tool, you can create a more natural sound or even remove vibrato altogether. To conclude, understanding the basic Autotune Pro tools can make all the difference when it comes to producing high-quality vocal recordings. With pitch correction, formant correction, and vibrato control in your toolkit, you can take your music production to the next level.
Advanced Tools And Techniques
Discover new ways to enhance your vocal recordings with the Autotune Pro tutorial. From pitch correction to time manipulation, the advanced tools and techniques provided will help take your music production to the next level.
Autotune Pro is a popular music production tool that allows users to correct and enhance vocal performances. While the software is relatively straightforward to use, there are plenty of advanced tools and techniques you can utilize to take your recordings to the next level. In this Autotune Pro tutorial, we’ll cover some of the advanced features of the software, including scale editing, note editing, and the various advanced settings available.
Scale Editing
Scale editing in Autotune Pro allows users to adjust the key and scale of a recording. This can be incredibly useful when working with a vocal that is not recorded in the correct key. Here’s how to use scale editing in Autotune Pro:
- Open the pitch and time correction settings in Autotune Pro.
- Select the scale of the original recording.
- Adjust the key and scale as needed.
- Apply the changes to the recording.
Note Editing
Note editing in Autotune Pro is a powerful tool that allows users to correct individual notes within a recording. This can be useful when a vocal performance is slightly off pitch in certain areas. Here’s how to use note editing in Autotune Pro:
- Open the pitch and time correction settings in Autotune Pro.
- Select the note you want to edit.
- Adjust the pitch and duration of the note as needed.
- Apply the changes to the recording.
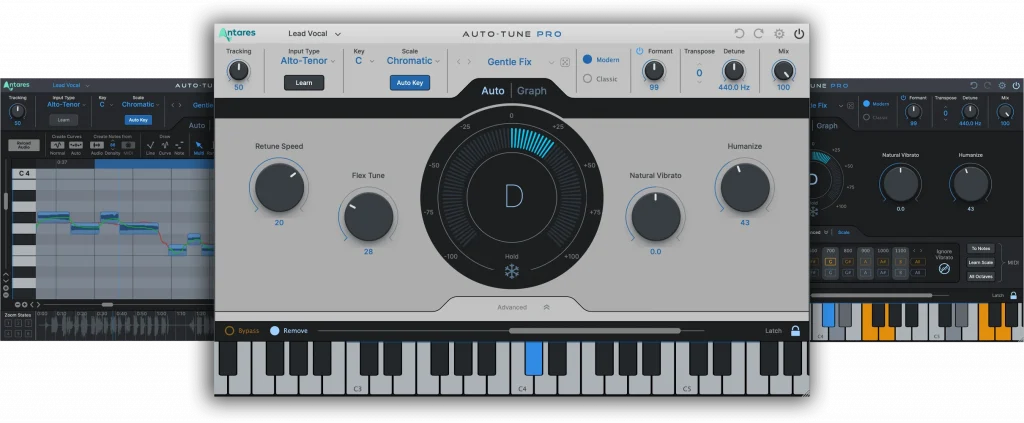
Advanced Settings
Autotune Pro also includes a range of advanced settings that allow users to fine-tune their vocal recordings. Here are some of the advanced settings available in Autotune Pro:
- Retune Speed: This setting controls how quickly the software corrects pitch errors.
- Humanize: This setting adds subtle variations to the pitch correction to create a more natural sound.
- Formant: This setting adjusts the vocal’s formants to create a more natural sound.
- Flex Tune: This setting controls the level of pitch correction applied to sustained notes.
By utilizing these advanced tools and techniques, you can take your Autotune Pro recordings to the next level. Whether you’re a professional producer or a beginner just starting out, these features are sure to come in handy.
Credit: www.antarestech.com
Mixing And Mastering With Autotune Pro
Learn how to perfect your songs with Autotune Pro through this step-by-step tutorial on mixing and mastering. Adjust pitch, speed, and formant to achieve a polished and professional sound.
Autotune Pro is a go-to plugin for many music producers and artists who want to achieve professional-sounding vocals. While it’s commonly known for pitch correction, it’s much more than that. Autotune Pro offers powerful features for both mixing and mastering, which can be used to enhance the overall sound quality of your music. In this Autotune Pro tutorial, we’ll be exploring the different ways you can use it in your mix and mastering process. 
Autotune In The Mix
One of the most common uses of Autotune Pro in mixing is to correct pitch issues in a vocal track. However, this plugin can also be used creatively to achieve unique vocal effects. For example, you can use the Humanize function to add a natural feel to robotic vocal performances. Additionally, you can experiment with the Flex-Tune feature to create subtle pitch shifts that can make the vocals sound more expressive. Here are some tips to consider when using Autotune Pro in your mix:
- Use Autotune Pro as the last plugin in your chain to ensure it doesn’t affect the processing of other plugins.
- Find the right key and scale settings that match the vocals and adjust the retune speed to suit the song’s genre and style.
- Use the sidechain input to trigger the plugin only when the vocal is singing.
- Use subtle adjustments if pitch correction is required, as over-processing can make the vocals sound unnatural.
Autotune In Mastering
When it comes to mastering, the aim is to achieve a balanced and cohesive sound across all tracks. Autotune Pro can be used in mastering to correct pitch issues in the vocals and any background harmonies that were missed during mixing. This plugin can also be used creatively to add subtle pitch modulations that can make the vocals more interesting to listen to. Here are some tips to consider when using Autotune Pro in mastering:
- Use Autotune Pro only when essential for the song and genre. Not all songs require pitch correction in the mastering stage.
- Use the retune speed feature wisely to avoid over-processing the vocals.
- Use the key, scale, and reference frequency settings to make sure the vocals are in tune with the song’s key and scale.
- Use the output gain feature to control the loudness of the vocals without affecting the overall loudness of the mix.
Autotune Pro is a versatile plugin that can be used creatively in both mixing and mastering. Use it wisely to achieve a professional sound, but don’t overdo it. The goal is to enhance the vocals, not to make them sound unnatural. Experiment with the different features and settings to find what works best for your music and style.
Tips And Tricks
Tips and Tricks to Get the Most Out of Autotune Pro Tutorial
If you are a music producer, singer, or songwriter, you may be looking to enhance your music productions with Autotune Pro. Regardless of your music style, Autotune technology can help you improve your vocals and overall sound quality.
Using Autotune For Creative Effects
Autotune is not just about pitch correction; it can also help you to create creative effects. One way to use Autotune creatively is to experiment with different settings to achieve a more auto-tuned or robotic effect. For instance, you can use the Retune Speed knob to adjust how fast or slow the pitch correction moves from one pitch to another.
You can also play around with the Humanize function, which can add some natural imperfections to your vocals in real-time. This feature can make your vocals sound more natural and less robotic.
Improving Workflow With Shortcuts
Learning keyboard shortcuts is a great way to improve your workflow and increase your productivity when using Autotune Pro. Here are some of the most useful keyboard shortcuts:
| Keyboard Shortcut | Description |
|---|---|
| Cmd + Z (Mac) or Ctrl + Z (PC) | Undo last action |
| Cmd + Shift + Z (Mac) or Ctrl + Shift + Z (PC) | Redo last undone action |
| Cmd + C (Mac) or Ctrl + C (PC) | Copy selected audio or settings |
| Cmd + V (Mac) or Ctrl + V (PC) | Paste selected audio or settings |
| Cmd + D (Mac) or Ctrl + D (PC) | Duplicate the selected audio region |
Using these shortcuts can save you a significant amount of time and boost your productivity.
By utilizing the creative capabilities of Autotune and mastering the most useful keyboard shortcuts, you can take your music production to the next level.

Credit: www.youtube.com
Frequently Asked Questions For Autotune Pro Tutorial
What Does Auto-tune Pro Do?
Auto-Tune Pro is a pitch correction software that corrects off-key notes in vocal tracks. It has advanced features like automatic scale detection, formant shifting, and time correction. Auto-Tune Pro is used by music producers, engineers, and artists to enhance the quality of their recordings and achieve a polished sound.
How Do I Use Auto-tune Pro In Pro Tools?
To use Auto-Tune Pro in Pro Tools, first, open the session and insert the plugin on the desired track. Then, choose the appropriate settings for your vocal, instrument, or MIDI track. You can also adjust the retune speed, formant, and vibrato parameters based on your preference.
Finally, playback the track and adjust as necessary until you achieve the desired effect.
How Do I Activate Auto-tune Pro?
To activate Auto-Tune Pro, you need to follow these steps: 1. Download Auto-Tune Pro and install it on your computer. 2. Launch the application and click on the Activate button. 3. Enter your iLok User ID and the Activation Code provided, then click Activate.
4. Restart the Auto-Tune Pro application and start using it with all its features.
Is Antares Autotune Pro Worth It?
Yes, Antares autotune Pro is worth it for musicians and producers who want to achieve high-quality vocal pitch correction and sound design. It offers advanced features like Auto-Key detection, Flex-Tune technology, and real-time MIDI control. Additionally, it has a user-friendly interface and a wide range of presets available.
Conclusion
By now, you have learned a lot about Autotune Pro and how it can enhance your music production process. With the help of this tutorial, you now have the tools to adjust the pitch of your vocals and ensure that your music is up to par.
Keep in mind that Autotune Pro is just one tool in your arsenal and can be combined with other techniques to achieve the desired sound. As you continue to experiment and refine your approach, don’t forget to practice and always be open to discovering new ways to improve your music.
Happy creating!
One reply on “Autotune Pro Tutorial”
mersi