Acustica Audio Ruby Tutorial covers the basics of using Acustica Audio’s plugin, Ruby, for audio mixing. In this tutorial, you will learn how to use various features and functions of Ruby to produce high-quality audio mixes.
Acustica Audio’s Ruby is a game-changer for audio mixing. The plugin offers a unique approach that emulates the vintage analog gear used by sound engineers. This tutorial will help you understand the fundamentals of Ruby and how to incorporate it into your audio mixing workflow.
You will learn about the various controls, parameters, and features that Ruby has to offer. With this knowledge, you can take your audio mixing skills to the next level and produce professional-quality mixes that sound great. So, let’s dive in and discover the world of Acustica Audio’s Ruby!

Credit: m.youtube.com
Installation And Setup
Acustica Audio Ruby is a powerful plugin that requires proper installation and setup before use. This tutorial will guide you through the process, ensuring that you get the most out of this software.
Acustica Audio Ruby is a powerful plugin that models the audio signal path of tube-based devices. It offers a variety of features that can enhance the mixing and mastering process. In this section, we will guide you through the installation and setup process of Acustica Audio Ruby.
Downloading The Software
Before we dive into the installation process, you need to download the software. Acustica Audio Ruby is available on the official website. You can purchase it or try the demo version. The demo version comes with some limitations but allows you to test the plugin’s functionality before buying it.
Installation Process
Installing Acustica Audio Ruby is a straightforward process. Here are the steps you need to follow:
- Double-click on the installer file you downloaded.
- Follow the instructions on the screen.
- Launch your DAW and rescan for plugins.
- Insert Acustica Audio Ruby on an audio track.
Mandatory System Requirements
To ensure Acustica Audio Ruby functions correctly, you need to fulfill the following system requirements:
- Operating Systems: Windows 7 or higher, Mac OS 10.10 or higher
- CPU: Intel Core 2 Duo 2GHz, AMD Athlon 64 or equivalent
- RAM: 4GB or higher
- Disk Space: 1GB or higher
- Plugins Format: VST, AAX, AU
Make sure your system meets these requirements before purchasing or installing Acustica Audio Ruby. In conclusion, the installation and setup process of the Acustica Audio Ruby plugin is quite simple. Download the software, follow the installation instructions, and ensure your system meets the mandatory requirements. With Acustica Audio Ruby, you can transform your mixes and take your sound to the next level.

Credit: mixandmastermysong.com
User Interface
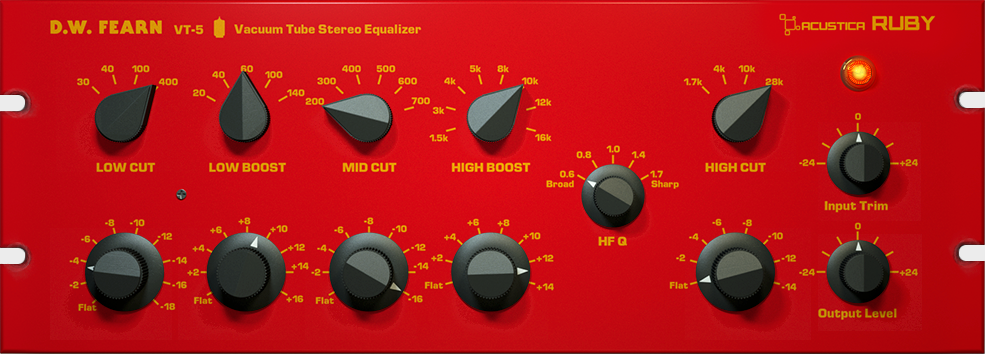
Acustica Audio Ruby Tutorial showcases a sleek user interface that makes it intuitive for beginners to navigate and operate the software. The UI has well-labeled controls, high-resolution graphics, and customizable skins for a personalized user experience.
Acustica Audio has earned a great reputation among the users with its innovative and intuitive audio plugins. They have once again come up with an amazing creation, the Acustica Audio Ruby plugin. Ruby is a highly versatile and powerful plugin that can produce quality sound and has a user interface that is not difficult to navigate. In this blog post, we will dive deep into the user interface of the Acustica Audio Ruby Plugin. Let us explore the essential details that we need to know about the UI of Ruby.
Overview Of The Workspace
The Acustica Audio Ruby plugin interface is designed to provide a simple and convenient user experience. It has a streamlined interface with a dark color scheme that is easy on the eyes. The overall layout of the interface is simple, straightforward, and customizable. The plugin features a centrally located graphical display area that shows the current active preset. This section contains several sections that are instrumental in guiding the user.
Explanation Of Each Section
The user interface of the Ruby plugin offers logical control sections such as Channel Strip, Harmonics, Compression, EQ, Stereo Controls, Post FX, and Limit. These sections are easy to access, and each section has its unique settings, knobs, and parameters. The Channel Strip section, for instance, contains every knob and parameter necessary to shape the sound of a single channel that is to be processed by the plugin. The Harmonics section, on the other hand, offers various models of distortion and saturation. The Compression section provides various types of dynamic control. The EQ section offers flexible equalization, and stereo controls is useful in dealing with the stereo image of the audio. The Post FX category includes a flexible delay and a high-quality reverb. The Limit section, as the name implies, provides full control over the limiter part of the plugin.
Customizing The Interface
The user interface of Acustica Audio Ruby plugin is customizable. Every user has different preferences; this makes the customizable UI feature a significant advantage. Users can choose the appearance of the plugin by selecting from the available options, like changing the color combination or creating custom skin. Moreover, the plugin can be resized as per the user’s liking, and it is possible to disable all graphical elements of the plugin, and use only numerical parameters available in each section. In conclusion, the user interface of the Acustica Audio Ruby plugin is designed to provide a seamless user experience. It is intuitive, customizable, and user-friendly. The plugin features essential control sections that can be accessed easily, and each section has its adjustable parameters. With Ruby’s user interface, users can have a convenient, accessible, and enjoyable audio plugin experience.
Using Acustica Audio Ruby
Acustica Audio Ruby is a virtual plugin that provides a user-friendly interface for manipulating audio signals. It features a professional-grade EQ and compression controls that can be used to enhance the quality of your audio files. Using this plugin can be a bit overwhelming if you are a beginner, but with a little bit of practice, it can become your go-to tool for audio processing.
Loading The Virtual Plugin
Before you can start using the Acustica Audio Ruby plugin, you need to load it into your digital audio workstation (DAW). This can be done by following these steps:
- Open your DAW and create a new audio track.
- Load the Acustica Audio Ruby plugin on the track.
- Load the audio file that you want to process on the track.
Signal Flow And Routing
Understanding the signal flow and routing of the Acustica Audio Ruby plugin is essential if you want to achieve the desired results. The signal flow of the plugin is as follows:
| Section | Function |
|---|---|
| Input | Controls the volume level of the incoming audio signal |
| EQ | Adjusts the frequency response of the incoming audio signal |
| Compression | Controls the dynamic range of the incoming audio signal |
| Output | Controls the volume level of the output signal |
You can adjust the signal routing and order of the sections by dragging and dropping them in the desired order.
Adjusting Input And Output Levels
The input and output sections of the Acustica Audio Ruby plugin allow you to control the volume levels of the incoming and outgoing audio signals. You can use these controls to avoid clipping or distortion in your audio files. The input level control should be set so that the loudest part of the audio signal does not exceed 0 dBFS. The output level control can be adjusted to match the level of the processed audio with the level of the original audio file.
Manipulating The Eq And Compression Controls
The EQ and compression controls are the most important features of the Acustica Audio Ruby plugin. The EQ section allows you to adjust the frequency response of the audio signal by boosting or cutting specific frequencies. The compression section allows you to control the dynamic range of the audio signal by reducing the volume of the loudest parts of the signal.
- Adjust the EQ controls by selecting a frequency band and adjusting the gain (dB) and width (Q) of the band.
- Adjust the compression controls by setting the threshold, ratio, attack, release and makeup gain.
Tips And Tricks
When it comes to using the Acustica Audio Ruby plugin, knowing a few tips and tricks can take your mixing game to the next level. In this section, we’ll dive into three specific techniques you can use to get the most out of this plugin: applying different presets, combining multiple instances, and using sidechain techniques.
Applying Different Presets
If you’re new to the Acustica Audio Ruby plugin, the sheer number of presets available can be overwhelming. However, taking the time to explore and experiment with different presets can help you achieve the perfect sound for your mix. Some useful tips to keep in mind when applying different presets include:
- Look for presets that are specifically designed for the type of sound you’re trying to achieve.
- Pay attention to the settings and adjustments made in the presets – you can use these as a starting point for your own tweaks.
- Don’t be afraid to mix and match presets to create a customized effect that suits your needs.
Combining Multiple Instances Of The Plugin
One of the benefits of the Acustica Audio Ruby plugin is that you can use multiple instances of it within the same mix. This gives you greater flexibility when it comes to shaping the sound and achieving a specific tonal balance. Here are some things to keep in mind when combining multiple instances:
- Experiment with different combinations of instances. For example, you might use one instance for a bass guitar track and another for a lead vocal track.
- Adjust the settings for each instance to create a cohesive sound across the mix.
- Consider using automation to create subtle changes in the level or frequency response of different instances at different points in the track.
Using Sidechain Techniques
Finally, when working with the Acustica Audio Ruby plugin, it’s worth exploring the use of sidechain techniques to create a more dynamic and interesting mix. Some tips to keep in mind when using sidechain include:
| Tip | Explanation |
|---|---|
| Use a compressor on a synth track to create a pumping effect that follows the rhythm of the kick drum. | This can create a sense of energy and movement in the mix. |
| Use sidechain compression on a bass guitar track to make it more prominent during specific parts of the song. | For example, you might use sidechain compression to make the bass more noticeable during the chorus. |
| Try using sidechain EQ to create space for a lead vocal in the mix. | This technique involves using EQ to duck the volume of other tracks when the vocal is audible. |
Advanced Features
Learn how to get the most out of the advanced features of Acustica Audio’s Ruby plugin with our comprehensive tutorial. Discover new ways to enhance your music production and improve your audio mixing skills today.
Acustica Audio Ruby Tutorial is a powerful tool for audio mixing and mastering. With its advanced features, users can achieve high-quality sound production. In this post, we will explore the advanced features of Acustica Audio Ruby Tutorial under three main headings: Sampling rate conversion, Offline rendering, and Using external sidechain sources.
Sampling Rate Conversion
Ruby has a feature that allows users to convert the sampling rate of audio files. This feature makes it possible to resample audio files without losing quality. Resampling can be done either by upsampling or downsampling the audio file. The upsampling increases the sampling rate of an audio file, while downsampling decreases it. With the Ruby’s sampling rate conversion feature, users can achieve seamless integration between different sample rates.
Offline Rendering
Ruby has an offline rendering feature that makes it easy to export audio files. This feature is useful for users who want to export audio files to various formats, such as WAV, MP3, or FLAC. With offline rendering, users can export audio files without having to play the entire project in real-time. This feature not only saves time but also ensures that the exported audio is of the highest quality possible.
Using External Sidechain Sources
Ruby has a feature that allows users to use external sidechain sources for mixing. This feature is useful for users who want to use an external input source such as a MIDI controller or another audio channel as the sidechain input. This feature ensures that each audio channel is mixed in a precise manner, and users can achieve a more refined and polished sound production. In conclusion, the advanced features of Acustica Audio Ruby Tutorial provide users with a wide range of options to achieve high-quality sound production. Whether it’s the sampling rate conversion, offline rendering, or the use of external sidechain sources, users have access to powerful tools that can help them to achieve the best possible sound production.
Credit: www.kvraudio.com
Frequently Asked Questions Of Acustica Audio Ruby Tutorial
What Is Acustica Audio Ruby?
Acustica Audio Ruby is a plugin that emulates vintage analog gear to create an analog sound. It is a channel strip that includes EQ, compression, and saturation. It is famous for its clarity, warmth, and precision and is suitable for both mixing and mastering.
How Do I Use Acustica Audio Ruby?
You can use Acustica Audio Ruby as a plugin in your DAW. First, you need to load it into a channel strip. Then, you can adjust the EQ, compression, and saturation to your liking. It is also possible to use it as an insert on a bus channel for additional processing.
What Are The System Requirements For Acustica Audio Ruby?
Acustica Audio Ruby requires a 64-bit operating system and a CPU with at least 2. 5 GHz. You also need at least 8 GB of RAM and a screen resolution of 1280 x 800 pixels or higher. It is compatible with Mac OS X and Windows OS.
Is Acustica Audio Ruby Suitable For Live Performances?
Acustica Audio Ruby is not specifically designed for live performances, but it can be used in live situations. However, it requires a powerful computer and a stable audio interface. It is more commonly used in the studio for mixing and mastering.
Conclusion
Overall, the Acustica Audio Ruby plugin is a powerful tool for producers and engineers looking to bring warmth and character to their mixes. Whether you’re working with vocals, drums, guitars, or anything in between, Ruby can help you achieve a rich and detailed sound that stands out from the crowd.
With its intuitive controls and extensive collection of high-quality impulses, this plugin is a must-have for anyone serious about achieving professional-level mixes. Give it a try and see for yourself why so many producers rave about Acustica Audio Ruby.