This Ableton Drum Programming Tutorial provides step-by-step instructions to program and customize drum sounds using Ableton Live software. From selecting drum samples to utilizing different MIDI techniques, this tutorial covers everything necessary to create unique and professional-sounding drum tracks.
Additionally, readers will learn how to create custom drum racks, arrange drum loops, and add effects to enhance their drum programming skills. By following the guidelines outlined in this tutorial, readers will be able to create endless possibilities for drum programming using Ableton Live.
Whether you are a beginner or an experienced producer, this tutorial is a valuable resource to elevate your drum programming skills.
Credit: www.ableton.com
Drum Programming Fundamentals
Learn the fundamentals of drum programming with Ableton in this easy-to-follow tutorial. Discover how to create dynamic and engaging drum tracks for electronic and pop music using various techniques, including the step sequencer and MIDI programming.
Understanding Drum Rhythms
Drum programming is a crucial aspect of music production. It’s because the drums are essentially the backbone of any genre of music, from rock to techno. In this Ableton drum programming tutorial, we’ll explore the basics of drum programming, starting with understanding drum rhythms. You’ll learn about the different drum sounds and how to merge them to produce a great beat. With determination and attention to detail, you can craft unique drum rhythms that’ll match the theme of your music.
Introduction To Drum Sampling
When it comes to drum programming, drum sampling is an essential technique that you should know. It involves selecting individual drum sounds from various sources, such as pre-recorded samples or recorded drums, and amalgamating them to produce a unique sound. In this Ableton drum programming tutorial, we’ll explore the fundamentals of drum sampling. You’ll learn how to select and organize drum samples, manipulate them, and integrate them into your beat.
Conclusion
By understanding drum rhythms and drum sampling, you’ll have all the tools you need to create professional-sounding drums that give your music the punch it needs. With Ableton, you have a suite of tools that can help you achieve the sound you want, and by practicing regularly, you can become a master at drum programming.

Credit: m.youtube.com
Drum Programming Techniques
Discover new drum programming techniques with this easy-to-follow Ableton Drum Programming Tutorial. Elevate your production game with tips on creating dynamic drum patterns and using various effects to enhance your beats.
Drum programming is a crucial aspect of creating music in Ableton. As a beginner, it could be quite overwhelming to learn how to program drums. However, once you get the hang of it, it becomes quite easy and even enjoyable. In this article, we will explore some of the essential drum programming techniques in Ableton, including creating drum loops, layering drums, and swing and groove.
Creating Drum Loops
Creating drum loops is an essential technique that every Ableton user must master. A good drum loop can provide a solid foundation for your music and elevate it to a whole new level. Here are some tips on creating drum loops in Ableton:
- Start by choosing your drum samples carefully. Select samples that complement each other and fit your genre.
- Set the tempo of your project and start building your drum pattern.
- Use the MIDI editor or the push controller to create your drum pattern. Try to keep it simple and add complexity as you progress.
- Experiment with different patterns until you find one that fits your music.
- Finally, add some compression and EQ to your drum loop to give it some character and punch.
Layering Drums
Layering drums is another drum programming technique that can add depth and complexity to your drum loop. Here are some tips on layering drums in Ableton:
- Choose drum samples that complement each other and have different tonal textures,
- Layer your drums by duplicating the MIDI clip and using different drum samples or processing on each one.
- Experiment with layering different parts of the drum, such as the kick and snare, to create a unique sound.
- Use EQ and compression to make sure each layer fits well in the mix and add effects such as reverb to give your drums depth and character.
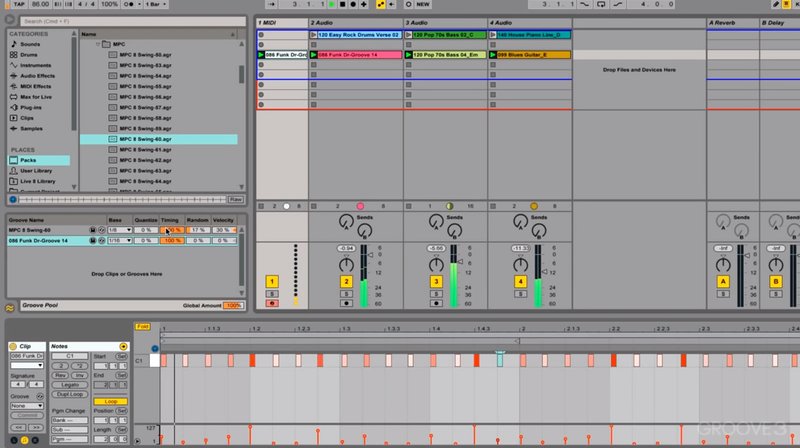
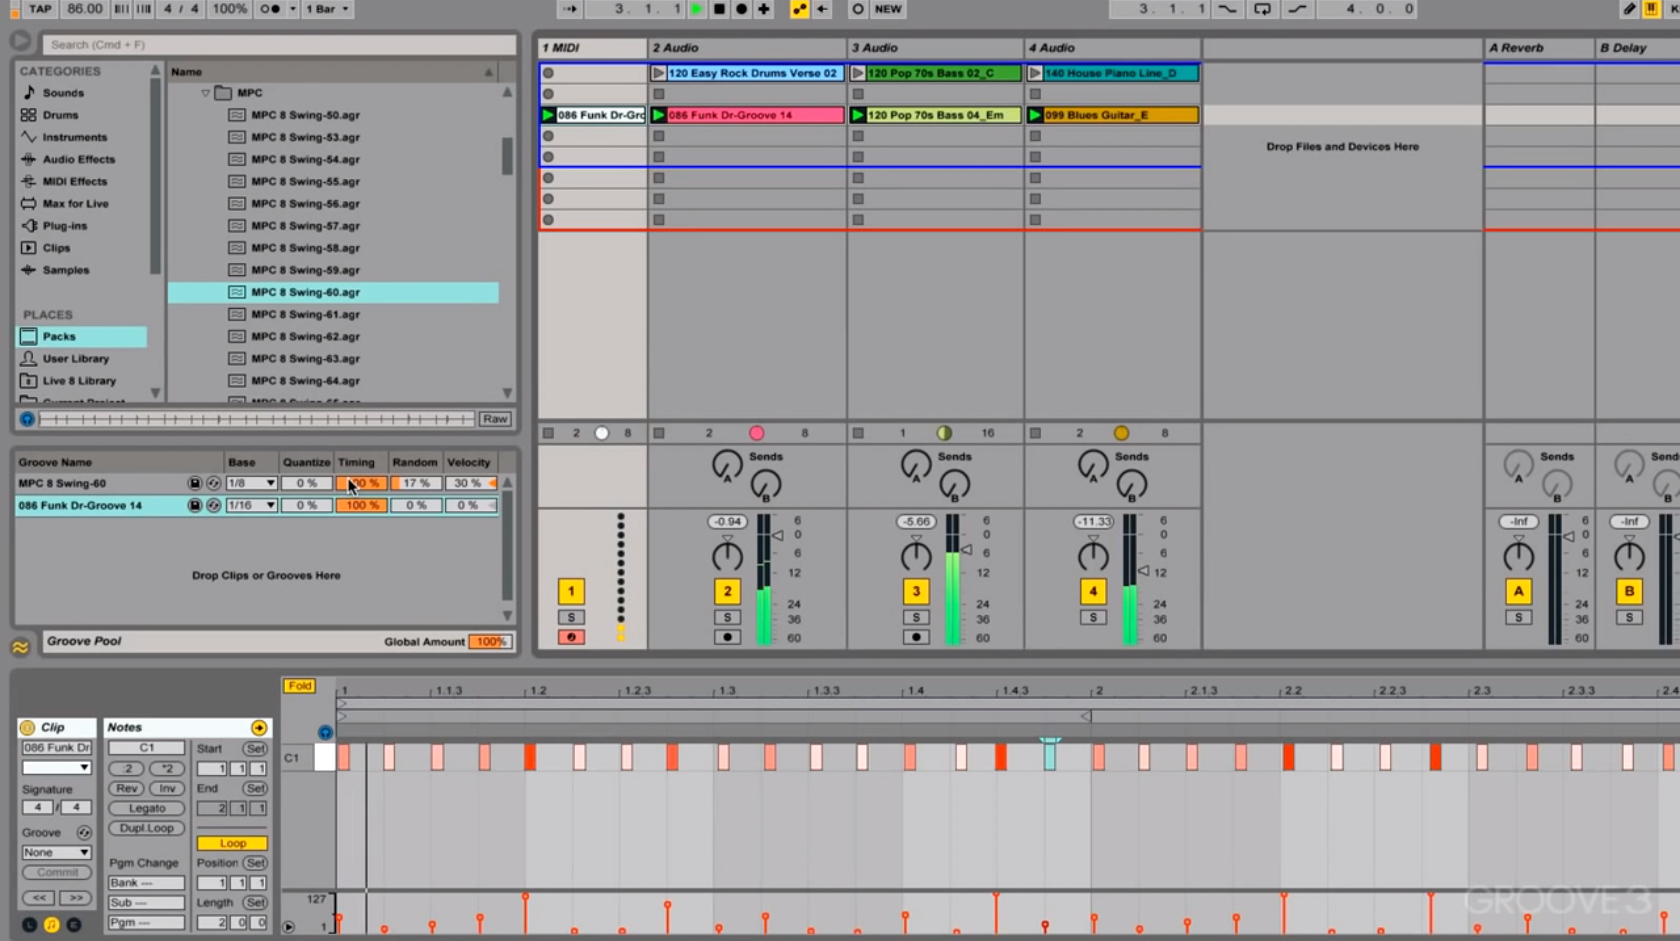
Swing And Groove
Adding swing and groove can give your drum patterns a human-like feel and make them sound less robotic. Here are some tips on adding swing and groove to your drum patterns:
- Use the swing function in Ableton’s MIDI editor or set swing manually in real-time using a controller.
- Experiment with different swing settings and see which works best for your music.
- Add velocity changes to your drum patterns to make them sound more natural and human-like.
- Finally, add some groove using Ableton’s groove pool or by manually adjusting the MIDI notes to give your drum patterns a unique feel.
Mastering these drum programming techniques in Ableton will help you create compelling and engaging music. By creating drum loops, layering drums and adding swing and groove, you can develop a unique sound and elevate your music to new heights.
Using Ableton To Program Drums
Learn how to program drums in Ableton with this comprehensive tutorial that covers everything you need to know. From creating beats to adding effects, this guide will help you elevate your drum programming skills and take your music to the next level.
When it comes to producing music with Ableton, it is essential to know how to program drums. Ableton is designed to make drum programming a breeze, and with a little know-how, you can create intricate and dynamic drum parts that will take your productions to the next level.
Drum Rack Basics
Before we delve into the specifics of recording and editing drum parts, it’s important to have a firm grasp of the Drum Rack. The Drum Rack is the heart of Ableton’s drum programming functionality, and it allows you to assign individual drum sounds to different MIDI notes. To create a Drum Rack, simply drag and drop the samples you want to use onto your MIDI track. Then, click the “Simpler” instrument and select the “Slice” option. This will automatically create a Drum Rack for you, with each slice assigned to a different MIDI note.
Recording And Editing Drum Parts
Once you’ve got your Drum Rack set up, it’s time to start recording and editing your drum parts. The key to creating realistic and dynamic drum parts is to make use of velocity and timing variations. To do this, you can either record your drum parts into Ableton using a MIDI controller or draw them in manually using the Piano Roll. When recording, make sure to vary the velocity of each hit to create a more natural feel. You can also add swing or shuffle to give your drums a more human touch. Once you’ve recorded your drum parts, you can start editing them using Ableton’s powerful editing tools. By adjusting the timing and velocity of individual hits, you can create complex and intricate drum parts that would be impossible to play live. In addition to editing the individual hits, you can also apply various effects to your drum parts to add character and depth. For example, you can add compression to bring out the punchiness of your kicks, or apply reverb to create a sense of space and depth. In conclusion, using Ableton to program drums is an essential skill for anyone looking to produce electronic music. By understanding the basics of the Drum Rack and making use of Ableton’s powerful editing tools, you can create intricate and dynamic drum parts that will take your productions to the next level.
Advanced Drum Programming
Learn advanced drum programming techniques with this Ableton tutorial. Enhance your skills and create dynamic beats, giving your productions a professional edge.
Looking to take your Ableton drum programming to the next level? Advanced drum programming techniques can help you add depth and complexity to your beats, making them sound more dynamic and engaging. In this tutorial, we’ll be focusing on two specific techniques: creating dynamic drum fills and programming drum breaks. Let’s dive in.
Creating Dynamic Drum Fills
Adding drum fills to your beats is a great way to keep them interesting and engaging. But if your fills sound repetitive or lacking in variation, you risk losing your listeners’ attention. The key to creating dynamic drum fills is to focus on variation in rhythm, velocity, and sound selection. Here are some tips to help you create more dynamic drum fills:
- Vary the rhythm of your fills by using triplets, quintuplets, or other subdivisions of the beat.
- Use velocity to create a more natural and human feel by accenting certain hits.
- Experiment with different sound selections, such as swapping out the snare drum for a clap or adding in a percussion hit.
Programming Drum Breaks
Drum breaks are a staple of electronic music, providing a break from the repetitive beat and adding a sense of excitement to the track. But programming effective drum breaks can be a challenge. To create an impactful drum break, you’ll need to focus on variation in rhythm, sound selection, and arrangement. Here are some tips to help you program more effective drum breaks:
- Vary the rhythm of your break by using syncopation or changing the tempo.
- Use sound selection to create contrast within the break, such as adding a distorted 808 kick or a heavily filtered hi-hat.
- Arrange your break for maximum impact, such as using a buildup or drop to create tension and release.
With these advanced drum programming techniques, you’ll be able to take your beats to the next level and keep your listeners engaged from start to finish. Try experimenting with these techniques in your own productions to see what works best for you. Happy drum programming!
Creative Sound Design
If you want to create music that really stands out, mastering sound design is key. When you’re programming drums in Ableton, there are plenty of tips and tricks that you can use to create a unique drum sound that sets your music apart. In this tutorial, we’re going to focus on one of the most important aspects of creating a distinct drum sound: creative sound design.
Processing Drum Samples
The first step to creating a unique drum sound is to choose the right samples. Ableton has a huge library of samples to choose from, but you may want to start with your own sample collection or a third-party sample library for added variety. Once you have your samples, you can start processing them in Ableton to create something truly unique. Try adjusting the pitch, decay, or adding distortion to give your drum sounds a completely new character. You can also layer samples to create more complex and interesting sounds.
Using Effects To Shape Drum Sounds
In Ableton, there are countless effects that you can use to shape your drum sounds. From EQs to compressors, delays, and reverbs, each effect can adjust the character of the sound in its own way. Try experimenting with different effects to find the perfect combination to enhance your drum sounds. Automated effects can create rhythmic and otherworldly sound patterns.
In conclusion, creative sound design is one of the most powerful tools available for any producer looking to create a truly unique drum sound. By processing your samples and using effects, you can customize your drum sound to fit perfectly with your music.
Credit: www.ableton.com
Arranging Your Drum Parts
Are you struggling to make your drum patterns sound appealing? Don’t worry; we have got your back. Arranging your drum parts is the most crucial step in the drum programming process. It can make or break your entire track. In this Ableton Drum Programming Tutorial, we will guide you on how to structure your song and create tension using drums.
Structuring Your Song
The arrangement of your song plays a vital role in holding your listener’s attention. It should not be too repetitive, but it should also not be too complex. Hence, you must divide your song into different sections, including an intro, verse, chorus, bridge, breakdown, and outro.
In the intro section, you can begin with a simple drum pattern that slowly builds up to a new section. In the verse section, you can repeat the drum pattern with slight variations to add more interest to your track. In the chorus section, you can introduce a different drum pattern that complements the melody and adds energy to the track. The bridge section can be used to break the monotony of the song by introducing a new melodic element with a different drum pattern. The breakdown section can be used to create tension by decreasing the drum pattern complexity gradually. Finally, the outro section can be used to end the track with a simple drum pattern that slowly fades away.
Building Tension With Drums
Drums can be an excellent tool to build tension in a song. One way to do this is to use a drum fill before transitioning to a new section. A drum fill is a rhythmic pattern that uses different drum sounds to signify a change in the track.
You can also create tension by gradually increasing the complexity of the drum pattern in a section. For example, you can start a section with a simple kick and snare pattern and gradually add hi-hats, cymbals, and toms to create a more intricate drum pattern that adds energy to the track.
In conclusion, arranging your drum parts is an essential step in the drum programming process. The structure of your song and the tension you create using drums can make or break your entire track. By following the tips in this Ableton Drum Programming Tutorial, you can create appealing drum patterns that elevate your music to the next level.
Frequently Asked Questions On Ableton Drum Programming Tutorial
Can You Program Drums In Ableton?
Yes, you can program drums in Ableton. Ableton has powerful drum programming capabilities with its Drum Rack and Simpler devices. These devices allow you to create your own drum sounds or use pre-made samples to create drum beats. With Ableton Live’s intuitive interface, you can easily program drums using various techniques such as step sequencing or recording MIDI notes.
How Do You Program Drum Fills In Ableton?
To program drum fills in Ableton, go to the Clip View Editor and select the last quarter note of the bar where you want the fill. Choose a high-pitched sound and program it in the grid editor. Adjust the velocity and timing to create a smooth transition into the fill.
Repeat as necessary for different fills.
How Do I Start Programming Drums?
To start programming drums, choose a drum machine or software. Read its manual, watch tutorials, and learn the basics of rhythm. Experiment with different sounds and create your drum patterns. Practice regularly, and listen to different drummers for inspiration.
How Do You Make Real Sounding Drums In Ableton?
Create realistic drum sounds in Ableton by blending drum samples, use velocity to create a natural feel, utilize the drum rack to assign different samples to different pads, customize drum macros to adjust effects and parameters, and fine-tune your drumming with the groove pool.
Conclusion
Creating unique beats and rhythms with Ableton drum programming can seem daunting at first, but with practice and patience, it’s a skill that any aspiring producer can master. By following these steps, you can craft dynamic and engaging rhythms that will set your tracks apart from the crowd.
Experiment with different samples, techniques, and styles to find your own voice and create music that truly speaks to you. With Ableton and a little bit of imagination, the possibilities are truly endless!