A limiter can make your songs louder by compressing the dynamic range. Here’s how to use it effectively.
Using a limiter is one of the most common techniques used to make music sound louder and punchier. It’s a versatile tool that helps control the dynamics of audio signals, ensuring that the output signal doesn’t exceed a certain threshold level.
This is especially useful for mastering and finalizing tracks for release, where you want to maximize loudness without distorting the mix. We’ll go over the basics of how a limiter works, what it’s used for, and how to use it effectively. Whether you’re a producer, mixing engineer, or mastering engineer, this guide will help you get the most out of your limiter and make your songs sound louder and more professional.

Credit: m.youtube.com
What Is A Limiter?
A limiter is a dynamic range compressor used in music production to control the levels of audio signals. By limiting the peak amplitude of a song, the volume can be increased to create a louder and more balanced sound.
A limiter is a dynamic range compressor that limits the peak output level of an audio signal. It is a type of audio processing tool that is designed to prevent distortion and provide a more consistent sound.
How Does A Limiter Work?
A limiter works by reducing the gain of an audio signal that exceeds a certain threshold level. By doing this, it prevents the signal from exceeding a certain level, which can cause unwanted distortion and damage to the speakers or audio system. When the audio signal reaches the threshold, the limiter automatically adjusts the gain level to reduce the signal’s volume. This process is often referred to as “brickwall limiting” because it limits the signal’s level so that it cannot go any higher.
Why Use A Limiter?
Using a limiter is essential in the music production process because it helps ensure that the final output is of high quality. By preventing distortion and ensuring that the audio signal is consistent, a limiter helps make your songs sound louder and more professional. Additionally, using a limiter can also help prevent damage to your speakers or audio system. When an audio signal exceeds a certain level, it can cause the speakers to distort or even fail. By using a limiter, you can prevent this from happening and ensure that your equipment is protected.
Difference Between A Limiter And A Compressor
While limiters and compressors are both dynamic range processors, there are some key differences between the two. A compressor is used to reduce the dynamic range of an audio signal by reducing the volume of loud sounds and increasing the volume of quiet sounds. A limiter, on the other hand, is used to prevent the audio signal from exceeding a certain level and causing distortion or damage. Whereas a compressor allows some peak levels to pass through, a limiter limits the signal entirely. In conclusion, using a limiter is essential in the music production process because it helps ensure that the final output is of high quality. By preventing distortion and ensuring that the audio signal is consistent, you can make your songs louder and more professional. The difference between a limiter and a compressor lies in the way they process the audio signal, with limiters limiting the signal entirely and compressors allowing some peaks to pass through.
Credit: www.waves.com
Setting Up Your Limiter
Setting up a limiter is essential to make your songs louder without causing distortion. By carefully adjusting the threshold and output gain, you can achieve a well-balanced mix that sounds professional and polished.
Setting up a limiter is a crucial step towards making your songs louder. A limiter is a compression tool that helps to control the dynamic range of your audio tracks. In order to get the best results, it’s crucial to understand the different parameters of a limiter and how they affect your audio. In this section, we’ll take a look at some of the most important parameters you need to keep in mind when setting up your limiter.
Threshold
The threshold is the level at which the limiter starts to kick in and reduce the volume of your audio. It’s important to set the threshold so that it doesn’t affect the parts of your audio that you want to keep at full volume. If the threshold is set too high, the limiter won’t be effective in controlling the dynamics. However, if it’s set too low, it can affect the quality of your audio. It’s important to find the right balance by tweaking the threshold until you achieve the desired results.
Ratio
The ratio is the amount of compression applied to your audio once it reaches the threshold. For example, a ratio of 2:1 means that for every 2dB of audio that goes above the threshold, only 1dB will come out. The higher the ratio, the more compression is applied to your audio. Setting the ratio too high can result in an over-compressed sound, while setting it too low can result in too much dynamic range. It’s important to experiment with different ratios to find the best setting for your audio.
Attack
The attack is how quickly the limiter responds when the audio level exceeds the threshold. A fast attack time will result in a more aggressive reduction of the audio level, while a slower attack time will result in a more natural sound. It’s important to find the right balance based on the type of audio you’re working with. For example, if you’re working with drums or percussive instruments, you may want a faster attack time to control their transient peaks.
Release
The release is how quickly the limiter stops reducing the audio level once it falls below the threshold. A fast release time will result in a more abrupt gain reduction, while a slower release time will result in a more gradual gain reduction. It’s important to find the right release time based on the type of audio you’re working with. For example, if you’re working with sustained instruments like pads or strings, you may want a slower release time to avoid unwanted artifacts. In conclusion, understanding the different parameters of a limiter is crucial in order to make your songs louder while also maintaining their quality. By tweaking the threshold, ratio, attack, and release, you can achieve the desired level of compression and dynamic range for your audio. It’s important to experiment with different settings until you find the sweet spot that works for your specific project.
Tips For Using A Limiter
To make your songs louder with a limiter, adjust the threshold and ratio settings and know how to use the attack and release controls. Keep an eye on the peak levels and avoid over-limiting that can cause distortion.
Using a limiter in music production is an essential step to make your songs louder without sacrificing quality. However, like any tool, a limiter can also cause more harm than good if not used correctly. Here are some tips on how to use a limiter effectively.
Maintain Dynamic Range
One of the most important tips for using a limiter is to maintain the dynamic range of the song. A limiter is not designed to make everything as loud as possible without regard for the levels of individual tracks. Instead, it should be used to control peaks and prevent them from clipping. Aim for a dynamic and balanced mix.
Avoid Clipping
Clipping occurs when the signal level of a track exceeds the maximum level that can be reproduced. It results in distorted and unpleasant sound. Therefore, it is crucial to avoid clipping using a limiter. Be careful when setting the threshold and ensure the limiter is only operating when and where you want it to.
Balance Levels
Balance is key when using a limiter. A limiter should be used to even out levels in a mix, instead of making everything loud. Before adjusting the threshold, make sure all the tracks in the mix are balanced in sound. For example, if a vocal track is too loud compared to other tracks, use an EQ first to reduce its volume.
Use Multiple Limiters In Stages
Another effective way to use a limiter is to use multiple limiters in stages. Instead of having one limiter do all the work, use a series of limiters to gradually control the peaks and raise the volume levels. This way, you can achieve a more transparent and natural sound without sacrificing volume. In conclusion, using a limiter is an essential step in music production, and following these tips can help you achieve a louder, well-balanced sound without compromising on quality.
Popular Limiters In The Market
Popular limiters are essential tools for musicians, producers, and sound engineers who want to make their songs louder without sacrificing quality. With an extensive range of limiters in the market like FabFilter Pro-L 2, Waves L2, and Sonnox Oxford Limiter, you can achieve the perfect loudness for your music.
If you’re a music producer or recording artist, you understand the value of having a polished and professional sound. One of the tools that can help you achieve that is a limiter. A limiter is a dynamic processor that allows you to increase the loudness of your music while preventing clipping and distortion. There are many limiters available in the market, but in this section, we’ll focus on some of the most popular ones that you might want to consider.
Fabfilter Pro-l 2
FabFilter Pro-L 2 is a limiter plugin that offers a range of features to help you achieve a clear and impactful sound. With its sophisticated algorithms, you can maximize the loudness of your music while retaining its dynamics. The plugin also allows you to adjust the attack, release, and look-ahead settings, giving you complete control over the limiting process. Additionally, FabFilter Pro-L 2 offers true peak limiting, oversampling, and dithering, making it a great all-in-one solution.
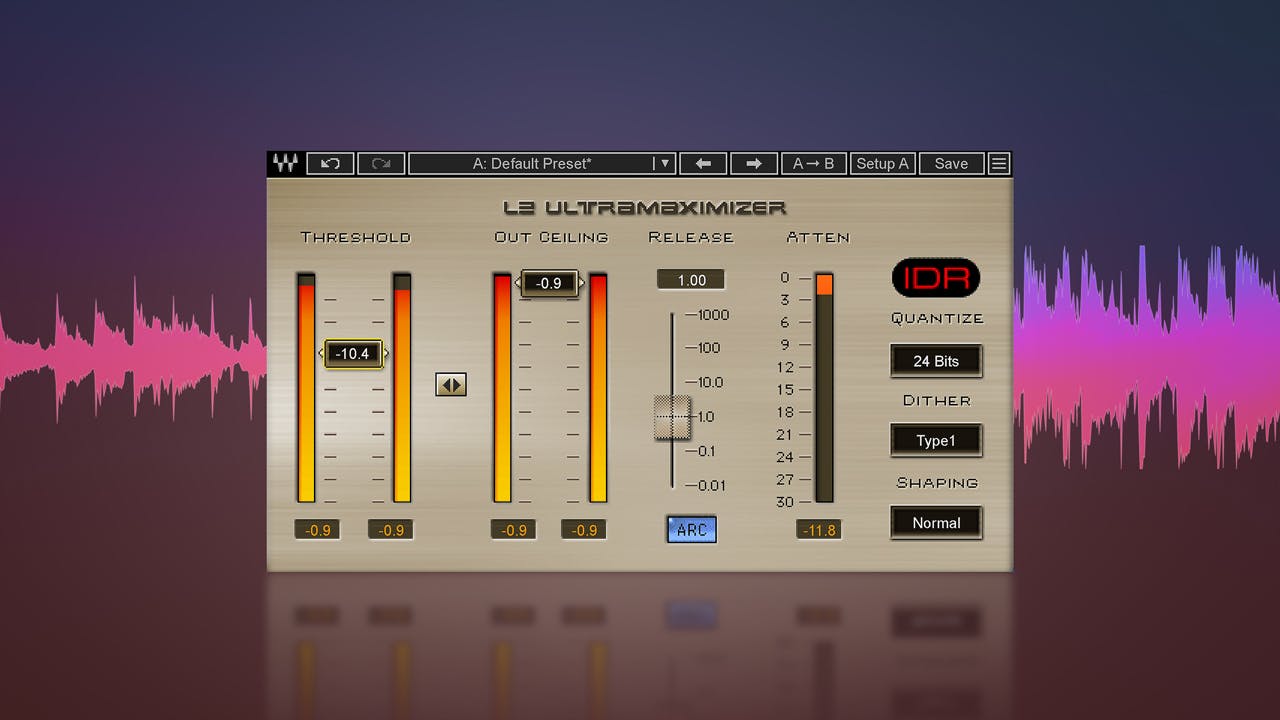
Waves L2 Ultramaximizer
The Waves L2 Ultramaximizer is another popular limiter that has been used by many professional musicians and producers. It offers two types of limiting – peak limiting and level limiting – and allows you to adjust the attack and release times. One of the advantages of the L2 is that it has a low latency mode, which makes it suitable for live performances. The plugin also includes a noise shaping feature that can help you reduce the noise floor of your tracks.
Izotope Ozone 9
iZotope Ozone 9 is a comprehensive mastering suite that includes a limiter among its many features. The limiter module in Ozone 9 offers a variety of modes, including IRC II, which is a transparent limiting mode that can help you retain the dynamics of your music. The plugin also includes a master assistant that can analyze your track and suggest settings for the limiter, making it easier for you to achieve the desired loudness level.
Tc Electronic Finalizer
The TC Electronic Finalizer is a hardware limiter that has been a staple in many professional studios for years. It offers a range of features, including multi-band limiting, analog and digital I/O, and 24-bit resolution. With its intuitive interface, the Finalizer allows you to quickly dial in the settings you need to achieve the desired loudness and clarity for your music. In conclusion, having a limiter in your toolkit can help you achieve a louder and more polished sound for your music. While there are many limiters available in the market, the ones we’ve discussed in this section are some of the most popular and feature-rich options to consider.
Mastering With A Limiter
Mastering with a limiter is a crucial technique for achieving louder and polished-sounding music. Using a limiter allows you to restrict the maximum level of your mix, avoiding distortion and giving your songs more clarity and presence.
Important Considerations Before Mastering
Before mastering your music using a limiter, there are a few essential things to keep in mind. First, make sure you have mixed your tracks correctly, which means your levels are balanced, and your mix doesn’t peak. Second, consider the style of music you are mastering and what you want to accomplish. Finally, ensure you have the right software and hardware to deliver high-quality sound. Taking these considerations into account will help you achieve desired results and produce outstanding music.
Mastering Your Mix With A Limiter
Mastering your music with a limiter can make your songs louder without sacrificing their quality. Many modern producers use limiters to increase the overall volume of their tracks without clipping or distortion. It’s an essential tool for achieving a polished and professional sound. A limiter works by setting a threshold volume level, and anything that exceeds that capacity is automatically compressed or limited, allowing you to increase the volume without compromising the dynamics of your music.
Using A Limiter In Tandem With Other Mastering Tools
Using a limiter alone may not always give you the desired results. Sometimes it may produce a sound that’s too harsh, or it may not provide the warmth and depth you’re looking for in your mix. That’s where using a limiter in tandem with other mastering tools comes in. A combination of a limiter, EQ, reverb, and compression can help you achieve a balanced and well-rounded sound. However, it’s essential to use these tools in moderation, as overdoing it will lead to an unbalanced mix. In conclusion, using a limiter in mastering can help you create an exceptional sound that is louder, clearer, and more polished. However, it’s crucial to use the limiter alongside other mastering tools to produce a balanced and professional mix. By considering the essential factors before mastering, you’ll be able to produce incredible music that stands out above the rest.

Credit: www.youtube.com
Frequently Asked Questions For Make Your Songs Louder With A Limiter
How Do You Increase Volume With Limiter?
To increase volume with a limiter, you need to adjust the threshold level and the ratio. The threshold level determines when the limiter kicks in and starts reducing the volume, while the ratio determines how much the volume is reduced.
You should also make sure to avoid clipping and adjust the attack and release times based on the type of audio you’re working with.
How Can I Increase The Loudness Of A Song?
To increase the loudness of a song, you can use a compressor, maximize the volume slider, EQ the mix, and add distortion or saturation to the sound. However, be cautious as increasing the loudness can lead to sound quality and distortion issues.
Experiment carefully and use your ears to find the right balance.
Why Do Limiters Make Things Louder?
Limiters make things louder by preventing any part of the audio from exceeding a set maximum level, thus allowing the rest of the audio to be made louder without distortion. This process is called dynamic range compression and is used to make audio stand out in a crowded field.
Do Limiters Affect Sound Quality?
Yes, limiters can affect sound quality. While they can prevent distortion and clipping by reducing the amplitude of the audio signal, they can also introduce unwanted artifacts such as pumping, breathing and squashing effects which can degrade the sound quality.
It’s important to use limiters judiciously and with caution to achieve the desired balance between loudness and sound quality.
Conclusion
Overall, a limiter is a powerful tool that can make your songs sound louder and more polished. With a simple adjustment of the threshold, you can control the dynamic range and prevent clipping distortion. By using a limiter effectively, you can enhance the impact and clarity of your music, without sacrificing its integrity or balance.
Whether you are producing EDM, hip-hop, or rock, a limiter can help you achieve a professional sound that stands out in a crowded market. Don’t be afraid to experiment and optimize your settings to find the perfect balance of loudness and clarity for your style.