Learn the basics of Ableton for beginners in this complete tutorial from start to finish. In this tutorial, you will be guided through the essential tools, features, and functions of Ableton.
Are you a music enthusiast starting out with Ableton or a music producer looking for a new DAW? Look no further than this tutorial, which can guide you through the complete Ableton interface. This comprehensive guide will introduce you to everything related to arranging and editing clips, working with instruments and effects, and much more.
With Ableton’s vast array of features and tools, including its unique Session View, this tutorial ensures that you’ll get started confidently and keep creating great music. From setting up your project to exporting tracks, this beginner tutorial for Ableton has you covered.
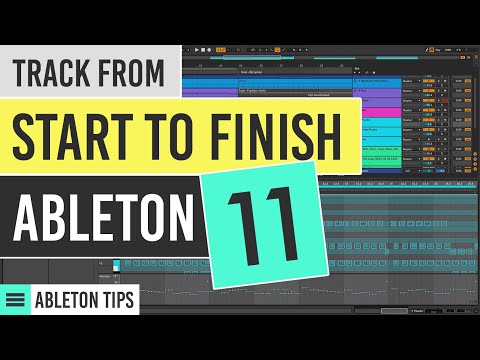
Credit: www.youtube.com
Setting Up Ableton Live
Before you dive straight into using Ableton, you need to download and install it on your computer. This step is crucial as it ensures that everything runs smoothly throughout your production process. In this section, we will take you through the process of downloading and installing Ableton Live on your computer. We will also give an overview of the Ableton workspace to provide you with a smooth start.
Downloading And Installing Ableton Live
To download Ableton Live, you first need to head over to the Ableton website and select the version that is compatible with your computer’s operating system. Once you have downloaded the appropriate files, you can begin the installation process.
- Double-click the .exe file to launch the installation process and follow the prompts shown on the screen.
- Select the relevant options in the installer, including your preferred language and installation folder.
- Once the installation process is complete, you can launch Ableton Live from the shortcut on your desktop.
Overview Of Ableton Workspace
Now that you have successfully installed Ableton Live, it’s time to explore the interface and workspace to gain a better understanding of how Ableton works.
The Ableton Live interface is divided into two main sections – the Session View and the Arrangement View. The Session View is where you can experiment with different sounds and loops, while the Arrangement View is where you can put together a finalized version of your track.
The workspace also includes various musical instruments and effects that you can use to create your desired sound. Additionally, you can customize the workspace to suit your specific preferences and needs.
By familiarizing yourself with the Ableton workspace, you’ll be on a solid foundation for creating your music projects in Ableton Live.
Understanding Audio And Midi
This Ableton beginner tutorial covers the fundamentals of understanding audio and MIDI. From setup and configuration to recording and editing tracks, this comprehensive guide will take you from start to finish and empower you to create your own music.
Audio Vs Midi
Audio and MIDI are two different types of data used in music production. Audio is simply the sound that you hear, while MIDI (Musical Instrument Digital Interface) is a digital language used to communicate musical information between devices. Audio files are recordings of actual sounds, whereas MIDI files contain information about what notes were played, how long they were held, and other musical data. Understanding the difference between the two is crucial for any aspiring producer.
Recording Audio
Recording audio is the process of capturing a live sound and converting it into a digital format. To record audio in Ableton Live, simply create an audio track and choose the input source you want to record. You can also adjust the recording settings, such as the input gain and file format. Once you hit record, Ableton will capture the sound and create a new audio clip in your session view.
Recording Midi
Recording MIDI works differently from recording audio. Instead of capturing a live sound, you’re recording the digital information that represents the notes you’re playing. To record MIDI in Ableton, create a MIDI track and select your instrument of choice. Then, click the record button and start playing. Ableton will capture the notes you play and create a new MIDI clip in your session view. Overall, understanding the differences between audio and MIDI, and knowing how to record both, is essential knowledge for any beginner in Ableton Live. With these skills, you’ll be able to start creating your own music and exploring the endless possibilities of music production.
The Basics Of Using Ableton
Learn the basics of using Ableton and follow a step-by-step beginner tutorial from start to finish. This tutorial will guide you through Ableton’s interface, tools, and techniques for producing music. Discover how to create loops, add effects, and navigate Ableton’s features.
As a beginner, it can be overwhelming to start learning a new software program like Ableton. However, with its user-friendly interface and intuitive features, Ableton is an excellent choice for beginners in music production. In this tutorial, we will guide you through the basics of using Ableton, starting from creating a new project to navigating the arrangement view. Let’s get started!
Creating A New Project
The first step in starting with Ableton is to create a new project. To do this, click on “File” from the top menu bar and select “New Live Set.” Alternatively, you can use the keyboard shortcut “CTRL/CMD+N.” This will open a new project with two views: Session View and Arrangement View.
Arranging Clips In Session View
The Session view is the default view in Ableton. It allows you to arrange and trigger audio and MIDI clips in real-time, making it great for live performances and improvisation. To arrange clips in Session View, simply drag and drop them onto the grid, and they will snap into place. Once you have arranged your clips, you can trigger them by launching them using the corresponding buttons. You can also group and manipulate multiple clips at once using the group function.
Navigating The Arrangement View
The Arrangement View is where you can arrange and edit your clips over time, giving you more control over your music’s structure. To access the Arrangement View, simply click on the “Arrangement” button at the top of the screen. In Arrangement View, you can see a timeline along the top, which represents the length of your track. You can edit and move individual clips to different locations in the timeline, resize them to change their length, or split them to create different sections of your track. In conclusion, understanding the basics of using Ableton is critical for anyone looking to begin their music production journey. By creating a new project, arranging clips in Session View, and navigating the Arrangement View, you can start making music with Ableton quickly and easily. Remember to experiment and have fun with your music production journey!
Credit: www.productionmusiclive.com
Editing Audio And Midi Clips
Learn how to flawlessly edit and manipulate both audio and MIDI clips in Ableton with this beginner tutorial. From start to finish, this guide will teach you all the necessary steps to create professional-sounding tracks.
Editing Audio and MIDI Clips is a crucial step in music production using Ableton. As a beginner, understanding the basics behind this step will help elevate your music-making experience. Here’s a comprehensive guide on Basic Audio Editing, Basic MIDI Editing, Using Effects on Clips, and Warping Audio Clips on Ableton.
Basic Audio Editing
When working with audio in Ableton, you’ll notice that each audio clip visually appears as a waveform. The basic audio editing involves the following:
- Crop and truncating an audio clip
- Adjusting the volume of an audio clip
- Fading in and out to smoothly bring an audio clip into and out of a mix.
- Reversing the audio clip for creative effects.
Basic Midi Editing
MIDI editing involves using virtual instruments and piano rolls to manipulate MIDI data. Some basic MIDI editing include:
- Creating a MIDI clip and inputting notes into the clip.
- Adjusting the timing of individual notes by moving them forward or backward in time.
- Changing the velocity of each note to create dynamics.
- Muting certain notes or sections of the clip to create variation.
Using Effects On Clips
Using effects on audio and MIDI clips is an essential part of music production. It adds flavor and character to the sounds. Ableton has numerous effects plugins to choose from, including EQ, delay, reverb, and distortion. Here are some tips:
- Double-click on the clip to bring up the clip view, where you can access the effects rack.
- Drag and drop the desired effect onto the clip.
- Adjust the effect parameters to achieve the desired effect.
- Save your effect chain as a preset for future use.
Warping Audio Clips
Warping is the process of manipulating the timing and tempo of an audio clip. It comes in handy when trying to sync different audio clips to a specific tempo. The following steps are involved in Warping:
- Enable Warping by clicking on the Warp button in the sample box.
- Set the Warp mode to either Beats, Tones, or Texture.
- Use the warp markers to adjust specific sections of the clip.
- Adjust the tempo and timing of the clip using the BPM and transient markers.
In conclusion, Editing Audio and MIDI Clips is a crucial step in producing quality music on Ableton. Hopefully, with this guide, you can now confidently experiment with basic audio editing, basic MIDI editing, using effects on clips, and warping audio clips. Keep creating!
Using Instruments And Effects
Using Instruments and Effects in your Ableton beginner tutorial
As a beginner in Ableton, you might find it quite challenging to get started on using the software. Understanding how to use instruments and effects is essential, as it helps you produce high-quality music. In this section, we’ll take you step-by-step through using Ableton’s built-in instruments, third-party plugins, audio effects, and MIDI effects.
Using Ableton’s Built-in Instruments
Ableton has a range of built-in instruments that can help you create different sounds and music styles. Some of these instruments include:
- Operator: This is a versatile synthesizer that can produce different types of sounds ranging from analog to digital.
- Electric: This instrument simulates different types of electric pianos, allowing you to create different chord progressions and melodies.
- Drum Rack: This instrument is suitable for creating drum beats and percussion sounds. You can create custom drum kits by dragging and dropping different samples into the drum rack slots.
Using Third-party Plugins
You may want to explore different third-party plugins that you can use in Ableton. These plugins are useful because they offer more flexibility and new features that Ableton may not have. Some examples of third-party plugins include:
- NI Massive: This plugin is suitable for creating basses, leads, and other complex sounds.
- Xfer Serum: This plugin is a wavetable synthesizer that can produce different types of sounds. It allows you to drag and drop different waveforms and create complex modulation effects.
- SoundToys Effect Rack: This plugin pack has different types of effects, including delays and filters that can be used to shape your sound.
Using Audio Effects
You can use different types of audio effects in Ableton to process your sounds. These effects can help you create unique and professional sounds, including:
- Reverb: You can use this effect to create the illusion of a larger space, making it sound like the sound is in a larger room.
- Delay: This effect allows you to repeat the sound after a certain interval, making it sound like it’s echoing.
- EQ Eight: This allows you to adjust the frequency range of your sound by boosting or reducing specific frequencies.
Using Midi Effects
MIDI effects are essential when it comes to editing and processing MIDI data. They help create more interesting patterns and melodies. Some MIDI effects include:
- Note Length: This helps to adjust the duration of MIDI notes after they have been recorded.
- Arpeggiator: This MIDI effect creates a sequence of notes from a single note, which is useful for creating complex melodies.
- MIDI Chord: This effect lets you play chords by pressing one key on your keyboard, making it easier to play complex chords.
The different instruments and effects available in Ableton allow you to add diversity to your music and create a unique sound. Understanding how to use them will aid you in the music creation process and help produce high-quality music. With these steps, you can begin to use instruments and effects like a pro.
Credit: www.borntoproduce.com
Arranging Your Song
Get hands-on experience on arranging your song with this comprehensive Ableton beginner tutorial from start to finish. Learn the basics of music arranging, structure, and add an element of creativity with the help of Ableton techniques.
Building Your Song Structure
Once you’ve got all your ideas down, it’s time to start arranging your song. The structure of your song is crucial and can make or break its success. A typical song structure usually consists of an intro, verse, chorus, bridge, and outro. However, don’t let this limit you as you can design your structure as per your creativity. You can use different sections of the track according to your taste, such as breakdowns, drops, build-ups, and more. One way to go about building the structure of your song is to start with the chords and melody that you have created. From there, you can add additional elements such as percussion, synths, basslines, and vocals. Think about the big picture of your track and how each section will flow and connect to one another.
Adding Variation To Your Song
To make your track more interesting, you can add variation to the structure of your song. A common way to add variation is to change up the drums, bass, or melody to create a new feeling or mood. Adding breaks, drops, and transitions can also help to make your track more engaging. Make sure to keep the structure of your song cohesive, so that it flows naturally.
Finalizing Your Mix
When you’re happy with the structure and variation of your song, it’s time to finalize your mix. The mixing process involves balancing the levels of each sound and making sure there is no clashing or muddiness in the mix. Adjust EQ, Compression, and Reverb to add depth and clarity to the tracks. Make adjustments until you are satisfied with the sound, then export the final version of your track. In conclusion, the ability to arrange a song effectively is essential to making a hit track. Start by building your song structure, adding variation, and finalizing your mix to create a professional-sounding track. Remember, creativity is key, and don’t be afraid to experiment with the arrangement to make your track more unique and interesting.
Frequently Asked Questions For Ableton Beginner Tutorial From Start To Finish
Is Ableton Easy For Beginners?
Ableton can be easy for beginners with its user-friendly interface and simple workflow. It has helpful tutorials and a wide range of features that cater to different levels of experience. However, like any software, it requires practice and patience to master.
Can I Learn Ableton Myself?
Yes, you can learn Ableton yourself. There are numerous online resources available, such as video tutorials, forums, and blog posts, that offer guidance and help you build your skills. Additionally, Ableton offers a free 90-day trial of their software, so you have time to experiment and practice.
How Long Will It Take Me To Learn Ableton?
Learning Ableton varies from person to person depending on their previous experience and dedication. However, with consistent effort, one can become proficient within a few months. Daily practice and taking online courses can speed up the learning process.
Where To Start With Ableton Live?
To start with Ableton Live, you can begin with creating a new project and experimenting with the different features and tools. Familiarize yourself with the interface and workflow, and watch tutorials to learn more about specific techniques. It’s also important to understand the basic concepts of music production and sound design.
Practice and experimentation is key to improve your skills.
Conclusion
This beginner tutorial for Ableton has provided a comprehensive introduction to the basics of this powerful music production software. From setting up your project to using MIDI and audio clips, as well as effects and instruments, you should now be able to confidently begin exploring the creative possibilities of Ableton.
Remember to start with a clear idea in mind, take breaks when needed, and enjoy the process of making music. With practice and experimentation, your skills in Ableton will only get better. Happy producing!