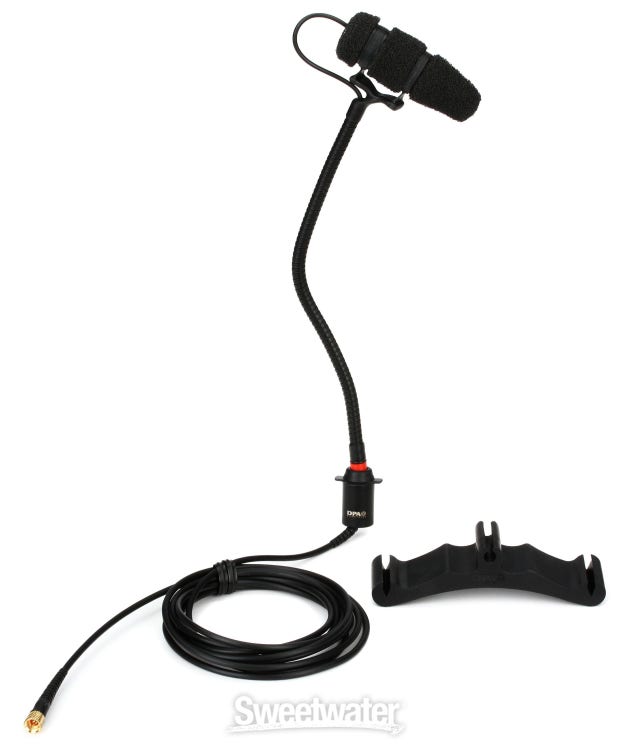
For optimal cello mic placement, position the microphone 12-18 inches from the instrument’s f-hole. Proper placement of the microphone is crucial in capturing the rich and resonant sound of a cello during live performances or recording sessions.
When placed too close to the instrument, the mic may pick up unwanted vibrations or distortions. Conversely, positioning the microphone too far away can result in a loss of detail and clarity in the sound. By following some simple guidelines and experimenting with placement options, musicians and sound engineers can achieve the best possible sound quality and balance when miking a cello.
Credit: www.sweetwater.com
Choosing The Right Microphone
Mic placement is crucial for capturing the full range and depth of a cello’s sound. Selecting the right microphone is the first step towards achieving high-quality recordings or performances.
Consideration Of Mic Types
Microphones come in various types, such as dynamic, condenser, and ribbon. Each type offers different characteristics suitable for different recording environments and styles.
Factors For Mic Selection
- Polar Pattern: Choose a microphone with a polar pattern that matches the sound projection of the cello.
- Sensitivity: Consider the microphone’s sensitivity to capture the nuances of the cello’s sound.
- Frequency Response: Look for a microphone with a flat frequency response to accurately reproduce the cello’s tones.
- Mounting Options: Ensure the microphone has the necessary mounting options for easy attachment to the cello.
- Directionality: Select a microphone with the appropriate directionality to capture the desired sound from the cello.
By taking these factors into consideration, you can choose the right microphone that complements the unique sound of your cello and enhances your recordings or performances.
Credit: www.sweetwater.com
Placement Techniques
When setting up a microphone for your cello, the placement plays a crucial role in capturing the rich and nuanced sounds of this beautiful instrument.
Optimal Distance From Cello
The optimal distance between the microphone and the cello should be around 12-18 inches to capture a well-balanced sound.
Angle And Direction Of Mic
Position the mic at an angle pointed towards the f-hole of the cello to capture the full resonance and warmth of the instrument.
Addressing Common Challenges
Proper mic placement is crucial for capturing the rich, resonant tones of a cello. However, musicians often encounter challenges when positioning the microphone to achieve optimal sound quality. Addressing these common issues is essential in ensuring a seamless recording or performance experience.
Dealing With Feedback Issues
Feedback can be a significant problem when miking a cello. To mitigate feedback, consider using a directional microphone and positioning it at an angle that minimizes the pickup of monitor speakers. Additionally, using a feedback suppressor or notch filter can help control any unwanted resonance.
Minimizing Background Noise
Minimizing background noise is essential for capturing the pure sound of the cello. Start by selecting a quiet recording environment. To further minimize extraneous noise, use a cardioid or hypercardioid microphone with a close-miking technique. Placing the microphone strategically close to the cello can effectively reduce ambient noise.
Tips For Recording And Live Performance
When it comes to recording or performing live with a cello, getting the microphone placement right is crucial for achieving the best sound. In this article, we will provide you with some valuable tips on how to properly place a microphone for recording and live performances on the cello.
Adjusting Levels And Eq
To ensure optimal sound quality, it is important to adjust the levels and EQ settings of your cello microphone. By adjusting the levels, you can control the volume and prevent any distortion or overpowering of the sound. Using an equalizer (EQ) helps in fine-tuning the tonal balance by boosting or cutting specific frequencies.
For recording, start by positioning the microphone about 12 to 18 inches away from the cello, angled slightly towards the lower part of the instrument. This placement allows the microphone to capture both the rich low-end and the detailed highs of the cello. Experiment with different microphone positions and angles to find the sweet spot that suits your recording environment and desired sound.
Utilizing Room Acoustics
Taking advantage of the room acoustics can greatly enhance the sound of your cello during both recording sessions and live performances. The room you are in contributes to the overall sound by adding natural reverberation and spatial depth. Positioning the microphone strategically can help capture the best characteristics of the room.
For recording, consider placing the microphone closer to the sound source to capture more of the direct sound of the cello and less of the room reflections. For live performances, experiment with microphone placement to ensure the audience can enjoy a well-balanced and natural sound, taking into account the specific acoustics of each venue.
Remember to listen to the recordings or test the sound during soundchecks and make any necessary adjustments to levels, EQ, and microphone placement accordingly. Each environment and scenario may require slight modifications to achieve the best sound possible.
Advanced Mic Placement Strategies
When it comes to getting the best sound out of your cello, mic placement plays a crucial role. A well-placed microphone can capture the rich tones and nuances of your instrument, bringing your performance to life. In this section, we’ll explore some advanced mic placement strategies that can take your cello recordings to the next level.
Utilizing Multiple Microphones
By using multiple microphones, you can capture different aspects of your cello’s sound and create a more comprehensive recording. Here are a few ways to effectively utilize multiple microphones:
- Close and Distant: Position one microphone close to the cello to capture the intimate details of the instrument’s sound, and another microphone placed further away to capture the overall ambiance of the room.
- Stereo Pair: Position two microphones in an XY or AB configuration to create a wider, more immersive soundstage. This technique can add depth to your recordings, making the listener feel like they’re sitting in the room with you.
- Spot Miking: Use additional microphones to specifically capture certain aspects of the cello’s sound, such as the bridge or the F-holes. This allows for precise control over different tonal characteristics during the mixing process.
Exploring Stereo Mic Techniques
Stereo mic techniques are often used to capture the natural stereo image of the cello and create a more realistic listening experience. Here are some popular stereo mic techniques:
- XY Stereo: Place two microphones in an X and Y configuration at a 90-degree angle. This method ensures a precise stereo image and excellent mono compatibility, making it a popular choice for recording cello.
- Mid-Side (M/S) Recording: Use one directional microphone (the mid mic) pointed towards the center of the cello, and one bidirectional microphone (the side mic) positioned perpendicular to the mid mic. This technique allows for precise control over the stereo width during the mixing process.
- Blumlein Pair: Position two bidirectional microphones at a 90-degree angle, capturing the cello’s sound from all directions. This technique creates an immersive stereo image but requires careful placement to avoid phase cancellation.
Experimenting with different stereo mic techniques can help you find the one that best suits the unique sound of your cello and the desired recording environment. Keep in mind that each technique may require slight adjustments and experimentation to achieve optimal results.

Credit: www.amazon.com
Frequently Asked Questions Of Cello Mic Placement
Where Should I Place The Microphone On A Cello?
For optimal sound capture, place the microphone near the bridge on the lower bout of the cello. This placement ensures balanced tonal representation and captures the rich resonance of the instrument.
How Far Should The Microphone Be From The Cello?
Position the microphone around 12 to 18 inches away from the cello to strike a balance between capturing the full tonal range and minimizing unwanted noise. Experiment with different distances to find the sweet spot for your specific setup.
Should I Use A Condenser Or Dynamic Microphone For Cello Recording?
While both can produce excellent results, condenser microphones are generally preferred for cello recording due to their wider frequency response and higher sensitivity. They capture more detail and nuances, ensuring a more accurate representation of the cello’s sound.
What Are Some Common Microphone Placement Techniques For Cello Recording?
Two popular techniques are the close-miking method, where the microphone is placed near the bridge for direct sound capture, and the room-miking method, where the microphone is positioned further away to capture the cello’s natural ambience. Experiment with different techniques to achieve the desired sound.
Conclusion
The placement of the cello mic greatly impacts sound quality. Experimenting with different positions can help find the ideal balance of resonance and clarity. Take the time to test and adjust to achieve the best results for your recording or performance.
Keep in mind the importance of mic distance and angle for optimal sound capture.