The first drum beat in Ableton Live can be created by inserting a drum rack and using the step sequencer or triggering samples. Ableton’s library also offers a range of pre-made drum kits to choose from.
Mastering the skill of creating drum beats is crucial for any music producer. Ableton Live is one of the most popular Digital Audio Workstations (DAWs) for music production. With its user-friendly interface and powerful features, Ableton offers endless possibilities for creating unique and exciting drum beats.
Whether you choose to use the step sequencer, triggering samples, or pre-made drum kits, the key is to experiment with different sounds and patterns to create a beat that suits your style. We will explore different approaches to creating your first drum beat in Ableton Live.
Getting Started
Getting started with Ableton Live can be a little intimidating at first, but once you get the hang of it, it becomes a very powerful tool. In this post, we’re going to take you through the process of creating your first drum beat in Ableton Live!
Setting Up Ableton Live
The first thing you need to do is set up Ableton Live on your computer. If you haven’t done this already, head over to the Ableton website and download the latest version of the software. Once you have it downloaded, go ahead and install it on your computer.
Creating A New Project
Now that you have Ableton Live installed on your computer, it’s time to create a new project. Open Ableton Live and choose “New Live Set” from the options menu. This will create a new, blank project for you to work with.
Understanding The Drum Rack
Now that you have a new project open in Ableton Live, it’s time to start working with the Drum Rack. The Drum Rack is a powerful tool that allows you to create and edit drum beats with ease. To access the Drum Rack, simply click on the “Drums” icon in the sidebar.
Once you have the Drum Rack open, you’ll see a grid where you can assign different drum sounds to different pads. To assign a sound to a pad, simply drag and drop the sound onto the pad you want to assign it to. You can then use the pads to create your drum beat.
Now that you know how to set up Ableton Live, create a new project, and use the Drum Rack, it’s time to start creating your first drum beat! Experiment with different sounds, rhythms, and patterns until you find something you like. Once you have your drum beat created, you can start adding other instruments and effects to create a full track.
Choosing The Right Drum Samples
Choosing the right drum samples is essential for creating your first drum beat in Ableton Live. You can experiment with different sounds and find the ones that fit your style and genre. Remember to keep it simple and focus on creating a groove that makes people dance.
Every music producer knows the importance of selecting the right drum samples for their track. A single drum kit can alter the overall sound of the beat, which is why it’s crucial to invest some time and effort in finding suitable samples. In this section, we’ll guide you through the process of selecting the perfect samples for your first drum beat in Ableton Live.
Selecting The Drum Kit
Begin by selecting the right drum kit for your track. Ableton Live is equipped with a range of drum kits, each with its unique sound and flavor. Choosing the right kit depends on the music genre you’re creating and personal preference. For example, if you’re going for a pop sound, the ‘Studio Acoustic’ kit could be an excellent starting point. In contrast, the ‘Drum Machines’ kit is perfect for electronic music. The key is to experiment with different kits until you find the sound you’re looking for.
Adding Samples To The Drum Rack
Once you’ve selected the drum kit, it’s time to add some samples to your drum rack. A drum rack is a collection of drum sounds that can be played using your MIDI controller. In Ableton Live, you can use the drag-and-drop method to add samples to your drum rack. The software supports various sample formats, such as WAV, AIFF, and MP3. Ensure the samples you choose complement each other and fit within the context of your track. If you’re creating a slow tempo track, you may want to select samples that are more laid-back, such as a low-velocity snare and a smooth hi-hat. However, if you’re going for a faster tempo, you may want to opt for punchier samples, such as a clap or kick with high velocity. The key is to experiment with different samples and focus on creating a cohesive sound.
Conclusion
In conclusion, selecting the right drum samples is an integral part of creating a drum beat in Ableton Live. The process may seem daunting at first, but with time and practice, you’ll develop a better understanding of what works best for your music genre. Remember to experiment with different kits and samples until you find the perfect match.
Programming Your First Beat
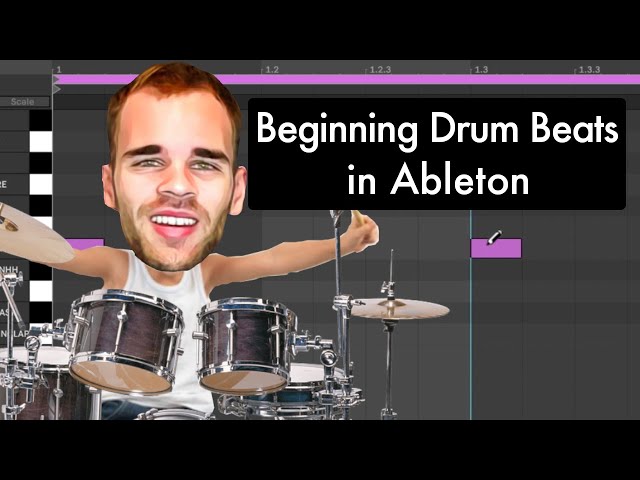
Learn how to program your first drum beat in Ableton Live with these step-by-step instructions. From selecting your drum kit to creating patterns and adding effects, this tutorial will give you the tools to make your own beats in no time.
Programming Your First Beat: Creating your first beat in Ableton Live can be an exciting experience, especially if you’re new to music production. In this section, we’ll cover how to program your first beat in Ableton Live, step by step. Adding a MIDI track: First things first, we need to add a MIDI track to the Ableton Live session. To do this, simply navigate to the “Create” menu and select “MIDI Track”. Alternatively, you can use the shortcut “CMD+Shift+T” (Mac) or “Ctrl+Shift+T” (Windows) to create a new MIDI track. Using the Piano Roll to program beats: Once you’ve added a MIDI track, it’s time to open up the Piano Roll. You can do this by clicking on the MIDI clip in the Arrangement or Session view and pressing the “E” key. The Piano Roll is where you will program your beats. Creating a basic kick-snare pattern: To create a basic kick-snare pattern, use your mouse to click and drag on the Piano Roll grid to create MIDI notes. Start by adding a kick drum on beat one and a snare drum on beat three. Repeat this pattern for a few bars to create a basic loop. Adding hi-hats and cymbals: Now that you have a basic kick-snare pattern, it’s time to add hi-hats and cymbals. Use the Piano Roll to create 16th notes on the off-beats (between the kicks and snares) for the hi-hats. You can also add cymbals on the downbeats (beats one and three) to add some variety to your beat. Ensuring each H3 heading adheres to HTML syntax: It’s important to adhere to HTML syntax when creating H3 headings. The syntax for an H3 heading is
Heading Text Here
. Make sure there are no extra spaces or characters before or after the opening and closing tags. In conclusion: By following these steps, you should now have a basic drum beat programmed in Ableton Live. Remember, the key is to experiment and have fun with your drum programming. Try out different patterns, velocities, and sounds to create something unique and exciting. With some practice and creativity, you’ll be well on your way to creating amazing beats.
Credit: www.levelsmusicproduction.com
Editing Your Drum Beat
Learn how to edit your first drum beat in Ableton Live to create unique and custom sounds. With simple steps and customized tools, you can enhance your drumming skills to produce remarkable tracks and beats.
Adjusting Velocity
Adjusting the velocity of your drum beats can bring an entirely new dimension to your music. In Ableton Live, it’s straightforward to do this. You can start by clicking on the “clip view,” and then select the pencil tool to draw on the beat you want to edit. To adjust the velocity, select the grid area representing your drum beat, and raise or lower the velocity to achieve your desired result. This technique can help you perfect some key drumbeat patterns.
Using Quantization To Tighten Up Timing
Quantization is another quick way to tighten up your timing and make your drum beat sound professional. Simply highlight the region you want to use quantization on, open the ‘Quantization’ dropdown menu and choose the desired quantization setting. This setting ranges from 1/32 to 1/4 notes. After applying quantization, you should listen to your drum beat again and assess if you’re satisfied with the timing.
Adding Variation To Your Beat
Adding variation to your drum beat helps your music sound more interesting and engaging. To do this, you can use things like fills, ghost notes, and substitutions. You can use fills to break the monotony of your drum beat. Ghost notes can be used to add complexity and enhance rhythm. Substitutions help you replace drum beats with a new beat to give a certain part of the beat a different feel. By experimenting with these different techniques, you can add variety to your drum beat, making your music more vibrant and exciting. By adjusting velocity, using quantization, and adding variation to your drumbeat, you not only improve your timing, but you also achieve new and exciting drum beat patterns that add value to your music. Play around with this method and see how it works out for you!
Adding Additional Elements
Enhance your first drum beat in Ableton Live by adding additional elements such as shakers, hi-hats, and percussion. Experiment with different samples and loops to create a unique sound and add depth to your track.
Adding Additional Elements in Ableton Live drum beats is a crucial step towards creating an outstanding and professional beat. Once you’ve laid the foundation and created the primary beat, you can explore the exciting world of percussion, fills, and transitions that bring depth and uniqueness to your tracks. In this blog post, we will discuss how to add different elements to your drum beat in Ableton Live, including percussion, transitions, and effects. Adding percussion and other elements One of the essential elements you can add to your drum beat in Ableton Live is percussion. Percussion instruments can range from shakers, claves, cowbells, and congas to tambourines and maracas. To add percussion to your beat, you need to create a new MIDI track by clicking on “Insert a new MIDI track.” Once you have the MIDI track, drag and drop the percussion sample you want to use onto the new track. Besides percussion, you can add other elements such as a bassline, chords, and melody to your beat. Adding these elements involves creating a new MIDI track and selecting the instrument of your choice. Ensure that you select a sound that complements the drum beat and does not overpower it. Creating transitions with fills and effects Using fills and effects is an excellent way to create smooth transitions between different sections of your drum beat. In Ableton Live, you can use the built-in automation tools to create these effects. For example, you can automate the filter and delay effects to create a transition between the intro and the chorus sections of your beat. Fills are also an excellent way to create transitions between different drum patterns and sections of your beat. A drum fill is typically a one-bar embellishment that bridges the gap between two different patterns. To create a fill, you can use various percussion instruments or drum samples to create a unique rhythm that complements the primary beat. Conclusion Adding additional elements to your drum beat in Ableton Live is a critical step towards creating a professional and polished sound. By experimenting with percussion, fills, and effects, you can create unique and memorable beats that stand out from the rest. Remember to keep your overall rhythm cohesive and use different elements to complement your primary beat, not overpower it. With practice and experimentation, you can elevate your drum beats to the next level.
Arranging Your Beat
Learn how to arrange your first drum beat in Ableton Live with ease. This beginner’s guide will provide step-by-step instructions on setting up and programming a basic drum pattern to kick-start your music production journey.
After creating your first drum beat in Ableton Live, the next step is to arrange it like a pro. Arranging your beat is essential as it enables you to create different sections in your arrangement, apply automation to add interest and build tension and release in your beat. Here are some practical tips to get you started:
Creating Sections In Your Arrangement
Creating sections in your beat arrangement is essential as it helps to keep your listeners engaged and interested in your music. Sections are like chapters in a book; they help to create structure and transition between different parts of your song. Here are some of the main sections you should include in your drum beat arrangement:
- Intro: The beginning of your beat, where you introduce your main melody or rhythm.
- Verse: The main body of your beat, where you establish the main groove and melody.
- Chorus: The part of the song that repeats and is easy to sing or dance along to.
- Bridge: A section that connects two different parts of your song, often used to add contrast to the melody or rhythm.
- Outro: The end of your beat, where you fade out or finish with a bang.
Using Automation To Add Interest
Automation is a great tool to add interest and variation to your drum beat arrangement. As the name suggests, automation involves changing the parameters of your sounds or effects over time. For example, you could apply automation to your filter cutoff or reverb decay to create a sense of movement or space in your beat. To apply automation in Ableton Live, follow these steps:
- Select the parameter you want to automate (e.g., filter cutoff).
- Click on the “automation” button in the clip or track view.
- Draw in your automation curve by clicking and dragging on the automation line.
- Adjust the curve shape and timing to your liking.
Building Tension And Release
Building tension and release is a crucial aspect of any drum beat arrangement. Tension refers to the “build-up” or anticipation in your song, while release refers to the “pay-off” or resolution of that tension. Here are some tips to help you build tension and release in your beat:
- Vary the intensity: Change the volume, velocity, or complexity of your sounds to create a sense of dynamism.
- Add silence: Insert moments of silence to create suspense and anticipation.
- Use effects: Apply effects like risers, white noise, or sweeps to create tension and transition.
- Change the rhythm: Experiment with different rhythms and time signatures to create surprise and contrast.
By following these tips, you can take your drum beat arrangement to the next level and create a compelling, well-structured song. Good luck and happy beat-making!
Mixing Your Drum Beat
Learn how to create your first drum beat in Ableton Live by properly mixing your drum sounds. By adjusting the levels, panning, and EQ, you can achieve a clean and balanced sound that will set the foundation for your music production.
After creating your first drum beat in Ableton Live, it’s time to take your production to the next level by mixing your drum beat. Mixing is the process of adjusting the levels, panning and adding effects to your individual tracks to create a balanced, cohesive and exciting final mix. Here are some tips to help you mix your drum beat like a pro.
Balancing Levels Of Different Elements
The first step to mixing your drum beat is to balance the levels of each individual drum element in your mix. This is important to ensure that no single element overpowers the others and that they all play well together. A useful way to do this is to turn off all your other drum tracks and listen to each element one by one. Adjust the volume of each element, so it sits comfortably within the mix when all the other elements are playing.
Panning Drums Within The Stereo Field
Panning is another technique you can use when mixing your drum beat. This involves placing different drum elements at different positions within the stereo field. A useful guideline when panning drums is to pan the kick drum and bass instrument to the center to create a solid foundation for your mix. Then, pan the other elements like Hi-hats, cymbals, and percussion to the left or right of the center to create width and depth.
Adding Effects To Create Depth And Excitement
Adding effects like reverb, delay, and distortion can enhance your drum beat and make it more exciting. A reverb effect can create a sense of space and make your drums sound like they were recorded in a large room. A delay effect can add depth and create an echo effect. Distortion can add character and make your drums sound gritty and aggressive. Be careful not to overdo it with the effects, as they can quickly muddy up your mix. In conclusion, mixing your drum beat is an essential part of any production process. By balancing levels, panning drums and adding effects, you can create a professional-sounding mix that will make your listeners move to the rhythm!
Credit: m.youtube.com
Exporting Your Beat
Exporting your beat is a crucial step in the music production process in Ableton Live. It is the final step in making sure your project can be played beyond the application and in any media player. Here’s a step-by-step guide on how to export your creation.
Preparing To Export Your Mix
Before exporting your beat, it is important to ensure that your track is ready to be shared with the rest of the world. Check that your levels are correct, and no instruments are too loud or too quiet. Make sure that you have automated your levels where necessary. As sound is subjective, listen to your creation closely, and make sure that you are happy with how it sounds.
Using File Export To Save Your Beat
Once you are done preparing your mix for export, you can proceed to export your beat. Start by clicking ‘File’ on the menu bar, followed by ‘Export Audio/Video.’ From there, you will have various options to select the export format, bitrate, and sample rate for your file. For best results, it is recommended that you export your beat in a lossless format like WAV. This will ensure that the audio quality of your creation is not compromised.
Sharing Your Creation With Others
After exporting your beat, you should test it on different media players to ensure that it plays back correctly and at the same level. If you experience issues, you can go back and tweak your mix to achieve the desired playback. Once you are satisfied with your beat’s overall sound and playback quality, you can share your creation by uploading it to a music platform or sending it directly to someone via email or another sharing platform.
Exporting your beat in Ableton Live is a straightforward process that can be done in just a few clicks. By following these steps, you can share your musical creation with the world. Enjoy making music and keep creating!
Credit: flypaper.soundfly.com
Frequently Asked Questions For Your First Drum Beat In Ableton Live
How Do You Make A Drum Beat In Ableton?
Making a drum beat in Ableton is easy. Simply create a new MIDI clip in the Session View, choose a drum kit, and place the notes where you want them in the grid. Adjust the velocity and timing as desired, and you’re good to go!
How Do I Make My Drums Sound Real In Ableton?
Create natural sounding drums in Ableton by using realistic samples, adding groove and velocity variations, adjusting EQ and compression, and incorporating realistic room and reverb effects. Utilize Ableton’s built-in drum racks and plugins, or invest in higher quality third-party plugins or drum libraries for more realistic and dynamic drum sounds.
How Do You Sequence Drums In Ableton?
To sequence drums in Ableton, first create a MIDI clip. Next, select the drum rack and input notes into the clip using the piano roll. Adjust the velocity, timing, and duration of each note to create the desired rhythm. Use automation to add variation and interest.
Finally, refine the mix and export the track.
How Do You Use Drum Samples In Ableton?
To use drum samples in Ableton, first open up a new session. Next, drag the drum sample into a MIDI track. Then, select a drum rack from the instruments folder, and drag the drum sample into the corresponding slot. Finally, play the drum sample using a MIDI controller or computer keyboard.
Conclusion
Creating your very first drum beat in Ableton Live can feel intimidating, especially if you’re new to the software. However, thanks to Ableton’s user-friendly interface, you’ll be able to start creating music in no time. With a bit of patience and practice, you’ll soon find your groove and be able to create beats that you’re proud of.
So, what are you waiting for? Begin experimenting with Ableton Live today and let your creativity flow!